

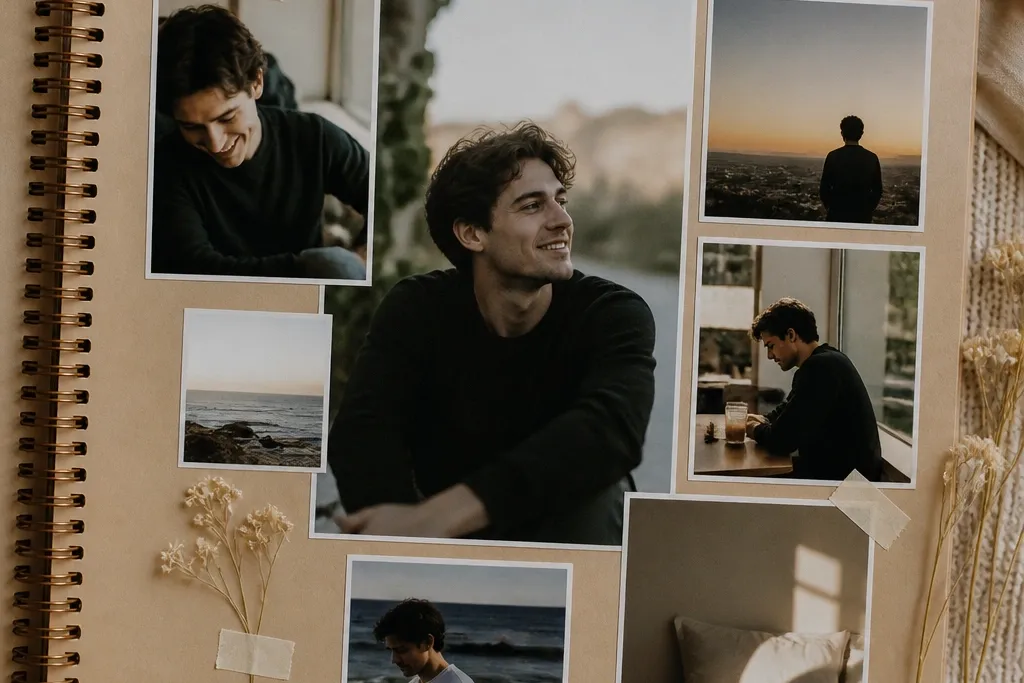
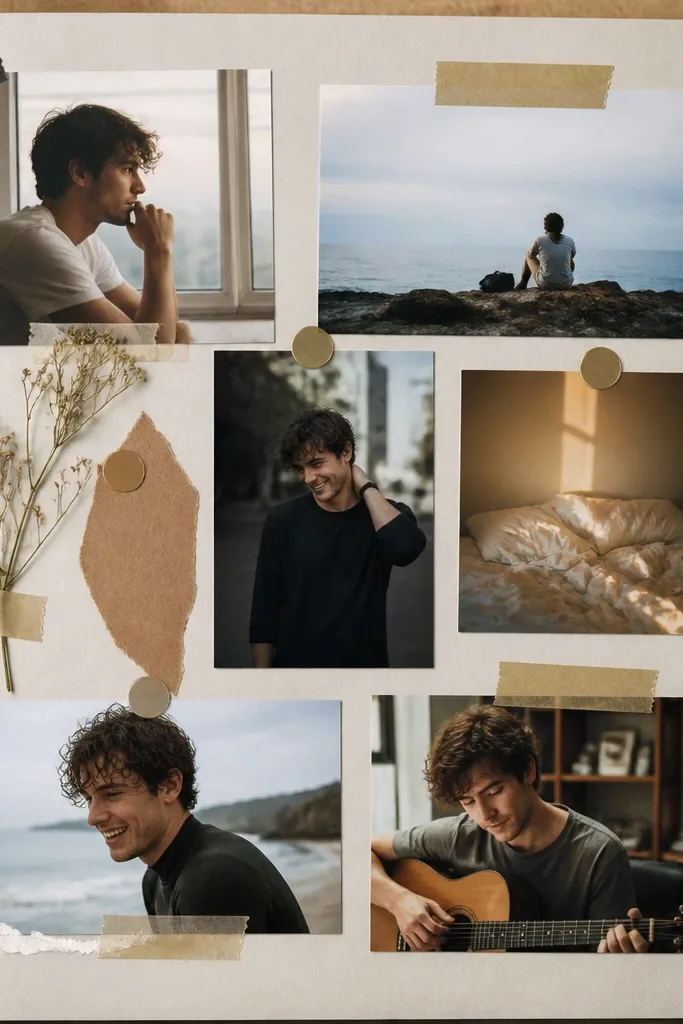
1. Kraft + Date Stamp Ticket Strip
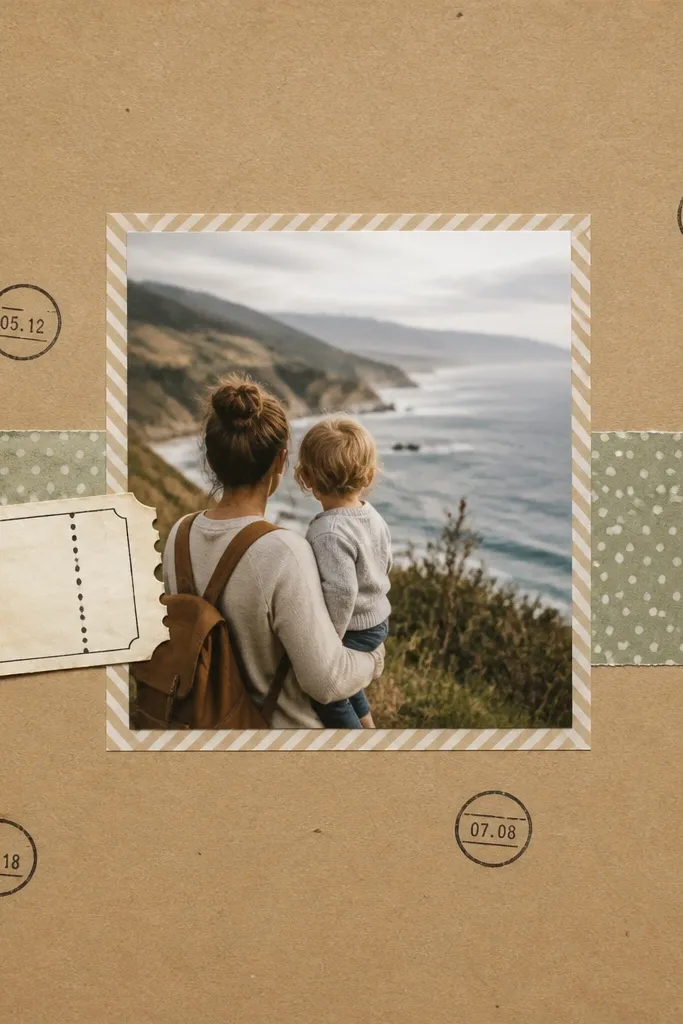
This layout is my go-to when the story is a specific outing because the kraft background makes everything feel grounded. Use black ink date stamps (or a stamp set) and keep them small — about 0.25 inch circles — so they don’t overpower the photo. I place the main 4x6 photo slightly above center, then layer a ticket strip made from a patterned paper band behind it. The color vibe is warm brown, cream, and one accent color like deep green or red — pick one and stick to it. It works great for fair or medium skin tones in photos because the warm paper tones don’t wash people out.
Start by cutting kraft cardstock to 8.5x11 and trimming a patterned paper band to 8.5 inches wide by 1.25 inches tall. Stamp 6 to 8 date circles on scrap paper, then punch them with a 0.75 inch circle punch or cut carefully by hand. Layer the patterned band across the page about 5 inches from the top using liquid glue or double-sided tape. Place your 4x6 photo on top of the band, then frame it with two strips of washi tape on the left and right edges only. Finish by tucking a “ticket” element at the left end of the band and adding one tiny journaling label under the photo using a straight-edged tag shape.
Editor's noteUse black archival ink for the date stamps so they don’t smear when you handle the page in a sheet protector.
Skip thisAvoid using three different accent colors — it makes the date stamps look like random decoration instead of part of the story.
2. Polaroid Stack With Faux Border Tape
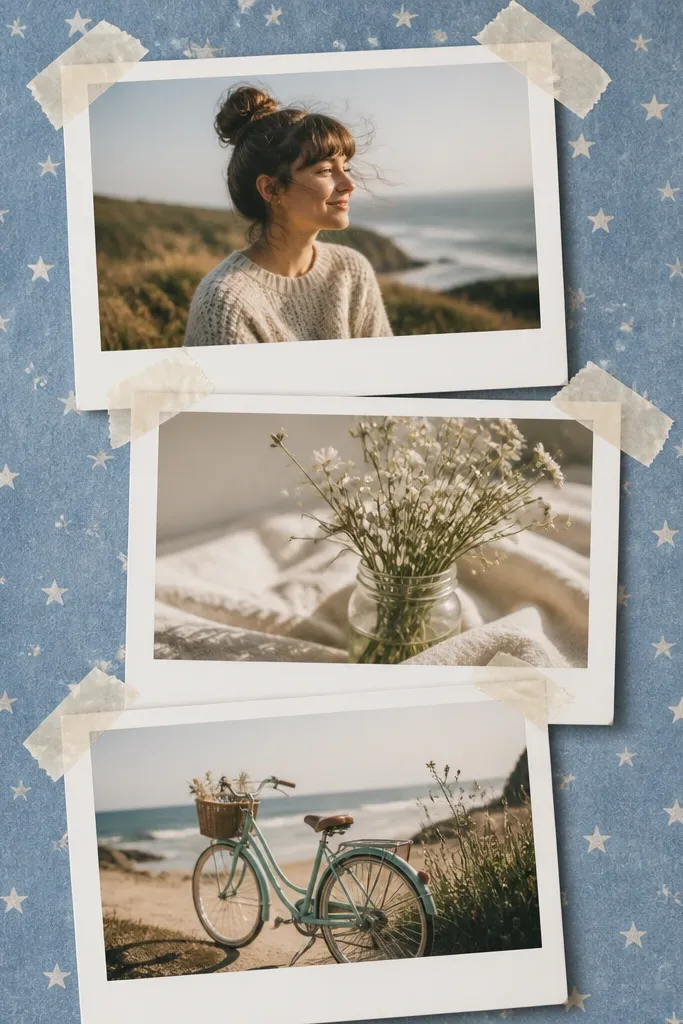
This is the layout I use for boyfriend pages when the photos are casual but you want them to look intentional. Polaroid-style frames create instant cohesion because every photo gets the same white border and the same “camera” vibe. I keep the stack slightly tilted, but the edges line up enough that it still feels clean. The background pattern is light and subtle — think tiny stars or small dots — so the photos stay the focus. This style flatters darker hair and warm-toned skin because the white border creates contrast without making the page look harsh.
Print three photos in 4x6 format, then trim each to about 3.25x4.25 inches for the photo area. Cut three white cardstock mats at 3.5x4.5 inches with a 0.12 inch border around each photo. Layer the top Polaroid slightly higher, then place the second in the middle and the third lower, leaving 0.2 inches between them. Add faux tape strips: cut 0.5 inch wide strips of washi tape, fold them at the edges, and tape only the top corners. Mount everything on a blue patterned paper background, then add one journaling strip under the lowest Polaroid using a 2x6 inch tag with straight edges.
Editor's noteIf you want the stack to look real, rough up the tape edge with a sanding block for a tiny “creased” look.
Skip thisDon’t glue the Polaroids flat with thick layers everywhere — foam only under one corner keeps the page from looking lumpy.
3. Vertical Photo Ladder With Number Title
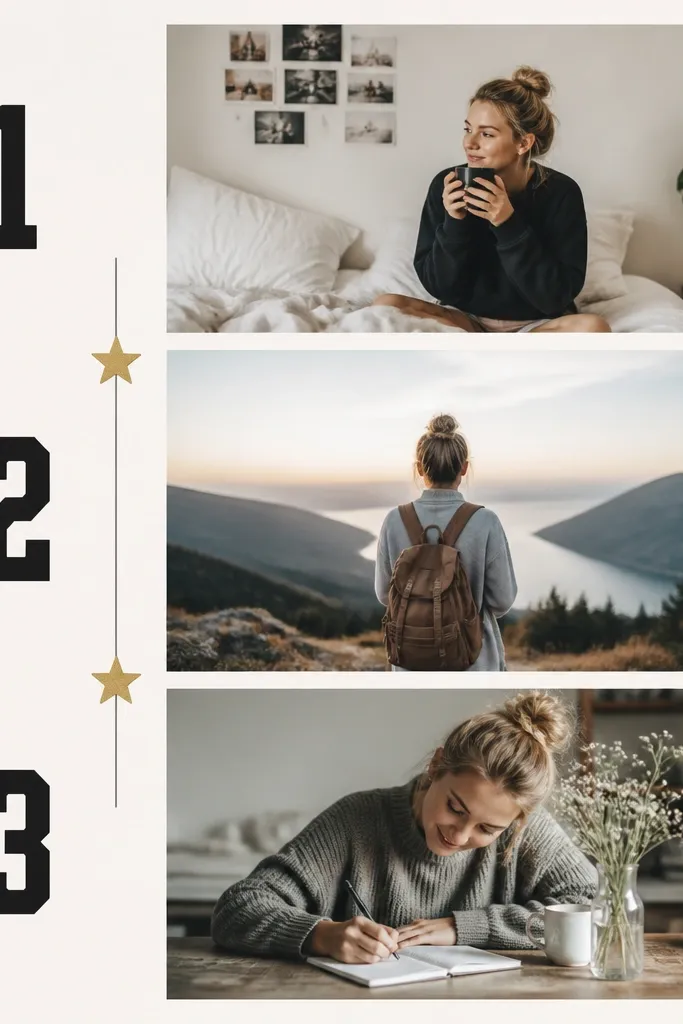
This one works especially well for anniversaries and “we started as friends” stories because it reads like a timeline without needing a full grid. The number title acts like a jersey or milestone marker, so it instantly feels boyfriend-friendly. I keep the background mostly plain — light gray or cream — and use one strong accent color for the title and lines. The ladder layout makes smaller photos feel powerful because each one gets its own “space step.” In photos with mixed lighting, the plain background helps skin tones look more consistent.
Start with 8.5x11 cream cardstock. Cut a 1.5 inch wide strip of colored cardstock for the left side title panel and glue it down 0.2 inches from the left edge. Create the number title using thick cardstock numbers or a vinyl cut, sized around 2.75 inches tall. Place three photos vertically down the center, each about 3x4 inches, with 0.15 to 0.25 inch gaps. Draw thin connector lines with a black fine-liner from the number panel to each photo. Add small star stickers or tiny punched circles between the lines and the photo edges, then journal on a narrow strip under the bottom photo.
Editor's noteUse a black gel pen to add a couple of handwritten date notes — it makes the title panel feel like a real “stats” page.
Skip thisAvoid cluttering the background with many stickers; the ladder needs breathing room.
4. Map Route Strip With Arrow + Weather Note
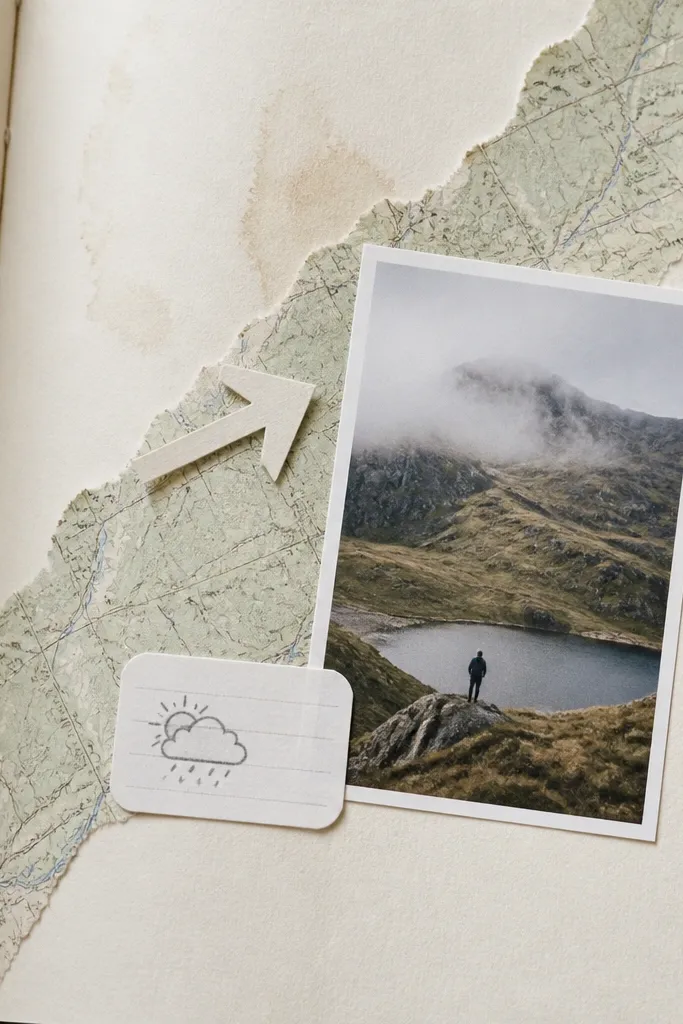
If you’re making scrapbook page ideas for boyfriend for trips, this layout makes the location feel like a real memory. The map strip gives you texture without needing lots of embellishments, and the diagonal placement adds motion. I always add a simple weather note — like “72 degrees, windy” — because it turns a photo into a moment. The arrow is small and flat, not glittery, so it looks tidy in a binder. This works well for photos with bright skies because the map print doesn’t fight the blue tones.
Cut a map-print or vintage-style paper into a strip about 10 inches long and 1.25 inches wide. Tear the edges with your fingers for a rough border, then place it diagonally from the top left toward the bottom right. Cut a small paper arrow from cardstock and glue it on top of the strip pointing toward the focal photo area. Place a 4x6 photo near the arrow, rotated slightly clockwise. Add a 2x3 inch white label with your weather note and journal the date underneath the photo using a fine black marker. Finish by stamping one small location icon or star near the top of the map strip.
Use a clear matte sticker sheet for the arrow if you want it to resist scuffs in a sheet protector.
Don’t glue the map strip too close to the binder rings; leave margin so it doesn’t peel.
5. Receipt Collage Corner With Clear Pocket
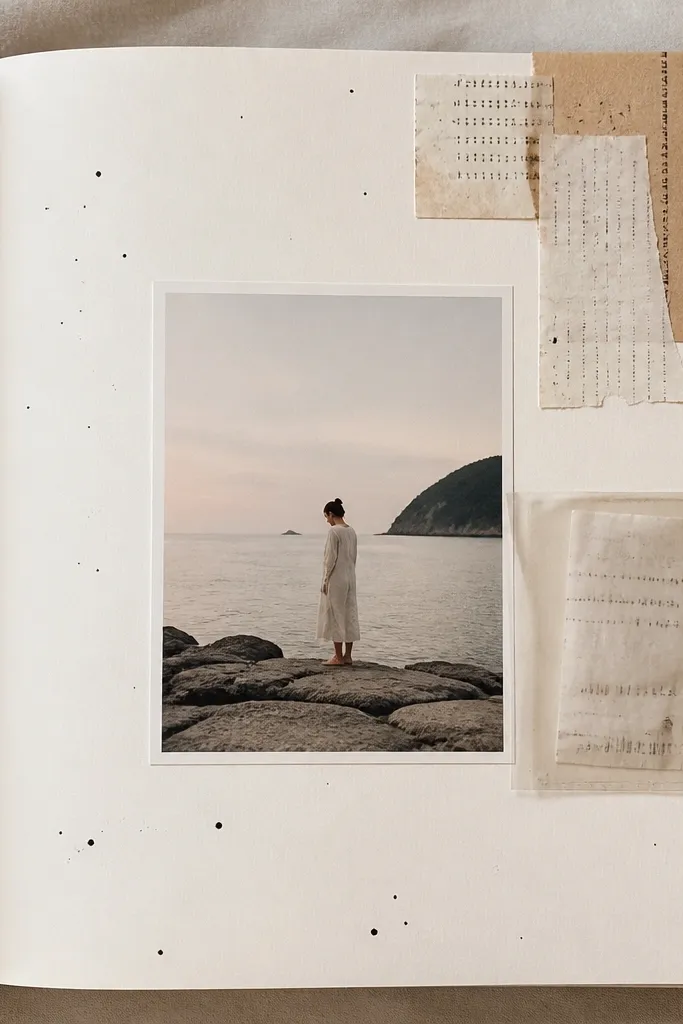
This is for the boyfriend pages that feel like real life: coffee runs, late-night snacks, quick errands. The receipt collage gives you instant authenticity and texture, and the clear pocket keeps the most important receipt protected. I use only one photo on the center for calm, then let the receipts do the storytelling around the corner. Keep receipts in the same color family if you can — warm browns and creams look best with skin-tone photos. The clear pocket adds shine without turning the page into glitter chaos.
Start with a solid cardstock base, like off-white or light tan. Place a 4x6 photo in the center and add a thin border strip behind it made from patterned paper about 0.5 inch wide. In the top right corner, layer 3 to 5 receipt strips — cut them down to about 1 inch tall pieces and vary the lengths. Glue them flat at first, then add a clear pocket or small clear adhesive sleeve over the top layer. Put one folded receipt inside the pocket, then add two small journaling lines on a tiny label near the photo’s bottom edge. Let the glue dry fully before putting it in a sheet protector.
Editor's noteInk the edges of torn receipt pieces with a brown stamp pad so the collage looks finished.
Skip thisAvoid heavy liquid glue directly on glossy receipts; use tape runner so it doesn’t warp.
6. Fabric Tape Border With Stitching Lines
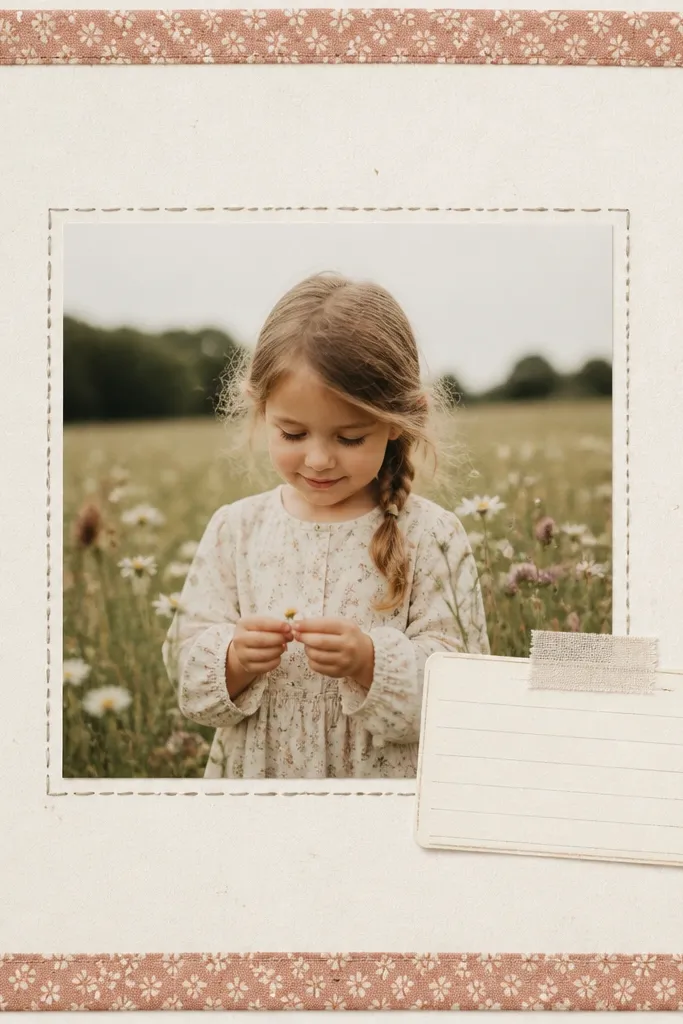
This page looks handmade in a way paper-only layouts can’t. Fabric tape edges add thickness and a soft texture that reads warm in photos. The stitching lines — drawn with a fine black pen — make it look like you actually sewed the layout. I like this for boyfriend scrapbook page ideas when you want cozy vibes: fall dates, hoodie weather, or movie nights. It also works for photos with mixed lighting because the fabric tape creates a consistent frame around the subject.
Use 8.5x11 cardstock in a warm neutral, like oatmeal. Apply fabric tape around the four edges, cutting corners cleanly and overlapping by 0.25 inch at each corner. Leave a 0.25 inch inner margin so the tape doesn’t crowd the photo. Place a 4x6 photo centered, then draw a stitched rectangle around it with a fine-liner pen, about 0.15 inch away from the photo. Add a journaling card under the photo using a 2.5x3.5 inch rectangle with rounded corners. Finish by placing one small die-cut shape near the top corner, like a heart or star, and glue it flat.
Editor's notePress the tape down with a bone folder so it bonds smoothly and doesn’t curl at the edges.
Skip thisDon’t use thick foam under the photo on fabric-tape pages; the page can bow in sheet protectors.
7. Blue Washi Side Frame With Cutout Stars
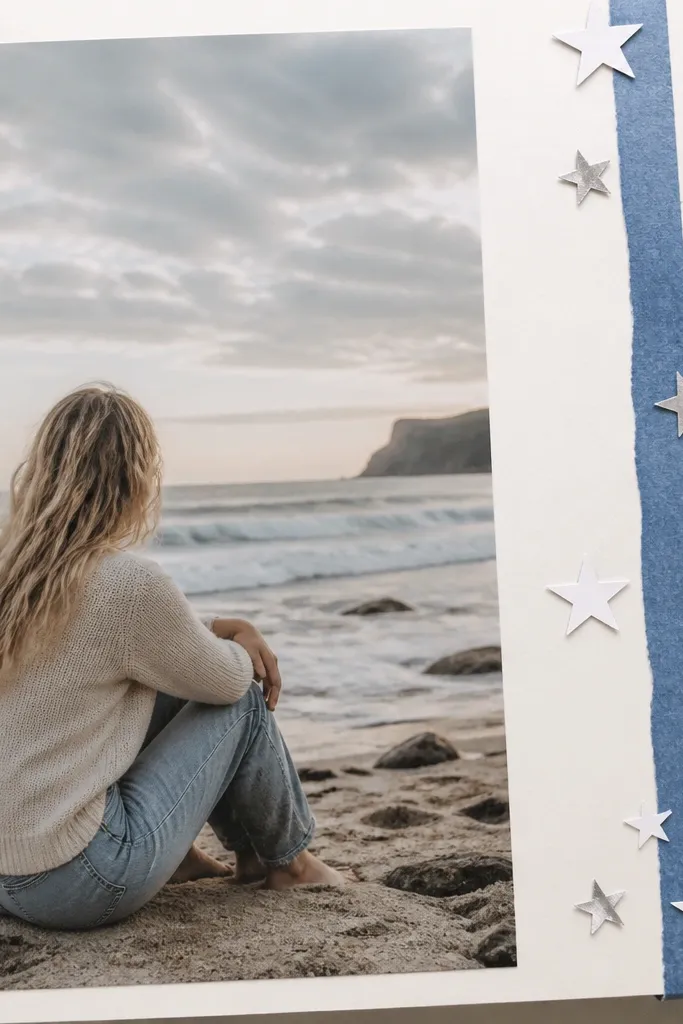
This one is clean and sporty without looking like a template. The blue washi side frame gives you a vertical “goal line” effect that guides the eye toward the photo. I pair it with small star cutouts because it feels like a team poster vibe, even if the story is just a fun hangout. Keep stars small — about 0.5 inch — so they don’t compete with the journaling. This layout looks best on photos with strong contrast, like outdoor daylight shots.
Start with light gray cardstock. Place a 4x6 photo on the left, leaving 1.25 inches of space on the right for journaling. Add a vertical washi strip on the right edge area, about 0.75 inches wide, then layer a second thin strip beside it using a different blue pattern. Cut or punch 6 to 8 stars from white cardstock and a few from silver paper, then scatter them around the washi frame. Add a 3x4 inch journaling box on the right using a stitched-edge label, and write in short lines. Mount everything flat with tape runner so the stars don’t snag in sleeves.
Use a silver star only once per page; too many makes it look like cheap confetti.
Avoid placing the photo too close to the edge; it makes the page look cramped once it’s in a binder.
8. Single Big Photo With Layered Matte + Shadow
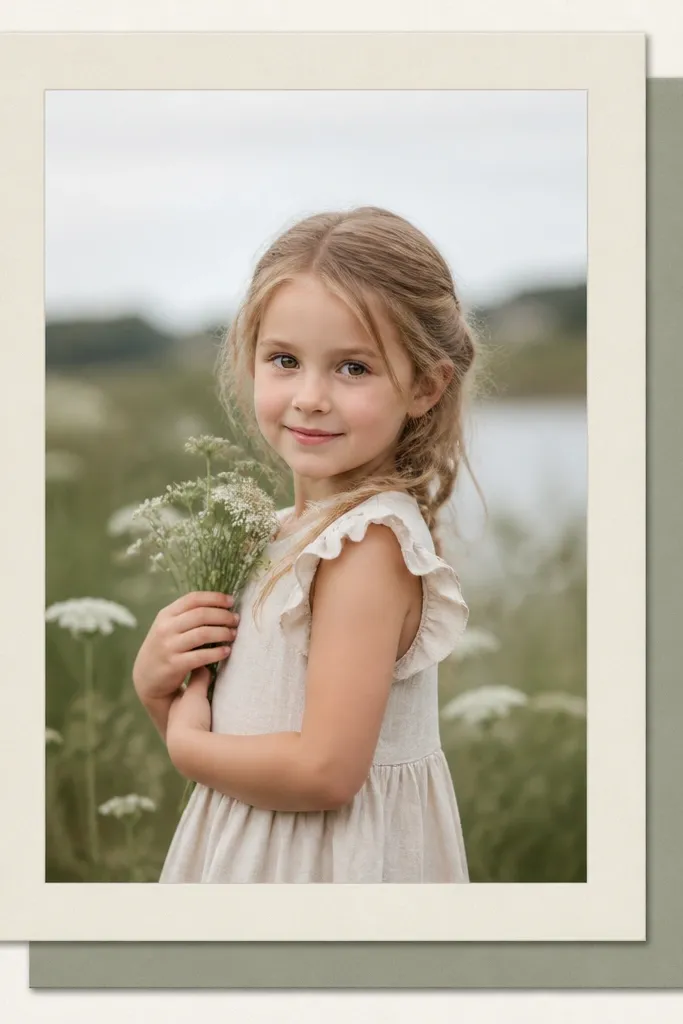
When you want scrapbook page ideas for boyfriend that look “gallery clean,” this is the layout. One big photo does the heavy lifting, and the layered matte makes it feel like a framed print. I create a faux shadow using a slightly darker cardstock layer offset by about 0.06 inches, which gives depth without foam. This works for nearly any skin tone because the matte controls the contrast around the photo. It also looks good for photos where the background is busy, since the mat isolates the image.
Use 8.5x11 cardstock in a soft neutral, like parchment. Cut a matte layer behind the photo at 5.75x7.75 inches and a second inner layer at 5.45x7.45 inches. Trim your 5x7 photo so it fits the inner layer perfectly, then glue the photo to the inner matte. For the shadow, cut a final outer layer from a darker cardstock, offset it down and right by about 1/16 inch, and glue the outer layer first. Place the framed photo centered, then add one small journaling strip under it, about 1 inch tall by 6 inches long. Finish with two tiny enamel dots near the journaling strip.
If you don’t have a 1/16 inch ruler, use a scrap strip and mark the offset with a pencil first.
Don’t use foam under both the photo and the mat; it creates a thick edge that bows in sheet protectors.
9. Corner Flip-Up Journal Tag With Photo Backer
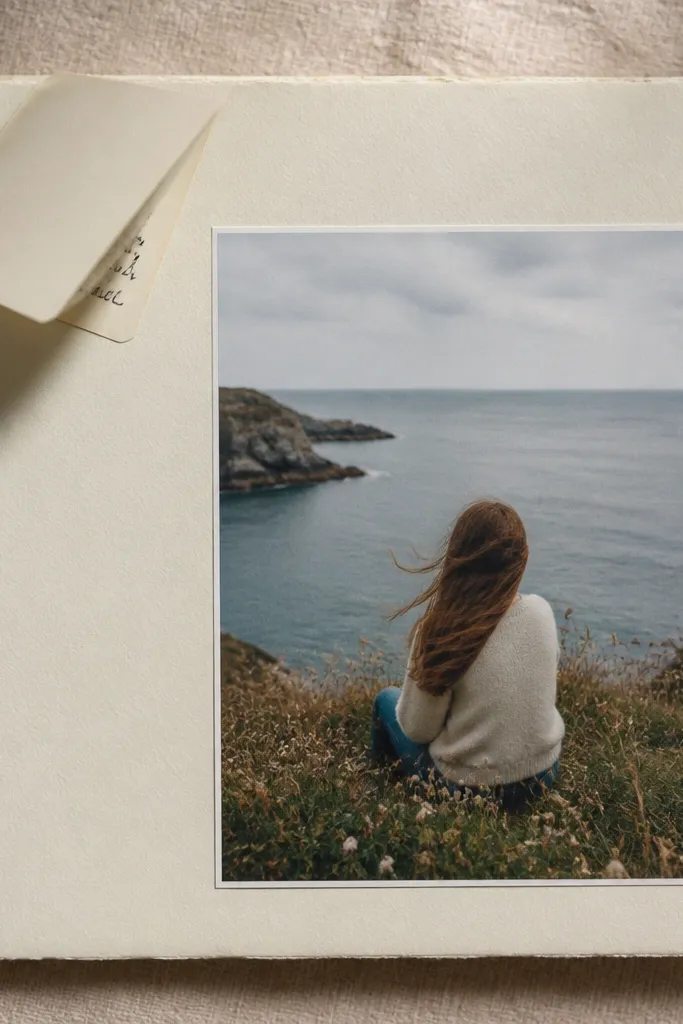
This is a fun interactive page, and it always gets a second look. The flip-up tag makes the page feel like a little secret while still keeping the overall layout tidy. I anchor the tag in the top corner, then add a photo backer behind it so the hinge doesn’t look flimsy. Use patterned paper for the tag backer in a tone that matches the photo — warm beige with cream works well. This style looks great for boyfriend pages where you want to include a short message you don’t want to put directly on the photo.
Start with 8.5x11 cardstock. Place a 4x6 photo on the right side, leaving a 3.5 inch space on the left for the tag. Cut a tag from cardstock at about 3x4.5 inches, then round the bottom corner. Create a hinge by attaching a small strip of washi tape to the top of the tag and gluing the other side of the tape to the page at the top left corner. Add a patterned paper rectangle behind the hinge so it looks intentional when the tag flips. Write journaling on the tag front or inside and seal the edges with a light layer of glue stick so it stays flat.
Editor's noteUse a brad or small binder clip to test the flip angle before gluing fully.
Skip thisAvoid hinging with thick chipboard; it makes the tag stick out too far.
10. Instagram-Style Grid With Date Captions
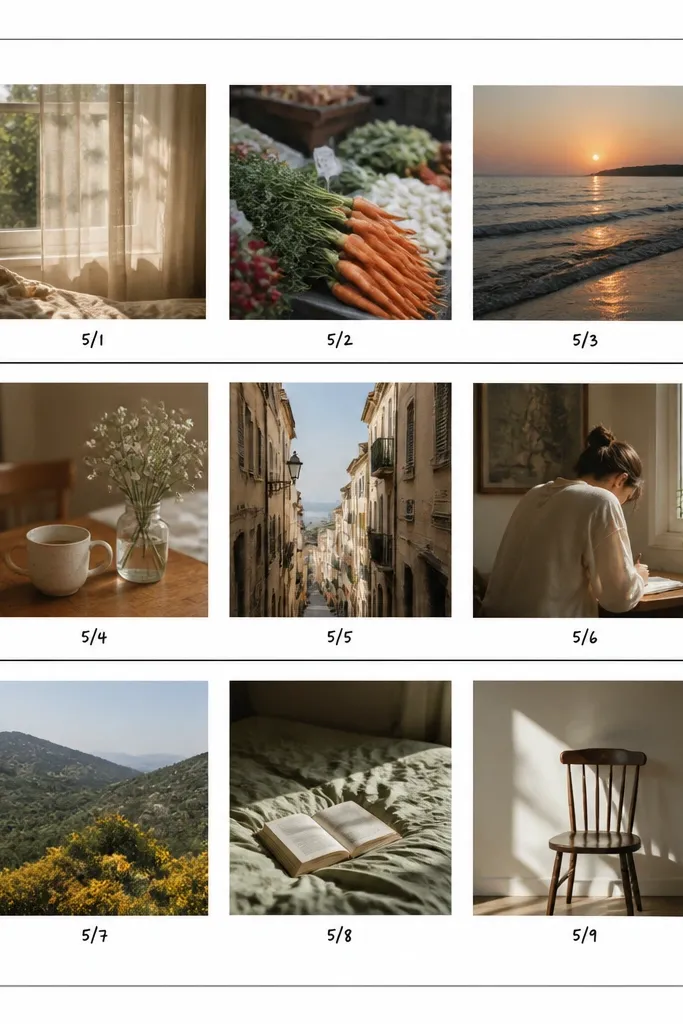
For boyfriend scrapbook page ideas when you have lots of small moments, a grid makes the page feel organized instead of chaotic. The trick is to keep the grid consistent: same photo size, same border, same caption placement. I use a simple black line divider so the layout doesn’t look too busy. Captions should be short: “June 12 — movie night” or “July 3 — new shoes.” This style works for most skin tones because the white border keeps the photos bright and separated from patterned clutter.
Cut a white cardstock base border or use white cardstock as your page background. Decide on 3 columns of photos; cut your photos to about 2.3x2.3 inches each so nine photos fit with small gaps. Use a ruler to draw a faint pencil grid guide, then adhere photos with a tape runner. Add tiny date captions under each photo using a 0.5 inch tall strip, either printed or hand-written in black. Add one larger journaling line at the bottom spanning the width, around 1 inch tall. Finish by adding one corner accent sticker that matches the dominant color in your photos.
Print your captions on a narrow strip of paper and trim it with a paper trimmer for crisp edges.
Avoid using different border sizes for each photo; the grid falls apart visually.
11. Ticket Booth Window With Side-Loading Photo Strip
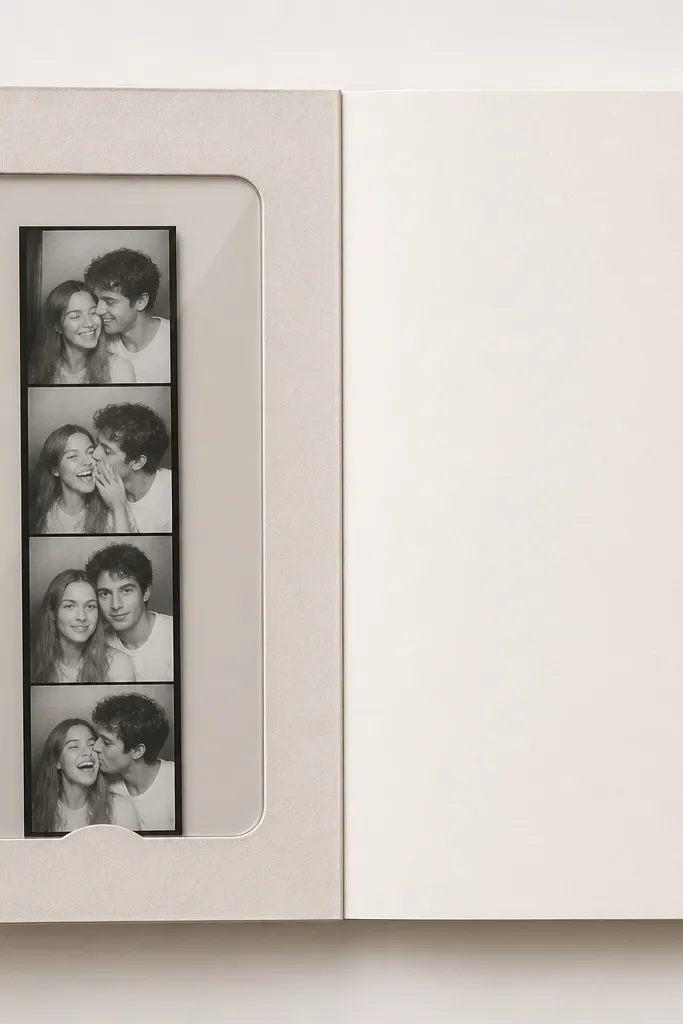
This is a fun “mechanical” page style that looks like a prop. The clear acetate window gives you a glass effect, and the photo strip behind it feels like a display. I like it for boyfriend pages with tickets, passes, or any story that feels like an event. The right-side journaling stays clean so the page doesn’t look crowded. In photos with darker outfits, the glass effect helps the image look crisp instead of flat.
Cut a rectangle window frame from cardstock about 5 inches tall by 3 inches wide and glue it onto the left side of the page. Cut a slightly smaller acetate piece and attach it behind the frame using double-sided tape around the edges. Slide or glue a narrow photo strip behind the acetate — about 1 inch wide by 5 inches tall — so it shows through the window. On the right side, add a journaling card about 3.5x5.5 inches with a border drawn in black. Add one small ticket stamp image at the bottom of the card. Let everything dry flat before placing in a sleeve.
Editor's noteUse a craft knife and ruler for the acetate frame cut so the edges look straight.
Skip thisAvoid fingerprints on acetate — wipe with a microfiber cloth before assembling.
12. Leaf Press Texture With Green Ink Stems
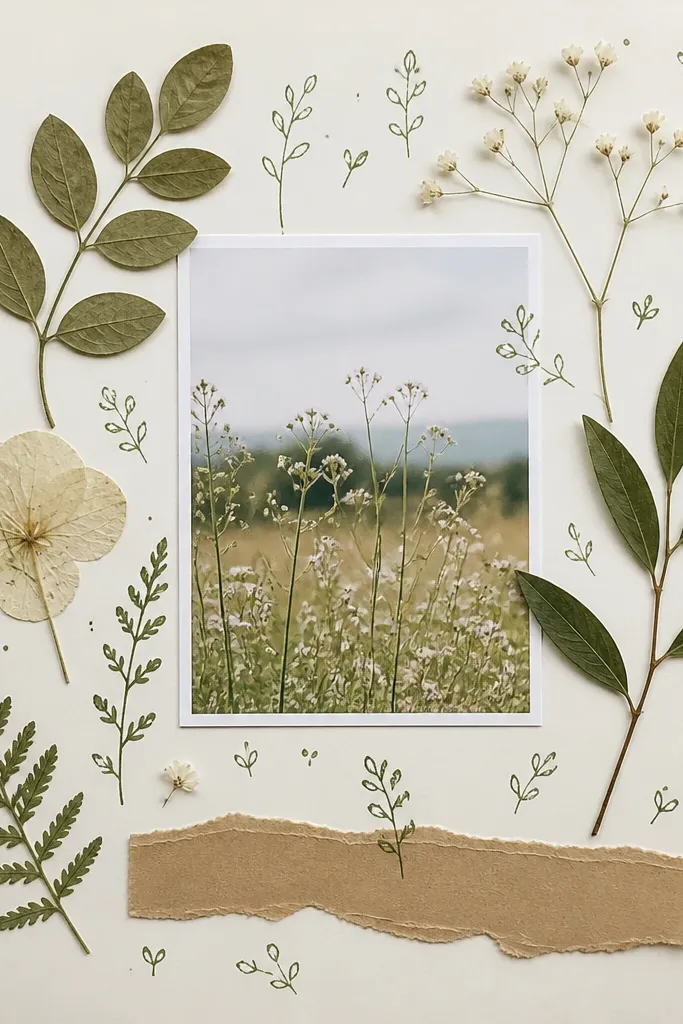
This is for boyfriend scrapbook page ideas that feel outdoorsy, even if the photo is just you two on a walk. Leaf press texture looks real and gives your page a tactile surface without adding bulky embellishments. I use green ink stems as the “drawing” layer so it ties the texture to the photo. Keep the photo color palette consistent with the leaves, like moss green and sandy beige. This works especially well for photos shot in daylight because the natural textures match the light direction.
Use light cardstock or watercolor paper as your base. Press a couple of real leaves (or use faux leaf silhouettes) onto the paper with light weight, then trace their outline lightly with a pencil. Dab green ink along the stem directions using a small brush or ink applicator. Add a 4x6 photo centered, then glue a kraft strip at the bottom about 1.5 inches tall. Write the date and one specific detail — like “found a bench by the creek” — in black marker on the kraft strip. Finish by adding two small leaf cutouts near the photo corners, glued flat.
Editor's noteIf you don’t have pressed leaves, stamp leaf silhouettes lightly and then draw over them with a darker green pen.
Skip thisAvoid heavy ink splatter — it makes the texture look messy instead of natural.
13. Black Card With Neon Lines Like a Scoreboard
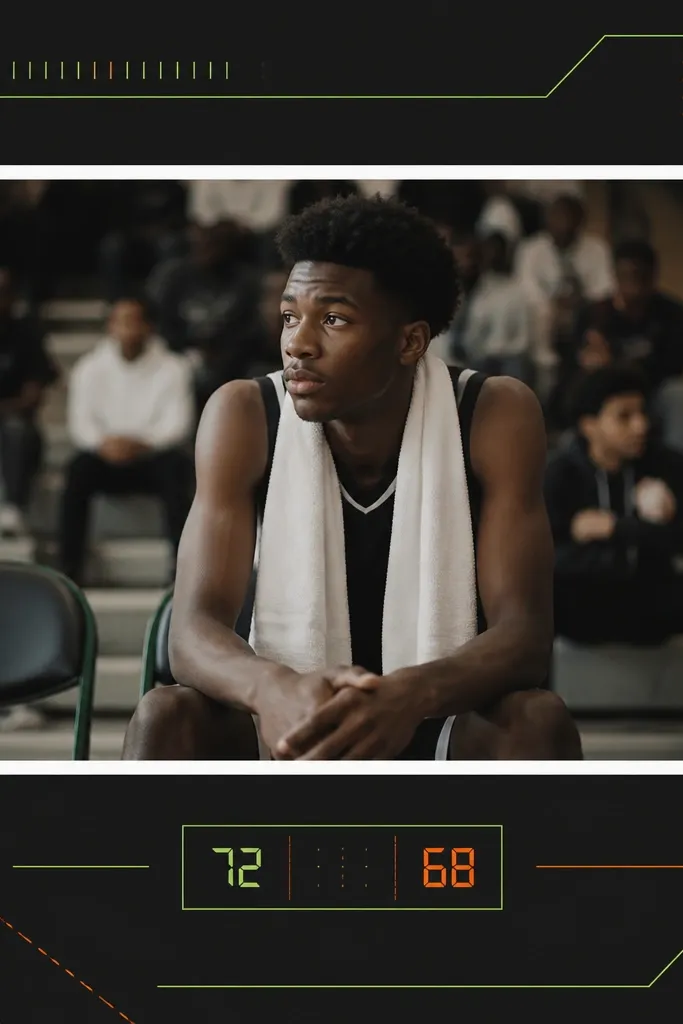
If your boyfriend likes sports, gaming, or anything with numbers, this layout hits the right mood. The black cardstock makes neon lines pop, and the white photo mat keeps skin tones from turning gray. I add a scoreboard-style strip with a score or date, plus thin lines that connect to the photo. Keep the neon to two colors max — neon green and neon orange looks best together. This style makes even casual photos look like an event poster.
Start with black cardstock cut to 8.5x11. Cut a white mat for your 4x6 photo at 4.25x6.25 inches and glue it centered. Use neon gel pens or neon paint markers to draw two diagonal lines from the top corners toward the mat. Add small number stickers or cut numbers from colored cardstock near the top left, sized about 0.75 inch tall. Place a thin journaling label under the photo using a strip of neon paper, about 0.75x4 inches. Write a short line like “Final score: 3-1” or “Best night — July 9.”
Editor's noteLet neon paint marker dry for 10 minutes before touching; smudges show fast on black.
Skip thisAvoid glitter glue on black pages; it looks grainy and catches on sleeves.
14. Monochrome Film Strip With Hand-Cut Frames
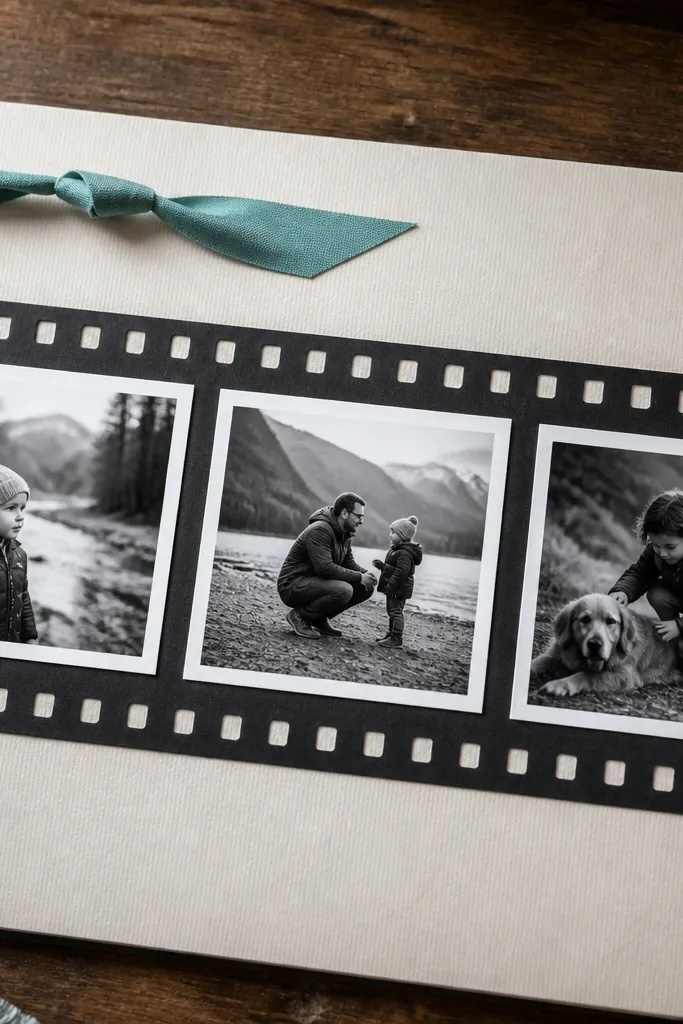
This one looks like a vintage photo strip, and it’s perfect when you have a set of small black-and-white pics. The film strip creates a rhythm across the page, so the layout stays interesting even with minimal color. I keep everything monochrome: black, white, and gray, with one accent like muted teal only for the title. It works great for photos with strong facial features because the monochrome focus makes expressions stand out. The film strip also hides uneven photo sizes since each frame has the same cut-out look.
Choose a light gray or cream background. Cut a film strip base from black cardstock about 8 inches wide and 1.5 inches tall. Create small inner windows by measuring and cutting three or four square frames, each around 1 inch wide with 0.1 inch spacing. Glue tiny black-and-white photos behind the windows so they show through. Add faux sprocket holes by punching small circles along the sides, spacing them evenly. Place the film strip across the center, then add a small title label above it using muted teal cardstock. Journal on a narrow strip under the film strip, about 0.75x6 inches.
Editor's noteUse a single straight edge for cutting the frames so the film strip looks manufactured, not wobbly.
Skip thisAvoid mixing too many photo sizes; the film strip should feel consistent across windows.
15. Candy-Stripe Corner With Mini Envelopes
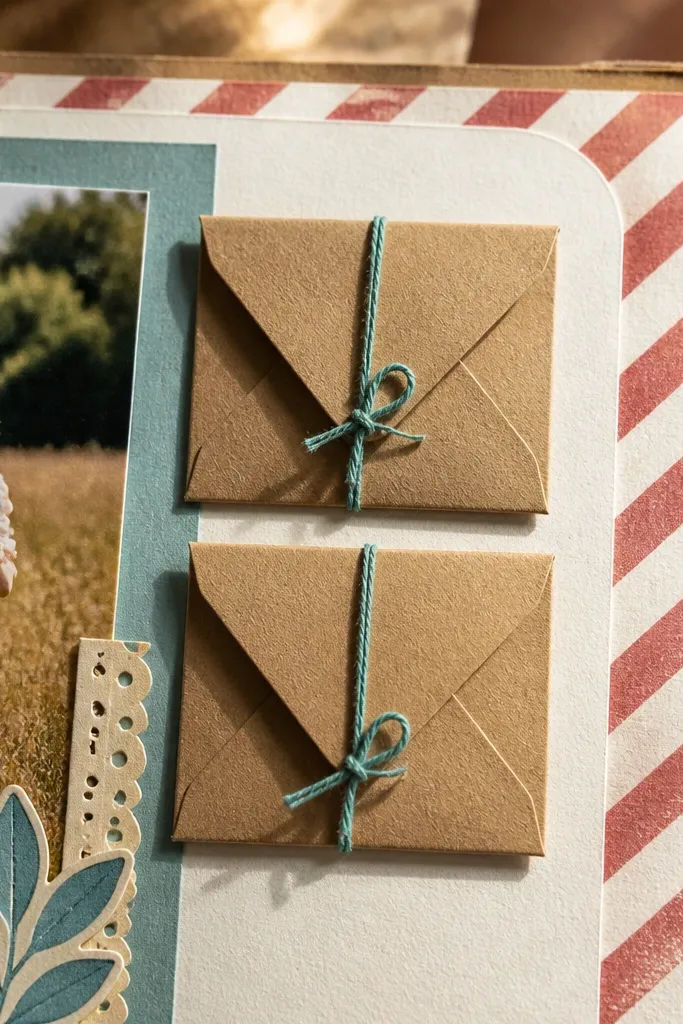
Mini envelopes are my favorite way to add boyfriend-page interactivity without making the page thick. The candy-stripe corner gives you a fun “party” feeling, while the envelopes keep the story organized. I use this for pages where you want to include a note, a small photo, or a tiny ticket inside the envelope. Keep the envelope openings flat and store the note inside so it doesn’t bulge when you slide the page into a protector. This looks great with photos that have bright accents because the stripe corner echoes those colors.
Start with a solid cardstock base in cream. Add a candy-stripe patterned paper triangle in the top right corner — cut it to about 3.5 inches across at the edges. Cut two mini envelopes from patterned paper or kraft paper using a simple envelope template, about 2.25x3.5 inches. Glue the envelopes flat in the corner, one slightly behind the other so both openings face inward. Place a 4x6 photo centered with a white mat, then write a short caption under it on a 1x4.5 inch label. Put a folded note or small journaling card inside each envelope. Seal the edges with tape runner so the envelopes don’t lift.
Use kraft envelopes for one of them — the brown makes the page feel warm against bright stripes.
Avoid writing huge paragraphs on the envelopes; keep notes short so they fit flat.
16. Sticker Map Coordinates With City Cutouts
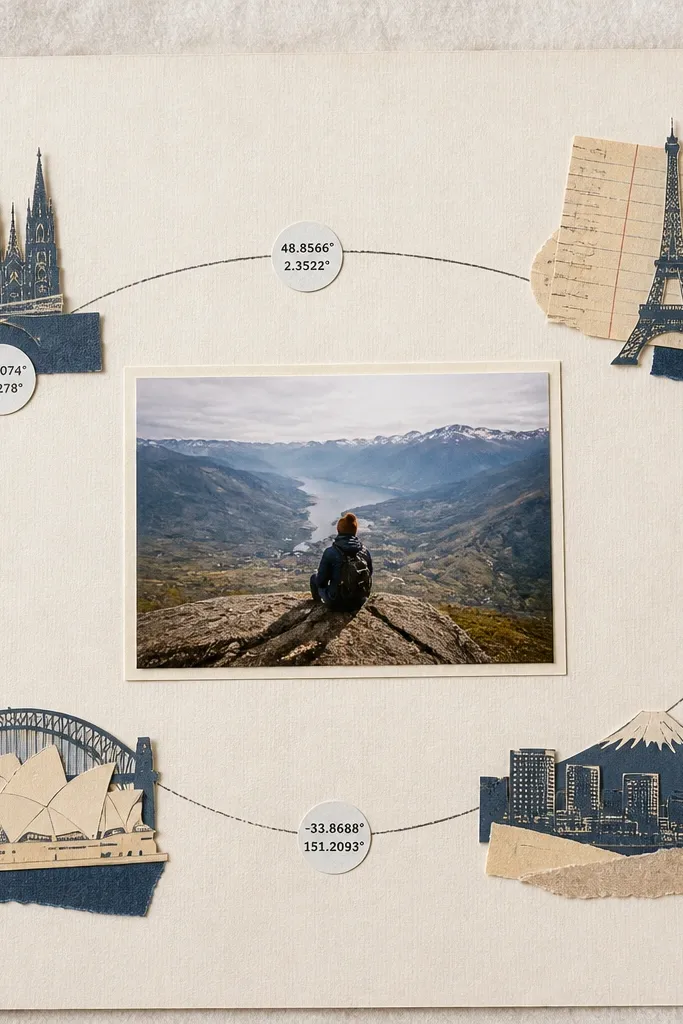
This is a clean way to do travel without turning the page into a scrapbook explosion. Coordinates look cool and personal, and they give you something to write besides “we went here.” I place the central photo in the middle, then add a thin map line across the page with coordinate stickers near it. City cutouts or small label shapes help the layout feel designed, even if your photos are simple. It works well for boyfriend photos taken indoors at night because the beige background makes skin tones look warmer.
Use beige cardstock as the base. Print or cut a thin map line strip about 8.25 inches long by 0.6 inches tall and glue it across the middle behind where the photo will sit. Place a 4x6 photo slightly above the map strip center. Add coordinate stickers or hand-written coordinates like “40.7128 N, 74.0060 W” near one side, using a small font size. Add 2 to 3 city label cutouts — about 1.2 inches wide — around the coordinates. Put a 2.5x4 inch journaling card at the bottom with the date and one sensory detail like “street food smell” or “wind off the river.”
Editor's noteWrite coordinates with a fine brush pen for crisp numbers instead of marker blobs.
Skip thisAvoid using multiple font styles for coordinates and journaling; pick one handwriting look.
17. Border of Ticket Punch Holes + Photo Center
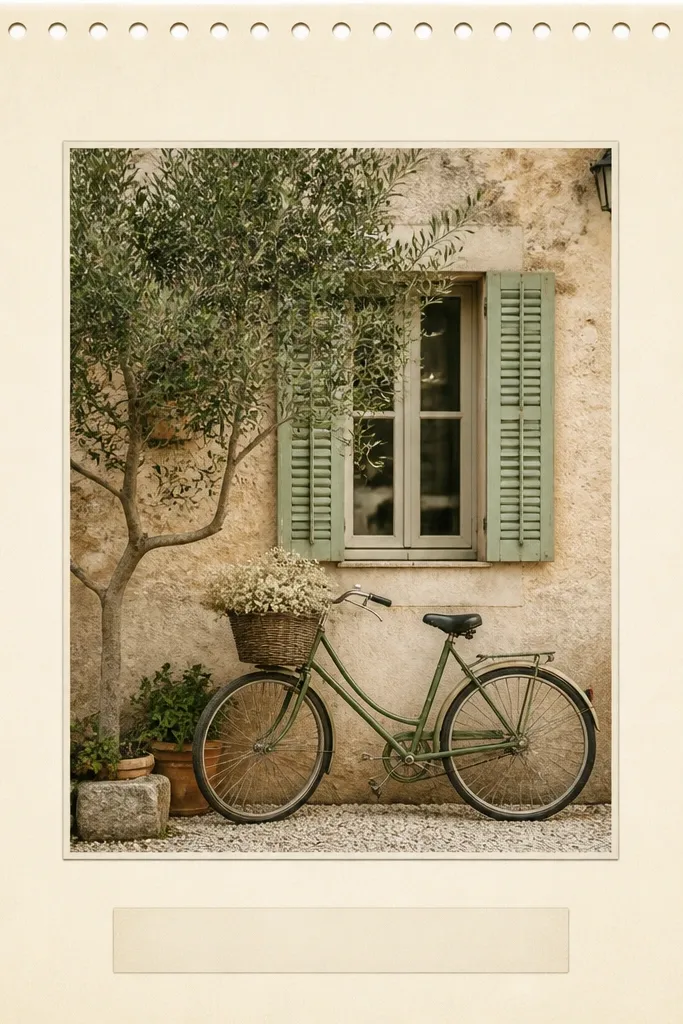
This layout looks like a ticket scrapbook page without needing actual tickets everywhere. The punched-hole border gives a graphic frame, and it keeps the page from feeling empty even when you only have one photo. I keep the center simple so the border does the work. For boyfriend pages, this style looks great with concert photos, movie nights, and any event where “time” matters. The cream mat around the photo keeps colors from bleeding into the dark or patterned border.
Start with a patterned or solid cardstock base, like deep navy. Create a border by punching small semicircles along the top and sides — about 0.5 inch from the edges. Measure spacing so holes are consistent, roughly every 0.5 inch. Cut a thin cream mat for your 4x6 photo at 4.25x6.25 inches and glue it centered. Add a bottom title strip using a 1.25x6 inch strip of contrasting cardstock, then write the event name in a simple font or hand lettering. Place one small journaling line on the title strip’s left side — date or location. Seal with matte adhesive so the punched edges don’t fray.
Editor's notePractice the punch rhythm on scrap first; consistency is what makes it look store-bought.
Skip thisAvoid uneven hole spacing — it reads sloppy, especially on dark backgrounds.
18. Pocket Page With Layered Photo Mats
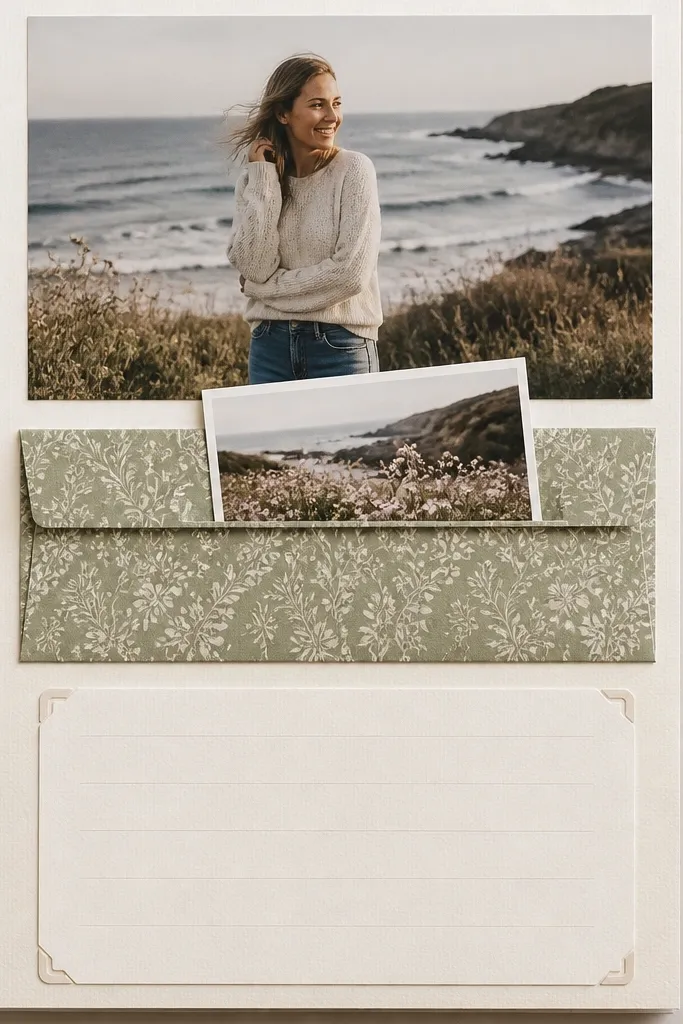
A pocket page is one of the easiest ways to keep extra boyfriend memories without gluing everything down permanently. Layered photo mats make the pocket photo feel connected to the main photo, and the journaling card keeps your story readable. I like this for pages with “proof” items like a tiny printed snapshot, a card from a restaurant, or a photo strip you trimmed from a set. This layout works well for all skin tones because the page uses structured mats instead of busy backgrounds.
Use 8.5x11 cardstock and glue a patterned paper pocket on the right side. Cut a pocket from cardstock at about 4x6 inches and fold the top flap down by 0.75 inch; glue the sides and bottom only. Place a 4x6 photo on the left top with a layered mat: one mat 5x7 in light paper and an inner mat 4.25x6.25 in white. Add a smaller 3x4 photo tucked into the pocket so it peeks out the top. Put a journaling card at the bottom left — about 2.5x4 inches — and write the date and two details. Add one small embellishment like a star sticker on the journaling card’s corner.
Editor's noteUse a bone folder on the pocket flap so it opens cleanly without buckling.
Skip thisDon’t make pockets too tight; if the insert catches, it tears the paper.
19. Monogram Letter Die With Photo Underlay

A monogram letter turns any boyfriend scrapbook page into something personal fast. The cut-out style looks clean and modern, and it lets the photo show through without extra layers. I use this when the story is broad — like “us” or “our first year” — and I want the page to feel cohesive across multiple photos. Choose one initial only and keep it big, about 5 inches tall, so it reads from across the room. This style looks good on photos with a lot of color because the letter frame contains the chaos and makes it feel intentional.
Start with a patterned paper background in a low-contrast print, like light dots. Cut a large letter from cardstock, about 5 inches tall, leaving the center open. Glue the letter so it sits centered over the photo area. Place a 5x7 photo behind the letter, aligned so the letter’s opening shows part of the photo face or main action. Add a small journaling label under the letter, about 2x4 inches, and write a short message. Sprinkle 6 to 10 tiny confetti dots in one color around the corners, then press everything flat so it lies in a sleeve.
Editor's noteIf you don’t have a die cutter, trace the letter onto cardstock using a bold font print and cut carefully with a craft knife.
Skip thisAvoid using multiple letters; one monogram keeps the page from feeling like a craft fair banner.
20. Black-and-White Handwriting Banner
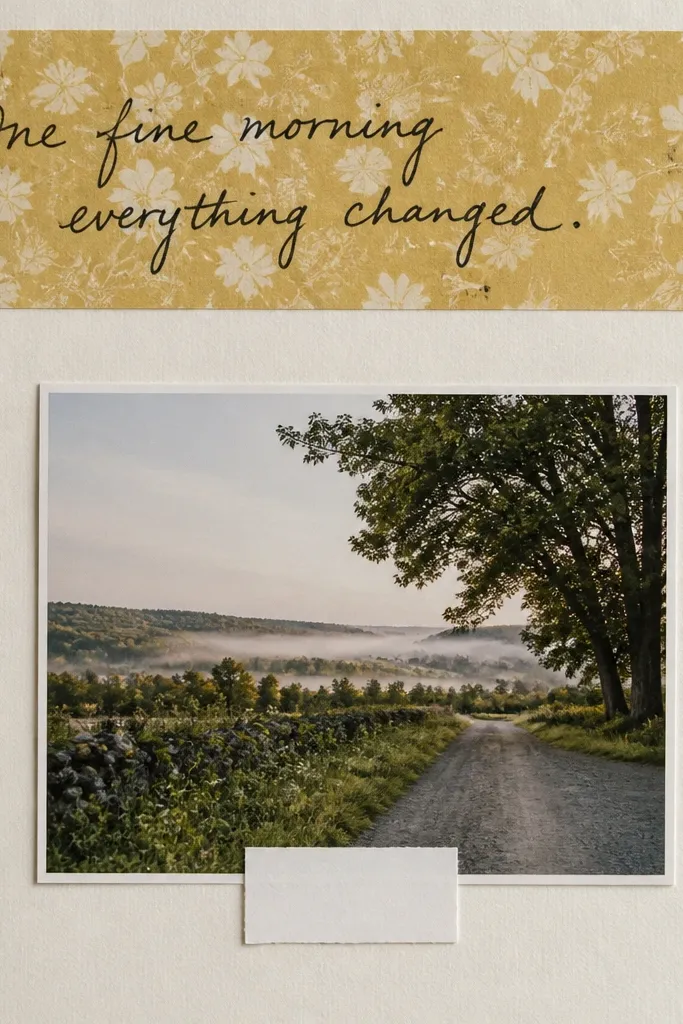
When you want scrapbook page ideas for boyfriend that feel personal and readable, handwriting banners are the move. The banner gives you a place to write something specific and meaningful, like a nickname plus a date, without needing a lot of tiny labels. I keep the banner black-and-white so it doesn’t fight the photo. The photo sits below with a simple mat, and the page stays clean enough for sheet protectors. This format works well for photos that are slightly busy because the banner is the only “busy” text element.
Start with a solid cardstock background. Cut a banner strip across the top that’s about 8 inches wide and 1.5 inches tall, using patterned paper with a subtle print. Glue it down and let it dry. Write your message in black gel pen — keep it 10 to 18 words max so it stays legible. Place a 4x6 photo below the banner, centered, with a thin white mat. Add a small journaling label at the bottom — about 1.5x4 inches — for the date and location. Finish with one small sticker near the photo corner that matches your banner pattern color.
Editor's noteUse a ruler under your hand so the handwriting line stays straight; it makes the banner look intentional.
Skip thisAvoid cursive that runs off the strip; if it can’t be read in one glance, it looks messy.
21. Board Game Night With Dice Roll Circles

This layout is for boyfriend pages that are playful, not sentimental. Dice roll circles make your journaling feel like part of the game, and the patterned strip at the bottom ties the theme together. I keep the circles around the photo, not covering it, so the photo stays the anchor. Choose one game color palette — like teal and gray — so it looks cohesive. It flatters photos taken indoors because the dark accents around the photo add contrast.
Use light gray cardstock. Place a 4x6 photo centered. Draw or punch 8 circles, each about 0.9 inches wide, and write dice numbers on them with a black marker, one or two numbers per circle if you want it to feel like a score. Position the circles around the photo edges — two at the top, two at the sides, four near the corners. Add a bottom strip of dice-themed patterned paper about 1.25 inches tall. Write a short sentence on a 2x3 inch label under the bottom strip, like “We lost track of time.” Glue circles flat and let everything dry before sleeve storage.
Editor's noteUse a circle punch so every dice circle is the same size — it makes the whole page look designed.
Skip thisAvoid using too many tiny icons; circles already carry the theme.
22. Concert Stage Spotlight With Glossy Overlay
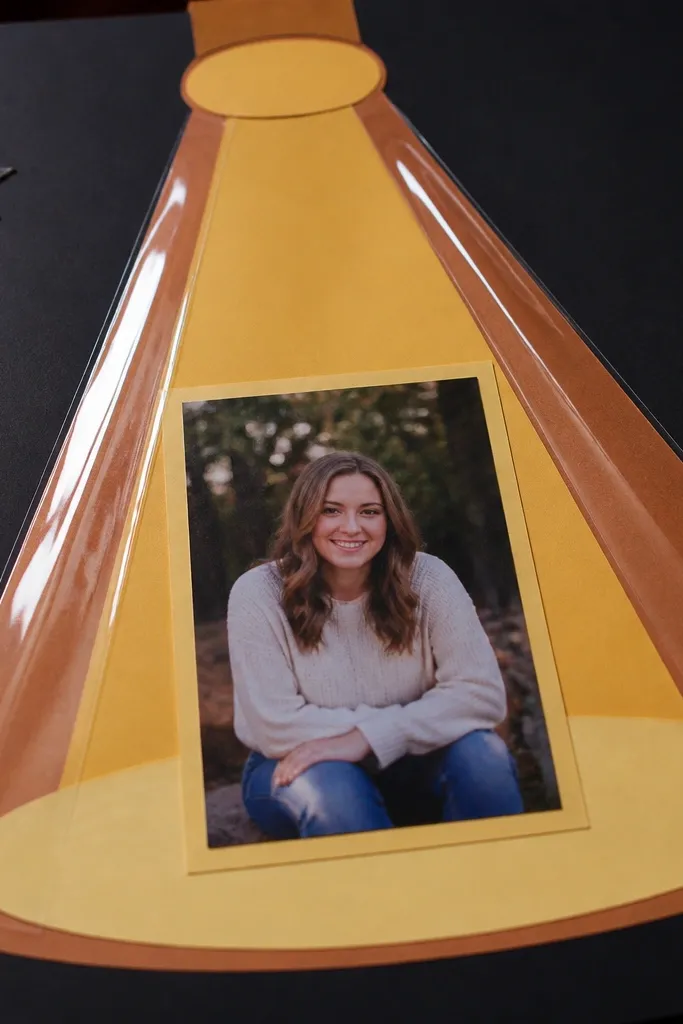
If your boyfriend loves concerts, a spotlight layout makes the photo feel like it’s on stage. The paper spotlight shape adds movement, and a glossy overlay gives you a real shine that looks dramatic in photos. I use yellow and orange cardstock for the spotlight, then I keep the rest of the page dark or neutral so the stage colors don’t smear into the journaling. This layout works best for photos with bright lights and silhouettes because the spotlight echoes those highlights. It also looks sharp for photos with darker clothing since the warm spotlight frames the subject.
Start with black or dark charcoal cardstock. Cut a spotlight shape from yellow cardstock and a slightly smaller one from orange cardstock, then layer them behind the photo area. Place your 4x6 concert photo centered on top of the spotlight. Add a glossy clear sticker overlay or a small sheet of clear acetate cut to the spotlight’s inner area, then glue the edges down so it doesn’t lift. Create a top title strip using metallic gold cardstock about 1 inch tall and 5 inches wide, and write the concert name. Add two journaling lines in white gel pen on a small label near the bottom right. Keep embellishments minimal so the spotlight looks like the main effect.
Editor's notePress the glossy overlay with a clean cloth to remove trapped air bubbles.
Skip thisAvoid covering the entire page with shine; it makes text harder to read and looks cheap.
23. Hobby Tool Tags With One Photo + Two Scrap Swatches
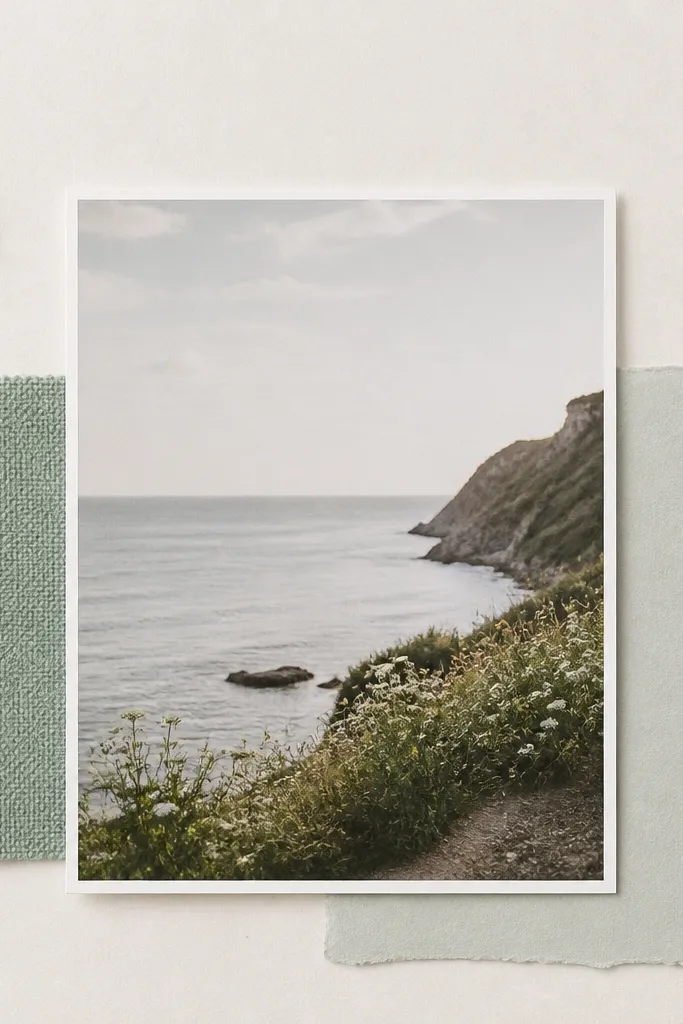
This layout is for boyfriend pages built around his hobby — woodworking, fixing bikes, cooking, drawing. Tool-shaped tags add personality without needing a ton of photos. The trick is to keep it structured: one photo in the center, then only two supporting swatches around it so the page doesn’t look busy. I choose swatches that match the hobby’s “real world” materials, like brown kraft for wood tones or dark denim for a repair vibe. This looks good on photos where the background is cluttered because the tags and swatches create a controlled frame.
Use a neutral base like kraft or off-white. Cut two swatches — one 1.5 inches tall strip and one 2 inches wide square — from fabric scraps or patterned paper in matching tones. Glue swatches behind the photo area at the top left and bottom right edges. Place a 4x6 photo centered with a thin cardstock mat. Add tool tags: cut or die-cut a wrench, paint brush, or hammer tag shape from cardstock and glue them at the corners, keeping them about 1.25 inches from the page edge. Write a short hobby line on a small label under the photo, about 1.5x4 inches. Seal all edges flat with tape runner.
Editor's noteIf you use fabric swatches, iron them flat first so they don’t ripple in the binder.
Skip thisAvoid random mismatched scraps; two swatches are enough to look intentional.
24. Weathered Polaroid Border With Torn Edges
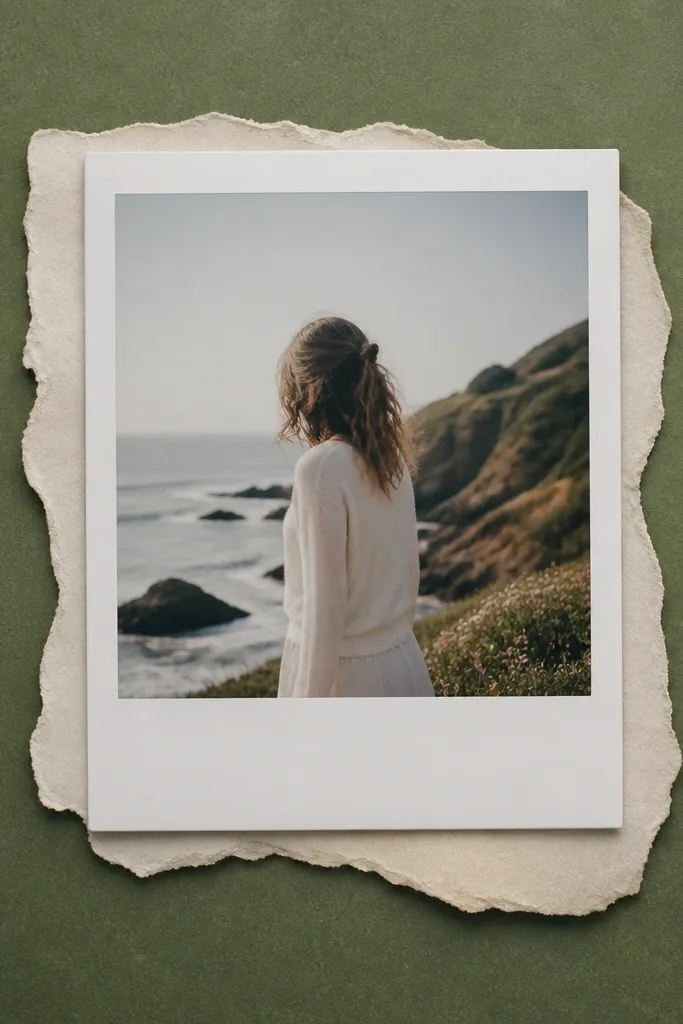
This is my “soft and worn” layout for boyfriend scrapbook page ideas when the photos feel nostalgic. Torn edges create a lived-in look, and the Polaroid border keeps the whole page anchored. I choose muted backgrounds like dusty green, faded blue, or warm gray, then I add one worn accent like a faint ink smudge or a light brown distress ink around the torn edge. It looks best with photos that have warm lighting or muted colors. The torn edges don’t harm readability because the photo stays centered and framed.
Start with muted green cardstock. Cut a torn paper layer behind your Polaroid frame using cream cardstock — tear the edges unevenly so it looks natural. Make a Polaroid mat for a 4x6 photo: outer size about 4.25x6.25 inches with a 0.12 inch border, and a slightly smaller inner photo window. Glue the torn layer first, then mount the Polaroid on top. Add a small journaling strip under the Polaroid, about 2x5 inches, and write a specific memory — keep it to two lines. Add one small sticker or stamp near the top corner for balance, then press everything flat before sleeving.
Lightly rub a brown ink pad along torn edges to hide white paper fibers.
Avoid tearing too much around the entire photo; keep the torn effect behind the frame, not on top of faces.
25. Two-Photo Split With Diagonal Caption Bar

This split layout is for when you have two photos that tell the same story from different moments. The diagonal caption bar gives you a place for a short, punchy line — like “first time we tried it” or “after the storm.” I use plain white background and black accents so the diagonal bar reads clearly. It looks sharp with both landscape and portrait photos because the diagonal line visually ties them together. This style also works well if one photo is darker than the other; the caption bar brings attention to the message, not the brightness.
Use white cardstock. Place two photos so they meet at an invisible diagonal: one photo on the top left portion and one on the bottom right portion, each trimmed to about 4x4.5 inches depending on your cut. Create a diagonal caption bar from cardstock, about 1 inch tall at its thinnest point, running from top right toward bottom left across the join. Glue the bar on top of the diagonal seam so it hides the photo edges. Write your caption in black marker directly on the bar. Add one small date stamp near the bottom edge of the bar, then journal a longer sentence on a narrow label under the photos, about 1.5x4 inches.
Editor's noteUse a pencil guide for the diagonal before gluing anything; it keeps the split from looking crooked.
Skip thisAvoid placing the caption bar too low; if it covers faces, it looks like an accident.



