

1. Cream + Navy "First Hello" Photo Window
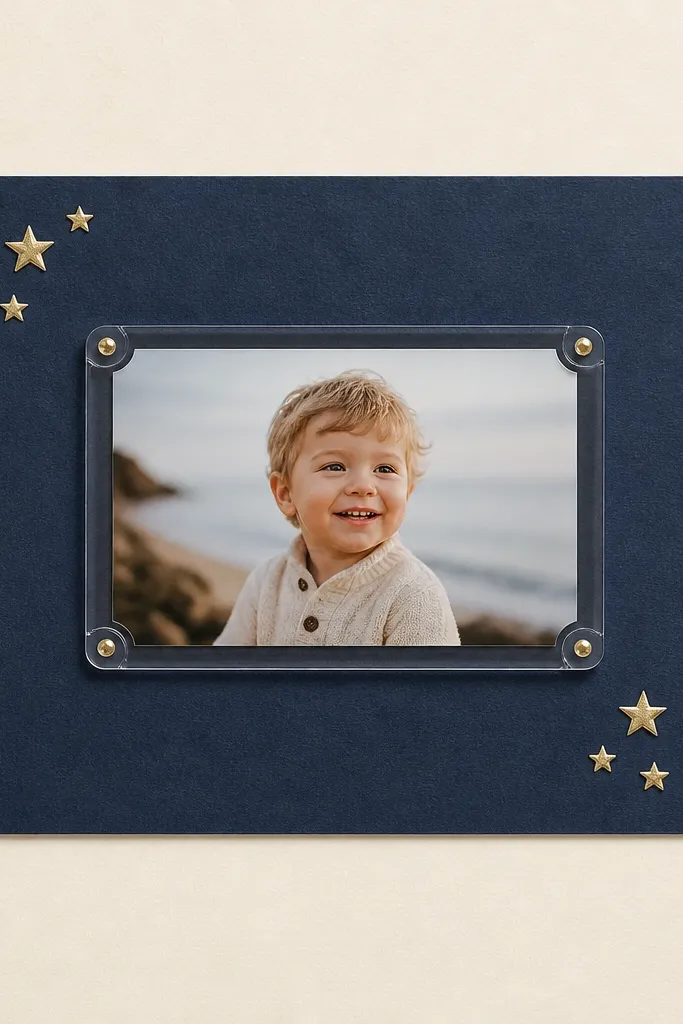
This page works because the clear window frame makes the photo feel like a keepsake instead of just another picture. I pair cream cardstock with a deep navy photo mat so your face tones stay warm and photos don’t look washed out. The gold stars are small — like 5 to 8 — so they read as “spark” not “kid party.” This layout flatters most photo styles, especially close-ups or candid shots where you want the viewer’s eye to land fast. It also looks clean for anniversary, Valentine’s, or a “how we met” section.
Start by cutting a navy mat that’s about 0.5 inch larger than your photo on each side. Center the photo on the mat and add a clear window layer using a pre-cut plastic photo sleeve or a clear acetate sheet trimmed to size. Tape the edges with double-sided tape so it stays flat. Then place a 1-inch-wide navy ribbon strip just under the photo, centered, and finish with four tiny gold star stickers — one near each corner of the window. Write a one-line label in navy ink under the ribbon that sounds like you, not a quote.
Use archival ink for the label so the handwriting doesn’t smear when you handle the book.
Avoid using glitter glue everywhere; it looks messy when it catches light.
2. Mini Love Letter Pocket on Receipt-Texture Paper
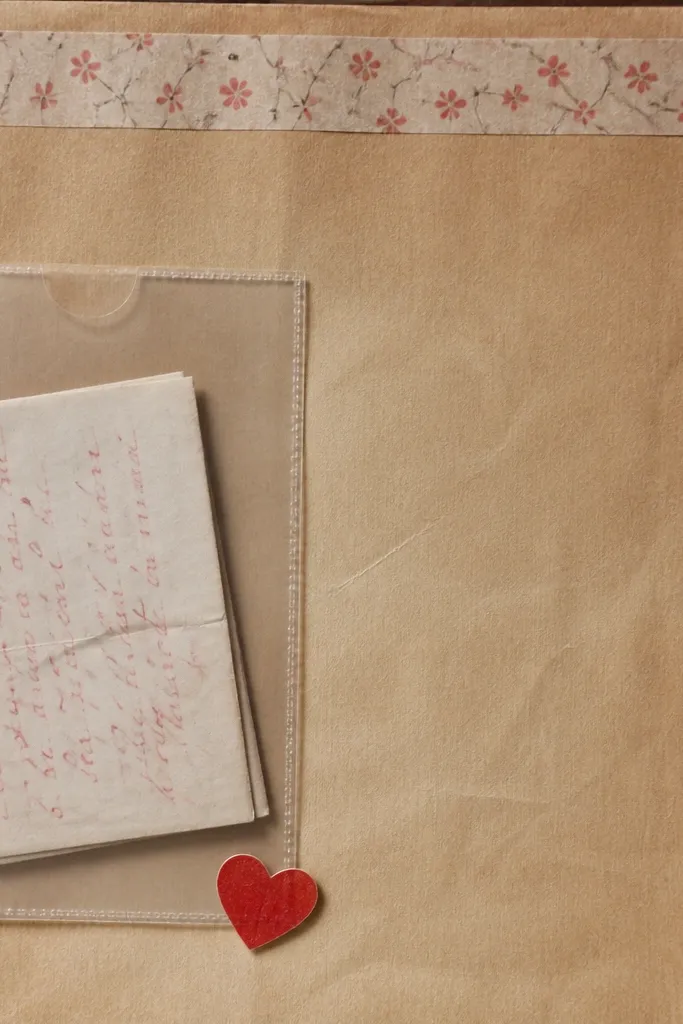
This one feels romantic because the letter is hidden in plain sight. Receipt paper gives you that “real day, real moment” texture without needing fancy supplies. I use light-brown paper with black or gray ink writing so it looks like something you found and saved. The clear pocket keeps the letter protected and lets him slide it out to reread. This page suits long-distance relationships, late-night feelings, and anyone who loves practical keepsakes.
Cut your receipt-texture paper to your page size and glue it down with a thin layer so it doesn’t ripple. Add a clear pocket sleeve on the left side, leaving about 1 inch of space on the right for a photo or blank writing block. Fold a letter to fit the pocket — I make mine about 3.5 x 5 inches — and write in red or dark brown ink. Place a thin strip of washi tape along the top edge of the pocket as a decorative “seal.” Add a tiny heart sticker at the bottom corner and leave the rest of the page clean so the letter is the star.
Use a glue stick for the background paper, not liquid glue, to keep it from buckling.
Skip bulky envelopes here; they make the page harder to close in a binder.
3. Ticket Stub + Date Map Overlay
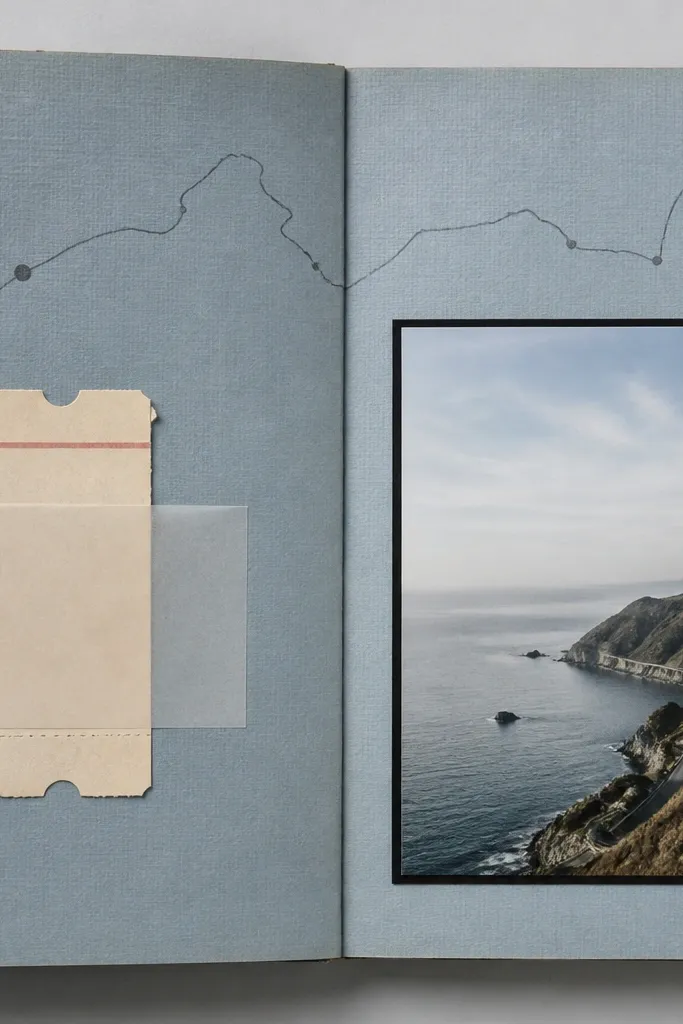
A map overlay feels romantic because it turns a date into a route he can trace with his finger. I like blue-gray backgrounds because they make tickets and ink look sharp. The ticket stub gives the page a real-world anchor, while the map line adds story without clutter. This layout works best for trips, concerts, museums, or even a “drive to nowhere” night. It also flatters darker photos since the map lines add lightness.
Print or draw a simple route line on light gray paper, then trim it to about 10 inches long to fit your top third. Layer a translucent vellum strip over part of the route so it looks like it’s “on top of” the map. Tuck a ticket stub under the vellum on the left — secure with two small pieces of tape at the top corners only. Add a black thin photo frame on the right, and place the photo so its bottom aligns with the route line’s midpoint. Write the date and location in small black ink under the photo.
Editor's noteIf your ticket is glossy, lightly scuff it with a fingertip so tape grabs better.
Skip thisDon’t cover the ticket completely with vellum; keep at least half visible.
4. Washed Denim Heart Corner with Fabric Swatch
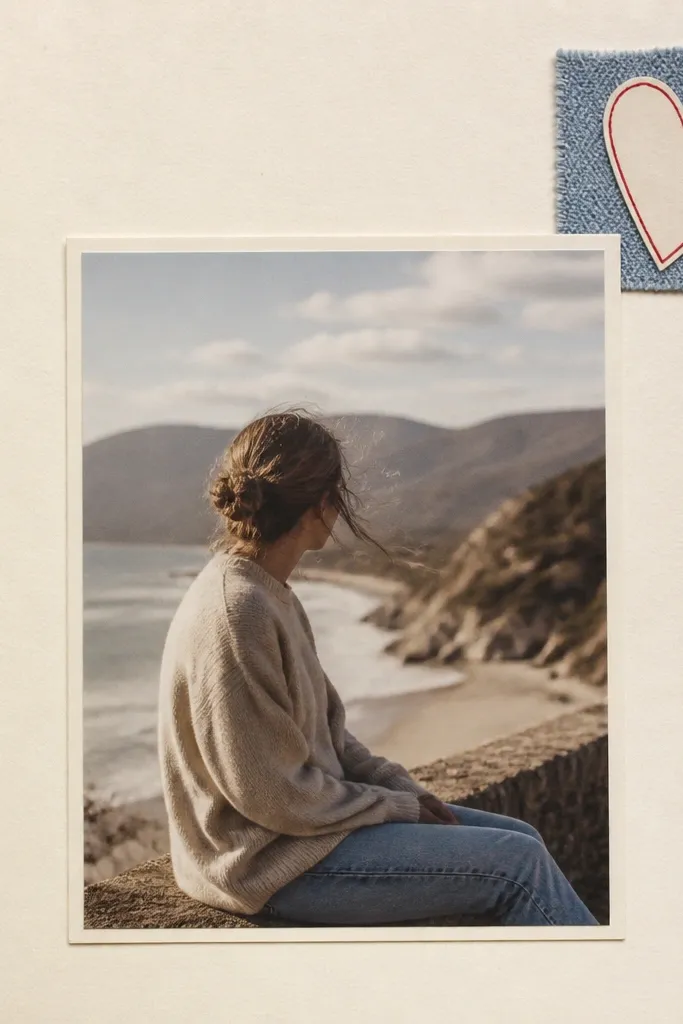
This page is romantic because fabric feels personal. Denim is especially good if you both wore jeans on your first date, met at a thrift store, or bond over casual styles. The off-white base keeps it soft, while the red heart outline gives a clear romantic signal without looking like a Valentine card. It works well for boyfriends because it reads “tough love” rather than sugary. It also looks great with photos that have blue tones.
Cut a small square of light-blue denim about 2.5 x 2.5 inches and fray one edge slightly with scissors. Glue it under a heart-shaped paper cutout placed in the top-right corner. Use red marker to outline the heart and add three tiny red dots around the outline like stitching. Center your main photo with a thin cream mat, leaving a clean 1/2 inch margin. Finish by writing one line under the photo in small handwriting — keep it short, like “You made ordinary days feel good.”
Editor's noteSeal the fabric edge with a thin layer of clear-drying craft glue so it doesn’t snag later.
Skip thisAvoid fuzzy fabric pieces that shed; they gum up pockets and sleeves.
5. Polaroid-Style Stack with Date Tags
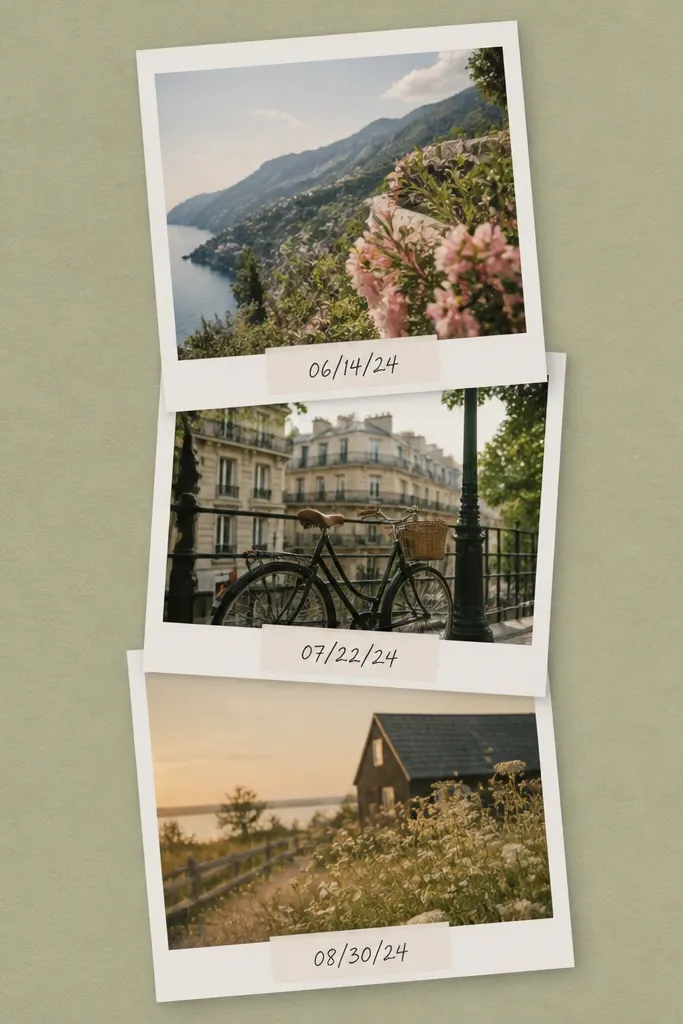
This layout makes romance feel playful and grounded. The polaroid stack draws attention to the photos first, then the date tags act like a mini timeline he can revisit. Sage paper softens the look and keeps skin tones flattering, especially for warm indoor photos. I use black doodle hearts because they look more “you two” and less like mass-produced stickers. This works for any boyfriend because the structure feels organized, not chaotic.
Cut three photo mats the same size, then add 1/4 inch overlap so the top photo covers the bottom corners. Place them slightly left of center so the right side has room for writing. Add small paper tags under each mat — each tag about 1 x 2.5 inches — and write the date in black ink. Use a thin black marker to add 2 to 4 doodle hearts in the negative space. Glue everything down with a tape runner so the stack stays crisp.
Editor's noteUse a ruler for tag placement; crooked tags make the page look rushed.
Skip thisSkip thick foam tape under every polaroid; the page gets lumpy in binders.
6. Sunset Gradients with "Our Favorite Song" Strip
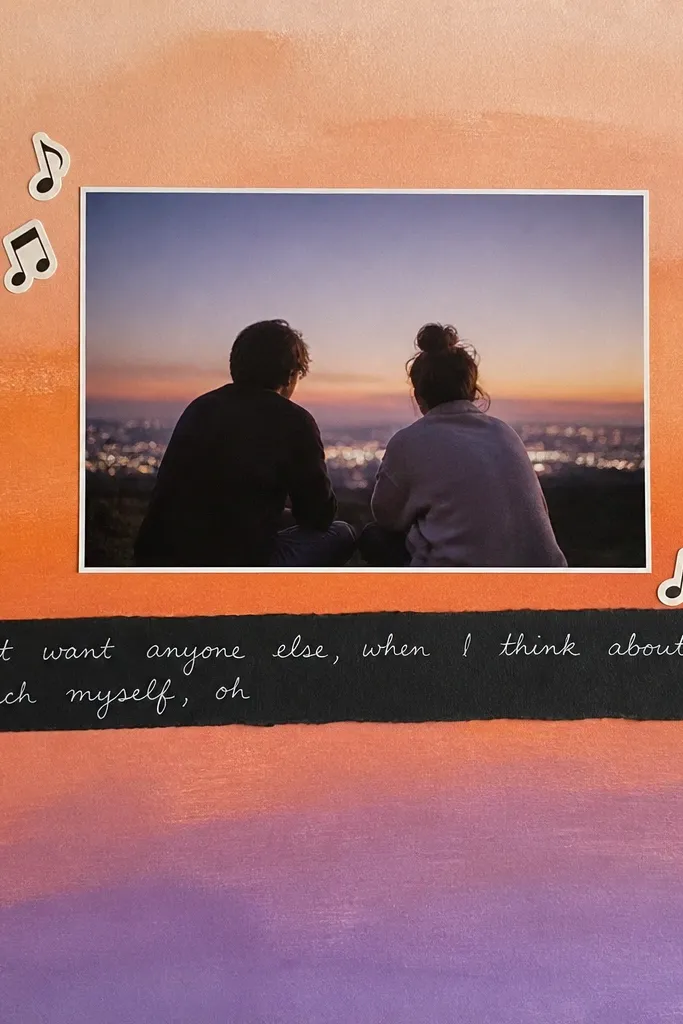
Song strips feel romantic because they freeze a feeling you both share. The sunset gradient gives you instant mood, and the black strip acts like a readable label so the page doesn’t look messy. I keep lyrics short — one line only — because long text looks like homework. This works best for couples who bond over music, drives, or late-night playlists. It also flatters photos taken at golden hour because the colors echo the sky.
Paint or sponge a gradient background using three colors: peach, orange, and a soft purple at the edges. Let it dry fully, then cut a black cardstock strip about 9 inches long and 1.25 inches tall. Center the strip and write the song title plus one short line in white gel pen. Place your main dusk photo above the strip, leaving a 1/2 inch gap between photo and text. Add 3 to 5 tiny music-note stickers in the corners and lightly tap them down so they don’t curl.
Use a white gel pen for the lyrics; it stays legible on dark paper.
Don’t print full lyrics in tiny font; it turns into a blur.
7. Envelope-within-a-Frame for "Next Date" Plan
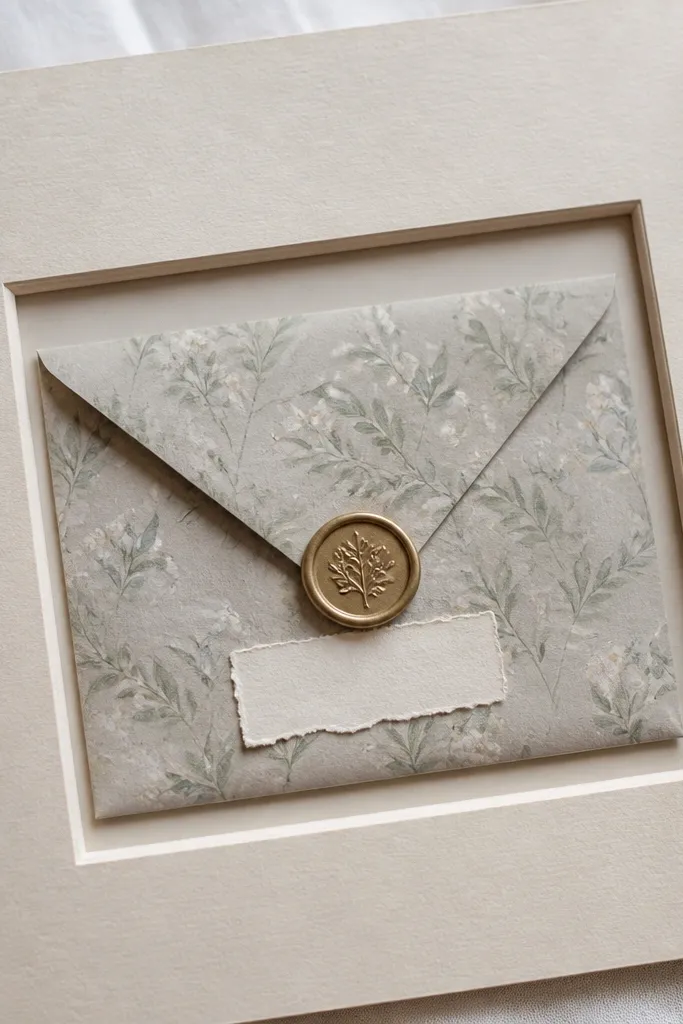
This page is romantic because it creates a promise he can open. The envelope-in-frame look feels polished and intentional, like you planned it, not glued it. Patterned paper gives personality while the frame keeps everything structured. I like using a wax-seal sticker because it makes the envelope feel “official” even though it’s just craft paper. This suits long-distance, anniversaries, and boyfriends who love planning.
Cut a frame shape from cardstock and glue it over your background, leaving the center open. Inside the opening, build a small envelope from patterned paper — about 4 x 6 inches unfolded — and attach only the sides and bottom so the top flap opens. Add a wax-seal sticker on the flap or use a tiny brad to hold it shut. Write “Next date plan” on the front in neat handwriting. Place a small photo or Polaroid-sized picture behind the envelope edges so it peeks out like a background layer.
Editor's noteWrite the plan with a pen, then glue a tiny printed “date” label over the top for a cleaner look.
Skip thisAvoid putting bulky embellishments inside the envelope; it won’t close flat.
8. Black-and-White Photo with Red Thread Stitching
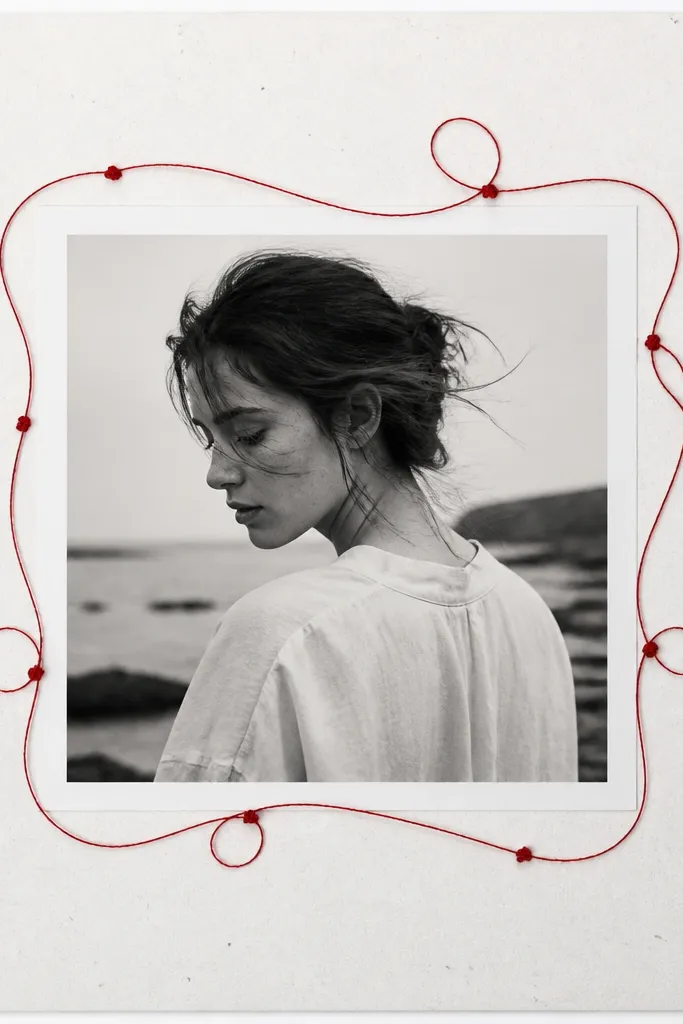
Red thread looks romantic because it mimics a handmade repair and ties the page together. Black-and-white photos keep the focus on expressions, and the red thread adds one strong color note. I use simple looping patterns because they look neat and don’t tangle. This layout flatters guys who like minimal design; it reads modern, not scrapbooky. It also works for serious anniversaries when you want “love” without hearts everywhere.
Print a black-and-white photo and mount it on a white mat. Use a ruler to mark two or three points on each side where the thread will pass. Punch small holes with an awl, then thread red embroidery thread through and tie off the back with a tiny knot. Stitch a loose loop around the photo — keep it symmetrical. Add a single line of handwriting at the bottom in gray or black ink, like “Always choose you.”
Editor's noteUse a needle with a blunt tip or a threader to keep the holes clean.
Skip thisSkip too many thread loops; more than three lines makes the page look busy.
9. Clear Tape "Memory Tape" Film Strip
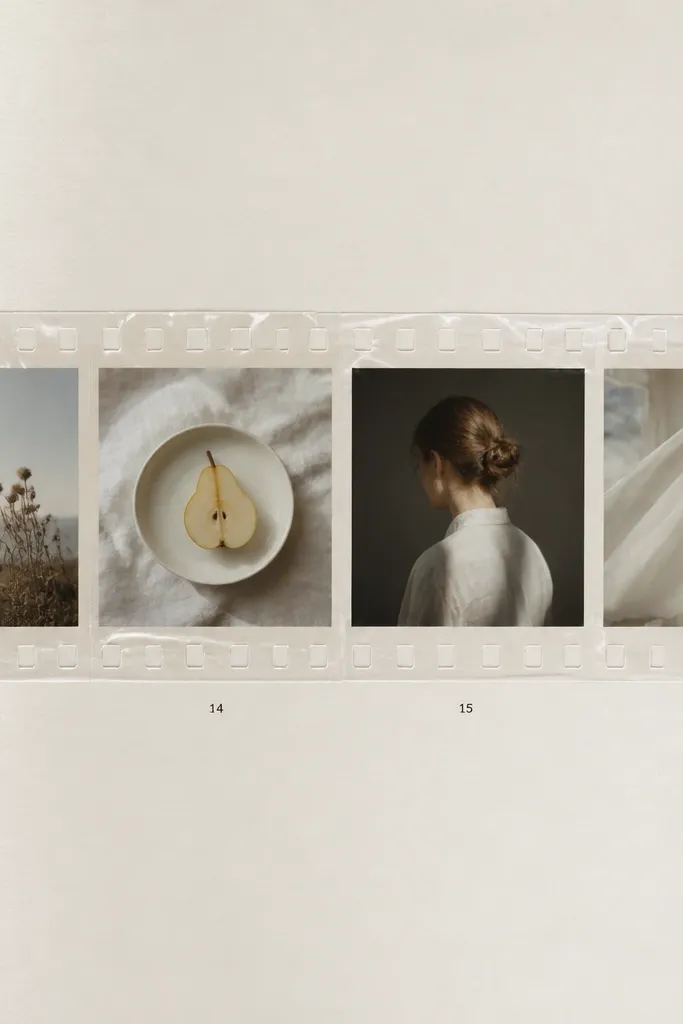
This page feels romantic because it turns memories into something he can flip through with his eyes, like a mini reel. Clear tape seals photos and adds a shiny, slightly imperfect “found footage” vibe. I use a film strip grid because it’s easy to align and it looks intentional even with casual snapshots. This works for boyfriends who love nostalgia, old phones, or anything techy. It also looks great when your photos are slightly different sizes.
Cut a strip of cardstock about 10 inches long and 3.5 inches tall. Arrange 5 small photo squares (about 2 x 2 inches each) in a row with 1/4 inch gaps. Seal each photo with a strip of clear tape across the top and bottom edges, pressing firmly with a bone folder. Add tiny black numbers under each photo using a fine-tip marker. Finish by writing one sentence in small print under the film strip — keep it under 12 words.
Press tape with a hard edge tool so bubbles disappear.
Don’t use matte tape; it kills the film-strip shine effect.
10. Map Coordinates + Tiny Compass Rose Corner
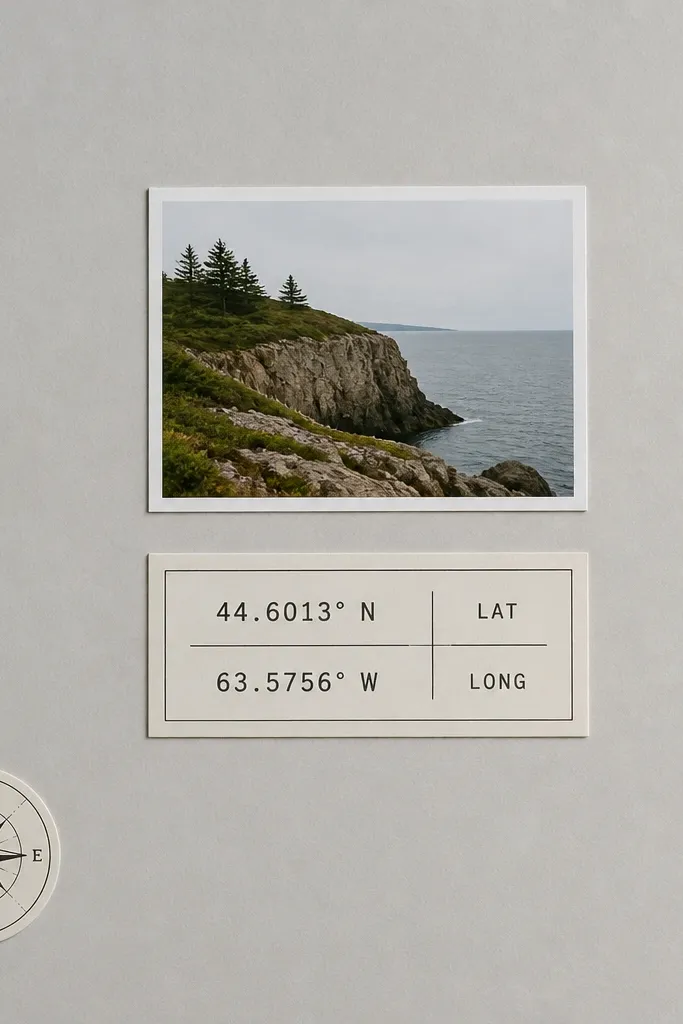
Coordinates feel romantic because they lock in a place and a time you both shared. I like using a compass rose in one corner only — it keeps the design from getting theme-y. The gray background makes the coordinate text crisp, and it pairs well with almost any photo color. This layout is great for proposals, first trips, or even the spot you always meet up. It flatters darker photos because the text block adds light.
Print or type coordinate text on a small rectangle of white cardstock about 3.5 x 5 inches. Glue it slightly below the center, leaving space for a small photo above it. Add a tiny compass rose sticker to one corner, then draw a thin line from the compass rose toward the coordinate block with a gray pen. Place your photo so its bottom edge aligns with the coordinate block’s top edge. Write the date in tiny ink under the coordinates.
Use a monospaced-style font for coordinates if you’re printing; it looks more “map” and less “card.”
Don’t add multiple nautical stickers; one compass rose is enough.
11. Dusty Rose Border with "Us" Photo Cutouts
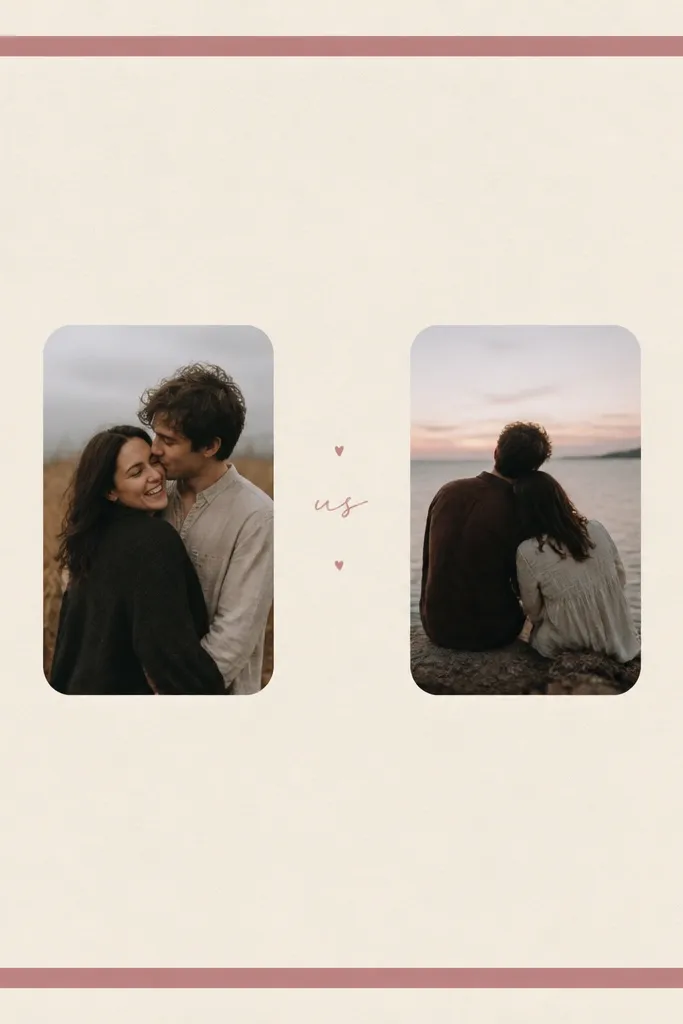
This page looks romantic because it frames your photos like a print, not like a collage. Dusty rose is soft and flattering on skin tones without turning the page pink-sweet. Rounded rectangles keep the photos friendly and modern. This is a great choice for boyfriends who prefer clean layouts and minimal decorations. It also works for any number of photos since you can keep the center simple.
Cut a dusty rose border strip from cardstock and glue it around the edges, leaving a 1/2 inch inner margin. Use a corner rounder punch to make rounded rectangles for two photos — about 3.5 x 4.5 inches each. Place them side-by-side with a small gap, centered in the frame. Add a small “us” label in the gap area using a thin black pen. Finish with a ring of 6 tiny heart dots in rose or red around the label, keeping them light and spaced.
Editor's noteUse thin black lettering for “us”; thick marker makes it look cheap.
Skip thisAvoid clutter in the center; the border already does the heavy work.
12. Matchbook-Style Mini Book for Compliments
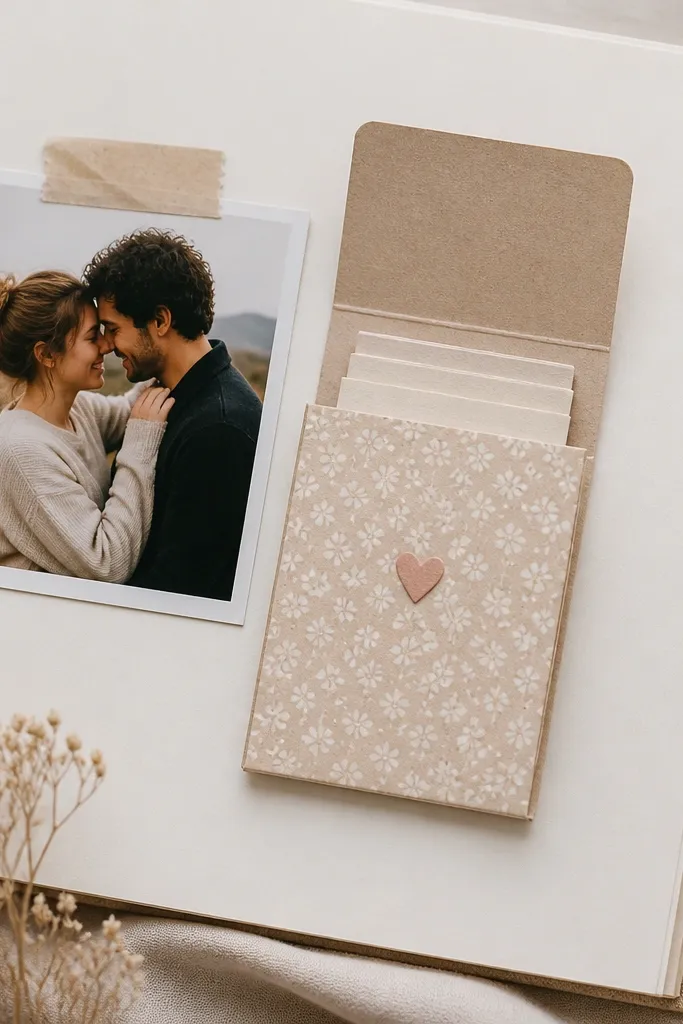
A matchbook-style mini book feels romantic because it’s interactive — he opens it and gets a mini burst of attention. I like this for boyfriends who respond to specific praise, like “I loved how you handled that” or “Your laugh makes my day.” The matchbook shape also keeps everything compact so the page stays flat. This layout works well for birthdays, anniversaries, and post-breakup “we’re okay” rebuilds. It reads thoughtful, not generic.
Cut patterned cardstock into a matchbook base about 3 x 6 inches folded. Glue the sides so it opens like a tiny booklet, then create 6 to 8 mini strips of paper inside — each about 1.5 x 3 inches. Write one compliment per strip in different ink colors (use three colors max). Attach the matchbook to the left side of your page with a strip of double-sided tape along the fold. Place a 4x6 photo on the right with a thin mat. Add a small caption under the photo like “Open when you need it.”
Use a paper trimmer for the mini strips so they stack evenly.
Don’t write long paragraphs; short lines look nicer and fit better.
13. Rose Gold Foil Quote Label on Black Mat
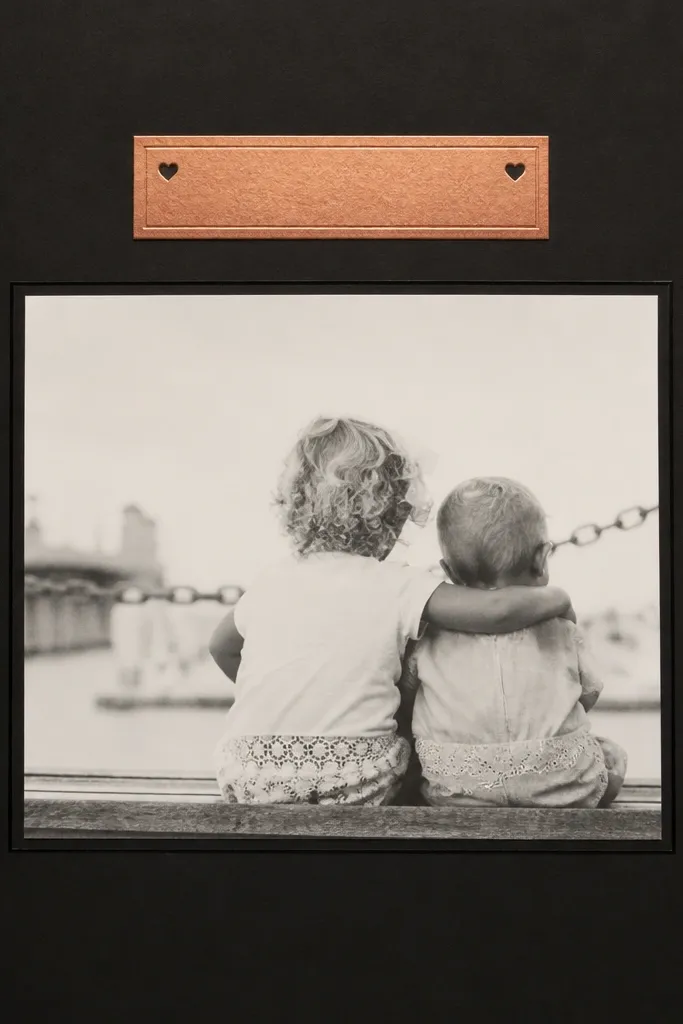
This one looks romantic because the rose gold foil reads like jewelry against dark paper. The contrast makes your photo pop, and the quote label stays legible from a distance. I use matte white photos here because glossy photos can look harsh on black cardstock. This layout flatters darker skin tones in photos and keeps bright colors from overpowering the page. It’s also a strong choice for anniversaries when you want the page to feel “grown-up.”
Cut a deep black cardstock background panel. Place your main photo centered on a matte white mat, leaving 1/2 inch margins. Add a small rose gold foil label at the top — about 4 x 1.5 inches — and write the quote with a fine-tip pen or use pre-printed foil letter stickers. Add two tiny heart icons in the corners of the black background. Finish with a thin line of writing under the photo in white or light gray ink.
Editor's noteBurnish foil labels gently with a fingertip so they stick without lifting edges.
Skip thisAvoid using too many foil elements; two is enough to look intentional.
14. Ribbon Bookmark Page with "Read Me" Note
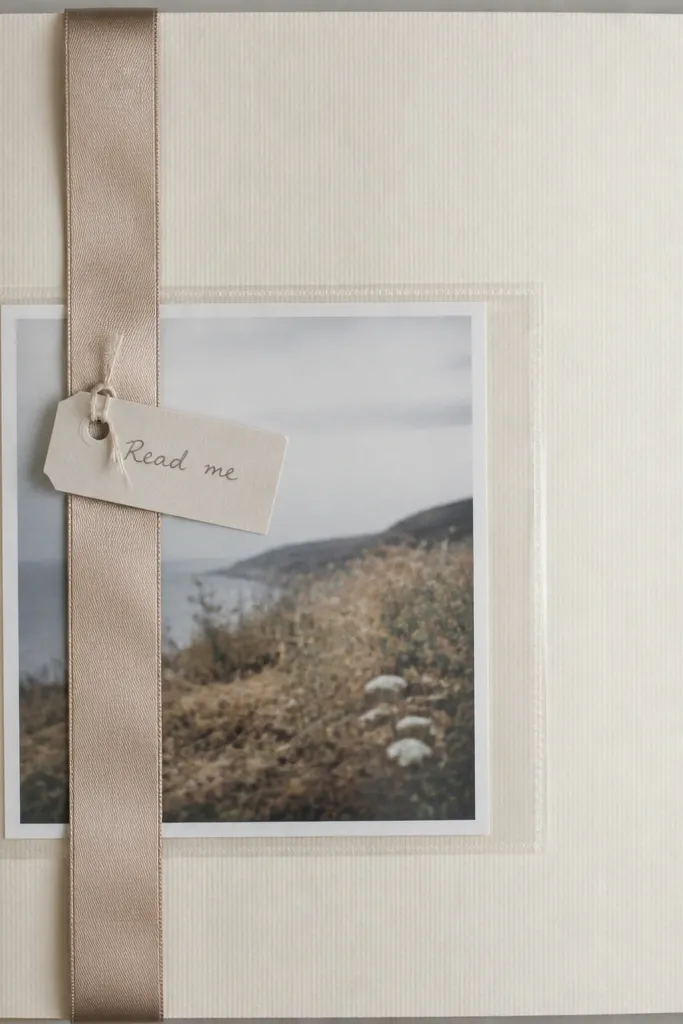
A ribbon bookmark page feels romantic because it gives him a reason to interact with the book every time he flips through. Satin ribbon looks soft and expensive, and it hides a small note neatly. I use it for “you make me feel...” messages since the note can stay private until he opens it. This also works for boyfriends who like reading notes but don’t want a full-page wall of text. The vertical ribbon keeps the layout tidy and visually strong.
Attach a clear pocket sleeve to the center of the page where the ribbon will pass through — keep it about 3 inches wide. Slide a small tag into the pocket and write “Read me” on the tag. Cut a satin ribbon about 10 inches long and glue tape the top end behind the pocket so the ribbon hangs. Add the main photo behind the pocket so it shows around the pocket edges. Tie a tiny knot at the bottom of the ribbon and trim the ends at an angle.
Editor's noteUse fabric glue on ribbon ends if they fray; it keeps the ends crisp.
Skip thisSkip thick knots; they create bulk and stop the page from laying flat.
15. City Skyline Silhouette with Night Photo Star Dots
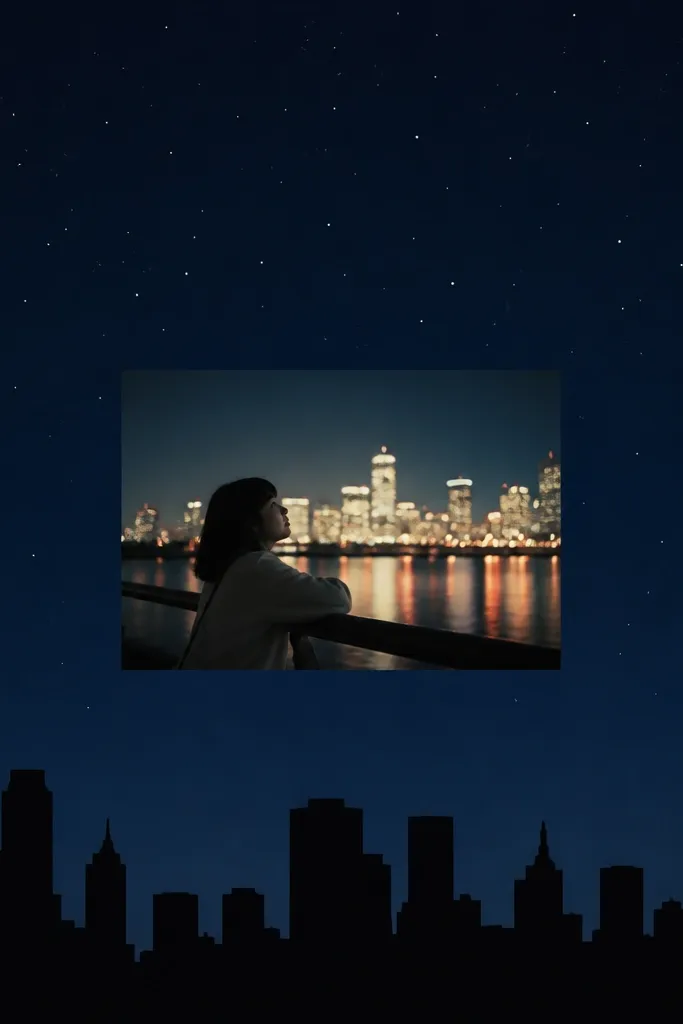
Night-sky pages feel romantic because they match the mood of late drives, city walks, and “just one more stop.” I use a skyline silhouette at the bottom so your eye rests there, then the photo becomes the center story. White star dots look good even with simple photos because they add texture and depth. This layout works best with night photos that have lights, street lamps, or a warm glow. It also flatters pictures with a lot of dark tones since the stars add contrast.
Cover the page background with dark navy cardstock. Cut and glue a black skyline silhouette across the bottom edge. Place your night photo above the skyline, centered, with a thin white mat. Add star dots using a white gel pen or sticker dots in a loose pattern — about 20 dots, varying sizes. Write “Our night drive” or the date in small white ink under the photo.
Editor's noteIf your photo is bright, reduce star dots near the photo edges so the page still reads clean.
Skip thisAvoid big glitter stars; they look uneven on dark paper.
16. Pressed Flower + Wax Seal on a "Promise" Page
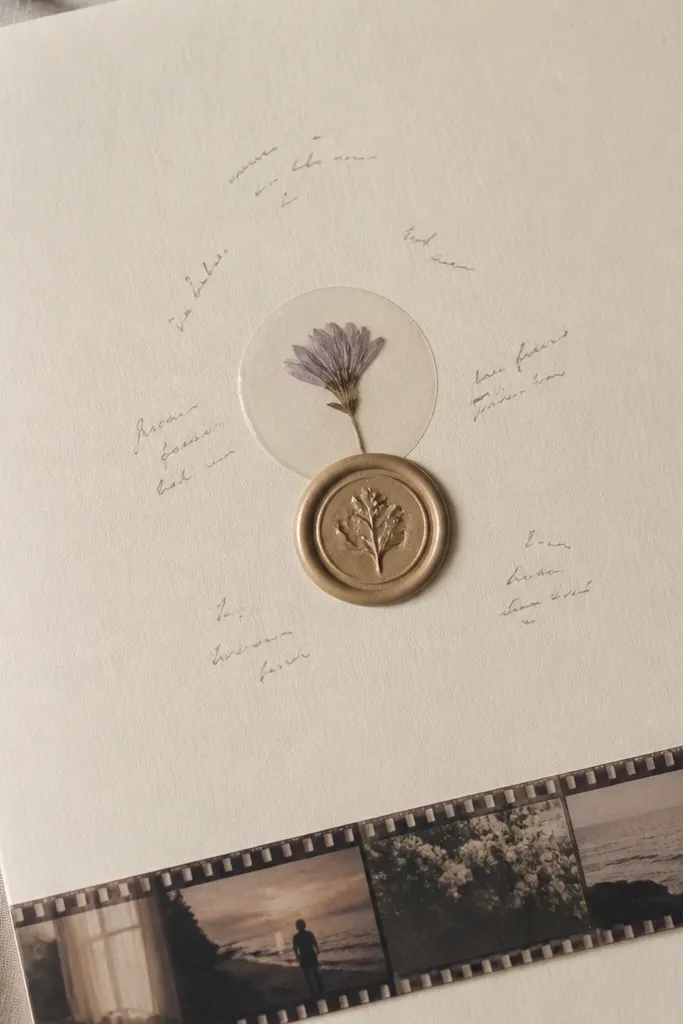
Pressed flowers feel romantic because they’re slow and physical, the opposite of scroll-and-forget. I keep the flower small — like the size of a quarter — so it looks intentional instead of like a craft project. The wax-seal sticker adds a “sealed promise” vibe without needing a lot of extra decoration. This page works for anniversaries, memorial dates, or any moment that feels meaningful. It also flatters pastel photos and keeps the focus on the flower + your message.
Press a small flower between books for at least a week, then trim it to fit under a clear circle sticker. Place the pressed flower in the center of the page and seal it with the clear circle. Stick a wax-seal sticker over the circle so the flower looks protected. Add a photo strip at the bottom — one small 4x6 photo cut down to about 4 x 2.5 inches — and glue it centered. Write a short promise line next to the flower in neat handwriting.
Use a clear circle sticker or lamination circle so the flower doesn’t fade from handling.
Don’t add lots of pressed petals; they bruise and look messy when handled.
17. Conversation Starters Bubble Labels
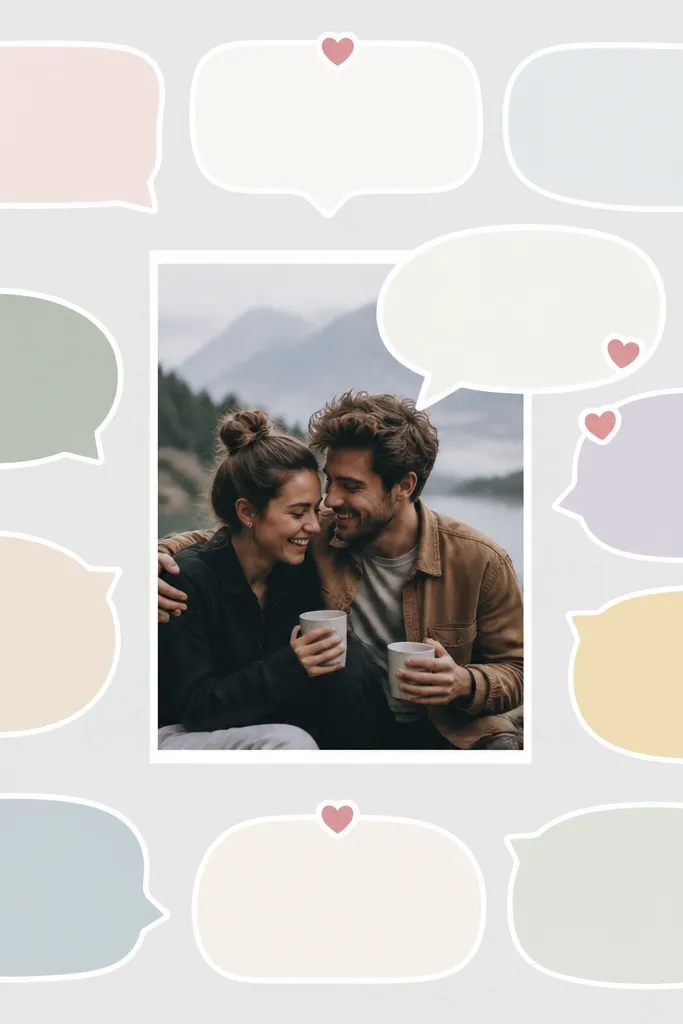
This page is romantic because it turns the scrapbook into an activity, not just a display. Bubble labels keep prompts playful, and the heart icons tie it back to romance. I use a neutral background so the labels stay readable and don’t fight with the photo. This works well for boyfriends who like talking, planning, or laughing about little memories. It also keeps the page from feeling like a “quote book” because the prompts invite a response.
Write 10 prompts on small bubble labels — each label about 1.5 inches wide — and add a tiny heart icon in one corner. Arrange the bubbles around the page edges leaving the center clear. Glue a main photo in the center with a thin mat. Add one speech bubble sticker pointing toward the photo and write “Answer mine” inside it. Keep the handwriting consistent and use one pen color for all prompts.
If he’s not big on journaling, make the prompts easy to answer in one sentence.
Avoid prompts that are too long; they look cramped on small labels.
18. Polka Dot Love Notes Around a Photo Frame
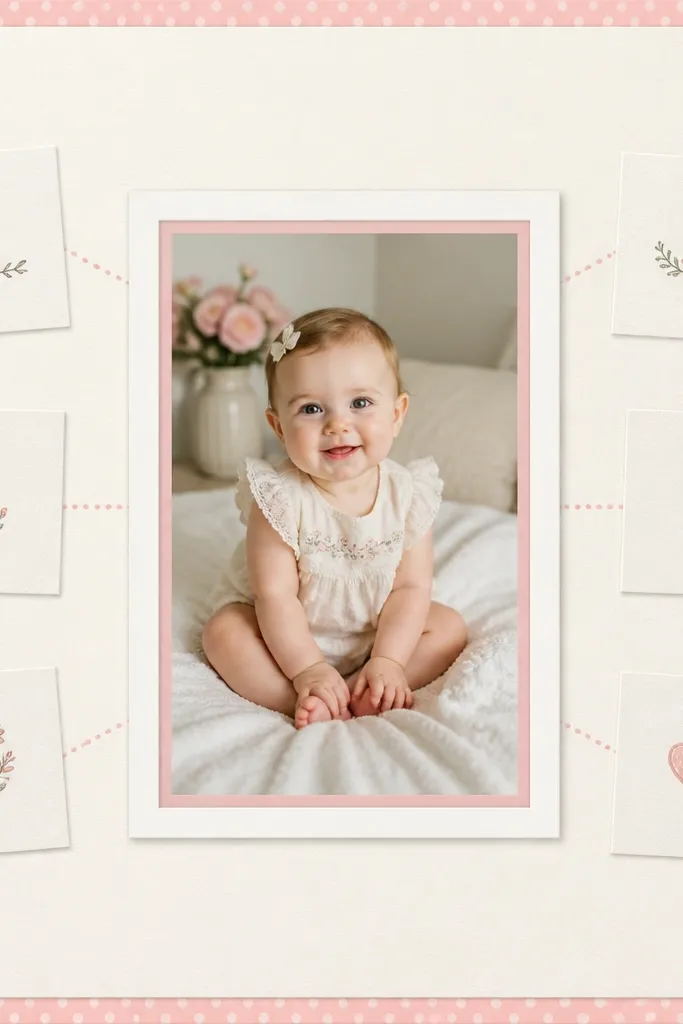
This page is romantic because it uses the photo as the anchor and the notes as little “proof” of why you love him. Polka dots keep it light, and the note cards keep the message specific. I like using small note cards instead of one big paragraph because each line stays readable. This suits boyfriends who like being reminded of the small things — how he shows up, what he does for you, how he makes you feel safe. It also looks great with group photos or couple selfies.
Create a polka dot border by using a stamp or a punch at the page edges, keeping dots small and consistent. Center your photo in a white mat with a thin pink inner border. Cut 6 mini note cards about 2 x 3 inches and write one short line on each — keep lines under 8 words. Arrange the note cards around the photo frame, alternating left and right sides. Draw tiny dot connectors with a pink pen between the cards and the photo border to guide the eye.
Use a fine-tip pen for the notes so the lines don’t bleed through cardstock.
Skip too many note cards; more than 6 on one page starts to feel chaotic.
19. Chocolate-Covered Page Marker with "Sweet Like You" Tag
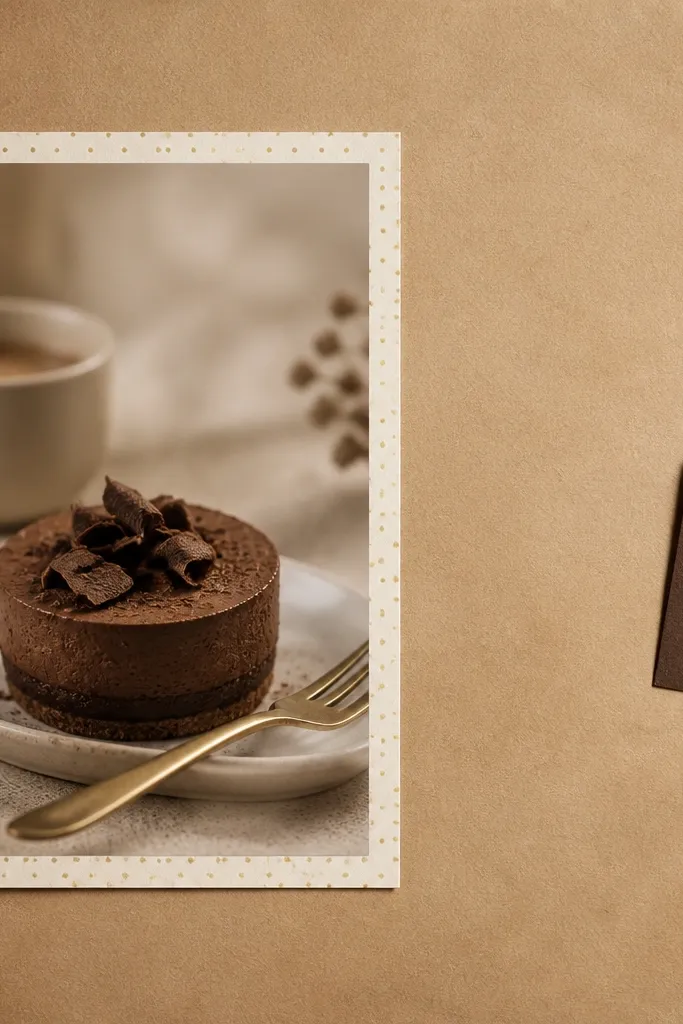
This page works because it combines a sensory cue (warm brown tones) with a functional piece (a ribbon marker). The tag feels cute without going full cartoon, especially when you use brown and cream instead of bright red. I like this for boyfriends because it feels playful and affectionate while staying “male-friendly.” The ribbon marker makes it easy for him to find the page again, which means he’ll reread it. It also pairs well with coffee dates, dessert nights, and cozy winter photos.
Cover the page with warm brown cardstock or patterned paper. Place a cream mat photo on the left — about 4 x 6 inches — and add a few tiny gold dots near the top corners. On the right edge, attach a chocolate-brown ribbon about 8 inches long so it acts like a bookmark. Create a small tag about 2.5 x 3.5 inches, write “Sweet like you” in white gel pen, and glue the top of the tag to the ribbon. Add one tiny heart sticker near the bottom of the tag.
Editor's noteUse double-sided tape behind the tag so it doesn’t peel off from ribbon movement.
Skip thisAvoid bright candy colors; brown + cream looks more grown-up.
20. Scratch-Off Love Reveal with One Hidden Photo
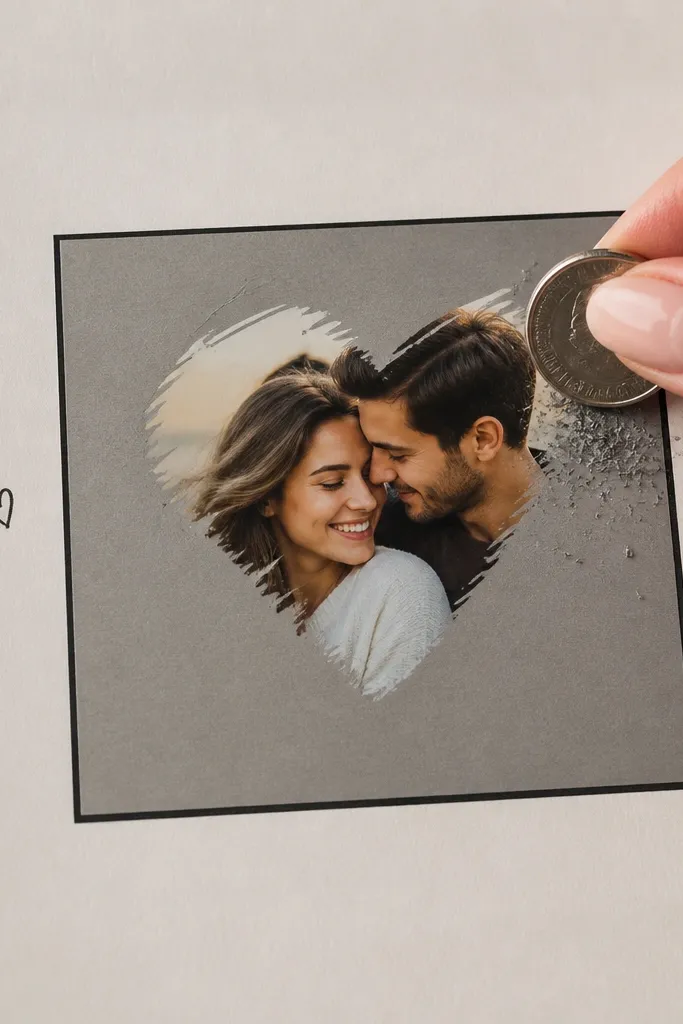
Scratch-off pages feel romantic because the surprise is built in. You can hide a photo he only sees when he wants to — like a favorite candid shot or a message photo. I use a gray scratch area because it looks clean and doesn’t scream “party craft.” This page is great for boyfriends who love puzzles or games, and it holds up well in a scrapbook because the reveal is contained. It also makes the book feel interactive without adding bulk.
Cut a square base about 3.5 x 3.5 inches and place it centered on the page. Add a hidden photo behind it by gluing the photo to the back of the square opening or by using a peel-and-reveal scratch layer kit. Apply the scratch coating on top of the photo area as directed by the kit. Draw a thin black border around the scratch square and add three small heart doodles around it. Write a short prompt above it like “Scratch to see my favorite moment.”
Test the scratch coating on a scrap first so you know how hard he’ll need to rub.
Don’t use low-quality scratch film; it peels unevenly and looks patchy.



