

1. Blush Ruffle Medallion Bouquet
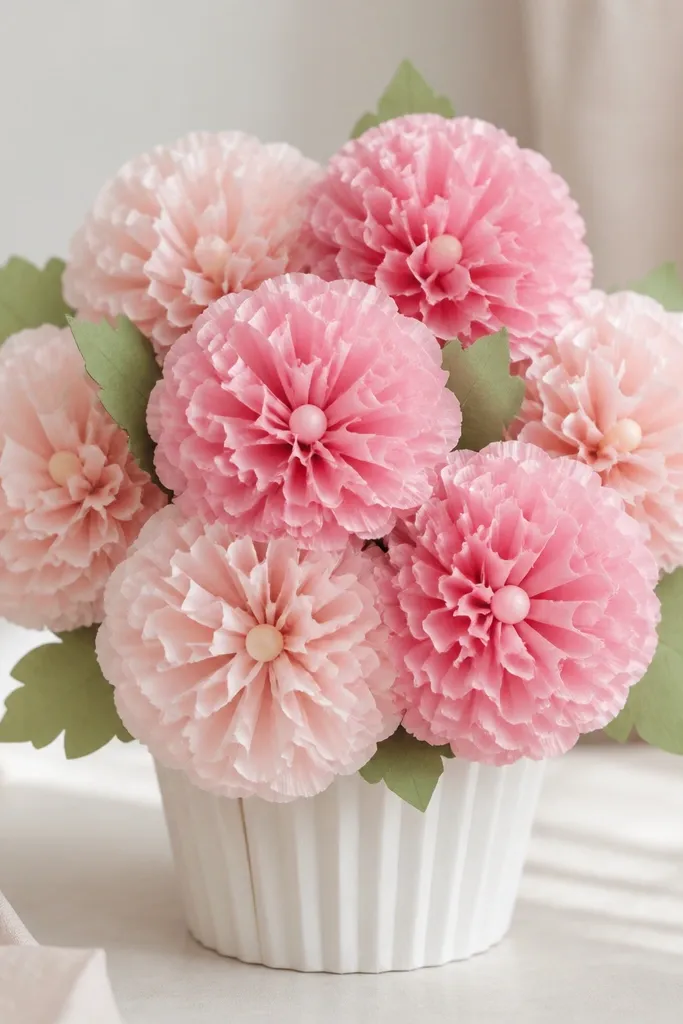
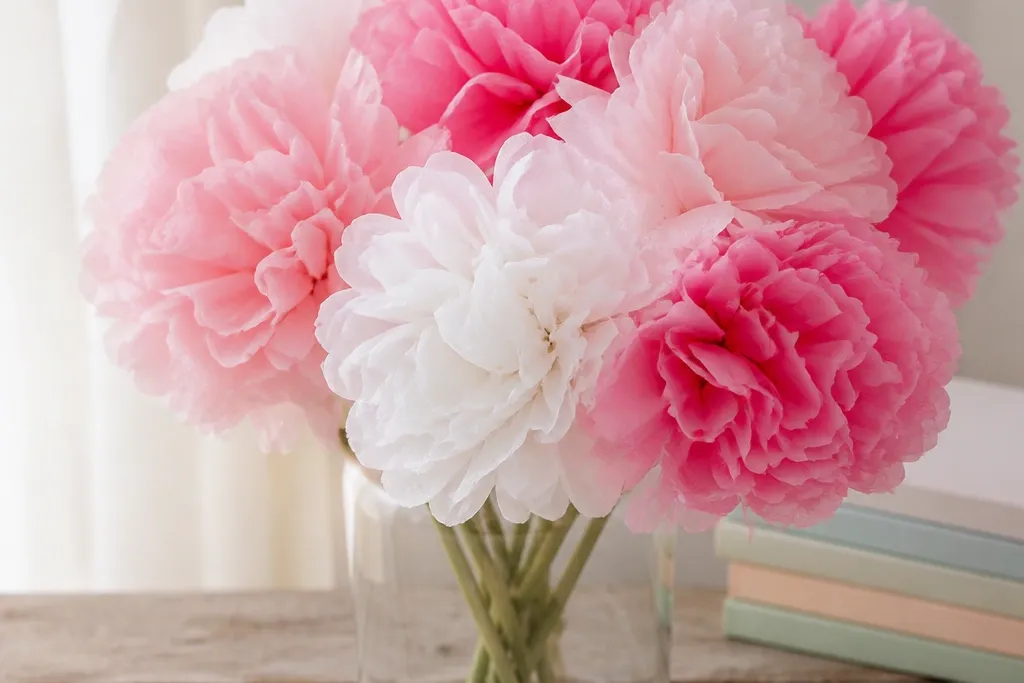
This one looks expensive because the petals are all the same color family and the ruffles are tight. I use blush tissue with one layer of pale pink mixed in so the center has a subtle glow. It flatters light skin and warm undertones because the color reads creamy, not dusty. For photos, it also looks great against white tablecloths and light wood backgrounds. The styling principle is monochrome with tiny variation — it gives depth without needing multiple colors.
Stack 8 sheets of blush tissue plus 1 sheet of pale pink, then cut into 10x12 inch rectangles. Accordion-fold starting at the short edge, making 1 inch pleats. Pinch the center, then fan layers outward by pulling each side up and back. Twist a 6 inch green floral wire around the center and trim the ends. For the bouquet, cluster 6 medium flowers (about 7 inches wide) and 3 smaller ones, then tuck a few tissue leaf strips between stems.
Spritz the leaves with a tiny bit of water from your hand (just mist, not soak) so they drape instead of standing stiff.
Don’t use only one tissue sheet per flower — it turns flat and looks like a school craft.
2. White and Gold Confetti Bloom
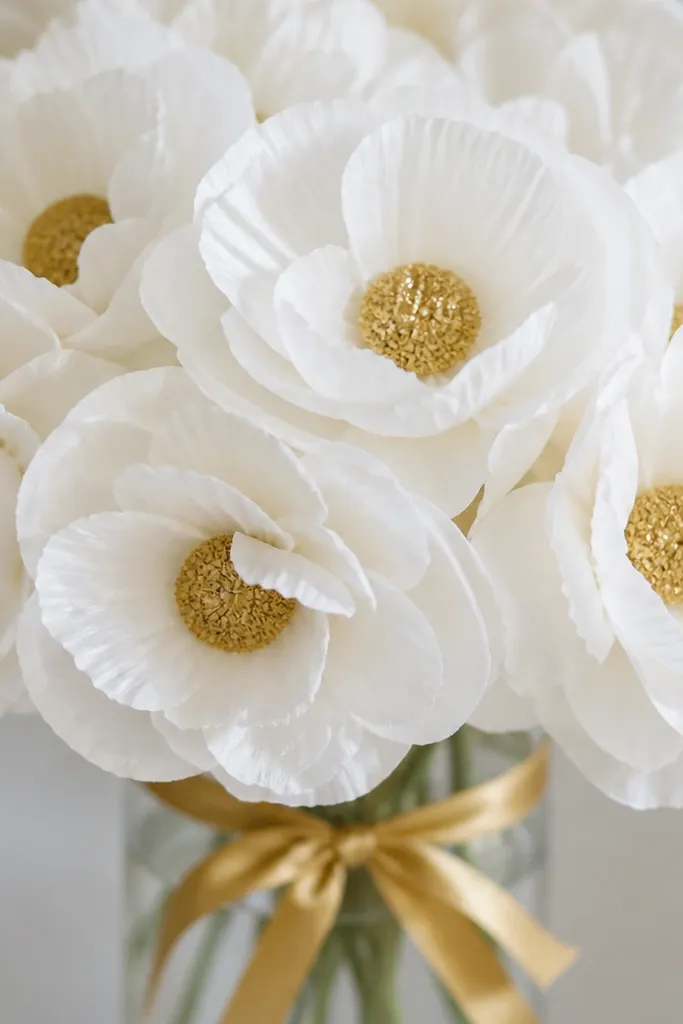
This style pops because the outer petals are clean white while the center adds sparkle. I like it for birthdays and baby showers because it reads fresh in both daylight and warm indoor lighting. White also flatters most skin tones in photos since it doesn’t compete with people’s faces. The gold center makes the bouquet feel intentional even when the petals are quick. The styling principle is high-contrast focus — keep petals simple and add one “detail” area.
Stack 7 sheets of white tissue and fold into a 9x12 inch accordion bundle. Pinch the center hard, then fan the petals so they look slightly domed. Cut a tiny 1 inch circle from gold tissue or gold metallic paper, then crumple it lightly into a nub. Hot glue or tape the gold nub to the center twist. Tie the stems together with thin gold ribbon, then add 5-7 blooms to a clear glass jar so the white shows through.
If you don’t have gold tissue, use a small piece of metallic wrapping paper and crumple it — it looks like a glittery center.
Skip heavy glitter on the petals; it sheds and looks messy by the end of the party.
3. Sunflower Sunshine Cluster
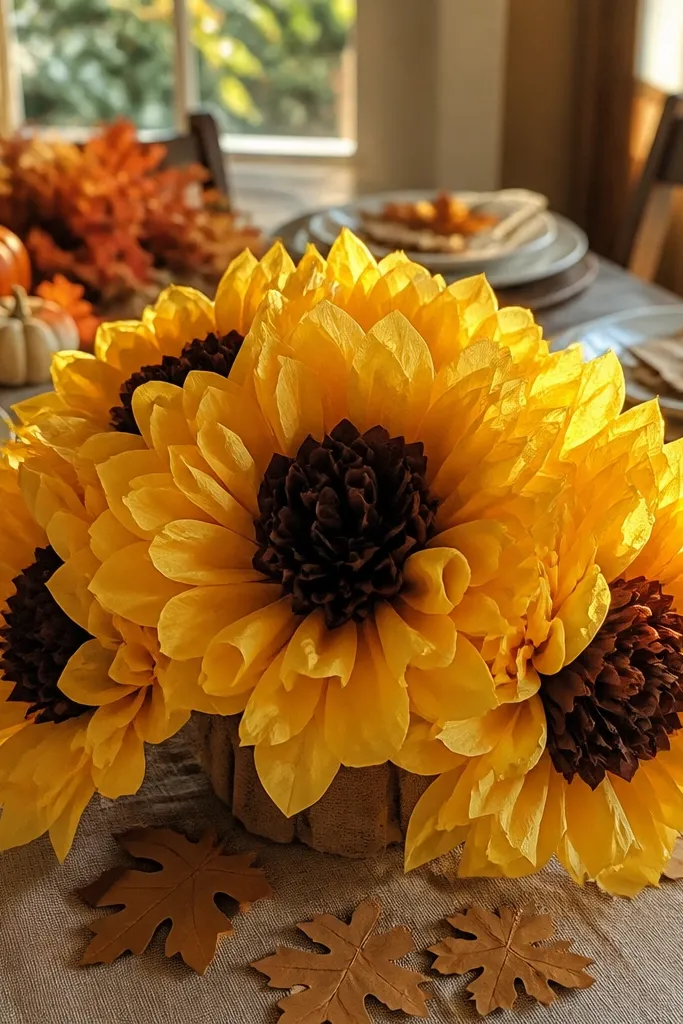
Stack 9 sheets of yellow tissue and cut into 11x11 inch squares (or 10x12 rectangles). Accordion-fold into tight 3/4 inch pleats. Pinch the center and fan the petals out wide. For the center, roll a small strip of brown tissue into a tight coil, then glue it into a 1 inch button shape. Attach the center to the twist, then add a strip of green tissue folded like a leaf to each stem. Cluster 4 large flowers (9 inches wide) with 2 smaller ones (6 inches wide) for a natural bunch.
If you want something that reads cheerful from across the room, this is it. Yellow tissue petals create that sunflower look fast, and the dark center makes it feel grounded instead of floating. It flatters medium to deep skin tones in photos because yellow creates warm contrast. I also use it for fall tables because it still works without orange overload. The styling principle is color blocking — one bold petal color plus one dark center.
Skip thisDon’t make the pleats too loose — sunflower petals look ragged when the folds aren’t tight.
Editor's noteTrim the petal edges with small scissors into gentle points so the yellow looks like it has texture.
4. Peony-Style Rose Pink Layers
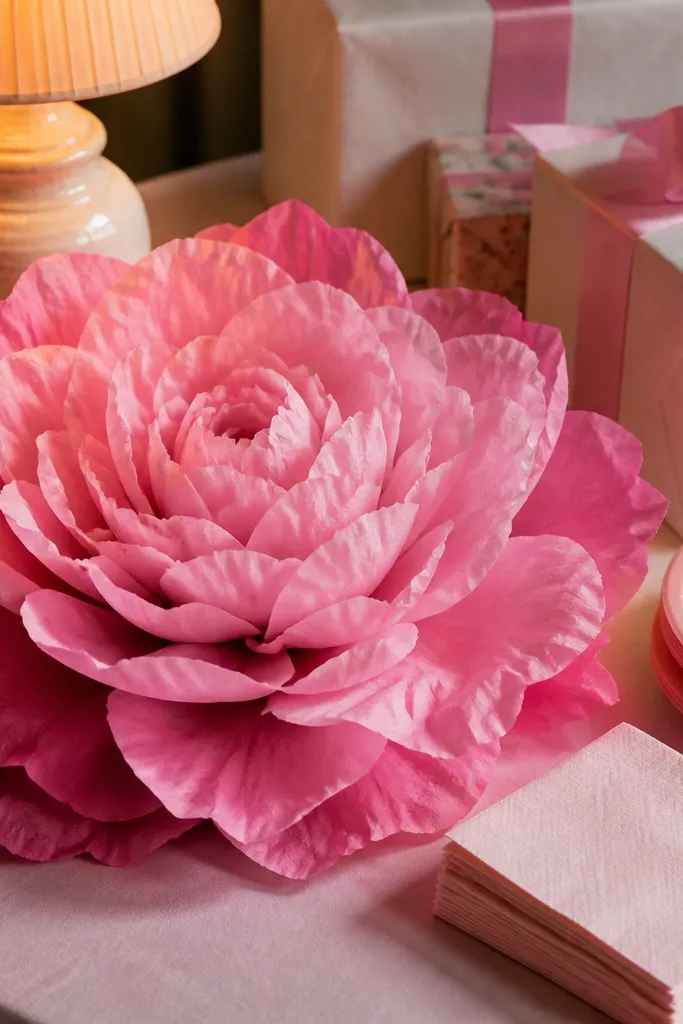
This one gives a peony vibe because the petals are layered and slightly uneven, like real petals. I use rose pink as the base and add a few darker rose sheets so the outer edges look richer. It flatters everyone in photos because pink reads soft and flattering without looking neon. If you’re decorating a bridal shower, this is the “everyone asks where you bought it” option. The styling principle is layered toning — light base, darker edge.
Stack 6 rose pink sheets and 2 darker rose sheets, then cut into 12x14 inch rectangles. Accordion-fold with 1 inch pleats, keeping the fold lines crisp. Pinch the center, then pull petals forward in a slow circle so the top layer sits higher. For extra fullness, separate the top 2-3 layers gently as you fan. Twist a stem wire through the center and trim the petal ends into a rounded shape. Make 3 big blooms and 2 medium ones, then arrange them in a shallow vase so they overlap.
Fan the top half first, then the bottom half. It keeps the flower from collapsing inward.
Don’t use scissor cuts that are too straight; straight cuts make it look like paper fans.
5. Purple Ombre Hanging Pom
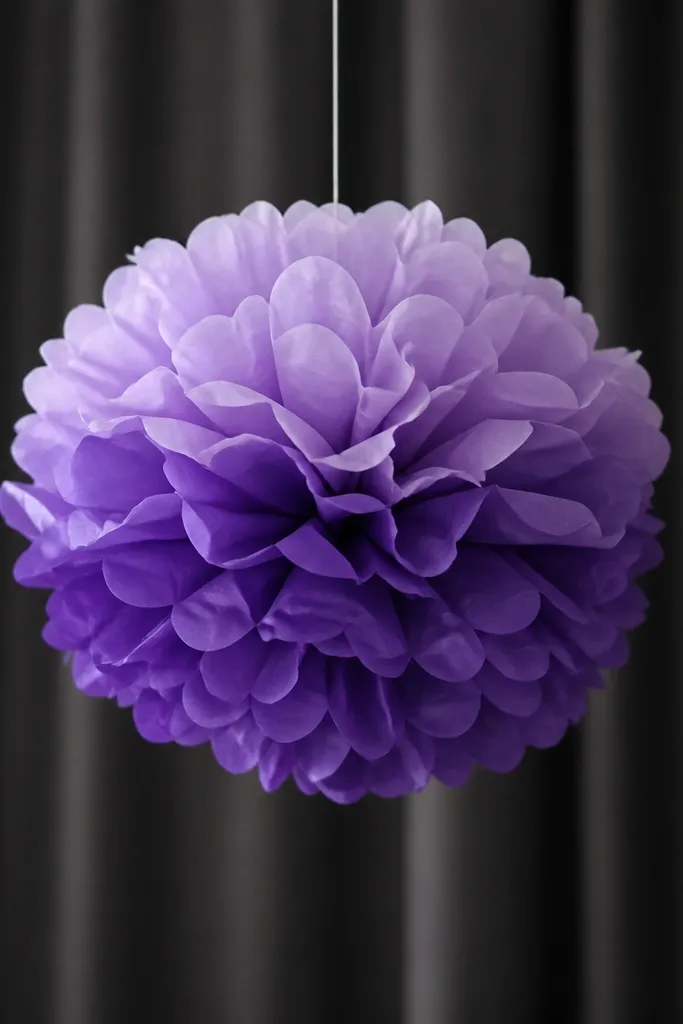
Cut 3 shades of purple tissue into the same size rectangles, like 9x12 inches: lavender, medium purple, and deep violet. Stack 3 sheets of each shade in order (deep on the bottom, lavender on top). Accordion-fold the whole stack into 1 inch pleats. Pinch center, then fan outward with extra care so the gradient stays visible. Attach fishing line or thin twine to the wire twist at the center, then hang at about 6-8 inches above eye level. Make 3 poms and hang them in a staggered line for a clean backdrop.
Ombre tissue looks like you spent hours because the eye reads a gradient. I like purple for parties because it photographs well against dark backdrops, and it looks dramatic without being loud. It flatters cooler undertones and makes white outfits pop. Hanging poms also hide minor asymmetry since the motion softens edges. The styling principle is gradient control — keep the fold consistent so the color shift stays smooth.
Skip thisDon’t mix random shades; the ombre needs a clear top-to-bottom order.
Editor's noteUse clear tape to secure the fishing line at the center twist so it doesn’t slip.
6. Tropical Teal and Coral Bouquet
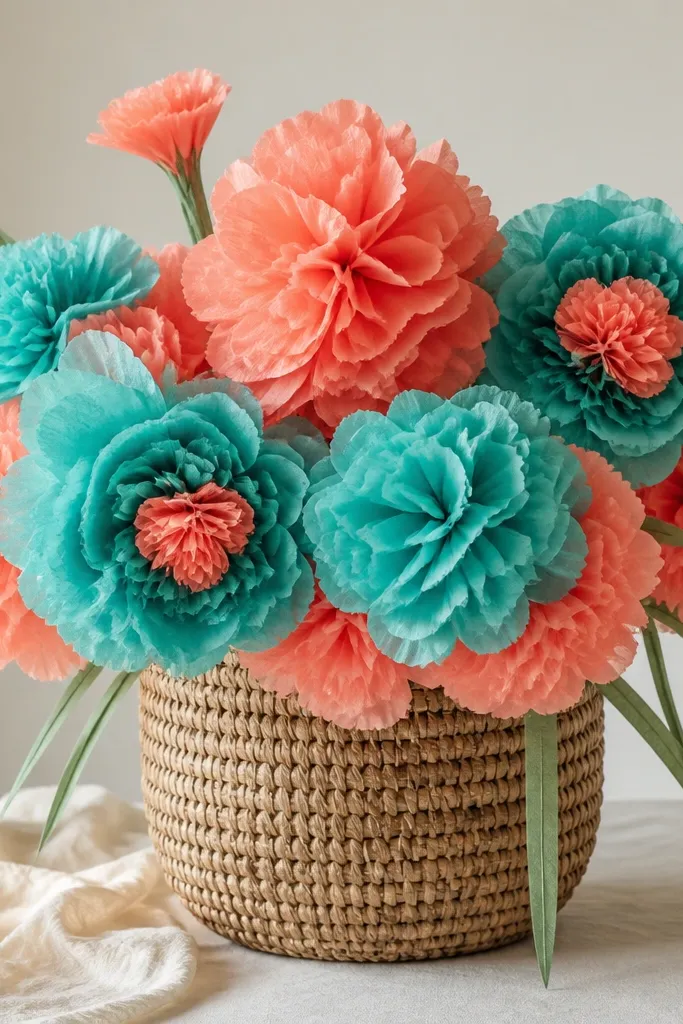
Stack 7 teal tissue sheets and make a flower with 1 inch pleats, then fan wide. For the coral flowers, stack 7 coral sheets and do the same size folds so the bouquet looks uniform. For centers, use a tiny rolled strip of coordinating tissue: coral centers for teal flowers and teal centers for coral flowers. Twist wire stems, then create a simple stem bundle by wrapping floral tape around 3-4 stems at once. Add 2-3 long strips of green tissue by folding them lengthwise and tucking between stems. Arrange 5 teal and 4 coral blooms in a basket so colors alternate around the rim.
Teal and coral makes a bouquet that looks like it belongs on a vacation card. Teal reads cool and crisp, while coral adds warmth — together they make skin look healthier in photos. I’ve used this for summer birthdays and backyard dinners, and it never looks dull. The styling principle is complementary color energy — two strong colors, balanced by keeping the centers simple.
Skip thisSkip black centers — they can make the whole bouquet feel heavier than you want.
Editor's noteKeep one flower size for the whole bouquet. Mixing sizes is fine, but mixing pleat sizes makes it look accidental.
7. Monochrome Black Velvet Bloom
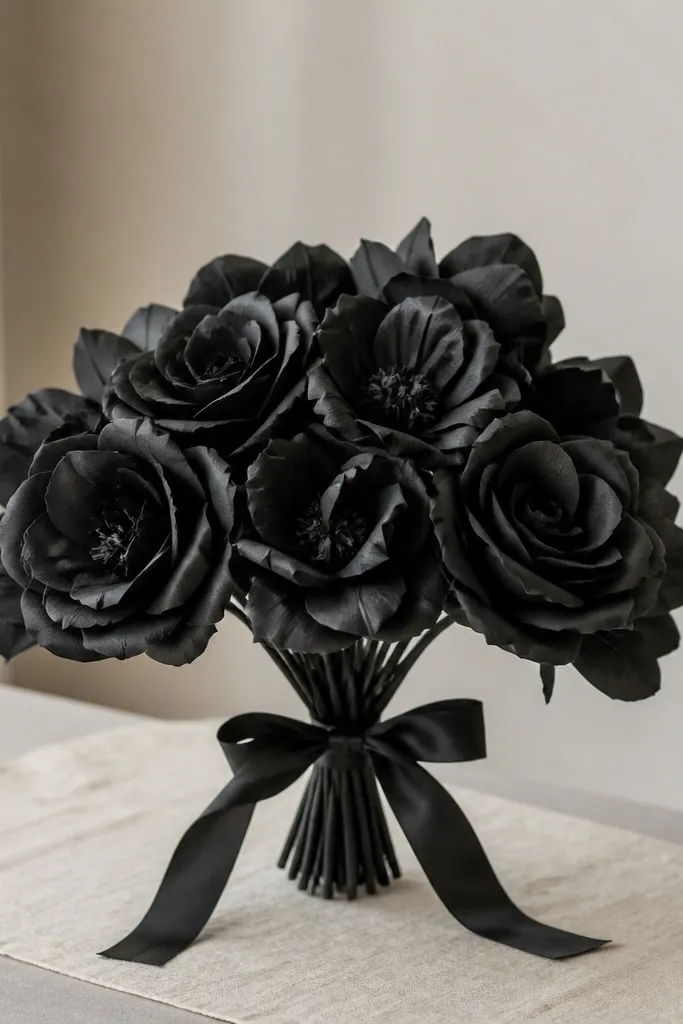
Stack 10 matte black tissue sheets and cut into 10x12 inch rectangles. Accordion-fold with 3/4 inch pleats so the petals look dense. Pinch the center, then fan each side slowly until the petals hold a soft dome. For centers, twist floral wire and wrap with a small strip of black tissue so it’s smooth. Trim the petal edges with tiny snips to create subtle waves. Use 6 flowers total, clustered tightly, and tie stems with a black satin ribbon so the bouquet has a clean base.
Black tissue flowers look dramatic fast, especially when your tissue is matte. I used these for a Halloween dinner and also for a modern party where everyone wore white — the contrast looked sharp. They flatter fair and medium skin tones because black frames the face in photos. The trick is to keep the centers neat so the flower reads “velvet” instead of “paper.” The styling principle is texture illusion — matte tissue plus careful fanning.
Skip thisDon’t overfan. If you pull too hard, black petals open too wide and look thin.
Editor's noteIf your black tissue is shiny, use it anyway but trim the petals more aggressively for a less glossy look.
8. Rainbow Mini Bouquet for Table Place Cards
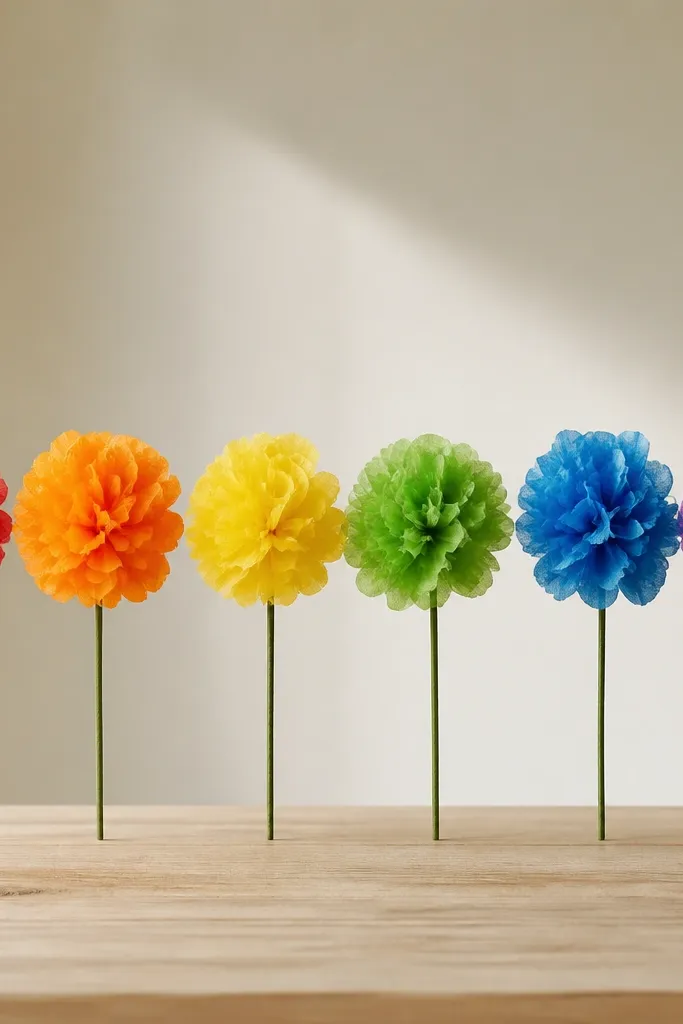
Cut 6 tissue sheets into 6x8 inch rectangles for each flower. Stack 6 layers and accordion-fold with 1/2 inch pleats for a small tight fan. Pinch center and fan, then attach a 6 inch bamboo skewer with hot glue at the center twist. Make 6 colors (red through purple) and keep the flower size identical by using the same rectangle cuts. Place each skewer in a small foam square or a tiny clay ball, then tuck one next to each name card.
Mini flowers look charming on place cards because they’re cute without blocking plates. I’ve made these for brunch tables where people eat fast and you want décor that doesn’t need maintenance. Each mini bloom flatters the table because it adds color without a big footprint. The styling principle is repetition with spacing — same shape, different color, and enough gap that each one reads individually.
Skip thisDon’t use thick cardboard bases for minis — they look bulky next to plates.
Editor's noteUse the same skewer length for every guest spot so the table looks intentional.
9. White Baby Shower Cloud Bouquet
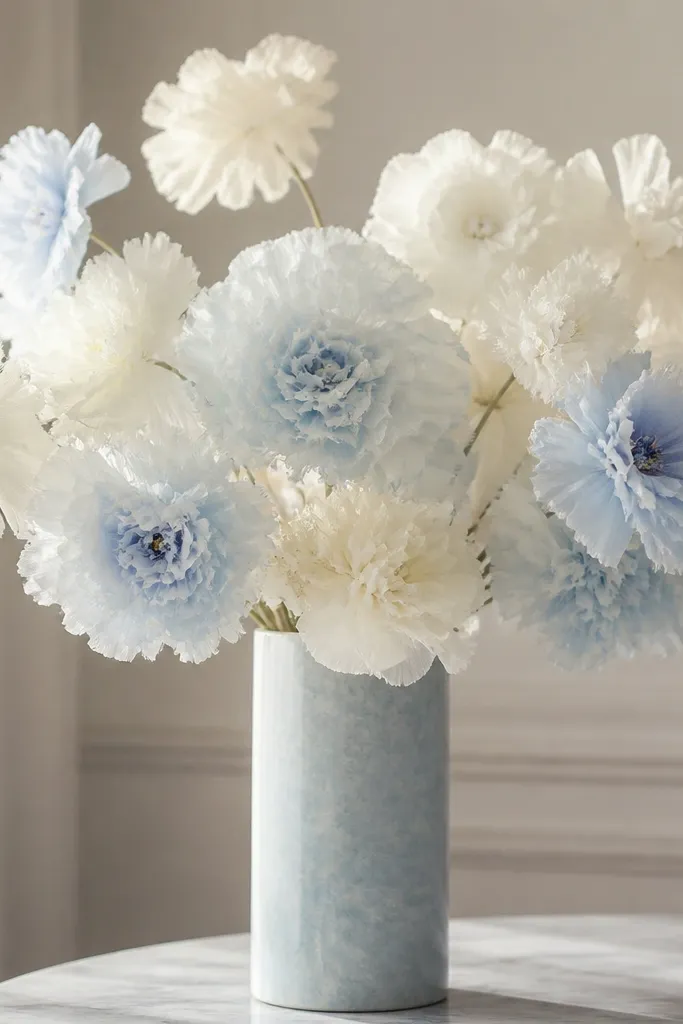
Stack 8 white tissue sheets and cut into 12x14 inch rectangles. Accordion-fold with 1 inch pleats, then pinch center. Fan the layers outward but stop when it looks like a soft dome, not a wide disk. For 2 flowers, swap 2 of the white sheets for light blue so the bouquet has a gentle accent. Twist wire stems and trim petal edges into rounded shapes. Arrange 7 white blooms and 2 light blue blooms in a tall vase with water-free filler like crumpled tissue at the bottom to hold stems.
This is the bouquet I make when the theme is “clean and sweet.” The lightness of white tissue gives a cloud effect, especially if you fan a little less than you would for a bold flower. Light blue accents add a baby-shower nod without turning the whole thing into a theme party. It flatters most outfits and skin tones because it’s neutral and airy. The styling principle is less pressure — softer fanning creates volume without harsh edges.
Skip thisDon’t make the petals too wide; wide white blooms read flat and toy-like.
Editor's noteIf you want extra “cloud,” use slightly smaller pleats (3/4 inch) on the accent blue flowers.
10. Cinnamon Spice Fall Bouquet
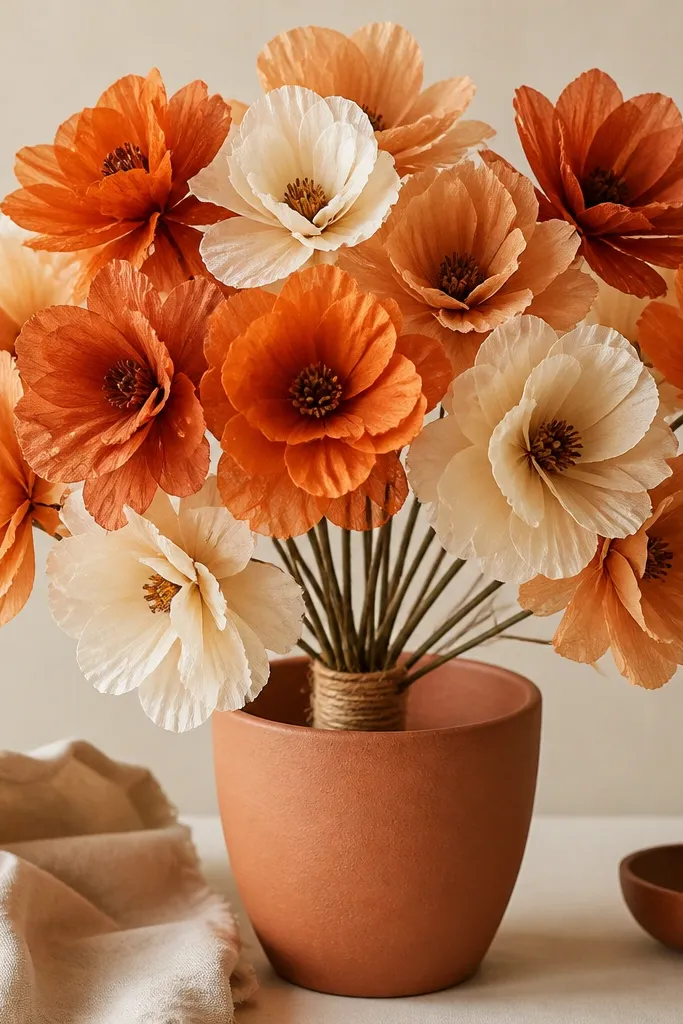
Warm tones make a fall bouquet that feels cozy instead of party-bright. Orange and rust read like cinnamon and baked clay, and cream keeps it from looking too harsh. I like this for office desks because it looks warm even under fluorescent lighting. It flatters deeper skin tones by keeping the palette warm, not cool. The styling principle is warm palette balance — one light neutral, two warm colors, one dark center.
Stack 7 orange tissue sheets for 4 flowers, then stack 7 rust tissue sheets for 3 flowers. Cut both into 10x12 inch rectangles and accordion-fold with 1 inch pleats. Pinch centers and fan gently into domes. For centers, roll a strip of brown tissue into a 1 inch coil and glue it in place. Wrap stems with twine at the base, then tuck 2 long strips of green tissue between stems so it looks like leaves. Put the bouquet in a terracotta pot and stabilize stems with crumpled tissue.
Trim the rust petals into slightly shorter ovals so the orange flowers look bigger by comparison.
Avoid neon orange tissue; it makes the bouquet look cheap under warm bulbs.
11. Pastel Mint and Lavender Wedding Table Blooms
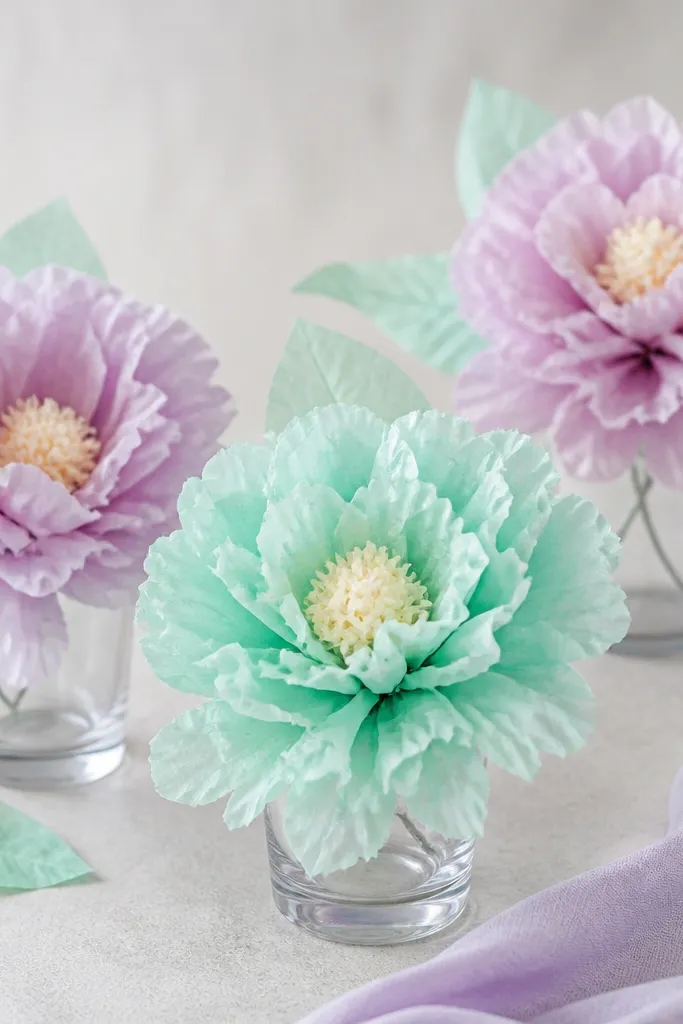
Pastels look clean and romantic when you keep the center tone close to the petals. Mint and lavender together read fresh, and they look good even when your guests are wearing soft colors. I’ve used this on wedding tables where people take photos of place settings, and the flowers don’t steal attention from the tableware. The styling principle is soft contrast — close tones with just enough difference to separate each bloom.
Cut mint and lavender tissue into 9x12 inch rectangles and stack 8 sheets per flower. Accordion-fold with 3/4 inch pleats for a slightly tighter petal look. Pinch center, fan, then twist wire stems. For the center, use a small rolled strip of the same color as the petals, but slightly lighter if you have it. Trim petals with rounded snips so the edges look scalloped. Arrange in small glass cups: 1 mint bloom and 1 lavender bloom per cup, then add 2 folded leaf strips to each base.
Use clear cups and keep stems short (3-4 inches visible) so the flowers look like they’re floating at centerpiece height.
Don’t add bright yellow or hot pink centers; pastels need calm centers.
12. Two-Tone Red Velvet Rose Bouquet
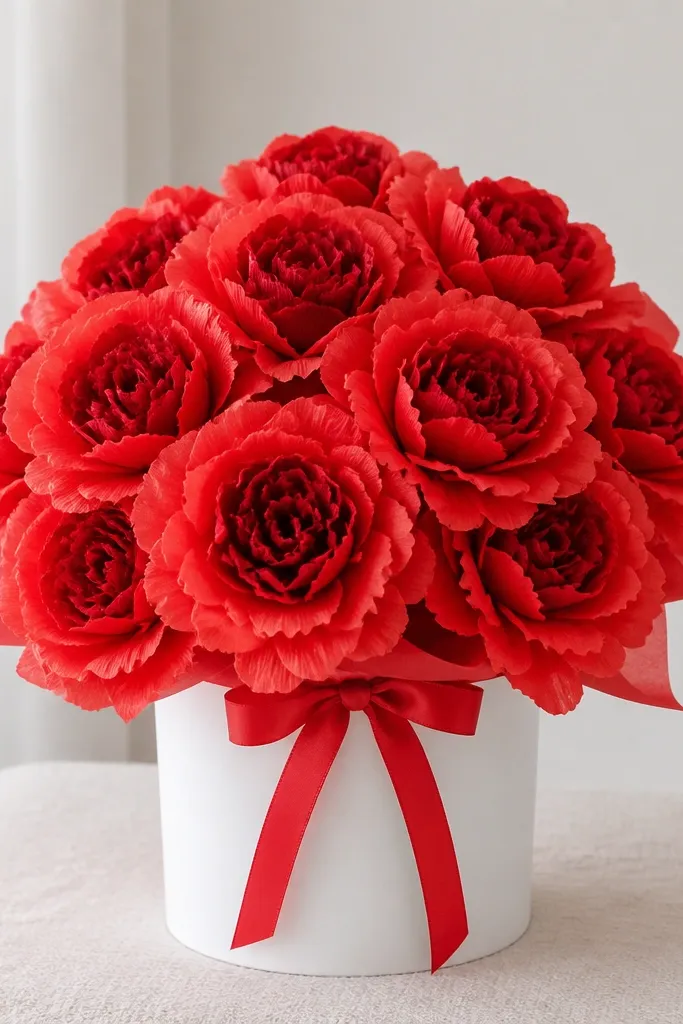
Two-tone reds look like you paid for layered petals. Deep red inside adds depth, while lighter red on the outside catches light and makes the flower look dimensional. It flatters warm skin undertones because the palette is close to natural warmth. I’ve used this for Valentine’s décor and it also works for holiday tables. The styling principle is inner depth — darker center, lighter outer petals.
Stack 4 sheets of deep red tissue on the bottom and 4 sheets of lighter red on top, then cut into 12x14 inch rectangles. Accordion-fold with 1 inch pleats and keep the fold edges aligned. Pinch center, then fan outward slowly so the inner deep red stays visible. Twist wire stems and wrap the center with a small strip of deep red tissue so it looks cohesive. Trim the outer petal edges into gentle points, and leave inner layers slightly round by not cutting them as much. Make 6 flowers and cluster them in a white bucket, then tie stems with red ribbon at the base.
Separate the top layer when you fan. That one move shows the two-tone effect.
Don’t mix the reds randomly in the stack — the gradient has to be inner to outer.
13. Emerald Green Statement Bouquet
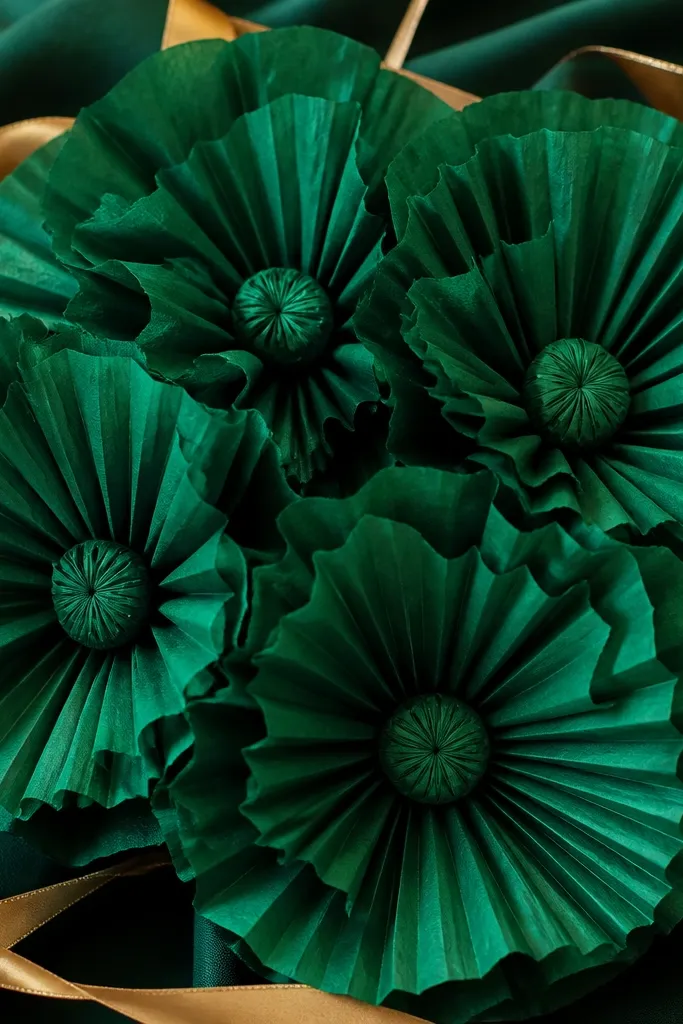
Emerald tissue reads bold and clean, especially if your tissue has a matte finish. I like it for St. Patrick’s Day and also for modern home décor because it doesn’t look childish. It flatters medium to deep skin tones by adding color that feels rich, not harsh. The styling principle is crisp structure — tight pleats and a compact center make it look like a sculpted flower.
Stack 9 emerald green tissue sheets and cut into 11x13 inch rectangles. Accordion-fold with 3/4 inch pleats to keep the petals structured. Pinch center and fan outward, then push the center in slightly so it forms a tight dome. Roll a small strip of gold tissue into a thin coil and glue it into the center for a subtle accent. Attach wire stems and trim the petals evenly so the flower outline looks symmetrical. Use 5 large blooms in a line bouquet: stagger height by trimming stems to 5, 6, and 7 inches.
If your tissue is thin, double the center layers by adding one extra sheet around the pinch point.
Don’t let the pleats get uneven; uneven pleats make emerald look sloppy.
14. Gold Dipped Center Glow Bloom
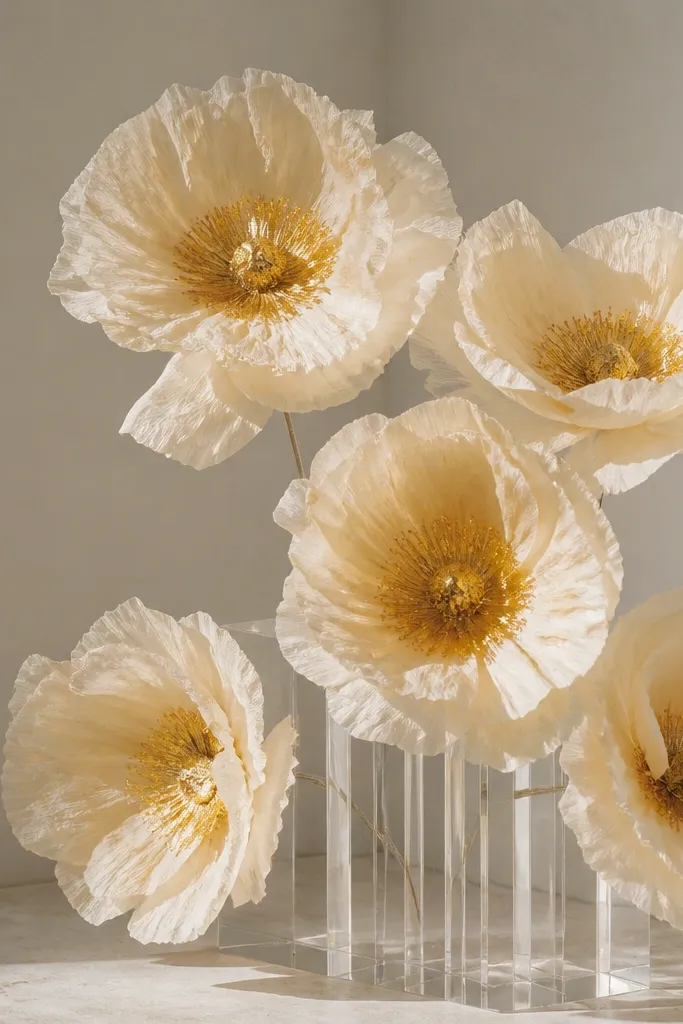
Stack 8 cream tissue sheets and cut into 10x12 inch rectangles. Accordion-fold with 1 inch pleats, then pinch center and fan into a medium dome. For the gold center, roll a small strip of tissue into a tight coil, then dab the coil with a mix of gold paint and a tiny bit of water so it spreads thin. Let it dry for 5 minutes on parchment, then glue it to the center twist. Attach stems and create a tight cluster of 8 flowers in a clear acrylic stand so the gold center catches light as people move.
This is the “one detail” look that makes tissue flowers feel intentional. Cream petals stay soft and neutral, and the gold center creates a warm glow. It looks flattering against both dark and light décor because gold bridges the colors. I’ve used it for holiday dinners where people want sparkle but not glitter everywhere. The styling principle is concentrated shine — keep gold only where the eye lands.
Skip thisDon’t paint the entire center blob; it can turn lumpy and heavy.
Editor's noteUse a small foam brush for the gold dab — it keeps the shine from bleeding onto petals.
15. Layered Fringe Petal Flower
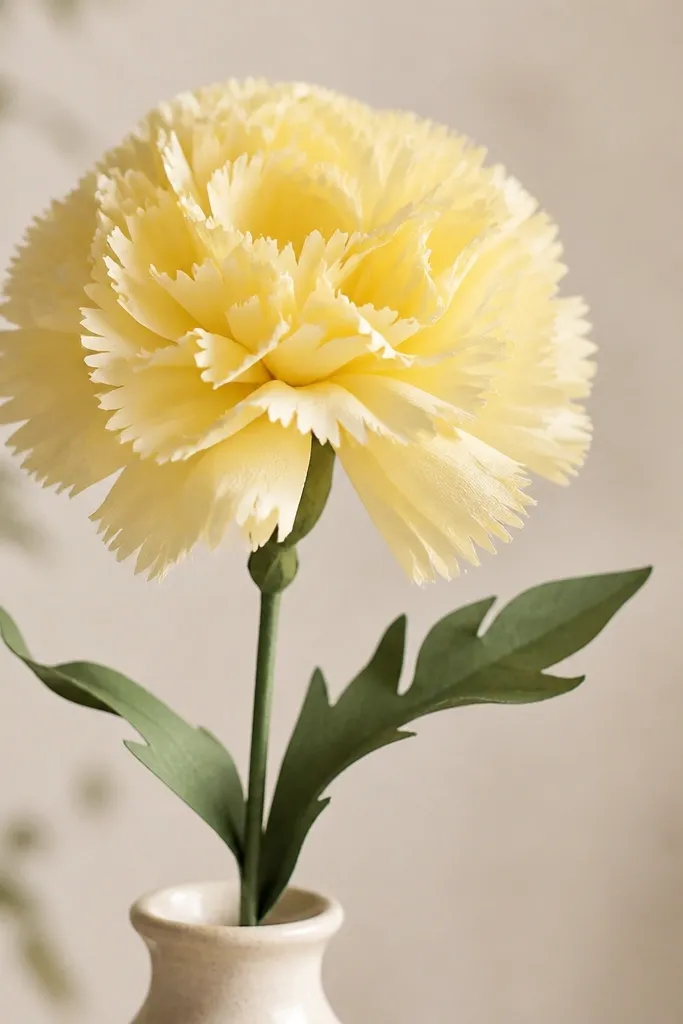
Fringe petals look like a different craft, but they’re still quick tissue flowers. The feathery edge catches light and makes the flower look fuller even with fewer layers. I like pale yellow for this because fringe reads soft, not spiky. It flatters people in photos because pale tones don’t overpower faces, and fringe adds texture instead of bulk. The styling principle is edge texture — cut the petal tips, not the center.
Stack 7 pale yellow tissue sheets and cut into 12x14 inch rectangles. Accordion-fold with 3/4 inch pleats. Pinch center and fan outward. Now take small scissors and cut a fringe pattern along the outer edges only — like 1/4 inch slits, stopping before the center. Twist wire stems and add 2 green tissue leaf strips folded lengthwise. Arrange 4 flowers on a small foam block or in a jar, spacing them so fringe edges don’t overlap too much.
Cut fringe while the petals are fanned slightly — it helps you keep the cuts even.
Don’t fringe the inner layers heavily; it makes the center look messy.



