

1. Stamped Leatherette Keychain with Coordinates Tag
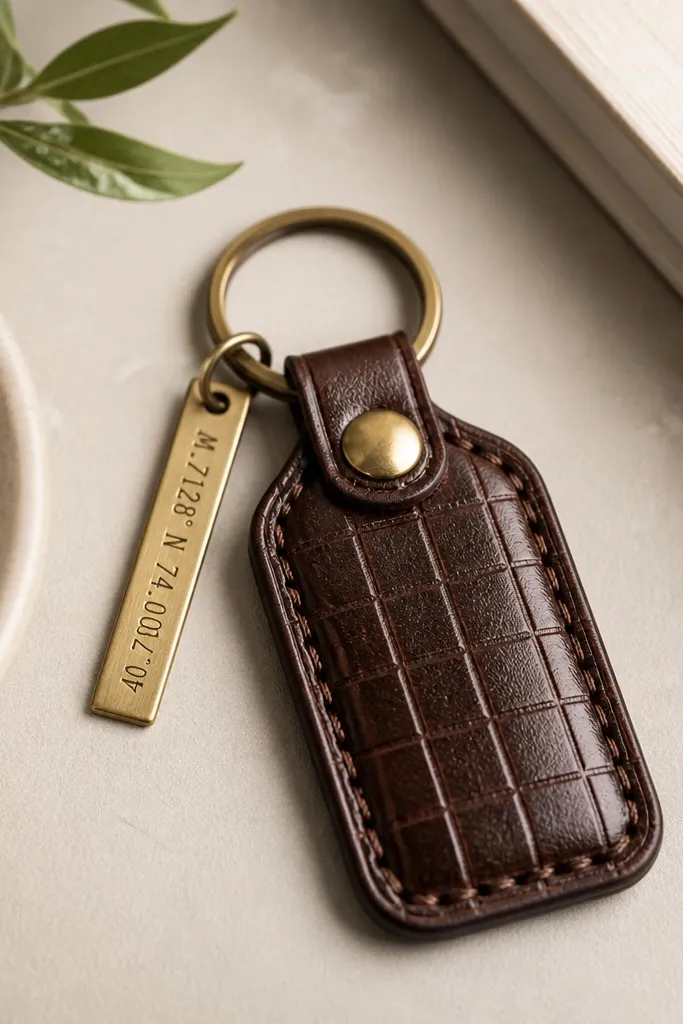
This gift looks expensive because the “surface detail” is crisp. I use dark brown leatherette (or faux leather) so the stamped lines catch light without looking fuzzy. The coordinates tag gives him a story he can point to, and the brass color reads warm next to dark leather. It flatters anyone’s style — clean and masculine for a hoodie-and-jeans guy, but still neat enough for someone who wears button-downs. The best part is it’s small, so it’s easy to carry and hard to forget.
Cut a 2 in x 3 in leatherette rectangle. Round the corners with scissors, then stamp a light grid using a ruler and a metal craft stamp or a simple alphabet stamp set. Punch two holes along the top edge, thread with waxed thread, and stitch a tight X pattern between the holes. Finish by applying a thin layer of clear acrylic or leather finish so the stamp doesn’t dull. Finally, attach a small brass coordinates tag using a split ring.
Editor's noteWrite the coordinates on the back of the tag with a fine-tip paint pen, then cover it with one more clear coat after it dries.
Skip thisSkip leaving the edges raw — unfinished edges make leatherette look like craft foam.
2. Photo Strip Desk Frame with Washi Tape Hinge
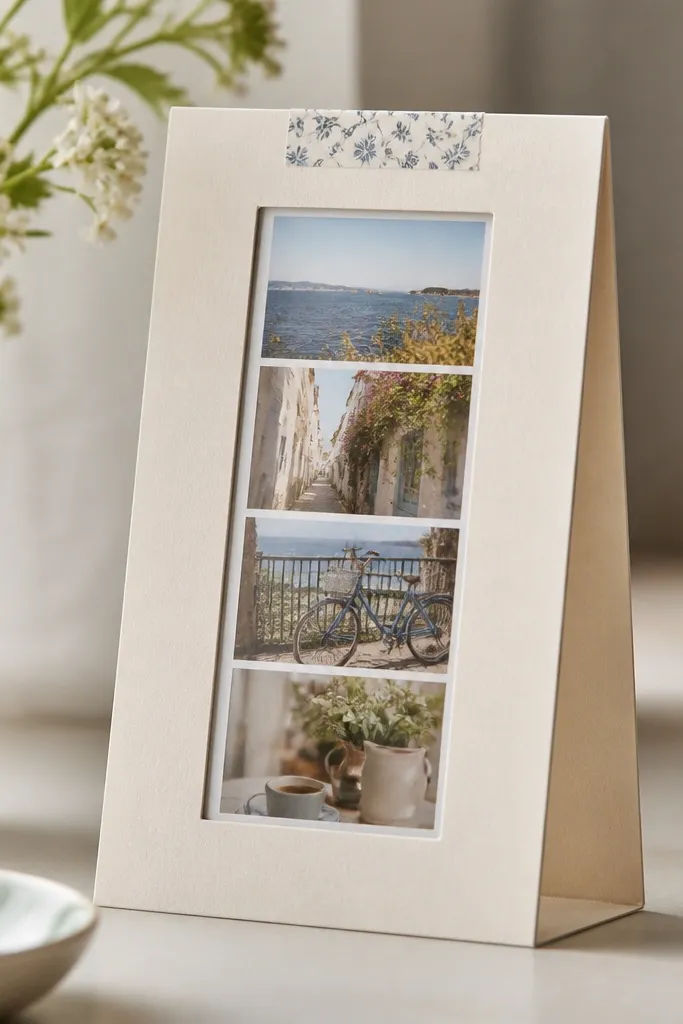
This is the kind of sentimental gift that actually sits on a desk. I build it with a photo strip so it’s one compact unit, not a big collage that takes forever. Washi tape works because it’s flexible and forgiving — you can hinge the top so the photo strip slides in. The clear window over the photos makes it look clean and intentional, and it handles everyday dust better than an open collage. It’s great for boyfriends who keep their phone on silent or never have time to print photos.
Choose 4 photos and crop them to match width, then print at 4x6 scale or print to fit your cardstock window. Cut a base from thick cardstock (or foam board) and add a clear plastic sheet window with double-sided tape. Create a hinge by taping the top edge with a single strip of washi tape, leaving the hinge line visible. Slide the photo strip into place and secure the sides with tape tabs so it doesn’t bow. Add two small “feet” folds on the back so it stands upright.
Editor's noteUse matte photos with a glossy window — the contrast makes the colors look richer than fully glossy prints.
Skip thisDon’t use cheap thin tape for the hinge; it droops and makes the frame look sloppy.
3. Mini Wood Key Hook with Burned Initials
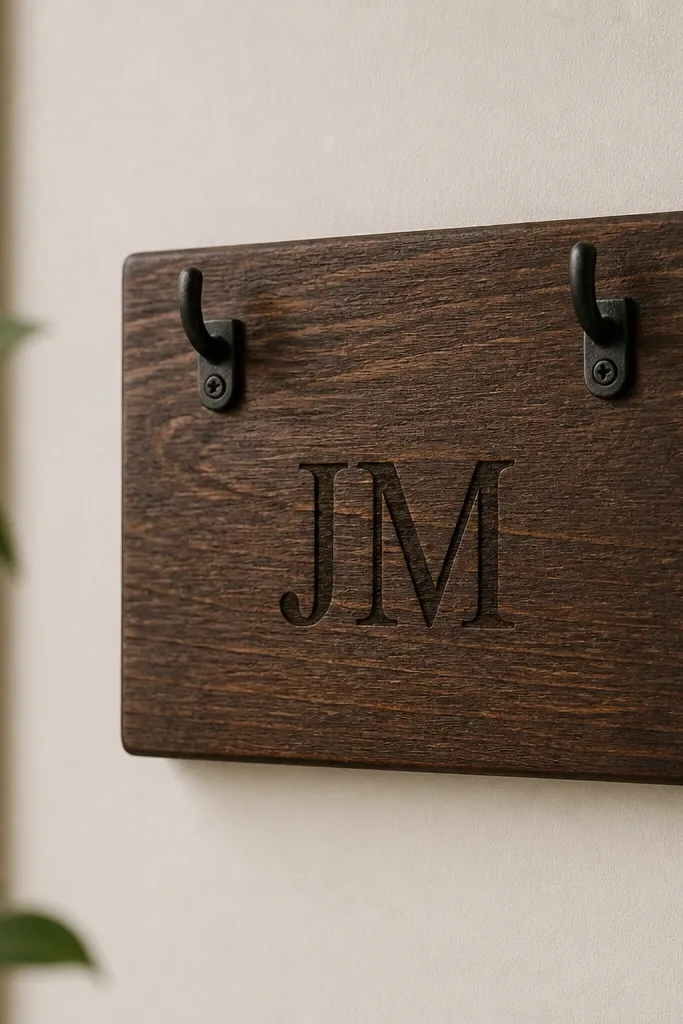
A key hook is practical and sentimental at the same time, because it changes where keys live. I like mini wood for this because it’s sturdy and doesn’t look flimsy like cardstock hangers. Burning initials with a wood burner gives a real texture — the lines look organic, not like a printed sticker. The stain color matters: I stick to walnut or espresso for a warm, masculine look that matches most homes. It works especially well for apartments with a small entryway where he needs a dedicated spot.
Sand a small wood block (about 4 in wide) and apply a thin walnut stain, wiping off extra after 2 minutes. Transfer one set of initials and burn them using a wood-burning pen, keeping the tip moving to avoid deep scorch holes. Seal with satin polyurethane after the burn cools — two light coats. Mount two tiny coat hooks using screws, placing them 1 in apart so both key rings fit. Attach a picture-hanging strip on the back or mount with two wall anchors depending on wall type.
Editor's noteBurn initials first, then stain — the burned area stays darker and looks more layered.
Skip thisAvoid skipping sealing; unsealed wood grabs fingerprints and looks worn fast.
4. Woven Friendship Bracelet-Style Watch Strap Tie
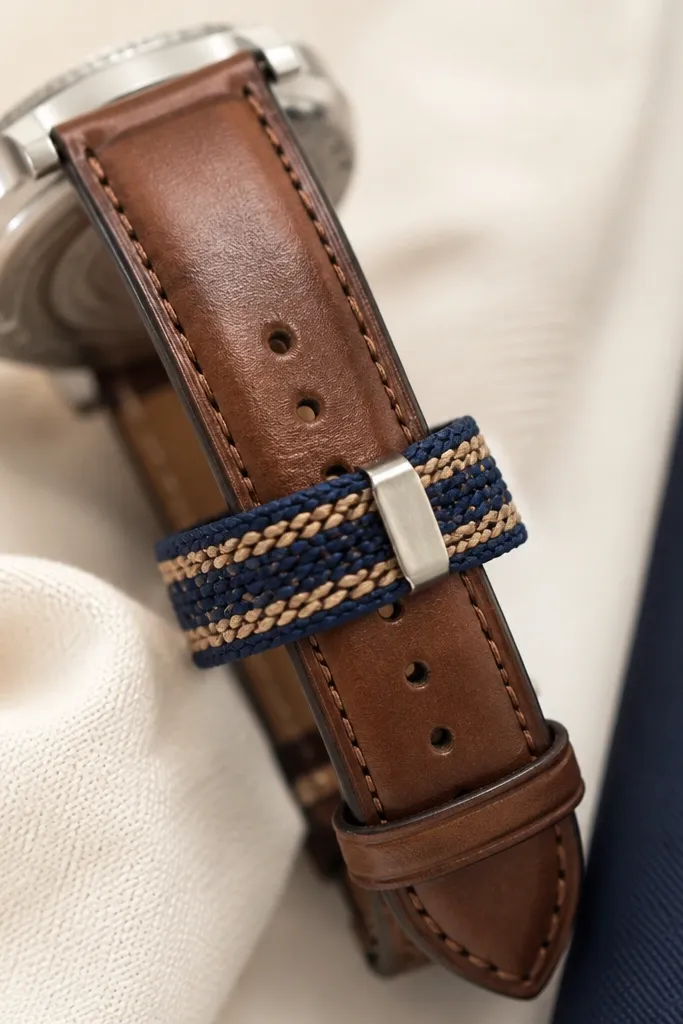
This one is for boyfriends who wear a watch or smartwatch every day and never take it off. Instead of changing the watch strap, you wrap a woven tie around the band so it adds personality without permanently altering anything. The tight weave looks neat and intentional, and the metal clasp gives it a finished look. I like navy and tan because it matches denim and khaki pants easily, and it looks good on light and medium skin tones. It’s also a great gift for someone who doesn’t wear jewelry but will wear something small on a wrist.
Cut 6 strands of embroidery floss or waxed cord in two colors (about 20 in each). Tape the bundle to your desk and braid or do a simple over-under weave to about 3.5 in long. Fold the ends and tie a secure knot, then trim the tails to 1/4 in. Stitch the ends down with a few whip stitches so it stays flat and neat. Attach a small lobster clasp or adjustable slider to each end using jump rings.
Make a quick fit test by wrapping it around his wrist over his usual watch — adjust length before you trim anything.
Don’t use loose knots at the ends; they snag and make the weave look messy.
5. Candle Jar Label with Custom Quote and Date
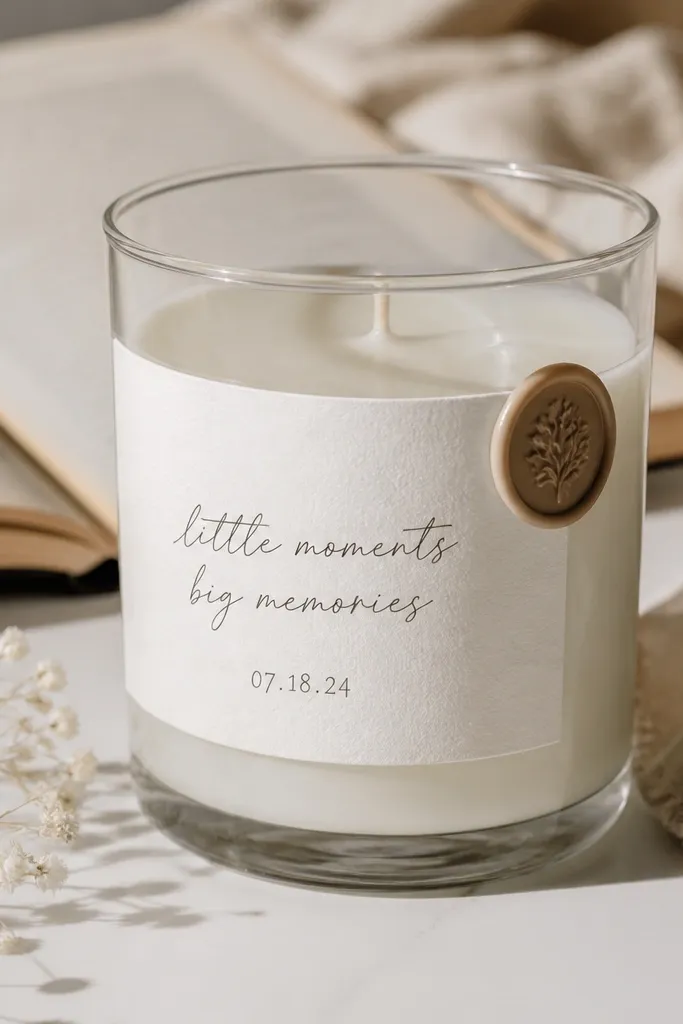
This is a sentimental gift that looks like you bought it from a boutique, because the label does the heavy lifting. I’ve done this with plain pillar candles and simple jar candles, and the result always looks polished. The trick is to use a wrap label that matches the jar size and to keep the design minimal — one quote, one date, one small icon. It works for boyfriends who like cozy nights, but also for anyone who owns candles and actually burns them. The clean typography and a wax-seal sticker make it feel personal without clutter.
Measure the candle jar circumference and cut a label sized to wrap with a 1/4 in overlap. Print or hand-letter the quote on thick matte sticker paper, using a dark ink like charcoal or deep navy. Add the date you met or a funny inside reference, then include a small icon (like a matchstick or star) in one corner. Wrap the label tightly and press from center outward. If you want extra charm, add a small wax-seal sticker at the overlap and seal with a thin clear tape strip over the seam.
Editor's noteChoose quotes that fit on one line when printed; wrap labels look best when they don’t stack lines.
Skip thisSkip glossy paper on glass — it reflects light and makes the text hard to read.
6. Map-Print Fabric Coaster Set with Heat-Seal Edges
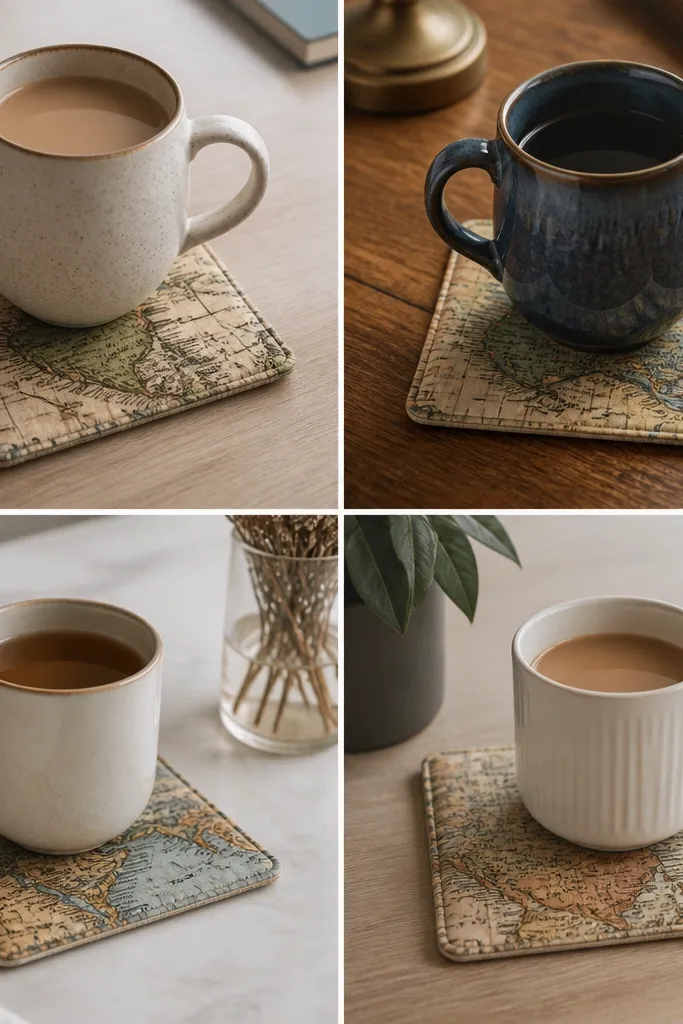
Coasters are one of the fastest handmade gifts that still feel useful and thoughtful. I like fabric coasters because they’re forgiving — you can hide small cutting mistakes with clean edges. The map print gives that “we have a story” feel, and it looks great with wood tables and dark mugs. Heat-sealing the edges makes them wipeable enough for everyday life, not just display. This works for boyfriends who host or who leave condensation rings everywhere.
Cut four circles about 4 in wide from fabric (map print) and four from a fusible interfacing or thin felt. Fuse the interfacing to the fabric with an iron, then stack with a second felt layer for thickness. Trim the edges evenly and seal with fabric glue or heat-seal tape along the perimeter. Add a non-slip backing layer using peel-and-stick felt dots. Package them in a small cotton pouch or tie them with a ribbon so they look like a set.
Editor's notePress the iron longer than you think — 20-30 seconds per section — so the layers don’t peel later.
Skip thisDon’t use thin fabric alone; it soaks and leaves rings.
7. Painted Bottle Cap Magnet with Message Backing
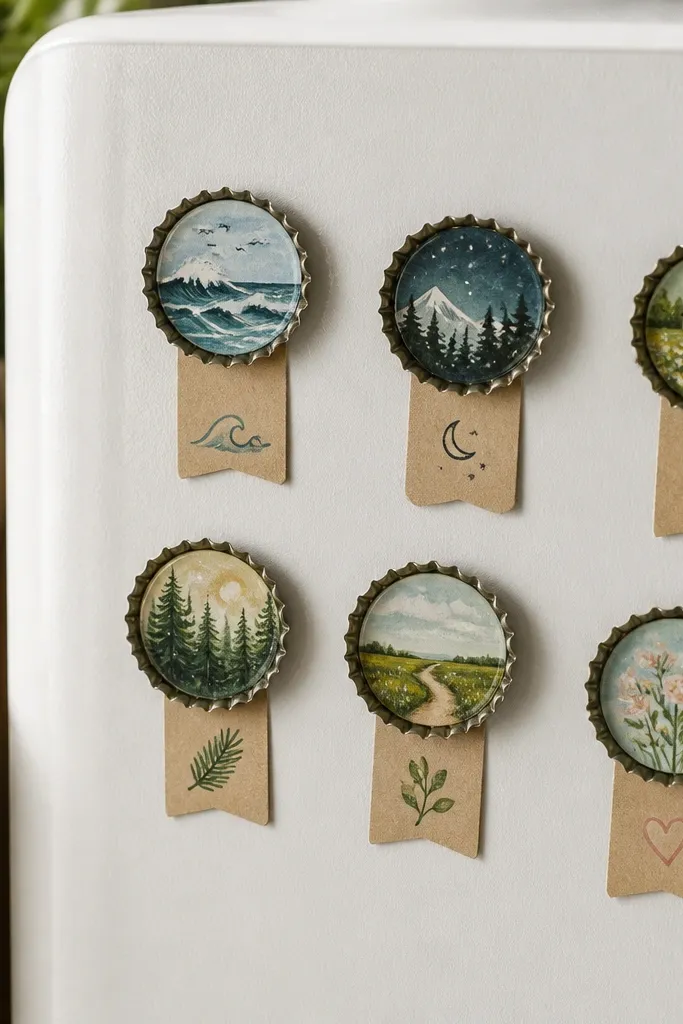
Bottle caps are tiny, fast, and surprisingly sentimental when you add a message. I paint or decoupage the top with something that matches his taste — sports logo colors, a skyline, a simple leaf, or a favorite album palette. The magnet makes it practical, and the message tag makes it personal. This works best for boyfriends who leave notes on the fridge or who actually use the kitchen as a hangout spot. It’s also a good backup gift when you’re short on time and need something in under an hour.
Remove bottle caps and clean them with soap, then dry completely. Paint the inside top area or fill with a tiny paper image sealed under clear acrylic or Mod Podge. Let it cure so it doesn’t smear. Glue a strong fridge magnet backing to the underside and press firmly. Write a short message on a small label (like “For your next late shift”) and tuck it into a tiny sleeve or glue it to a card that holds the set.
Editor's noteUse a fine paintbrush and add one highlight dot — it makes the cap look glossy and finished.
Skip thisDon’t skip sealing the paper — it lifts when it gets humid.
8. Custom Beer Coaster Acrylic Block with Photo Insert
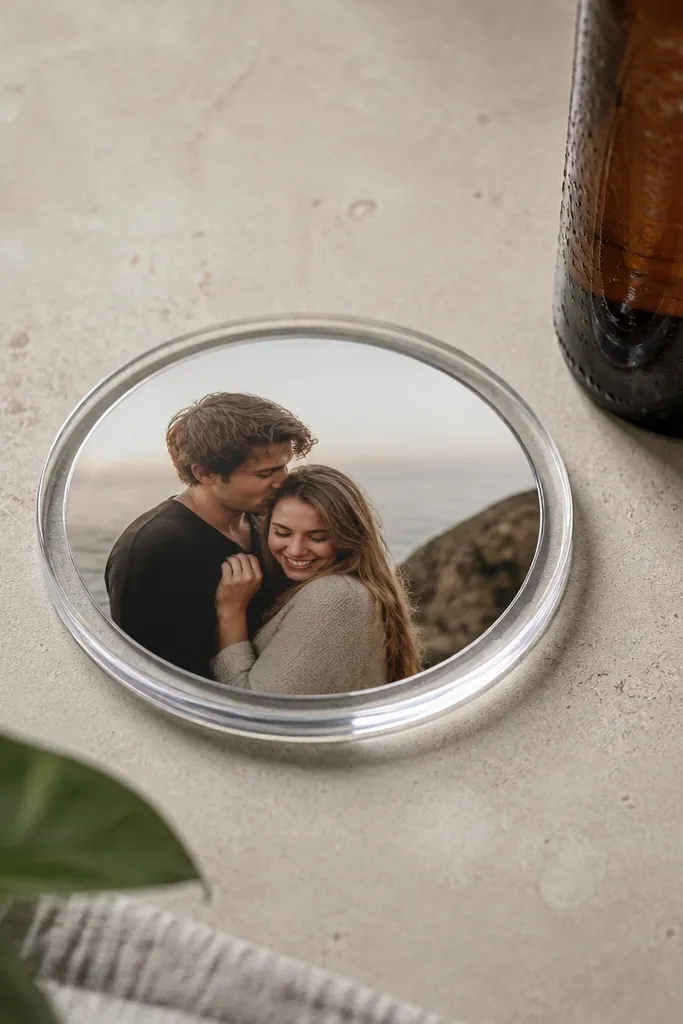
If your boyfriend likes beer nights or game nights, an acrylic coaster looks like something you’d buy, not make. The photo insert is the sentimental part, and the clear block makes it feel sturdy and premium. I like using one photo he’ll recognize instantly, like a backyard barbecue moment, and centering it so it’s readable from above. Acrylic blocks also handle spills better than paper coasters. This is a great gift for someone who has friends over and needs practical decor.
Pick a coaster size you can find as a kit or blank (often 4 in). Print your photo insert and trim it to fit the center opening with a 1-2 mm border. Clean the acrylic block with glass cleaner so no dust sits under the insert. Insert the photo and secure with the kit’s backing or clear sealant tape. Let it set fully before you stack it so the edges look uniform.
Editor's noteChoose a photo with strong contrast so faces and objects read clearly through acrylic.
Skip thisAvoid fingerprints on the inside — they show up as cloudy spots.
9. Thread-Wrapped Mason Jar Pencil Holder
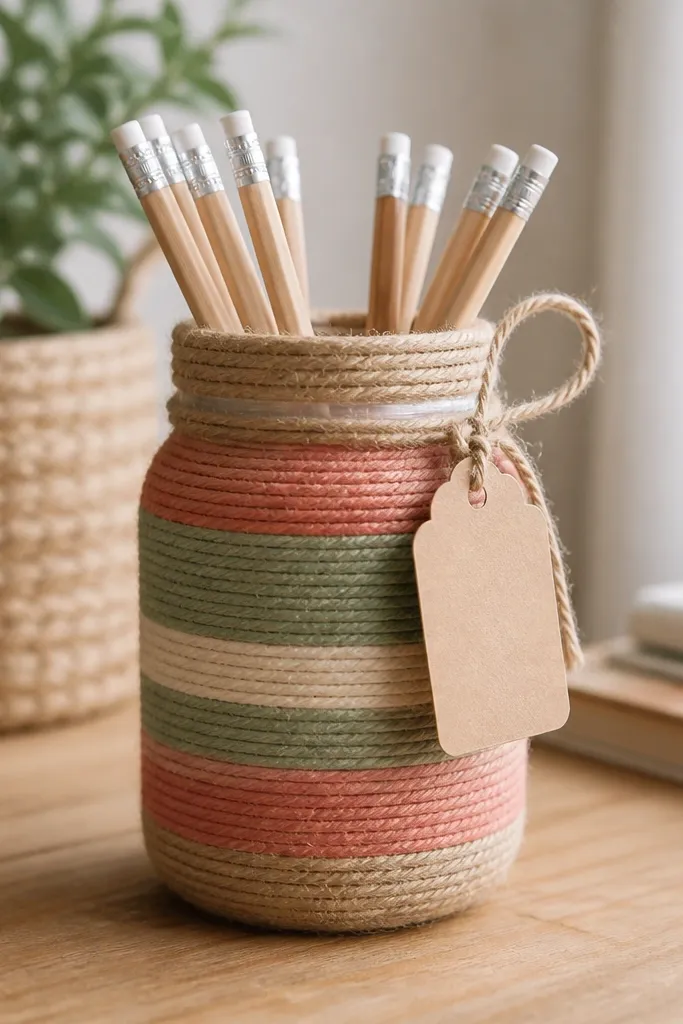
This gift works for the boyfriend who has a desk, a garage bench, or a work-from-home setup. The jar shape is classic, and wrapping it with thread makes it look intentional instead of store-bought. I use thick twine for texture and a thinner thread accent line for contrast. The result feels warm and handmade, and it’s sturdy enough for daily use. It also flatters a masculine desk aesthetic — neutral twine, simple tag, no glitter overload.
Clean a mason jar and let it dry. Apply craft glue in a small section and start wrapping twine around the jar bottom edge, keeping tension even. When you reach the top, tuck the end under a previous wrap and glue it down. Add a thin contrasting thread stripe around the middle by gluing a narrow band and winding the thread tight. Finish by tying a small cardstock tag with baker’s twine and adding a label inside for what it’s for.
Wrap with tension, not force — tight enough to remove gaps, loose enough to avoid bulges.
Don’t use runny glue — it soaks through twine and leaves dark patches.
10. Knotted Rope Key Organizer for the Car
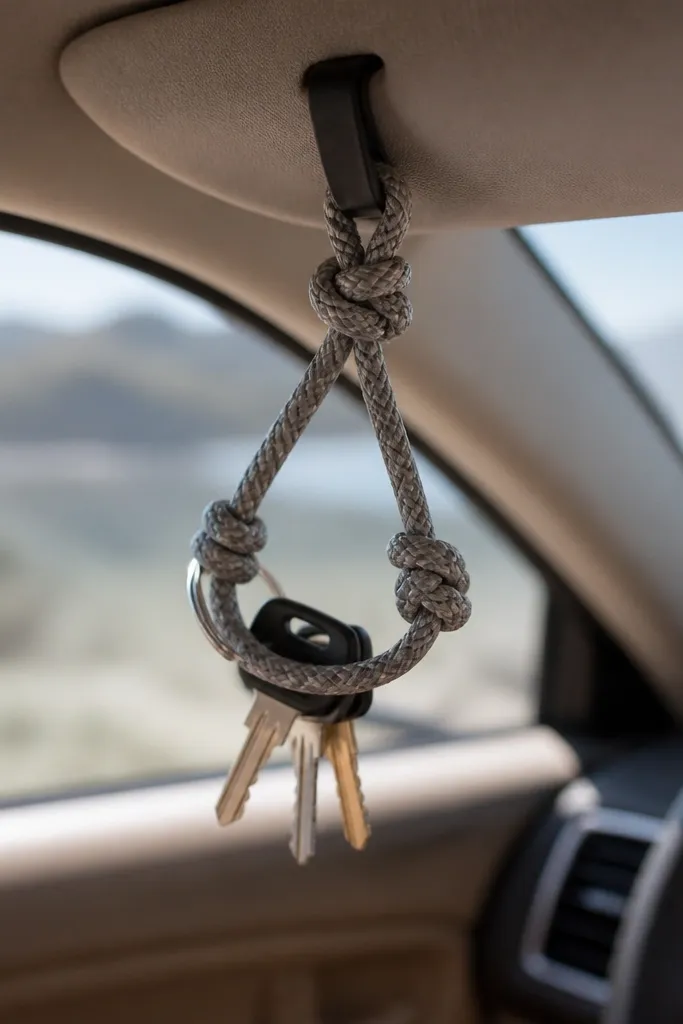
This is one of my favorite quick easy handmade gifts for boyfriend because it solves a real annoyance. If his keys end up on the passenger seat, this rope cradle stops that without complicated tools. The knots create a soft “seat” so keys don’t clatter against hard plastic. I use thick cotton rope or braided paracord with a yarn-like feel so it looks warm, not tactical. It suits anyone — clean knots for a minimalist guy, bold colors for someone who likes statement items.
Cut a piece of rope about 18 in long. Fold it in half to find the middle, then tie an overhand knot near one end to form a hanging loop. Tie a second knot about 5 in from the first to create a cradle where keys rest, leaving enough space for key rings. Secure the rope ends by melting the tips only if you’re using synthetic cord; for cotton, fray-check with fabric glue. Attach it to a visor hook, a small suction hook, or a clip-on car organizer using zip ties or a stitched loop.
Editor's noteTest the cradle with his actual keys before you trim anything — weight changes how far the rope settles.
Skip thisSkip thin cord; keys slide off and it looks flimsy fast.
11. Embroidered Canvas Phone Stand with Stitched Edge
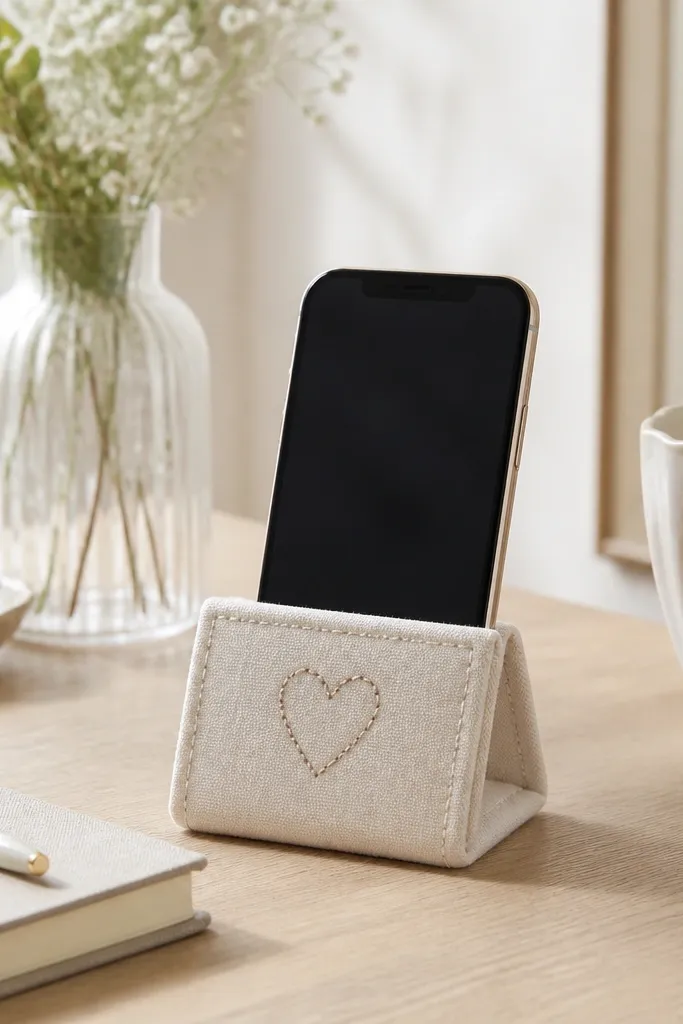
A phone stand is useful every day, and embroidery makes it feel personal without being loud. I like off-white or natural canvas because it hides small thread mistakes and looks calm next to a laptop. A simple stitched edge looks tidy and adds structure, so it doesn’t collapse. This gift flatters boys who keep their phone on the counter — it makes charging look intentional. The embroidery also reads as handmade even from across the room, because thread texture catches light.
Cut a stand pattern from sturdy canvas or duck cloth, about 6 in tall with a 4 in base tab. Stitch the sides with a simple straight stitch and reinforce the fold line so it holds its angle. Add a small embroidery design on the front panel using one or two colors — I like dark green thread on off-white canvas. Add a stitched border around the edges with a satin stitch or tight running stitch. Finish by ironing the stand flat and testing the phone fit.
Editor's noteUse a heavier needle and don’t rush — canvas needs steady pressure or the stitches look uneven.
Skip thisDon’t use lightweight fabric; it bends and makes the stand wobble.
12. Custom "Always Late" Playbook Ticket Wallet
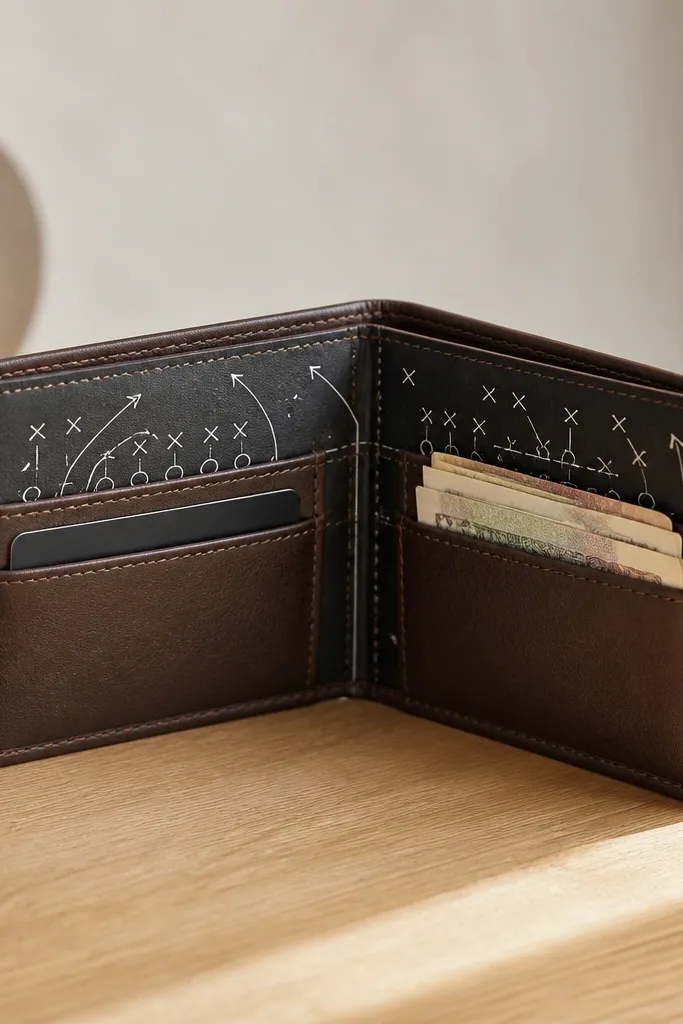
This one is for the funny boyfriend who likes inside jokes. I make it from a slim faux leather wallet blank and decorate the inside with a “playbook” card — like a tiny set of rules, goals, and a date. The outside stays plain, so it doesn’t look like a craft project, and the inside is where the personality lives. It works for anyone because it fits in a pocket without bulk. The sentimental part is the card text — short, specific, and tied to something you both do.
Buy a slim card wallet blank or create one from faux leather sheets with a simple fold and rivet or glue edges. Print or hand-letter a mini playbook card on cardstock, sized to slide into one pocket. Add two small tabs or elastic bands to keep the folded notes from falling out. Seal the faux leather edges with fabric glue or edge paint so it looks clean. Put in one “rule” card plus a small note from you before you hand it over.
Editor's noteKeep the joke on the inside — it reads as personal when he opens it, not cringe in public.
Skip thisSkip bulky paper inserts; they make the wallet tight and uncomfortable.
13. Satin Ribbon Bookmark with Heat-Fused Ends
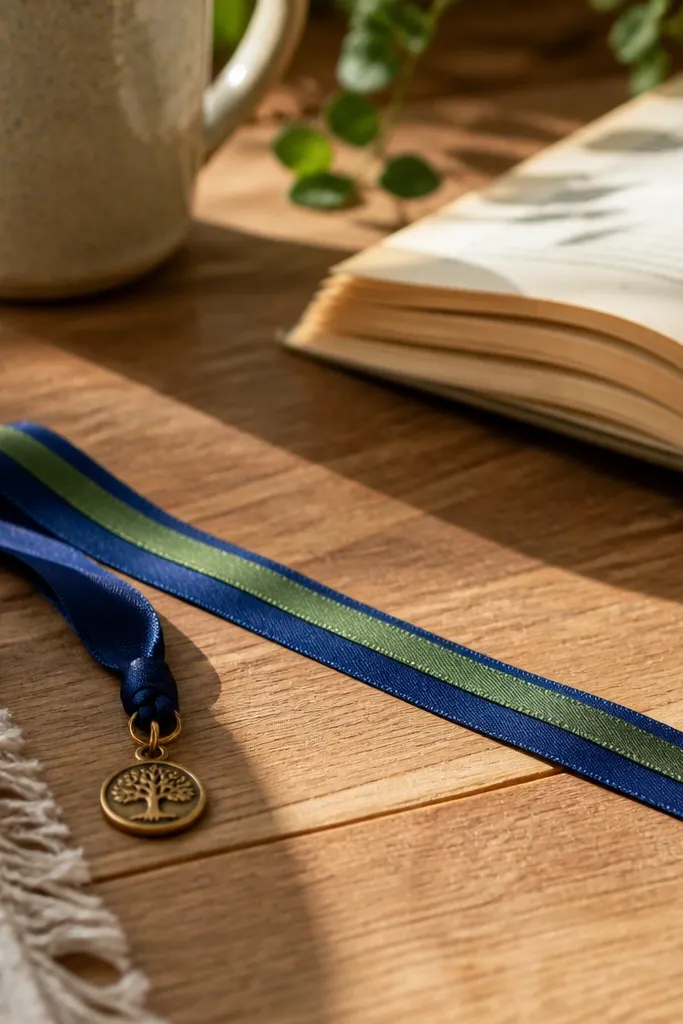
If he reads — even on weekends — a bookmark is a sentimental gift he’ll actually use. Satin ribbon looks smooth and feels nice in hand, and small metal charms add weight so it never drifts out of the book. I like layering two narrow ribbons so it looks styled instead of plain. This suits any taste because you can match his favorite color palette. It also works for boyfriends who don’t like clutter; it’s flat and disappears in a book.
Cut two ribbons per bookmark, about 10 in long each. Stack them and pin the top, then stitch through the layers or glue a small fabric strip to the back. Add a metal charm at the bottom by threading through a tiny jump ring or attaching with a needle and thread. Heat-fuse the ribbon ends with a lighter carefully, holding the tip steady to avoid singeing too far. Make a small top loop or tie a knot so it sits securely in the pages.
Editor's noteUse a lighter on low flame and melt just the last 1/8 in — too much heat makes it brittle.
Skip thisDon’t leave frayed ends; it looks cheap and catches on pages.
14. Cork Coaster with Burned "Our Place" Label
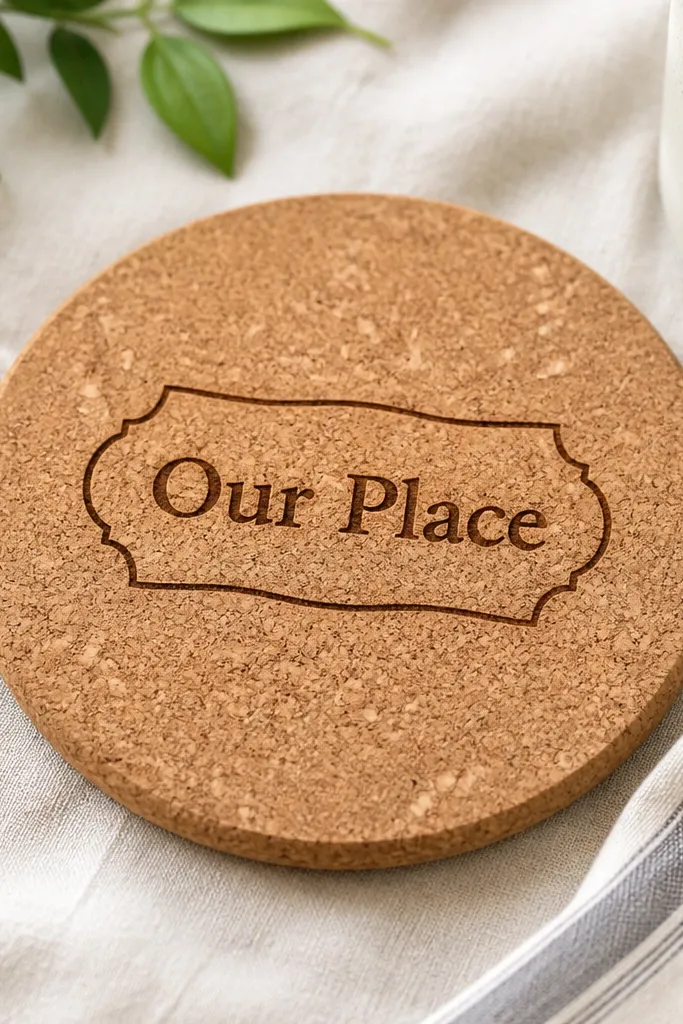
Cork is forgiving and looks natural, so it’s a great base for a handmade, grounded gift. Burning a label into cork gives a warm, woodsy look that feels personal without needing complicated painting. “Our Place” works if you have a specific spot — a diner, a bench, a parking lot where you talk — and you can swap the text accordingly. This is a great gift for a boyfriend who likes simple decor and spends time at home. Sealing it keeps it from shedding and makes it wipeable.
Cut or buy round cork coasters and lightly sand the surface if it’s rough. Use a printed stencil or freehand sketch to mark your text lightly with pencil. Burn the letters with a wood burner set to medium so the lines are readable but not scorched through. Brush off dust and seal the coaster with a clear matte sealant or acrylic spray in thin coats. Let it dry fully before you package it with a matching small note card.
Editor's noteUse a stencil for straight letters; your burn will look cleaner even if your handwriting isn’t perfect.
Skip thisAvoid heavy sealant — thick coats can darken the cork unevenly.
15. Pencil-Pouch Zipper Case from T-Shirt Side Panels
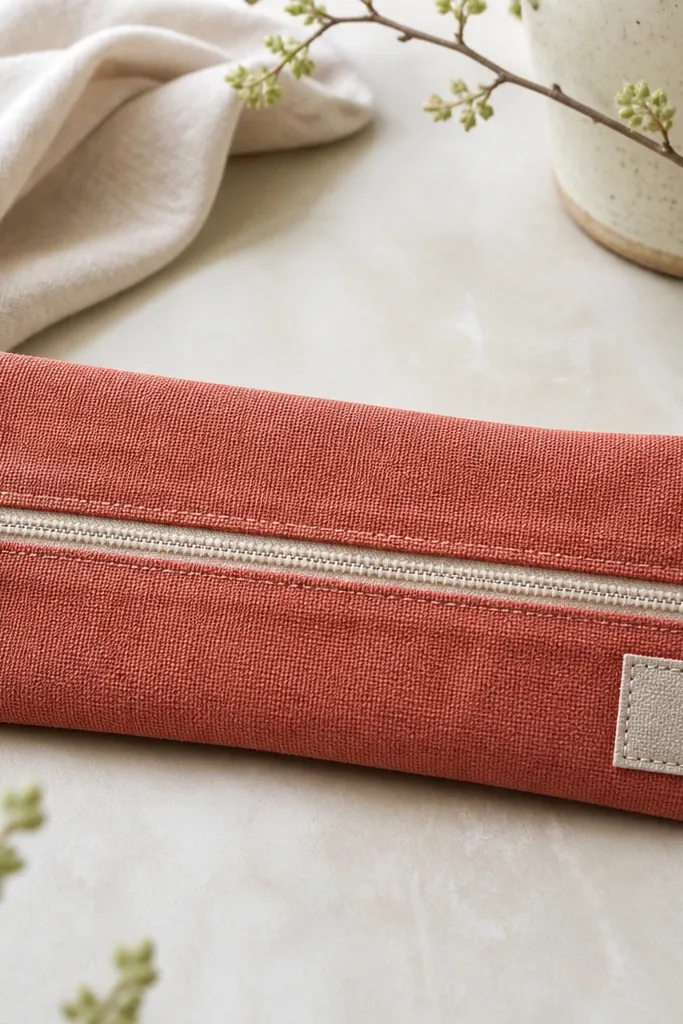
This is a smart handmade gift for boyfriends who carry pens, tools, or even charging cables. Repurposing a T-shirt gives you a soft fabric pouch that matches his wardrobe colors. The zipper case feels more “finished” than a drawstring bag, and it protects items in a backpack or car door pocket. I like using knit t-shirt fabric because it looks relaxed and masculine — especially in heather gray, navy, or black. It also makes a practical sentimental note: you used something he already wears or loves.
Cut two panels from the T-shirt side area so the stretch stays even. Use a zipper that matches the pouch height, and pin the zipper to the panel edges with the right sides facing. Sew carefully along the zipper teeth with a zipper foot if you have one. Add a lining layer using a simple cotton scrap if the T-shirt is too thin. Sew the sides, box the corners if you want it to stand open, and attach a small patch with a few stitches on the front.
Editor's noteStabilize knit fabric with a strip of fusible interfacing near the zipper so it doesn’t stretch out of alignment.
Skip thisDon’t skip stabilizing — knit fabric can cause the zipper to twist.
16. Personalized "Gas Station" Scratch Card Jar Notes
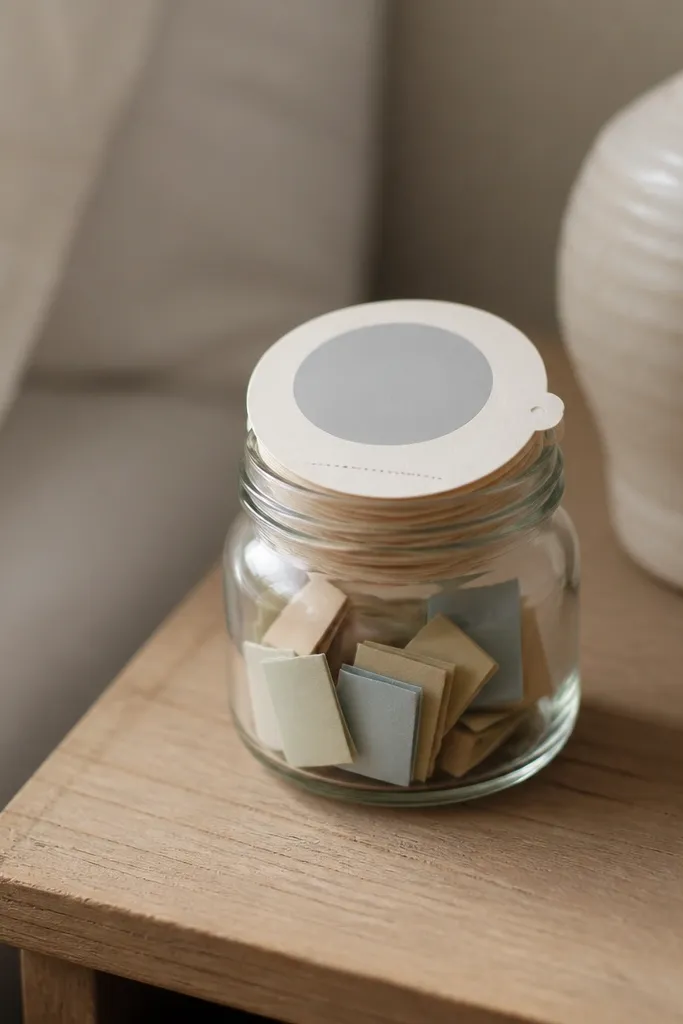
This gift hits the sweet spot between sentimental and fun. I make a jar of short prompts that he can scratch and pull when he’s bored, stressed, or driving. The “gas station” scratch style makes it feel like a game, but the notes are real — plans, compliments, and inside references. It works for boyfriends who like low-effort date ideas and don’t want a big planned outing every time. The jar also looks cute on a shelf, especially if you keep the labels consistent.
Write 20 short notes on small paper strips, each one a prompt like “Pick the next song” or “10-minute walk and talk.” Fold them and place them in a jar. Create label stickers with a prompt number and cover the number area with scratch-off coating or a scratch-off sticker sheet. Seal the jar lid with a ribbon band and add a card explaining how to play. When you gift it, include one “first scratch” note taped to the outside so he can start immediately.
Keep notes under 6 words so they’re quick to read while he’s doing something else.
Don’t write long paragraphs; he’ll skip them when he’s busy.
17. Glow-in-the-Dark Star Map Keychain Charm
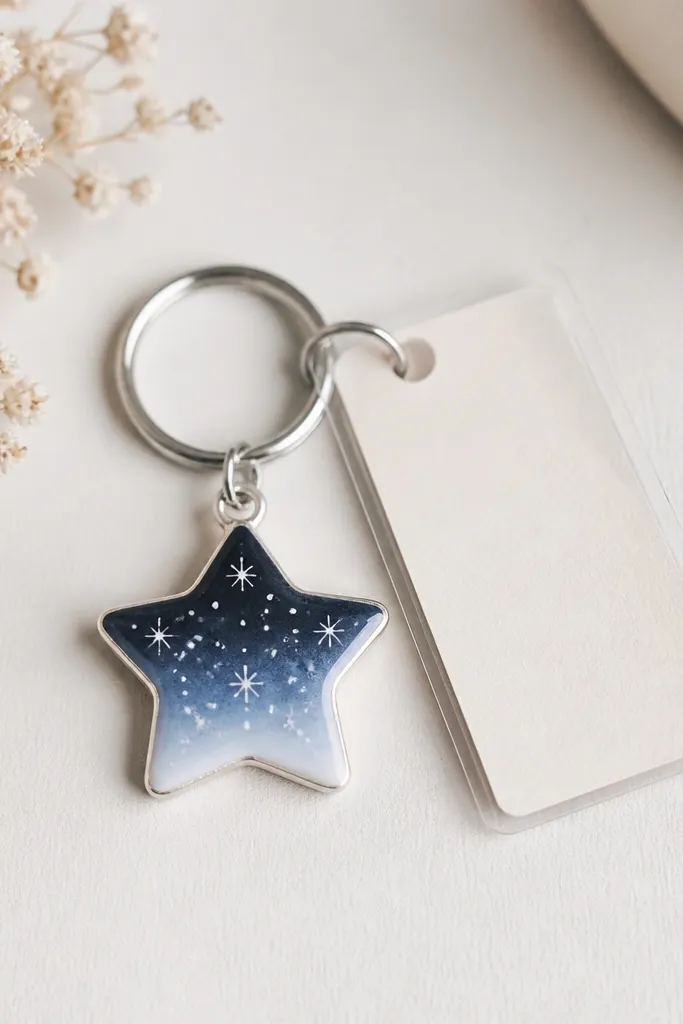
This is one of those gifts that looks plain in daylight and turns into a moment at night. I use glow-in-the-dark star dots on a small charm backing so the effect shows in his room or car at dusk. Add a tiny laminated tag with a date or place and it becomes sentimental, not just decorative. It works for boyfriends who like gaming setups, bedrooms with mood lighting, or just quiet nighttime drives. The glow effect makes it feel personal, because he notices it when he reaches for his keys.
Cut a small backing piece from acrylic or sturdy cardstock and punch a hole near the top. Apply glow paint or glow dot decals in a simple star pattern — I do 7 to 12 dots so it doesn’t look cluttered. Let it cure fully, then cover with a clear adhesive layer or thin clear tape to protect the surface. Attach a charm chain to a split ring, then add a laminated tag with your chosen date. Package it in a small envelope so the glow doesn’t get scuffed.
Editor's noteCharge the glow charm under a bright lamp for 2 minutes before you wrap it so he sees the effect right away.
Skip thisAvoid glitter-heavy designs — it looks messy and can fall off onto his keys.
18. Hand-Painted Sock Pattern Insider Note Card
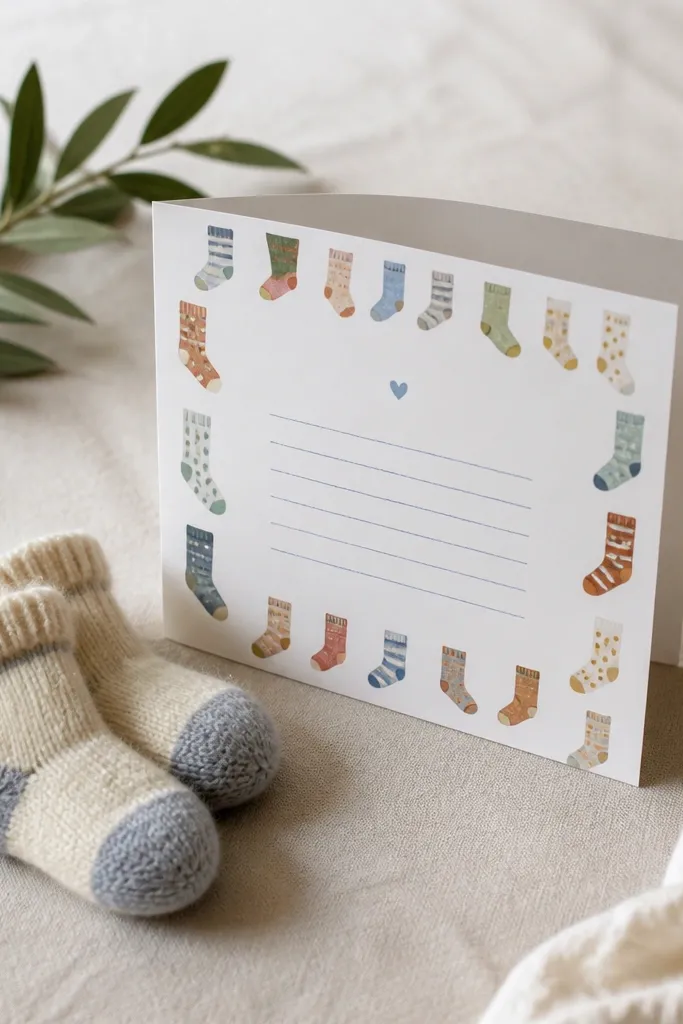
This is a gift combo that feels personal without spending a lot. The card looks like real art because it has a repeating sock pattern border, and the socks make it practical. I like using a limited color palette — one base like cream, one accent like rust, one tiny dot like navy — so it looks cohesive. It flatters everyone because socks are universal, but the card is where you show you know his style. It’s also a good choice when he’s picky about gifts and you want something safe.
Fold thick cardstock and paint a simple border of socks along the outer edge using fabric paint or acrylic paint meant for paper. Let the border dry flat, then write your message inside with a fine black marker. Add a small detail like his favorite color stripe or a tiny heart near the bottom. Pair it with one folded pair of socks and attach the socks to the card using a belly band. Wrap the set in tissue and tie with ribbon for a clean finish.
Practice the sock drawing on scrap first — a consistent sock shape makes the border look intentional.
Don’t overfill the card with too many colors; it starts looking like kids' craft paint.
19. Cinch-Wrap Bottle Tote with Fabric Lining
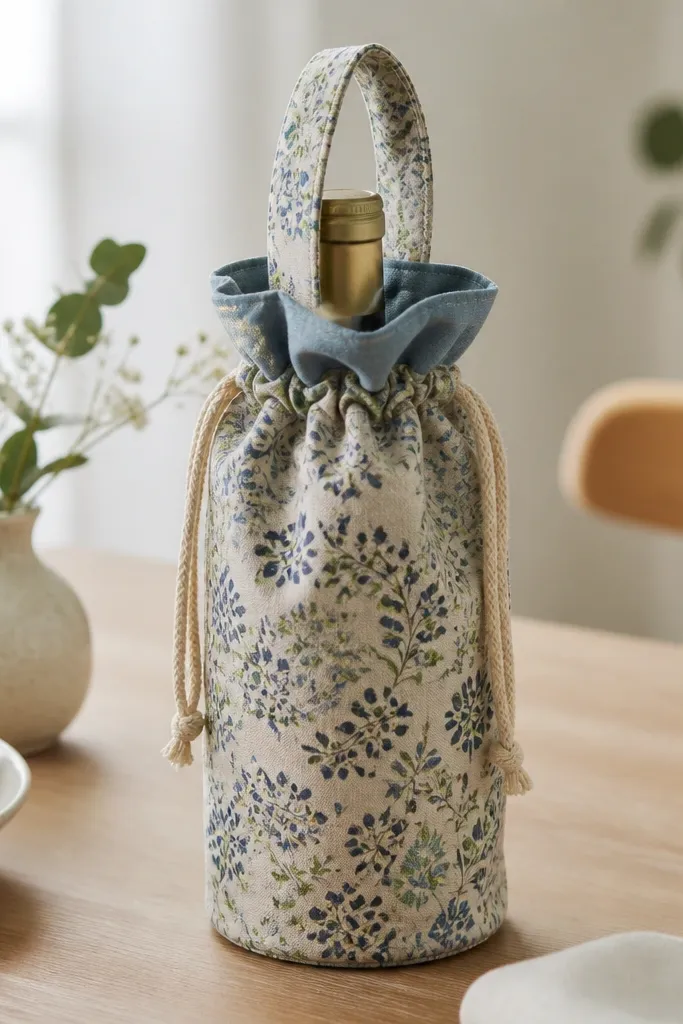
A bottle tote is thoughtful because it upgrades a gift that’s already good. I make these from cotton so they look soft, and I add a lining so the tote holds its shape and doesn’t show stains. The cinch cord closure is fast to sew and looks neat, so the top doesn’t flop open. It works for wine, fancy soda, or a craft beer bottle — and it doesn’t require him to carry a flimsy bag. If he’s the type who brings gifts to friends, he’ll appreciate the reusable tote too.
Cut two rectangles from patterned cotton and two from lining fabric, about 10 in tall and 7 in wide. Sew the lining and outer fabric separately, then pin them right sides together and stitch around the bottom edge. Turn right side out and press the seam. Create a channel at the top by folding over 1 in and stitching, leaving a gap for the cord. Thread ribbon or cotton cord through the channel, tie knots, and test the fit with the bottle.
Use a wider seam allowance at the bottom — it prevents fraying and keeps the tote from stretching.
Skip skipping the lining; without it, the tote looks cheap and can show bottle condensation.
20. Tiny Resin Key Pendant with Dried Flower Accent
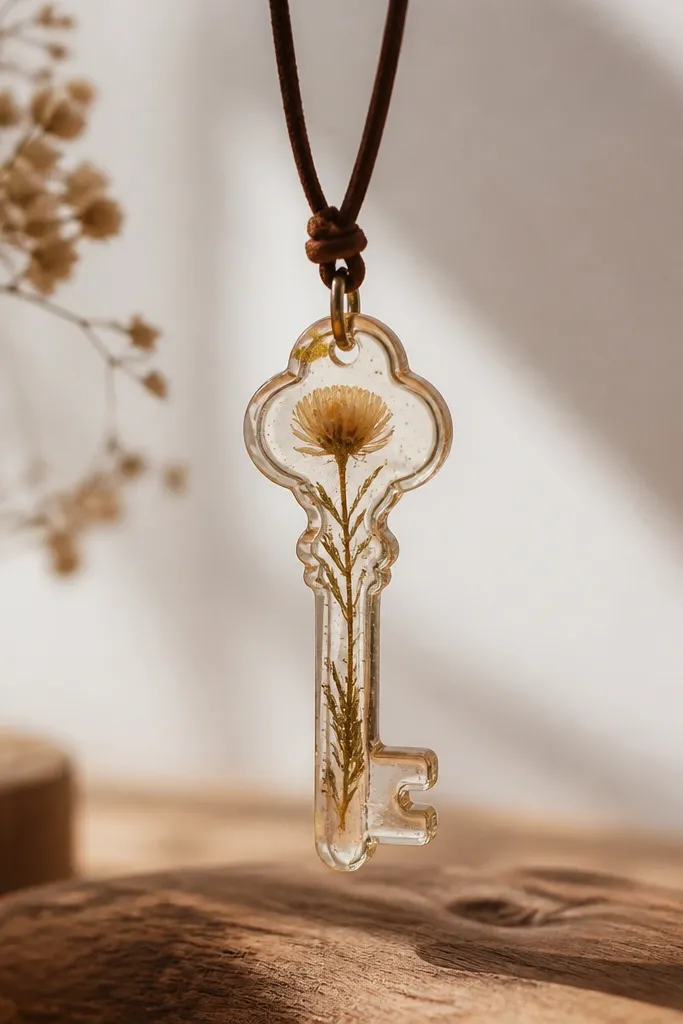
If you want a handmade gift that looks like jewelry, resin is the way. I keep it simple with a tiny key shape and one dried flower accent, because too many elements makes it cloudy. Dried flowers also read sentimental — it’s literally a preserved memory. I use warm tones like amber or soft gold tint so it looks good on both cool and warm skin tones. This works best for boyfriends who like subtle accessories or who wear a chain sometimes. The key shape also has a clear theme for everyday carry.
Use a silicone resin mold in a key shape and mix clear epoxy resin precisely by the kit ratio. Place a dried flower or petal in the mold and pour a thin first layer, then let it settle for a few minutes. Add the rest of the resin slowly so bubbles rise — pop bubbles with a toothpick. Let it cure fully, usually 24-48 hours depending on your kit and temperature. Remove the pendant, sand lightly if needed, and attach it to a thin leather cord or a jump ring with a small bail.
Editor's noteSeal the dried flower with a tiny drop of clear resin before the full pour so it doesn’t float.
Skip thisDon’t rush curing; flexing resin early leaves tacky spots.



