

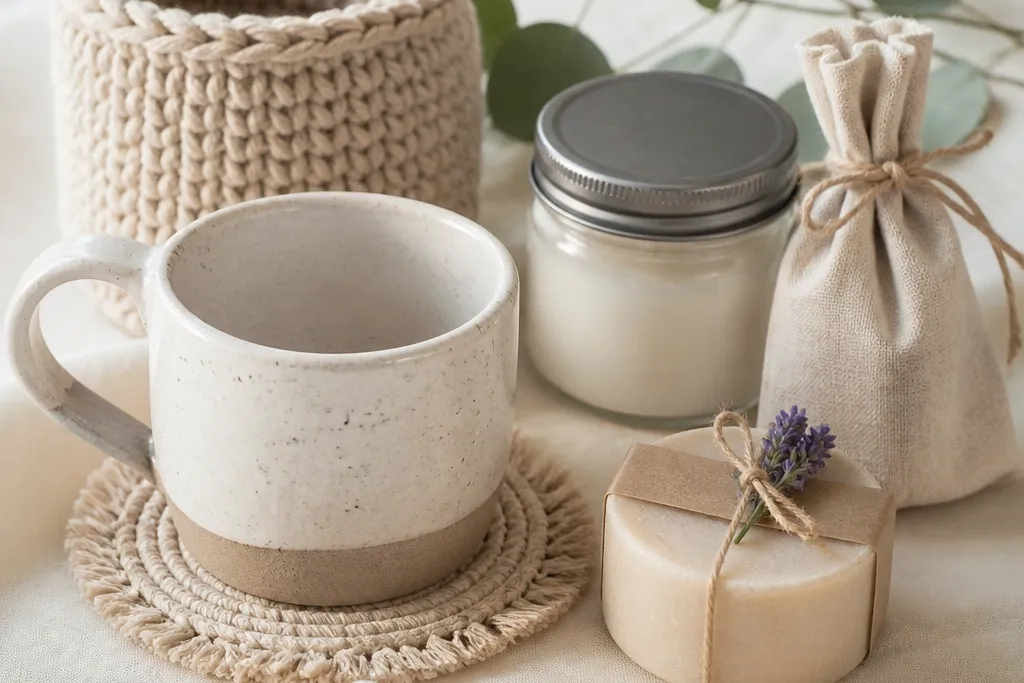

1. Fabric Scrap Friendship Keychain with Button Charm
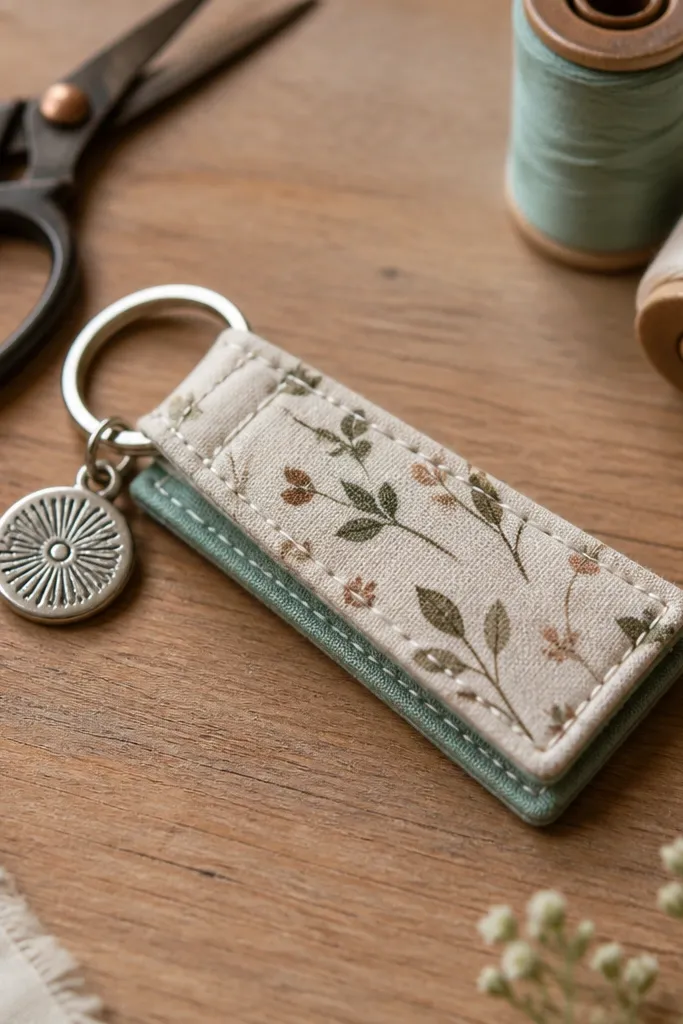
This keychain looks handmade because the fabric has visible grain and the stitching is straight, not sloppy. I use two scraps that already have personality — one solid (like navy cotton) and one print (like tiny white daisies) — so the front reads clearly. The button charm adds weight, which makes it feel “real” in the hand, and it catches light when it swings. It flatters anyone because it’s small, light, and doesn’t depend on skin tone or sizing. For a gift that feels personal fast, match the button color to a detail your friend wears, like a gold ring tone or a specific handbag hardware color.
Cut one fabric rectangle for the front and one for the back, both about 4 inches by 2 inches. Place them right sides together, pin, and stitch around the edges with a 1/4-inch seam allowance, leaving a 1-inch gap to flip. Clip the corners, turn right-side out, press flat, and topstitch around the perimeter so the edges look crisp. Close the gap with a ladder stitch, then attach a split ring and a button charm using a needle and thread through the button holes. Finish by tying a small knot of embroidery floss at the ring so it looks intentional instead of “random button attached.”
Editor's noteUse a slightly thicker thread (like size 40 or 50) so the stitches sit proud and look neat in photos.
Skip thisDon’t skip pressing — wrinkled fabric makes the whole keychain look rushed.
2. One-Hour Photo Transfer Coaster Set (2 Coasters)
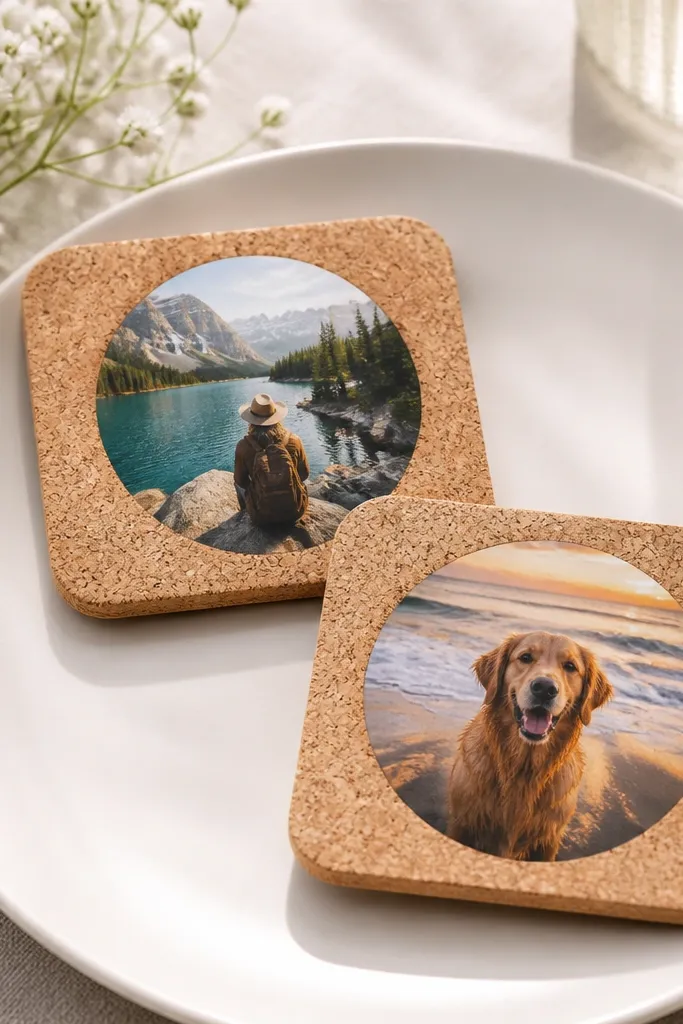
Cork is forgiving, and a photo transfer looks personal without making you cut up a whole frame. I like this for BFFs who love memories but don’t want clutter. The transferred image sits under a clear topcoat, so it looks smooth and glossy instead of like a sticker. Choose one photo with strong contrast — a face against a light background or a simple object shot. It works for any skin tone and any style because the image does the personality work; your job is clean edges and a protective finish.
Lightly sand the top of each cork coaster with 220-grit sandpaper so the surface grabs the transfer. Print your photo in laser (not inkjet), cut it to size, and place it face-down on the coaster with transfer medium following your medium’s directions. Let it dry fully, then gently rub away the paper until the image is clear. Seal with two thin coats of clear acrylic sealer, letting each coat dry and sanding lightly with 400-grit between coats for a glassy look. Finally, wipe off dust and test with a drop of water to make sure it beads.
Pick photos that are already edited for contrast; washed-out pictures look muddy under clear coat.
Avoid thick, gloopy sealer — it pools around the edges and makes the transfer look cloudy.
3. Heat-Transfer Initial Sweatband (No-Sew Option)
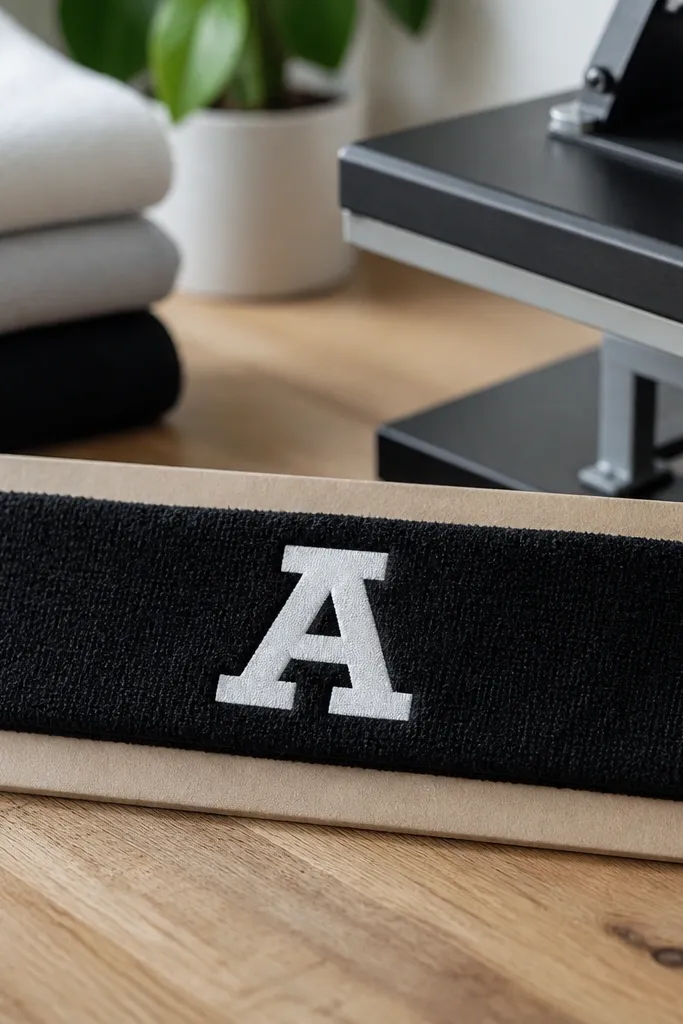
A sweatband is one of those gifts that feels thoughtful because it’s practical and personal. I make these with a friend’s initial in a high-contrast vinyl color, like white on black or pink on charcoal. The terry fabric gives it texture, so it doesn’t look like a flat craft. It flatters anyone because it’s adjustable by stretch and sits comfortably on wrists for workouts, hair styling, or wiping makeup. The main aesthetic win is clean edges around the vinyl and the right font size — bold enough to read from a distance.
Cut a terry headband to wrap size, usually about 9 inches long by 2 inches wide, and press it flat on a heat-safe surface. Cut heat-transfer vinyl for your initial, leaving a 1/8-inch margin around it. Weed the vinyl, place it on the band, and cover with a pressing sheet so you don’t scorch the fabric. Press with firm heat and hold time according to the vinyl brand, then let it cool before peeling. Wrap the finished band on a wrist-sized card and add a small ribbon tail so it looks like a gift, not a supply project.
Editor's noteUse a blocky font (simple sans) for the cleanest edges on terry.
Skip thisDon’t stretch the fabric while pressing — vinyl lifts if the weave shifts.
4. Painted Mason Jar "Tea for Two" Gift
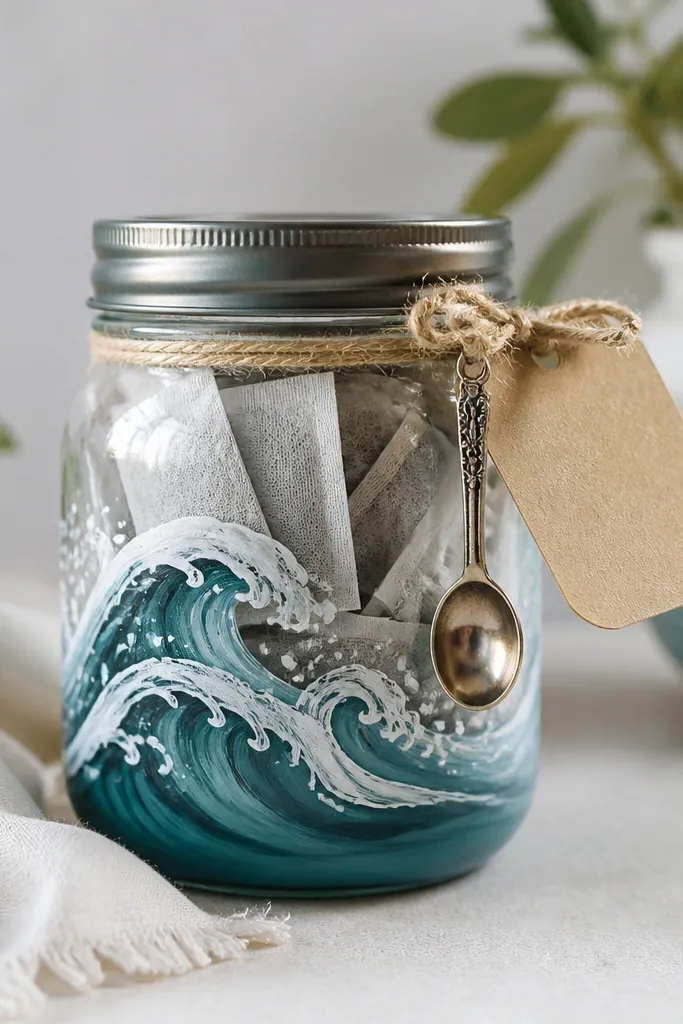
This jar gift looks cozy and looks more expensive than it costs because of the painted design and the organized label. I use a matte paint or acrylic paint with a simple wave or stripe pattern — it reads well even if your brush skills aren’t perfect. The jar is practical, so it doesn’t sit in a drawer. It works for any friend because you can tailor the tea flavors to their taste, and the design still matches their style. The key is keeping the palette tight: two colors max plus a neutral like cream or black.
Clean the jar and remove any residue from the glass so paint sticks. Tape off a simple pattern (like a wave band across the middle) using painter’s tape, then paint in two thin coats, letting each coat dry. Remove tape carefully while paint is still slightly tacky for sharper lines. Fill with 10 to 16 tea bags, then add a label card that lists flavors and steep time. Seal with a ribbon around the lid and tie twine for a rustic look. Finish by adding a tiny spoon charm or a folded “steep guide” strip taped to the inside of the lid.
Editor's noteWrite steep times in a font you’d actually want to read, like a simple handwritten script, so the label feels warm.
Skip thisDon’t overload the jar — too much tea makes the lid area messy and the label won’t sit flat.
5. No-Sew Felt Bookmark with Tassel Corner
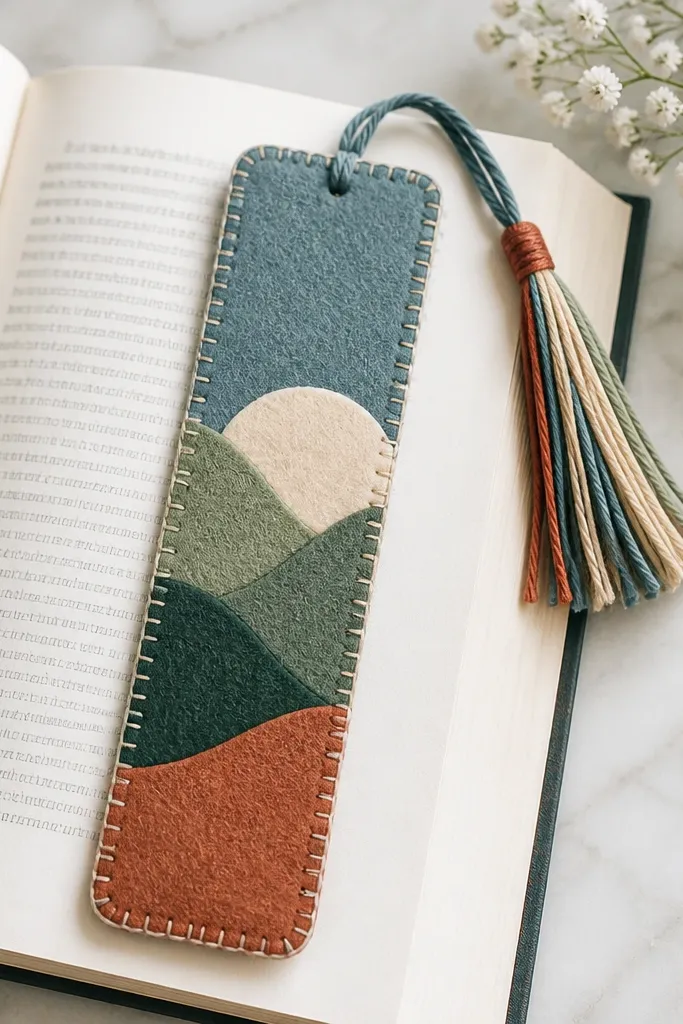
Bookmarks are underrated gifts because they get used immediately, and they don’t require sizing. Felt holds shape, so your bookmark stays tidy even if your friend is rough with it. I like a two-tone design: one solid felt base and one contrasting applique corner (like mustard with dark green). The tassel adds movement, and it makes the bookmark feel like a “real” handmade item. It suits anyone — books, planners, study BFFs, all of them. The style principle is crisp edges and a simple corner motif that reads instantly.
Cut a felt rectangle about 7 inches by 2 inches, then cut a second matching piece for the back. Glue or sew the two layers together along the sides, leaving the top end for the tassel attachment. For the tassel, wrap 12 to 18 strands of embroidery floss around a fork 10 times, then slide off and knot one end. Attach the tassel to the top corner between the felt layers, then glue the layers shut. Add a small felt applique on the front using fabric glue, like a heart or star, and press under a book for 20 minutes.
Cut felt with a rotary cutter if you have one — straight edges look better than scissors on this project.
Avoid fuzzy felt edges from cutting — trim until the edge looks clean before gluing.
6. Candle Sleeve Made from Old T-Shirt Sleeve
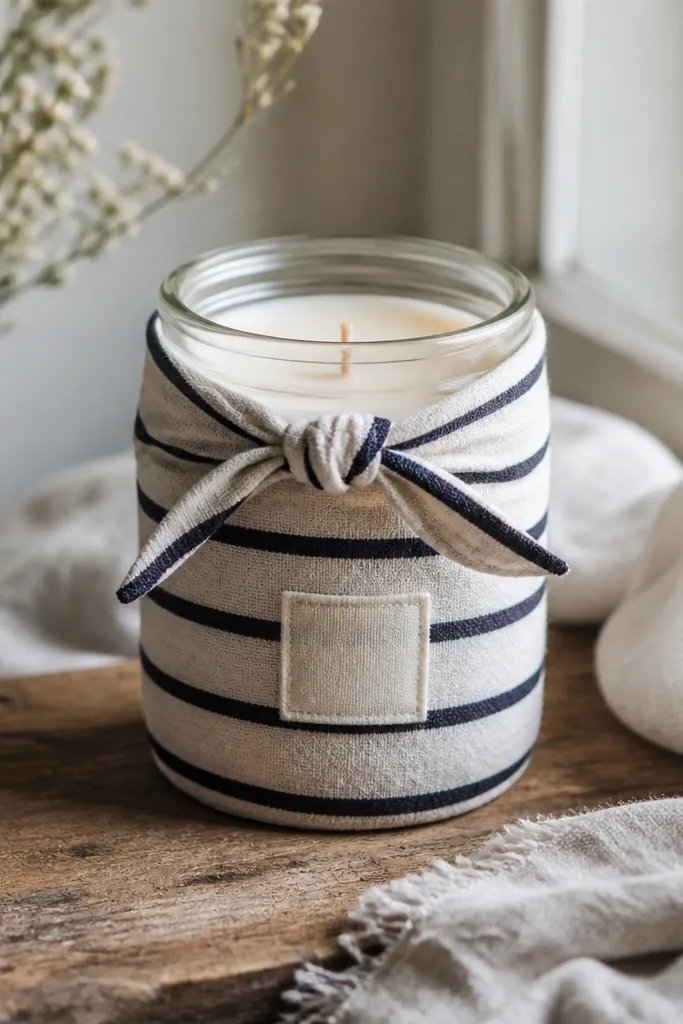
This is the fastest “decor upgrade” gift I’ve made, and it looks like you tried even when you didn’t. A T-shirt sleeve wraps around the jar with natural stretch, so it fits candles of different sizes. I like using stripes or a graphic tee because the fabric already has design — you’re not painting or drawing from scratch. It flatters the candle style and your friend’s taste because you can match the sleeve color to their room palette. The aesthetic is soft and casual, which suits most BFF home decor.
Cut a T-shirt sleeve section so it’s tall enough to cover most of the candle jar, usually 4 to 5 inches. Slide it over the candle and mark where you want the top edge to sit. Trim the bottom edge straight, then hem or glue the bottom seam so it doesn’t fray. Tie a ribbon around the top to create a neat finish, then add a small fabric tag with your friend’s name or a short phrase using fabric marker. Wrap the finished candle in tissue paper and keep the ribbon visible.
Wash and dry the T-shirt first so the fabric stretches less after you gift it.
Don’t use a sleeve that’s too thin — see-through fabric makes the candle look patchy.
7. Embroidery Hoop Wall Mini with Scrap Fabric Backing
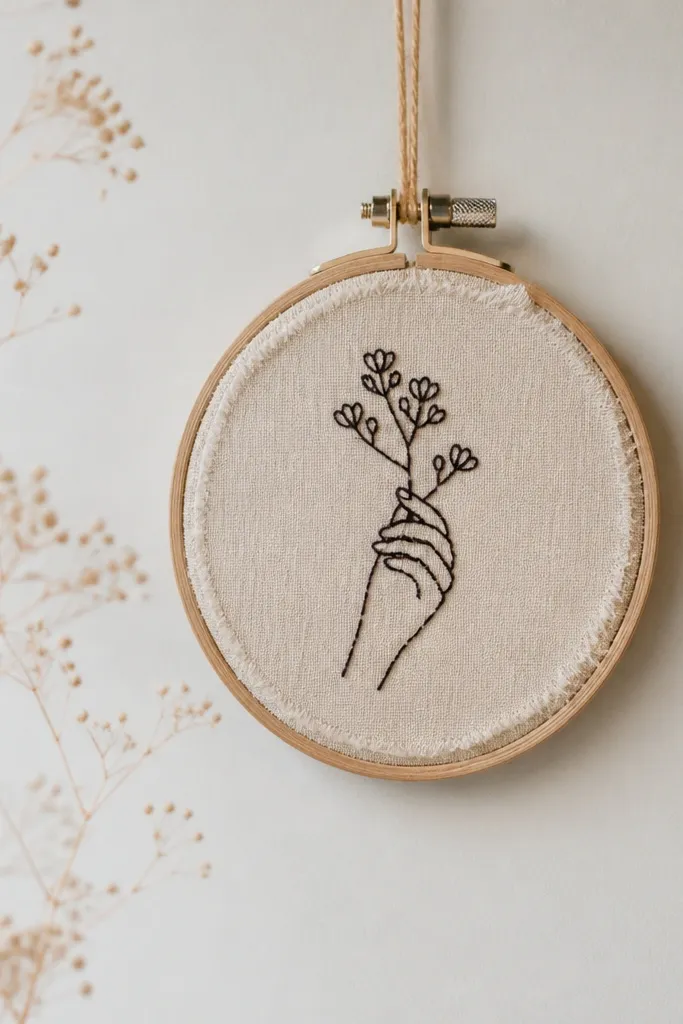
A mini hoop looks cute on walls without taking over the room. I use a small hoop (4 to 6 inches) because it’s easier to finish fast and it reads “intentional” rather than like a practice piece. Scrap fabric backing adds depth — linen, denim, or even a sturdy quilting cotton — and the stitches sit on top like a tiny piece of art. It flatters different decor styles because the fabric does the heavy lifting. The trick is to keep the stitched design simple: one line drawing, a small leaf, or a short word in thread.
Choose a hoop size and cut a piece of fabric 1 inch larger than the hoop diameter. Place fabric inside the hoop, tighten the screw, and fold excess underneath. Sketch a simple design lightly with a fabric pencil, then stitch with one strand of embroidery floss for clean lines. Use a running stitch or backstitch so the lines look crisp. Finish by tying a loop of twine through the hoop screw area and hang it on a nail or command hook.
Editor's noteDo a test stitch on scrap first so you pick a thread tension that doesn’t pucker the fabric.
Skip thisDon’t overstuff with details — tiny hoops look messy when you cram too much.
8. Satin Ribbon Bookmark with Pressed Flower Look
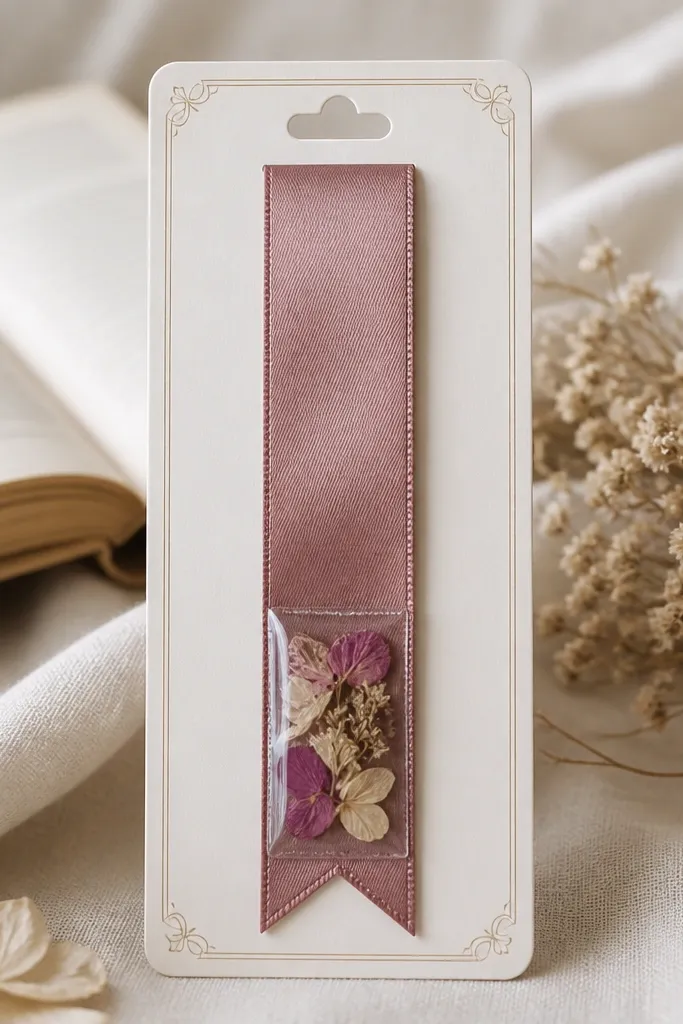
This bookmark looks delicate because it has a “pressed flower” feel, even if you’re using simple materials. I use a satin ribbon for the top texture and add a small clear pocket (made from clear plastic sheet) so the petals stay protected. The result feels thoughtful and pretty without needing fancy resin. It works for friends who read, journal, or carry planners. The style principle is contrast: soft petals against a crisp ribbon and a clean label.
Cut a satin ribbon strip about 10 inches long and set aside. Arrange dried petals on a small piece of clear plastic or a clear pocket sleeve, then trim to the size of a 2-inch label area. Seal the edges with a clear tape strip or a hot glue dot at the corners only, keeping the center flat. Attach the pocket to the ribbon by gluing or sewing through the ribbon ends. Add a cardstock backing behind the clear pocket for stability, then write a short note in dark ink and tuck it behind the plastic.
Editor's noteUse thin petals like baby’s breath or small leaves so they stay flat under the plastic.
Skip thisDon’t use thick, wet flowers — they look lumpy and can discolor.
9. Personalized Bottle Cap Magnet Set
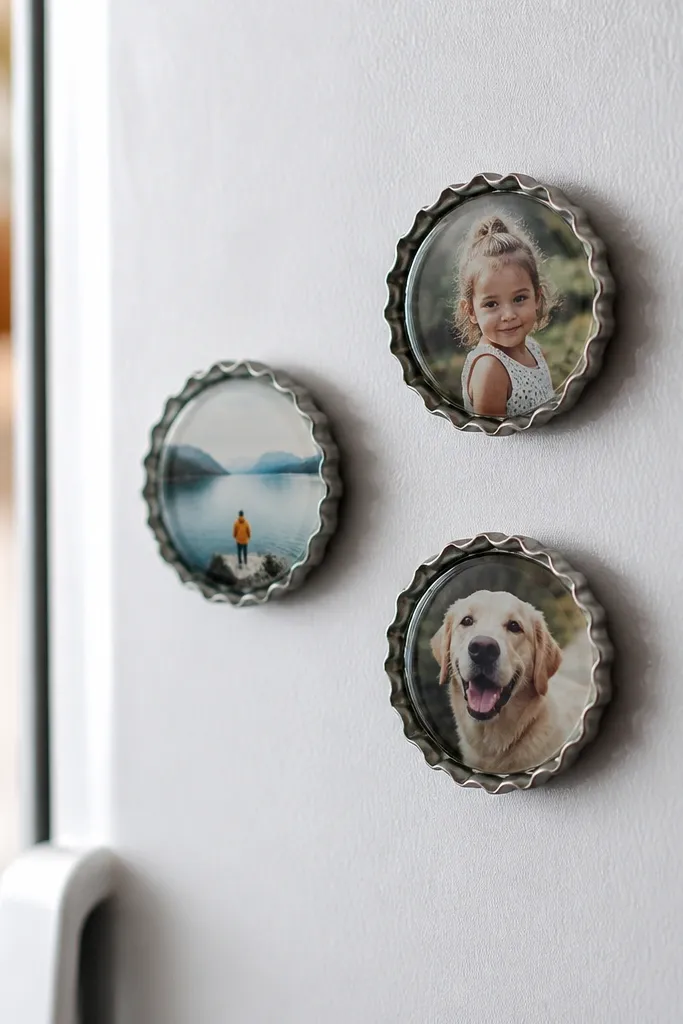
These magnets are quick and they look fun because the surface is glossy and the design is small and readable. I make them with printed photos, song lyrics, or inside-joke icons, and they fit any friend because the content is the personalization. The bottle cap shape gives you a built-in border, so your design doesn’t need to be fancy. It’s also hard to mess up: even if your photo is imperfect, the glossy topcoat smooths it. For aesthetics, I keep the colors bold and the text short so it reads at a glance.
Pop open bottle caps and clean them well. Print your designs as circles the size of the bottle cap insert, then cut them carefully. Glue the printed circle into the cap, add a clear adhesive or resin topcoat, and let it cure flat. Attach a magnet backing with strong craft glue, then wipe the edges clean. Package them in a small bag with a note that says which one goes with which inside joke.
Editor's noteUse a laser printer for sharper printed text; inkjet smears under certain sealers.
Skip thisAvoid messy glue around the rim — wipe excess immediately so the cap looks factory-finished.
10. Mini Cross-Stitch Key Holder on Cardboard Back
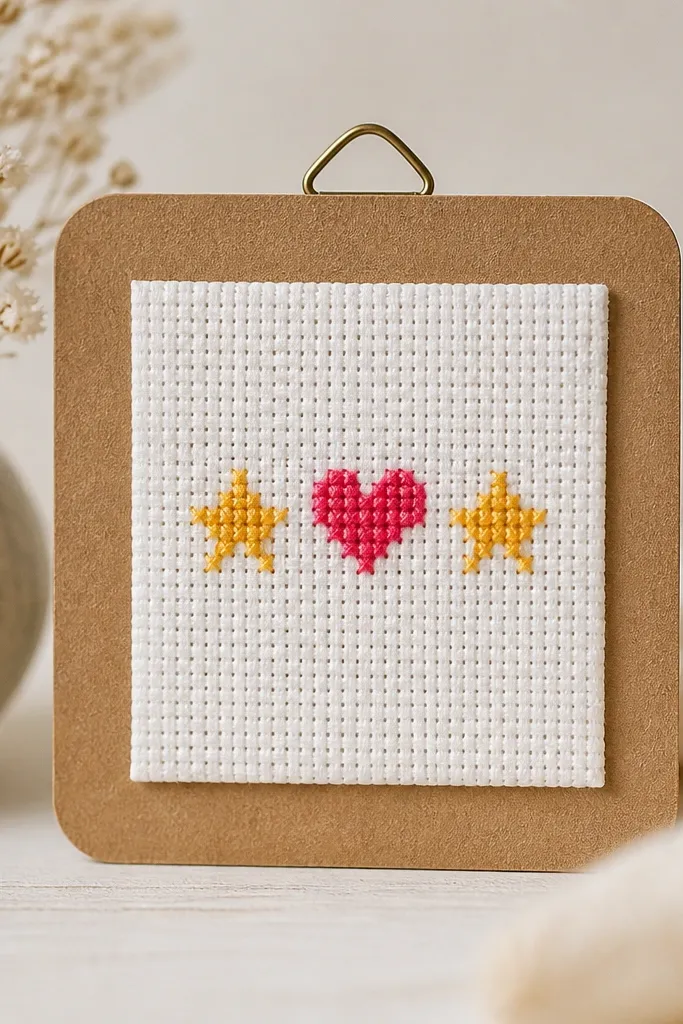
If your friend loves cute, this mini cross-stitch key holder works because it’s small and it has a clear purpose. I mount the finished stitch on a stiff backing so it doesn’t flop, and I add a simple hook so it can hang by the door or on a wall. The look is bright and cozy because cross-stitch threads catch light and create texture. It flatters any decor since you can choose threads that match a room palette — mint, mustard, or dusty rose. Keep the design tiny and centered for a clean, gift-ready finish.
Start with a stamped or counted cross-stitch pattern on evenweave fabric, finishing to a small square like 3 by 3 inches. Trim the fabric back and glue the cross-stitch square onto cardboard cut to size. Fold the edges of fabric under the cardboard and glue down so the back looks tidy. Attach a small metal picture hook or screw-in hook at the top. Finish the front with a thin ribbon strip or a border of fabric for a framed look.
Use two strands of embroidery floss for a slightly bolder stitch that looks good in photos.
Don’t leave raw fabric edges on the back — it makes the whole piece look unfinished.
11. Crinkle Paper Bouquet in a Coffee Can
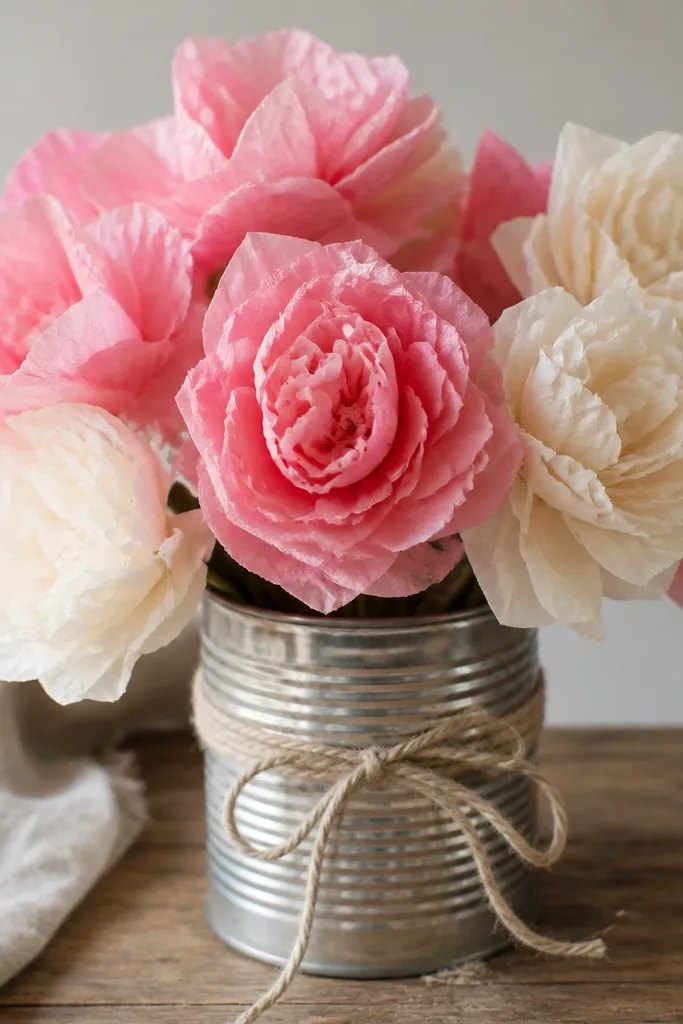
This is a “looks like store-bought” craft because crinkle paper makes petals look full without complex assembly. I use a coffee can because it gives you height and a rustic base, and it hides the messy glue area. The flowers are light, so your BFF can display them on a desk without worrying about breakage. It flatters most rooms because you can match the petal colors to their decor — warm neutrals for minimalists, bold pink and orange for playful spaces. Aesthetic rule: pick two main colors and one accent only.
Cut crinkle tissue paper into petal strips, about 2 inches wide and 6 to 8 inches long, and gather the strip at the bottom with glue. Build each flower by stacking 6 to 10 petals, starting with larger petals at the base and smaller at the top. Twist the top slightly and fluff layers so the flower has a rounded shape. Fill the coffee can with crumpled paper or foam, then glue the stems into place. Wrap the can with a strip of kraft paper or fabric and tie with twine for a clean finish.
Editor's noteUse hot glue for attaching stems, then cover the glue line with extra tissue paper so it looks smooth.
Skip thisAvoid using too many colors — crinkle paper already has visual noise, so extra hues make it look chaotic.
12. Hand-Painted Ceramic Mug Handle Tag
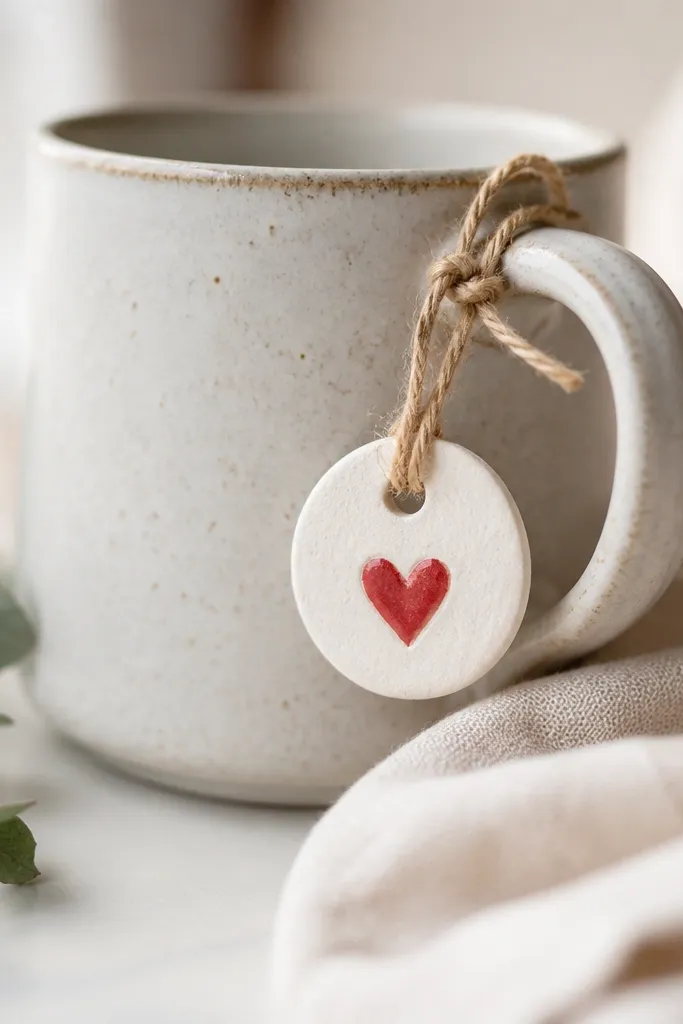
Mug handle tags are small, personal, and they make your gift feel practical instead of decorative only. I make tags from air-dry clay so you don’t need a kiln, then paint them with acrylic and seal. The tag sits on the handle, so it catches attention every time your friend reaches for coffee. It flatters anyone because it works regardless of mug size, and the twine tie adjusts easily. For an aesthetic that looks clean, keep the design minimal — one icon and one color pop.
Roll air-dry clay to about 1/8-inch thickness and cut a tag shape roughly 1.5 by 3 inches. Add a small hole near the top using a needle, then let it dry fully until it’s hard. Sand lightly with fine sandpaper if needed, then paint a simple design with acrylic craft paint. Seal with a clear acrylic sealer that’s safe for decorative items, let it cure, then tie the tag to the mug handle with 6 to 8 inches of twine. Wrap the tag slightly so it doesn’t slide.
Editor's noteUse a fine paint brush and paint one thin layer at a time to avoid streaks.
Skip thisDon’t skip sealing — unsealed clay scuffs fast and the paint dulls.
13. Mini Pom-Pom Garland for Photo Wall
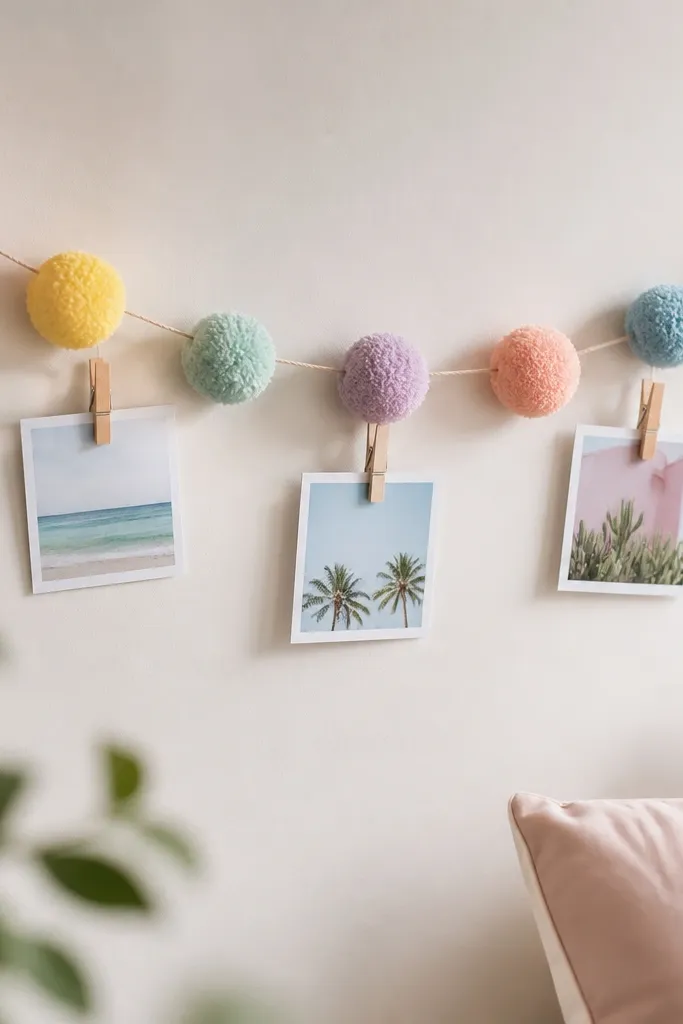
A tiny garland makes a photo wall look styled without buying new decor. Pom-poms add softness and movement, and they’re easy to match to a friend’s color scheme. I keep it short — 3 to 4 feet — so it looks intentional and doesn’t become clutter. It flatters any friend because it’s adjustable: it hangs above a desk, on a dorm mirror, or around a small gallery frame. The design principle here is even sizing and a limited palette so the garland reads as one cohesive piece.
Make pom-poms using yarn in two main colors and one accent, aiming for 10 to 14 pom-poms. I use a pom-pom maker for consistent size, but you can also wrap yarn around cardboard templates. Tie each pom-pom to a thin string using a double knot, spacing them about 3 to 5 inches apart. Attach the string to two pushpins or command hooks, then clip mini photos using mini clothespins. Keep the photo count low (3 to 6) so the garland stays the focus.
Use yarn that matches your friend’s wardrobe colors — you’ll see the connection immediately.
Avoid loose knots — pom-poms slide and the spacing looks messy.
14. Decorative Paper Bag Gift Wrap with Wax Seal Look
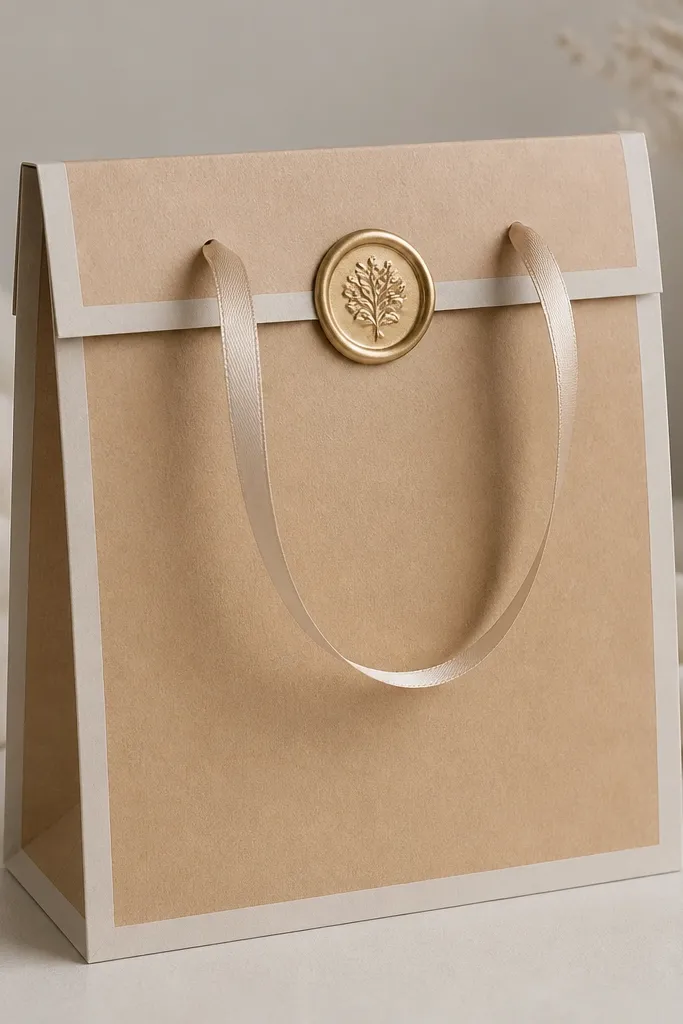
This isn’t just wrapping — it makes any small gift look like a planned presentation. I use kraft paper bags because they’re sturdy and they look good even when you add simple borders. The wax seal look is a visual shortcut: it adds a “formal” vibe without actual candle wax. It flatters any style because you can change the color of the seal and ribbon to match your friend’s aesthetic. The aesthetic principle is clean geometry: straight stripes, centered seal, and tight ribbon loops.
Fold and crease the top of a kraft bag so it stands straight. Add a paper border strip around the center with double-sided tape, cutting the strip so it’s perfectly level. Tie a ribbon through the top handles and pull it snug so the bag doesn’t sag. Place a faux wax seal sticker or homemade wax-seal style circle in the center of the front. Write your friend’s name in a contrasting pen on a small tag and attach it with a short piece of twine.
Editor's noteUse a ruler for the border strip; crooked lines make even expensive gifts look amateur.
Skip thisDon’t use too many embellishments — one seal and one border reads polished.
15. Beaded Phone Charm with Braided Cord
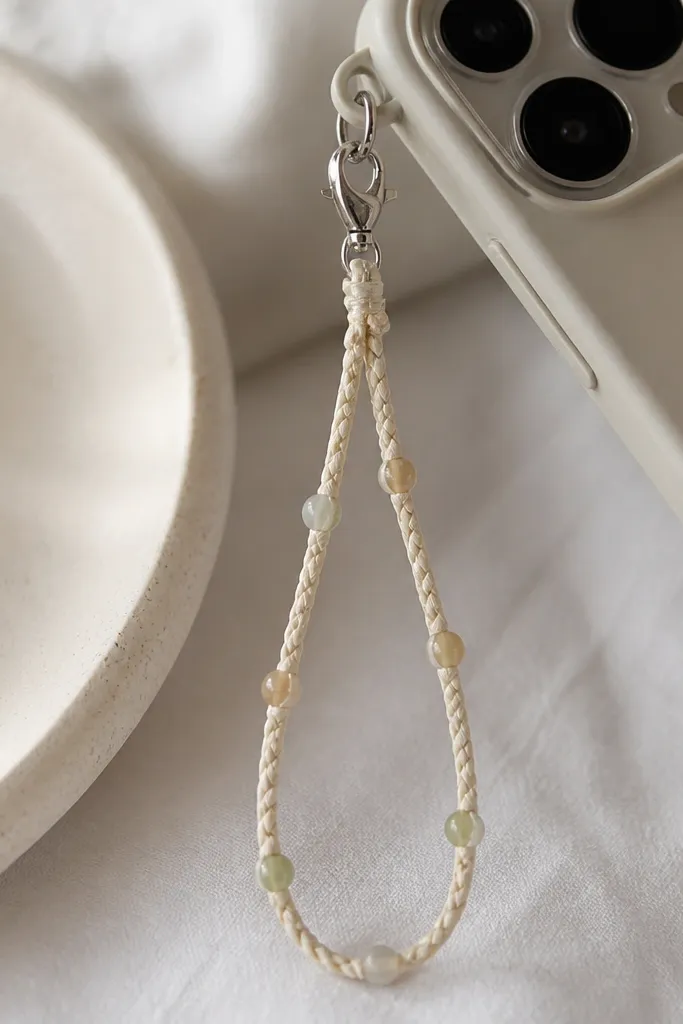
Phone charms are a gift that gets used daily, and beads make them look bright and personal. I build these with braided cord because it lays flat and doesn’t twist like single string. Choose beads that match your friend’s metal tone — silver for cool palettes, gold for warm. It flatters anyone because it doesn’t require sizing — the clasp attaches anywhere. The styling principle is spacing: evenly spaced beads look intentional, messy spacing looks like a leftover craft.
Cut braided cord about 6 inches long, then fold in half and tie a knot at the top loop. Slide beads onto each side of the cord, alternating colors if you want a pattern like light pink, white, light pink. Add a small spacer bead near the bottom so the charm has weight and doesn’t flip. Attach a lobster clasp by looping the cord ends through a jump ring and securing with a tight knot plus a tiny drop of glue. Trim loose ends and burnish slightly so they don’t fray.
Editor's noteUse 4mm beads for a balanced look; smaller beads disappear on camera.
Skip thisAvoid overloading beads — too many makes the charm bulky and it pulls at the phone case.
16. Cricut-Free Stamped T-Shirt Sleeve Wrist Wallet
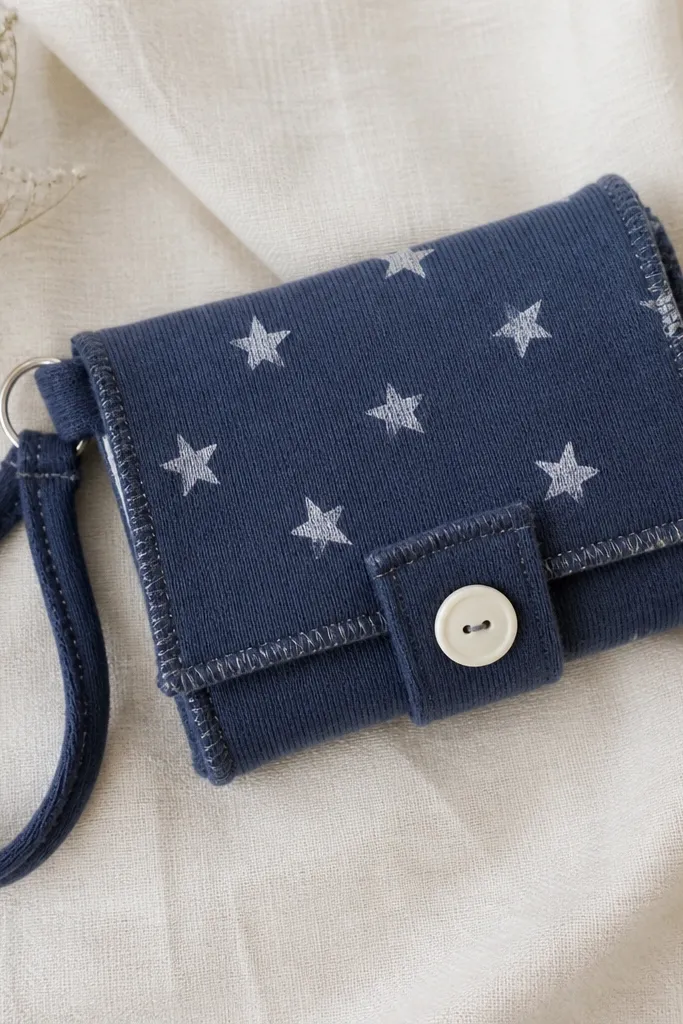
A wrist wallet is a smart BFF gift because it holds essentials for quick errands. I use a T-shirt cuff because it stretches and feels soft against skin, which matters if your friend actually wears it. The stamp pattern looks crisp and gives it a graphic look without needing a cutting machine. It flatters most body types because it’s adjustable and sits snugly on the wrist. The aesthetic principle is a clean closure and a bold stamp — simple, readable, and practical.
Cut a T-shirt cuff section about 5 inches tall and fold it into a tube with right sides together. Stitch along the open side with a stretch stitch or zigzag, then trim seam allowance. Make a small pocket by stitching a horizontal line across the tube at about 2 inches from the bottom. Stamp a simple star or heart pattern on the outside with fabric paint and a foam stamp, then let it dry. Add a small button and elastic loop closure at the top so it closes securely without feeling tight.
Editor's noteTest your stamp on scrap first — fabric paint can bleed, so you want a light, even coat.
Skip thisDon’t use thick paint layers — they crack when the fabric bends.
17. Painted Wooden Spoon Rest with Color Block Heart
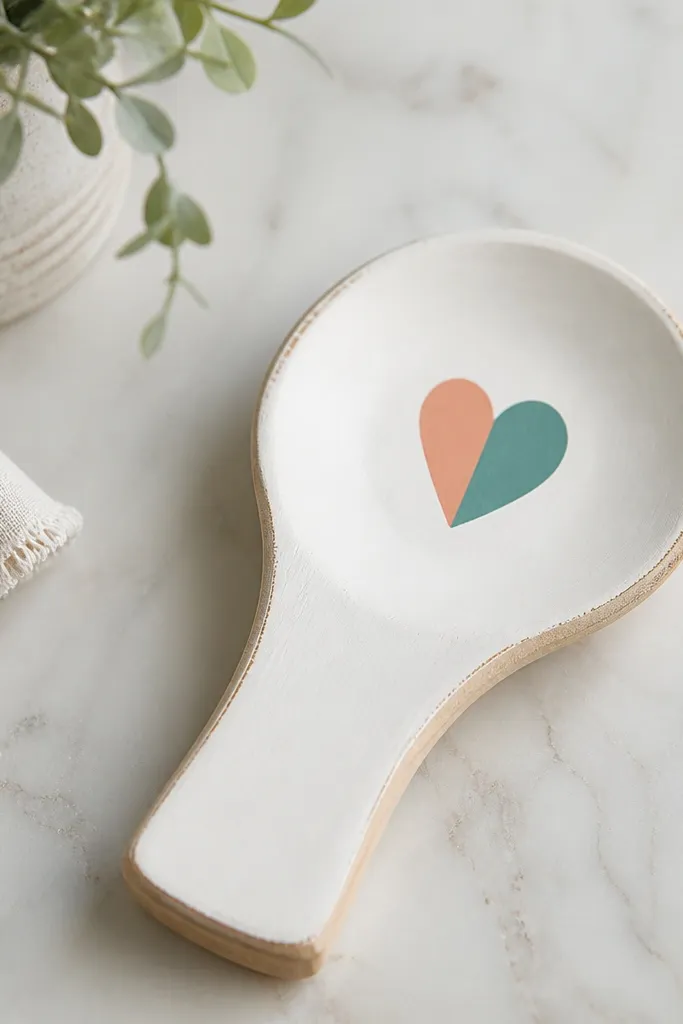
Spoon rests are one of those kitchen gifts people actually use, and painting one makes it look styled instead of generic. I keep the design simple: a color-block heart or a single stripe so it doesn’t chip everywhere. Wood grain helps the piece look charming, even if the paint isn’t perfect. It flatters any kitchen because you can match coral, teal, or mustard to your friend’s dish towels. The aesthetic principle is leaving some wood showing so the paint feels intentional, not like a full coat job.
Sand the spoon rest lightly with 220-grit, then wipe dust off with a damp cloth. Tape a heart shape using painter’s tape or a stencil, then paint the heart in two colors with thin coats. Let dry, remove tape, and touch up edges with a small brush. Seal with a food-safe topcoat if the brand lists it for kitchen use, or use a clear protective sealer meant for tabletop crafts and avoid direct heat contact. Dry fully, then add a small ribbon loop for gifting.
Paint in thin layers; thick paint creates raised edges that chip first.
Avoid painting the bottom edge — the contact with counters makes it wear faster.
18. Thread-Wrapped Letter Ornament for a Door Hook
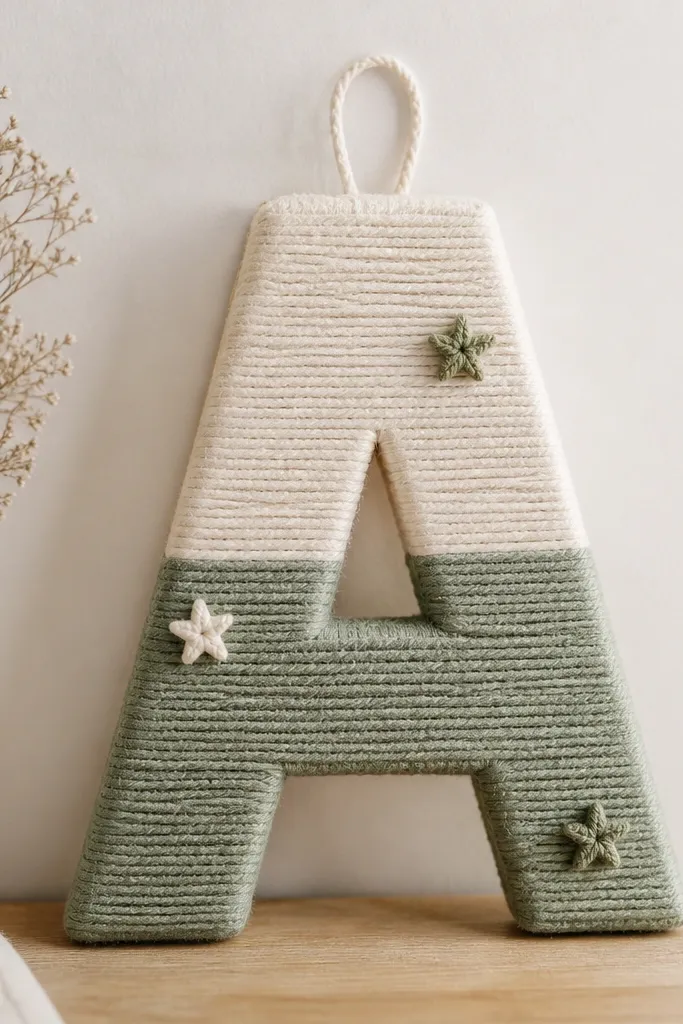
Thread-wrapped letters look cozy and personal without requiring fancy tools. I pick a letter that matches your friend’s first name initial and wrap it in two yarn colors for a soft, layered look. The yarn texture makes it feel handmade even if the letter shape is basic cardboard. It flatters any style because you control the palette, and the letter reads clearly from across a room. The aesthetic principle is tight wrapping — gaps make it look unfinished.
Cut a cardboard letter template and trace it onto cardboard so you have a front and back piece. Glue the two pieces together, then cut a small slit at the top for a hanging loop. Wrap yarn around the letter starting from the bottom edge, gluing every few inches as you go. Keep tension firm but not stretched, and overlap yarn slightly so there are no gaps. Add tiny accents like mini felt stars or a small ribbon bow at the bottom, then hang it on a door hook or command hook.
Use hot glue for the first few anchor wraps, then switch to fabric glue for the rest to avoid lumps.
Don’t rush the wrapping — loose yarn leaves visible cardboard gaps.
19. Lemonade Stand Label Jar for Bath Salts
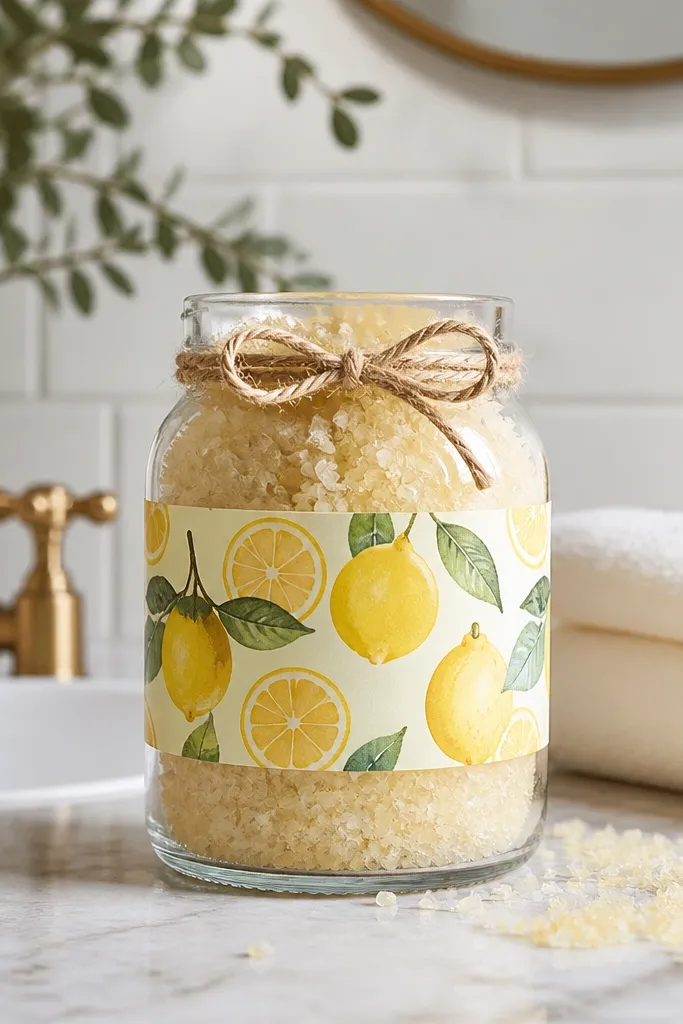
This gift looks like a mini spa because the label is bright and the salts are a clean, single color. I make bath salts in a pale yellow base and keep the label in lemon and cream, then add a simple “soak time” line. It flatters anyone because it’s not dependent on clothing size, and the scent is the personalization. The aesthetic principle is clean typography and a tidy jar fill — no messy spills on the rim. If your BFF likes self-care but won’t buy fancy products, this is the sweet spot.
Mix bath salts with Epsom salt and a fine base like sea salt, then add a few drops of lemon-scented essential oil or fragrance oil and stir well. Color lightly with cosmetic-safe colorant so it stays pale yellow, not neon. Pour into a clean jar and press the top gently so it settles. Cut a label card, wrap it around the jar with double-sided tape, and add a twine bow. Seal the lid and wipe the jar rim with a damp cloth so the label looks crisp.
Editor's noteUse a fine sieve when mixing so the salts look uniform and don’t clump.
Skip thisAvoid sticky residue on the rim — it makes the jar look used before it’s even gifted.
20. Painted Pegboard Mini Organizer with Scrap Vinyl Tabs
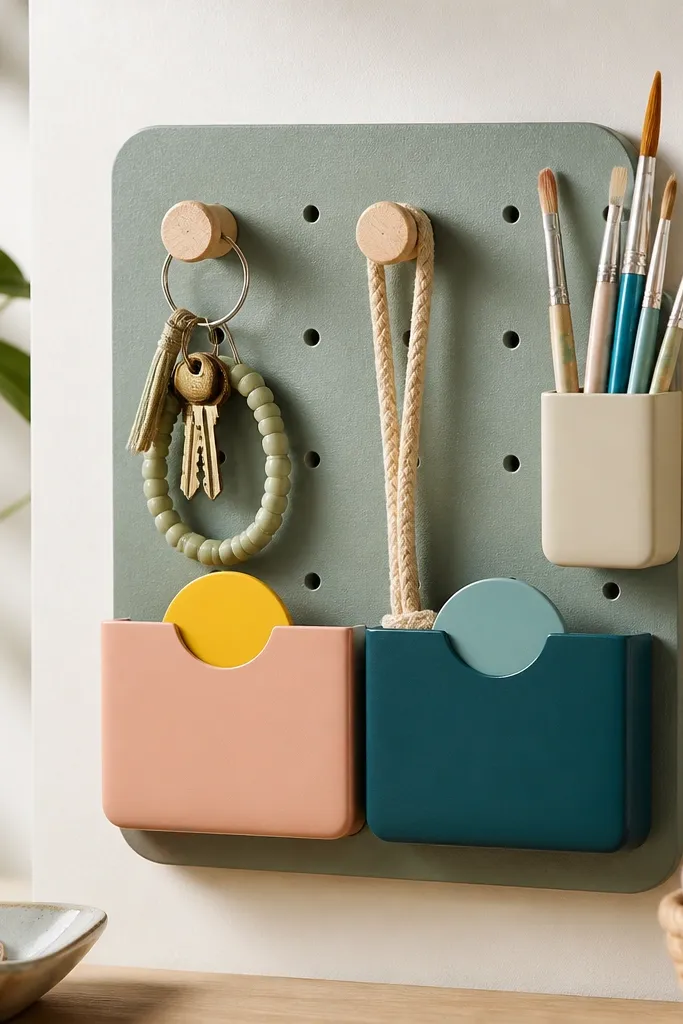
This is a decor-meets-utility gift that makes your friend feel supported, not just entertained. I use a mini pegboard panel because it looks organized immediately, and the hooks let your friend hang what they actually use. Paint the board in a soft matte color like sage or warm white, then add vinyl tabs for labels. It flatters different styles because the pegboard is neutral and the tabs give you personalization. The aesthetic principle is order: straight rows, consistent spacing, and labels that are short.
Cut pegboard to a small size like 8 by 10 inches and sand the edges. Paint with matte craft paint, then let it cure fully so the surface doesn’t feel tacky. Install two small hooks and one mini shelf or cup holder using screws. Make vinyl labels from scrap vinyl or sticker vinyl, then place them neatly under each hook position. Finish by adding a small ribbon loop at the top so it hangs like a framed piece rather than a random board.
Editor's noteMeasure spacing with a ruler before you drill — one crooked hook makes the whole piece look off.
Skip thisDon’t skip edge sanding — sharp pegboard edges catch fingers and make it feel cheap.



