

1. Coordinate Love Jar Labels
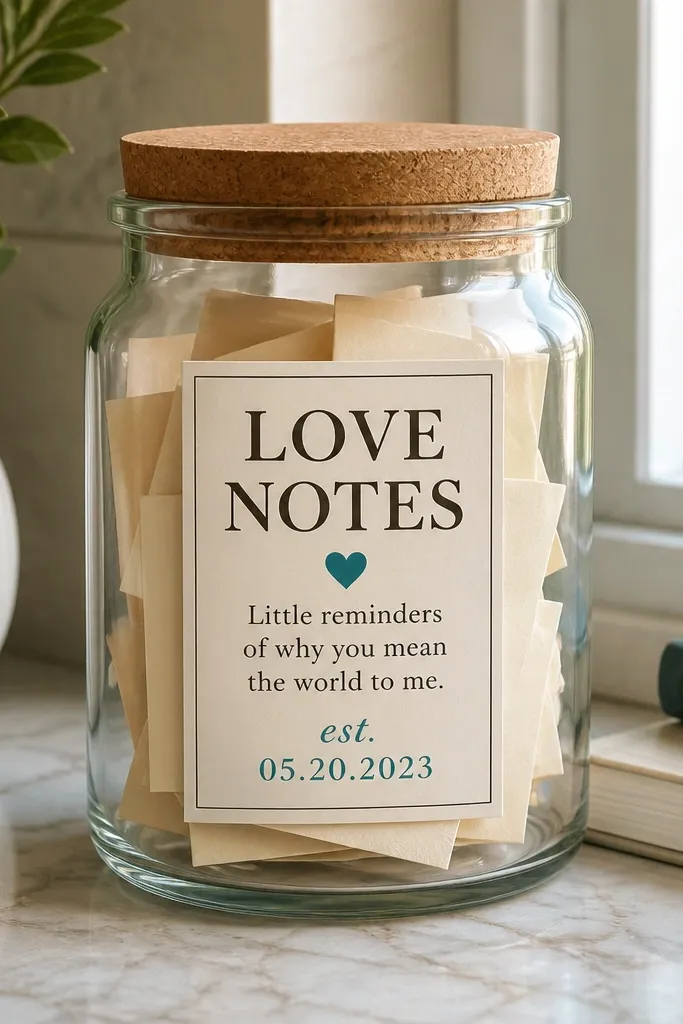
This is the kind of gift that looks thoughtful even when you’re mailing it. Use a jar because it reads instantly as “keepsake,” and the cork lid makes it feel special. I like cream cardstock (not bright white) with black ink, then one accent color — usually deep teal or warm terracotta — for the date line. For body/skin tone styling: this gift doesn’t depend on skin tones, but it does look good next to his hands because the label stays high-contrast and easy to read. It flatters his desk setup too, especially if he has darker wood or a black keyboard. The styling principle is contrast and clean edges — one label, centered, no busy collage.
Start by printing the coordinates and date on cream cardstock at about 4.5 inches tall so it wraps neatly around a standard 16 oz jar. Cut a strip that covers the jar width with a 1/4 inch overlap, then wrap it and tape the overlap on the inside. Fold 20-30 paper strips into thirds and write one short memory per strip (one sentence each), then tuck them into the jar. Seal the label by brushing a thin layer of matte Mod Podge over the outside or by pressing clear packing tape over the label edges only. Finish with the cork lid and a small tag tied to the neck if you want extra charm.
Editor's noteWrite the strips in two ink colors — black for the main line and a colored pen for one keyword — it makes the jar feel “designed.”
Skip thisAvoid glitter pens on the label edges; they flake in shipping and make the jar look messy.
2. Photo Strip Desk Frame
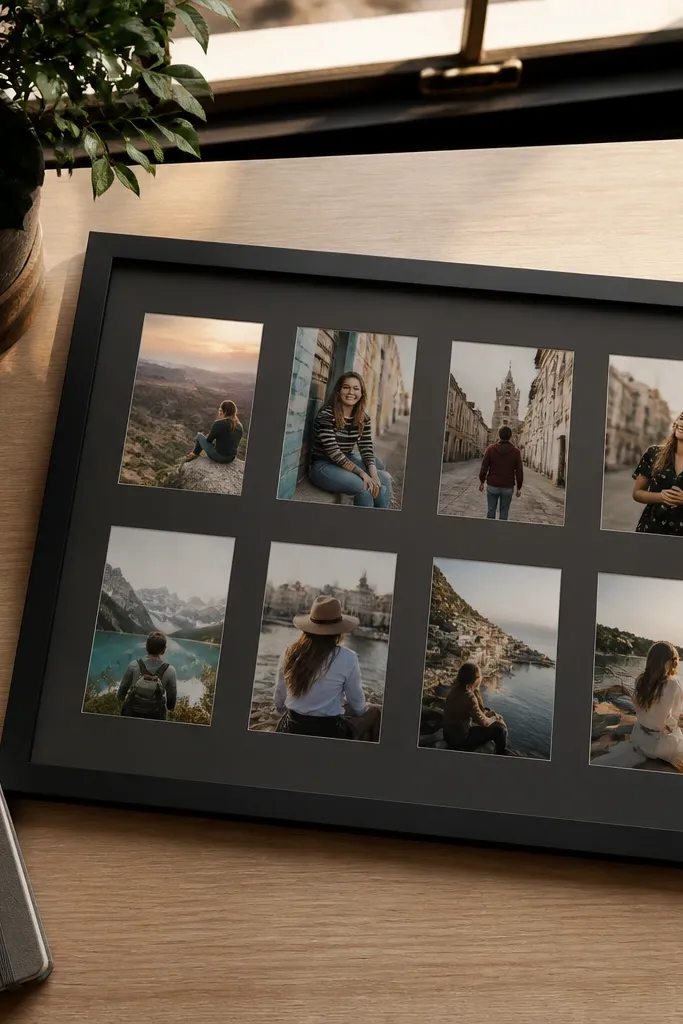
A desk frame works because he can see it every day, even across cities. I use matte black foam board because it hides glue marks and makes photos pop without looking shiny. Choose 6-8 photos and crop them the same way — close-ups for one set, wider shots for another — but keep them consistent in size. This gift looks best with warm-toned photos (golden hour or indoor lamp light) because matte board doesn’t compete with skin highlights. The styling principle is repetition: same photo size, same spacing, same label style.
Cut a piece of foam board to 8 x 10 inches. Print photos into strips of 2 x 3 inches (or crop manually) and dry-fit them with even spacing of about 1/2 inch. Add tiny labels above each strip on white cardstock using a simple font or hand-lettered block style. Tape or glue the photos, then seal the entire surface with a thin coat of matte Mod Podge so fingerprints don’t show. Put a clear stand behind it (I use folded cardboard or a small acrylic easel) and keep the front edge clean with a strip of clear tape.
Editor's noteIf you’re mailing it, skip the stand and instead pack the frame flat in a rigid mailer.
Skip thisAvoid using glossy photo paper with a shiny board; the glare makes the label text hard to read.
3. Song Lyric Keychain with Laminated Label
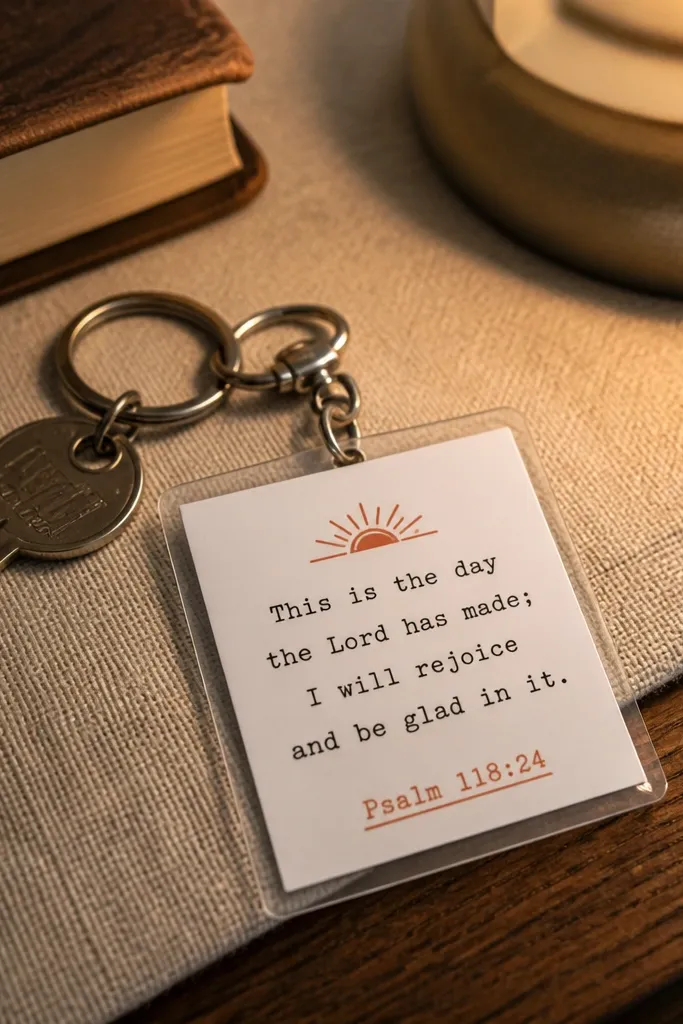
This is my fastest “quick easy diy gifts for boyfriend” when I need something small but personal. A laminated lyric label stays readable and survives daily key jingle. I print the lyric on thin white sticker paper or regular paper, then laminate it with clear adhesive laminate sheets. For styling: use one accent color only, like a red underline under one line, so it doesn’t look like a random quote. It flatters his everyday carry because the design stays crisp against dark jackets and jeans. The principle is legibility: thick lettering, high contrast, and rounded edges to prevent peeling.
Print the lyric line on sticker paper or regular paper, then cut a rectangle about 1.25 x 2.5 inches. Round the corners with scissors or a corner punch. Punch a hole at the top center, then laminate the piece by covering the front and back with clear adhesive laminate so the edges are sealed. Attach a jump ring through the hole and clip it onto a split ring keychain. If he likes subtle style, choose a matte laminate; if he likes flashy, choose glossy.
Underline just one word with a colored pen. One small color pop looks intentional in person.
Avoid printing tiny text; keychains get rubbed and the smaller the font, the faster it looks blurry.
4. Refillable Hot Chocolate Love Kit
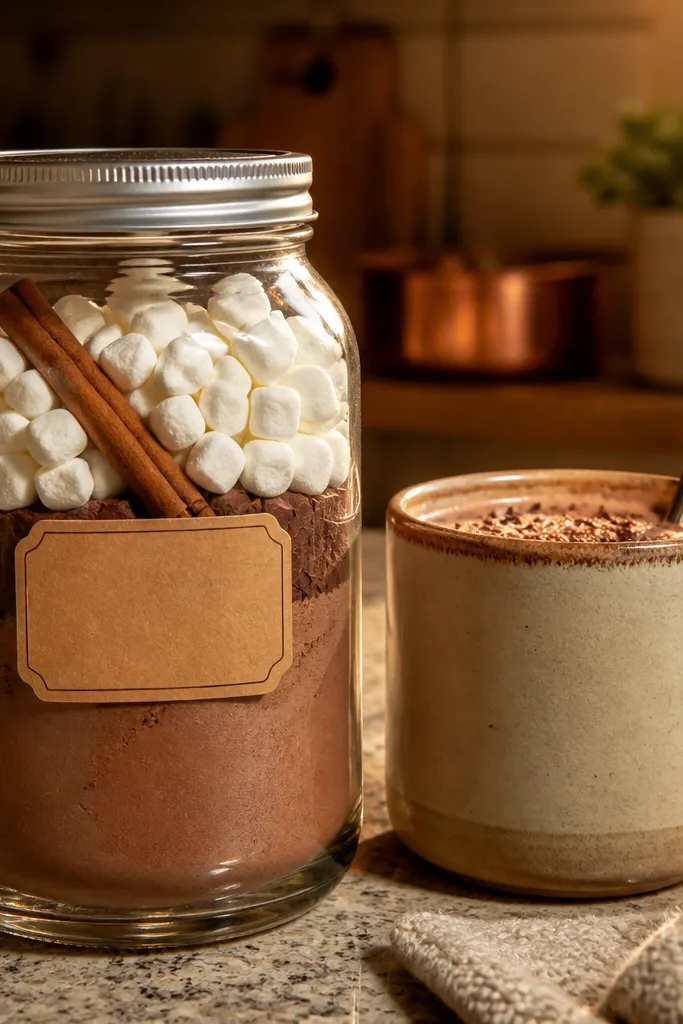
If he’s the type who likes cozy drinks, this gift feels like a hug that he can use repeatedly. I layer ingredients in a jar so it looks good even before he makes anything. Use cocoa mix, mini marshmallows, and a cinnamon stick or two for the “wow” moment when he opens it. Kraft paper labels with black marker look grounded and masculine on a pantry shelf. The styling principle is visible layers and one clean label — no scattered stickers.
Choose a 16-oz jar with straight sides so layers look even. Add 1/2 cup cocoa mix, then a thin layer of brown sugar or powdered creamer, then top with mini marshmallows. Add a cinnamon stick tucked behind the label side so it peeks out. Make a kraft label that says “Add to 1 mug of hot milk” and include a simple step. Seal the label with packing tape over the edges and tie a kraft paper ribbon around the neck.
Write dosing on the label with a measuring spoon reference: “2 tbsp mix per mug.”
Avoid using wet-ingredient toppings like flavored syrups; they separate and the jar looks uneven fast.
5. Custom Map Scratch-Off Notes
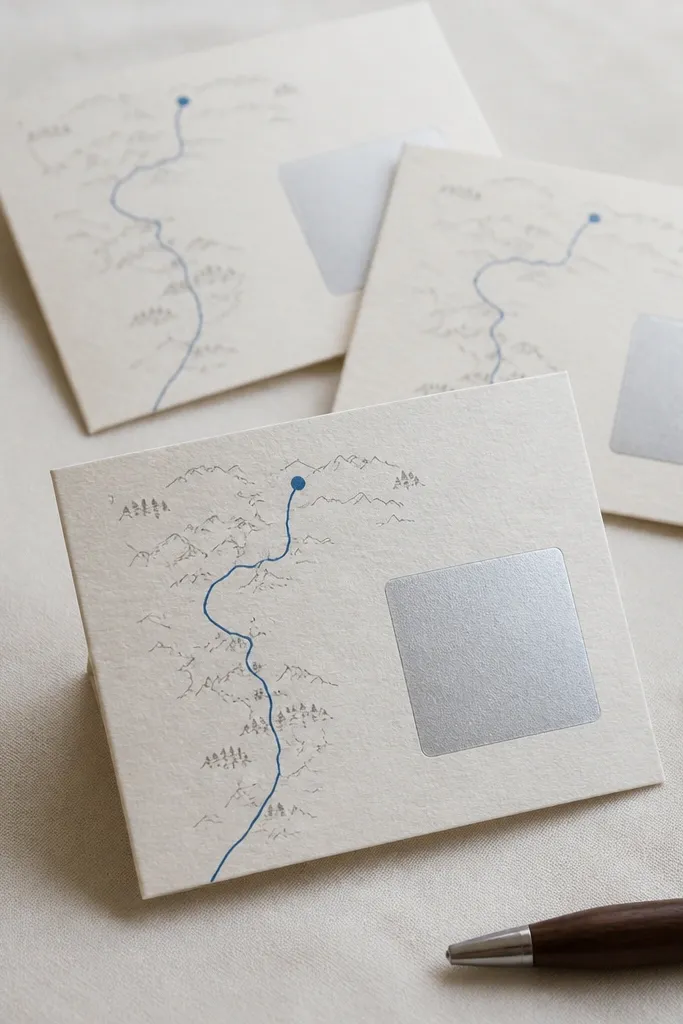
This one is fun because it feels like a game, and games keep long-distance energy alive. I use a simple map graphic (straight line route) plus a scratch-off message on each card. The scratch-off layer makes the surprise feel real even when you’re apart. For visuals, keep the palette to two colors: blue for the route and charcoal for text. It looks great against his desk and doesn’t clash with his existing stuff. The styling principle is clean layout: map background, route line, then a centered scratch block.
Cut 6 mini cards from 110 lb cardstock, about 3.5 x 5 inches. Print or hand-draw a simple map line and add his two city names in small type at the bottom. Cover the message area with scratch-off coating sheets (the kind used for raffle scratch cards) and let it cure. Write one short message per card under the scratch layer on the back side or on a separate sticker you place under the scratch sheet. Pack them in a small envelope with a note that says “Scratch one after work.”
Use short messages (3-8 words) so the surprise feels snappy when he scratches it.
Avoid full-bleed scratch areas; the edges lift and the card looks cheap after a few scratches.
6. Painted Mason Jar Candle Holder (Unscented)
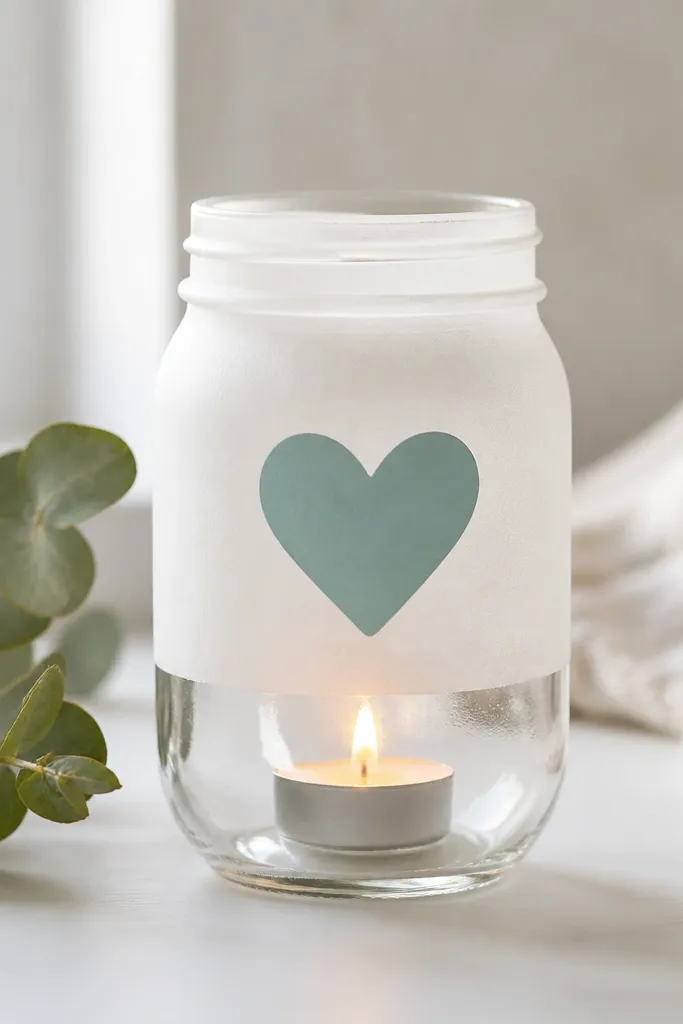
This gift looks cozy without needing a fancy candle. I make it unscented with a battery tea light because it’s safer for shipping and it still gives that warm glow. Frosted white paint with one stencil shape in muted teal or deep navy looks classy and not childish. It flatters darker rooms and looks great on a bedside table with black frames or neutral bedding. The styling principle is controlled paint: thin coats and clean stencil edges.
Clean the jar with rubbing alcohol so paint sticks. Tape off a line where you want the frosted area (about the top third), then sponge on frosted glass paint in two thin coats. Let it dry fully between coats. Use a stencil to paint a single heart or initials in teal, keeping the stencil centered. Place a battery tea light inside and optionally add a strip of twine around the neck with a small tag.
Editor's noteIf you want a stronger look, add a thin gold paint line under the teal stencil — just one line.
Skip thisAvoid thick paint layers; they crack and the jar looks uneven.
7. T-Shirt to Bandana Photo Holder
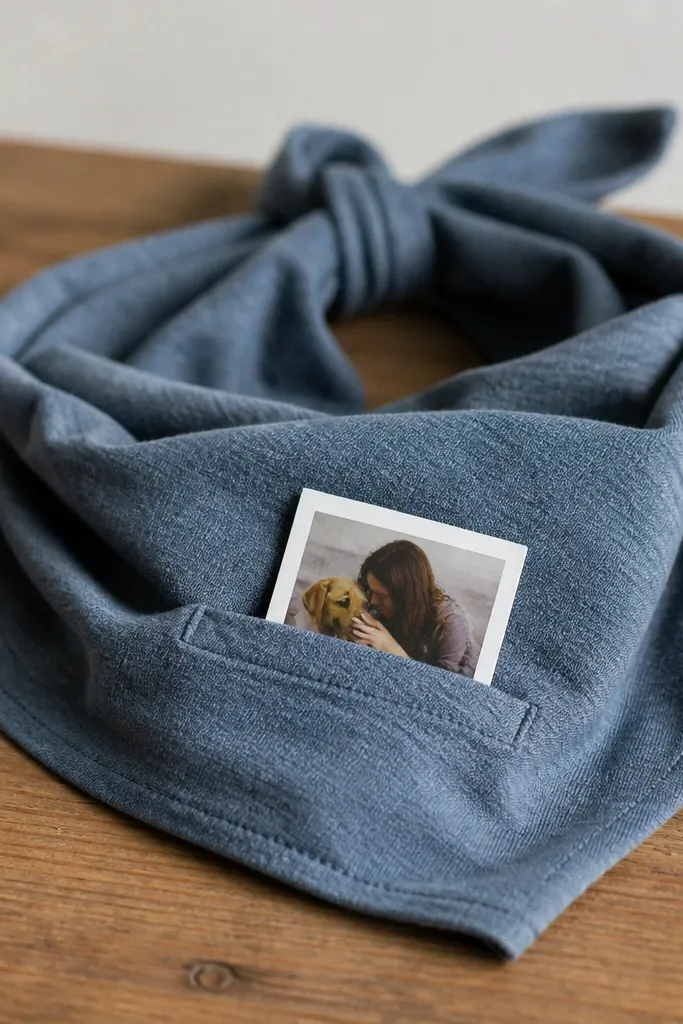
This is a sentimental gift that also works as a practical photo holder. I turned old cotton into a bandana because it’s comfortable and it looks lived-in in a good way. Choose a t-shirt in his favorite color, or one that matches his car interior or hoodie color. The pocket holds a small 2 x 3 photo so he can swap it seasonally. For styling, keep the bandana shape clean and the pocket stitched on at a corner so it looks intentional. The principle is repurposing with structure — fabric softness plus a precise pocket.
Cut a square from the t-shirt fabric, about 18 x 18 inches, then fold into a triangle bandana shape. Create a small pocket by cutting a 3.5 x 4.5 inch rectangle of matching fabric and sewing it to one corner, leaving the top open. Press the pocket edge with a 1/4 inch fold and stitch it down so it doesn’t fray. Insert a printed photo on thicker paper and trim it to fit the pocket. Tie the bandana around his wrist or neck and tuck the photo in before giving it.
Use a photo print on matte paper so it doesn’t glare in indoor light.
Avoid stretchy knits for the main bandana if you want sharp folds; it turns saggy fast.
8. Desk Organizer Photo Coaster Set
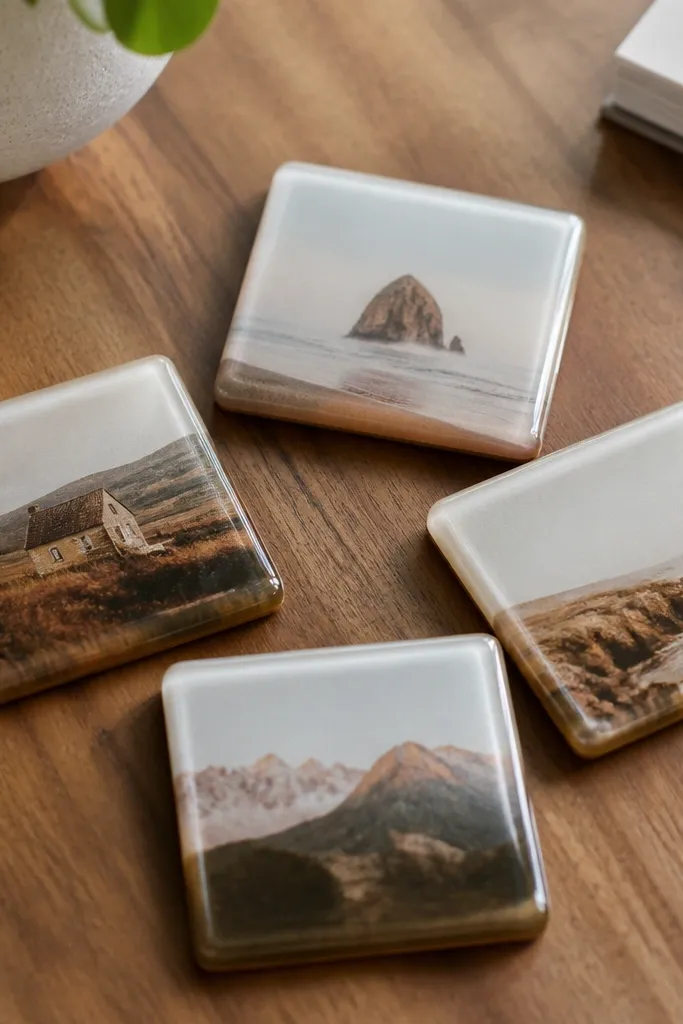
Coasters are one of those gifts that he uses without thinking, so the personal part gets repeated exposure. I make four matching coasters with tiny photos — close-ups from your best moments, not full-face selfies unless the crop is flattering. Use resin or a thick Mod Podge layer so the surface wipes clean. For styling, keep the background consistent: either all white paper behind the photos or all light gray. It looks good next to a black laptop and a neutral desk mat. The principle is uniform size and a glossy seal that makes the photos look crisp.
Buy cork coasters or felt-backed coasters, 4 x 4 inches each. Print four photos and crop them to fit the center area, usually about 2.25 x 2.25 inches. Glue the photo to the top with Mod Podge, smooth out bubbles, then let it dry. Apply a second coat and then a final thin layer, making sure the edges get sealed. After curing, wipe the top with a dry cloth and stack them to check for tackiness.
Write a tiny date on the back of each coaster in pencil so you remember which day each photo is from.
Avoid skipping the edge seal; moisture creeps in and the photo starts to lift.
9. Glow Nightstand Note Box
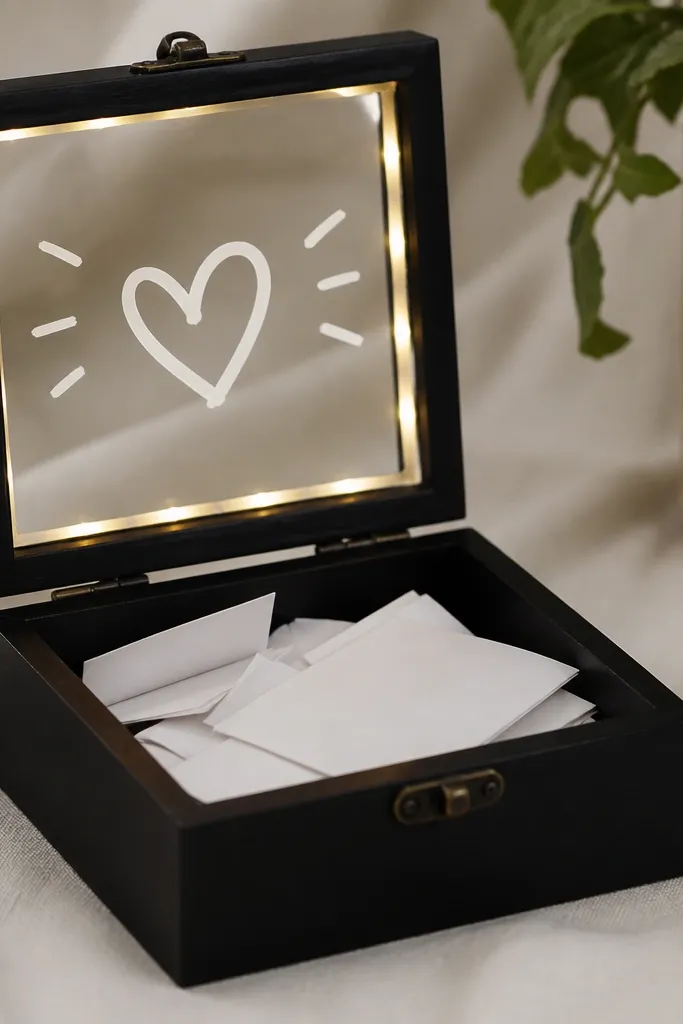
This gift is for the late-night boyfriend — the one who reads texts slowly and likes a calm vibe. I use a small wooden box with a sliding lid so it looks like a real keepsake, not a craft bin. Paint the box black, then write one phrase across the lid in white paint pen. Add an LED strip inside with warm white light so the notes look cozy when he opens it. It looks great in bedrooms with dark bedding or warm lamps. The principle is controlled glow: the light should come from inside, not from messy cables.
Paint the box with matte black acrylic and let it cure overnight. Cut small note strips and write one “for you tonight” message per slip, 12-18 total. Place a warm white LED strip along the inside bottom edge and tape the wire path so it doesn’t snag. Cut a clear plastic window panel from a thin clear folder sheet and attach it under the lid if the box doesn’t already have one. Write the message on the inside of the window area with white paint pen so it glows nicely.
Editor's noteUse warm white LEDs, not cool white. Cool white makes skin tones look gray in photos.
Skip thisAvoid cheap LEDs with flicker; the box looks unfinished when the light pulses.
10. Torn Paper Heart Wall Hanging
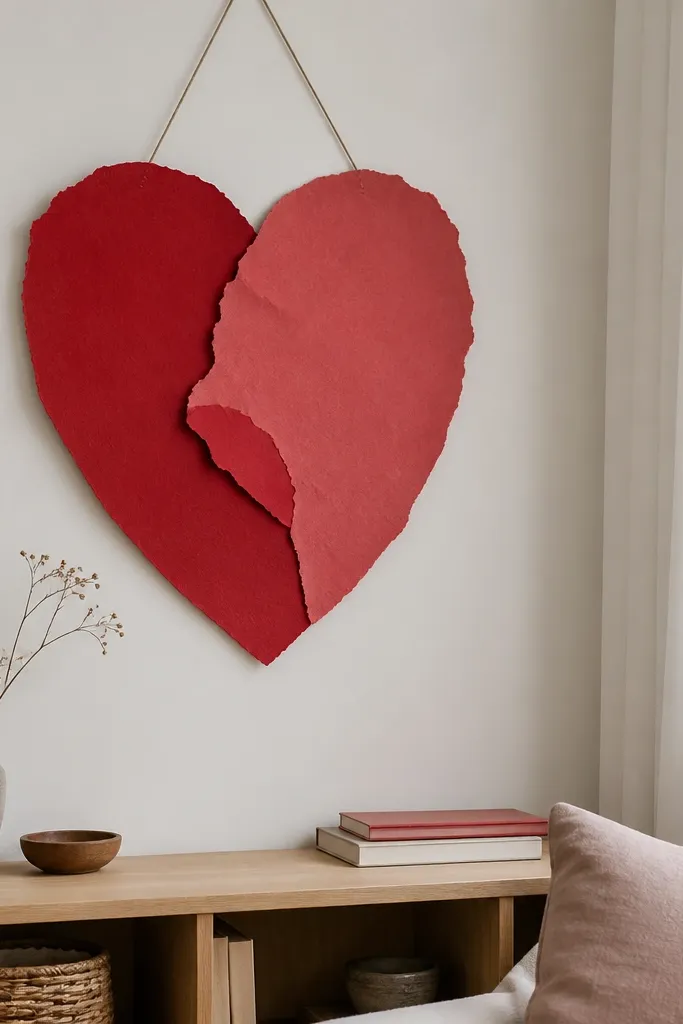
A wall hanging is a long-distance flex because it changes his space even if you can’t be there. I build a heart using torn paper because the edges look handmade and soft in a way clean paper can’t. Use off-white background with two reds only — one deep and one blush — so it stays cohesive. It flatters rooms with neutral walls and warm wood frames. The principle is texture: torn edges catch light and look good from across the room.
Stretch an 8-inch embroidery hoop with thin beige fabric or cardstock as the base. Trace a heart shape on the base lightly with pencil. Tear paper strips about 1/2 inch wide and layer them inside the heart shape, starting from the bottom so pieces overlap. Glue with a thin layer of white glue diluted slightly with water so it doesn’t warp the paper. Once dry, hang it with a simple ribbon loop through the hoop.
Use a craft knife for the straight background edges; it makes the hoop look cleaner.
Avoid using too many colors; mixed scraps make it look like a school project.
11. Custom Hoodie Lint Roller Cover
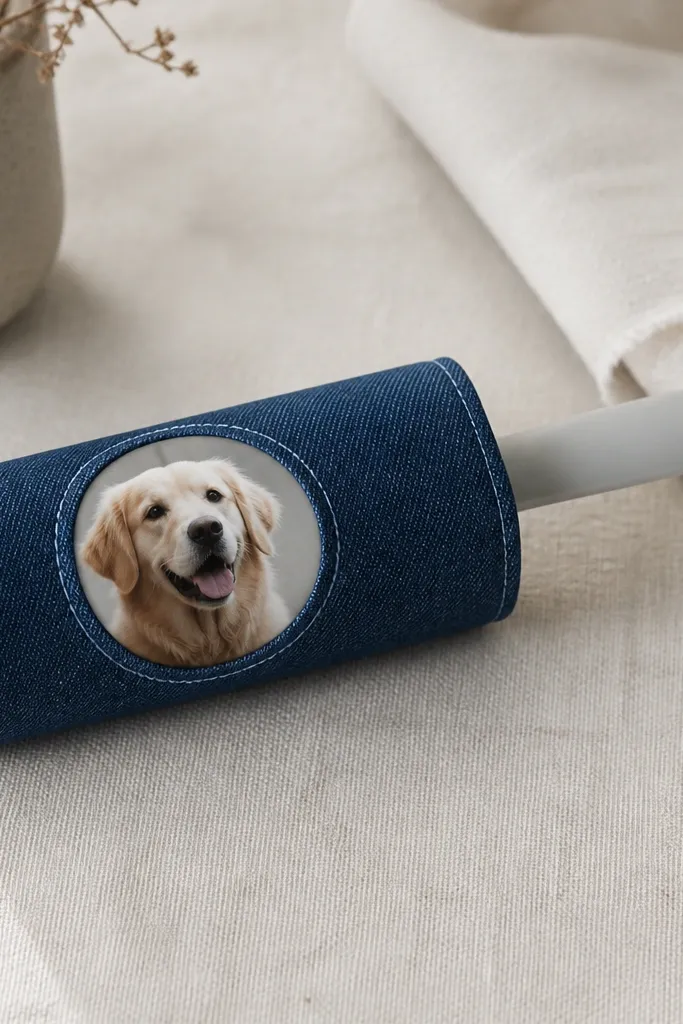
This one is weirdly practical, which is why it lands. If your boyfriend deals with pet hair or lint on his clothes, he’ll use it right away. I sew a cover from denim or canvas so it feels sturdy and masculine, then add a small patch with a photo circle or a simple initial design. It looks good on his laundry room shelf because the colors match his wardrobe. The principle is function with one personal detail, not a full decorative overhaul.
Measure the lint roller body and add 1/2 inch to the circumference for seam allowance, then cut a rectangle of canvas. Sew the side seam with matching thread, then hem the bottom so it fits snugly. Create a top edge casing for a thin elastic band if the roller has a grip section; otherwise, just fold and stitch. Add a patch on the front: print a 1.5-inch photo circle, glue it onto a scrap of felt, then stitch around the edge. Slide the cover onto the roller and test the movement before finishing the elastic.
Use iron-on interfacing on the patch backing so it doesn’t sag over time.
Avoid stretchy knit fabric for the cover; lint rollers tug and knits stretch out fast.
12. Vinyl Record Coaster Set with Handwritten Credits
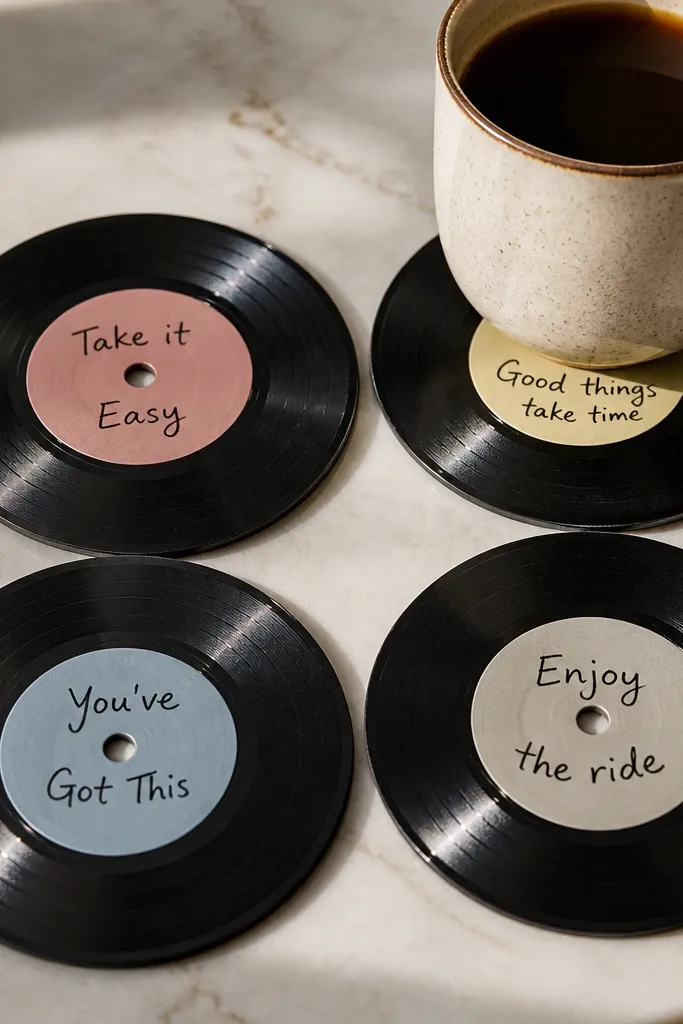
If he’s into music, vinyl coasters feel personal without being cheesy. I cut vinyl records into coaster circles and seal the edges with a thin layer of clear acrylic so they don’t scratch his table. The center label area is already a design — I add handwritten credits like “Side A: us” and a date. This gift looks best with bold contrast: black vinyl plus white paint pen. The principle is using the original material as the design base.
Buy blank vinyl record blanks or use old records you don’t mind cutting. Mark coaster circles using a template the size of a glass coaster, then cut carefully and smooth the edge with fine sandpaper. Clean dust with rubbing alcohol. Write messages in white paint pen on the center label area, then seal with a clear acrylic top coat in two thin layers. Add felt feet if you want extra table protection. Let cure fully before stacking.
Editor's noteWrite the date small at the bottom of each coaster so it looks like liner notes.
Skip thisAvoid leaving raw edges; vinyl chips can scratch and look rough.
13. Clear Vinyl Passport-Style Photo Sleeve
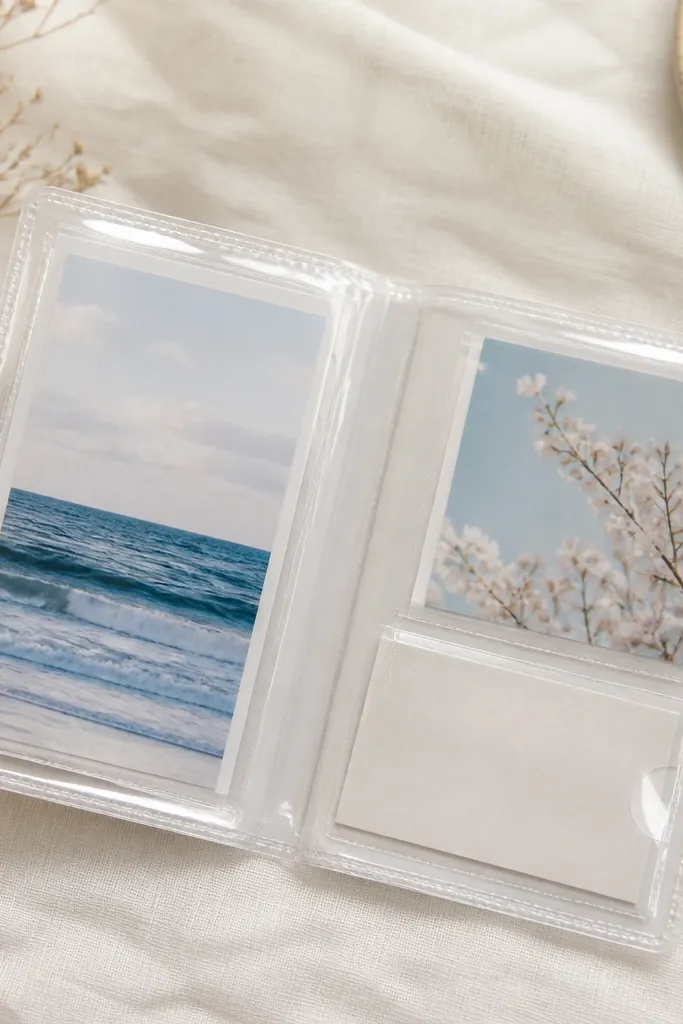
This is a smart gift for long-distance because it protects photos and makes them feel like a collectible. I use clear vinyl so it looks clean and modern, and I add a simple “travel log” layout with dates. It flatters anyone’s style because it looks like an accessory, not a craft. Use warm tones inside — sepia photos or slightly golden filters — because clear vinyl can look stark with cool colors. The principle is protection plus structure: clear cover, neat pockets, and photo windows with consistent spacing.
Cut clear vinyl sheets to about 7 x 10 inches for the cover. Create a spine by folding the vinyl and heat-sealing or using double-sided seam tape. Add two photo windows by cutting openings in the front panel and backing them with thin cardstock frames. Stitch if you have a machine that can handle vinyl; otherwise, use heat-seal vinyl tape along the edges. Add a small interior pocket for a handwritten note by sealing three sides and leaving the top open. Insert photos and a folded letter, then seal the top pocket with a small Velcro dot so it opens and closes.
Editor's noteUse a paper frame behind each photo window to stop images from looking flat through the vinyl.
Skip thisAvoid messy seam tape; uneven edges make the whole sleeve look homemade in a bad way.
14. Mini Scrapbook Page in a Trading Card Holder
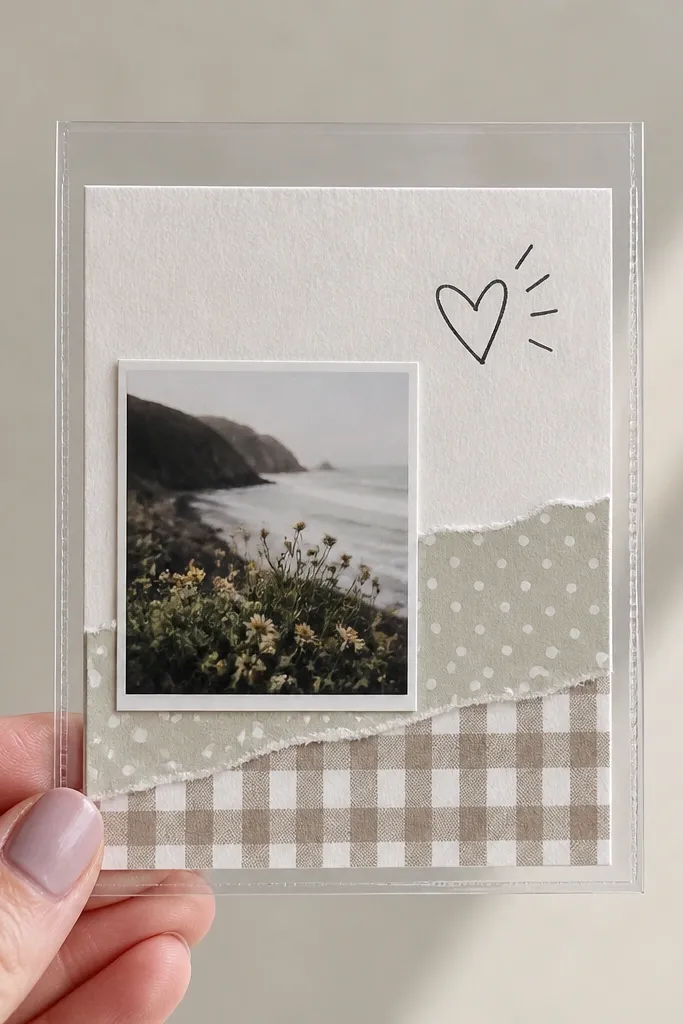
This is one of the easiest quick easy diy gifts for boyfriend because it’s small, flat, and hard to mess up. Trading card holders keep everything protected, so your photos don’t get bent in a mailbox. I make one mini page per moment: a photo, a short caption, and two decorative strips. It looks great because the page stays centered and framed by the plastic sleeve. The principle is a clean grid: photo on one side, text on the other, consistent margins.
Cut a mini page from 110 lb cardstock, about 3.5 x 4.5 inches, to fit most card sleeves. Add a photo strip (about 1.5 x 2 inches) on the left, then add a handwritten message on the right using a fine-tip paint pen. Glue two patterned paper strips behind the photo edge for a layered look. Put the page into a clear trading card sleeve and trim any overhang so it doesn’t catch. If you’re mailing, place the sleeved page in a rigid mailer so it doesn’t crease.
Write the caption in all caps for one line and keep it under 8 words.
Avoid thick glue blobs near the edges; they show through the plastic and make it look lumpy.
15. Embroidered Initial Socks Repair Kit Tag
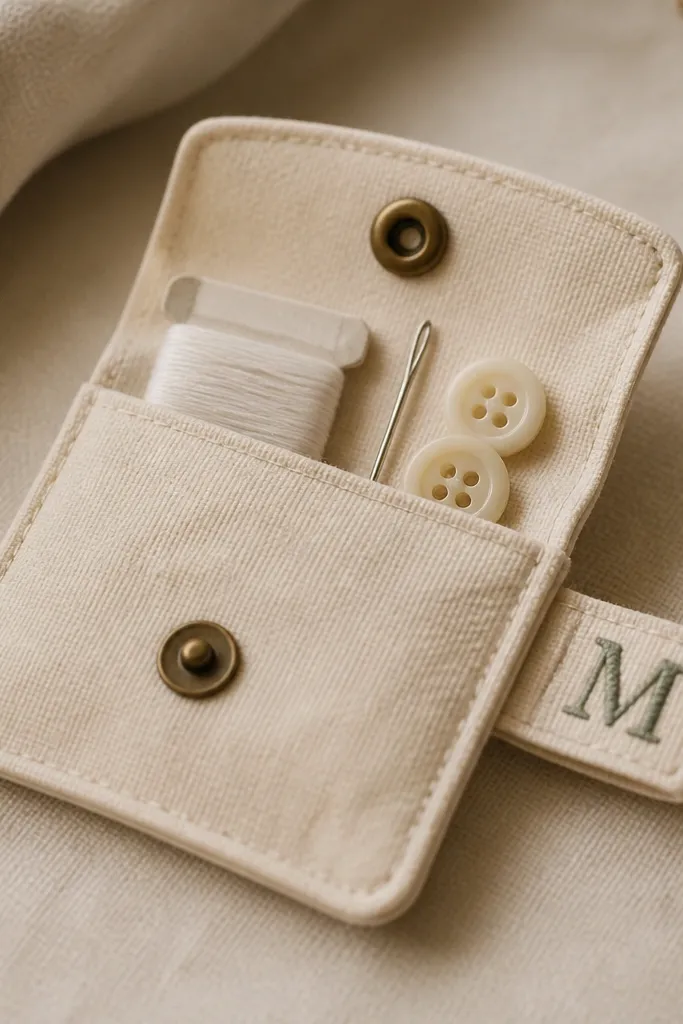
This gift is the opposite of “cute but useless.” It helps him fix a small problem fast, and the tag makes it personal. I sew a fabric tag with his initial using simple backstitch so it looks clean, not messy. Put a needle, matching thread, a small spool, and two spare buttons in a small zip pouch. Choose thread color that matches a jacket or hoodie in his wardrobe, like charcoal, navy, or forest green. The principle is functional packaging with one embroidered detail.
Cut a fabric rectangle tag, about 2 x 3 inches, and fold the edges under so it looks finished. Embroider one initial centered with backstitch using a single thread color. Stitch around the tag edges to secure it. Place a needle, a small packet of thread, and two buttons into a mini zip pouch. Attach the pouch to the tag with a short piece of ribbon or a small jump ring. Write “For quick fixes” on the pouch with a fabric marker so it stays readable.
Match the thread to the dominant color of his jeans or jacket, not the shoes.
Avoid mismatched thread colors on the tag; it makes the kit look like leftover supplies.



