

1. Galaxy Photo Coaster Set with Faux Resin Shine
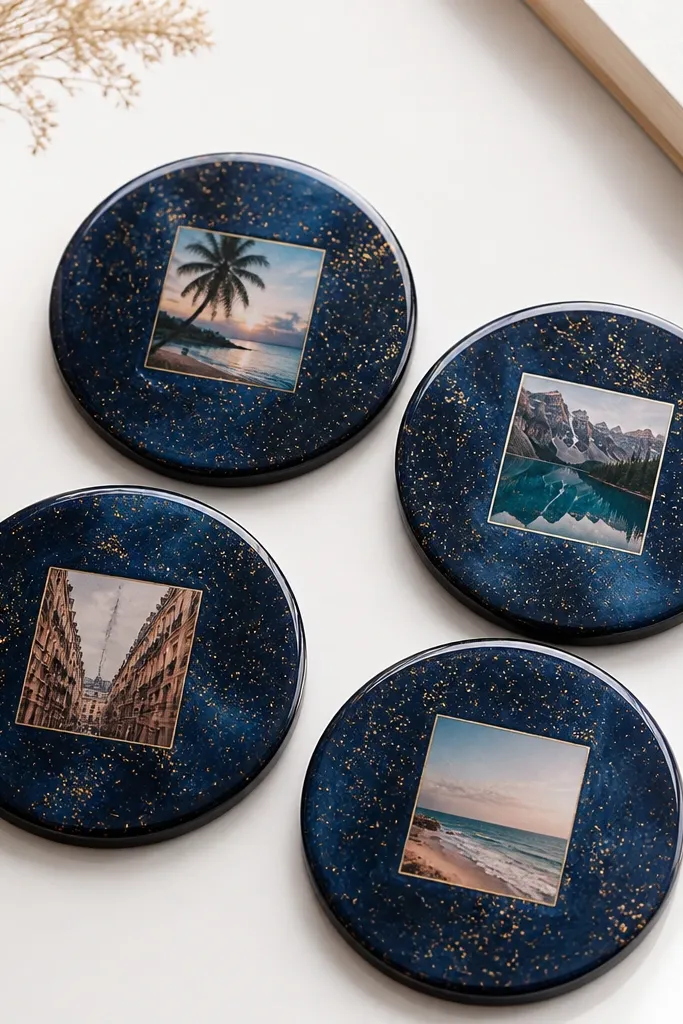
This one is a crowd-pleaser because it mixes a personal photo with a color story your friend can reuse every day. I make the galaxy background with navy acrylic paint, then add gold acrylic paint dots for stars — the contrast looks clean instead of messy. For the center, I use a 2-inch printed photo square so the face or pet photo stays clear. The glossy top layer makes it look like resin without the brittle feel. It’s best for friends who love cozy nights in, coffee runs, or hosting — the coasters get used, so the gift doesn’t get stuck in a drawer.
Start by cutting four circles from 1/8-inch craft wood or dense cork sheet, each 4 inches wide. Paint the edges and the top with two thin coats of navy acrylic, letting it dry between coats. Add star dots with a fine brush and gold acrylic, then cut your photos into 2-inch squares and glue them dead center using Mod Podge. Seal everything with a glossy clear topcoat in thin layers — I do three light coats, letting the first coat tack up before the next.
Editor's noteUse a small foam brush for the topcoat so you don’t get streaks.
Skip thisDon’t flood the edges — thick clear coats can pool and make the coaster look uneven.
2. Pressed Flower Bookmark with Watercolor Edge Tint
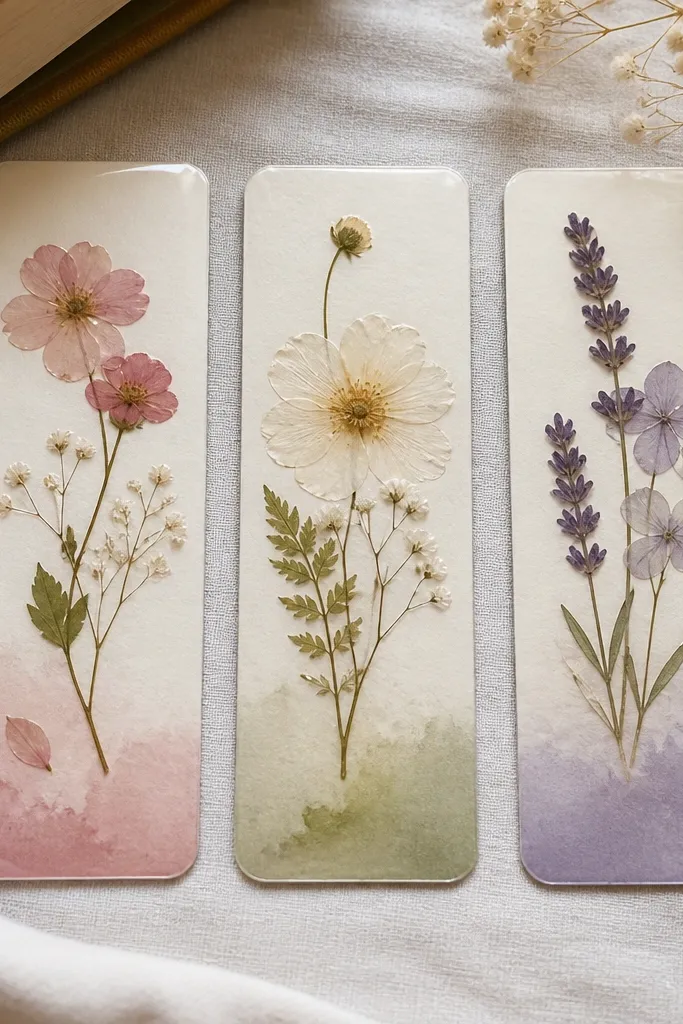
Bookmarks feel thoughtful because they’re small, personal, and they get used immediately. I like this version because pressed flowers alone can look fragile, but the watercolor edge tint makes the whole bookmark feel intentional and modern. Use thin, flat flowers — pansies or tiny daisies — so they don’t create bumps under the laminate. The cream base makes the colors look warmer on any shelf or book cover. This suits readers who journal, highlight, or keep multiple books going at once. It also works for friends who don’t want a big “stuff” gift.
Start by pressing flowers for at least 24-48 hours so they lie flat, then trim your cardstock to bookmarks sized 2 inches by 6 inches. Arrange the flower on the lower third and secure it with a dot of clear glue or Mod Podge, keeping the edges clean. Brush a watercolor wash along the bottom edge only — about 1/2 inch tall — and let it dry fully. Finally, laminate each bookmark or cover with two thin coats of clear gloss medium, then trim any rough edges with a craft knife.
Cut the watercolor wash with a damp paper towel so it stays soft, not streaky.
Skip thick petals — they create ridges that look cheap when sealed.
3. Monogram Leatherette Key Fob in Minimal Black and Tan
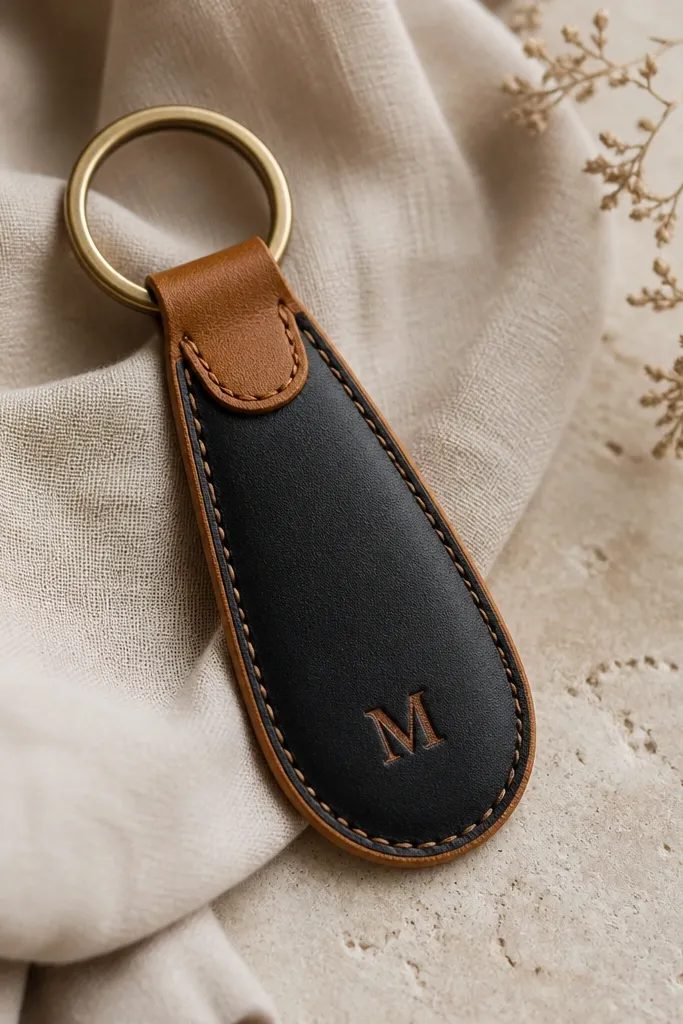
This is the kind of gift that feels grown-up because it’s practical and clean. The minimal black-and-tan combo looks sharp against any key set, and the monogram makes it personal without adding clutter. I use leatherette or faux leather because it cuts clean and holds shape when you fold it. A stitched border gives it that “store-bought” edge even if you’re using a basic sewing machine or strong hand stitches. It’s perfect for friends who carry a lot of keys, live in an apartment, or always lose their keyring.
Start by cutting two rectangles of leatherette — 2 inches by 5 inches — one black and one tan. Place them right sides together and sew along three sides with a 1/8-inch seam allowance, then flip it so the seams hide inside. Add your monogram with heat-transfer vinyl or fabric paint stencil — keep it small, about 1 inch tall, centered on the black panel. Fold the top down to form a loop, then sew or rivet it in place. Finish by attaching a brass key ring and a short metal snap if you want quick closure.
Editor's noteUse a leather needle if you sew — it makes the stitches look straight instead of snagged.
Skip thisDon’t center the monogram too low — it should sit above where the fold hides it.
4. Personalized 3-Panel Wall Art with Scrapbook Paper and Matte Varnish
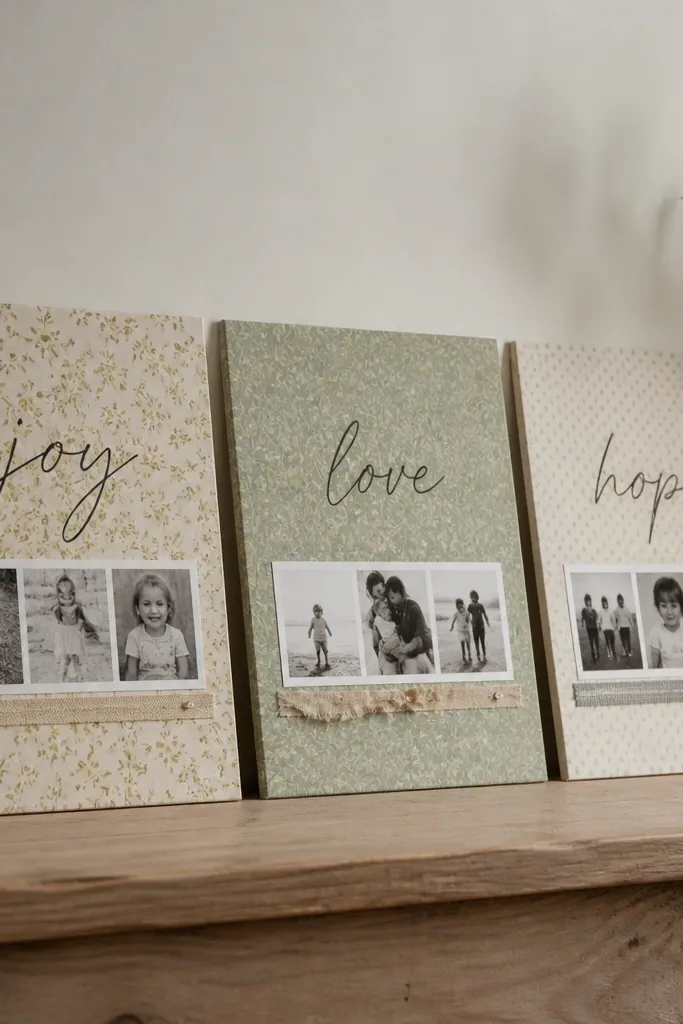
Triptych wall art is an instant upgrade because it makes a corner look styled. This version uses scrapbook paper patterns that your friend already likes, then anchors them with a single hand-lettered word or date. I like matte varnish here because it hides fingerprints and looks like real gallery work, not a laminated craft. Keep the lettering in one color — usually black or deep charcoal — so the patterns don’t fight each other. This fits friends who decorate with neutrals, or who want something personal for their entryway, dorm, or office.
Start by cutting three canvases or wooden panels into the same size, like 6x8 inches each. Cover each panel with scrapbook paper using Mod Podge, smoothing from the center outward so you don’t get bubbles. Add a thin border by painting a 1/4-inch strip around the edges in matte black. Letter your word with a paint pen or fine brush, then seal with two thin coats of matte varnish. If you add photos, print them 1.5 inches wide and keep them in a single vertical strip so the layout stays clean.
Use a ruler for the border and tape the edges for crisp lines.
Don’t use glossy seal — it makes scrapbook paper look plasticky.
5. Citrus-Scented Soy Candle Jar Labels with Heat-Set Vinyl
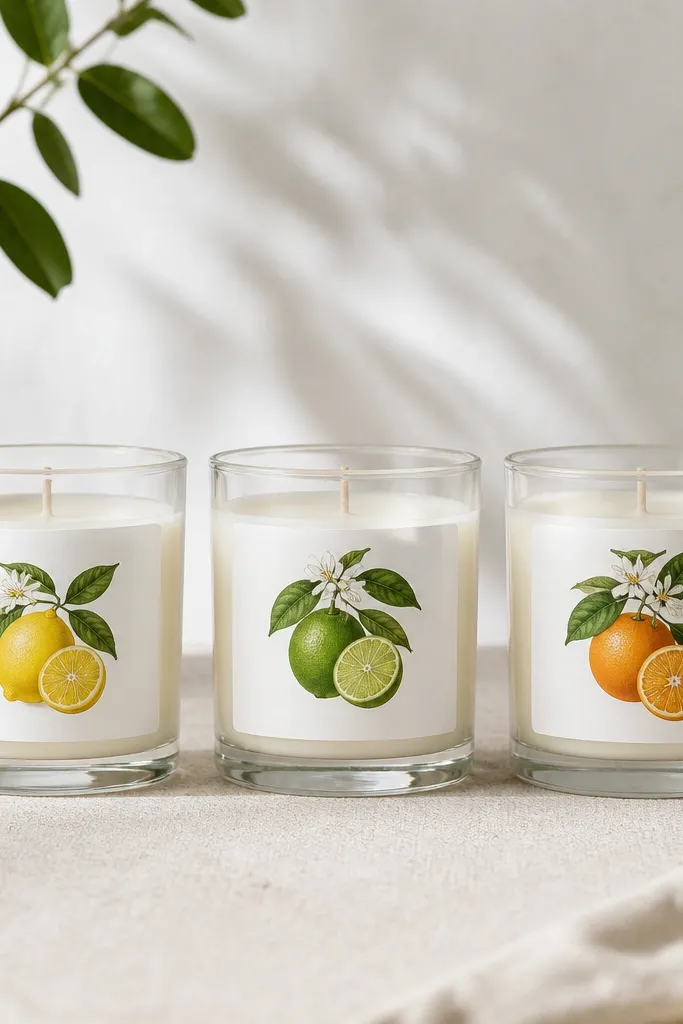
If your friend likes candles, the label is where you make it personal without overcomplicating. Heat-set vinyl gives crisp text that looks store-ready, and the white label base keeps it modern. I make the jar labels for citrus scents like orange or lemon because the color palette stays bright — think black text with a thin yellow accent. The gift feels intentional because it looks coordinated across multiple jars. This is great for friends who host, love self-care nights, or have a shelf where candles get noticed.
Start with three clean glass jars, then wipe them with rubbing alcohol so the vinyl sticks. Cut heat-set vinyl labels in sizes like 2.5 inches wide by 3.5 inches tall, and add a tiny citrus icon at the bottom. Apply vinyl using a heat press or iron with parchment paper — press for 10-15 seconds and check edges. Fill jars with soy wax and add essential oil blends like 1.5 ounces orange + 0.5 ounce lemon per 16-ounce jar, then pour and wick. Tie a small twine bow around the label only if your friend likes rustic — otherwise keep it plain.
Do a test press on a scrap of vinyl so you don’t overheat and warp the carrier sheet.
Don’t put the label on a dusty jar — vinyl lifts and looks messy fast.
6. Embroidered Initial Tea Towel with Buttonhole Border
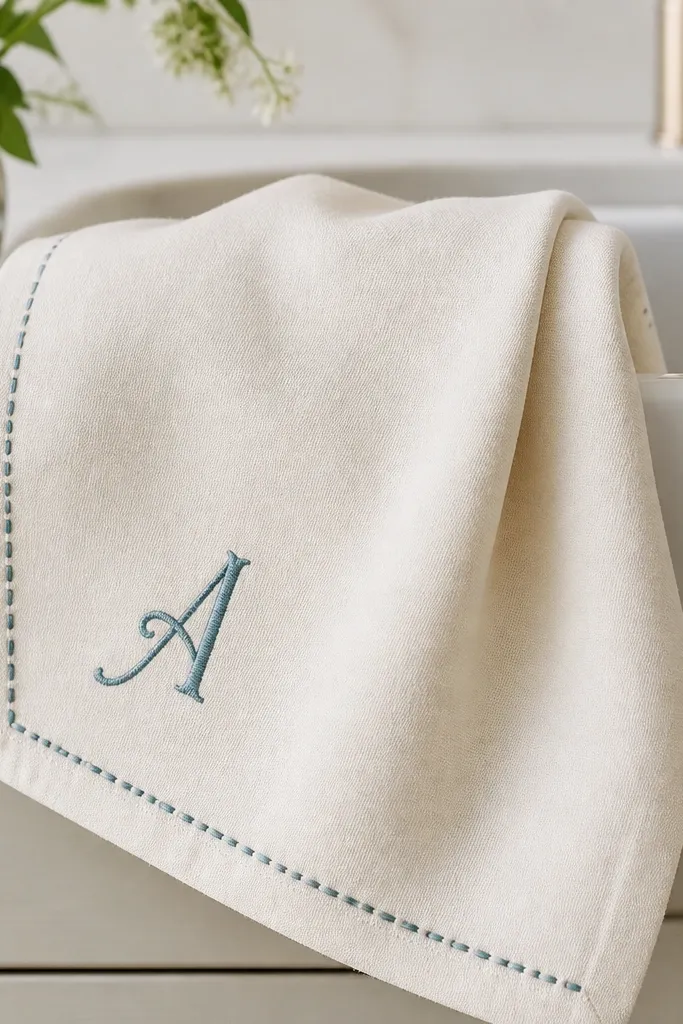
This is a practical gift that still looks special because embroidery reads as handmade even from a distance. I use a single initial in a muted color like teal or clay because it shows up without shouting over the kitchen. The buttonhole border makes the towel look finished, like a shop item, and it hides raw edges. Choose a thick cotton towel so the stitches sit on top instead of disappearing. This fits friends who cook, host brunch, or love a clean kitchen aesthetic.
Start by washing and drying the towel so it shrinks before you stitch. Mark your initial placement using a fabric marker and keep it about 3 inches from the top and side. Stitch the initial with a backstitch or satin stitch using 6-strand embroidery floss — I pull the thread taut but not tight. Add a buttonhole stitch around the towel edge you want framed, keeping each loop consistent. If you’re not confident, draw a simple rectangle guide first with a pencil, then stitch along it.
Editor's noteUse a hoop for the initial so the embroidery stays smooth.
Skip thisDon’t use thin, see-through towels — the thread shadows show and look uneven.
7. Modern DIY Handmade Gift: Scrapbook Paper Desk Calendar Flip Blocks
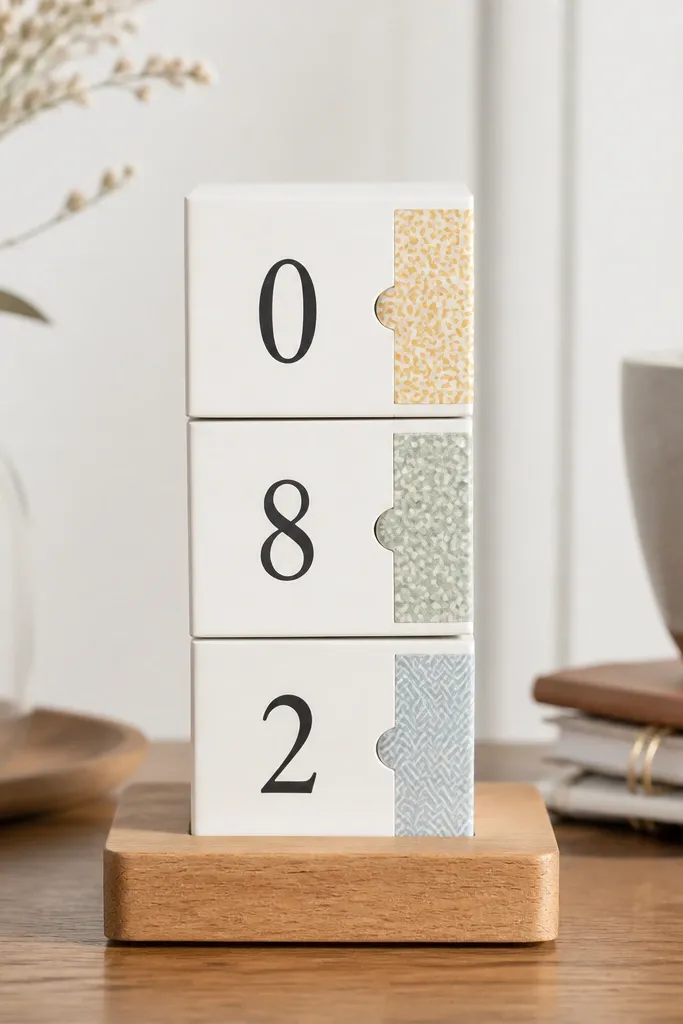
A flip-block calendar is the kind of gift that gets used daily, but it doesn’t have to look childish. I build mine with scrapbook paper that matches the friend’s color vibe — usually neutrals plus one accent. The secret is the base and tabs: thick paper for the tabs and a sturdy base so it doesn’t wobble. The numbers in bold black make it readable from across a room. This is a great pick for a friend who works from home or loves planning but forgets to change desk calendars.
Start by cutting a sturdy base from 1/2-inch craft wood or thick cardboard, about 8 inches wide by 4 inches deep. Cover it with matte contact paper or matte scrapbook paper. Make 31 flip tabs from 5x8-inch cardstock strips, then fold and glue them into small blocks that slide over a track or attach with binder clips. Use a stencil for date numbers — each number about 1 inch tall — and add tiny month labels at the bottom. Finally, seal the paper with matte clear spray so it doesn’t scuff when handled.
Use a single number font style across every tab so it looks designed, not assembled.
Don’t leave tabs too flimsy — thin paper collapses and makes the whole piece look cheap.
8. Two-Tone Wall Mirror Frame with Spray Paint and Tape Resist
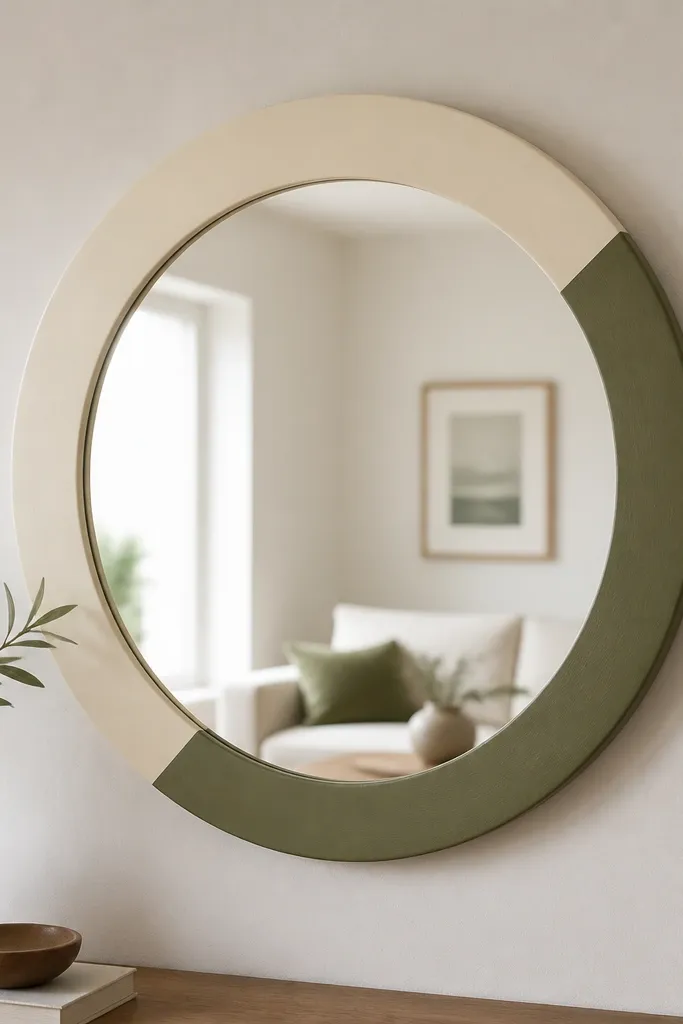
A mirror frame is one of the fastest ways to make a gift look high-end because it changes light in the room. The tape-resist technique gives a crisp, modern diagonal split that looks intentional instead of “painted.” I stick to two matte colors because matte hides tiny unevenness and looks clean in daylight. Pick an olive + cream combo for warm friends, or charcoal + blush for cooler tones. This fits friends who rent, need a quick room refresh, or like minimal decor that still has personality.
Start by removing the mirror from its backing so you can paint the frame safely. Clean the frame with degreaser, then sand lightly if it’s glossy plastic. Tape a diagonal line with painter’s tape — press the edges firmly so paint doesn’t bleed. Spray the first color in thin coats, wait 10 minutes between coats, then remove tape after the final coat is dry to the touch. Spray the second color, let it cure 24 hours, then reattach the mirror. Add a felt backing strip so it doesn’t scratch walls or wobble.
Editor's noteDo a test spray on cardboard to match the exact shade before you hit the frame.
Skip thisDon’t rush tape removal — peeling too early can pull paint and ruin the sharp line.
9. Resin-Look Keychain with Photo Strip and Glossy Epoxy Coating
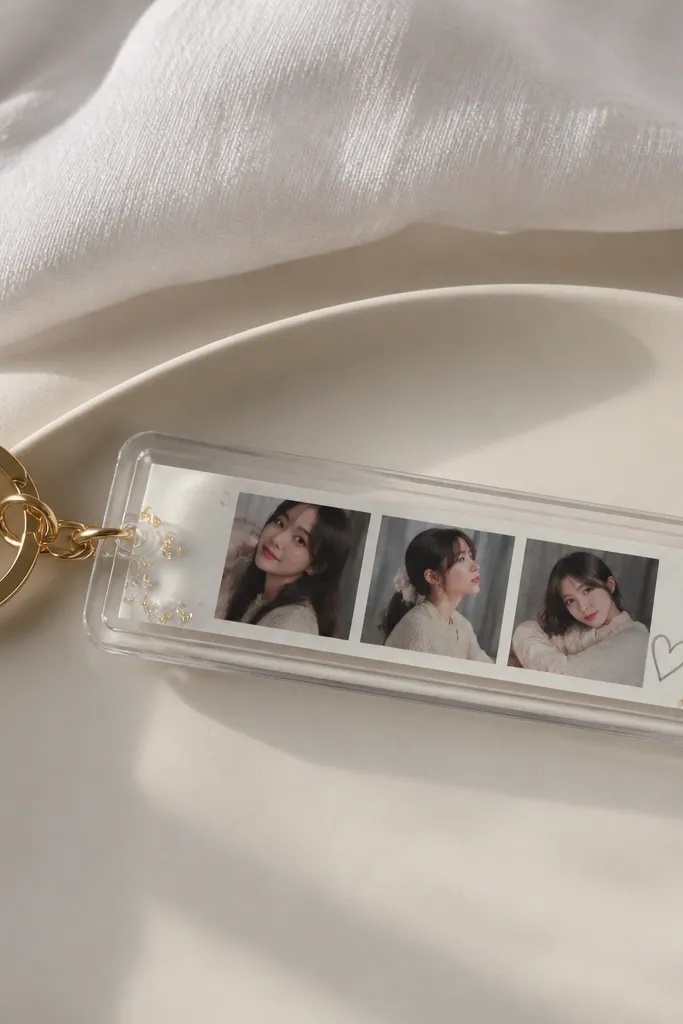
This keychain has that resin look without turning bulky. I use a photo strip instead of a full photo because the narrow layout stays crisp and doesn’t blur under clear coating. Gold foil flakes inside the clear area make it sparkle when the light hits, and it’s subtle enough for everyday carry. It’s a great modern diy handmade gifts for best friend option because it’s personal but not fragile like a framed photo. Give it to a friend who loves sentiment but still wants something she can clip to a bag or keys.
Start by printing a photo strip at high resolution, then cut it into 1/2-inch wide strips that fit your keychain mold. Mix epoxy coating according to your bottle ratio and work in a level area. Place a tiny amount of gold foil flakes behind the photo strip so they sit around it, not on top. Pour a thin first layer, set the photo strip, then pour the final layer to cover. Pop out the cured keychain after the full cure time — don’t rush it — and sand any rough edges with 800-grit paper.
Use nitrile gloves and a level surface so you don’t get lumpy cures.
Don’t trap air bubbles — tap the mold gently and pop micro bubbles with a toothpick.
10. No-Sew Denim Pocket Organizer for Her Essentials
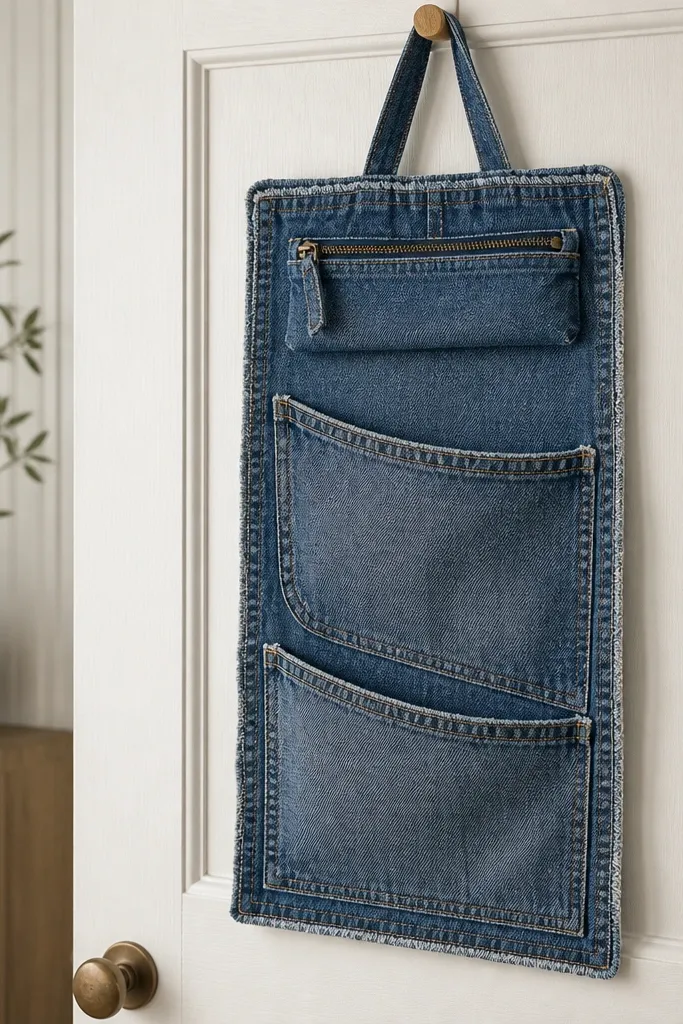
This is a practical gift that looks thoughtful because it uses denim, which already has structure and texture. I like the pocket layout for holding lip balm, chargers, hair ties, and a small perfume — the friend can find things without digging. Even if you don’t sew, you can get a clean finish with fabric glue and iron-on seam tape. The denim color gives a modern casual vibe that fits most rooms. It’s best for friends in apartments, dorms, or anyone who wants their everyday stuff in one spot.
Start by cutting two denim panels sized about 10 inches wide by 12 inches tall, then cut a third smaller panel for a top pocket. Use iron-on seam tape along the edges to bond the panels, then reinforce with fabric glue for a stronger hold. Add a small zipper pouch by sewing or gluing it into the top panel — keep the zipper centered. Attach a hanging strap from the same denim and add a metal snap or loop at the top. For finishing, trim the edges so pockets have straight lines and press the whole organizer under a heavy book for 30 minutes.
Use a strong fabric glue brand that dries clear and flexible, not brittle.
Don’t leave frayed edges — fraying makes it look unfinished even if the pockets work.
11. Watercolor Name Plaque on Wood Slice with Clear Seal
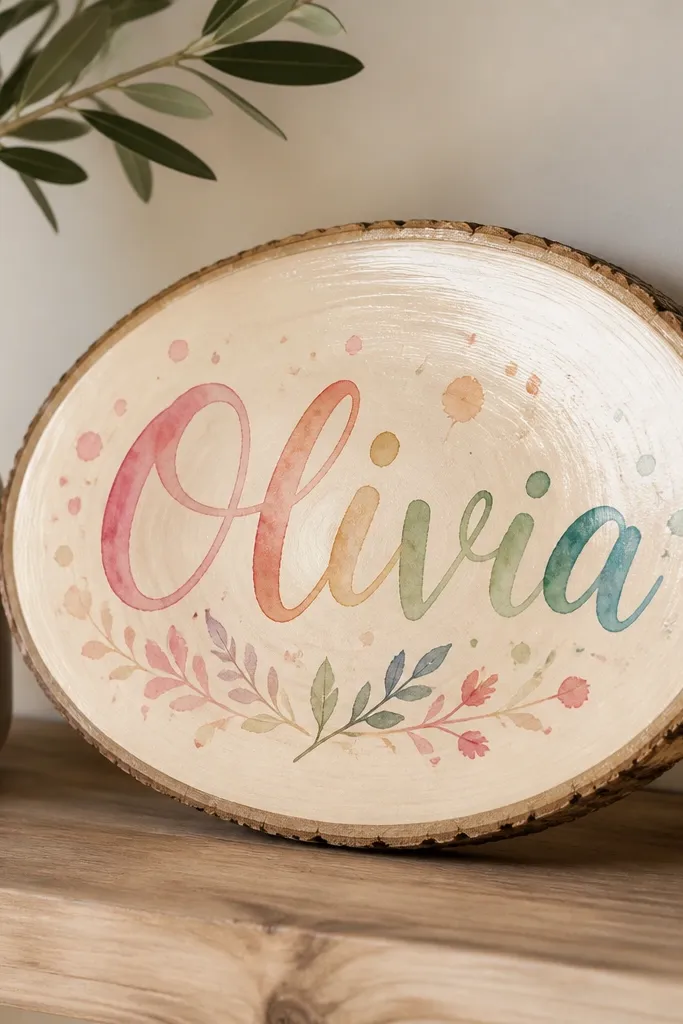
Wood slice plaques look special because the texture underneath makes the watercolor feel like part of the wood, not pasted on. I paint the name in a simple script or block letter and keep the splashes small so the plaque stays readable. The clear seal makes the paint pop and protects it from dust and finger smudges. Choose colors based on her favorite hoodie color or room accent — I often use soft peach + gray-blue. This works for friends who love shelf decor, plants, or minimalist touches that still feel personal.
Start by sanding the wood slice lightly with 220-grit so the surface grabs the paint. Wipe off dust and apply a thin white gesso layer only if the wood is very dark — otherwise watercolor can sink. Paint the name with watercolor brush pens or diluted acrylic, keeping letter height around 1.2 inches tall. Add tiny splatter dots behind the name, then let it dry completely. Seal with two coats of clear matte or satin varnish, brushing in one direction to avoid streaks.
Use painter’s tape to mask off the edges so you get a clean wood border.
Don’t use heavy water — it can warp thinner wood slices and blur your letters.
12. DIY Botanical Candle Holder Using Glass Mugs and Air-Dry Clay
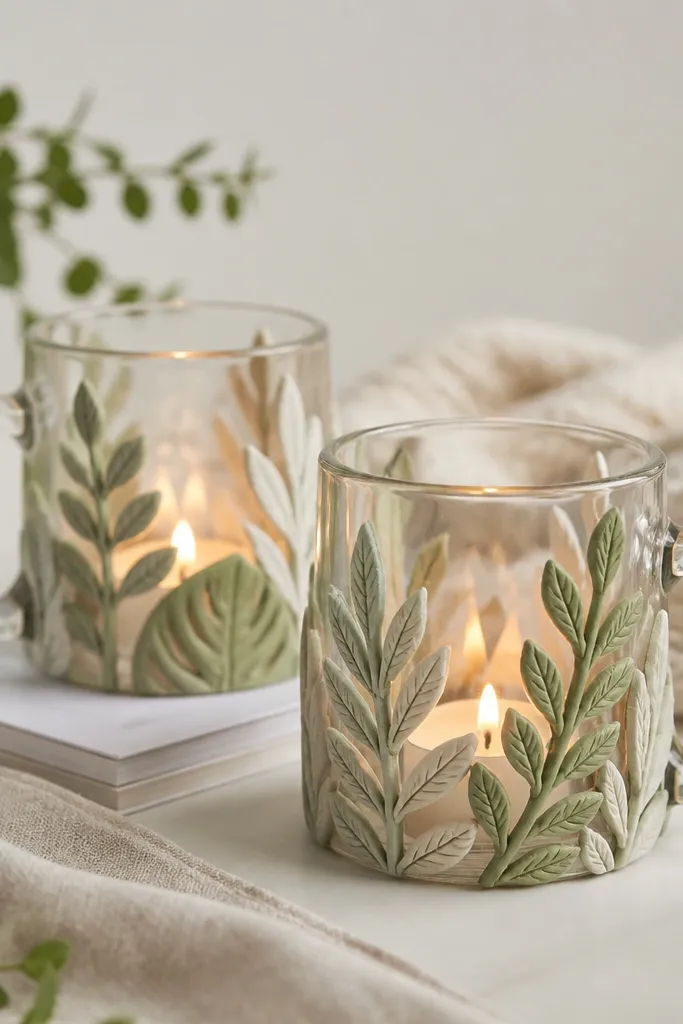
If you want decor that looks handmade but still modern, clay botanicals on glass do that instantly. The leaf texture wraps the mug and catches light, so even a plain tea light looks fancy. I keep the colors muted — sage green leaves with cream highlights — because bright neon clays scream craft store. This gift fits friends who like slow evenings, plants, and cozy table settings. It also works for birthdays because it feels like an experience, not just an object.
Start by cleaning two glass mugs and placing a tea light insert inside so you can plan height. Roll air-dry clay thin, then press leaf shapes with a silicone leaf mold or by hand-cutting leaf silhouettes. Attach leaves to the mug with a dab of water and gentle pressure, then add small vein lines using a toothpick. Let the clay dry fully until it’s hard, then paint in thin layers and seal with clear matte sealer. Keep the clay below rim height so it doesn’t interfere with burning safely.
Editor's noteUse a tea light that sits centered so the flame lines up with the clay pattern.
Skip thisDon’t put clay too close to the flame area — keep a safe gap and never leave it unattended.
13. Fabric Scraps Photo Frame with Clean 1-Inch Border
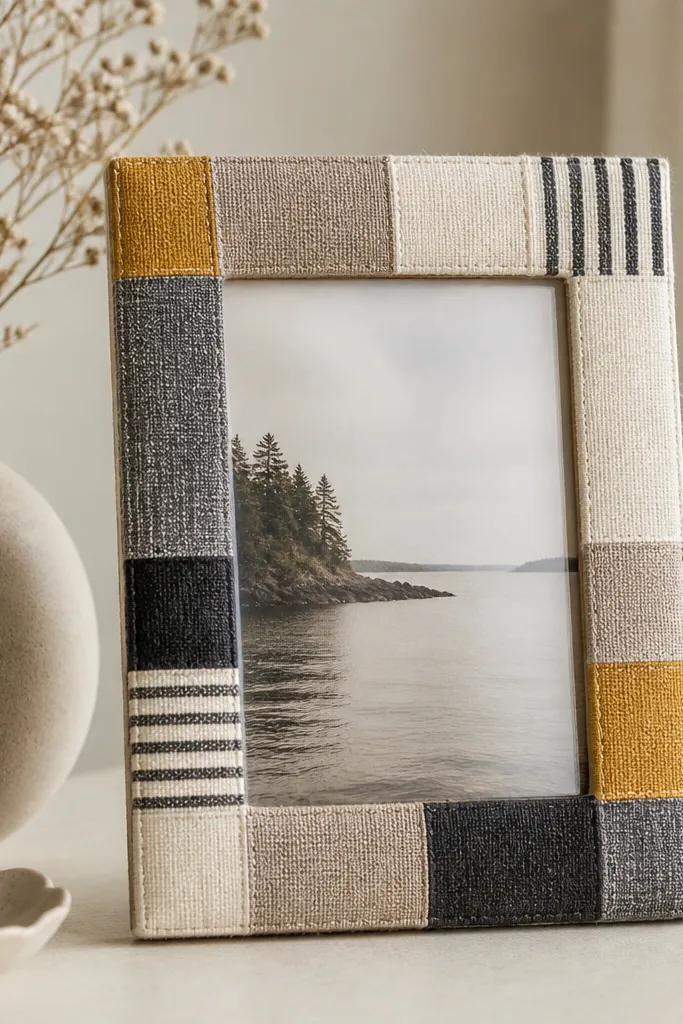
This frame looks modern because the border is controlled. Instead of random scrap chaos, I build a clean 1-inch fabric border around the photo — stripes on one side, small squares on the other. The fabric adds warmth, and the clear glass keeps it from looking like a collage. Choose fabrics with similar weight so the border lies flat. This gift fits friends who love family photos but want them to look styled, not tucked in a drawer.
Start with a cheap 4x6 frame and remove the backing and glass carefully. Cut fabric scraps into pieces that match the border width — 1 inch — and iron them flat first. Apply fabric glue to the frame border area and layer pieces in a planned pattern, leaving the center window untouched. Trim the ends flush with a craft knife, then glue down a thin strip of fabric along the inner edge for a crisp line. Reassemble the frame and wipe the glass with glass cleaner so the photo stays sharp.
Iron each scrap before cutting so seams don’t show bumps.
Don’t use stretchy knit scraps — they warp and make the border ripple.
14. Color-Blocked Knit Coasters Set with Fringe Ends
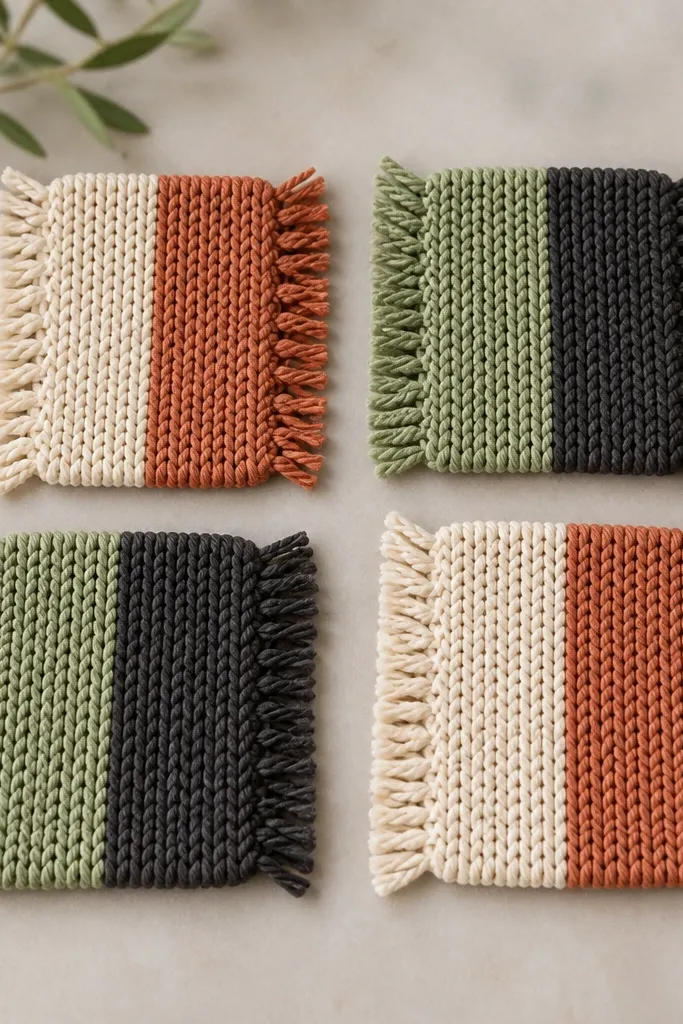
Knit coasters are one of those gifts that feels cozy without being bulky. Color-blocking keeps them modern, and the fringe makes them fun while still looking tidy. I like thick yarn because it wicks condensation and doesn’t feel flimsy when your friend sets a mug down. Choose colors that match her kitchen towels — terracotta and cream is an easy win. This is ideal for friends who drink tea or coffee at home and enjoy small decor that actually gets used.
Start by choosing thick cotton yarn or cotton-acrylic blend yarn in two colors. Cast on a simple square pattern, about 4.5 inches wide, then bind off and weave ends. Use a basic slip-stitch or garter stitch so the texture looks even. For color-blocking, knit one color for half the coaster height, then switch yarn for the other half. Add fringe by cutting 1-inch yarn strands and tying them into evenly spaced knots along the edge, then trim to match.
Steam-block the finished coasters so the edges stay square.
Don’t use too-thin yarn — it looks delicate but it stains and soaks through fast.
15. Cricut Vinyl Mug Wrap with Heat-Transfer Seal
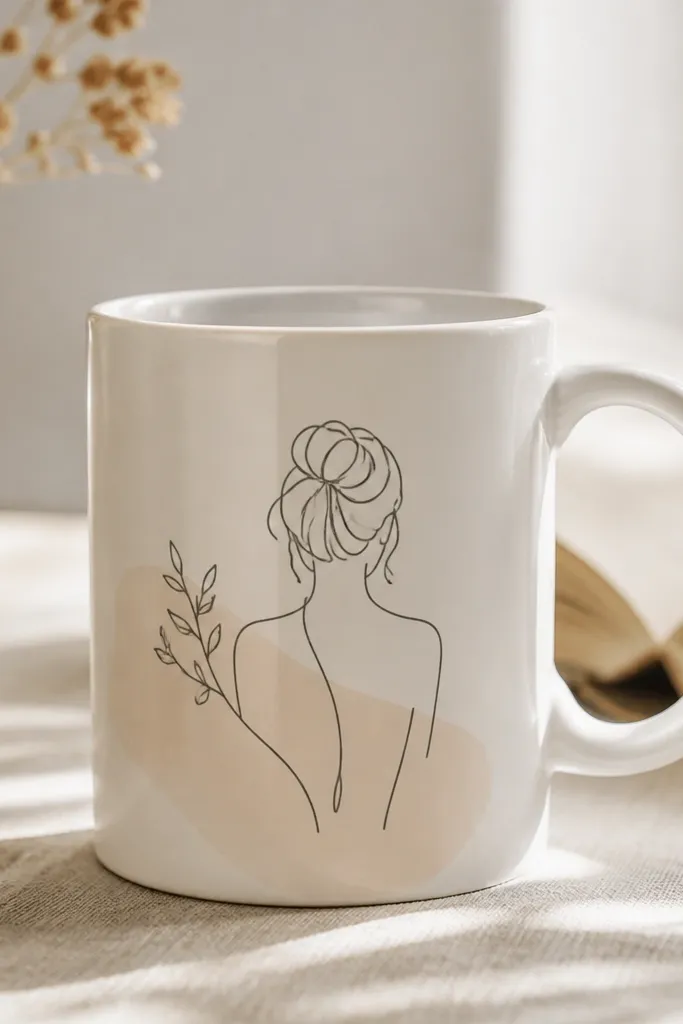
A vinyl mug wrap is personal and modern because the design is crisp and readable. I use heat-transfer vinyl so the text looks like it was printed, not stuck. Keep the design small and centered — I aim for about 3 inches wide — so it doesn’t warp around the curve. This gift is great for friends who love a clean aesthetic but still want a little humor. It also works when you’re short on time because the process is fast once you’ve done a test cut.
Start by washing the mug with dish soap and rubbing alcohol, then dry fully. Create your design in Cricut with a single layer, then mirror it for heat transfer. Cut heat-transfer vinyl and weed the excess carefully so the edges are clean. Place the vinyl on the mug centered and press with a heat press or even an iron using a protective parchment layer, applying firm pressure for the recommended time. After cooling, add a clear dishwasher-safe seal if your vinyl brand recommends it, then cure if needed.
Do a test press on a scrap mug or tile so you match heat and time to your setup.
Don’t forget mirroring — you’ll end up with reversed text.
16. DIY Wall Shelf Name Plate with Stencil + Metallic Paint
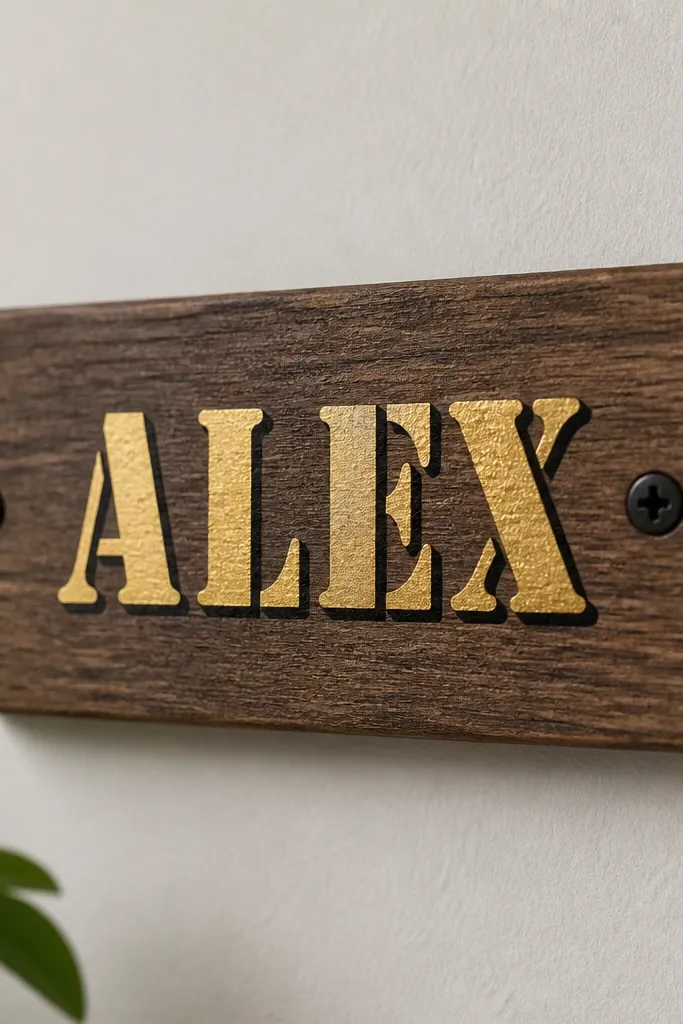
Name plates make a desk or shelf feel personal without clutter. The trick is stencil edges and a metallic paint that’s not too thick; it should look smooth, not glittery chaos. I use a thin black outline behind metallic letters so the gold reads clearly from across the room. This gift suits friends who like organization and visible routines — entryways, desks, and bathroom shelves. It also works well if you want something that lasts for years without changing style.
Start by sanding a small wood board, about 6x10 inches, then wipe dust off. Paint the board with matte black or warm white depending on her decor. Place a letter stencil and tape it down tight so paint doesn’t bleed under the edges. Use a foam brush to apply metallic gold paint in light coats, letting each coat dry before the next. Remove the stencil carefully while the paint is still slightly tacky for clean edges, then seal with a matte or satin clear coat so it doesn’t rub off.
Use painter’s tape to mask the stencil corners so the stencil stays flat while you paint.
Don’t overwork wet metallic paint — it can smear and look streaky.
17. Mini "Best Friend" Memory Jar with Rolled Notes and Cloth Labels
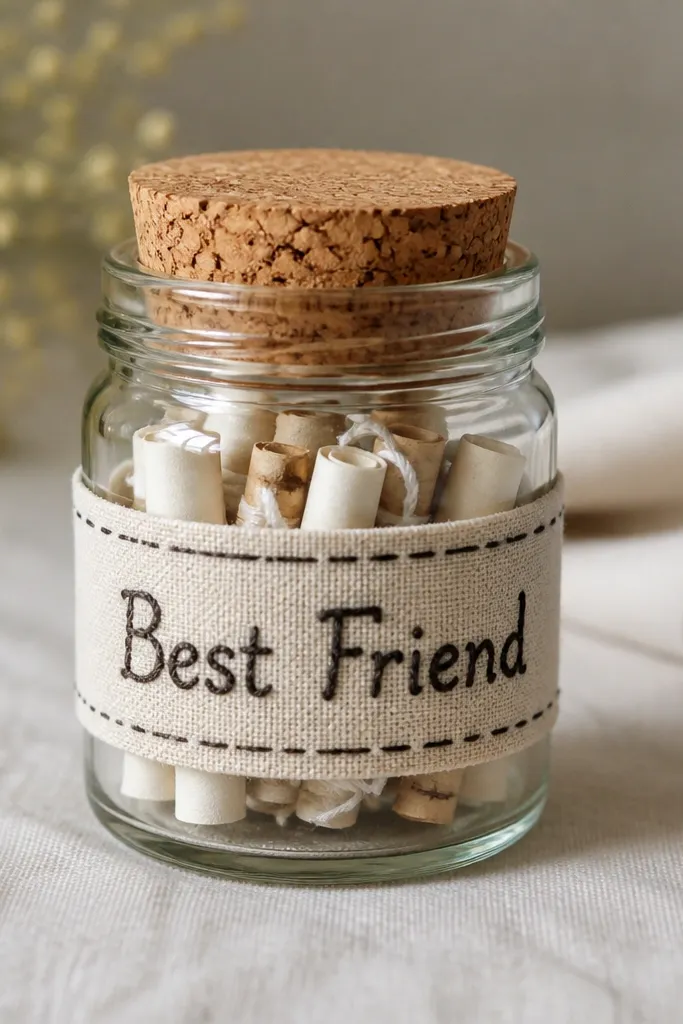
Memory jars feel personal because your friend can pull a note on a bad day and get something specific. I like the rolled notes instead of folded because they fit more neatly and look tidy through the glass. The cloth label makes it feel soft and handmade, not like a printed sticker. This gift suits friends who have anxiety, stress, or just need frequent reminders that they’re loved. It also works if you’re worried about size — it’s compact and sits on a shelf without taking over.
Start with a small jar, like 12 ounces, and wash it so the label sticks. Cut paper strips sized about 1 inch by 3 inches, then write short messages — one per strip. Roll each strip tightly and tie with a thin piece of twine or string, then pack them in the jar. For the cloth label, cut a rectangle of cotton, stitch or paint the words using fabric paint, then wrap it around the jar and secure with a strip of ribbon. Add a small card tag with the jar date so it feels like a time capsule.
Write messages in a consistent ink color so the jar looks cohesive even when notes show through.
Don’t use flimsy paper that tears when you roll — it makes the jar look messy.
18. Leatherette Bracelet with Perforated Pattern and Snap Clasp
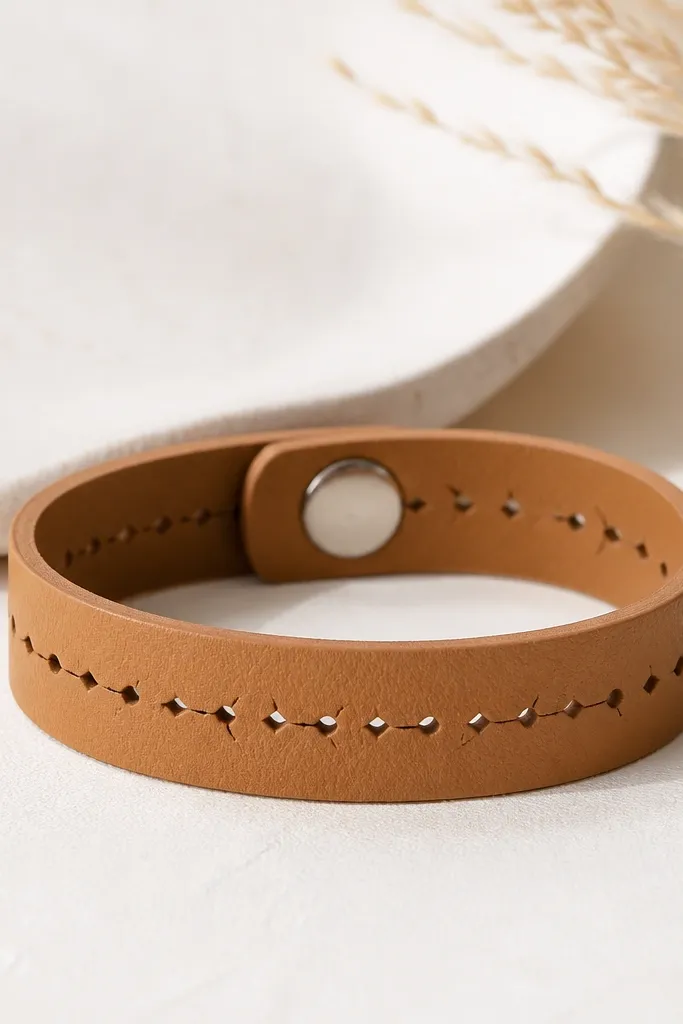
Bracelets look modern when they have a clean surface and one design element. The perforated pattern gives texture without needing extra paint or glitter. I use leatherette because it’s easy to punch holes and it holds its shape around the wrist. A snap clasp is practical — your friend can take it on and off without fighting a buckle. This fits friends who wear jewelry daily and want something personalized that still matches casual outfits.
Start by measuring her wrist with a soft tape, then add 1 inch for comfort. Cut a leatherette strip about 3/4-inch wide and long enough for your measurement. Mark a line down the center and use a hole punch to create evenly spaced perforations — I do 1/4-inch spacing with a consistent row. Edge-stain or paint the sides with a matching tan dye so it looks finished. Attach a snap clasp to both ends with rivets or strong snaps, then test fit and trim excess.
Editor's notePunch a few test holes on scrap first so your spacing matches the look you want.
Skip thisDon’t leave raw edges — unsealed edges look unfinished even if the bracelet fits well.
19. Paint Marker Custom Tote with Stencil Stars and Heat-Set Fix
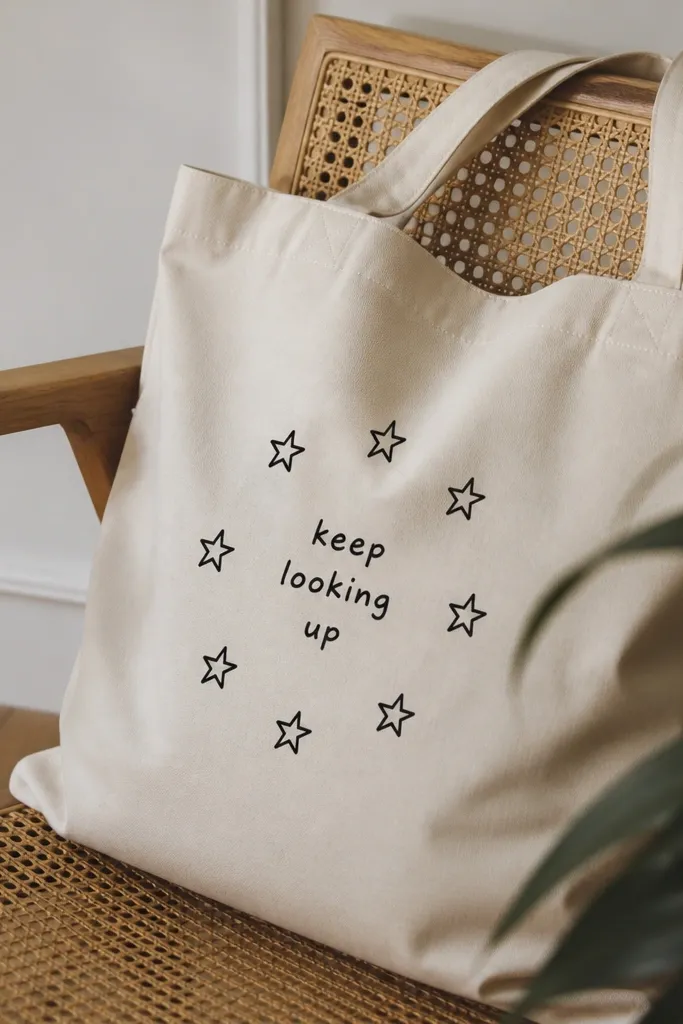
A custom tote is one of the most useful gifts, and paint marker work looks sharp when you use stencils. I like star patterns because they’re simple shapes that still look modern. Keep the tote canvas light — cream or natural — so the black and one accent color pop. The best part is that it’s personal without being too sentimental. This suits friends who run errands, go to the gym, or carry books and groceries in one bag.
Start by pre-washing the tote to remove sizing, then iron it flat. Use painter’s tape to mask the center area and place a stencil — star clusters around a small phrase works well. Outline with paint marker in thin passes so you don’t flood the fabric. Let it dry fully, then heat-set by ironing inside out on a cotton setting with parchment paper on top of the design. After heat-setting, wash once gently to test if any ink smears, then repeat heat-set if needed.
Do two light passes instead of one thick pass for cleaner edges.
Don’t skip heat-setting — paint marker that isn’t fixed smears the first time it gets wet.
20. Desk Drawer Tray from Foam Board with Fabric Lining
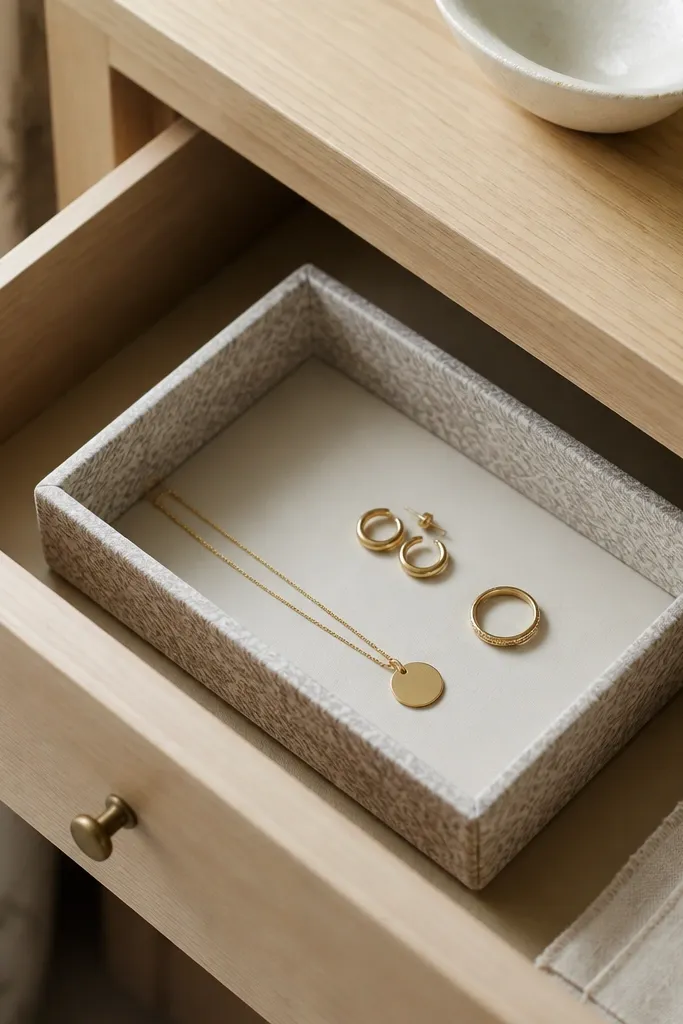
If your friend’s desk looks chaotic, a drawer tray is a gift that actually changes the daily experience. Foam board gives you sharp corners and a flat base, and fabric lining makes it look warm instead of like a school project. I use a fabric with small pattern or subtle texture because it hides tiny dust specks. This is perfect for friends who keep jewelry, hair ties, or stationery in drawers and want a simple way to find things fast. It also photographs well because the tray is tidy and structured.
Start by measuring the inside of the drawer and cutting foam board to fit, allowing 1/8-inch clearance on each side. Cut a second foam board layer for the walls, and glue it into a tray shape with hot glue or craft adhesive. Cover the base with fabric using Mod Podge, smoothing from center outward. Wrap the fabric around the walls and trim edges cleanly so corners line up. Seal the fabric with one thin coat of Mod Podge on top and let it cure before placing it in the drawer.
Use a brayer or even a plastic card to press fabric flat and avoid bubbles.
Don’t use bulky fabric — thick seams make the tray catch on drawer rails.
21. Handmade Bookmark Set with Foil Accents and Thick Lamination
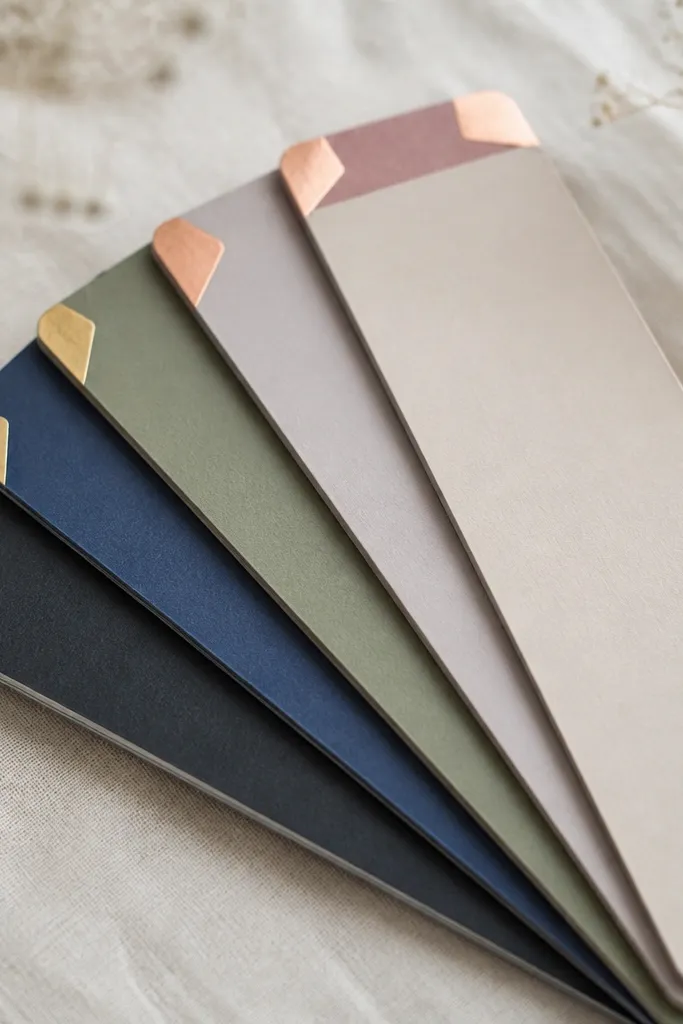
Foil accents make bookmarks look premium, and thick lamination keeps them from bending after a few uses. I design mine with matte cardstock backgrounds and one foil element — usually a corner triangle or a tiny line. That single metallic detail reads modern instead of “crafty glitter.” Use smooth paper so the lamination adheres evenly. This is a great gift for friends who read a lot, journal, or always borrow books and need bookmarks that don’t fall apart.
Start by cutting bookmarks from thick cardstock, like 2 inches by 7 inches. Add matte color blocks with acrylic or paint pens, then apply foil using a foil transfer tool or a foil-ready adhesive layer at the corner. Cover each bookmark with a thick laminating pouch or clear laminating film, trimming edges with a craft knife. Seal the sides so the lamination doesn’t peel — run a thin strip of tape along the edge under the heat roller if needed. Finish by punching a small hole at the top and adding a thin ribbon for a clean pull.
Editor's noteKeep foil shapes small — a tiny accent looks expensive; big foil areas look messy.
Skip thisDon’t laminate over wet paint — it traps moisture and creates cloudy spots.
22. Sew-Free Felt Garland Letters for Her Room Door
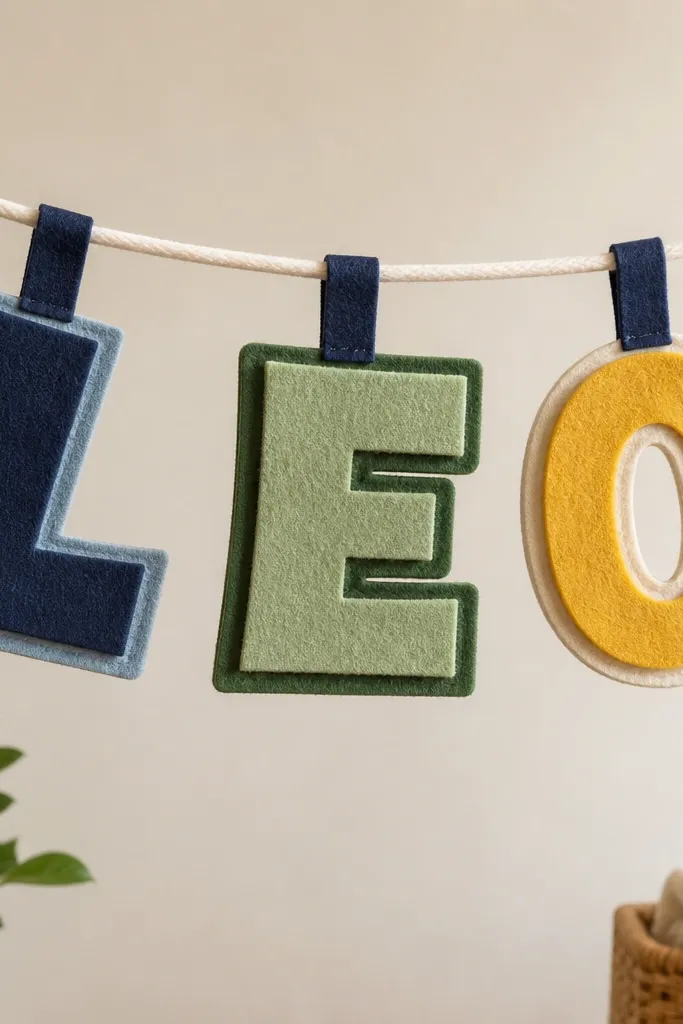
Room-door garlands feel sweet without being childish when the letters are clean and the spacing is even. I layer felt letters to create depth, then use a single string for hanging so it looks cohesive. Felt also hides mistakes like uneven cuts because the material stays soft. Pick two or three colors that match her room — like blush, cream, and dusty green. This works for birthday mornings, dorm rooms, and friends who like decor that changes seasonally.
Start by cutting felt letters using a stencil, then layer each letter by cutting a second felt piece slightly smaller. Hot glue the layers together, then add a small felt backing to hide glue marks. Thread a string through the top of each letter by poking two holes and tying knots, keeping the letters about 4 inches apart. Add small felt circles or star shapes between letters if you want extra movement. Hang the garland with removable adhesive hooks so you don’t damage paint.
Offset the top layer by 1/8 inch for that dimensional look.
Don’t use too many colors — five felt tones makes it look chaotic instead of modern.
23. Modern DIY Handmade Gift: Stitched Fabric Coasters with Contrast Binding
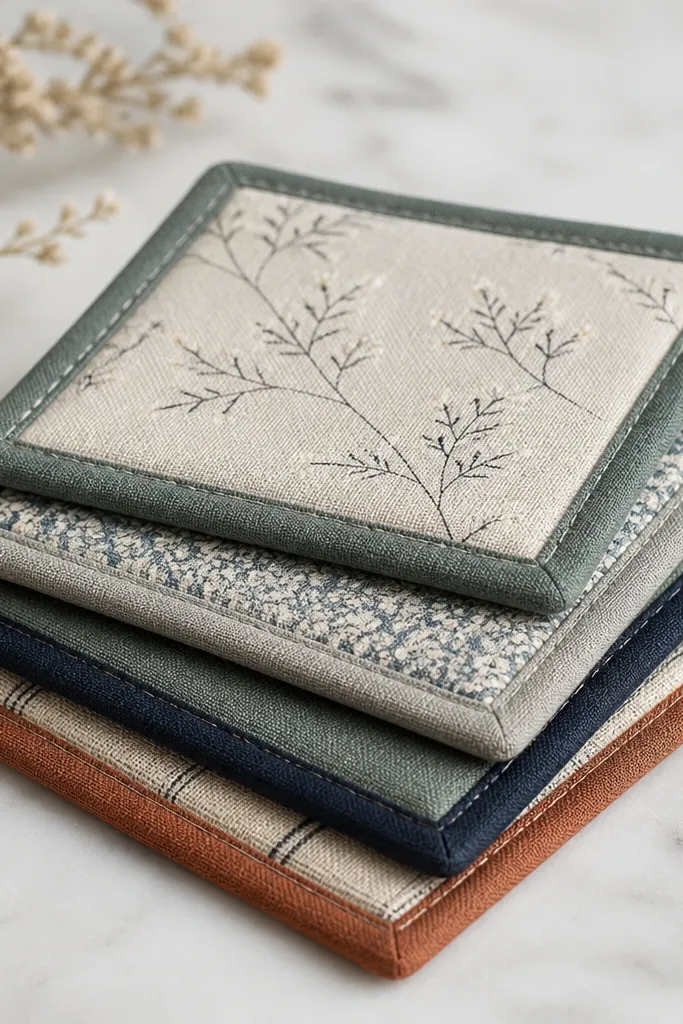
Fabric coasters are practical, and contrast binding makes them look finished like you bought them. I use a linen-look fabric for the top and a thicker cotton or felt layer underneath so the coaster feels substantial. The binding color is where the modern feel happens — black or deep navy looks crisp against almost any print. This is a good pick for friends who want something soft for their living room but still need protection for mugs. It also works well if you’re gifting for a birthday and want a set instead of a single item.
Start by cutting four squares, like 4.5 inches each, using two layers of fabric plus one layer of heat-resistant felt or cotton batting. Stack the layers and baste with temporary spray or pins. Sew around the perimeter with a straight stitch, leaving a small opening if you want a cleaner finish. Create contrast binding from bias tape and sew it over the raw edge, then close the opening. Press lightly so the seams lie flat and the coaster edges look sharp.
Use a walking foot if your machine pulls the layers — it keeps the stitches even.
Don’t skip the felt layer — thin fabric coasters skid and soak through.
24. Mini Herb Plant Labels with Chalk Paint and Clear Tape Topcoat
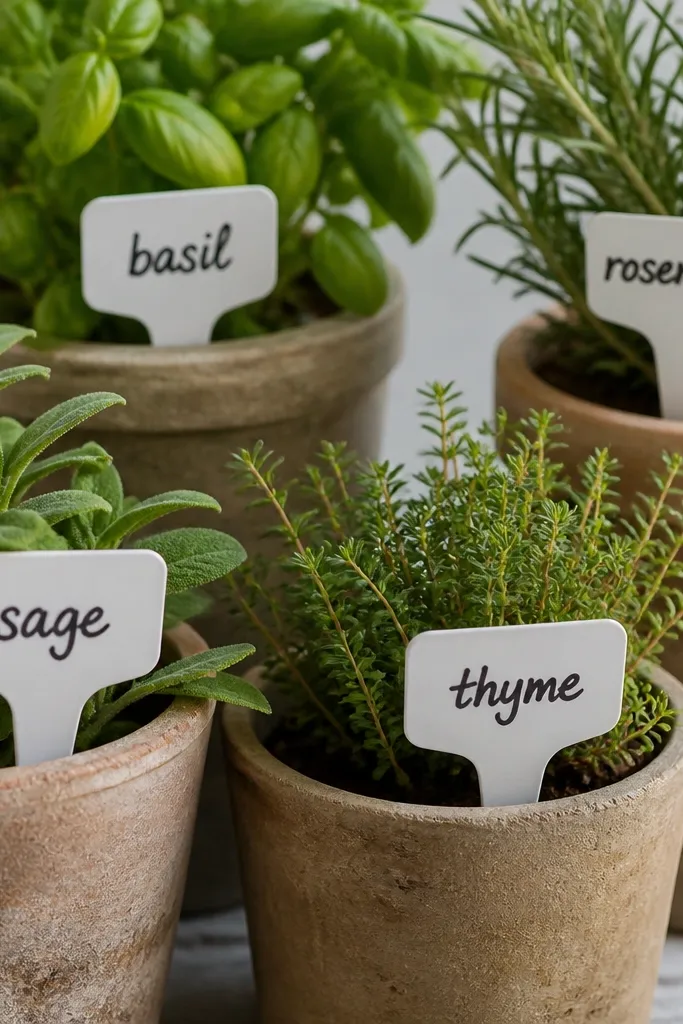
Plant labels are the kind of gift people don’t think to buy for themselves, but they make the whole plant setup look tidy. Chalk paint gives a soft, matte writing surface, and the clear tape topcoat protects the lettering from water. I use small rectangular labels sized about 2 inches by 3 inches so they fit even on tiny herb pots. This is perfect for friends who have a windowsill garden, grow basil for cooking, or keep succulents and want everything labeled. It also looks modern because the design is minimal and the handwriting stays consistent.
Start by cutting label blanks from thin wood or plastic sheet, then sand lightly to remove shine. Paint the labels with white chalk paint and let dry. Write herb names with chalk marker or a thin brush and charcoal paint, keeping the letters around 1/2 inch tall. Seal the top with a strip of clear packing tape — press it smooth and trim edges so it doesn’t peel. Attach labels to pots with small clips or tie them with twine so the gift stays easy to set up.
Editor's notePractice your handwriting on paper first so your label names match in size and spacing.
Skip thisDon’t use glossy paint — it makes chalk lettering smear and look messy.
25. Custom Spotify Code Coaster Tile with Black Frame
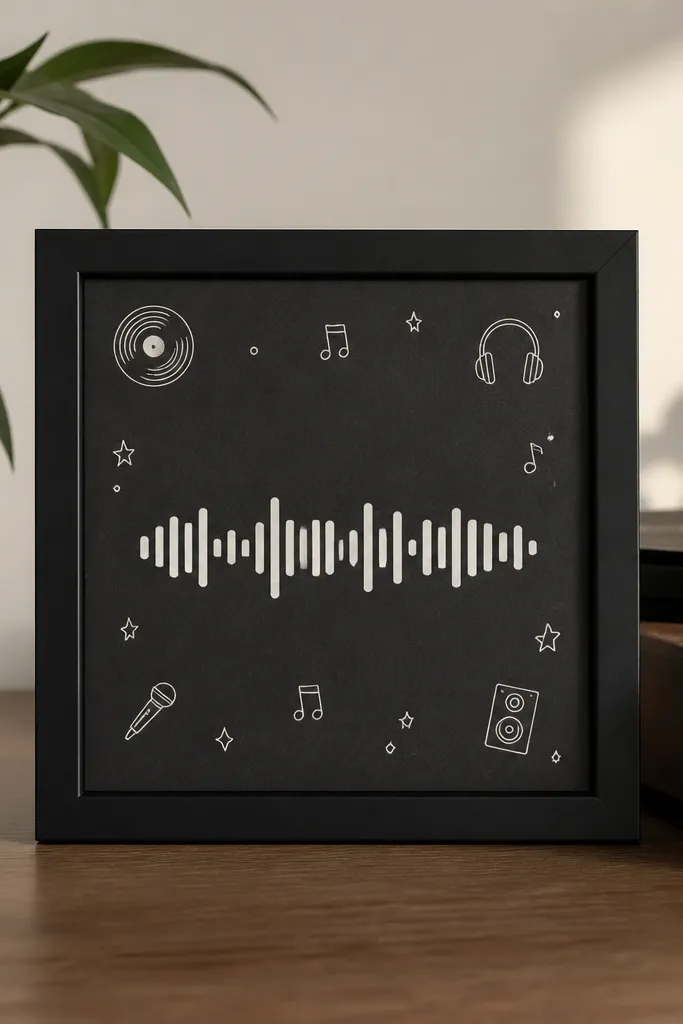
This gift is personal in a way your friend can use immediately. A Spotify code coaster tile lets her scan and play a playlist tied to your friendship, and the black frame makes it look like decor instead of a screenshot. I print the Spotify code in pure black on off-white so it scans reliably and still looks stylish. Add one small detail — like a date or tiny note — so it feels like a message, not a tech novelty. This fits friends who love music, throw parties, or always have a playlist going in the background.
Start by generating the Spotify code and downloading it at high resolution. Print it on off-white cardstock, then cut it to a square that fits your tile, like 4x4 inches. Glue the code square onto a matte ceramic tile or MDF tile and seal with matte Mod Podge so it doesn’t glare. Paint a thin black frame around the edges using acrylic, or attach a pre-cut frame piece. Finally, add cork backing or a rubber pad so it doesn’t scratch surfaces when used as a coaster.
Editor's noteTest the scan with your own phone before sealing — glare can ruin readability if you use glossy finish.
Skip thisDon’t cover it with thick glossy varnish — it can create glare that blocks scanning.



