

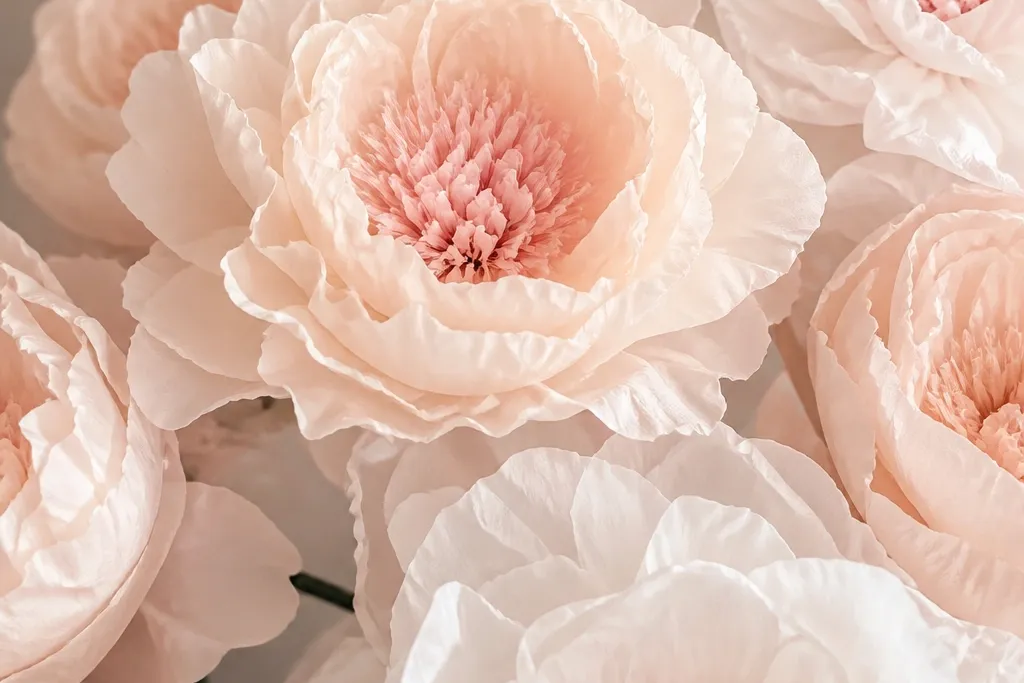
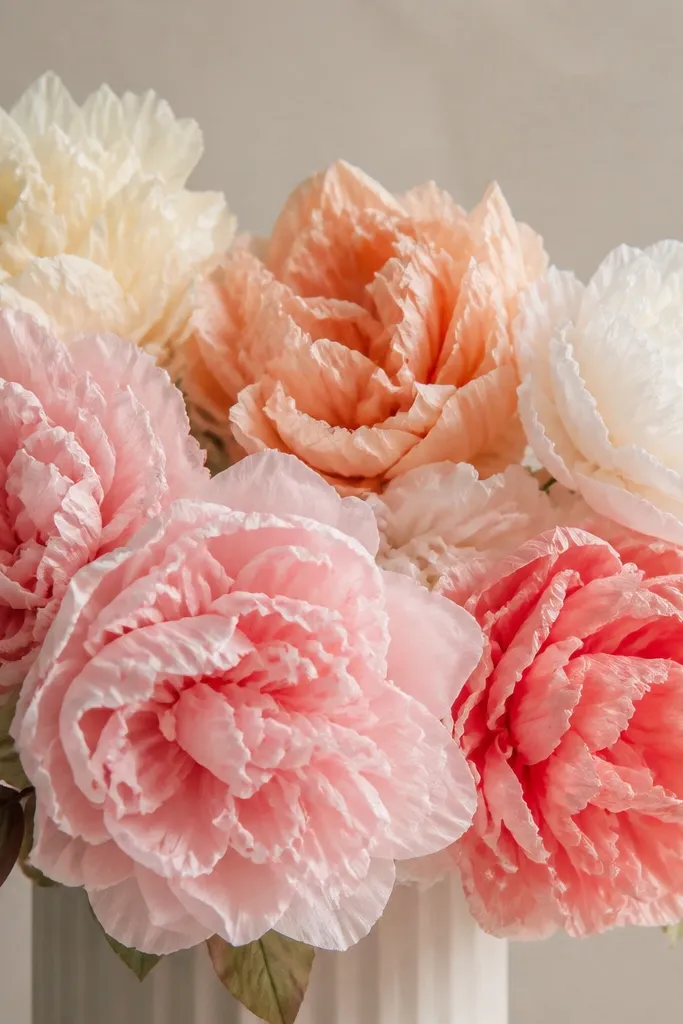
1. Champagne Ivory Ombre Wall with Tight Bud Centers
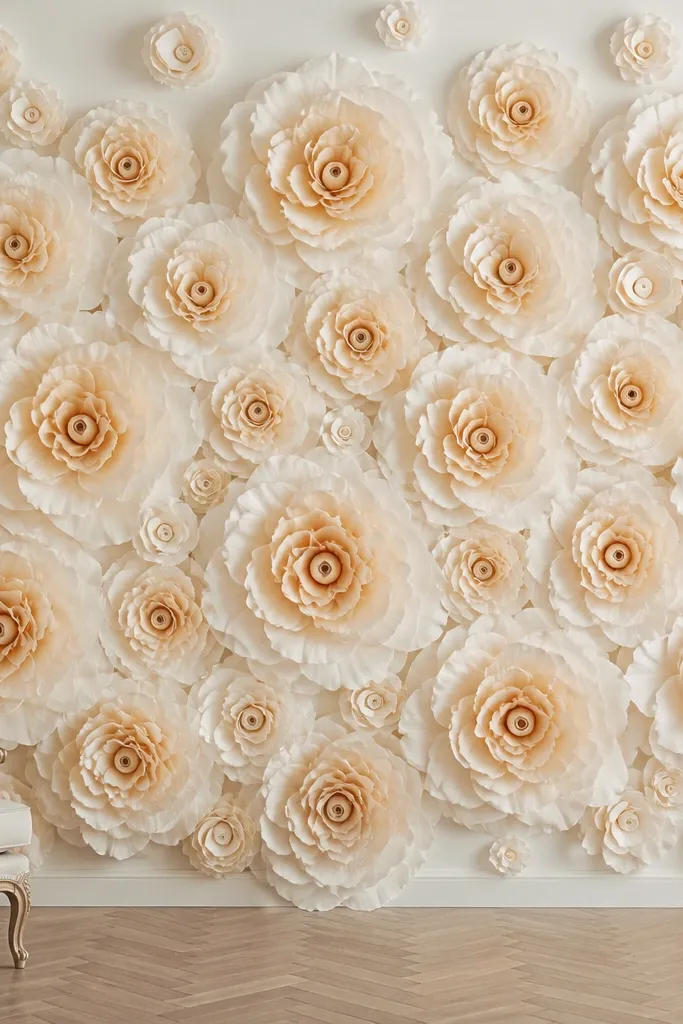
This setup looks expensive because the ombre gives you depth even when the petals are flat on the wall. I used ivory tissue for the outer petals, then a gradual step into champagne and light gold for the inner layers, with the centers made from tightly rolled tissue buds. The warm neutrals flatter most skin tones in photos because they don’t throw harsh pink or cool blue shadows. This wall is great for bridal showers, anniversary parties, and any room that has warm wood or cream curtains. The luxury effect comes from smooth color transitions and centers that stay tight instead of spreading out.
Start with a template: cut 6-petal and 8-petal petal groups in three shades (ivory, champagne, pale gold). Curl each petal using a pencil — wrap the tissue lightly for a soft arc, then glue only the base so the tips stay lifted. Assemble the flower in layers: outer ivory first, inner champagne second, then pale gold for the mid petals, and finish with a bud center that fills the hole. Mount flowers on a foam board or directly to a wall using removable adhesive dots, keeping 4-5 inches between stems so the petals don’t collide. Finally, place 2-3 single large blooms higher than the clusters to create a natural “flow” in photos.
Editor's noteDust the bud center with pearl powder (not glitter) for a soft glow under warm indoor lights.
Skip thisAvoid using pure bright white and icy silver together — it makes the ombre look like party paper instead of decor.
2. Black Tie Luxe Wall with Matte White Petals and Charcoal Ribbons
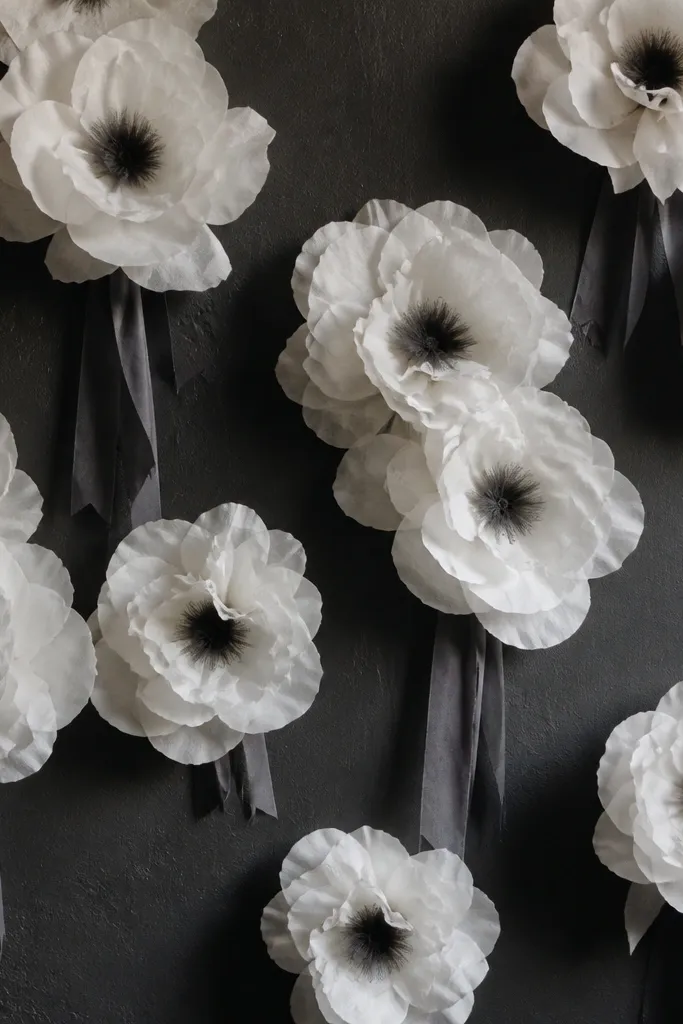
High-end tissue flowers look most “designer” when they have sharp contrast. I built this wall using matte white tissue for outer petals and slightly thicker tissue for inner layers so they stand away from the wall. For the centers, I used white rolled tissue but brushed charcoal-gray paint or tinted glue around the roll so the middle reads dark in photos. Add charcoal ribbon ties around the stem bundles — not bows, just short wraps — and the whole wall looks styled, not handmade. This works best for evening events, black table linens, and venues with dark backdrops. People with warmer undertones in their outfits photograph great against this because the white doesn’t turn them orange or dull.
Start by making three sizes: 16-inch wide flowers, 12-inch wide flowers, and a few 9-inch blooms for filler. Curl petals with a pencil but keep the curl tighter on inner layers so the bloom has a “shell” shape. Assemble and mount clusters of 2-3 blooms close together, then tie a 6-inch charcoal ribbon strip around the stem bundle before securing it flat to the wall. Keep the overall cluster spacing about 6 inches between bloom centers so there’s breathing room. Step back and adjust: add one small bloom at the edge of each cluster to avoid a blocky layout.
Editor's noteUse matte ribbon or cotton-look ribbon; shiny satin looks cheap next to matte tissue.
Skip thisDon’t tint the whole petals gray — only the center should carry the dark tone.
3. Rose Quartz Bloom Garden with Peach-Satin Center Rings
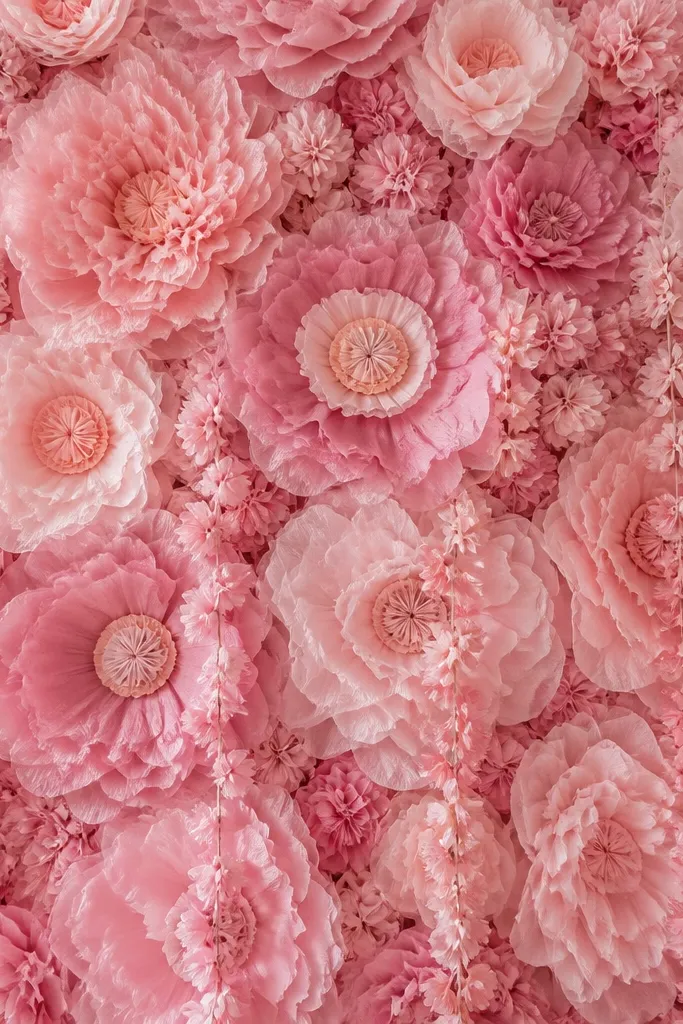
This wall reads luxury because it combines soft rose petals with a center detail that looks like fabric. I used rose quartz tissue for most outer petals, blush for inner petals, and peach tissue for the mid layers. Then I wrapped a thin strip of peach satin ribbon around the rolled center before gluing the petal layers on top, so the center ring shows a smooth, satin-like band. The color palette flatters cool and neutral skin tones, especially in daylight, because the pink is warm but not neon. It’s also a great fit for baby showers, bridal parties, and “soft romantic” photo booths.
Make your rose blooms in two thicknesses: standard tissue for outer petals and slightly sturdier tissue for the inner ring. Curl outer petals gently with a pencil so they open like a fan, then curl inner petals a little tighter for a stacked look. Wrap the rolled center with a 1-inch strip of peach satin ribbon, then glue the first inner petal layer on top of the ribbon edge. Mount larger blooms in a diagonal band across the wall, then fill gaps with 8-10 inch mini flowers spaced 3-4 inches apart. Finish by adding a few tiny blooms connected with the same satin tone so the wall has a “garden” rhythm.
Editor's noteCut mini flowers from the same rose sheet so the shade match looks intentional.
Skip thisSkip metallic tissue in the main petals — it makes the soft palette look costume-y.
4. White-on-White Sculpted Flowers with Pearl Dot Centers
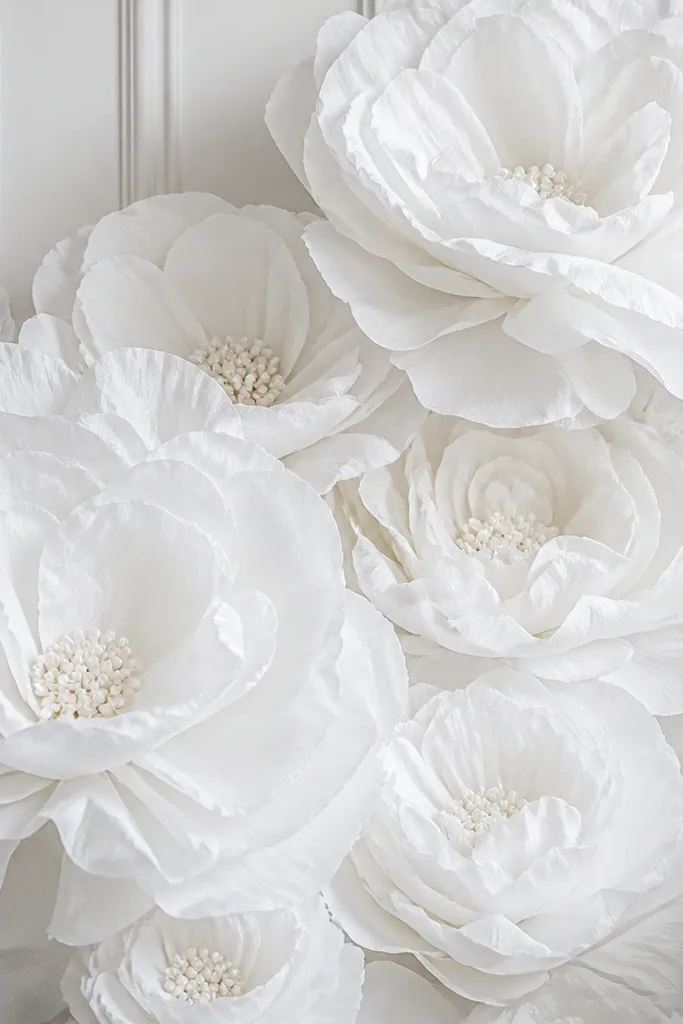
White-on-white is the “quiet luxury” move. It looks high end when you add sculpting and micro-detail, because plain white flowers can look flat and cheap. I built this with three whites: true bright white outer petals, soft off-white inner petals, and a slightly thicker tissue for the innermost ring to hold an open shape. For the center, I used rolled tissue and pressed tiny pearl beads or pearl dusted glue dots into a tight cluster. This palette flatters almost every outfit color and makes skin look clean and bright in photos. It also works beautifully for minimalist venues where you don’t want a loud theme.
Start with 3 sizes: 18-inch hero flowers, 14-inch supporting flowers, and 10-inch fillers. Curl petals on a pencil — outer petals get a wider curl, inner petals get tighter curl so the bloom looks sculpted. Assemble with staggered petal counts: fewer petals on the outer layer, more on the inner layer, and a tight bud at the center so there’s no empty hole. Secure to the wall with removable hooks or adhesive dots so the petals can cast shadows. Place flowers in clusters of 1 hero + 2 supporting around it, and keep filler blooms only in the corners and between clusters so the wall feels intentional.
Editor's noteUse a hair dryer on low for 10-15 seconds after assembling to set the curl — don’t overheat the tissue.
Skip thisDon’t use only one shade of white — the lack of tonal difference kills the expensive look.
5. Dusty Gold and Cream Luxe Wall with Foil-Edge Petals
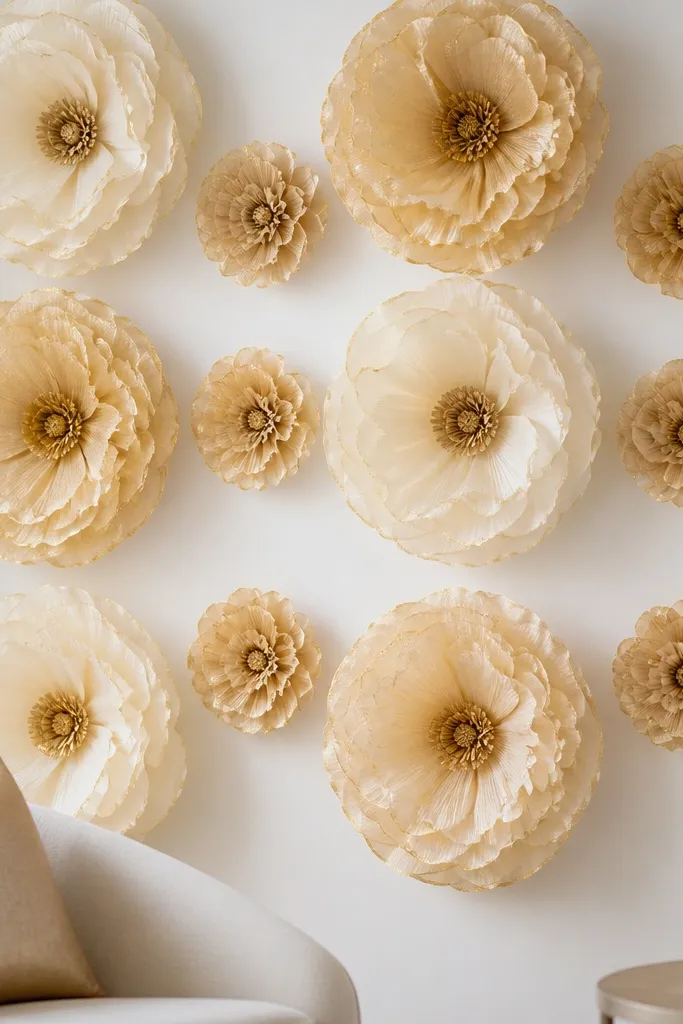
This wall turns tissue paper into something that reads like event styling. I used cream tissue for outer petals and dusty gold tissue for inner petals, then painted a thin line of metallic gold along the petal edges with a small craft brush. The foil-edge trick catches light when people move, so the wall looks alive without needing extra decor. The warm gold flatters neutral and warm undertones, and it looks gorgeous with champagne dresses, tan suits, and warm candlelight. It’s a strong choice for holiday dinners, birthdays, and upscale engagement parties.
Cut petals in two colors and keep them the same size so the ombre doesn’t look accidental. Curl petals with a pencil and let them rest flat for 2 minutes before assembly. Paint a thin metallic gold edge on the inner petals only, right along the outer curve, then let it dry fully. Assemble flowers with cream outer layers, dusty gold inner layers, and a gold-tinted rolled center. Mount in alternating rows: hero blooms every 16-20 inches across, supporting blooms in between, and mini fillers at the ends of each row. Keep all stems vertical so the gold edge lines up and looks intentional.
Editor's noteUse a foam brush for the gold edge; it leaves a soft line instead of streaks.
Skip thisDon’t paint foil edge on every layer — too much shimmer makes it look like party craft.
6. Sage Green Luxe Wall with Linen-Texture Ribbon Hangs
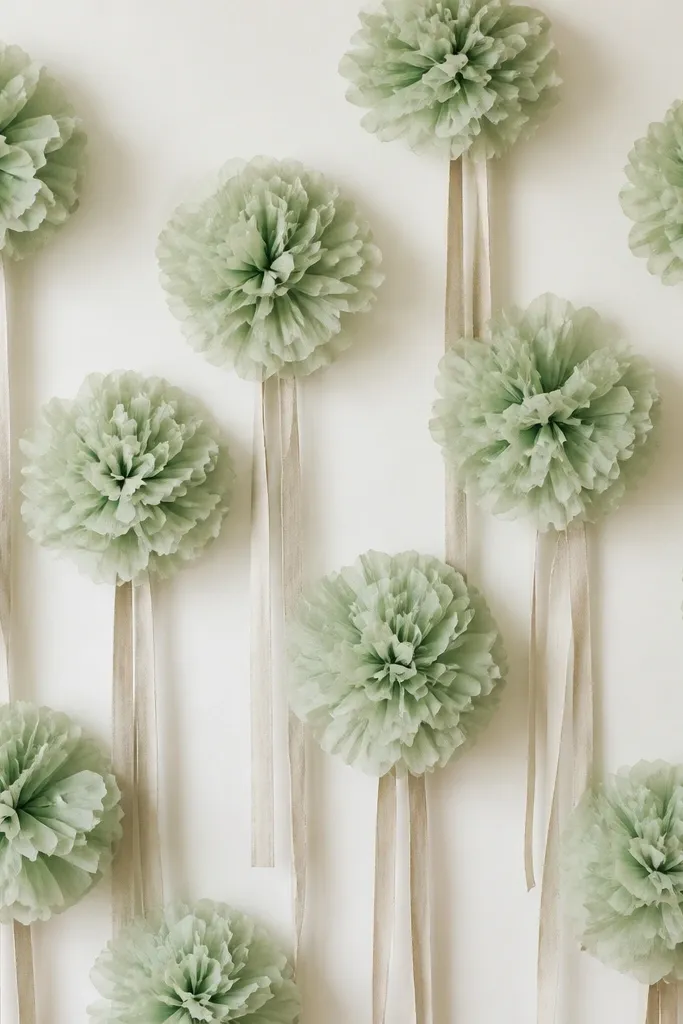
Sage green feels premium because it pairs well with natural textures. I used sage tissue for the outer petals and a slightly deeper olive for the inner ring so the bloom has a defined center. Then I added linen-texture ribbon tails under selected flowers — 10-12 inches long — so the wall has movement and looks styled. This is one of the few tissue paper flower walls that looks good in photos even when the room is bright and overexposed, because the green tones stay calm. It suits spring events, garden weddings, and any venue with linen tablecloths or neutral walls.
Make petals in two greens and keep your inner petals slightly smaller so the center doesn’t look wide and flat. Curl outer petals gently and inner petals tighter, then assemble with a rolled bud center in olive. For the ribbon, tie a knot around the stem bundle before you mount it, then tape the ribbon tails against the wall so they hang straight. Arrange flowers in clusters of three, with one cluster slightly offset to create a diagonal pattern. Leave 5-7 inches between clusters so the ribbon lines stay visible and the wall doesn’t feel packed.
Editor's notePress the ribbon tails with a warm iron on low for 5 seconds through a cloth so they hang clean.
Skip thisAvoid glossy satin ribbon — it clashes with tissue texture and reads cheap.
7. Tropical Punch Wall with Teal, Coral, and Sunflower Centers
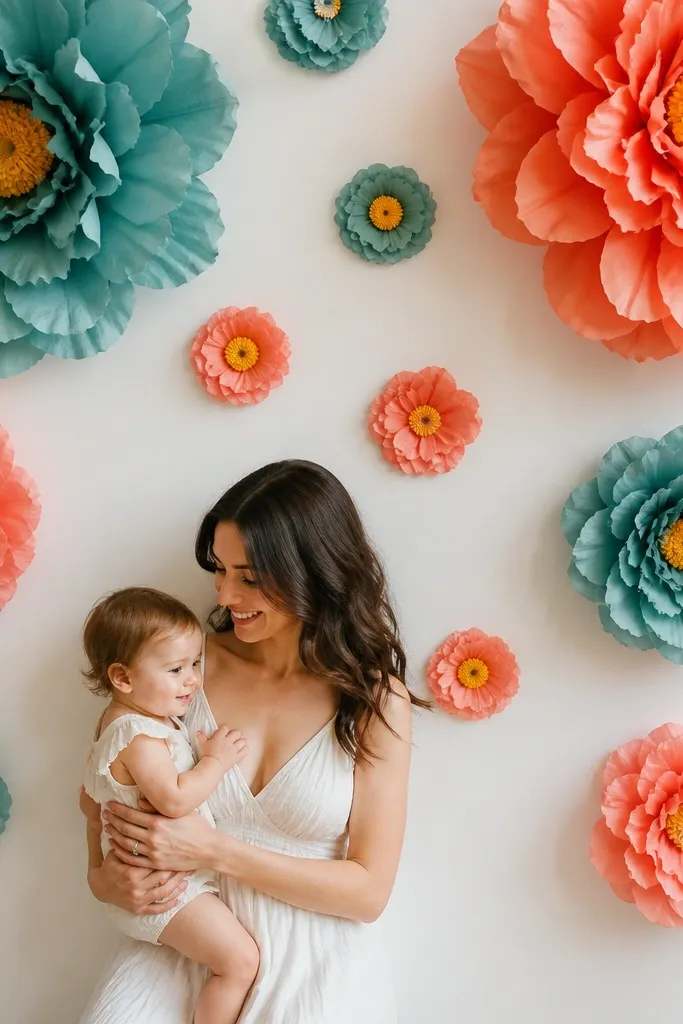
Luxury doesn’t have to mean neutral. This wall looks high end because the colors are bold but the shapes are disciplined: consistent petal curl, clean layer stacking, and a center that looks like it belongs. I used teal tissue for outer petals, coral for the inner petals, and bright yellow for the center, formed into a layered disk effect. The sunflower center is what makes it feel “designed” instead of random — it adds a graphic focal point. This setup flatters people with darker hair and warm skin tones because the teal and coral create a clean contrast. It’s a smart choice for summer birthdays, beach weddings, and photo walls where you want energy.
Cut and curl outer petals from teal sheets and inner petals from coral, keeping sizes consistent within each flower. Build the center as a 3-layer disk: roll small tissue strips into tiny coils, glue them tightly into a circle, then add another ring with shorter coils for a raised center. Assemble by placing teal petals first, then coral petals so the coral forms a visible inner frame. Mount hero flowers in a loose triangle across the wall, then fill the gaps with 10-12 inch flowers in either teal or coral only — not both in each mini. Keep center disks bright and centered by using a circle template for the glue placement.
Use yellow tissue that is slightly thicker so the center disk holds its round shape.
Don’t mix too many colors in one flower — each bloom should have one outer color and one inner color.
8. Monochrome Plum Wall with Velvet-Look Petal Edges
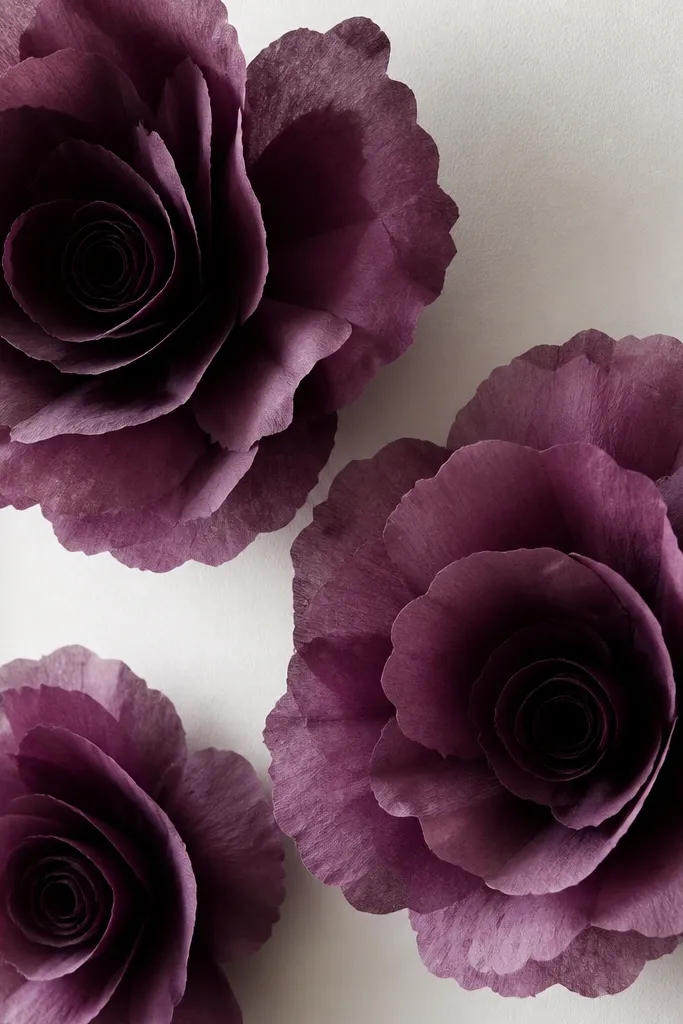
Monochrome looks luxury when you create texture, not when you repeat the same shade. I made this wall with plum tissue in two depths: a medium plum for outer petals and a deeper plum mixed with a tiny bit of black in tinted glue for the inner ring edges. The trick is brushing the deeper tint lightly along the petal tip curve so it looks like velvet shading. The centers stay tight and dark, which makes the bloom feel expensive and photo-ready. This palette looks striking with silver jewelry and dark outfits and flatters cool undertones well. It’s a great fit for gala nights, winter events, and dramatic engagement photos.
Prepare two batches of petals: medium plum and deep plum. Curl medium petals gently, then curl deep petals tighter for a stacked look. Dip the tip edge of deep petals lightly into tinted glue mixed with a little cocoa-brown paint, then press edges for 10 seconds on scrap paper so it dries without streaks. Assemble outer medium plum first, inner deep plum second, and finish with a dark rolled center. Arrange blooms in a staggered pattern: larger flowers at eye level, smaller ones above and below, keeping 5 inches between bloom centers. Step back and check contrast — the darker tips should be visible from 6 feet away.
Editor's noteTest one petal edge on scrap first so the tint doesn’t go too dark and muddy.
Skip thisDon’t leave the center loose — a wide open center makes dark monochrome look heavy.
9. Blush Peony Wall with Multi-Roll "Ruffle" Petals
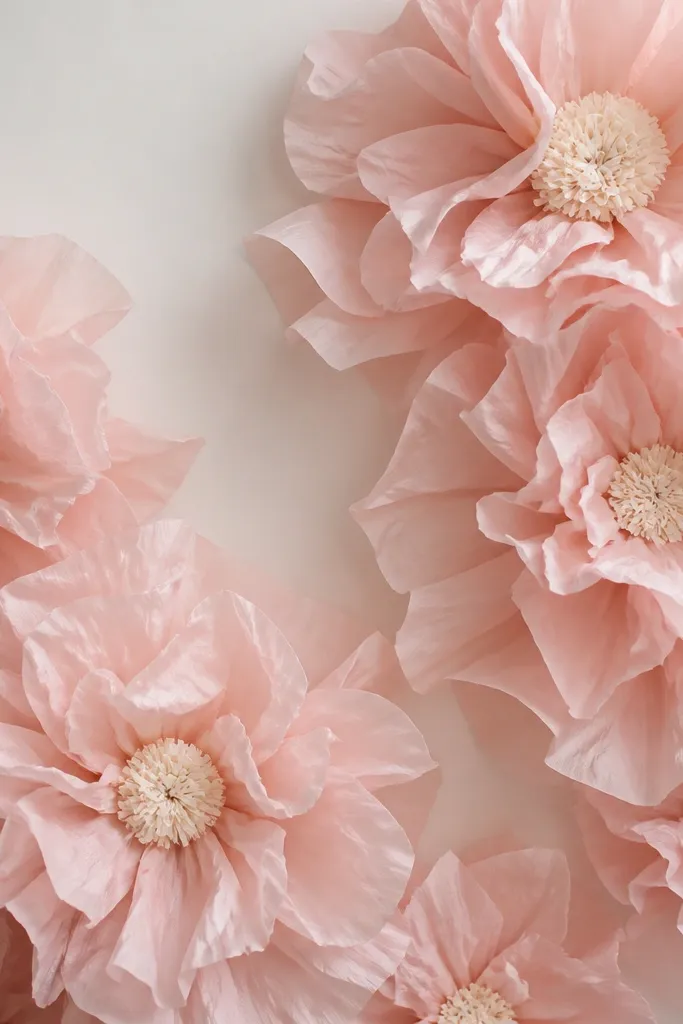
A peony look reads luxury because petals look abundant and sculpted, not uniform. For this wall, I used blush tissue and built ruffles by rolling each petal strip around a pencil, then doing a second mini roll at the base so the petal sits like a wave. The center is creamy rolled tissue, slightly larger than a bud, so the bloom looks full. This palette flatters most people because blush doesn’t fight skin tone — it just brightens it. It’s ideal for weddings, bridal showers, and romantic parties where you want soft volume without loud colors.
Cut petal strips and fold them into ovals, then roll each one on a pencil. For the ruffle effect, pinch the base while it’s still on the pencil so it sets into a slight twist, then glue only the bottom edge. Assemble in three tiers: outer ruffle petals (largest), mid petals (slightly smaller), and inner petals (tightest curl). Mount the flowers with a slight tilt — push the stem bundle at a 5-10 degree angle so the ruffles catch light. Use clusters of 3 blooms, with a 2-3 inch gap between blooms inside a cluster and 6-8 inches between clusters for a high-end “garden wall” look.
Editor's noteUse a ruler to keep petal strip width consistent — ruffles look premium when they’re uniform.
Skip thisDon’t overcrowd the wall with medium blooms — peony walls look expensive only when you leave real negative space.
10. Ivory and Terracotta Sunset Wall with Curved Stem Arcs
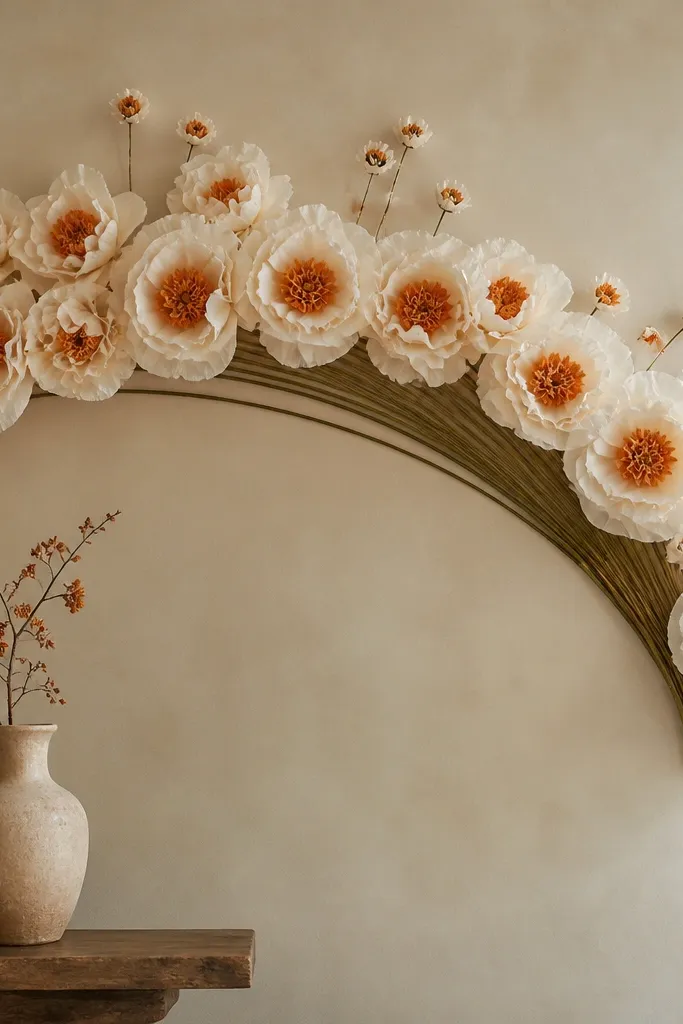
This wall looks luxe because the layout has a shape, not just scattered placement. I used ivory outer petals with terracotta inner petals so the flowers look like they’re lit from within. Instead of mounting everything flat and straight, I aligned stems to form a gentle arc across the wall, which makes the whole backdrop feel intentional. Terracotta adds warmth, and ivory keeps it clean so it doesn’t look like fall craft paper. This works great for rustic venues that still want a polished photo backdrop. It also photographs well for families because the arc guides the eye toward the center.
Make hero flowers in 18-20 inches wide with ivory outer petals and terracotta inner petals, and make 10-12 inch flowers for the top edge of the arc. Mark an arc line on the wall with a pencil and mount stems along that line using adhesive hooks — keep stems leaning slightly toward the center. Assemble each flower with tighter curls on inner petals so terracotta shows as a framed inner layer. Place larger blooms at the center of the arc and smaller ones toward the ends. Leave 6 inches between bloom centers at the outer ends and 4-5 inches near the center so the arc stays readable.
Use a laser level app or string line to keep the arc smooth across the whole wall.
Avoid mixing terracotta into the outer petals — it makes the wall look muddy instead of sunset-lit.
11. Pastel Rainbow Luxe Wall with Only One Flower Type per Color
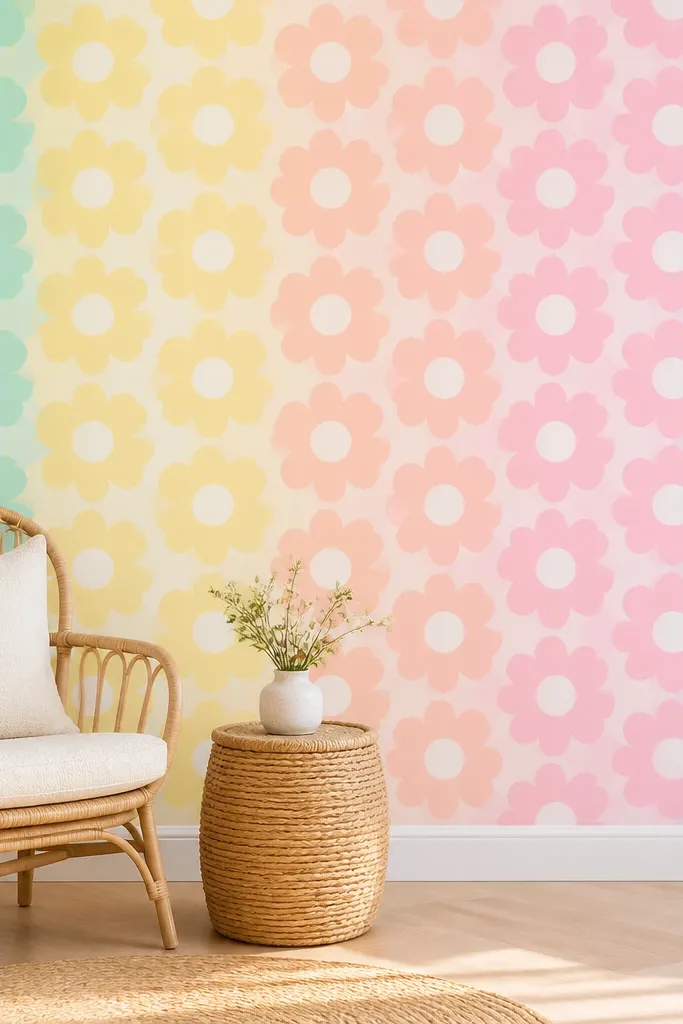
Rainbow walls look high end when they’re controlled. I made this by choosing one flower structure — same petal count and same curl style — and then repeating it across pastel colors in bands. Each band uses one color family, and the centers are consistent white so the wall looks cohesive. The luxury feel comes from discipline: no mixing random shades within one bloom, no changing petal shapes. This works well for birthdays, kids parties that still want grown-up decor, and school events where you want color without chaos. It also photographs better because every flower has the same silhouette.
Create one petal template set and reuse it for every color so sizes match perfectly. Curl petals with a pencil and assemble with the same layer order each time: outer pastel, inner pastel, and white center bud. Mount in vertical bands across the wall, staggering flowers within each band so the gaps don’t line up. Use 3 sizes: 16-inch in the center of each band, 12-inch on the sides of each band, and 9-inch as transition fillers between bands. Keep band widths about 18-24 inches each so the colors are readable from photos.
Editor's noteTie a small white ribbon around the stems of the 9-inch fillers so they blend and don’t look like leftover scraps.
Skip thisDon’t mix two different flower shapes in the same color band — that’s where it starts looking handmade in a messy way.
12. Garden-Party White Pearls Wall with Droplet Center Clusters
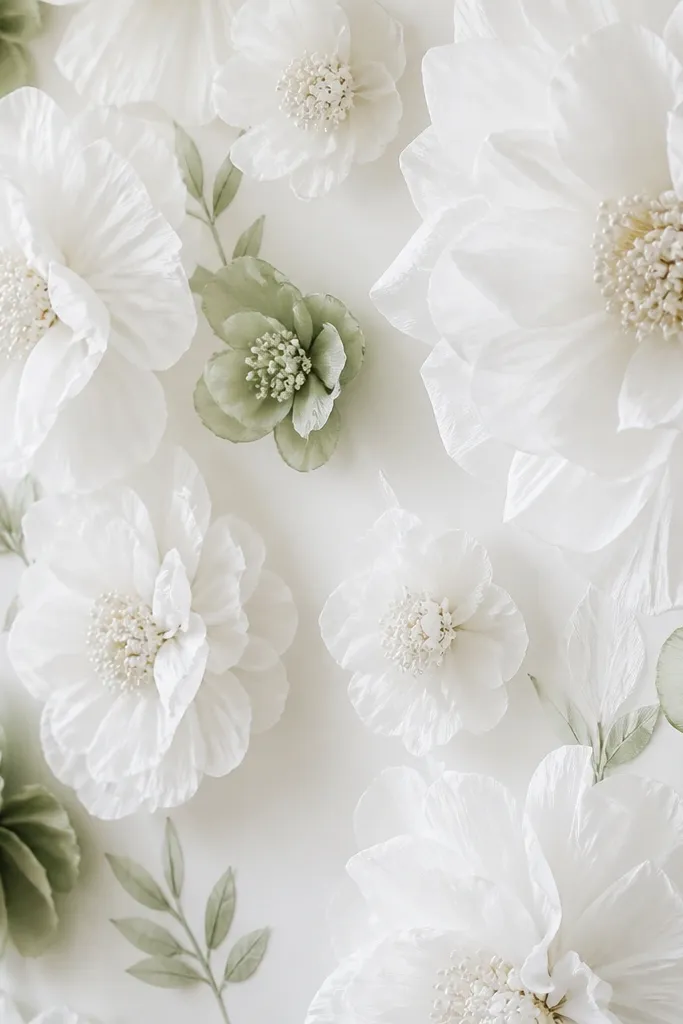
If you want luxury that feels delicate, this is it. I used white tissue flowers but built the centers as droplet clusters: small rolled tissue pieces glued into a tight bunch, then dusted with pearl powder so they look like tiny beads. I added a few pale green accents only as inner rings, so the wall stays mostly white and airy. The result is a soft, garden-party vibe that still looks intentional in close-up photos. This works for brunch events, baby showers, and small weddings where you want the decor to feel light rather than heavy. It flatters everyone because the white centers brighten faces in pictures.
Make your main flowers first: 14-18 inches wide with 2-3 petal layers, curled softly for a gentle open shape. For droplet centers, roll tiny 1-inch tissue strips, glue them into a circle, then add a second ring of smaller droplets to build height. Dust the droplets lightly with pearl powder and let it dry before mounting. Mount flowers with 5-7 inches between bloom centers so the wall doesn’t look jammed. Add pale green as an inner ring on only 1 out of every 4 blooms for subtle variety.
Pearl powder looks better than glitter for this style — it doesn’t throw harsh sparkles on camera.
Don’t overdo the dusting; thick pearl powder makes the center look crusty.
13. Gold Leaf Look Wall with Metallic Tape Petal Strips
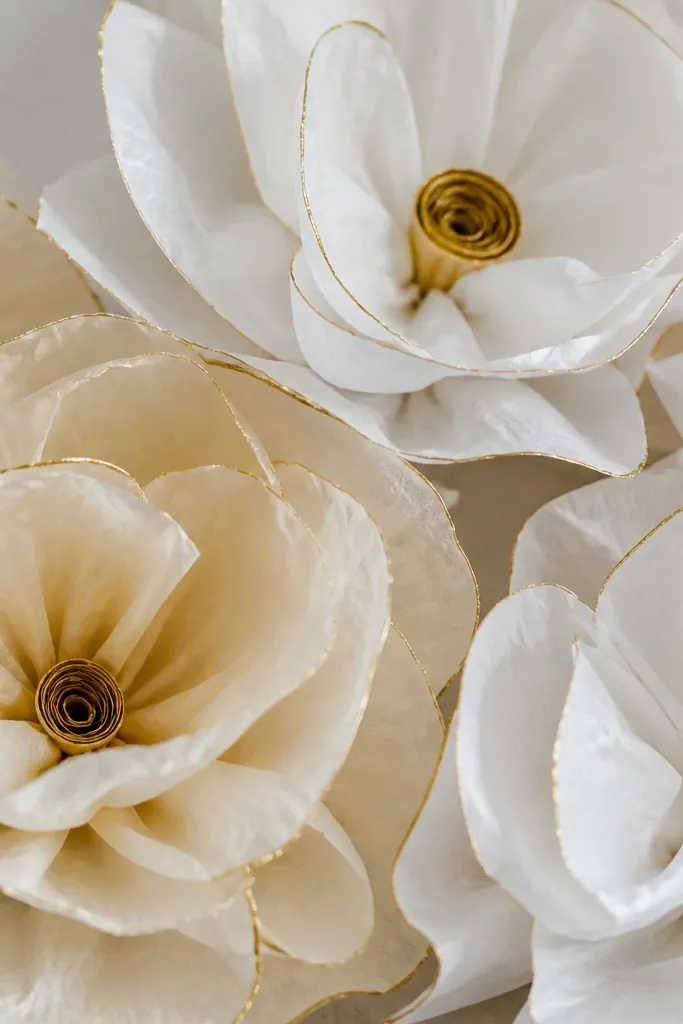
This is the “gold leaf” look without expensive materials. I used cream tissue for petals and added thin strips of metallic tape along the petal edges of the inner layers only, so the shimmer is controlled. The outer petals stay matte, which keeps the whole wall from looking like a craft store display. The center is rolled tissue tinted with gold so everything ties together. This wall looks great in rooms with gold fixtures, warm lighting, and beige decor. In photos, the metallic tape makes the texture read richer even if the camera exposure is flat.
Cut petals in cream and warm white, and curl them on a pencil. Assemble the outer layer with matte cream petals first. For the inner petals, apply a 1-2 mm strip of metallic tape along the outer edge before gluing — press it down gently so it adheres without wrinkles. Build the inner ring and then place a rolled gold-tinted center. Mount hero flowers every 18 inches across the wall, then fill with 10-12 inch flowers between. Keep tape on inner petals only so the shimmer doesn’t overwhelm the wall.
Editor's noteTrim tape edges with small scissors so they look clean, not ragged.
Skip thisDon’t cover entire petals in tape; it looks like packaging material.
14. Soft Navy and White Wall with Starburst Mini Blooms
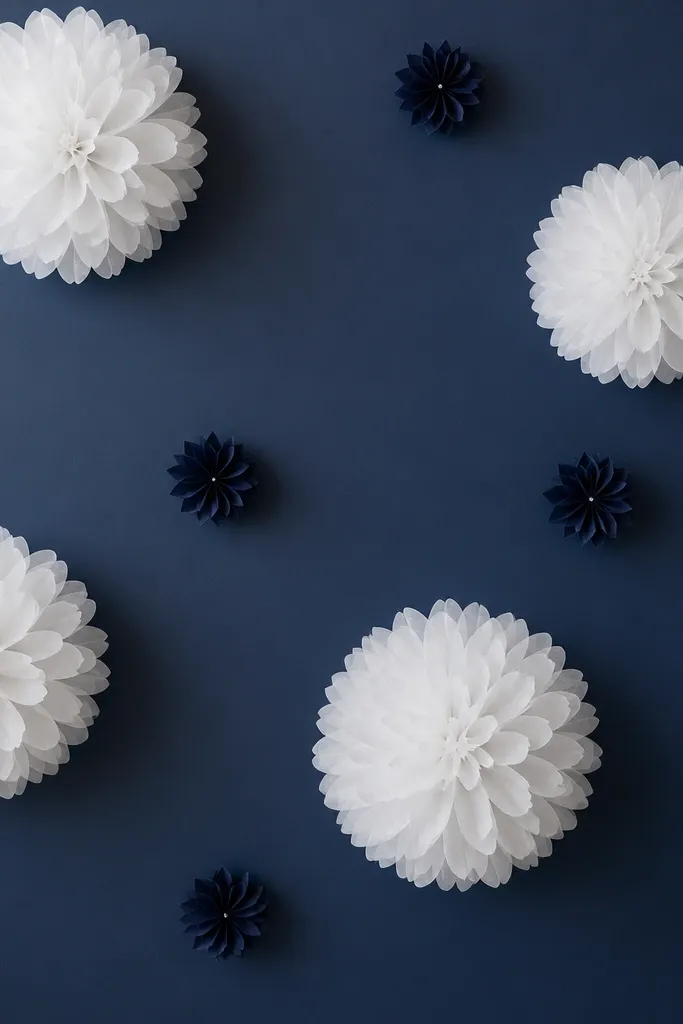
This wall feels luxury because it mixes scale and adds a second texture type. The large blooms are white with sculpted petals, while the mini blooms are navy starburst-style tissue folded and fanned like little fireworks. I keep the centers bright white so the navy reads as accent rather than heavy. This works for nautical-themed events, graduation parties, and modern weddings with navy suits and crisp white linens. It also photographs well because the navy accents create crisp edges in the background.
Make your large flowers first: 16-20 inch white blooms with 3 petal layers curled at different tightness levels. For mini starburst blooms, cut tissue squares, fold accordion-style, pinch the center, and glue to a small circle base. Mount large blooms in a staggered grid with 7 inches between bloom centers. Place mini navy blooms in the gaps — about 6-8 mini blooms per large flower cluster. Keep mini blooms smaller than you think; if they’re too big, the wall turns into clutter instead of design.
Editor's noteUse thicker tissue for the mini starbursts so they stay crisp and don’t droop.
Skip thisDon’t use navy on the main outer petals; it makes white outfits look dull in photos.
15. Blush and Mocha Luxe Wall with Chocolate-Tinted Centers
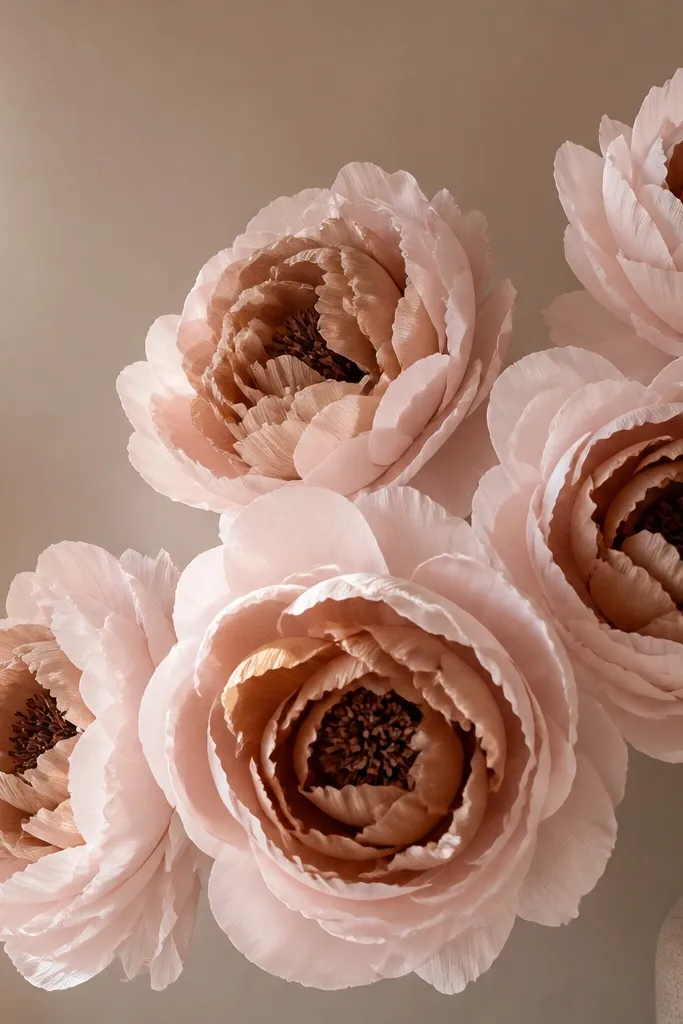
Warm neutrals look high end when the center looks like it belongs to the palette. I used blush outer petals, mocha inner petals, and a chocolate-tinted center made from rolled tissue with cocoa-brown paint mixed into glue. The chocolate tint gives a depth effect without needing dark outer petals. This wall flatters warm undertones and also complements cool skin nicely when you keep mocha warm rather than gray. It’s perfect for fall weddings, bridal brunches, and dessert-table backdrops. The luxury feeling comes from the center color depth and the smooth blush-to-mocha transition.
Cut blush outer petals in larger sizes and mocha inner petals slightly smaller, then curl both on a pencil. Assemble outer petals first, then inner mocha petals so mocha forms a framed halo. For the center, roll tissue into a tight coil, glue it, then brush cocoa-brown tinted glue onto the coil so it dries darker. Mount flowers in clusters of 3 on the wall, with one hero bloom in the middle of each cluster. Keep spacing tight inside clusters (4-5 inches between stems) and wider between clusters (7-8 inches). Finish by adding one or two mini blush blooms at the top corners to balance the composition.
Let the tinted center dry flat on parchment for 10 minutes so it darkens evenly.
Avoid gray-brown centers; they make the whole flower look dirty instead of warm.
16. Emerald Luxe Wall with Matte Black Center Disks
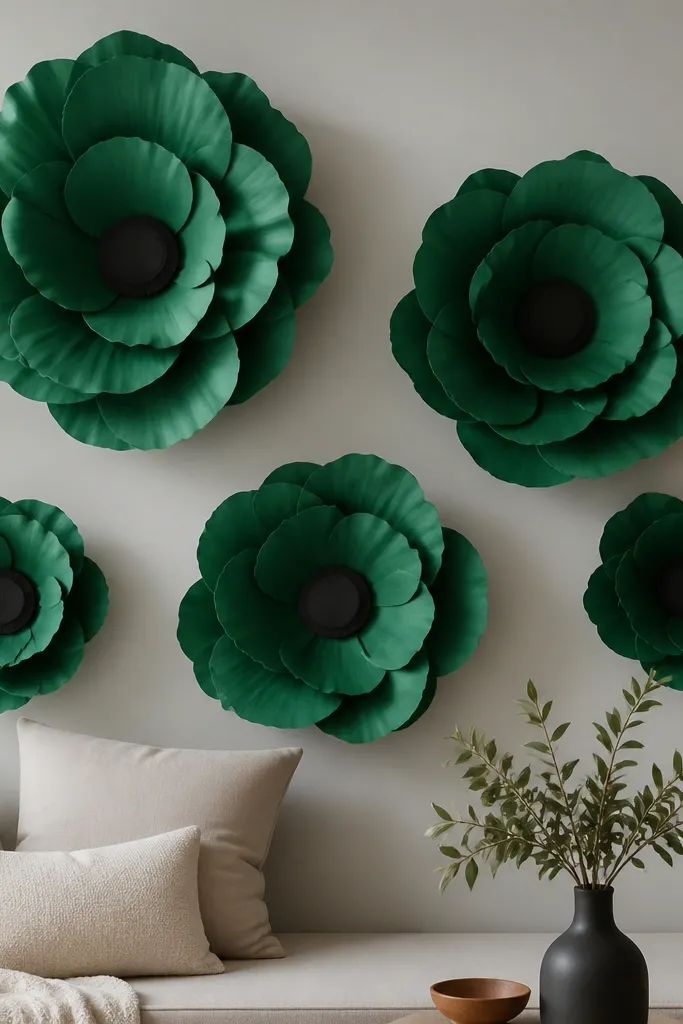
Emerald plus matte black is one of the most “designer” combos I’ve used. I used emerald tissue for outer petals and deeper green for inner petals, then made center disks from rolled tissue pressed into a flat circle. The black center reads like a button, giving the bloom a tailored look. This wall looks incredible with gold earrings, black outfits, and deep jewel-toned dresses. It also makes the green pop without needing glitter. If you want luxury that feels modern and not bridal-soft, this is the one.
Make 18-22 inch emerald hero flowers and a smaller 12-14 inch set for spacing. Curl outer petals with a medium pencil curl so they open wide, then curl inner petals tighter. Assemble with emerald outer layers, then deeper green inner layers. For center disks, roll tissue strips, glue them into a disk, and press it gently flat against a tray until set. Mount using 6-8 inches of spacing between bloom centers so the black disks stay visible and the wall breathes. Place flowers in a diagonal pattern rather than a grid to avoid a stiff look.
Use matte black craft paint on the disk after assembly for a uniform finish.
Don’t use shiny black tape in the center; it reflects light in a cheap way.
17. Champagne Rose Wall with Floating Flower Lines
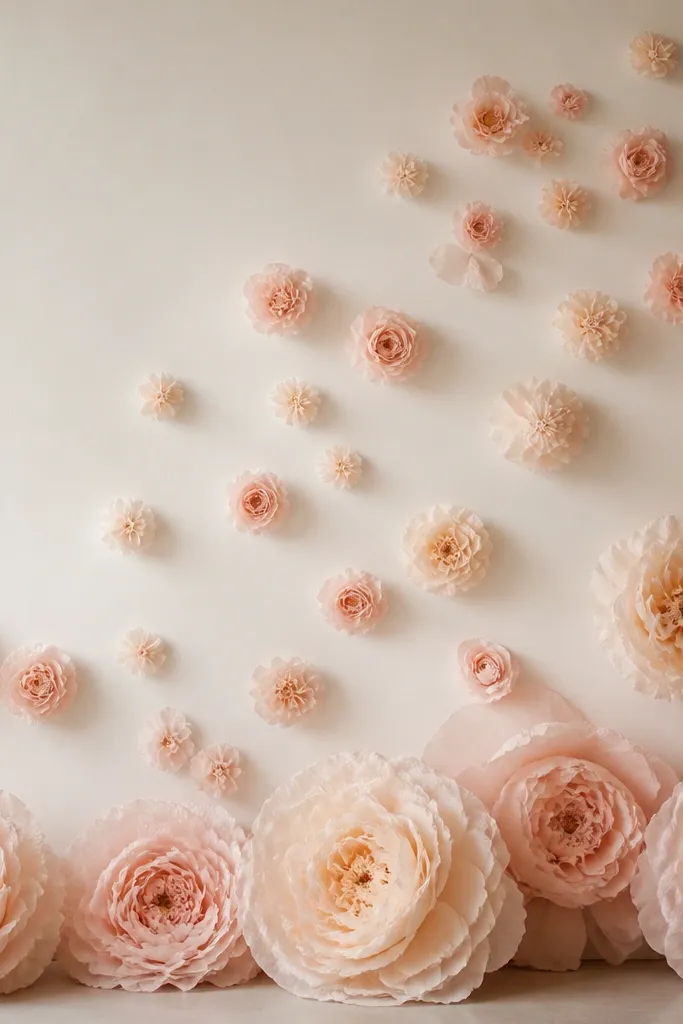
This design feels luxury because it looks like the flowers are floating, not glued down in a flat cluster. I used champagne rose tissue for petals and kept the centers tight and lightly dusted with pearl powder. Then I mounted the line of smaller blooms slightly forward on the wall using extra adhesive thickness so they cast soft shadows. The result is that the backdrop has depth even from a side angle. This is perfect for sweetheart tables, photo booth edges, and any event where you want a “light” look that still feels expensive. It also makes people in photos stand out because the wall doesn’t overwhelm the subject.
Start with a base anchor: place 2-3 large blooms at the bottom corners, about 24 inches apart. Build a floating line across the wall using 10-12 inch blooms — mount them on adhesive dots with a bit of extra thickness (stacked dots) so they sit forward. Curl petals gently so they keep an open shape, and keep inner petals a shade lighter than outer petals for a soft glow. Use pearl dust only on the center, not on petals. Finish by adding 2-3 tiny 6-8 inch blooms at the ends of the line to make the curve feel complete.
Editor's noteTake one test photo from the side before you finish the whole wall — depth is easier to judge in pictures.
Skip thisAvoid mounting everything at the same distance from the wall; flat depth reads cheap.
18. Peach Cream Wall with Layered Petal Fans and Hidden Supports
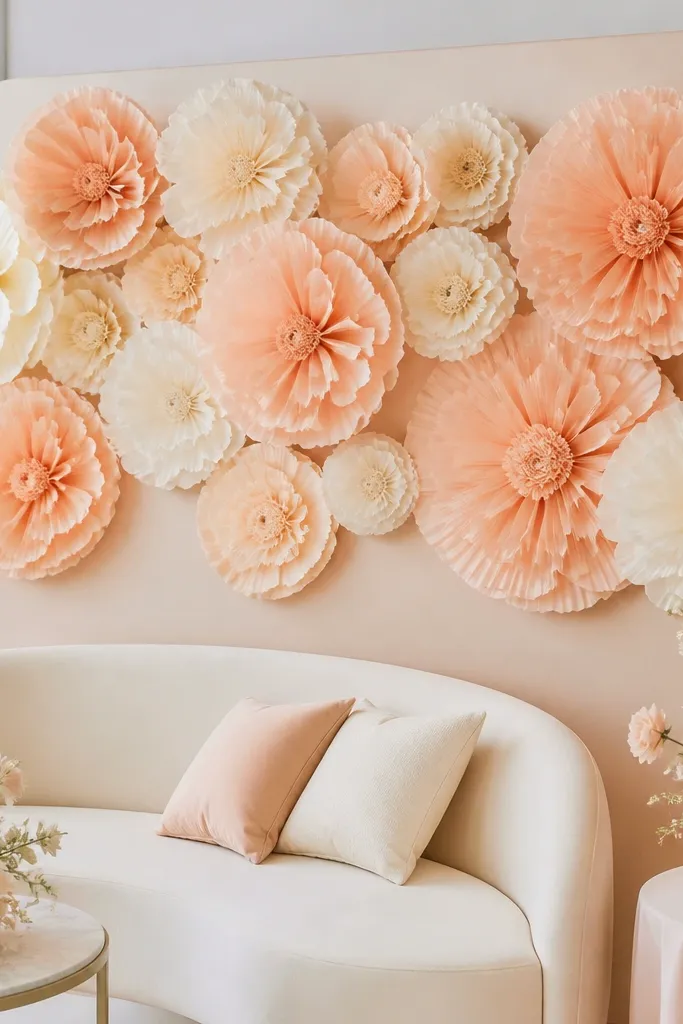
This wall looks expensive because the stems disappear completely and the flowers read as sculptural fans. I made peach outer petals and cream inner petals, then used a backing panel behind the arrangement so the mounting hardware stays hidden. The fan look comes from layering flat-cut petals with a consistent curl and then tightening the center so it doesn’t sag. This is a good choice for rental spaces where you want a clean setup that looks professional even if someone inspects the edges. It flatters warm undertones and pairs with peach dresses, cream suits, and neutral linens. The luxury is in the hidden supports and the crisp petal fan shape.
Cut petals into fan-friendly ovals, then curl each petal on a pencil with the curl direction consistent across the flower. Assemble outer peach petals first, then cream inner petals so cream frames the center. Build a tight center coil and glue it so the bloom doesn’t droop. For mounting, attach a thin backing panel to the wall first (foam board or sturdy poster board), then stick flowers onto the backing so stems hide behind it. Arrange in a staggered pattern: big blooms about 18 inches wide with 6-7 inches between them, and add small filler fans only in gaps. Finally, trim any visible backing edges so the wall looks finished.
Editor's noteIf your tissue is thin, double the outer petals — it keeps fan edges crisp without extra bulk.
Skip thisAvoid mounting directly with visible tape lines; it kills the clean luxury look.
19. Ivory and Sage "Boutique Bouquet" Wall with One Dark Accent Bloom
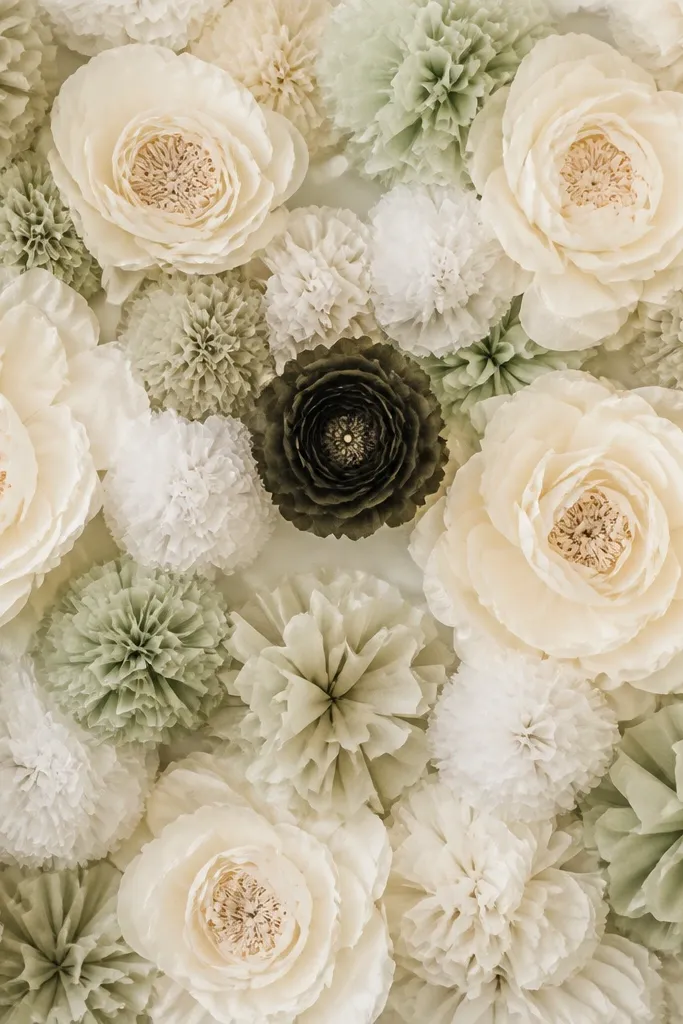
Luxury walls look curated when there’s a single focal contrast. I built this with ivory and sage flowers in matching petal shapes, then placed one dark accent bloom in deep sage or charcoal-green. The contrast draws the eye, and the rest of the wall stays calm and high-end. I used tight centers on all blooms so the shapes look consistent and intentional. This wall works for engagement parties, boutique-style events, and anyone who wants “soft but styled.” It flatters faces because the light tones brighten the background without turning skin red or gray.
Make two main flower templates: ivory blooms and sage blooms, each 14-18 inches wide with 3 petal layers. Curl outer petals gently and inner petals tighter for the same silhouette across both colors. Assemble centers as rolled tissue buds and keep them tight so they don’t spread. Mount flowers in bouquet clusters of 2-4 blooms, with 5-6 inches between stems inside clusters and 7-9 inches between clusters. Add the one accent bloom in the center of the wall, slightly larger (about 20 inches) so it reads as the hero. Place small sage mini blooms along the edges to connect the clusters.
Editor's noteChoose the accent bloom color from the room — tie it to a curtain or table runner so it looks planned.
Skip thisAvoid multiple dark accent blooms; too many focal points makes it look accidental.
20. White Rose Wall with Paper Lattice Backing for Shadow Depth
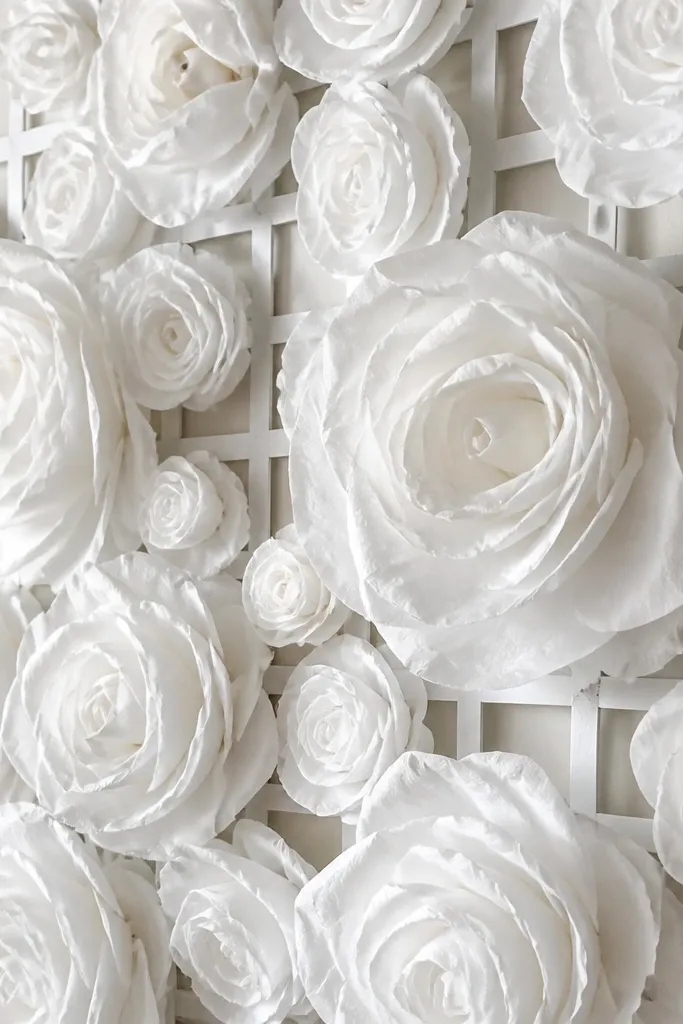
This looks luxury because it adds shadow texture behind the flowers. I used a lattice backing (thin craft paper or lightweight grid board) behind the wall display, then placed white rose tissue flowers on top. The lattice breaks up the flatness of a plain background and makes the blooms feel more dimensional, even if you don’t use glitter or metallics. The white rose petals are sculpted with pencil curls and staggered layers so they cast soft highlights. This works in rooms with spotlights or window light because the lattice shadows move slightly as people walk. It also flatters photos because the background isn’t a solid block of white.
Build the lattice backing first and mount it flat to the wall using painter’s tape or removable adhesive strips. Make your white roses in 16-20 inch sizes with 3 petal layers and tight bud centers. Curl petals on a pencil and assemble with slightly staggered petal sizes so the outer edges don’t line up perfectly. Mount each flower directly onto the lattice using adhesive dots on the back of the center — keep the flower centered so it doesn’t tilt. Arrange clusters with overlap: 2 blooms can be close enough that their petals overlap slightly, but keep at least 3 inches between bloom centers. After mounting, check the shadow pattern by walking to the side of the wall — you want lattice shadows to show behind, not hide under petals.
Use a lattice backing color that matches your wall (off-white on off-white) so it blends and only the shadows show.
Avoid thick backing that blocks light — it makes the whole setup look heavy.



