

1. Brass-Trim Linen Key Fob
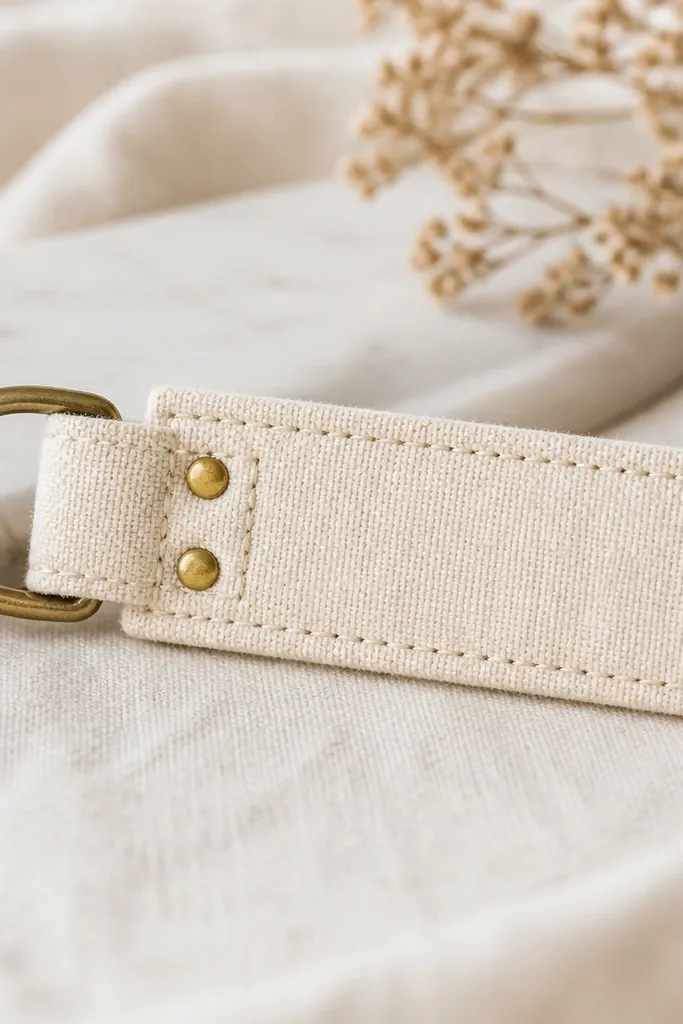
This key fob looks luxe because linen is structured when it’s the right weight, and the brass hardware catches light without looking flashy. I like cream linen paired with antique brass — it reads warm and expensive, especially on dark keychains. The strap should sit flat against the hand, not floppy, so it feels “made,” not improvised. It works for anyone with lots of keys or a bag they grab daily. If your friend has a cooler wardrobe, switch to a stone-gray linen and blackened brass for a sharper look.
Cut a linen rectangle 4.5 x 7 inches, then fold it lengthwise so it forms a 1-inch-wide strap. Stitch along the long edge with a 1/4-inch seam allowance, then turn and press so the seam sits inside. Add a brass D-ring at the folded end, then wrap the end over itself and stitch a box pattern around the attachment point. Finish the raw edges by trimming flush and using a thin coat of fabric glue or edge sealant, then let it dry before attaching any keys.
Editor's noteUse a heavy needle (size 90/14) and press with a hot iron so the linen holds crisp lines.
Skip thisSkipping edge finishing makes the fob look frayed and cheap in photos.
2. Chocolate Brown Leather Coaster Set with Burnished Edges
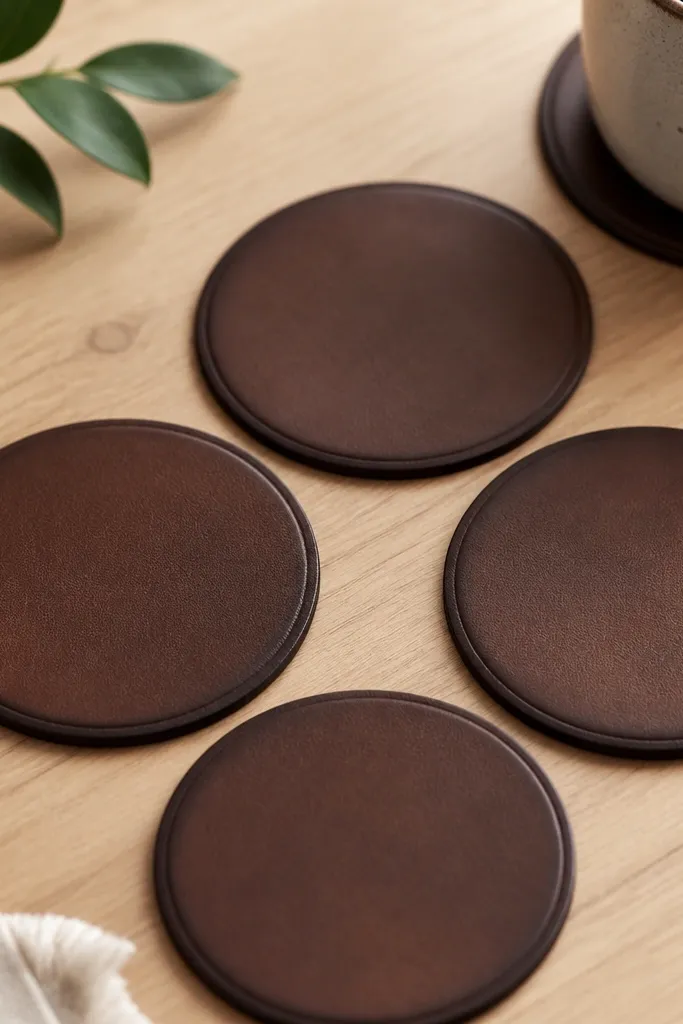
Leather coasters feel like a grown-up gift because they have weight, a smooth top, and edges that look deliberately finished. Deep chocolate brown looks expensive against most home interiors, and the matte surface hides small water marks better than glossy leather. This is a great gift if your friend loves coffee, hosting, or has a desk setup where small objects matter. If they have lighter decor, keep the leather in warm brown, not black. For someone with a minimalist style, skip extra stamping and let the burnish do the work.
Cut four circles at 4 inches diameter from 2-3 oz leather, using a sharp circle cutter for clean edges. Lightly sand the edge with 220 grit, then apply edge burnishing compound in thin layers. Burnish with a cotton cloth or an edge slicker until the edge turns glossy and smooth. Let the edges set for 10 minutes, then wipe the top with a barely damp cloth so it looks fresh.
Editor's noteBurnish in small sections so you keep the edge even and avoid streaks.
Skip thisUsing thin, floppy leather makes coasters curl and look like a craft project.
3. Marbled Soy Candle in a Reusable Glass Jar
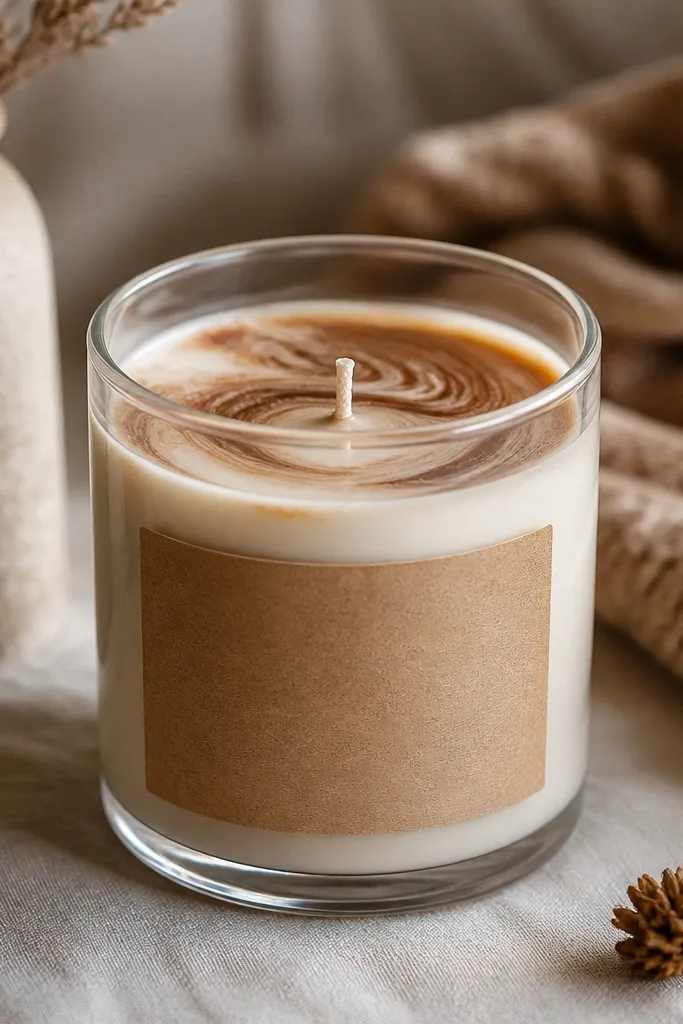
A marbled soy candle reads luxe because the wax surface looks like stone when it’s done right. Reusable glass jars make it feel considered, not disposable, and a cream-and-cocoa palette suits almost every room. This gift works best for a friend who likes cozy nights, bath rituals, or a desk candle that smells good but doesn’t overwhelm. The key is a smooth top and a wick centered so it burns evenly. If your friend is more modern, swap to gray-and-charcoal marbling and a black label.
Melt soy wax in two batches using a double boiler. Pour the first color halfway into a pre-warmed jar, then drizzle the second color in thin lines and drag a skewer through it once or twice for marbling. Let it set until the top is firm, then trim the wick to 1/4 inch. Apply a centered label on kraft paper, then tie a narrow satin ribbon around the jar only after the wax is fully cured.
Editor's noteWarm your jar with hot tap water first so the wax doesn’t pull away from the glass.
Skip thisPouring too fast or over-mixing the marbling gives you muddy swirls instead of clear stone-like patterns.
4. Hand-Sewn Felt Rose Bouquet (No Drying Required)
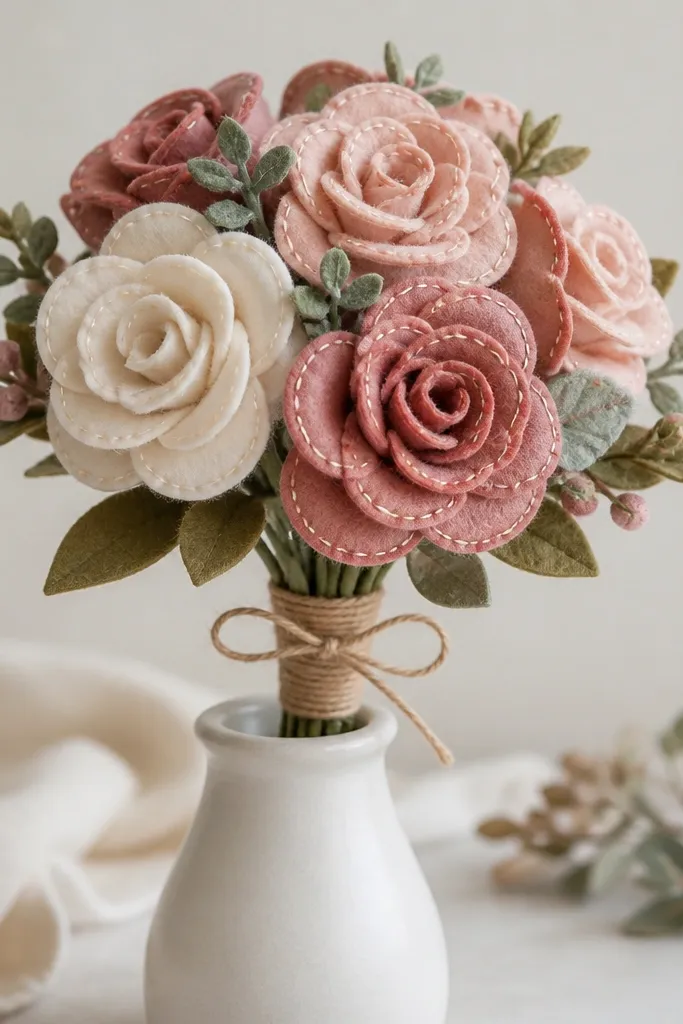
Felt roses look high end when the petals are layered with visible stitching and consistent petal shapes. Blush and dusty rose make the bouquet feel romantic without going full “kid craft.” I like giving these to friends who don’t want real flowers that die quickly, but still want something pretty on a shelf. The stitching gives texture that reads premium up close, especially if the felt is thick. This also works for different skin tones in photos because the pinks stay flattering and soft.
Cut felt petals in 5 sizes, starting around 1.5 inches for the smallest and going up to 3.5 inches for the largest. Roll each petal into a tight cone, then stitch the base with matching thread so the shape holds. Build the rose by stacking sizes from smallest to largest, then stitch the bottom layers together. Tie the finished stems with twine and place in a small vase; keep spacing airy so the roses don’t look like one big clump.
Editor's noteUse a single thread color per rose base so the stitching looks intentional, not random.
Skip thisUsing thin craft felt makes petals collapse and look flat.
5. Embossed Friendship Passport Holder with Waxed Thread
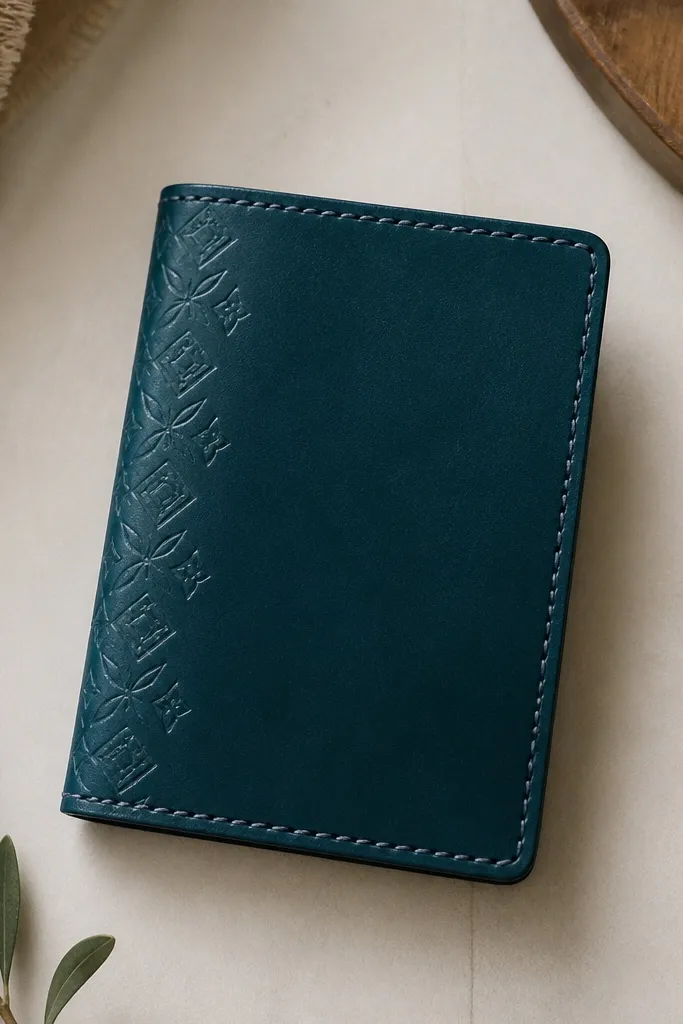
A passport holder feels luxe because it’s built like a tool: sturdy leather, tight stitching, and a clean interior. Deep teal leather looks richer than plain black, and the embossed pattern adds interest without turning into clutter. Waxed thread stitching looks especially premium because the thread sits slightly raised and the tension is visible. This gift fits travel friends, weekend getaway planners, and anyone who keeps documents in a neat folder. If they travel with a minimalist style, keep the emboss light and skip extra pockets.
Cut leather panels to fit a standard passport with a 1/2-inch margin, then mark stitching holes 3/16 inch from the edge. Create a card slot by stitching a 3 x 4-inch leather piece onto the inside panel, leaving a small top opening. Do the embossing before assembly using a low-relief stamp and a firm mallet for a crisp impression. Assemble the cover, then stitch with waxed thread through the pre-punched holes using a saddle stitch pattern, keeping stitches evenly spaced.
Burnish the thread ends with a needle tip after tying off so the knot sits flat.
Skipping hole spacing tools makes stitches wander and immediately reads “cheap.”
6. Silk-Screened Tea Towel with Fringe Tie Tag
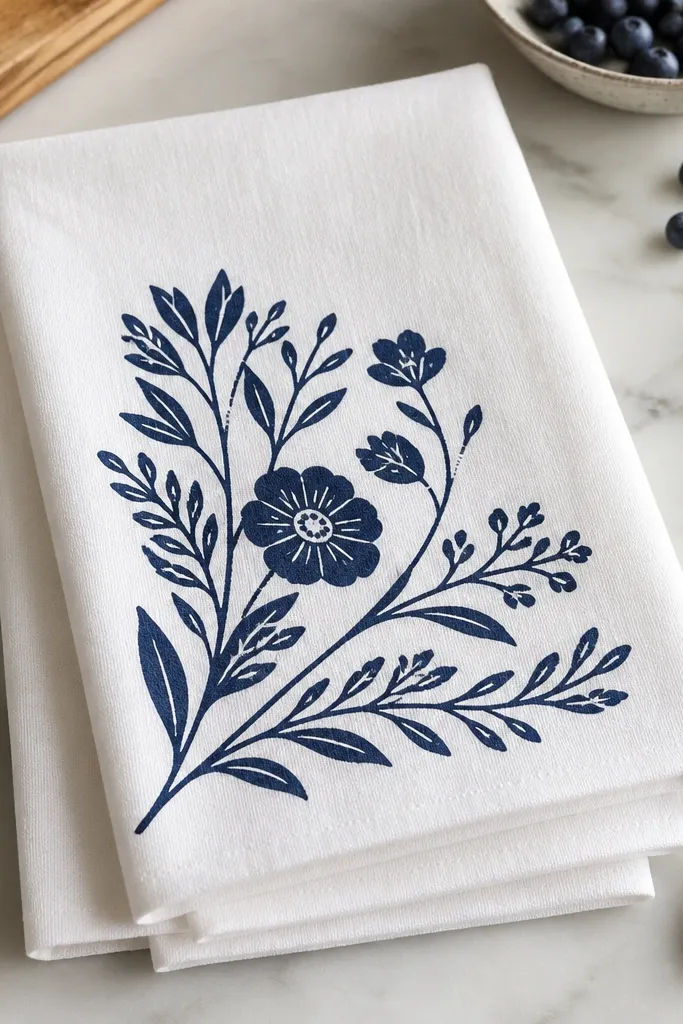
A silk-screened tea towel looks high end because it’s a real textile gift, not a printed paper item. One clean color — navy on white — reads classy in kitchens and photographs well. I gift these to friends who love hosting or have a new apartment because it feels instantly useful. The fringe tie tag adds a “gift wrap” vibe without adding bulk. If your friend leans modern, keep the design minimal: a single line drawing or a small monogram.
Wash and dry your towel first so the ink won’t crack later. Create a simple stencil design and screen it with fabric ink using a foam brush or screen squeegee, then let it dry fully. Heat set the ink according to the ink brand instructions. Add a fringe tie tag by cutting a small strip of cotton in navy, fringe one side, and tie it to the towel using a short piece of thin twine.
Editor's noteUse a ruler to keep the print corner perfectly aligned — it makes the whole towel look purchased.
Skip thisPrinting on unwashed fabric causes shrinkage and misaligned ink.
7. Knotted Macramé Wall Hanging with Two-Tone Rope
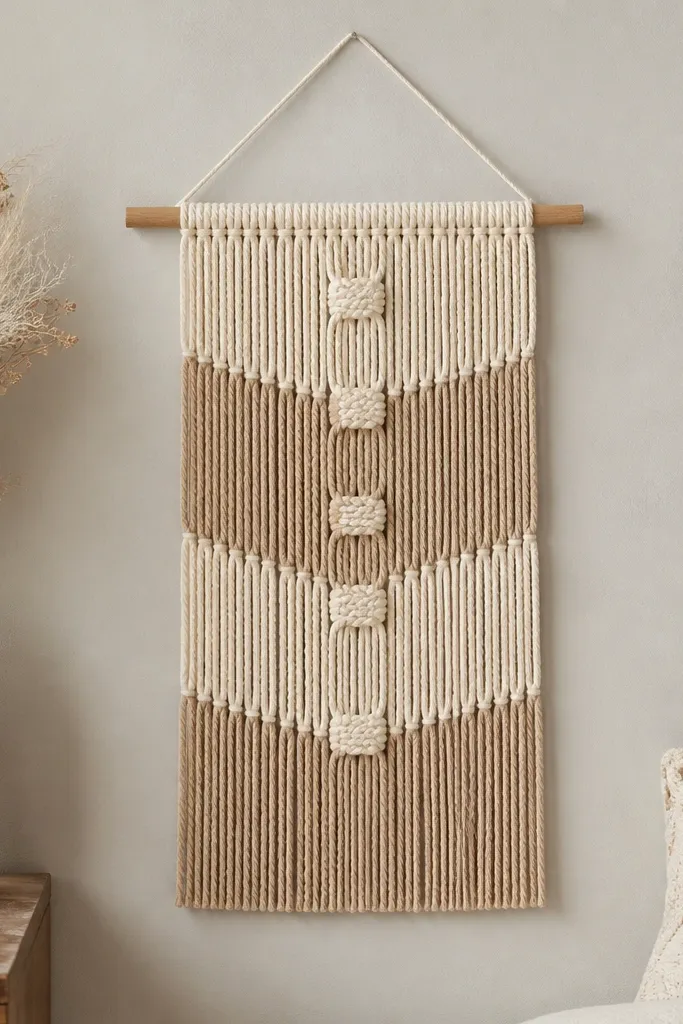
Macramé gets luxe when the knots are consistent and the rope is thick enough to look intentional. Two-tone rope — cream and oat — looks warm and modern, and it doesn’t clash with most decor. This works beautifully for a friend who loves boho-lite or Scandinavian interiors where you want texture without loud color. Keep the size compact so it doesn’t look like a weekend craft project. The straight fringe is what makes it look “finished,” not messy.
Cut 16-20 strands of rope at about 30 inches each, depending on how long you want the fringe. Attach them to a dowel using a lark’s head knot, then separate into two groups for two-tone sections. Tie square knots in a central column, keeping tension even — pull each knot snug but not stretched. Alternate rope colors per row for a clean rhythm, then finish by trimming fringe ends to the same length with a sharp scissors.
Use painter’s tape to hold the rope in place while you knot so nothing shifts mid-row.
Loose knots look sloppy fast; tighten as you go and re-tension before you finish the bottom.
8. Monogram Leather Bracelet with Magnetic Clasp
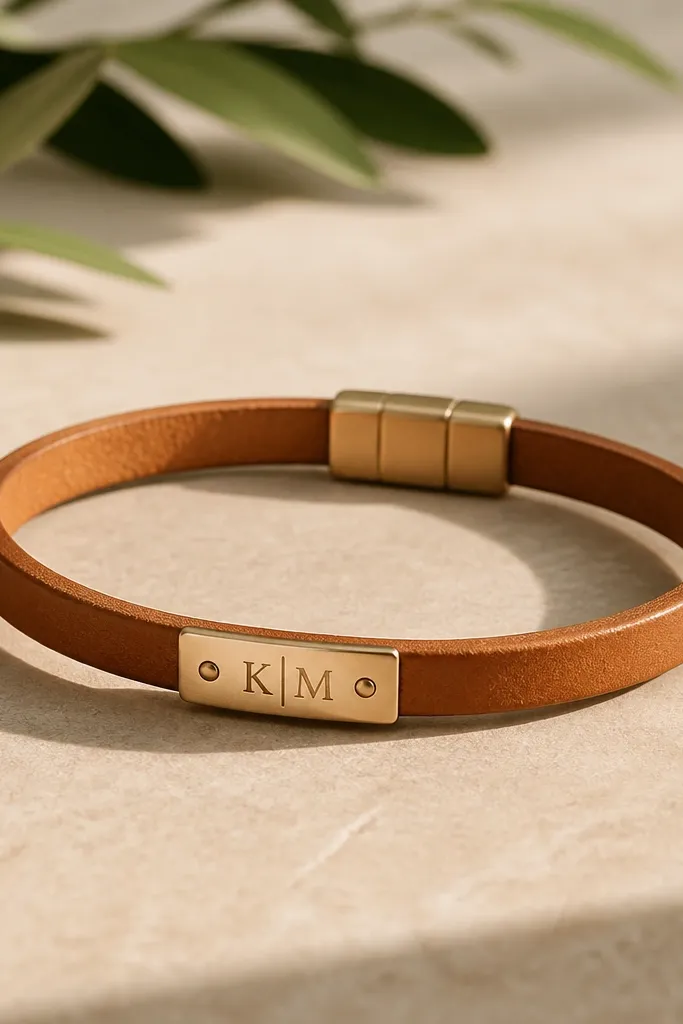
A leather bracelet looks luxe because it sits close to the body and shows material quality. Warm tan leather with a small stamped monogram plate looks personal without being loud. Magnetic clasps make it feel like a product you’d buy, and they’re easy for your friend to put on. This gift suits friends who wear jewelry daily, and it also flatters many skin tones because tan leather warms up the wrist area. For cooler style, use black leather and a silver-toned clasp.
Cut a strip of leather to your friend’s wrist measurement plus 1 inch for comfort, then mark two clasp points. Stamp the monogram on the leather first or on a small metal plate attached later, depending on your tools. Install the magnetic clasp according to the clasp hardware instructions, then stitch the bracelet ends with a thin edge stitch or a hidden stitch. Finish the edges with edge paint or burnishing so the bracelet looks smooth along the sides.
Editor's noteMake a paper mock-up of the strap width before cutting leather so it sits flat.
Skip thisUsing a too-wide strap makes it look bulky and costume-like.
9. Hand-Painted Ceramic Mug with Clear Coat Design
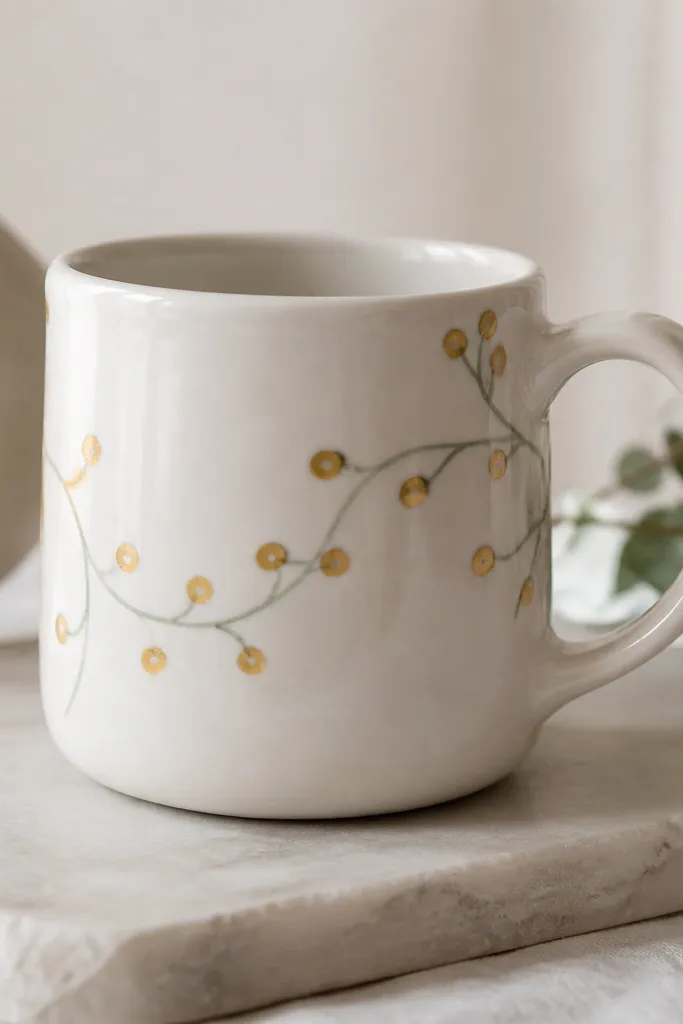
A hand-painted mug feels high end when the design is small, controlled, and sealed for daily use. I love a white base with muted green and gold dot accents because it looks calm and expensive, not childish. This is great for a friend who drinks coffee daily or works from home. The clear coat makes the surface glossy and easy to wipe, so it doesn’t look like “decor only.” If they’re more minimalist, keep it to one line and two dot clusters.
Clean the mug thoroughly with rubbing alcohol so paint grips. Paint a simple branch line and a few dots with a fine detail brush, keeping spacing consistent around the handle side. Let it dry, then bake or cure the paint based on the paint brand you use. After curing, apply a food-safe clear coat glaze or sealer if your paint requires it, then let it fully cure before washing. Wrap with tissue and a sturdy box so the handle doesn’t get bent.
Practice the dot sizes on a scrap tile so your gold dots match perfectly.
Painting a wide full-wrap design — it looks messy when the mug curves.
10. Candlewick Rope Wrapped Planter with Tiny Drainage Tray
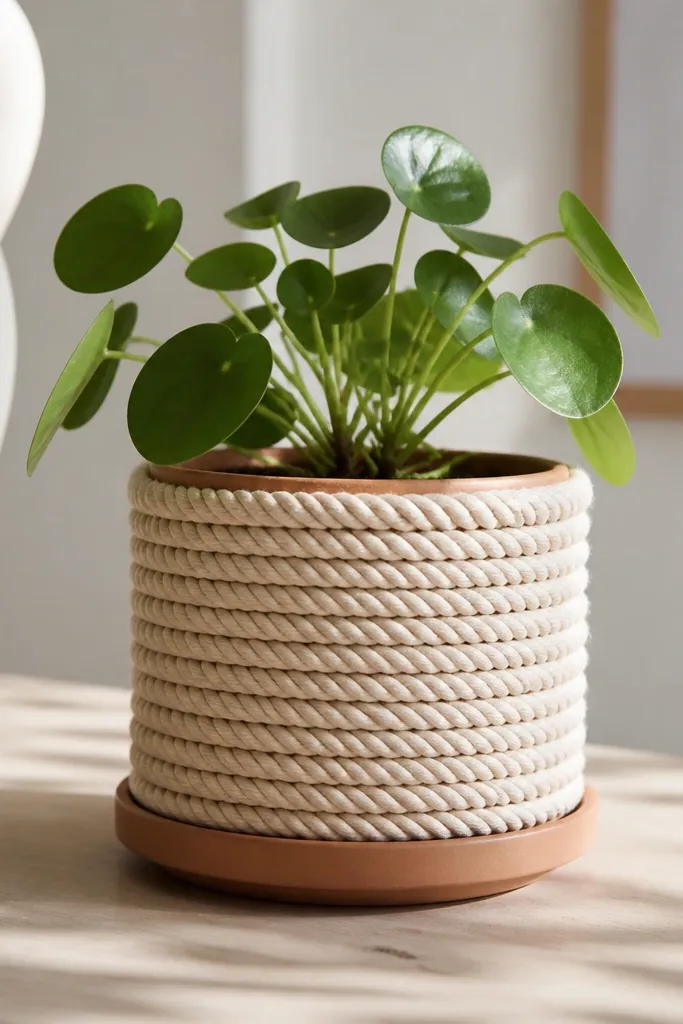
Rope-wrapped planters look luxe when the rope is thick and wrapped tight, with a consistent spacing line. I’ve done these with candlewick because it has a sturdy texture that holds shape and looks cozy without looking rustic-chaotic. Add a tiny saucer tray so water management looks intentional. This gift fits friends who keep a few plants alive, or who want a low-effort desk plant. The neutral rope color also flatters most plants and looks good in photos.
Choose a small planter size and remove any label residue. Wrap rope around the base in tight coils using hot glue sparingly — press each layer down so it adheres without bumps. Continue up the sides, keeping the coil line straight by rotating the planter as you wrap. Add a saucer tray and leave a small gap at the rim so you don’t crush the plant pot edge. Finish by tying a thin ribbon around the top seam or trimming rope ends neatly.
Use a fabric measuring tape to keep the rope height even around the circumference.
Over-gluing causes glue strings and a lumpy finish.
11. Velvet Ribbon Photo Frame with Corner Miter Cuts
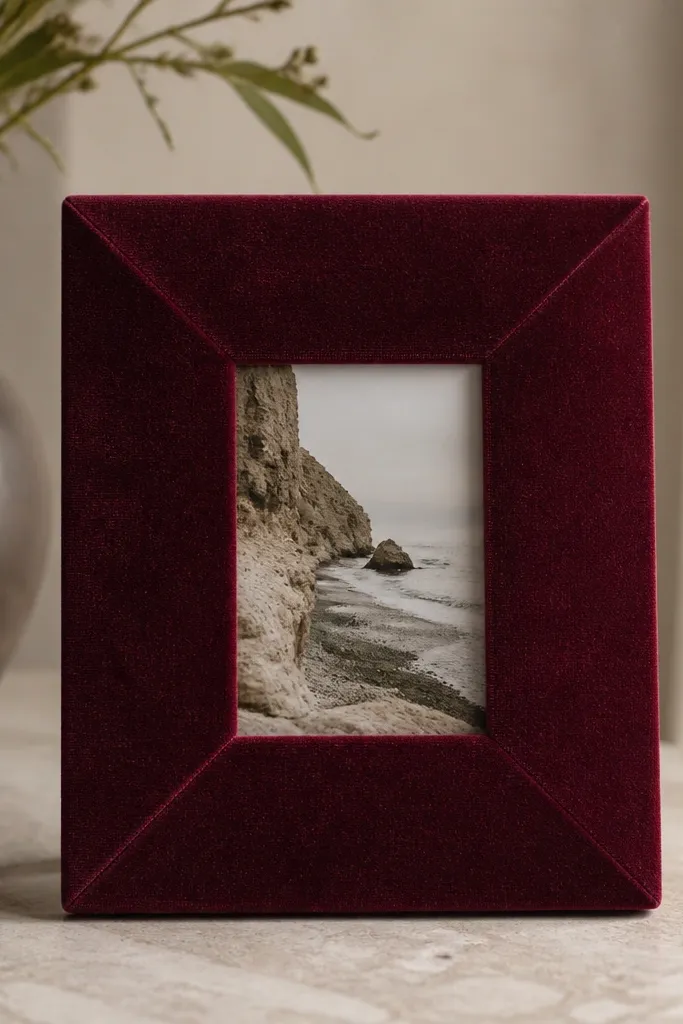
This frame looks luxe because velvet ribbon hides tiny surface imperfections and the mitered corners look like custom upholstery. Burgundy reads rich against most photos, especially black-and-white or warm skin tones. It’s a sweet gift for a friend you’ve shared memories with, like a best friend from college or someone you’ve traveled with. The velvet texture gives depth that plain paper frames don’t. Keep the photo size centered so it feels balanced rather than cramped.
Measure the frame front and cut velvet ribbon strips with miter corners so the seams meet at 45 degrees. Use double-sided fabric tape on the back edges so you don’t see glue near the face. Apply the strips starting with the top, then sides, then bottom, pressing the ribbon flat with a burnishing tool or clean finger. Trim excess with a sharp craft blade so the corners stay crisp. Insert the photo and replace the backing carefully so the velvet doesn’t wrinkle.
Editor's notePress the seam with a warm iron on low through a cloth — velvet lays flatter fast.
Skip thisUsing regular glue near velvet can create shiny spots and uneven texture.
12. Personalized Embroidered Canvas Tote with Leather Patch
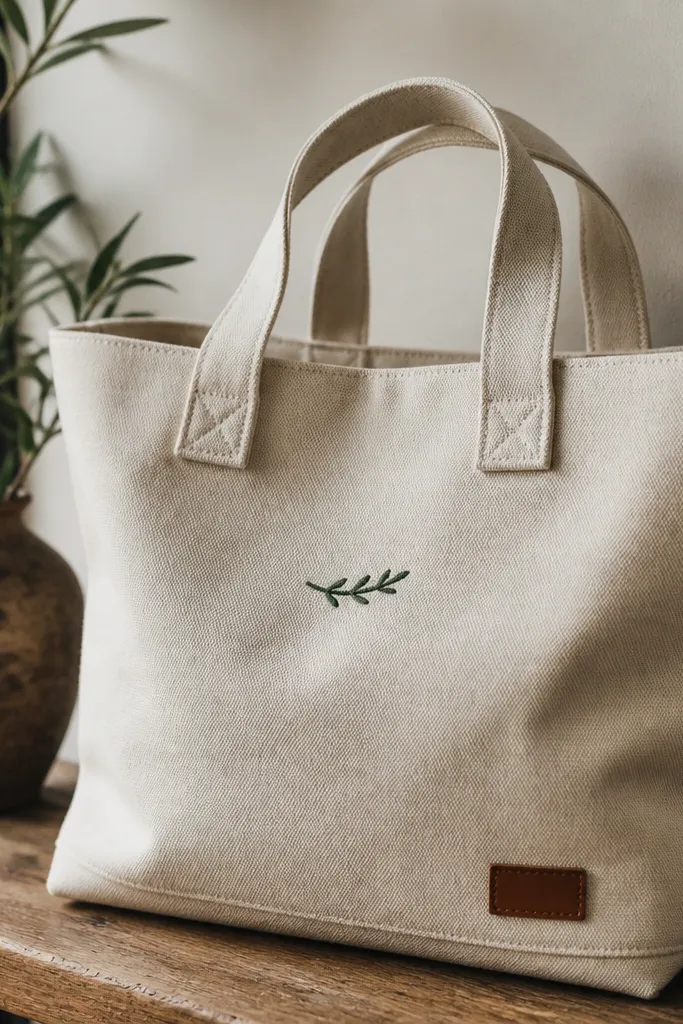
A canvas tote becomes luxe when the embroidery is tight and the patch is leather, not faux vinyl. Natural beige plus dark green thread looks classic and doesn’t scream “craft.” I give this when my friend is starting something new — new job, new apartment, new routine — because it’s practical and personal. The leather patch also protects the corner from wear, so it keeps looking good. For someone with a simpler style, keep the embroidery to a single word or date.
Pick a thick canvas tote with reinforced handles, then mark the embroidery placement using a light pencil or fabric marker. Embroider with a simple satin stitch or backstitch, keeping your letter height consistent and spacing even. Cut a small leather patch (about 2 x 3 inches) and stitch it to the bottom corner with waxed thread. Wash and dry the tote first so the fabric doesn’t shift later. Final step is to trim loose threads and press the embroidered area with a low iron through a cloth.
Editor's noteUse a hoop for the embroidery so letters stay crisp and don’t puff.
Skip thisEmbroidery on thin canvas makes the letters look wavy after use.
13. Pressed Flower Resin Bookmark with Brass Corner Tag
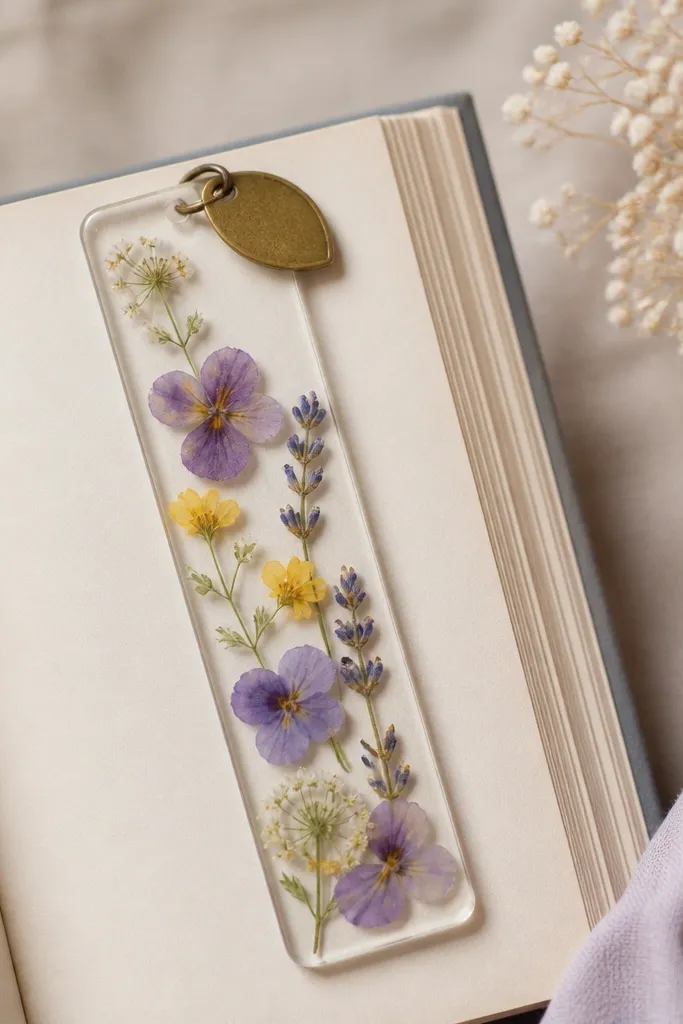
Resin bookmarks look expensive when the flowers are small, layered intentionally, and sealed without bubbles. Pressed lavender and pale yellow flowers inside clear resin look delicate but still readable. The brass corner tag makes it feel like a collectible item, not a school-project craft. This gift works for an avid reader friend who keeps books on a nightstand. It also makes a great “add-on” gift alongside a bigger item.
Press your flowers between heavy books for at least a week so they stay flat. Mix resin in small batches and pour a thin first layer into a flat silicone mold, then place flowers carefully with tweezers. Add a second layer to fully cover, then pop bubbles with a heat gun or torch held far enough away to avoid scorching. Let it cure fully before removing from the mold. Attach a brass corner tag using a small jump ring or rivet, then wipe the finished piece with microfiber.
Editor's noteChoose flowers with thin stems and flat petals for the cleanest look under resin.
Skip thisOverstuffing the mold causes flowers to float and touch the surface unevenly.
14. Crisp Paper Marbling Stationery Set with Wax Seal Stamp
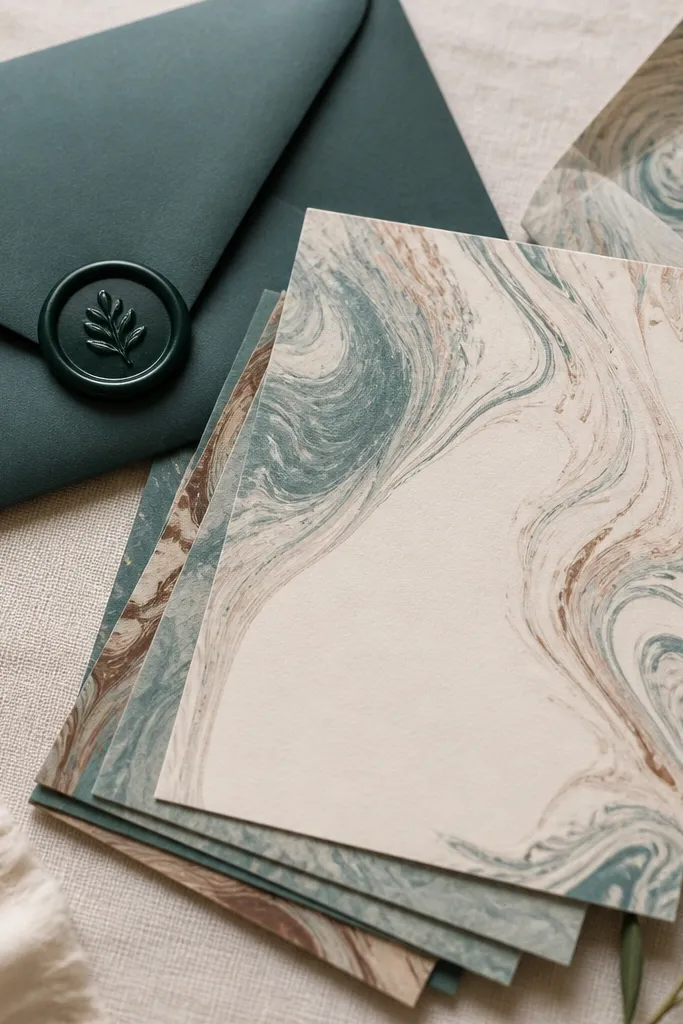
Stationery feels luxe when the paper looks handmade and the finishing touch is a wax seal. Marbling creates that one-of-one look without needing fancy illustration skills. Muted teal with cream and brown looks adult and calm, and it photographs well on desk setups. This is a great gift for a friend who writes thank-you notes, sends birthday mail, or just likes having pretty paper. Wax seals add weight and a crisp impression that makes the whole set feel premium.
Use thick watercolor paper cut to 4 x 6 inches for cards, and thick envelopes if you want it to feel extra. Marble the paper using a marbling kit or a simple shaving-cream style method, then rinse and let cards dry flat under a book. Make sure the marbling floats don’t smear by working one card at a time. Add a wax seal stamp design on the envelope flap using a dark green or deep brown wax. Wrap the set in tissue and tie with twine so it looks like a shop product.
Editor's noteDo one test card first and keep your marbling colors consistent across the whole set.
Skip thisUsing thin copy paper — it curls and ruins the luxe feel.
15. Handmade Soap Bars with Oat Milk + Honey Swirl
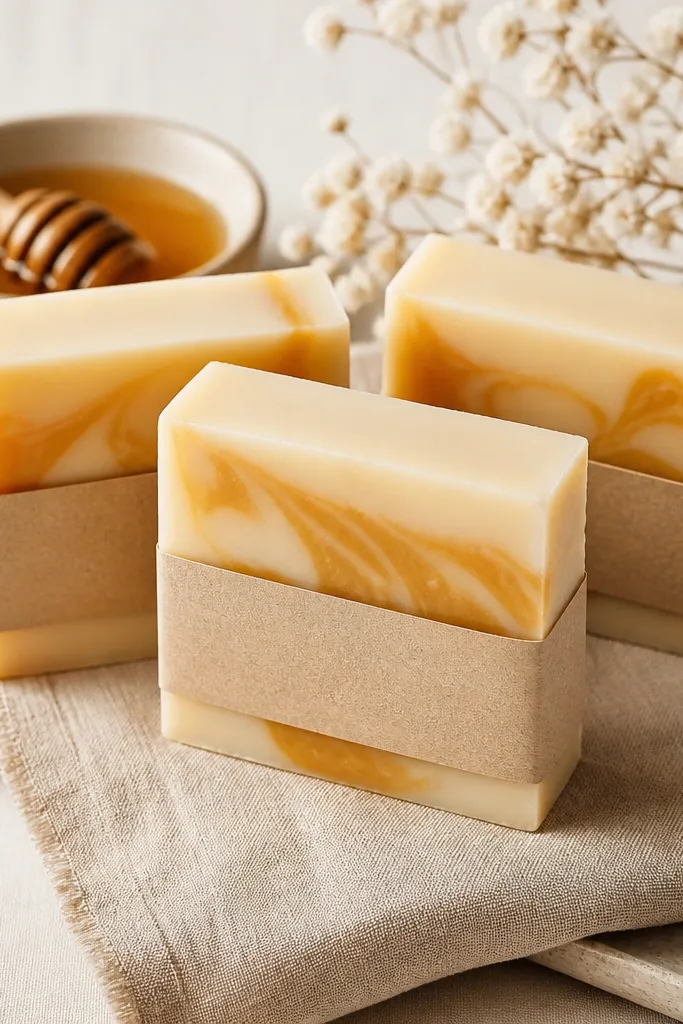
Soap looks high end when it has clean layers and a controlled swirl, not a chaotic mix. Oat milk soap base has a creamy look, and honey-gold swirl adds warmth without turning orange. This is a thoughtful gift for a best friend who loves self-care, takes baths, or has sensitive skin and wants gentle scents. The bar shape matters too — crisp rectangles look more “boutique” than uneven chunks. If your friend prefers no fragrance, you can keep it simple with unscented base and let the color do the job.
Melt soap base or use melt-and-pour with oat milk and honey-gold mica or safe colorant. Pour a thin layer into a silicone mold, then drizzle the honey color in lines and lightly swirl with a toothpick once or twice. Tap the mold to release bubbles and keep the top smooth. Let it set until firm, then pop out bars and cure as the soap instructions require. Label each bar with a strip of kraft paper and a date sticker so it looks intentional.
Swirl less than you think — two passes looks clean, ten passes looks muddy.
Pouring too hot causes separation and rough tops.
16. Woven Friendship Bracelet with Sliding Knot Closure
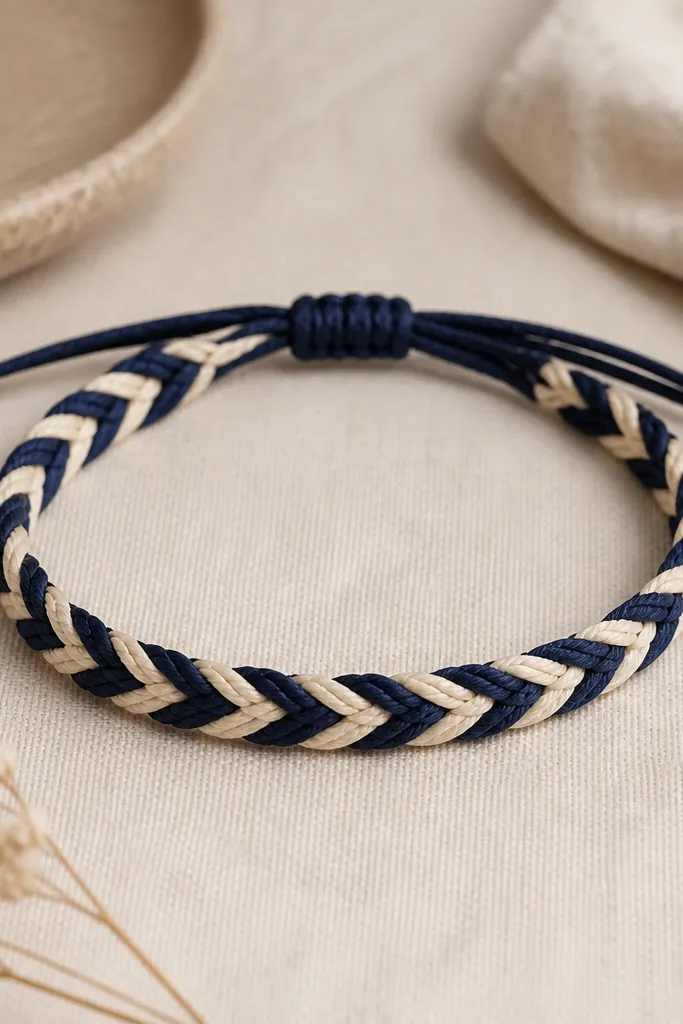
A friendship bracelet feels luxe when it’s woven tight and uses a closure that looks like a real product. A sliding knot closure looks clean on the wrist and makes the bracelet adjustable without bulky clasps. Cream and navy is a sharp combo that works on both warm and cool skin tones, and it pairs with gold or silver jewelry. This is the best choice when you want something personal but quick, like a gift for someone you see often. Keep the pattern simple so it looks intentional instead of busy.
Cut 6-8 strands of embroidery floss or braided cord in your two colors, each around 40 inches long. Tie a knot at one end and secure to a clipboard. Weave using an over-under pattern, pulling each pass tight so the braid stays dense. When you finish, make two small braided ends and form a sliding knot closure using one cord strand. Trim ends and burnish lightly with a lighter on synthetic cord only, then tie a tiny knot to keep it secure.
Use a clipboard so tension stays even; that’s what makes the weave look professional.
Leaving slack in the weave — it makes the bracelet look sloppy and thin.
17. Silk-Look Scarf Knot with Hand-Dyed Ombre Ends
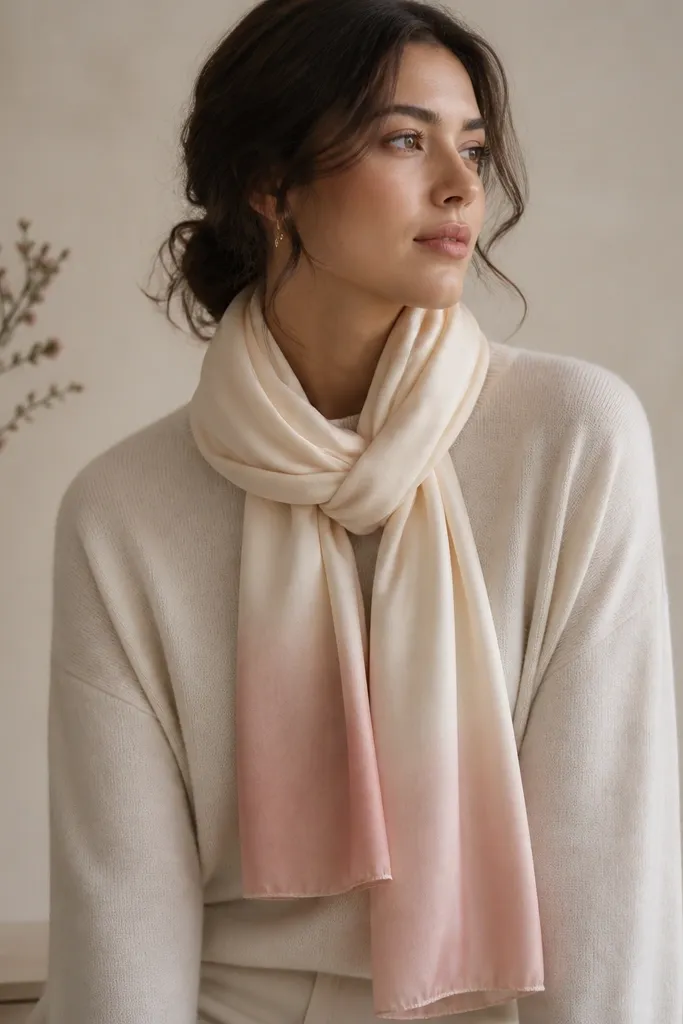
This gift looks luxe because the ombre dye job creates dimension, and a scarf changes how an outfit looks instantly. I use a silk-look polyester or silk blend for that drape, and the ombre ends make the scarf look like it came from a boutique. Blush fading into cream is flattering on most skin tones and works with both gold and silver jewelry. It’s a great best-friend gift for holidays, graduations, or any time you want to give something wearable and photo-friendly. The knot styling keeps it neat so it doesn’t look like you threw fabric around.
Pre-wash the scarf and soak in water, then mix dye for a two-step ombre effect. Dip the lower section gradually and lift at set intervals, then repeat with slightly different dye concentration for depth. Rinse carefully until water runs clearer, then hang to dry. Once dry, iron on low with a pressing cloth. Style the scarf using a simple “loop knot” at the neck or tuck one end behind the knot and pin if needed for a clean silhouette.
Editor's noteKeep the ombre transition line soft by lifting and re-dipping the last third of the scarf.
Skip thisDyed fabric that isn’t fully rinsed can bleed later and ruin the look.
18. Upholstery-Style Fabric Wall Pocket for Small Notes
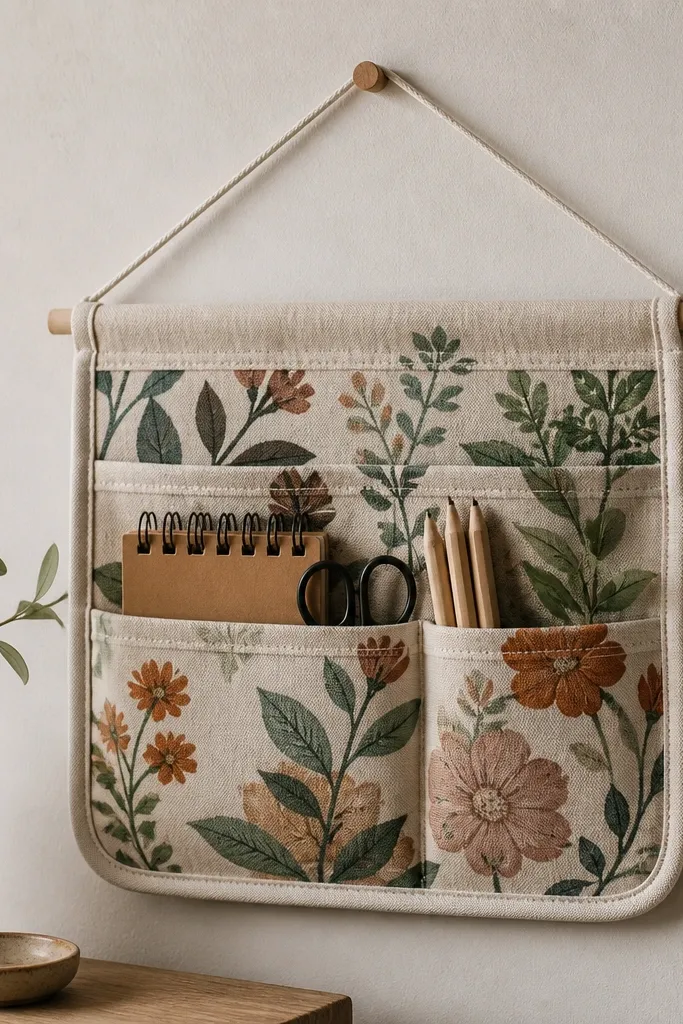
A fabric wall pocket looks luxe when it’s sewn like a product — bound edges, tight seams, and structure. Thick cotton or linen-blend fabric holds the pocket shape so it doesn’t sag. I love using a subtle geometric print in muted tones because it makes the pocket interesting without being loud. This gift is perfect for a best friend who has a mail pile, a small entryway, or a kitchen where notes get lost. The pockets also make the gift feel “useful,” not just decorative.
Cut fabric panels for a main backing and pocket sections, then interface the back if your fabric is too floppy. Bind the edges with matching bias tape so the seams are hidden and tidy. Sew pocket openings with straight lines and reinforce top edges with extra stitching. Add a simple hanging rod sleeve at the top, then press everything flat so it hangs clean. Fill it with a few mini cards and a pen so your friend gets the point immediately.
Editor's noteUse a walking foot if you have one; it keeps patterned fabric from shifting under the needle.
Skip thisSkipping interfacing makes the pocket droop and look unfinished.
19. Bronze-Edge Trimming on a Handmade Recipe Card Box
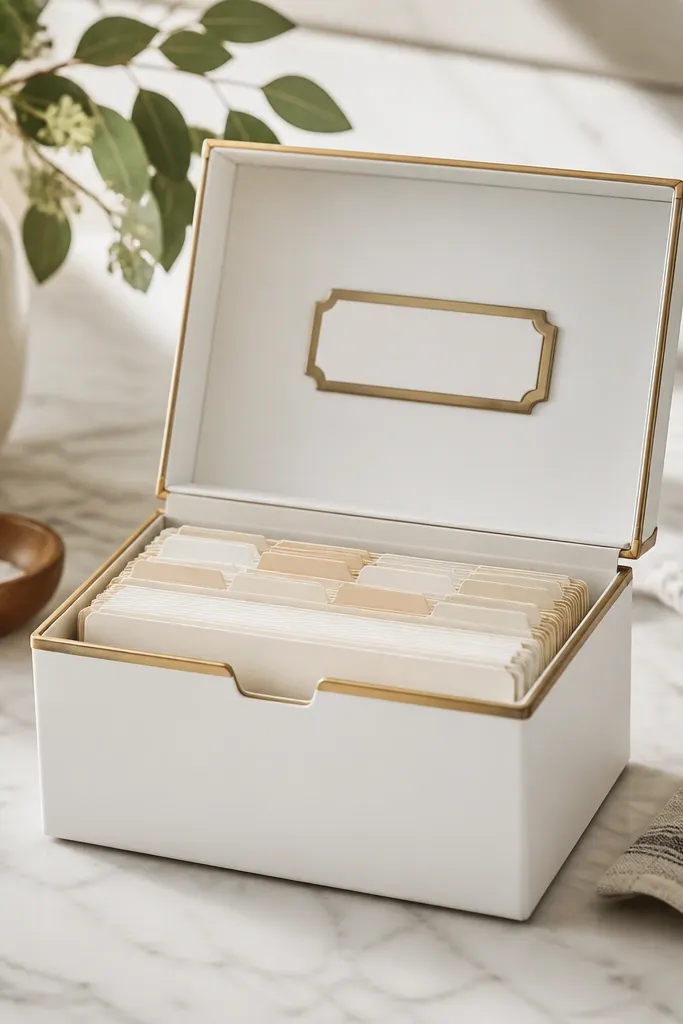
A recipe card box feels luxe when the box edges are crisp and the outside finish is clean. Matte white plus bronze trim looks like a boutique kitchen accessory, and it’s easy to personalize with your friend’s favorite cuisine or a short phrase. This is a strong gift if your best friend hosts or likes cooking, because it turns “random recipes” into a system. The metal-like trim also hides small paper cut imperfections. It looks great on counters and doesn’t scream craft.
Build the box from thick cardstock or thin chipboard, using a clean folding template so the corners are square. Cover the box with matte paper or thin book cloth, then apply bronze edge tape or paint pen along the edges. Add a lid label centered with a thin kraft paper rectangle and a neat font. Make card inserts by cutting card stock to fit and rounding corners with a corner punch. Assemble with strong glue and let it set under light weight so it stays flat while drying.
Use edge tape for the sides and a paint pen only for tiny gaps — it keeps the bronze looking even.
Using glossy paper — it reflects light and makes seams look obvious.
20. Handmade Velvet Bookmark Set with Embroidered Tassels
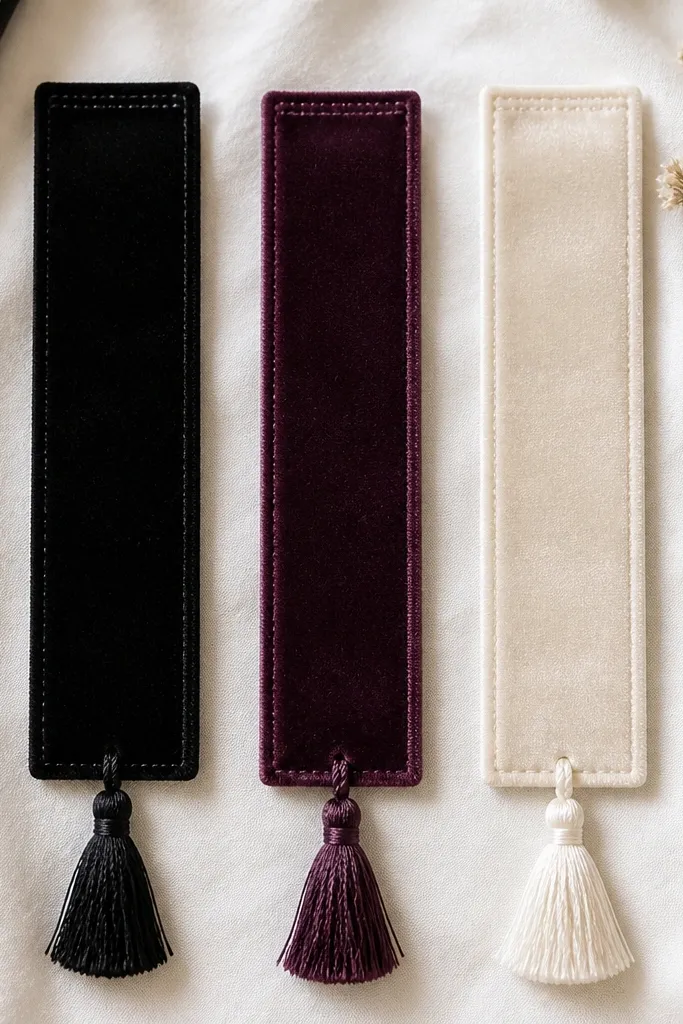
Velvet bookmarks look expensive because the pile catches light softly and feels premium in hand. A set of three in black, plum, and cream gives your friend options without needing multiple designs. Embroidered tassels add a finishing detail that reads “gift” instead of “craft.” This works for readers who dog-ear pages — it’s a practical upgrade. The dark tones also hide lint and look good in everyday bags.
Cut velvet strips 2 x 8 inches, then fold and stitch a 1/4-inch seam on the top edge to create a clean finished end. Separate embroidery floss into matching thread colors and stitch a tiny pattern near the top — a simple star, dot cluster, or one letter. Create tassels by wrapping floss around a cardboard strip, then tying at one end and trimming to even lengths. Attach tassels through the top seam or stitch them on after. Press lightly with a cloth over the velvet so the pile stays soft.
Editor's noteTrim tassels after attaching so all three bookmarks hang at the same height.
Skip thisCutting velvet without a sharp blade — the edges fray and look messy.



