


1. Linen-look bookmark set with tassels and book page tabs
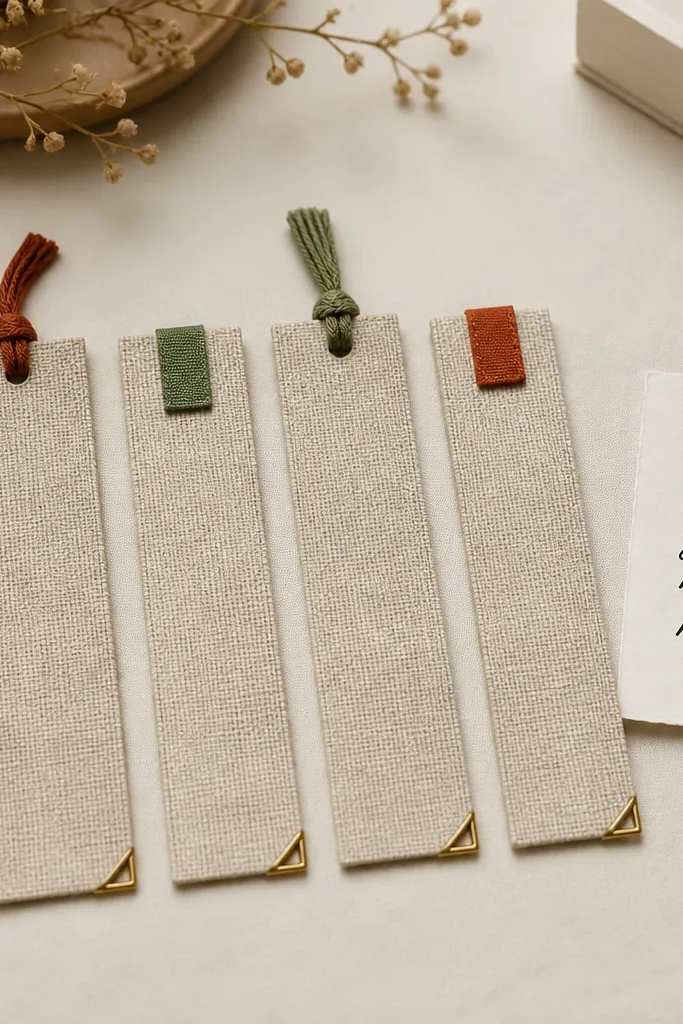
These bookmarks feel high-end because the fabric looks like linen even when you use cotton-linen blend or linen-look quilting fabric. The tassels add movement when your friend flips pages, and the page tabs make the bookmarks practical for re-reading. I’ve gifted this to best friends who read romance and fantasy, and they always use them within a week because they’re easy to spot in any book. The neutral beige base also flatters most skin tones when your friend holds them, and it looks clean next to colorful book covers.
Cut four strips of linen-look fabric to 2.25 inches wide and 7.5 inches long. Fold each strip in half lengthwise, press with a hot iron, then stitch a simple straight line along the open edge or glue it with fabric glue — I prefer glue for speed. Add a 3-inch tassel on one end using embroidery floss tied around a small stitch point, then trim the tassel ends evenly. For the tab, glue a 1-inch square of contrasting fabric near the top third and fold the edges down so it grips pages.
Editor's noteUse a piece of cardboard as a backing while you glue tabs — it keeps the glue from soaking through and keeps the edges crisp.
Skip thisAvoid fraying edges on flimsy fabric — use a fabric that already has a tight weave or finish edges with a quick zigzag stitch.
2. Salt-scrub sugar scrub jar with label + mini wooden scoop
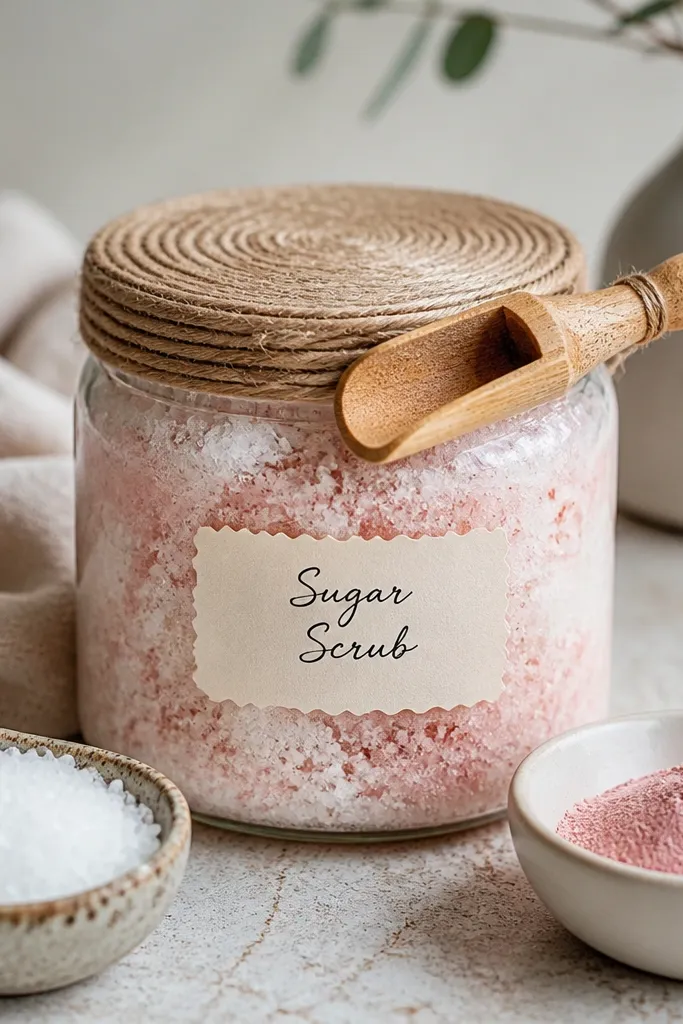
This is one of the lowest effort handmade gifts that still feels like a treat. The jar looks pretty because the scrub has visible texture, and the label makes it feel intentional instead of homemade-from-a-kitchen. I’ve made this for friends who are always rushing — it’s quick to use in the shower, and it doesn’t require extra tools beyond the scoop. The soft pink and white palette works for most skin undertones, and the scent choice keeps it personal without being overpowering.
Mix 1 cup fine sugar with 1/2 cup coarse salt, then add 1/3 cup coconut oil until it clumps like wet sand. Stir in 1-2 teaspoons of your preferred fragrance oil and a pinch of cosmetic mica for color — I like pale pink mica for a “spa” look. Spoon into a 16 oz jar and press the surface flat with the back of the spoon. Tie twine around the lid and attach a waterproof label made on vinyl or laminated paper, then tuck the wooden scoop on top before you wrap.
Choose fine sugar for a smooth feel and keep the coarse salt amount lower if your friend has sensitive skin.
Avoid using craft glitter in scrubs — it can shed and look messy when wet.
3. Heat-safe coaster set from cork rounds + fabric trim
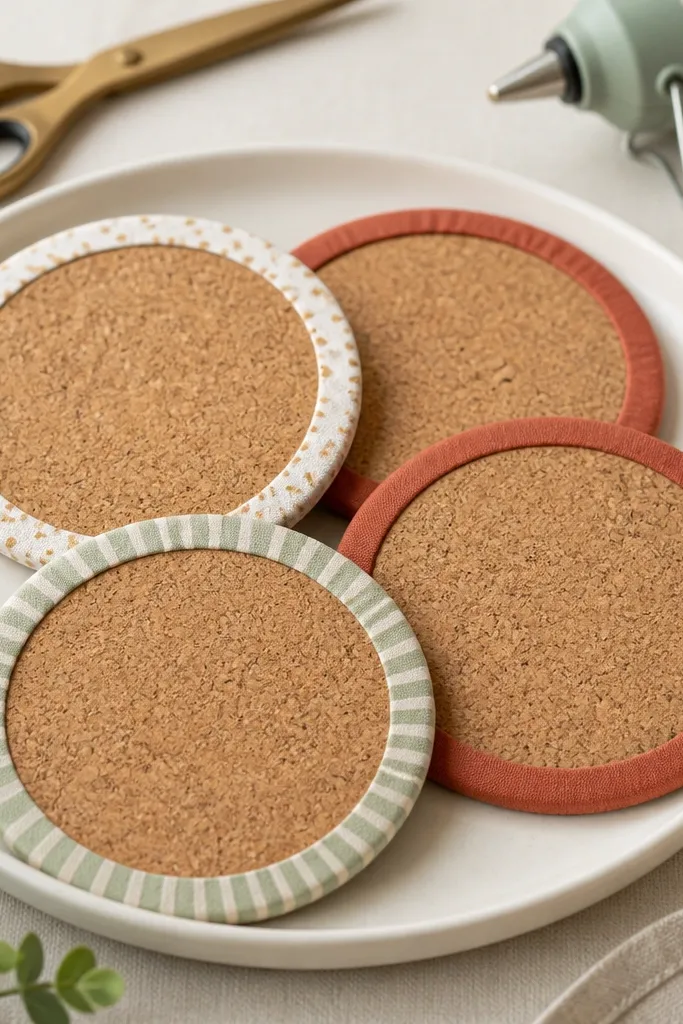
Cork coasters are hard to beat for low maintenance because they’re already functional before you decorate them. The fabric trim gives the look, and the cork center keeps heat tolerance where it counts. I’ve gifted these to friends who host and leave mugs on the table, and they survive real life — no worrying about delicate finishes. The colors look good in most homes because cork sits between warm and neutral, and the fabric border lets you match your friend’s vibe.
Buy a pack of 4-inch cork rounds, then cut fabric strips that wrap the edge with a 1/4-inch overlap. Apply a thin ring of fabric glue around the cork edge, press the strip in place, and hold for the time on your glue bottle. Trim the seam flush and seal the top edge with a second thin coat so it looks smooth. If you want a layered look, add a 1/2-inch fabric circle on top using glue at the center only so the cork texture still shows.
Use a narrow fabric strip (around 3/4-inch) so the coaster doesn’t look bulky under a mug.
Avoid soaking the cork with glue — it warps and makes the fabric border look wavy.
4. T-shirt yarn keychain with braided strap and metal clip
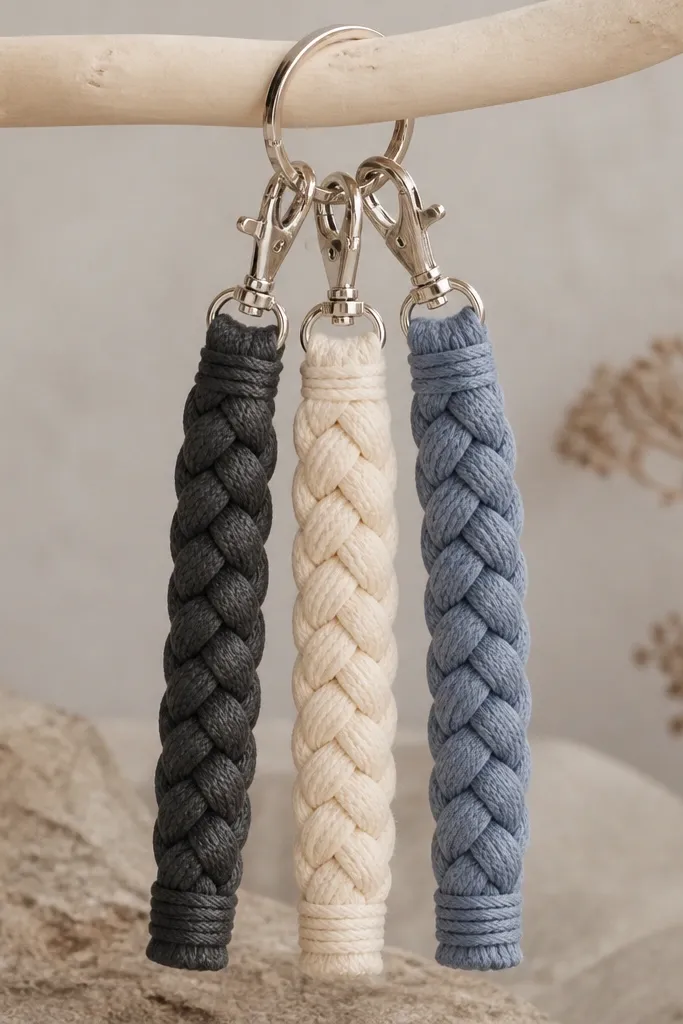
T-shirt yarn keychains look cute and feel tough because the material is soft but sturdy once braided. They’re low maintenance because you don’t need to sew — you just braid and tie. I’ve made these for friends who toss their keys on a table and lose everything; the texture makes the keychain easy to spot in a bag. The braided look also flatters hands because it looks neat even when your friend’s nails are short.
Cut a cotton t-shirt into strips, then tie the strips into long strands and braid three strands together. Keep your braid tight — aim for about 1/2-inch width for a clean look. Wrap the braid end with a single strand and knot it tight, then trim the ends. Attach a metal key clip using a loop: fold the top end back, stitch through with heavy thread or secure with fabric glue, then let it cure before you hang it.
Editor's noteUse a fabric glue dot at the top loop before stitching — it stops the braid from slipping while you work.
Skip thisAvoid slippery knit t-shirt yarn that frays — cut from a t-shirt with a tight weave so the braid holds shape.
5. Embroidery floss friendship bracelet with a simple knot pattern
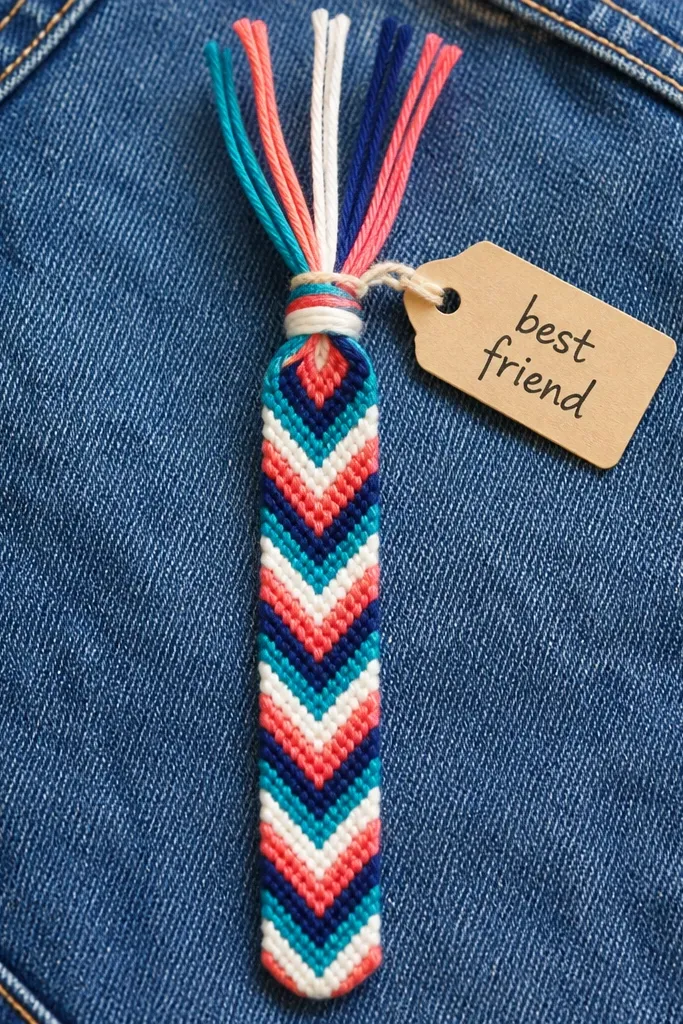
This is the classic for a reason, but I’m picky about the look. The chevron pattern reads “skillful” when the knots are consistent, and it’s still low maintenance because you’re only doing one repeat. I’ve given this to friends who wear casual outfits daily, and it layers nicely with rings and small watches. The color combinations let you match your friend’s wardrobe without guessing her exact style.
Cut 6 strands of embroidery floss about 30 inches each and tie them into a knot bundle, leaving a 2-inch loop at the top. Separate into left and right groups and start a forward-back knot repeat to form the chevron. Keep tension even by anchoring the knot bundle to a clipboard with tape while you work. After 7-8 inches, tie a final knot, then trim ends and add a small strip of clear nail polish on the knot to keep it from loosening.
Editor's noteUse a clipboard or binder clip to hold tension — it makes the knots line up without you fighting the bracelet.
Skip thisAvoid rushing the tension — loose knots make the pattern look messy fast.
6. No-sew fabric scrunchie set in matching solids + one accent print
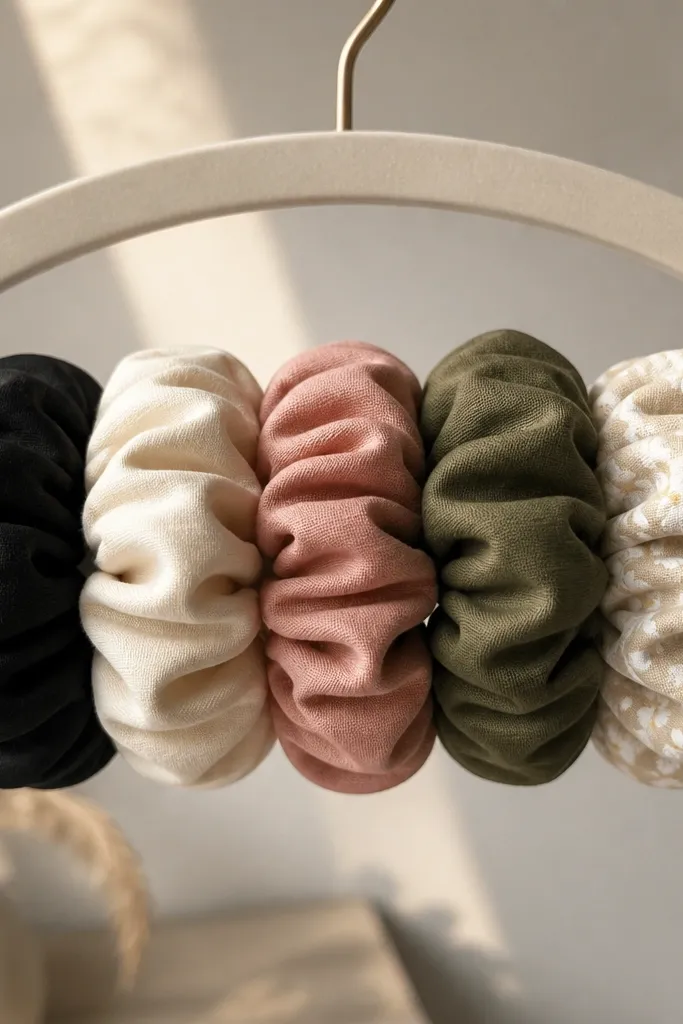
Scrunchies are low maintenance because you don’t need a pattern and your friend can wear them immediately. The key to making them look handmade is the fabric choice and the fullness — a thin scrunchie looks cheap. I’ve made these for friends with long hair and shorter hair; the thicker ones hold better and don’t slide as easily. The color set works for most wardrobes because solids mix with everything, and the tiny print adds personality.
Cut fabric rectangles 8 by 16 inches for each scrunchie. Fold lengthwise right sides together and stitch along one long edge, then turn right-side out using a chopstick or safety pin. Insert 3/4-inch elastic cut to 7 inches, then stitch the opening closed with a ladder stitch or fabric glue. Wrap an accent strip around one scrunchie and stitch it down so it looks like a band, not a random patch.
Choose cotton with a bit of weight (like quilting cotton) so the scrunchie keeps its dome shape.
Avoid flimsy polyester fabric — it collapses and makes the scrunchie look thin.
7. Pressed-flower phone charm with epoxy dome and key ring
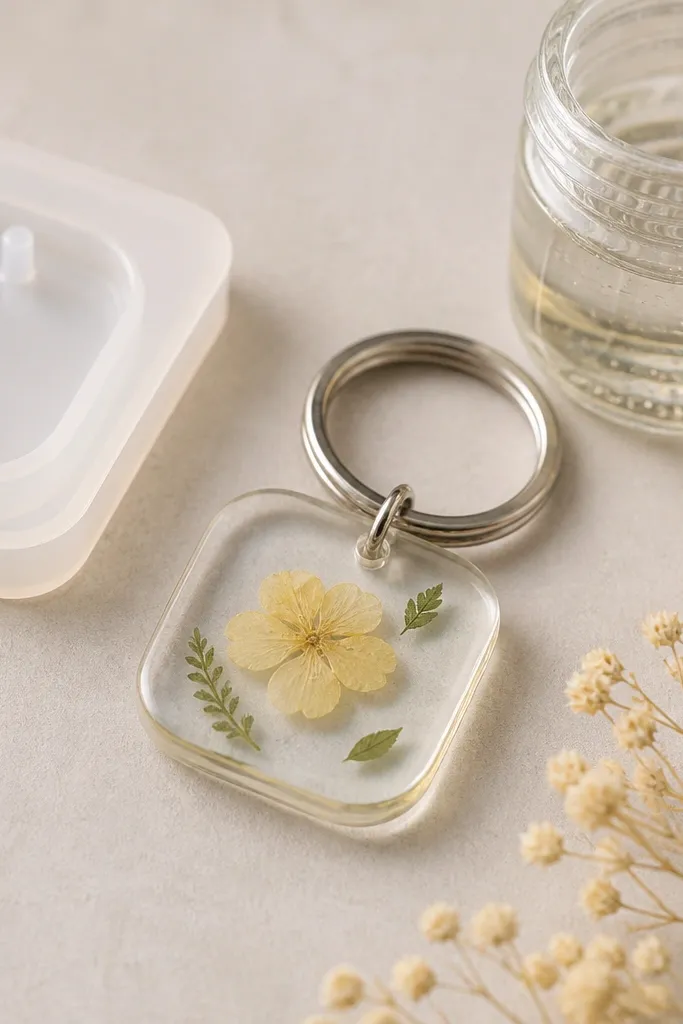
This charm looks delicate but it’s actually low maintenance once you have a mold. The epoxy dome makes the flower look like it’s floating, and the glossy surface catches light even on plain phone cases. I’ve made these for friends who love cute accessories but don’t want heavy jewelry — it’s light, it doesn’t snag, and it’s easy to clip on. Choose flowers that are flat and dry so they don’t shift, and you get a clean, consistent look.
Dry your pressed flowers flat for at least 1 week between heavy books, then cut to fit a small silicone mold. Mix two-part epoxy in a small cup and add a drop of clear tint if you want warmth, like a tiny amount of warm amber dye. Pour a thin base layer, place the flower in the center, then cover with more epoxy until the mold is full. Let it cure 24-48 hours, pop it out, then attach a metal key ring through a pre-punched hole in the top tab area of the mold.
Editor's noteSeal the flower with a thin first epoxy layer so the petals don’t float — it keeps the placement centered.
Skip thisAvoid using fresh flowers — moisture makes bubbles under epoxy.
8. Monogram candle jar label with soy wax pour and twine
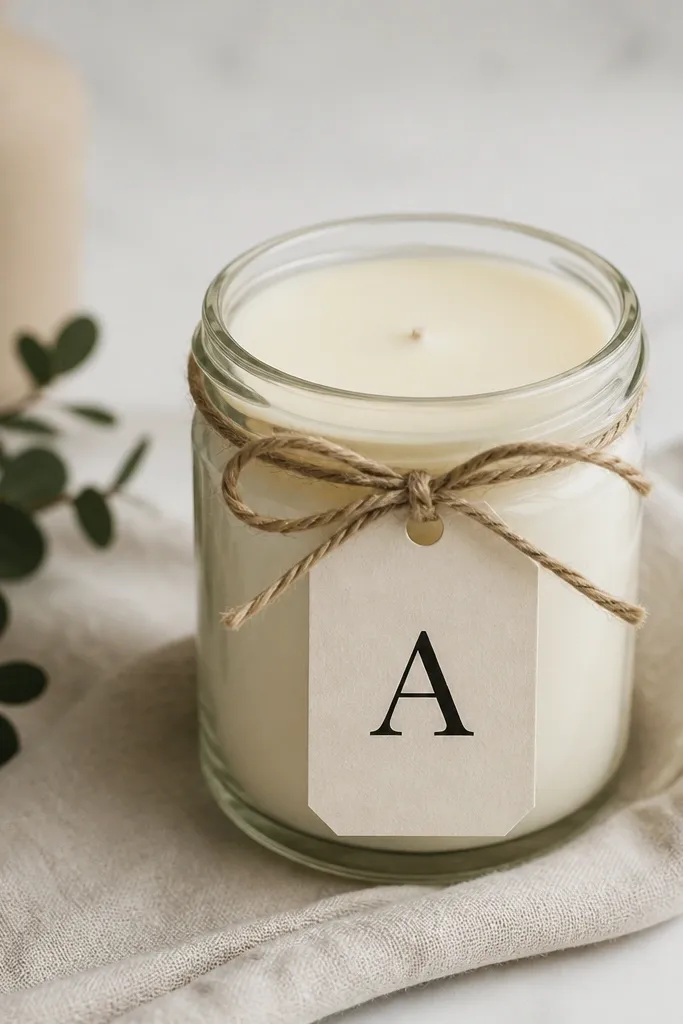
If you want handmade that looks like you bought it at a boutique, this is the move. The label and twine are what your friend will notice first, and the soy wax is forgiving because the surface smooths as it cools. I’ve made this for best friends who like cozy scents but hate strong perfumes; you can choose a mild scent like vanilla oat or clean cotton. The simple monogram flatters everyone because it’s one letter, big and readable, and it doesn’t clash with their home decor.
Buy plain glass jars and pre-waxed wicks. Melt soy wax flakes, then stir in fragrance oil per your wax instructions (I usually keep it around 6-8% fragrance). Pour into jars, center the wick, and let cool without moving them for 8 hours. After it sets, wrap twine around the jar neck and attach a vinyl monogram label cut with a craft cutter or printed and laminated for a crisp look.
Trim the wick to 1/4 inch before gifting so the first burn looks neat.
Avoid over-fragrancing — a strong candle smell makes the gift feel harsh instead of cozy.
9. Custom photo coaster set using Mod Podge + cork backing
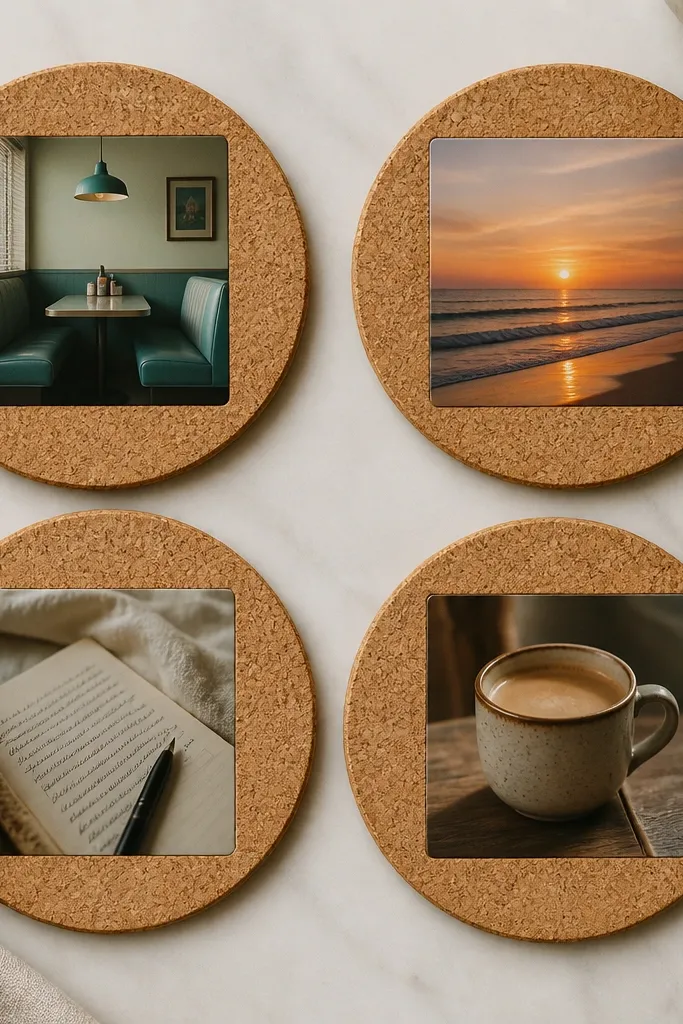
These coasters feel personal without being complicated. The photos make it instantly recognizable to your friend, and the cork backing keeps them practical for real use. I’ve gifted this when I didn’t know what to buy, and it always lands because it’s not a generic “memory” — it’s the moments she actually repeats in conversation. The glossy coating gives a clean finish that looks like a product, not a craft project.
Cut printed photos into squares that fit your cork rounds (about 3.5 inches for a 4-inch coaster). Paint a thin layer of Mod Podge on the cork, place the photo, then add another layer on top. Let dry, then repeat with a second coat for durability. After the final coat dries, add a felt pad to the bottom if your friend’s furniture scratches easily.
Print photos with a matte finish — glossy prints can show glare through the coating.
Avoid thick photo paper edges — trim close so the surface stays flat under a mug.
10. Beaded initial keychain with tiny seed bead pattern
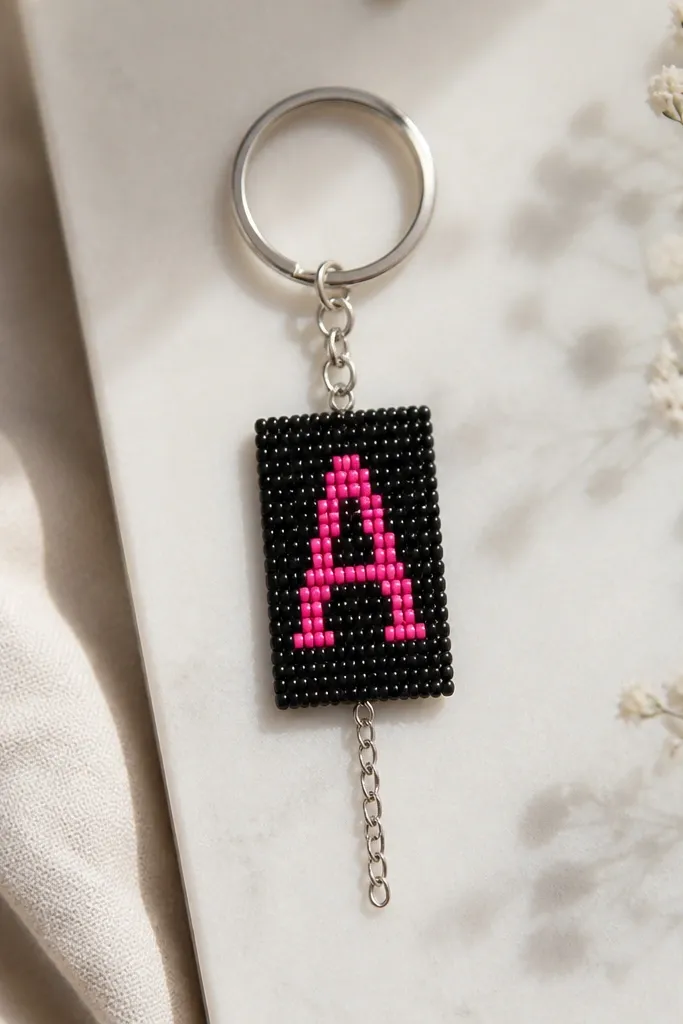
A beaded initial keychain is one of the fastest “looks expensive” gifts if you keep the design small. Seed beads create a crisp letter shape, and the black background makes the initial pop. I’ve made these for friends who like clean accessories and don’t want anything bulky on their keys. The compact size also fits most bags and doesn’t snag on pockets.
Use a simple beading grid or string a base line of seed beads to outline your letter shape. I start with a black border, then fill the inside with the initial color using a consistent tension so the beads sit flat. Add a small top loop with a few beads so you can attach to a key ring. Finish by tying off tightly and hiding the knot by weaving through the last 10 beads.
Editor's noteKeep your seed beads in one color tray and your letter beads in another — it speeds you up and reduces mistakes.
Skip thisAvoid huge beads for letters — they make the curves look blocky and cheap.
11. Custom tea towel with fabric paint recipe strip
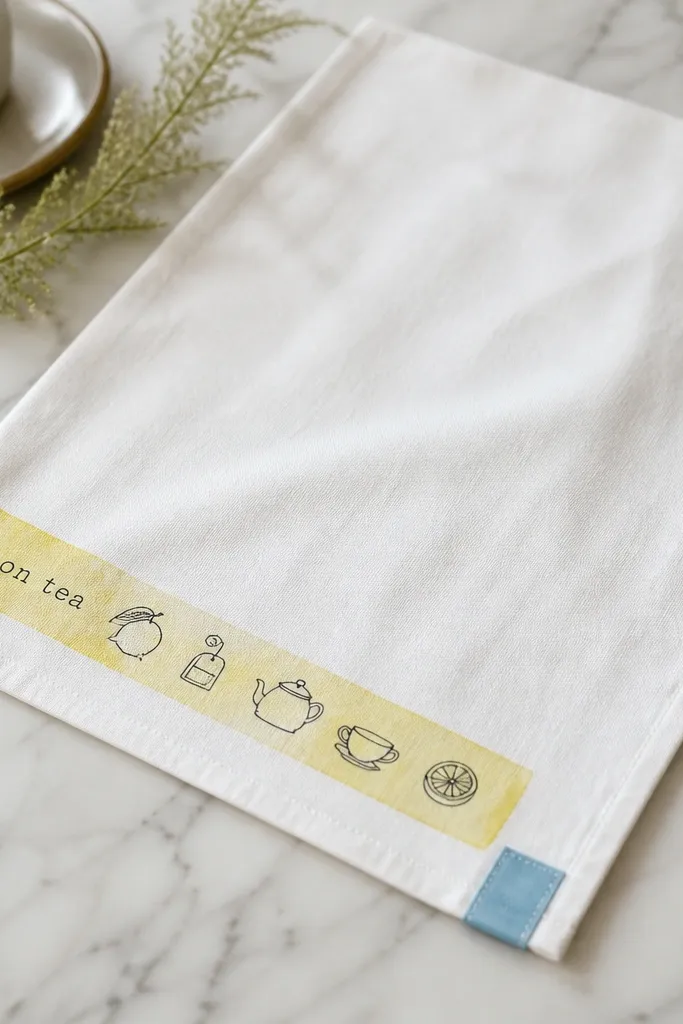
Tea towels are low maintenance because they get used and washed, and fabric paint can handle routine laundering if you heat-set it. The recipe strip is personal without being too sentimental, and it makes the towel feel like a practical gift. I’ve given this to friends who host brunches; they hang it where it’s visible, so the design is always in use. A white base keeps it clean, and black paint reads crisp even from across the kitchen.
Start with a pre-hemmed cotton tea towel or sew a tight hem yourself. Tape off a 6-inch wide area near the corner and use fabric paint with a stencil for the recipe strip. Let it dry per the paint instructions, then heat set with an iron on the cotton setting (or bake it if your paint says so). Sew or glue a small fabric label on the bottom corner using matching thread so it looks finished.
Use painter’s tape and burnish the edges with your fingernail so the paint line stays sharp.
Avoid using regular craft acrylic paint — it washes off and looks faded fast.
12. Desktop desk plant pot cover from scrap fabric + rope tie
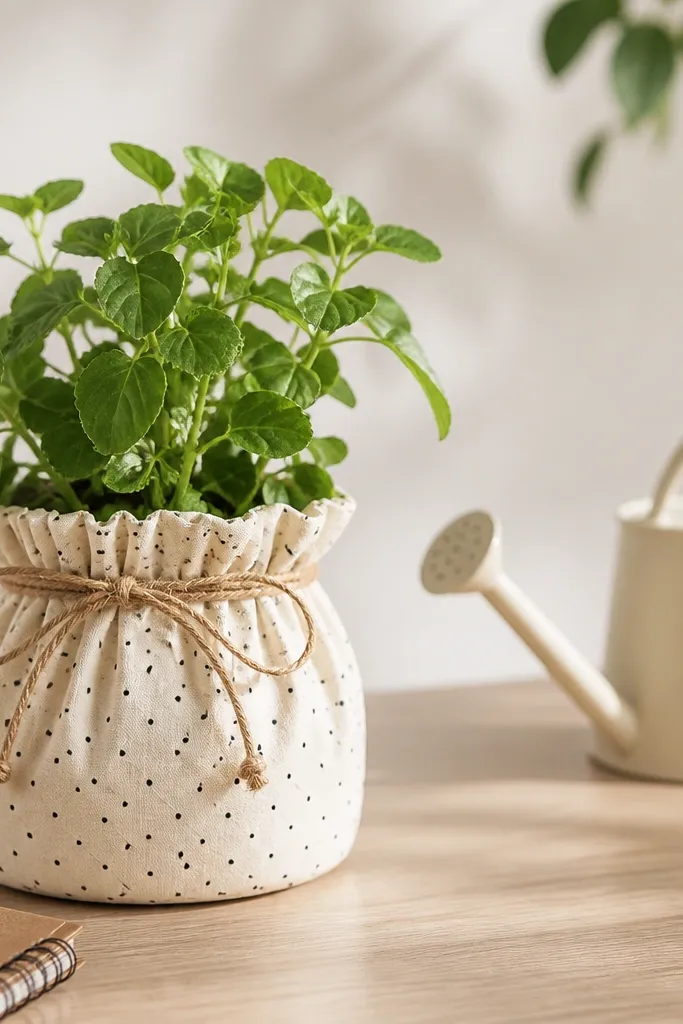
This works because it turns a plain planter into a styled object without needing to sew a full bag. The rope tie is secure, and the fabric cover hides scuffs from shipping or your friend’s first plants. I’ve made these for friends who keep succulents on windowsills and desks, and they always get compliments because the pot looks “intentional.” Neutral fabric with one texture — like dots or small checks — makes it match almost any room.
Cut a rectangle of fabric wide enough to wrap around the pot with 1 inch overlap. Fold the bottom edge up 1/2 inch and stitch to form a clean base hem. Create a top channel by folding a 1-inch band inward, then stitch along the sides leaving an opening to thread the jute rope. Wrap the fabric around the pot, pull the rope to gather the top, and tie a simple knot — trim rope ends so they don’t fray.
Editor's noteUse stretchy fabric only if you plan the overlap — non-stretch cotton gives a cleaner, flatter look.
Skip thisAvoid thin, see-through fabric — it shows the pot’s mess and looks unfinished.
13. Crochet mug cozy in chunky yarn with slip-on button strap
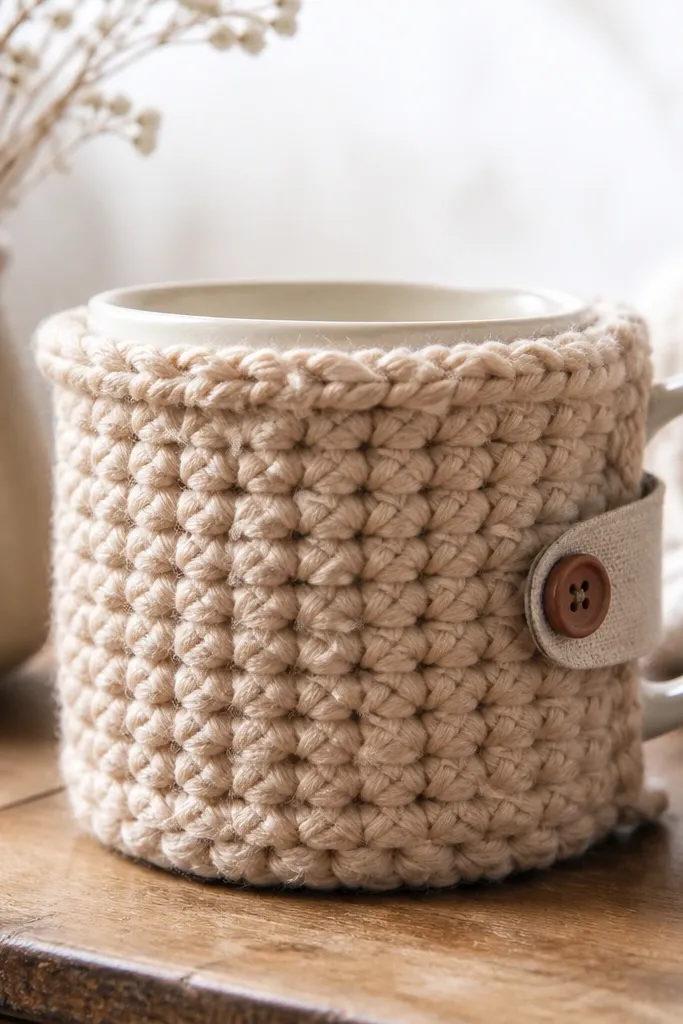
Mug cozies are low maintenance because they’re quick to crochet in chunky yarn and they don’t need perfect symmetry. The thick texture looks cozy and hides minor stitch inconsistencies. I’ve made these for friends who drink tea at night; the cozy protects hands and makes their mug feel “special” even on plain days. The oatmeal color looks good in kitchens with stainless steel or wood cabinets.
Choose chunky yarn (like 6-weight) and crochet a simple rectangle long enough to wrap your mug, roughly 8 inches tall by 10 inches wide. Stitch the rectangle into a tube by joining short ends with slip stitches. Add a rolled edge by crocheting a few rows of single crochet at the top. For the strap, crochet a small band and attach a button so it closes neatly — place the button where your friend’s thumb naturally reaches.
Editor's noteWrap the cozy on the mug while you work — adjust width immediately instead of guessing from a pattern.
Skip thisAvoid tight gauge with thin yarn — it makes the cozy hard to slide on and off.
14. Fabric-wrapped wine bottle cover with simple bow tie
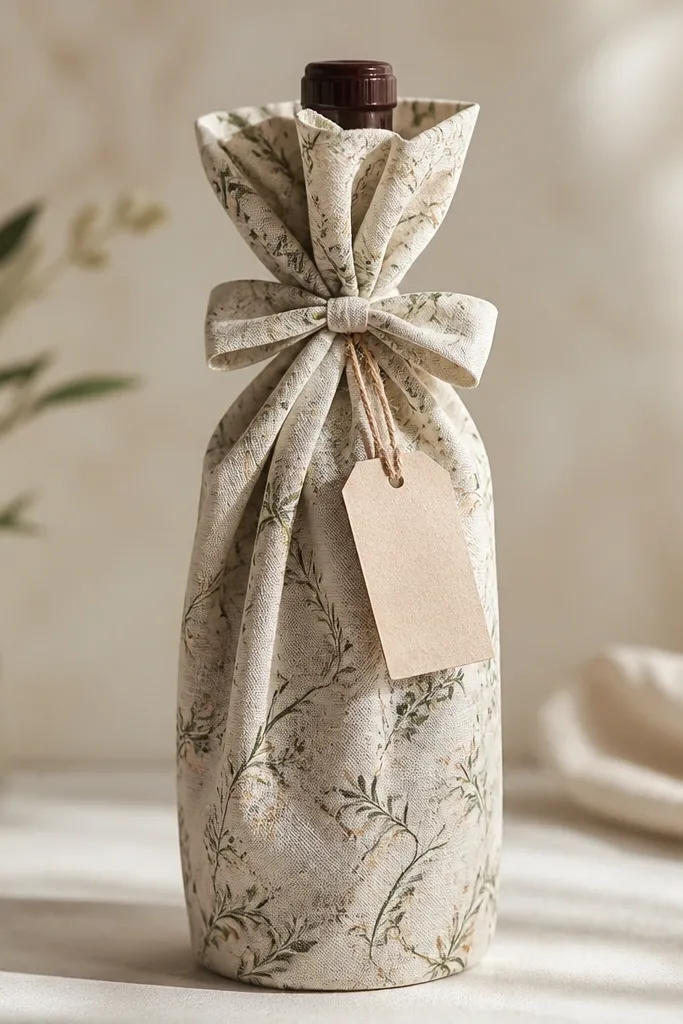
This is a gift that looks dressed up without being fragile. The fabric wrap hides labels, scuffs, and whatever your bottle looks like out of the store. I’ve done this for casual birthdays and housewarmings, and it always looks better than store gift bags because the folds look intentional. The bow gives a focal point, and you can match the fabric to your friend’s color preferences without asking.
Cut a rectangle of fabric about 18 inches wide and 24 inches long for a standard bottle. Fold the bottom edge up 1/2 inch and sew or glue to create a clean base. Wrap the fabric around the bottle, then gather the top with a running stitch or a few small dots of fabric glue to keep it tight. Finish with a bow using a 12-inch strip of fabric and attach a small tag with twine.
Use a medium-weight cotton or linen blend so it drapes instead of clinging.
Avoid stretchy jersey — it rolls and makes the gathered top look uneven.
15. Geometric air-dry clay earrings with painted dots
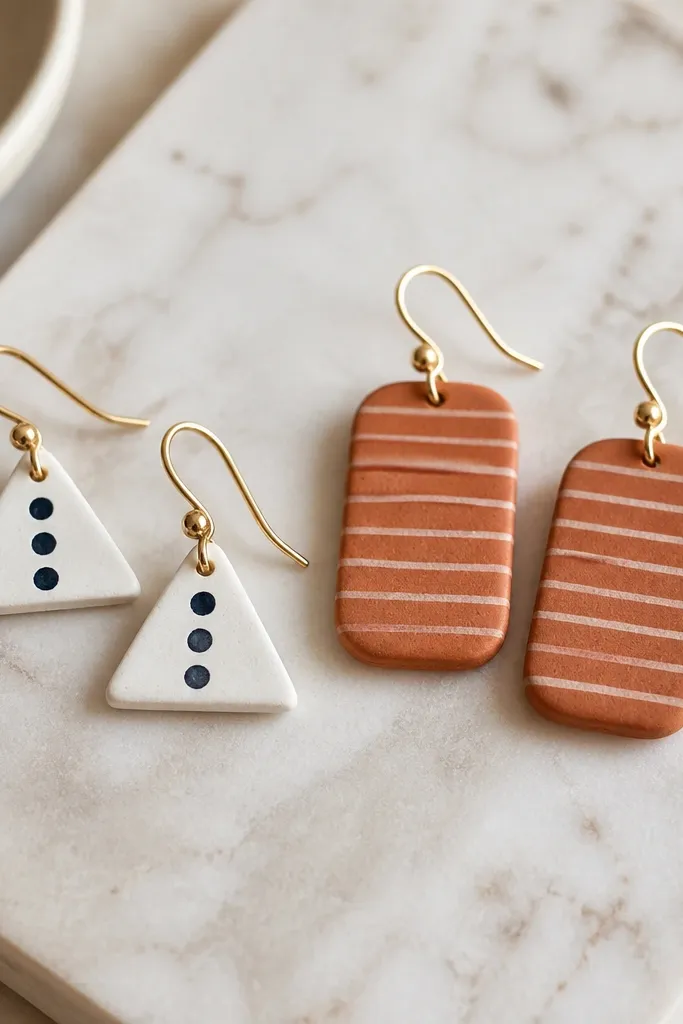
Air-dry clay earrings look modern and they’re surprisingly light. The trick is to keep shapes small and paint with a steady hand — dots read clean even if you’re not great at fine lines. I’ve made these for best friends who wear simple outfits and want one personality piece. The matte finish looks expensive, and the painted dots let you match any color palette from neutrals to bright.
Roll air-dry clay to about 1/8 inch thick and cut shapes using a craft knife and a metal ruler. Poke a small hole near the top for the earring hook, then let dry completely (usually 24-48 hours). Sand lightly with fine grit to smooth edges, then paint dots or stripes with acrylic paint and a small craft brush. Seal with a matte or gloss clear sealant so the paint doesn’t chip.
Paint after the clay dries fully — wet clay pulls pigment into lines and ruins the crisp look.
Avoid thick pieces — heavy earrings pull down and look awkward by night two.
16. Handmade soy wax sachets for drawers with dried herb blends
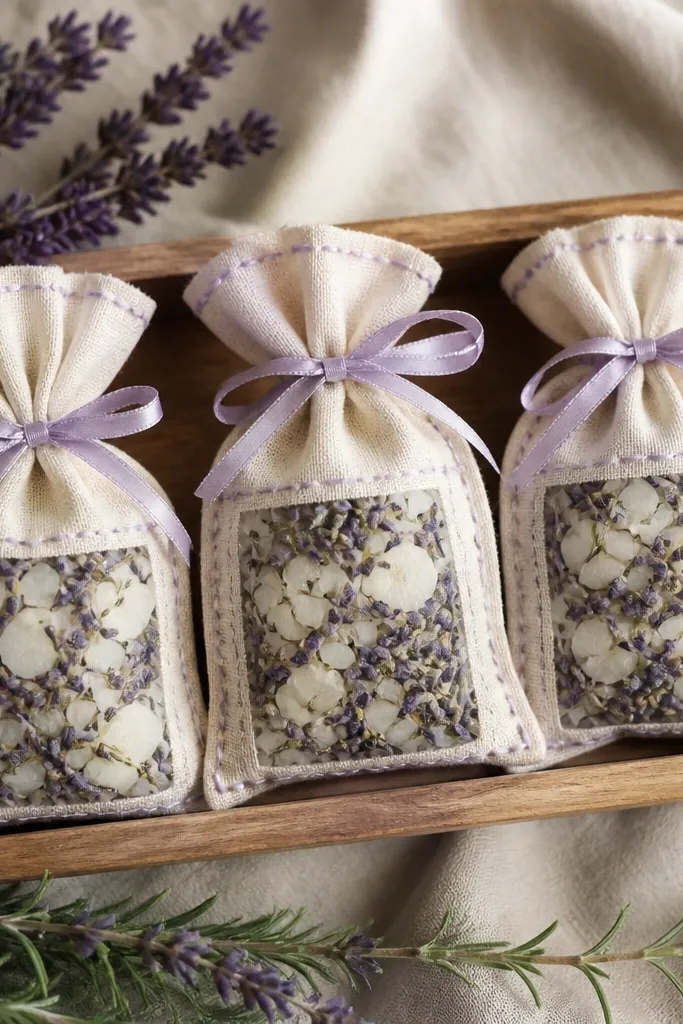
These sachets feel thoughtful and low maintenance because they don’t need to be worn or used daily — they just quietly keep drawers smelling fresh. The herb blend looks pretty through the pouch and adds texture, not just scent. I’ve gifted these when my friend’s moving into a new place, and she puts them in her dresser right away. Soft lavender and rosemary colors also look calming and work with most bedroom palettes.
Melt soy wax and mix in dried lavender buds and finely chopped dried rosemary. Pour into a shallow silicone mold and let set until crumbly, then crumble into small pieces. Fill cotton sachet pouches with the wax herb crumbles and tie the top with ribbon. Label the pouch with a tiny strip of paper so your friend knows what scent it is, then place in drawers or between folded linens.
Use a tight weave cotton — it holds scent longer than thin net-like fabric.
Avoid overloading with buds — too many large pieces clog the scent release and look messy.
17. Stamped canvas tote mini organizer with fabric pockets
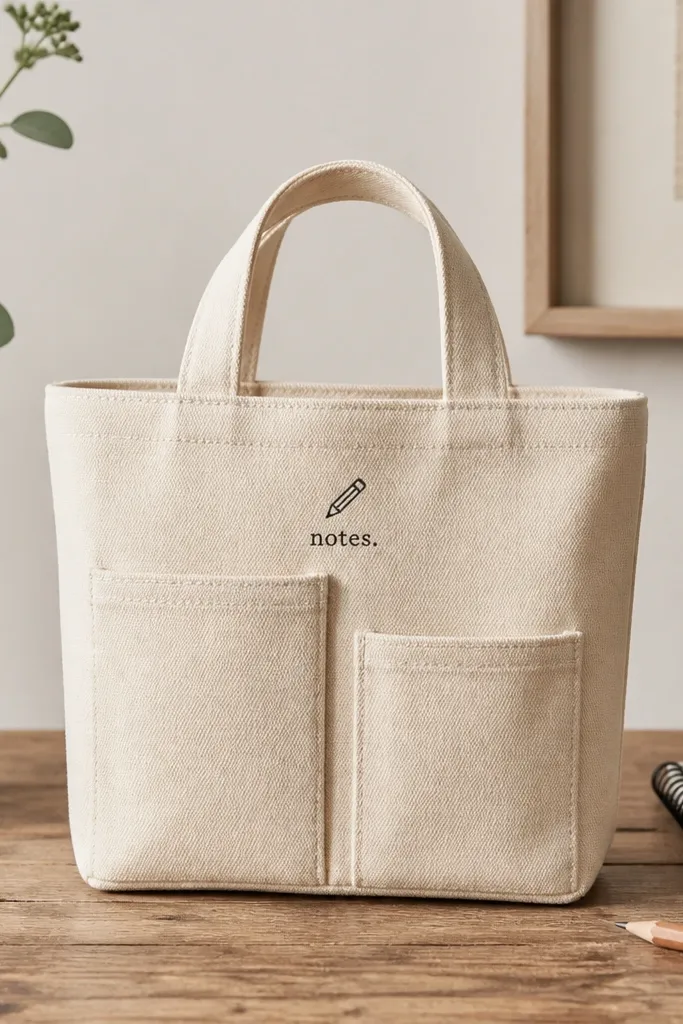
A mini tote organizer is low maintenance because it’s sturdy and it makes your friend’s daily chaos easier to handle. Fabric pockets keep lip balm, chargers, or hair ties from rolling around, and the stamped design looks crisp without needing fancy lettering. I’ve made these for best friends who carry a bag to work or school; they tell me later that they finally stop losing the little stuff. A black stamp on natural canvas looks good against almost any outfit color.
Buy or cut a small canvas tote body and reinforce the pocket area with a scrap of fusible interfacing. Stitch two pockets: one 6 by 6 inches and one 6 by 4 inches, both with a 1/2-inch hem at the top. Stamp a simple icon above the pockets using fabric ink and a stencil, then heat set if your ink requires it. Finish by sewing the tote handles and adding a small pocket label inside so the organizer feels complete.
Editor's noteUse fusible interfacing on the pocket backs so they stand up instead of flopping.
Skip thisAvoid printing with regular inkjet — it smears unless it’s designed for fabric.
18. Custom constellation wall print using string and nails
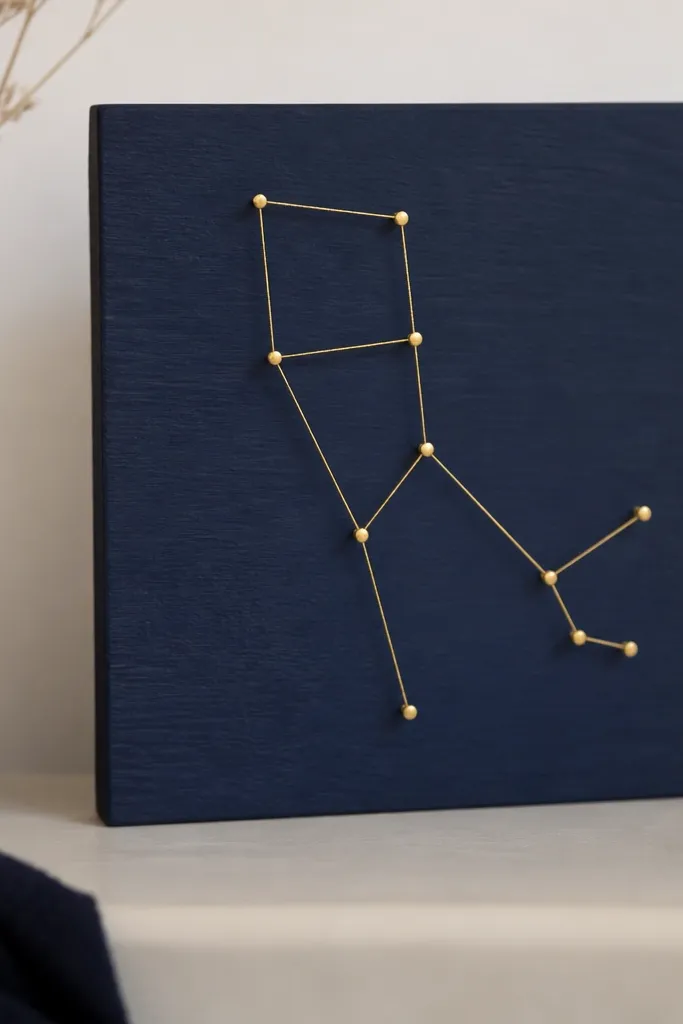
This looks like a designer piece because the string lines are clean and the board background makes the “stars” pop. It’s low maintenance because once you place the nails, you just wrap string — no complex measuring needed beyond the initial layout. I’ve done this for friends who love space but don’t want a big poster; the board size is perfect for a shelf or entryway wall. Navy with gold string looks great with warm wood and brass decor.
Paint a small wood board (8x10 inches) deep navy and let dry fully. Lightly mark star points in pencil based on a constellation reference, then hammer tiny nails at each point — leave the nail heads visible. Start string at one nail, wrap tightly to the next nail, and continue until the constellation lines are complete. Finish by adding a short loop of string for hanging and trim loose ends with pliers.
Editor's noteUse gold or metallic string — it reads like “stars” under indoor lighting.
Skip thisAvoid loose string tension — it makes lines sag and look handmade in a messy way.
19. Paper quilling-style heart card with layered strips
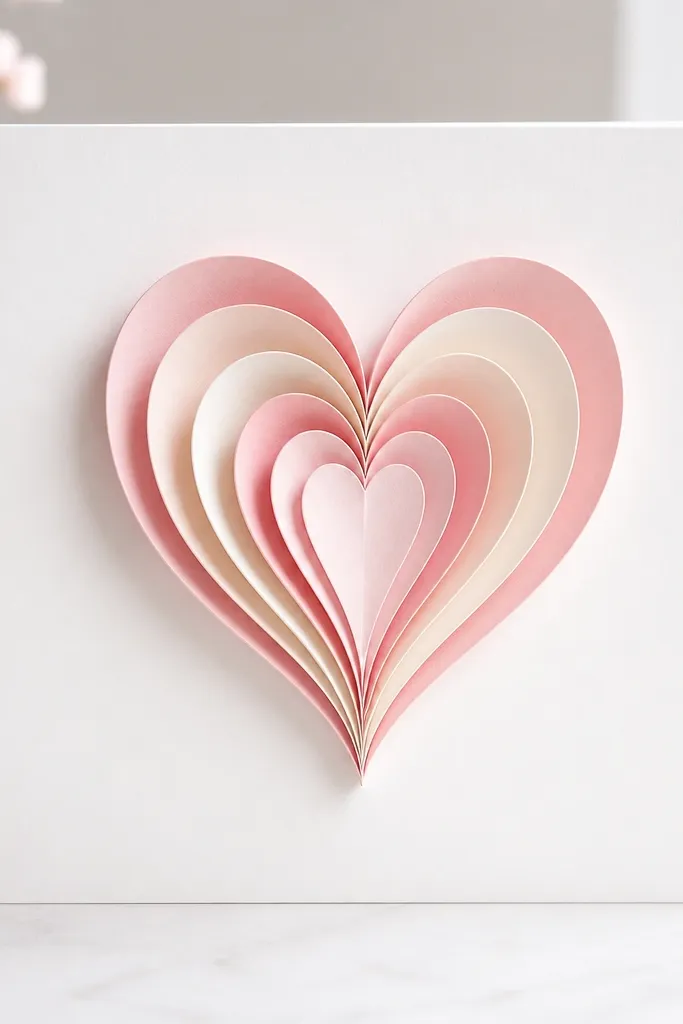
If your friend loves stationery, this card feels special without being hard to plan. Layered paper hearts look dimensional, and you can keep the design small so it doesn’t warp the card. I’ve made this for friends who keep cards in drawers and take photos of them later; the texture shows clearly in pictures. The soft pink and cream palette flatters everyone because it’s neutral enough for any home aesthetic.
Cut paper strips about 1/8 inch wide in pinks and cream, then curl them around a toothpick to make tight coils. Glue coils to form a heart shape on cardstock, using a simple outline first. Build layers from the outer heart inward so the edges frame the center. Finally, glue the heart to the card front and add a small sentiment banner using black marker or printed text.
Coil tightly and keep glue minimal — too much glue makes paper buckle and lose the neat shape.
Avoid wet glue blobs — they curl the paper strips and make the heart look uneven.
20. DIY bath bomb gift set in silicone molds + printed care card
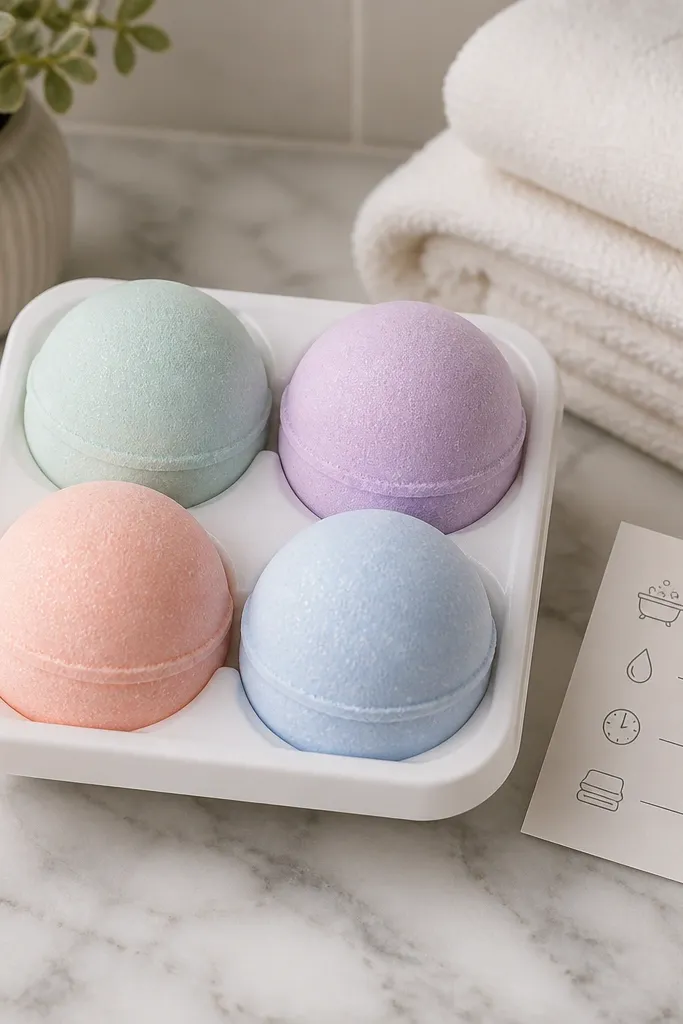
Bath bombs look fun and feel like a real treat, and they’re low maintenance when you use silicone molds and pre-measured ingredients. The colors are what sell it visually, especially when you keep glitter minimal and use matte-looking cosmetic-safe shimmer. I’ve given these to best friends who are always stressed, and they use them right away because they feel like an event. Pastel mixes also photograph well for a “wow” moment without extra decoration.
Mix dry ingredients like 1 cup baking soda, 1/2 cup citric acid, 1/2 cup cornstarch, and your fragrance. Add color with cosmetic-safe pigments in small amounts until the mixture looks like a pastel. Spritz with witch hazel or water — just enough to make the mixture clump when squeezed — then pack firmly into silicone molds. Let dry overnight, pop out, and place in a clear bag with a printed care card.
Test one bath bomb first — if it crumbles, you need a slightly stronger spritz for clumping.
Avoid adding too much liquid — it causes fizzing in the mold and ruins the shape.
21. Fabric ribbon hair bow set with snap clip back
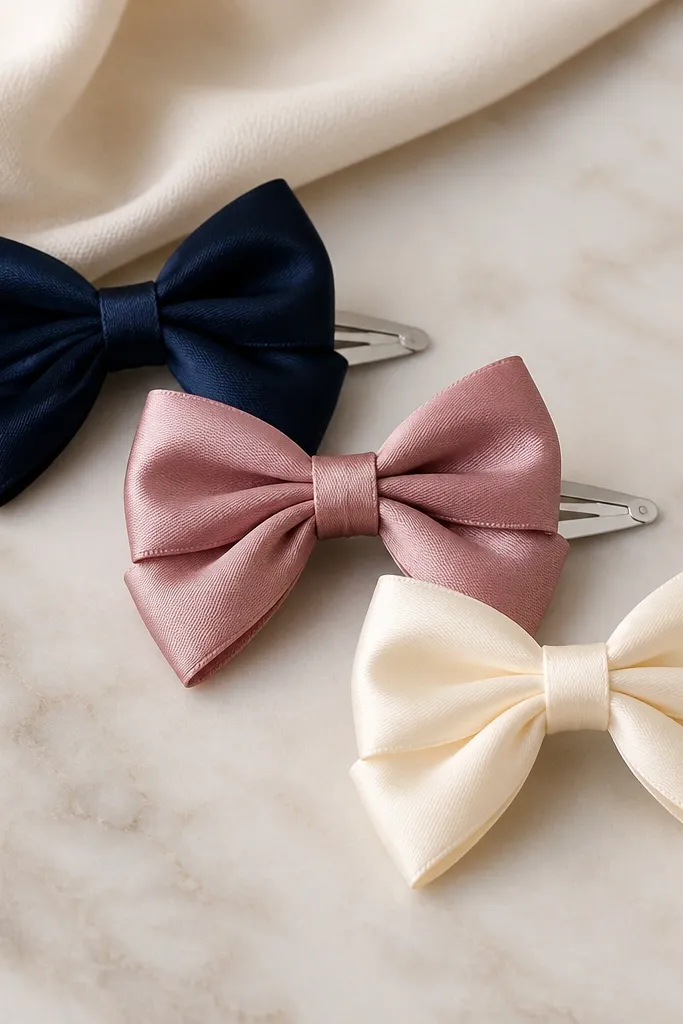
Hair bows are low maintenance because they look polished even when you’re not sewing complicated seams. Satin ribbon gives a shiny finish that looks store-bought, and the snap clip makes them easy to use for quick hair days. I’ve gifted these to friends with little siblings and also to adult friends who wear claw clips and need a cute accent. The color set works because navy and rose pair well with denim and black basics, while cream keeps it bright.
Cut ribbon into two loops for each bow — 7 inches for the outer loops and 3.5 inches for the center. Fold each loop in half and pinch the middle, then stitch or glue the pinch point to hold shape. Layer the center piece over the pinched middle and secure with a small strip of ribbon wrapped around the center. Attach a snap clip by gluing the ribbon strip to the clip base, then add a small fabric backing so the glue doesn’t show.
Editor's noteIron the ribbon before you fold — it keeps the loops sharp and symmetrical.
Skip thisAvoid cheap ribbon that frays — it makes the bow edges look tired.
22. Beeswax lip balm gift tubes with custom stickers
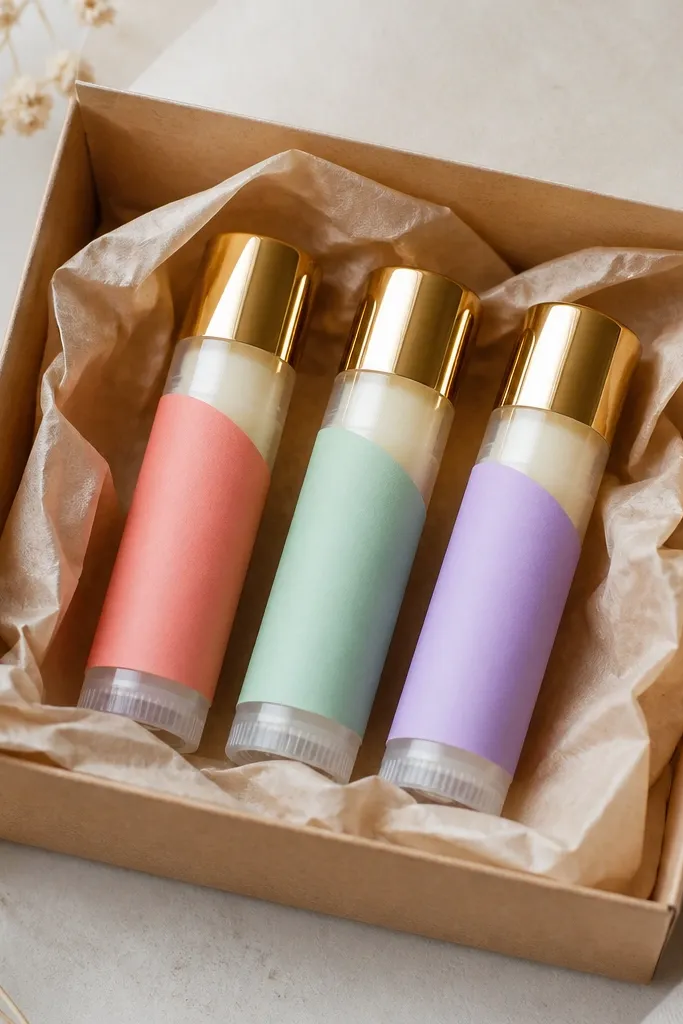
Lip balm is one of the most practical low maintenance handmade gifts because it’s small, useful, and doesn’t require your friend to “learn” anything. Beeswax makes it firm enough for travel, and the tubes look clean and professional. I’ve made these for friends who work outdoors or sit in dry offices — they use them daily, so the gift doesn’t get stuck in a drawer. Bright labels make the balm feel fun, and neutral balm color works for everyone’s preference.
Melt beeswax pellets with a carrier oil like sweet almond oil in a small pourable cup. Add a tiny amount of flavor or essential oil, and add lipstick pigment only if you want a tint. Pour into lip balm tubes and let cool until solid (usually 1-2 hours). Stick on custom labels made from waterproof sticker paper or laminated cardstock, then add a small kraft box liner if you want it to feel like a set.
Editor's noteStir the mixture well before pouring so pigment and oil distribute evenly.
Skip thisAvoid over-scenting — strong essential oils can irritate lips and smell “perfumey.”
23. Handmade desk notepad with washi tape binding and stamped cover
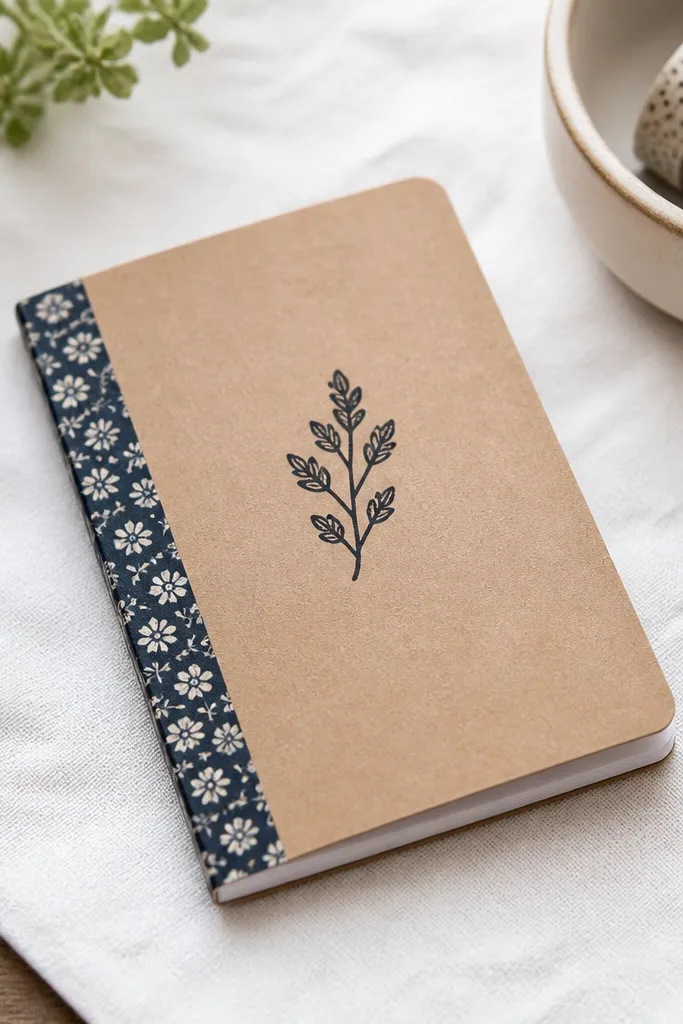
A desk notepad is low maintenance because it’s basically paper + one clean binding trick, and it’s the kind of gift your friend uses every week. Washi tape binding looks tidy and gives you a place to add personality without ruining the cover with glue. I’ve made these for best friends who work at home and keep sticky notes everywhere; a notepad gives them one “home” for reminders. The kraft cover with a black stamp reads warm and works with both minimal and colorful desks.
Cut lined paper to a small size like 4 x 6 inches and stack about 30-40 sheets. Cut a kraft cover slightly larger, then stamp a simple icon on the front and let it dry. Align the paper stack with the cover and bind the spine with two strips of washi tape, one on the front edge and one on the back edge. Press the tape down with a ruler so it stays straight, then trim any overhang.
Use a thicker washi tape (about 3/4 inch) for a cleaner spine that doesn’t peel.
Avoid loose alignment — uneven stacks make the tape look crooked.
24. Hand-Painted Recipe Card Holder from a Scrap Wood Block
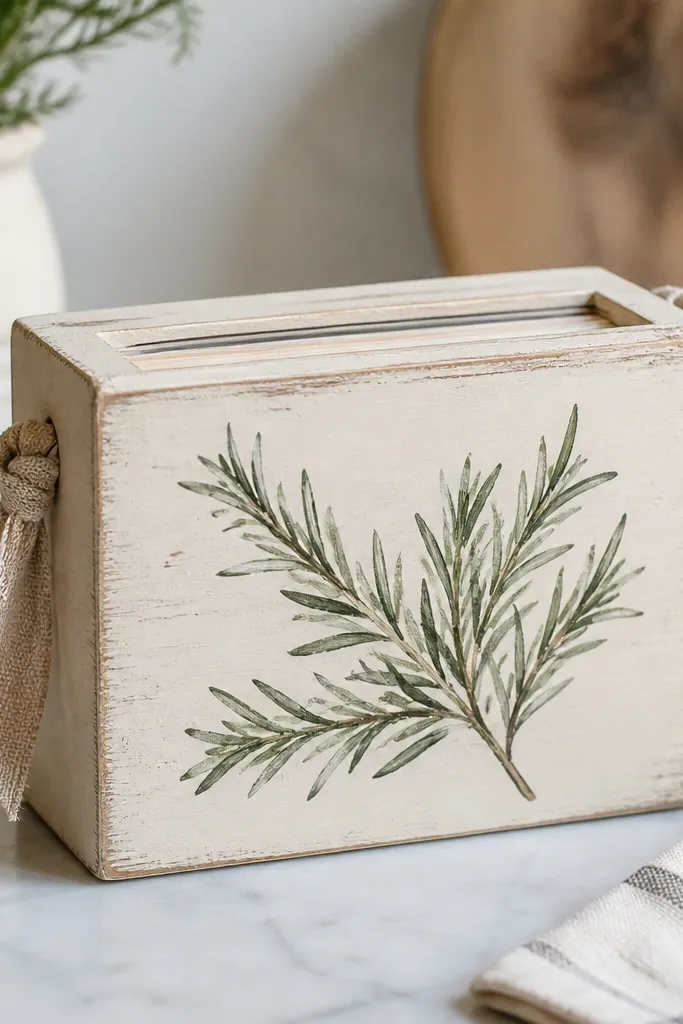
This gift is low maintenance because it turns into something your friend uses every time she cooks, yet it takes you less than an afternoon to make. I made one from a leftover pine offcut and it looks way more intentional than a store-bought card stand because of the handmade paint and the card slot you size to her recipe cards. The key is keeping it small and stable so it doesn’t wobble on the counter. I also like giving it with a stack of blank recipe cards so she can start using it immediately.
Cut a scrap wood block to about 4 x 2.5 x 1.25 inches, then sand the top edge until it feels smooth under your thumb. Mark a center slot on the top that is 0.2 inches wide and about 1 inch deep, then cut it with a jigsaw or a drill-and-sand method and clean the corners with sandpaper. Paint the front and sides with matte acrylic (cream or warm white), then add your design with a small liner brush and craft paint (I use leaf green and a tiny brown stem). Dry-brush a little paint around the edges so the grain peeks through, seal with a clear matte spray, and tie a linen ribbon around it for a cute grip when she moves it. Make matching recipe cards from cardstock, then test-fit them in the slot before you seal the final coat.
Size the slot to the exact paper weight you’re giving her — 110 lb index cards slide in cleanly without snagging.
Don’t paint the top slot closed — leave it bare or masked so the cards slide in on the first try.
25. Sew-on Garden Seed Packet Pouch with Waxed Canvas Lining
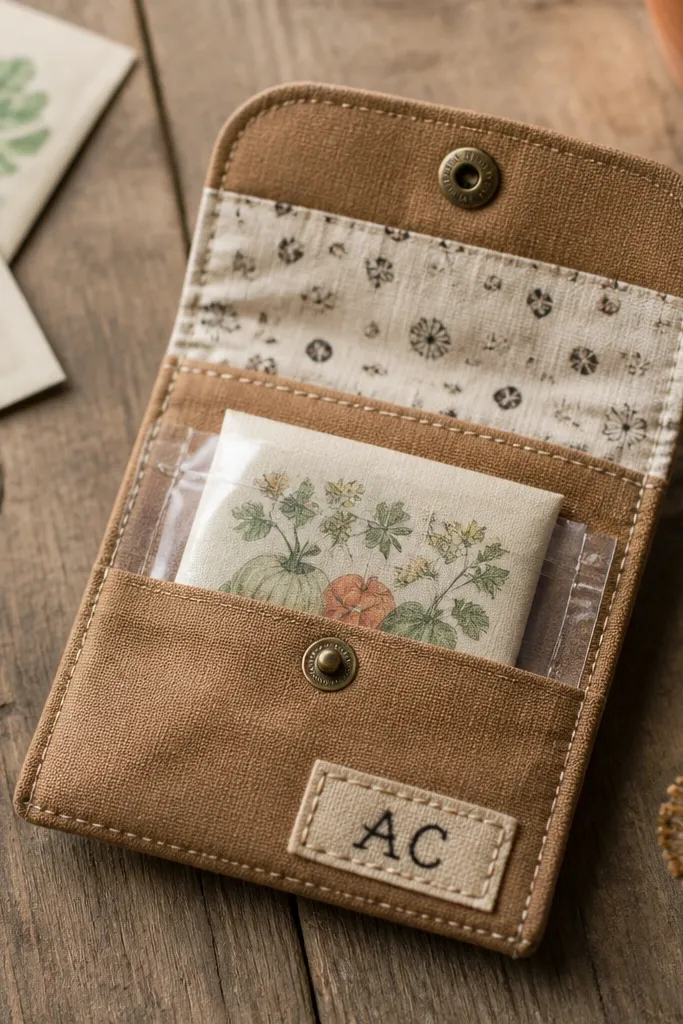
This is one of my favorite low maintenance handmade gifts because it’s practical for anyone who keeps a drawer of gardening supplies. It holds seed packets flat, protects them from getting creased, and looks better than a random plastic bag. I’ve given this to friends who swear they don’t have time to garden — they still use it for herb seeds and little plant starts. The waxed canvas makes it wipe-clean, which matters when someone puts it in a tote with soil tools.
Cut two rectangles of waxed canvas about 6 x 4 inches and two rectangles of cotton lining about 6 x 4 inches. Sew the lining to the canvas on three sides, then turn it right-side out and press flat so the edges look crisp. Add a clear pocket on the front using a strip of clear vinyl cut to about 6 x 2 inches, then top-stitch around the vinyl edges so it doesn’t peel. Create a flap by sewing a third canvas strip about 6 x 1.5 inches over the top edge, then attach a simple snap or magnetic button near the flap corner. Finish with a stitched label strip (cotton tape or twill) and put one seed packet inside to kickstart use.
Editor's noteUse a Teflon foot or tape over the needle path when sewing waxed canvas so it doesn’t drag and bunch.
Skip thisDon’t skip pre-washing the cotton lining — unwashed fabric shrinks and makes the pouch twist after a wash.



