

1. Crisp Photo-Window Love Card (No Mess Layers)
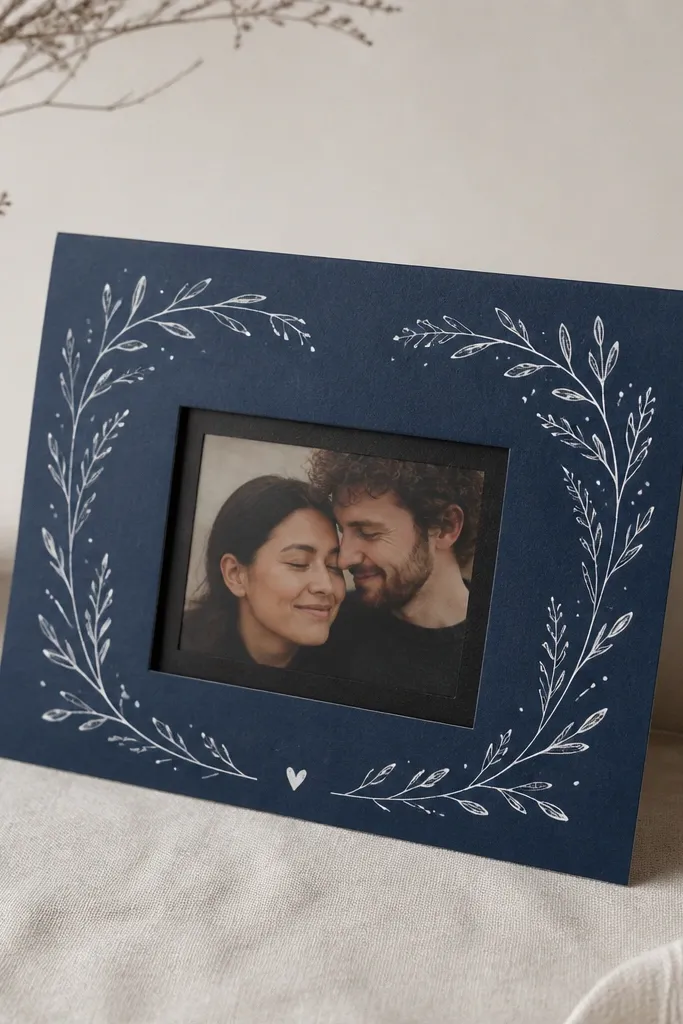
This is the kind of paper gift that looks expensive because the photo sits inside a clean window. I use an A6 folded card (4.1 x 5.8 inches) in deep navy cardstock, then cut a centered rectangle window with an X-Acto knife and a metal ruler. The border strip is matte black paper, about 1/8 inch wide, so it frames the photo without looking bulky. It flatters almost any relationship vibe — casual, long-distance, or anniversary — because the photo does the emotional work and the card stays tidy.
Editor's noteUse a fresh blade and cut on a self-healing mat — ragged cuts are the only thing that makes this look DIY.
Start with 110 lb navy cardstock and fold it in half, then mark a centered window rectangle about 2.2 x 1.6 inches. Cut the window using a ruler and replace the blade if it starts snagging. Layer a matte black border strip behind the cut edge so the window looks framed from the front. Print your photo in a small size, trim it to fit the opening, and glue it to a backing panel inside the card. Finish by writing a short message (three lines max) in white gel pen on the outer panel.
Skip thisAvoid glitter glue on the window edge; it catches light unevenly and looks messy fast.
2. Mini Book of 30 Tiny Compliments (Folded Like a Zine)
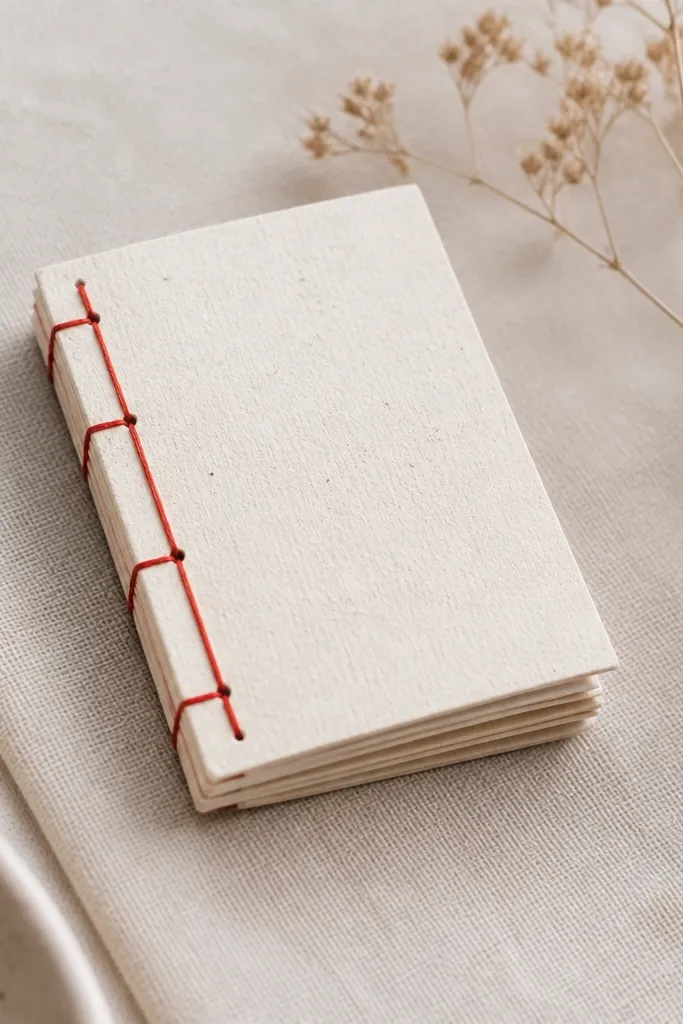
This gift feels personal because each page is its own little moment, and it’s still low maintenance because the structure is repeatable. I make mine with 8 folded sheets, which gives you 32 pages — perfect for a “30 compliments” theme with two extra pages for a title and a thank-you. The look stays clean when you keep the text in one font style and add tiny icons in one accent color like red. It works best for boyfriends who like reading, inside jokes, or anything that feels thoughtful without being loud.
Editor's noteNumber the compliments lightly in pencil first so you don’t lose count when you’re writing late at night.
Start by cutting 8 sheets of 110 lb paper to 5 x 8 inches, then fold each sheet in half to make 8 mini page units. Stack them and align the folds, then punch two holes near the spine (about 1/2 inch from the fold) and stitch with waxed thread. Create pages by writing one compliment per page; keep the writing centered and leave a 1/4 inch margin. Make the cover from textured cream cardstock and glue it over the first and last page. Add a title on the front in black marker and a small red icon in the bottom corner of every page.
Skip thisDon’t use multiple font styles; it turns the pages into a collage instead of a cohesive mini book.
3. Shadowbox Paper Map of His Favorite Place
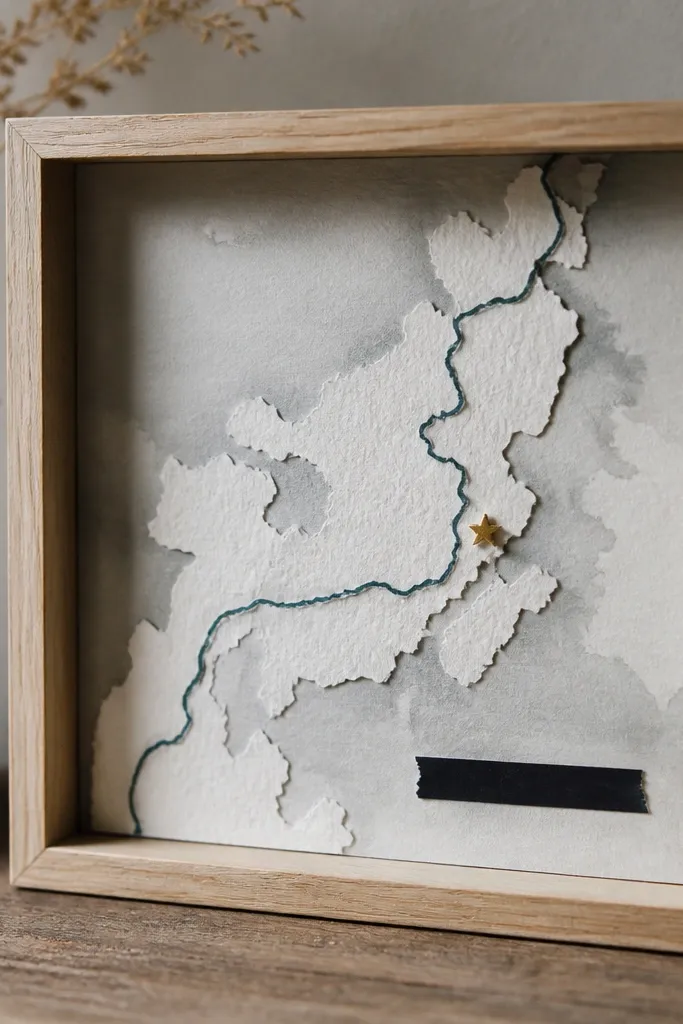
A shadowbox-style paper map looks like a real piece of decor because you’re building depth with layers. I use a 5 x 7 inch shadowbox frame and layer a muted map background, then draw the route with a fine-tip pen. The teal route line makes it pop without needing bright colors everywhere. This is a great boyfriend gift for someone who loves a specific coffee shop, beach, neighborhood, or road trip — the “place” becomes the story.
Editor's noteUse a fineliner that’s labeled “archival” or test on scrap first; the wrong ink bleeds when you seal.
Start with 140 lb watercolor paper cut to fit the shadowbox backing size. Sketch a simple version of the area — no need for exact streets, just the general shapes — then draw the route with a dark teal fineliner. Cut small label strips from black matte tape-backed paper (or black cardstock) and glue them near key spots. Add one tiny star sticker on the exact “favorite place” point and lightly shade around it with a gray marker. Seal the top layer with a thin matte Mod Podge coat if your pens smear, then assemble inside the frame without overstuffing the depth.
Skip thisAvoid copying a full Google screenshot; it looks busy and turns into a messy collage.
4. Folded Shirt Card With Matching Tie Color
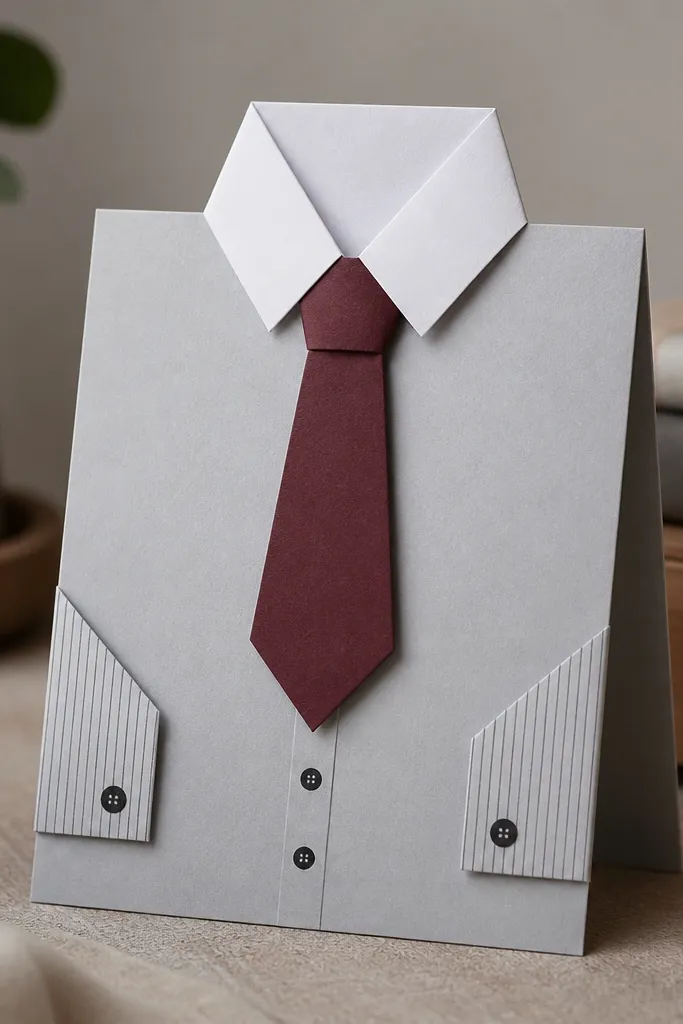
This is a paper gift that makes people smile immediately because it turns a greeting card into a tiny wearable object. I like gray or kraft cardstock for the shirt body because it looks clean, then I pair it with one bold tie color like burgundy, navy, or forest green. The detail that makes it look legit is the collar shape and the button dots — simple marks, but placed carefully. It fits birthdays, job promotions, or “thinking of you” moments for boyfriends who like classic style.
Start with a 6 x 6.5 inch cardstock square and fold it into a shirt base using a triangular collar fold. Cut a tie panel from 110 lb cardstock, about 1 inch wide at the top and 1.5 inches long, then add a small diagonal stripe pattern with a lighter marker. Glue the tie to the shirt front and draw two small collar points with a pencil guide. Add four small “buttons” with a black fine-tip pen and a tiny line for the pocket. Finish by writing a short message inside the card using a thicker marker so it doesn’t bleed.
If your folds crack, score the lines with an empty ballpoint pen before folding.
Avoid using thin printer paper; the shirt shape collapses and looks flimsy.
5. Bookmarked Letter With Hidden Pocket Note
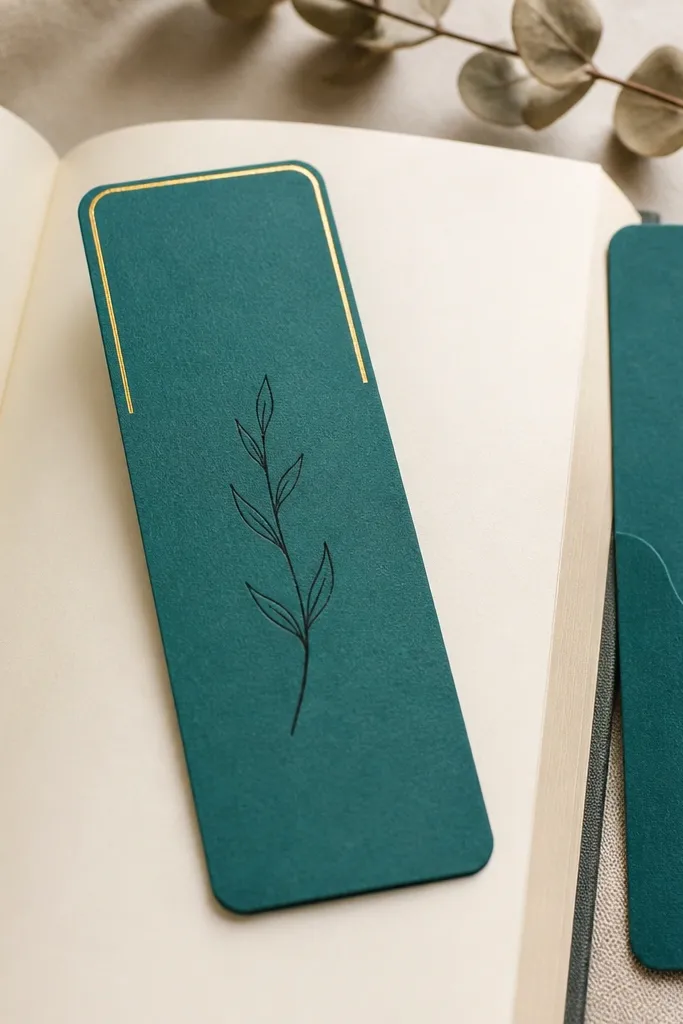
This gift is low maintenance because it’s one piece you can hand over fast, and it keeps getting used. I make bookmarks from thick cardstock so they slide into books without bending. The hidden pocket note is the surprise — it’s small enough to tuck in a pocket, but it feels special because he finds it later. I like teal or forest green because they look calm and masculine, and the gold foil strip adds a little “present” energy without glitter.
Editor's noteUse a corner punch for consistency — it makes the whole piece look intentionally designed.
Cut a bookmark to about 2 x 7 inches from 110 lb teal cardstock, then round the corners with scissors or a corner punch. On the back, cut a small pocket rectangle about 1.2 x 2 inches and glue three sides, leaving the top open. Roll a note (about 1 x 3 inches) into a tight cylinder and slide it into the pocket. Add a gold foil strip across the top front edge and write one line message centered in black ink. Seal the pocket edges with a thin layer of matte Mod Podge so the glue doesn’t lift.
Skip thisAvoid super-glossy foil everywhere; it reflects light and makes the handwriting hard to read.
6. Paper Wallet Card Holder for His Keys or Cash
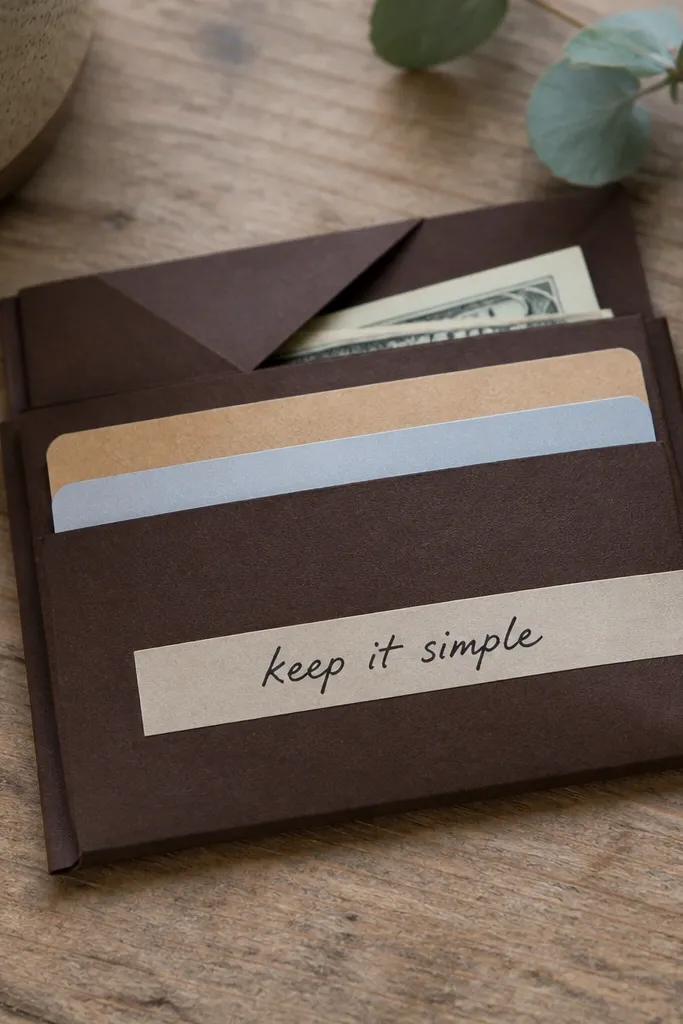
A paper wallet is one of the few DIY gifts that gets used daily, which is why it holds up better than a decorative-only card. I build it from cardstock and add a simple “burnished edge” look so it doesn’t look like you just folded paper. Dark brown, charcoal, and deep green look sharp on men’s desks and in pockets. This works well for boyfriends who like minimal carry — he can stash a card, a couple bills, or a small photo.
Editor's noteBefore sealing, dry-fit everything and trim any corners that snag on the folds.
Start with 110 lb cardstock cut to a strip that folds into a tri-fold wallet, roughly 10 x 7 inches before folding. Fold into sections (about 3.5 inches, 3 inches, 2.5 inches) and test fit a credit card for clearance. Create card slots by gluing two vertical tabs inside and leaving a 1/16 inch gap so cards slide out smoothly. Add an envelope pocket on one side by gluing two edges and leaving the top flap free. Burnish all fold lines with a fingernail or a bone folder, then seal the outer surfaces with a thin matte Mod Podge for sturdiness.
Skip thisAvoid thick layers of tape on the fold lines; it makes the wallet bulky and stiff.
7. Stamped Initials Wall Art on Layered Cardstock
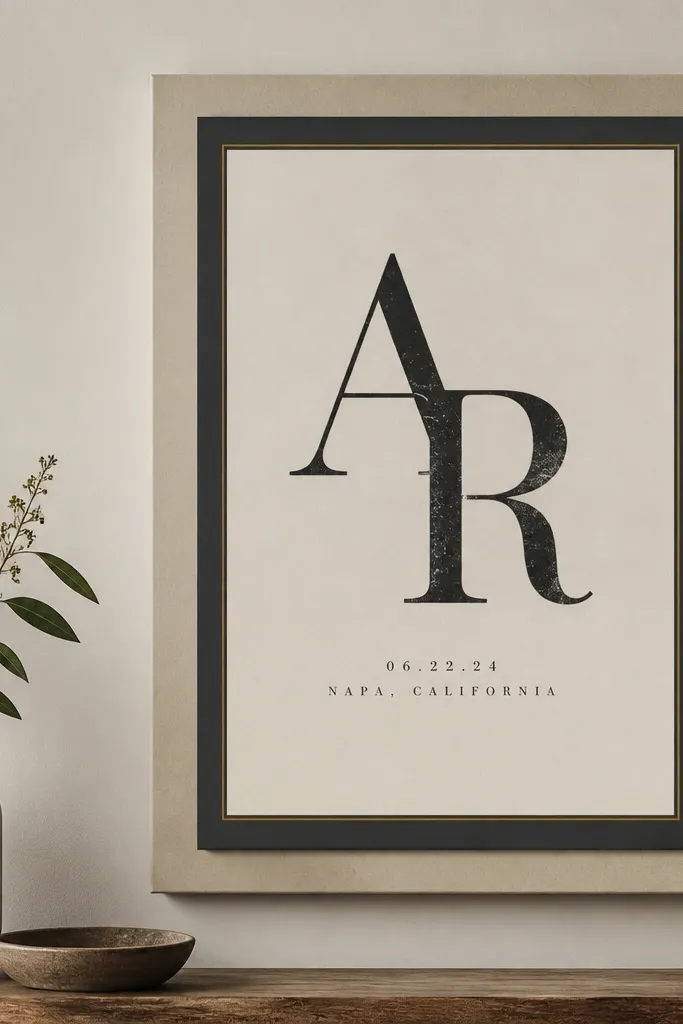
This looks like real decor because it uses graphic design rules: big type, controlled spacing, and layered borders. I use one pair of initials (his and yours or his first initial) in a bold stamp or block letter stencil, then I add a small typed line under it like “Oct 12” or a city name. The color combo matters: beige background plus charcoal border plus a thin gold line looks clean without trying too hard. It’s a good choice when you’re buying time — you can make it in under an hour and it still looks intentional.
Editor's notePress the stamp on scrap first to calibrate pressure so you don’t get patchy letters.
Start with a base panel of 8 x 10 inches in light beige cardstock. Cut an inner border mat in charcoal, leaving a 1/2 inch frame around it, and glue it centered. Stamp or stencil the initials on the top layer using black ink — do one pass, let it dry, then add a second pass only if it’s faint. Add a thin gold line with a pen or gold tape along the bottom border. Type or hand-write a small date line in the center bottom and glue the finishing layer on top.
Skip thisSkip busy patterns behind the letters; it makes the initials look like a mistake.
8. Pop-Up Heart Card With One Clean Accent Color
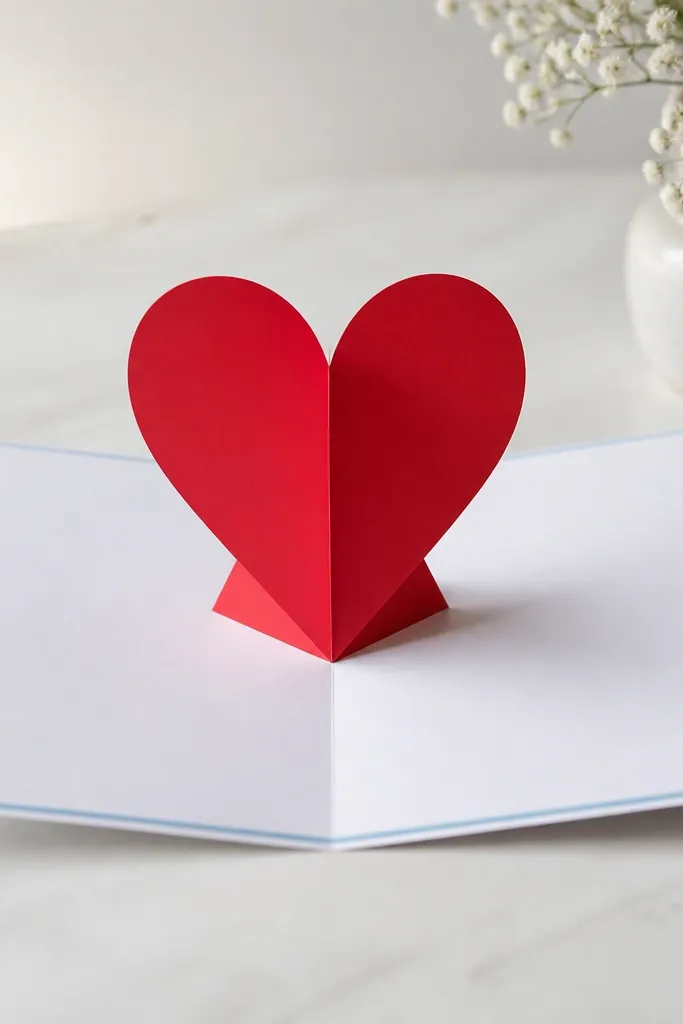
Pop-up cards feel like a lot of work, but the easiest version uses one accent color and simple geometry. I use a white card base so the heart looks crisp, then I keep everything else in a single accent like light blue. The heart shape is made from folded cardstock, so it has sharp edges and doesn’t flop. This gift works best for boyfriends who like sweet but not overly cheesy — the clean palette keeps it from turning into a cartoon.
Editor's noteFold the heart pieces with a bone folder so the edges stay sharp instead of soft.
Start with an A5 white cardstock base and fold it in half. Cut the pop-up heart pieces from 110 lb red cardstock and assemble them with tabs that glue flat to the inside fold lines. Add a light blue border strip (about 1/4 inch) around the front panel so the whole card looks coordinated. Write a short message inside on a small matte tag and glue it flat so it doesn’t interfere with the heart opening. Test-open the card before you finish sealing anything so the heart pops without scraping.
Skip thisAvoid multiple heart colors; it makes the pop-up look chaotic and cheap.
9. Printed Quote + Torn Paper Edge Frame
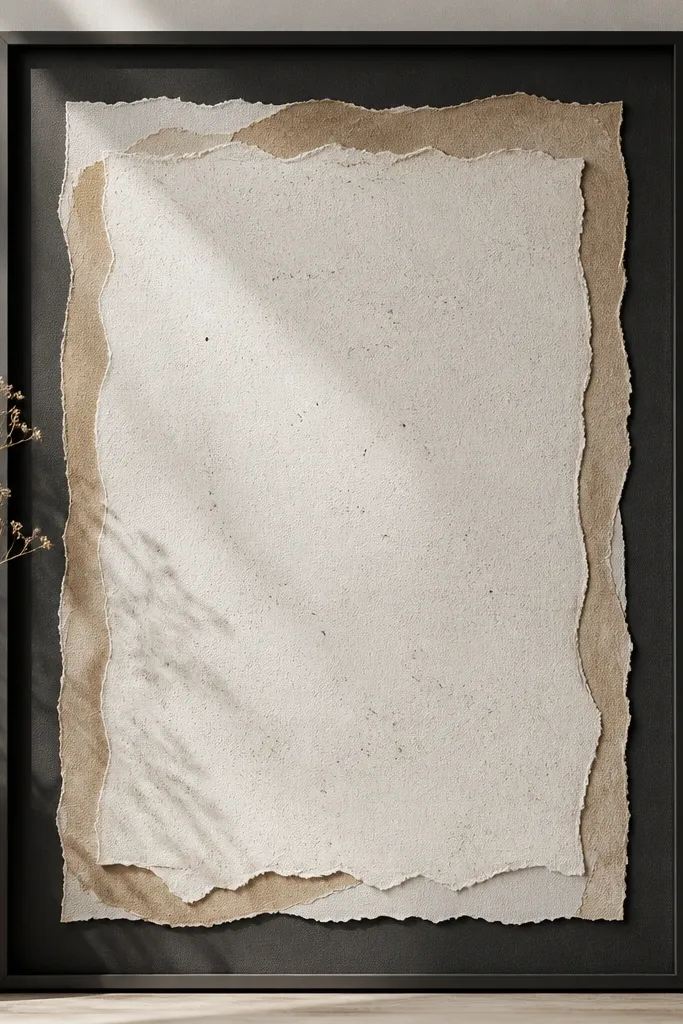
This gift reads like typography art, but it’s still DIY-friendly because torn edges create texture without you needing to draw anything fancy. I print a short quote on cream paper, then frame it with a charcoal mat and torn strips in two neutral tones. The torn paper edge looks handmade even when everything is neat, and it hides minor cut imperfections. It works well for boyfriends who like calm aesthetics — desks, reading corners, and offices.
Editor's noteTear on a desk with a dark surface under it — you can see the fiber texture better while you work.
Print the quote on 110 lb cream cardstock sized to about 4 x 6 inches. Cut a charcoal mat to 5 x 7 inches with an opening that shows the quote centered, leaving a 3/4 inch border. Tear off-white and tan strips by hand, then layer them along the mat opening so the quote has a textured frame. Glue the torn strips with a thin glue stick, then press with a flat object so they stick evenly. Mount the quote behind the mat opening and secure it with small strips of tape on the back only.
Skip thisAvoid straight-cut borders; the whole point is the torn edge texture.
10. Origami Fortune Cookie Note Holder
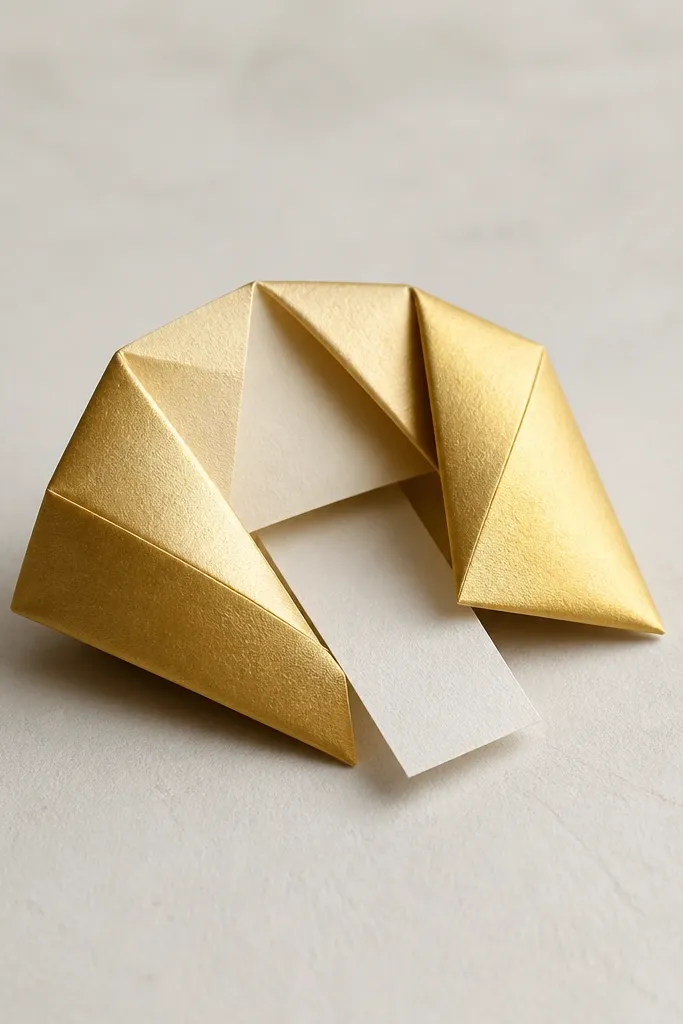
This is a fun paper gift that feels playful without being messy. I use metallic gold or matte parchment-colored paper so it looks like a real “fortune” object, not a craft project. Each cookie holds a short note like “Your turn to pick dinner” or “I’m proud of you for...” It works for boyfriends who like surprises, and it’s perfect for a date night add-on when you want something light and quick.
Editor's noteUse thinner paper for the fortune slip so it unrolls easily when he reads it.
Cut square paper pieces around 4 x 4 inches (bigger if you want room for longer notes). Fold using the standard fortune cookie pattern: crease all lines first, then form the two ends so the pocket opens. Write a short slip on thin paper, roll it tight, and place it inside before you seal the last fold. Add a tiny label strip with his name or a date on the outside. If you want it sturdier, brush a thin matte Mod Podge layer on the outside and let it dry flat.
Skip thisAvoid thick cardstock inside the cookie; it won’t fold closed cleanly.
11. Paper Coaster Set With His Initials and Lamination
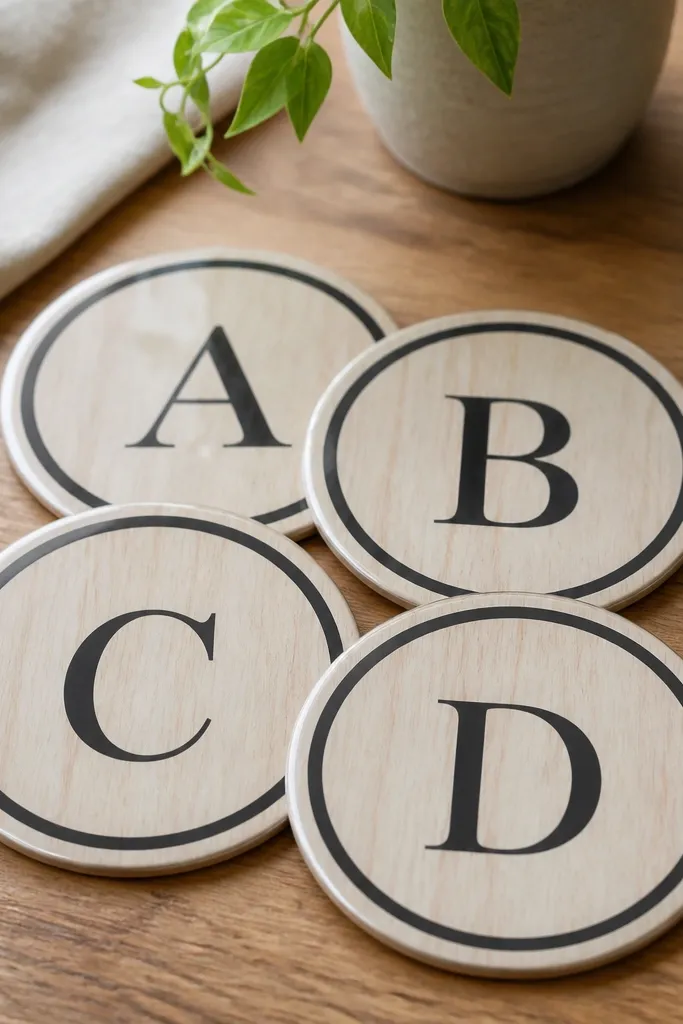
Coasters are a practical gift, and paper coasters look high-end when you laminate them. I use 110 lb cardstock printed with a subtle pattern, then I add his initial in a thick black marker or vinyl cut letter. The lamination makes the paper resist spills and makes the surface feel smooth like store-bought coasters. This works best for boyfriends who leave water cups on the desk or who host friends, because it turns your gift into an everyday item.
Editor's noteLet marker ink dry fully before lamination so it doesn’t smear under heat.
Start by cutting four circles from 110 lb cardstock using a round cutter or trace a mug lid (about 3.5 inches). Print or draw a pattern background first, then add one large initial centered. Laminate each coaster with clear pouches, trimming the edges after lamination. Round the corners or use a circle punch so the edges look finished. Place felt pads on the bottom if you want it quieter on wood tables.
Skip thisAvoid uneven trimming around the lamination edge; it catches on cups and looks sloppy.
12. Conversation Map Envelope With Date Prompts
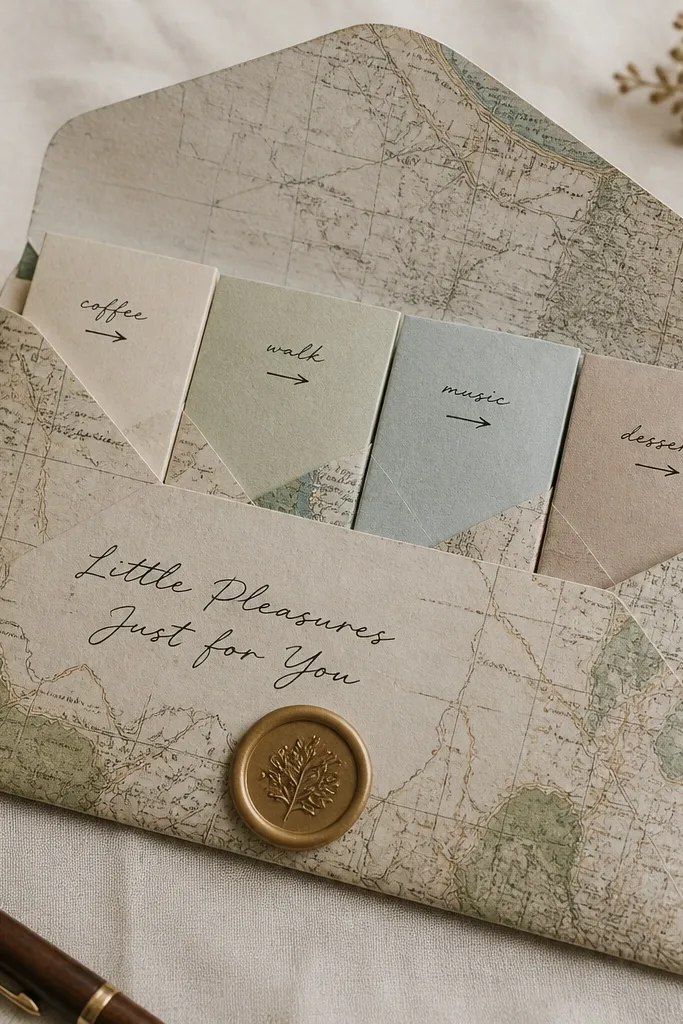
This gift is a paper system for planning dates without a long back-and-forth text thread. I make a big envelope with a map-style background, then tuck in 4 folded prompt cards that feel like mini missions. The map look makes it feel grown-up, not childish, and the prompts keep the night from stalling. It’s ideal for couples who want spontaneity but need structure.
Editor's noteUse one font style for all prompt cards — it makes the set look like it came from the same designer.
Start with a manila or kraft envelope and cover it with a thin layer of printed map paper or a painted gray wash. Write a title on the front in black marker, then seal the edges with small tape strips from the inside so it stays sturdy. Make four prompt cards about 3 x 4 inches from 110 lb cardstock, each with one activity and a tiny detail like a time limit or question. Fold each card in half, then add a small arrow doodle on the outside for visual consistency. Put the cards into the envelope and close it with a decorative sticker or small ribbon wrap.
Skip thisAvoid prompts that are too broad like 'have fun' — they lead to awkward planning.
13. Layered Paper Nameplate for His Desk Setup
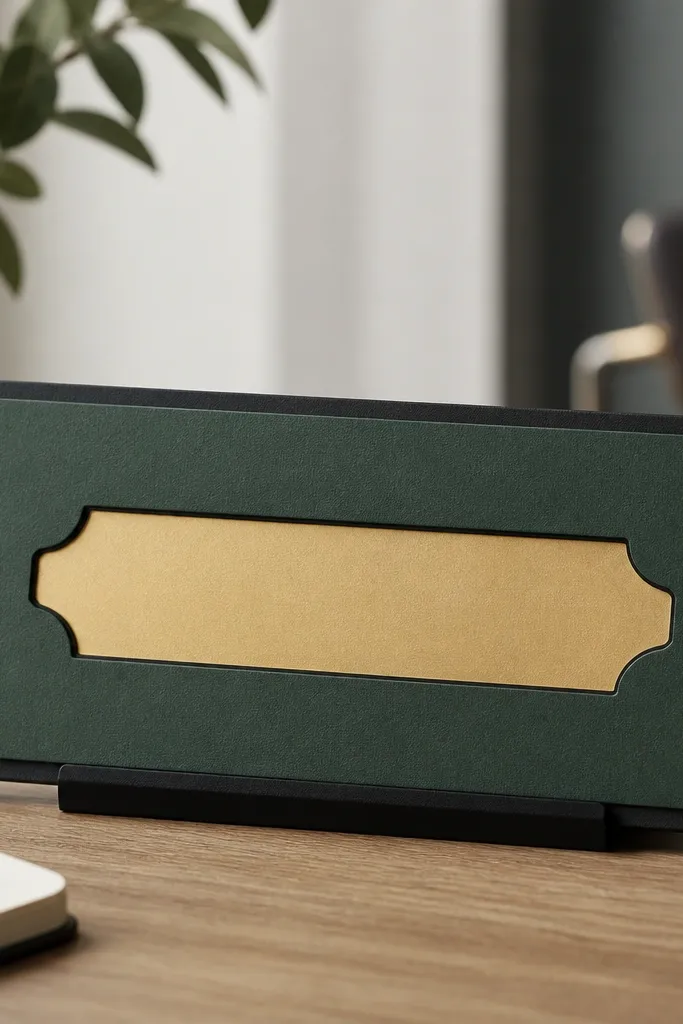
A nameplate is a gift that looks like you paid attention to his routine. I like layered paper because it gives dimension without heavy crafting tools. The cut-out letters backed with a metallic tone create a “desk product” look, and the stand makes it sit up instead of flopping. This fits boyfriends who work from home, game, or build models at a desk — it turns the space into something he recognizes as his.
Cut a base rectangle from black cardstock, about 10 x 3 inches, and create a simple stand by folding a 1.5 inch tab at the back. Cut a top layer from deep green cardstock and leave a window for his name letters. Create the letters by tracing a stencil onto brass-colored paper and cutting them out, then glue behind the green layer so the brass shows through. Add a small icon like a star or a wrench in the corner. Finish by sealing the top with matte Mod Podge so the edges look smooth and the paper won’t fuzz.
If cutting letters is hard, use a vinyl letter stencil guide and trace carefully before cutting.
Avoid super-thin paper for the stand; it will sag after a week.
14. Stacked Paper "Ticket Book" for Dates
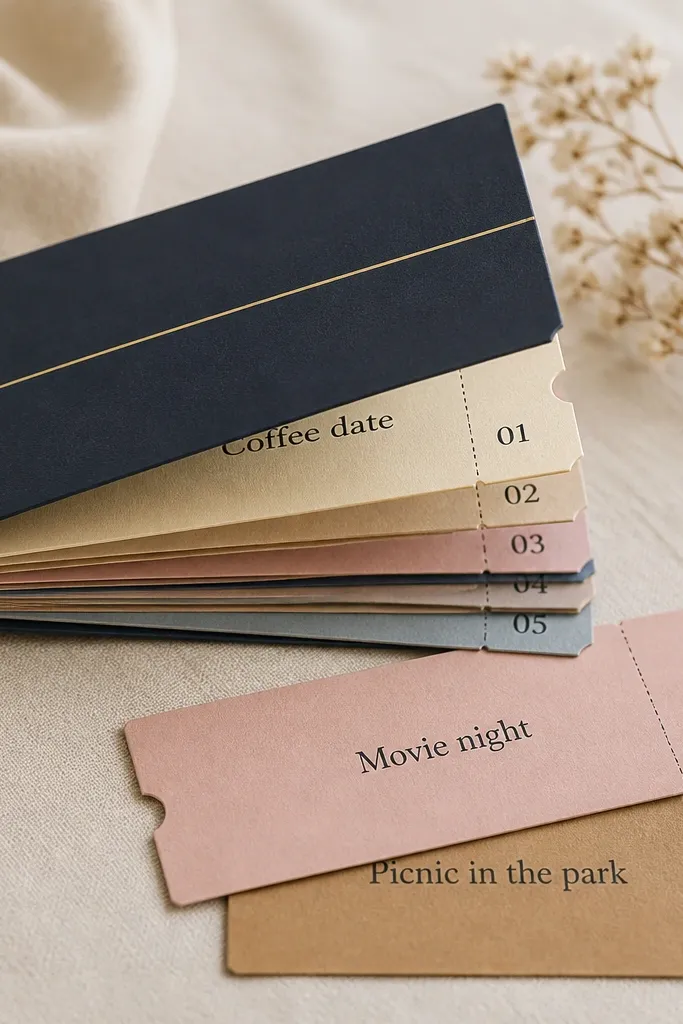
A ticket book feels like a gift-within-a gift because each slip is a mini promise. I make it from stacked cardstock strips so it stays rigid and doesn’t bend in a drawer. The “perforation” look comes from drawing dotted lines, which is easier than actually perforating. It works for boyfriends who like plans but also like choices — you can pick a ticket when you want something fun.
Start with a strip of 110 lb cardstock cut to about 4 x 8 inches, then create 6 or 8 ticket sections by marking lines and cutting. For each ticket, write a different date idea and leave room at the top for a number. Add dotted lines across the middle of each ticket using a ruler and a fine black marker. Bind the stack with a simple ribbon loop through two punched holes near the top. Make a cover from navy cardstock, then glue the ticket stack inside so the top edges align perfectly.
Use the same color ribbon for every ticket book so it looks like a set, not random slips.
Avoid ideas that repeat like 'movie night' three times; he’ll notice right away.
15. Matte Paper Frame With a Hand-Drawn "You + Me" Skyline
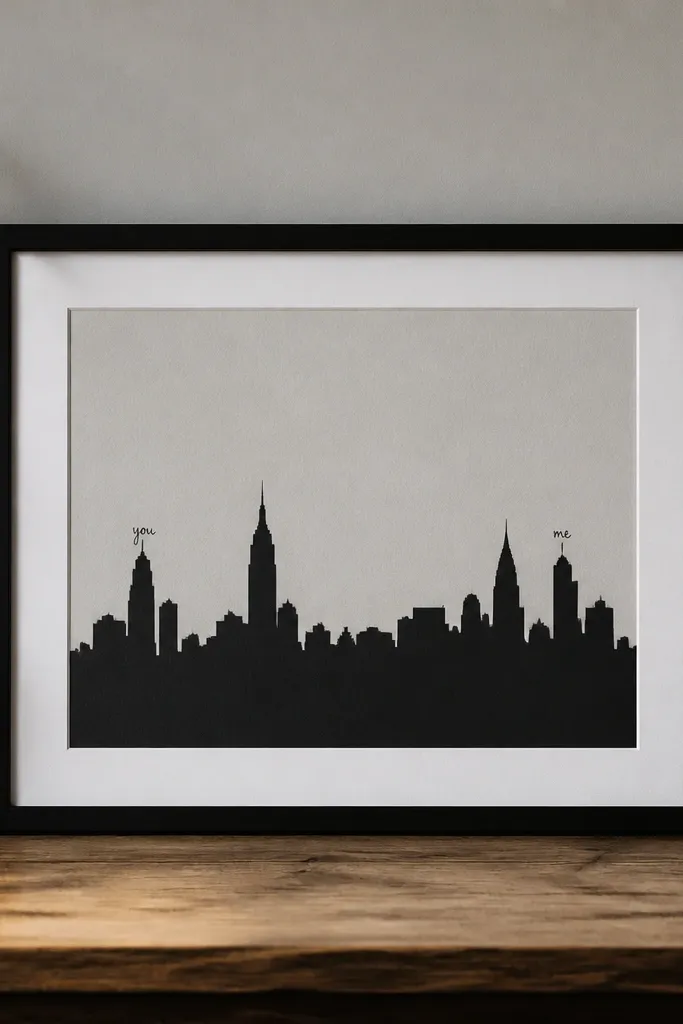
This is my go-to for boyfriends who like minimal wall art. The skyline silhouette gives structure, and the matte paper keeps it classy instead of glittery. I draw the skyline with simple shapes — no details — so it looks clean even if your drawing isn’t perfect. The “you + me” text on separate buildings makes it personal without taking over the whole design. It’s also a good option when you want decor that doesn’t look like a greeting card.
Editor's noteUse a ruler to keep the skyline horizon straight — that one detail makes it look designed.
Start with a 5 x 7 inch frame or a frame-style backing cut from cardstock. Cut a background panel in soft gray matte paper and glue it centered. Draw a skyline silhouette in black marker or black cardstock cutout, then add small windows as dots only on two buildings so it stays minimal. Cut a thin white border strip and place it around the skyline. Add “you” on one building and “me” on another using a fine pen, then attach the front panel to the frame backing with small tabs so it stays flat.
Skip thisAvoid busy shading behind the skyline; it turns a minimal piece into a messy one.



