

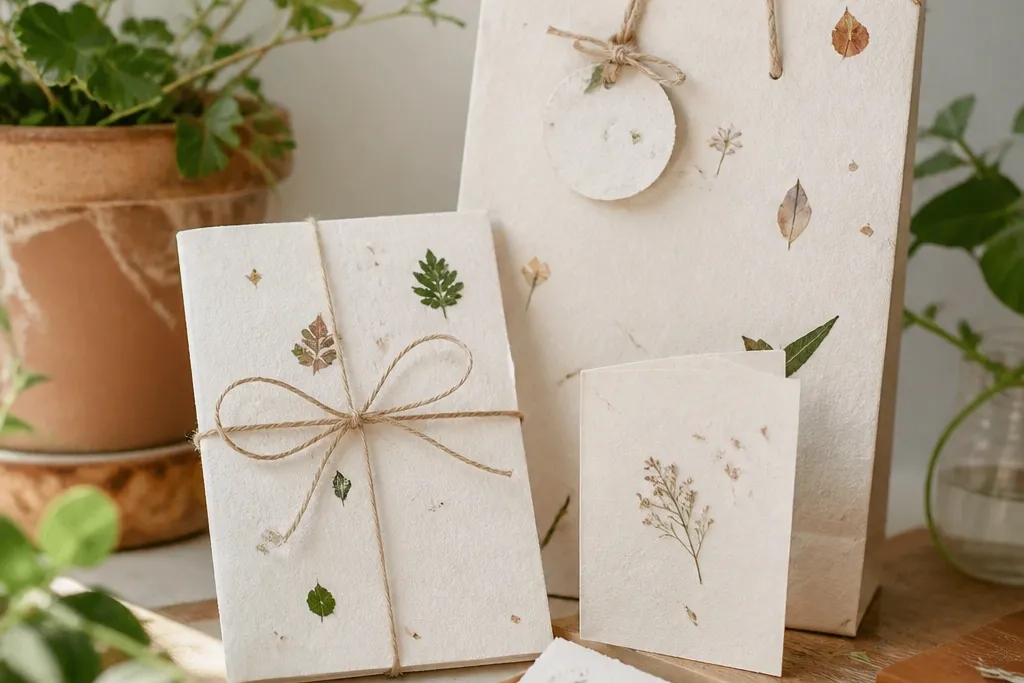
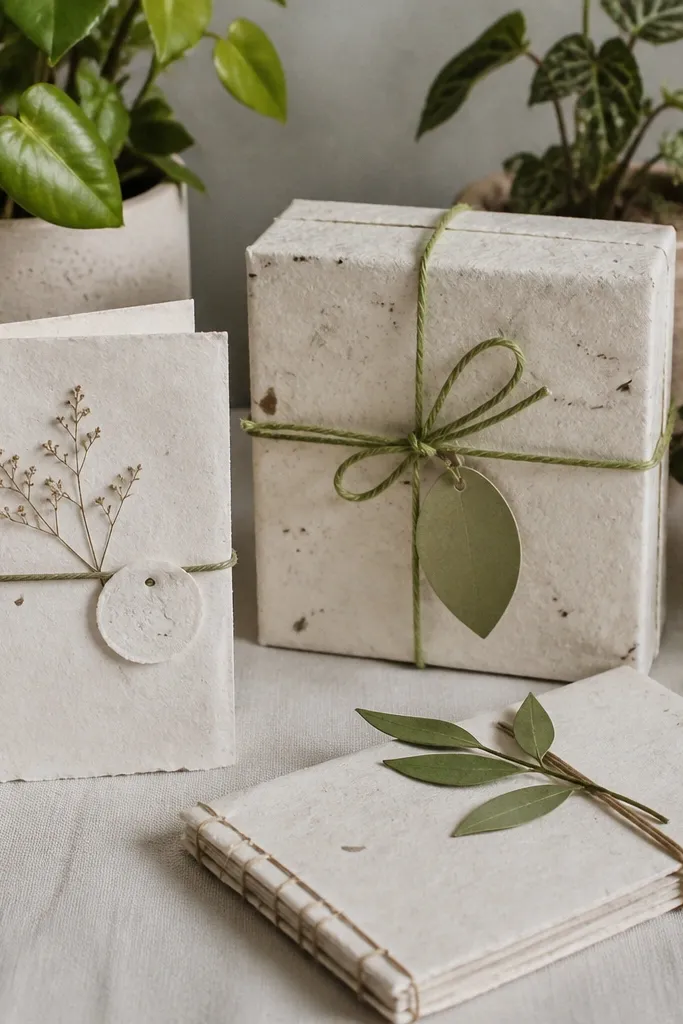
1. 4x6 Terrarium Window Card with Pothos Tip Cutting
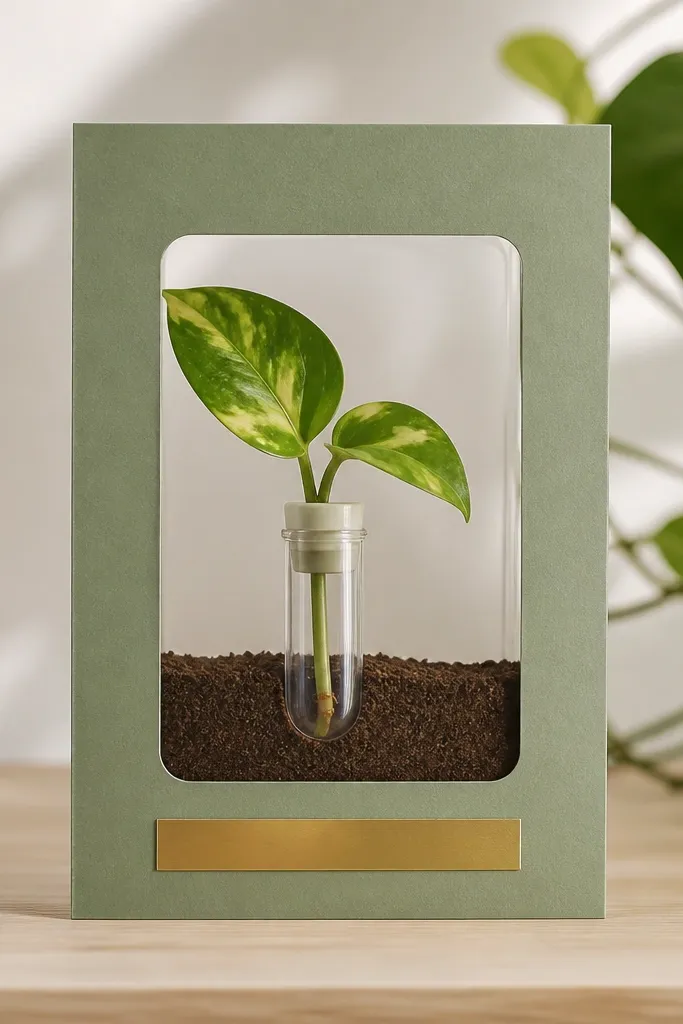
This is the gift I reach for when my best friend likes plants but doesn’t want another big item. The 4x6 size fits a desk, and the pothos tip looks lush even when it’s still small. I build it with matte sage cardstock so the plant greens don’t fight glossy paper glare. The clear window makes it feel like a real terrarium without putting water on the paper. It looks best for people who like calm, neutral decor because the sage frame softens the bright green leaves.
Start by cutting a 2.5x3.5 inch window in the front of your 4x6 card base, then layer a thin paper frame around it using 110 lb cardstock. Place a clear plastic sleeve or small clear zip pocket behind the window so the mini vial sits inside it. Mix your “soil” by crumbling dark brown paper (or using brown ink on torn kraft) and glue it under the window area only. Slide a tiny pothos tip cutting into a mini clear vial with a little water or hydro beads, then set the vial into the pocket. Close the card and add a small “air gap” spacer at the bottom so the vial isn’t pressed against the paper.
Use a removable vial so you can swap the cutting later; it keeps the gift looking fresh after a few weeks.
Avoid gluing the vial directly to paper — condensation will warp the cardstock edge.
2. Pressed-Leaf Paper Frame with Snake Plant Photo Transfer
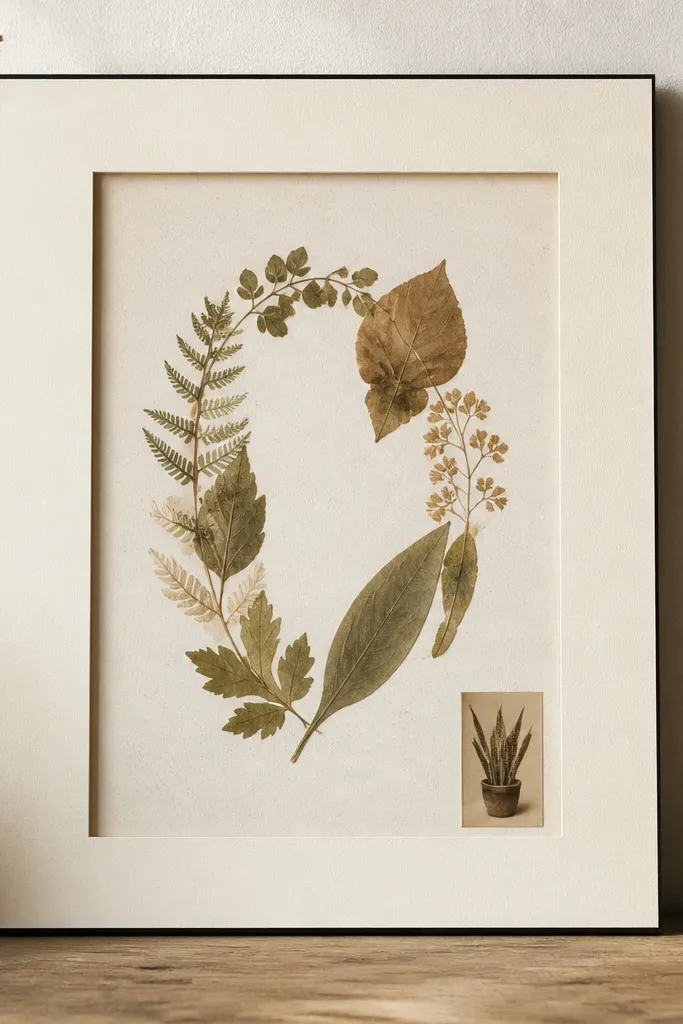
If your best friend likes plants but keeps them in a few statement spots, this frame gives the vibe without needing a living pot. I use pressed leaves because they add real texture that paper alone can’t fake. The snake plant element is a photo transfer or printed image that gives a clean, graphic look, so it reads modern instead of scrapbooky. Cream and sepia work with warm skin tones and light hair because the palette stays gentle. It also suits best-friend gifts for people who prefer minimal decor — there’s no clutter, just a calm botanical statement.
Start with an 8x10 frame and a double mat: one off-white mat with an 6.5x8 opening and a thinner cream mat behind it. Press leaves between book pages for 5-7 days, then arrange them in an oval and glue with a thin layer of matte photo adhesive. Print or transfer a small snake plant image, then distress the edges with a sanding block so it blends into the mat. Glue the image near the bottom right on top of the pressed-leaf layer, leaving space around it. Finish by sealing the paper surface with a light spray of matte fixative so the pressed leaves don’t lift.
Choose leaves with different sizes — two large leaves and three small ones look intentional instead of random.
Don’t use shiny leaf sealant on top — it creates glare that makes the frame look plastic.
3. Layered Paper Planter Pocket for a Mini ZZ Plant Leaf
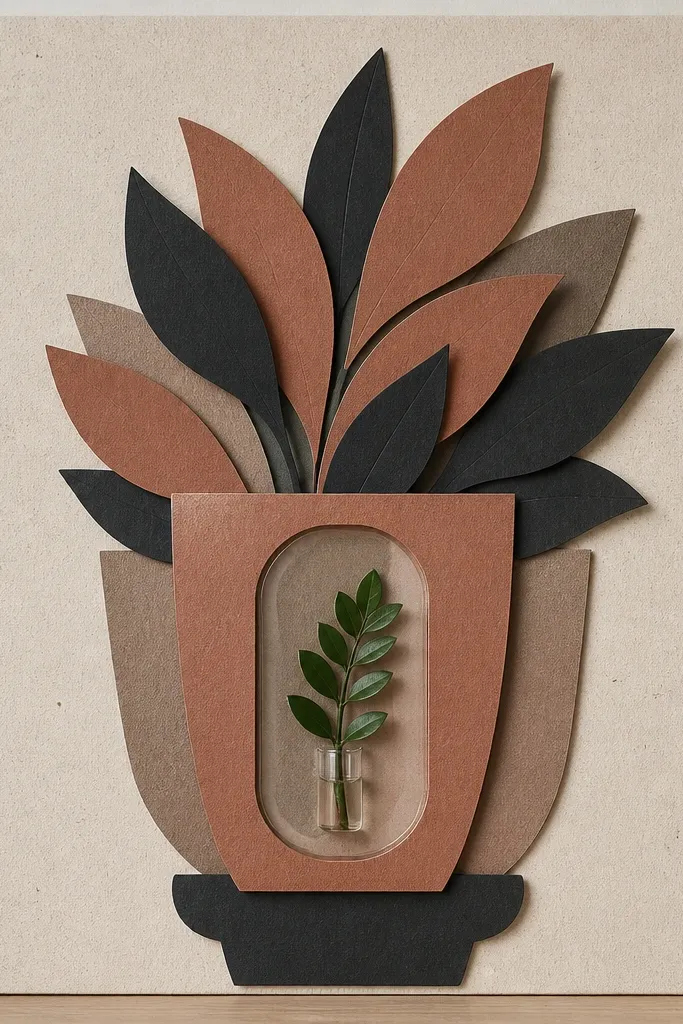
Start with a textured beige cardstock background at 11x14. Cut a planter silhouette from clay cardstock, then layer a darker charcoal “shadow” behind it so it has depth. Create a clear pocket from a plastic sheet trimmed to fit the planter opening, with a sealed top edge using heat-seal tape or a careful glue border. Add a faux soil strip inside the opening using torn brown paper and a thin line of green ink at the top. Insert a mini ZZ leaf in a small glass vial into the pocket, then glue the pocket edges to the back of the planter layer only.
This one looks like a wall planter even though it’s paper-based. The ZZ leaf shape stays sculptural, so the gift looks good even when the plant is small. I like this for friends who love low-effort care because ZZ plants handle indoor conditions well and don’t need constant watering. The clay planter color reads warm against light beige, so it flatters people who wear earthy neutrals and gold jewelry. It also works for birthdays and housewarming because it feels like decor from day one.
Skip thisAvoid heavy wet soil inside the vial — keep the vial water level low to prevent drips.
Editor's noteMount it with two small picture hooks so it hangs flat and doesn’t bow from the pocket weight.
4. Watercolor Marbled Paper "Soil" with Pothos in a Clip Frame
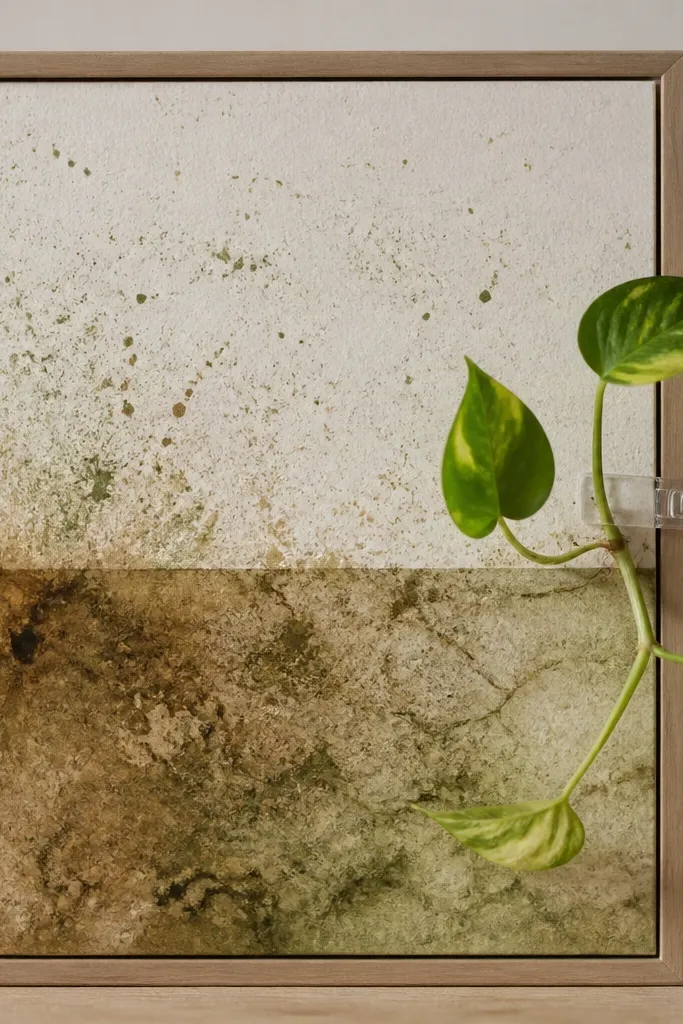
Start by marbling brown and green ink on watercolor paper using shaving cream or a thin acrylic gel method, then blot and rinse until you get swirls. Cut a 10x8 frame window and glue the marbled paper as the bottom layer. Add watercolor speckles on the top half with a round brush and diluted moss green. Attach a clear spring clip (or small plastic binder clip inside a clear sleeve) to the right edge of the frame so the pothos stem can sit inside without touching paper. Place the cutting in a small vial that clips into the holder, then close the frame with a backing board and corner brads.
This gift looks playful and artsy, and it works great for a friend who likes color but still wants clean lines. The marbled paper soil gives a natural base, and the pothos vine adds movement even if it’s only a short cutting. I use a clip-style holder because it keeps water contained and makes the plant easy to replace later. The marbling reads soft, which balances pothos’s crisp leaf edges. It also looks flattering in rooms with warm lighting because the browns and greens glow instead of looking flat.
Skip thisAvoid thick glue under the marbled layer — it creates bubbles and makes the soil look lumpy.
Editor's noteLet the marbled paper dry flat under a book for a full hour so it doesn’t curl under the backing.
5. Botanical Origami Envelope with Seed Paper Roll and Tiny Sprout Tag
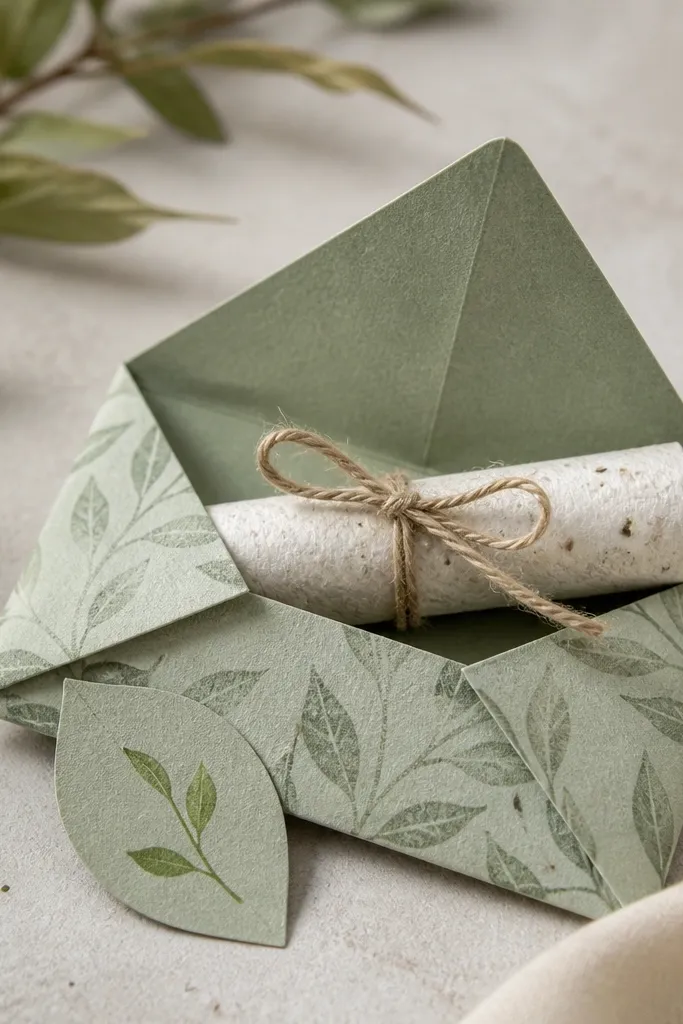
Start with a 6x6 or 7x7 square of patterned cardstock for the envelope, and fold it using a simple square flap style so it stays sturdy. Make seed paper at home or buy it pre-made, then cut a strip about 1 inch wide and 6 inches long and roll it loosely. Tie the roll with 6-8 inches of twine and tuck it into the envelope. Cut a small leaf tag from kraft paper and stamp or draw a tiny sprout on it. Write planting directions on the back of the tag so it’s not hidden.
This is a paper gift that feels personal because it’s interactive. Instead of a plant pot, you give seed paper that grows, which is perfect for friends who love the idea of plants but forget to water. The origami envelope holds up well, and the seed paper roll looks cute even before it’s planted. I use muted sage and warm cream so the envelope looks calm on shelves. It also works for friends who like craft nights or who already have jars of seeds.
Skip thisAvoid glossy seed paper — it’s harder to write on and looks cheap when you add handwriting.
Editor's noteUse a waxed paper liner inside the envelope if your seed paper is slightly textured — it prevents snagging.
6. Faux Moss Paper Wreath Card with Mini Orchid Sticker Window
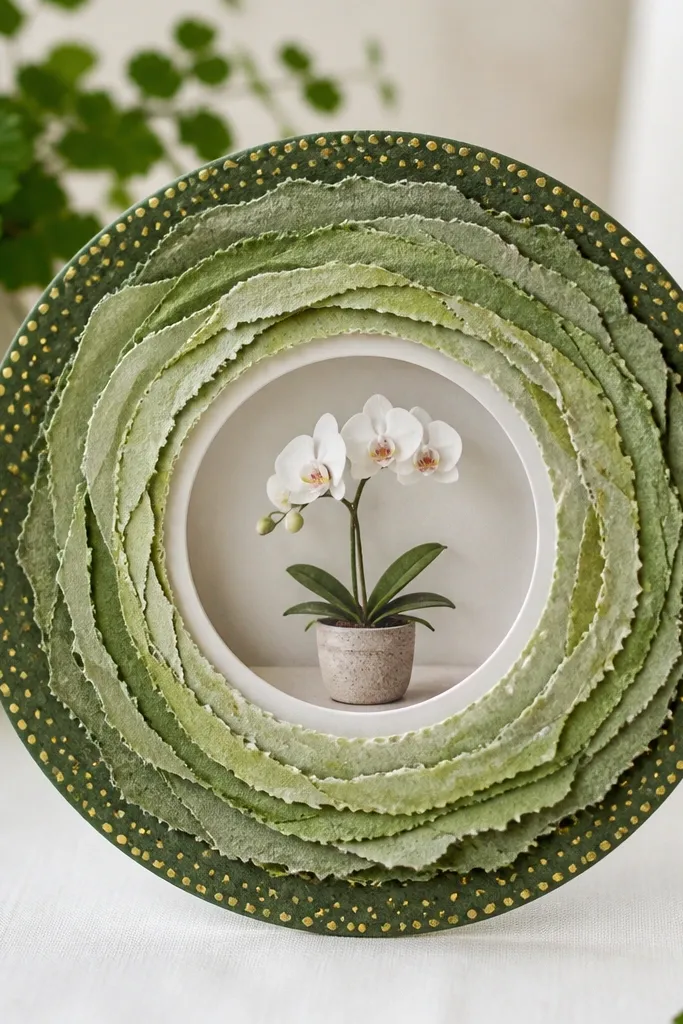
Start with an 8-inch circle wreath base cut from thick cardstock, then cut 1/4-inch strips from two shades of green. Fringe the strips lightly and layer them around the circle with hot glue or strong craft glue in short sections. Cut a 2-inch circle window in the center, then add a clear acetate sheet behind it. Insert a sealed mini pocket with an orchid print and a small faux soil oval behind the image. Finish by adding gold dots with a paint pen at the outer ring and write a short message on the inside fold.
This one is for the best friend who loves flowers but wants something wall-ready. The wreath shape reads decorative, and the clear window makes the center feel like a living ornament. I keep it plant-adjacent by using a tiny orchid photo insert or a small sticker-like orchid print inside a sealed pocket, so there’s no water damage. The layered moss-green paper gives depth and a soft, fuzzy effect that looks great in photos. It also flatters people who like glam accents because of the gold dot ring.
Skip thisAvoid one flat shade of green — it turns into a flat paper ring instead of a moss effect.
Editor's noteUse two green tones and keep one darker shade only at the outer half — it makes the wreath look dimensional.
7. 11x14 Paper Shadow Box with Air Plant in a Hanging Pocket
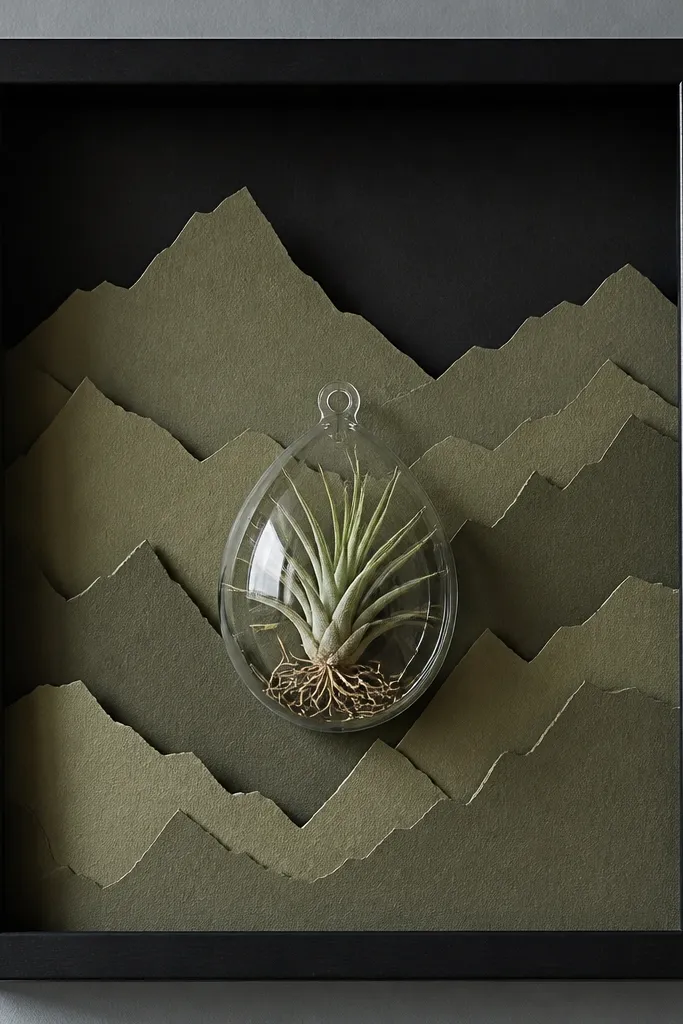
Shadow boxes make paper gifts feel gallery-grade, and air plants look perfect inside because they don’t need soil. The hanging pocket keeps the air plant stable and lets you mist it without soaking the paper. I use a black backing because it makes pale green air plant leaves pop and keeps the whole piece looking modern. This works well for friends who like dark decor or who wear black outfits and silver jewelry. It’s also a great gift for someone who travels — air plants tolerate neglect better than most desk plants.
Start with an 11x14 shadow box frame with a depth of at least 1.5 inches. Cut layered mountain shapes from olive, sage, and charcoal paper and glue them onto the back. Make a hanging pocket by sealing a clear plastic strip into a U-shape and attaching it to two small paper tabs on the back panel. Place the air plant in the pocket and adjust until the leaves sit centered. Add a faux “mist cloud” using torn white paper at the top and lightly ink it gray so it looks atmospheric.
Mist air plants over a sink first, then let them drip-dry before you hang them in the box.
Avoid placing the air plant directly against paper — condensation marks show up fast.
8. Handmade Paper Banner with Plant Tags and a Small Herb Cutting
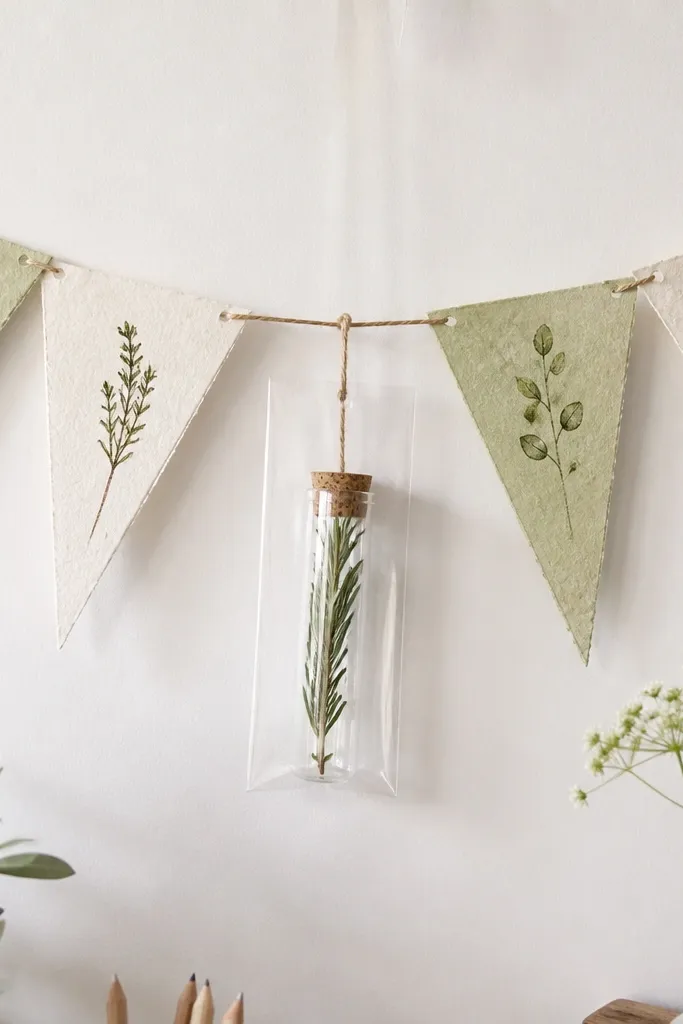
Start by cutting 10-12 handmade paper triangles about 3 inches wide and 4 inches tall. Punch holes at the top corners and string them together with thin twine. Make small tags (1.5x2.5 inches) from kraft paper and stamp or write plant names with dark ink. Seal a small herb cutting in a vial, then slide the vial into a clear plastic sleeve attached to the banner with a mini binder clip. Place the vial at the center triangle so it balances the banner’s weight.
A banner feels like an event, and it’s the best move when you want your gift to look fun right away. I made this for a friend’s apartment move and they left it up because the tags look like decor. The herb cutting gives a real plant moment, and the clear sleeve keeps paper safe. I recommend using small herbs like basil or mint cuttings because they look full quickly and smell great when you open the room. The cream and light green palette works with both warm and cool interiors.
Skip thisAvoid using regular printer paper for the triangles — it bends and tears around the holes.
Editor's noteUse thicker twine or double-string — thin string sags and makes the banner look homemade in a bad way.
9. Plant-Stamped Tissue Paper Bouquet in a Shadow Frame
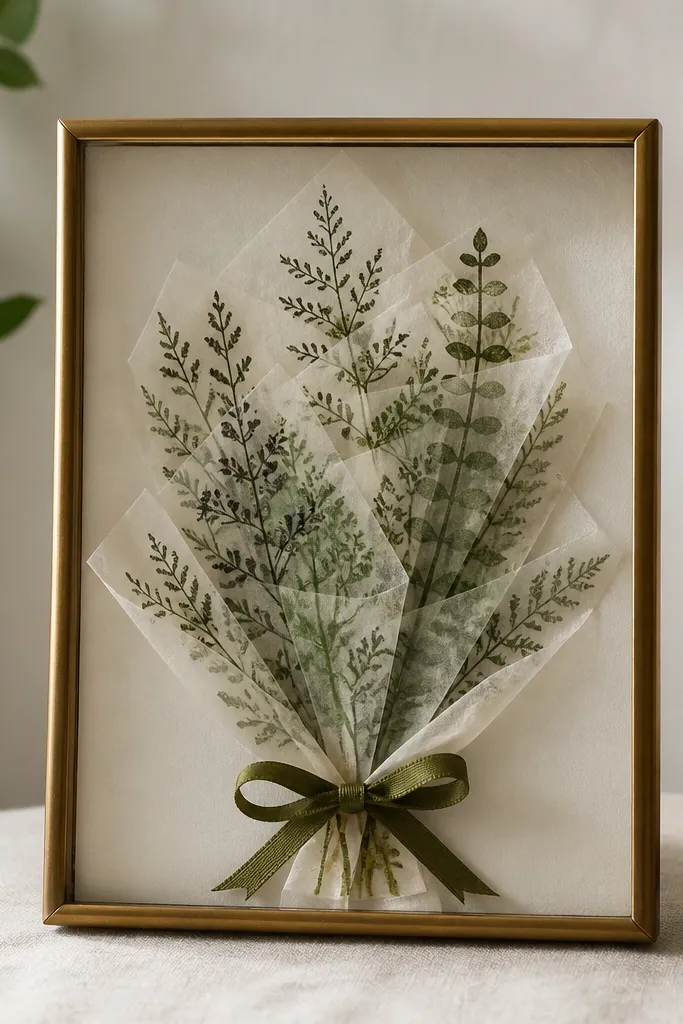
Start with a 9x12 shadow frame and remove the backing glass if you have it. Cut tissue paper into petal-like shapes and stamp with dark green ink using a sponge or stamp pad. Layer the tissue shapes from largest to smallest, gluing only the center points so the edges float. Add a small ribbon bow at the bottom using a 1/4-inch satin ribbon in olive or dusty rose. Place the layered bouquet inside the frame and secure with the backing so the tissue doesn’t shift.
If you want something that looks like a bouquet but doesn’t wilt, tissue paper is your friend. I stamp tissue with plant silhouettes, then layer it so it looks like real petals and leaves. The shadow frame makes it look intentional, not craft-store. This is great for best friends who are busy and don’t want to care for plants daily. Tissue also looks soft and flattering in photos because it catches light and spreads it gently across the stamped pattern.
Skip thisAvoid soaking tissue with too much ink — it tears and leaves muddy spots.
Editor's noteStamp tissue in multiple directions — it makes the bouquet look fuller without adding more layers.
10. Geometric Paper Planter with Hydro Bead Setup
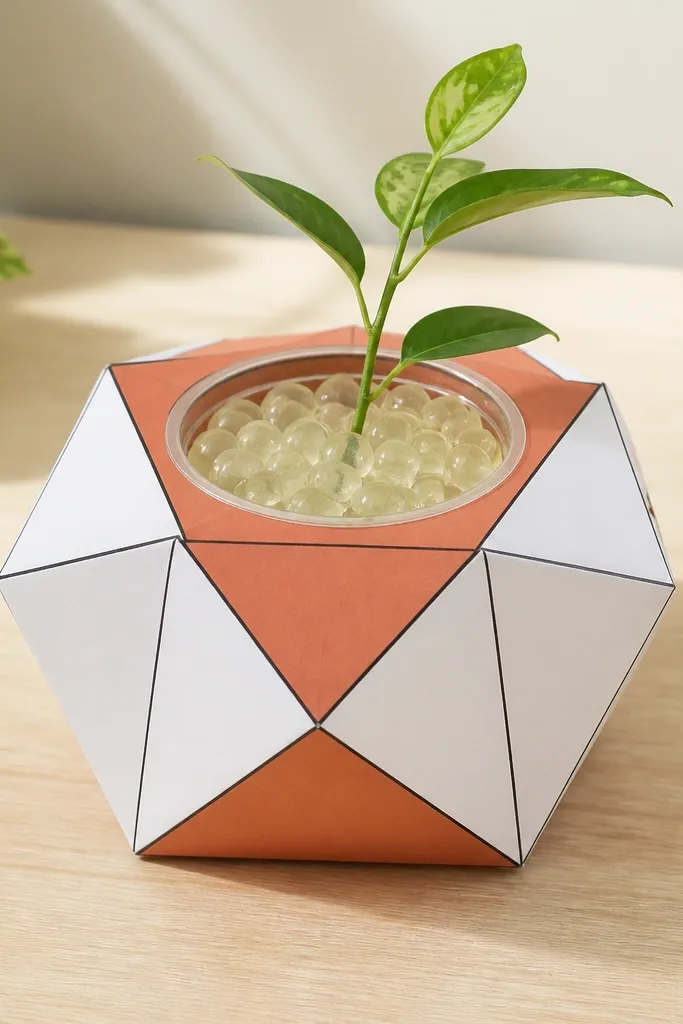
Start with a 10x10 base board in white cardstock and cut a geometric planter shape using a stencil. Outline the planter edges with a fine-tip black marker so the shape stays sharp. Make a clear cup sized to sit inside the cutout, leaving a 1/4-inch paper border around it. Fill the cup with pale hydro beads and add a small pothos cutting or a tiny snake plant pup in the beads. Glue the planter shape to the base only around the edges, then place the cup inside the opening without glue contact so it’s removable.
This one looks crisp and modern, and it’s the easiest way to make a real plant gift feel designed instead of accidental. Hydro beads keep the water contained, so paper stays safe and the plant looks clean. I like geometric planters for friends who decorate with clean lines and like black, white, and terracotta tones. The hydro beads also create a subtle sparkle under indoor light, which makes photos look better than you’d expect. It’s a strong choice for birthdays because it reads like decor, not a craft project.
Skip thisAvoid using heavy wet potting soil — it leaks and stains the paper border.
Editor's notePick beads that are the same brightness as the paper — very bright beads can look too toy-like next to matte cardstock.
11. Handmade Paper Booklet with Plant Care Cards and a Rooted Cutting Sleeve
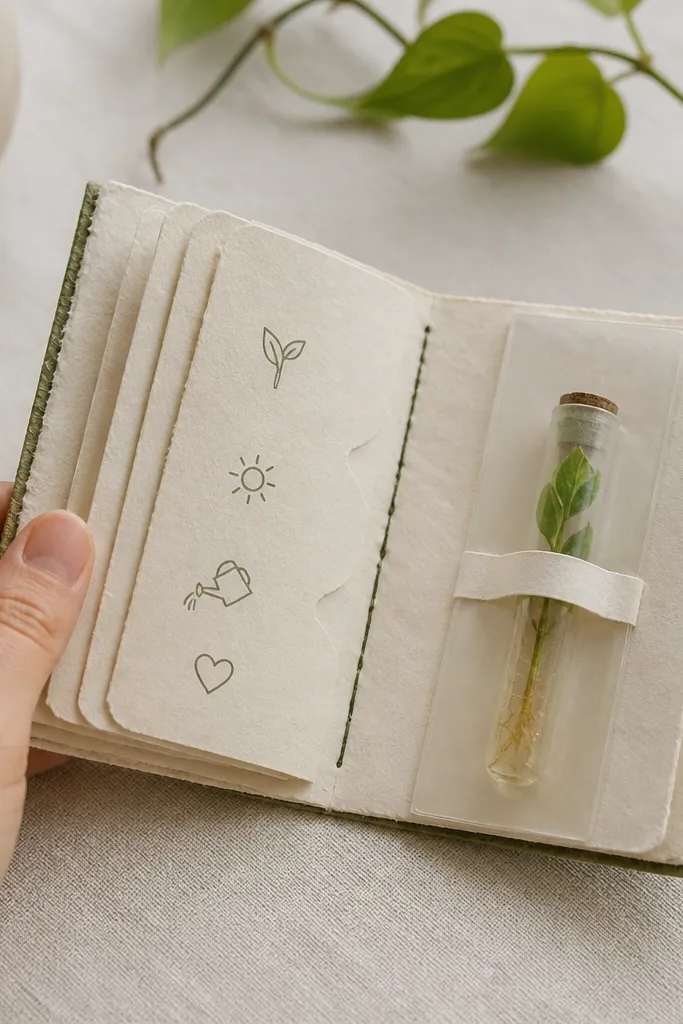
Start by making a stitched booklet: cut 6-8 folded pages from 80 lb cream cardstock and stitch the spine with waxed thread. Create care cards on small strips (2x3.5 inches) with simple icons: light, water, and timing. Add a last-page pocket using a clear plastic sleeve glued to the inside edges of the back cover. Insert a mini vial with a rooted cutting and tape only the vial’s top rim to the sleeve so it stays stable. Add a short note on the first page with the exact care routine you recommend for that plant.
This gift feels thoughtful because it teaches your best friend how to keep the plant alive. I made one for my friend who always forgets watering schedules, and the care cards solved that problem fast. The booklet format also makes it easier to personalize without printing a big poster. The rooted cutting inside a sleeve stays protected and removable. It looks best for friends who like being organized and who appreciate written instructions over generic “good luck” cards.
Skip thisAvoid handwritten care on tiny paper with a wet pen — it smears inside the booklet.
Editor's noteWrite the care schedule in weeks, not days (like “water every 14-18 days”) — it’s easier to remember.
12. Seeded Paper Coaster Set with Plant-Themed Labels and One Living Center Vial
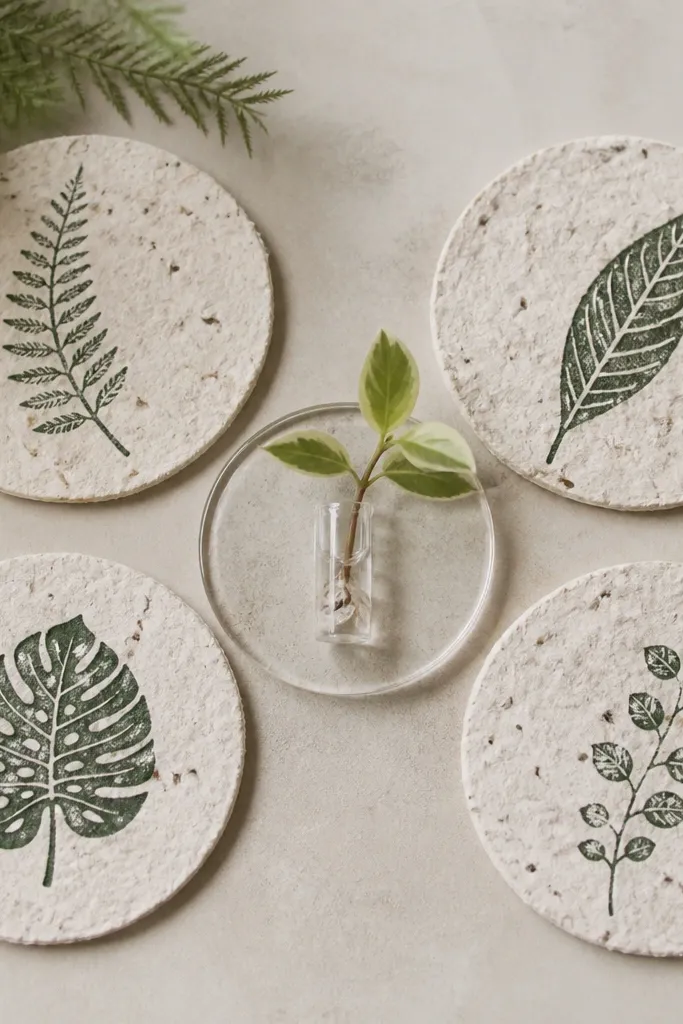
Start by making or buying four handmade seeded paper circles about 4 inches wide. Stamp or print plant labels (like “pothos,” “snake plant,” “mint,” “basil”) and glue them near the center of each coaster. For the center vial, use a clear acrylic or plastic ring insert about 1.25 inches wide so it protects the paper from condensation. Put a small cutting in a mini vial with a tiny water level so it doesn’t slosh. Arrange the coasters around the ring and tie a ribbon around the set with a loop at the center so it looks like a bundle.
Coasters are one of the most-used gifts, which is why I like them for best friends who host. You get an everyday paper item plus a plant moment that fits the same theme. The seeded paper labels make it feel special, and the living center vial keeps the gift tied to plants without needing a whole planter. I use dark green ink so it looks readable and classy against light seeded paper. This is a great option for kitchen or coffee-table decor lovers.
Skip thisAvoid leaving the vial too full — spills ruin paper fast.
Editor's noteSeal the coaster edges lightly with matte medium if your friend uses them daily — it resists staining.
13. Botanical Collage Paper Vase with Faux Flower Cutouts and Real Leaf Clip
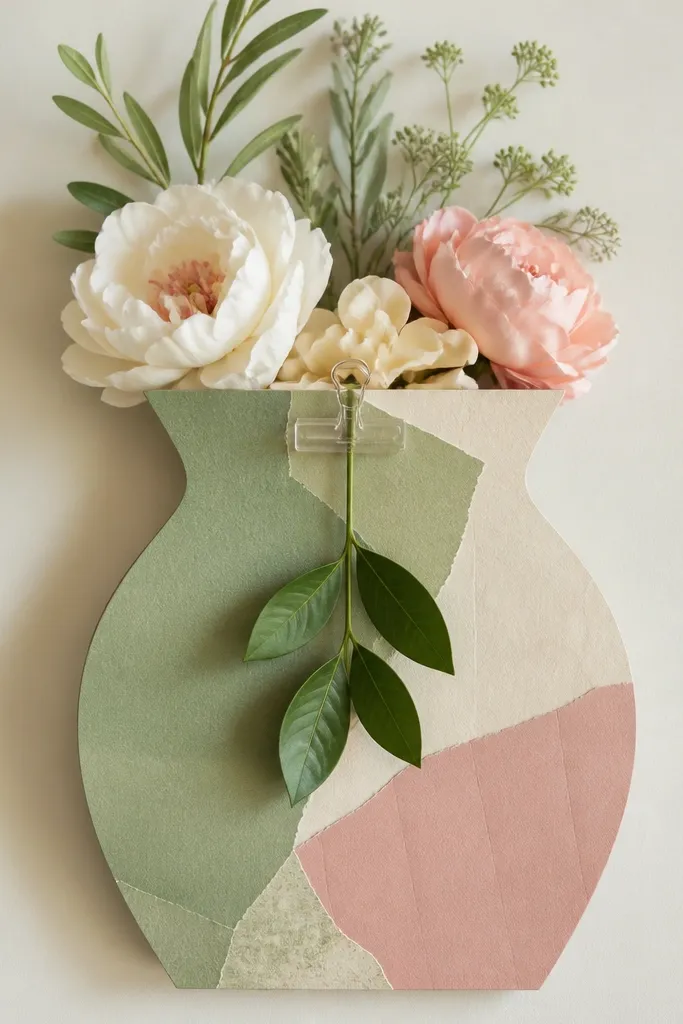
This gift looks like a vase even though it’s flat. The collage style gives texture and depth, and the real leaf clip makes it feel alive. I like this for friends who love art prints and mixed media but still want plants involved. The muted pink accent makes the greens look softer, which flatters people with warm undertones. It’s also a good choice when you want a gift that looks good on a shelf without taking up space like a pot.
Start by cutting a vase silhouette from thick cream cardstock. Layer collage pieces inside the vase: use torn paper strips in olive, sage, and a small amount of muted pink. Add a thin line of darker green along the vase outline to keep it crisp. Create a clear clip pocket at the top using acetate and a small binder clip so a real leaf can be held without touching paper. Insert faux paper flowers made from layered tissue or thin cardstock inside the vase opening, then glue only the base points so the shapes don’t flatten.
Choose one real element only — one leaf or one small stem looks intentional, two starts looking crowded.
Avoid too many paper textures in the same color family — it turns into visual noise.
14. Paper Macrame-Style Plant Hanger Card with Mini Herb in a Sleeve
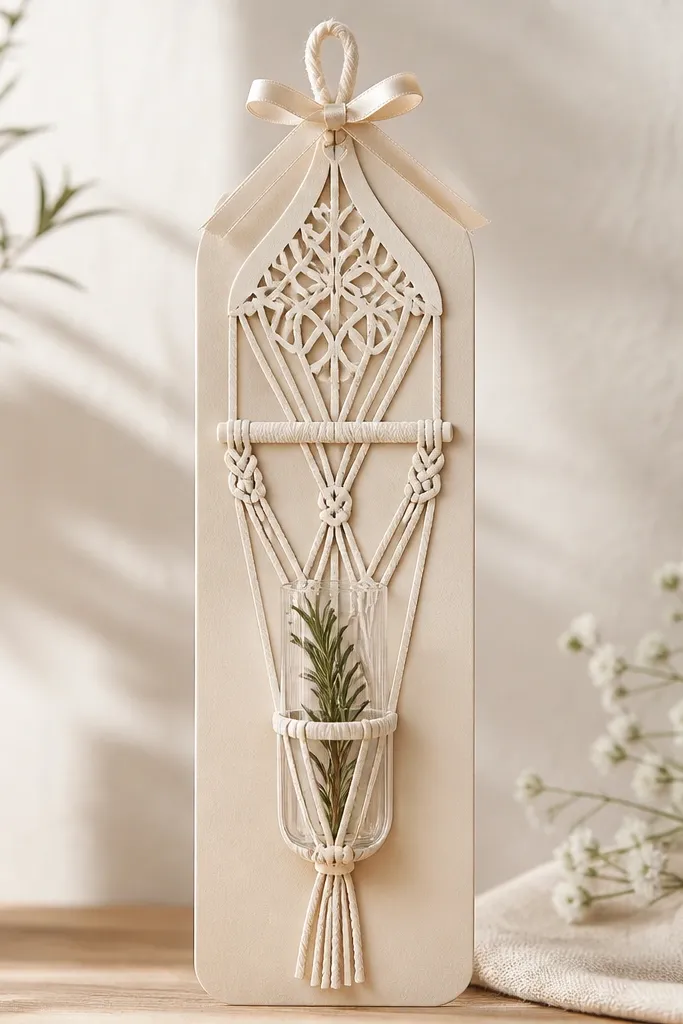
This one looks like macrame but it’s paper, so it’s light and easy to mail. The hanging card shape suits friends who like plants near windows because it mimics real hanging planters. I use off-white and soft gray rope-strip paper, then add one small green ribbon accent so it ties to the herb. The clear sleeve keeps the vial protected from moisture, and the paper “ropes” hide the sleeve edges. It’s perfect for birthdays for friends who love boho decor.
Start with a tall card base about 6x10 inches, then cut rope-like strips from off-white cardstock. Layer the strips into a macrame pattern using small paper “knot” pieces glued at intersections. Add a top tab for hanging with a small hole punch and twine or a ribbon. For the plant area, attach a clear sleeve pocket at the bottom and insert a mini herb vial. Finally, add a small ribbon bow at the top and write the message on the inside panel.
Use a ruler to keep rope strips evenly spaced — uneven spacing makes it look messy.
Avoid thin craft paper strips — they bend and make the knots lose their shape.
15. Handmade Paper Calendar Page with Plant Growth Tracker and Leaf Swatch
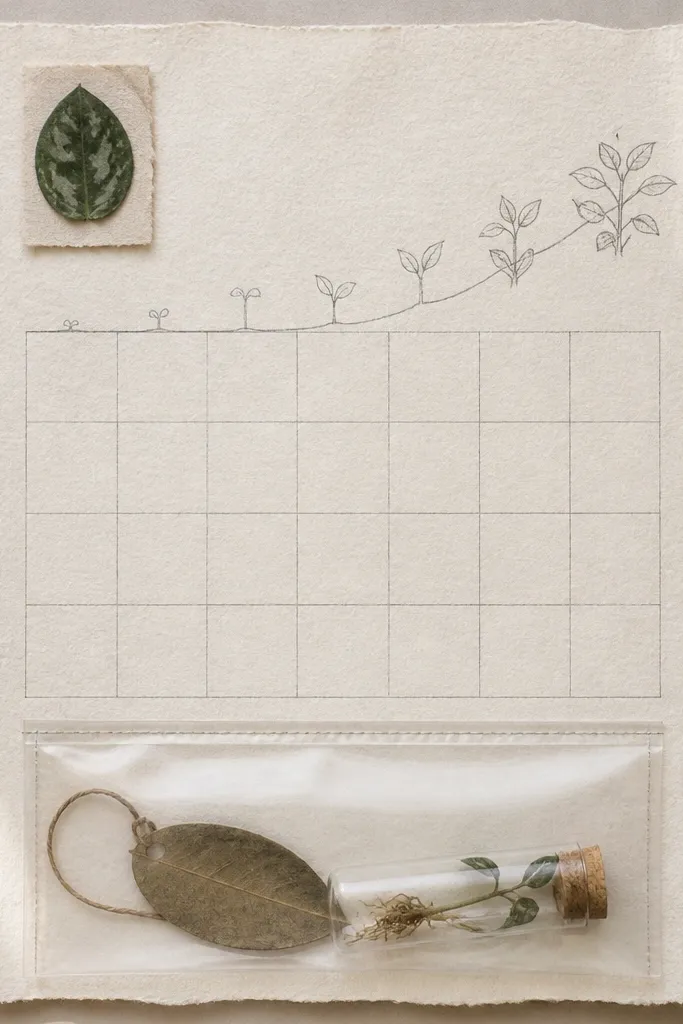
Start with an 8.5x11 sheet of textured handmade paper. Draw a simple 4-week tracker grid with light pencil and then outline key dates with a fine black pen. Glue a small dried leaf swatch near the top left and label it with the plant name. Add a clear pocket at the bottom using acetate and sealed edges, then insert a mini vial with a small rooted cutting. Finish by writing one care note on the back — light and watering timing in plain words.
This is for a best friend who actually wants to track progress. Plant gifts that have a “next step” tend to get kept, and a growth tracker turns the gift into a project. I use one rooted cutting sleeve so they can watch roots or new growth without a full pot. The leaf swatch adds a tactile botanical element even when the plant is still small. It looks best for friends who like stationery and planners, and it fits desks and kitchens because it’s one page, not a bulky frame.
Skip thisAvoid dark marker grids — they overpower the plant and make the page look like a worksheet.
Editor's noteUse pencil for the grid and pen for labels so the page stays soft and not harsh.
16. Origami Pot with Handmade Paper Soil and Real Moss Accent
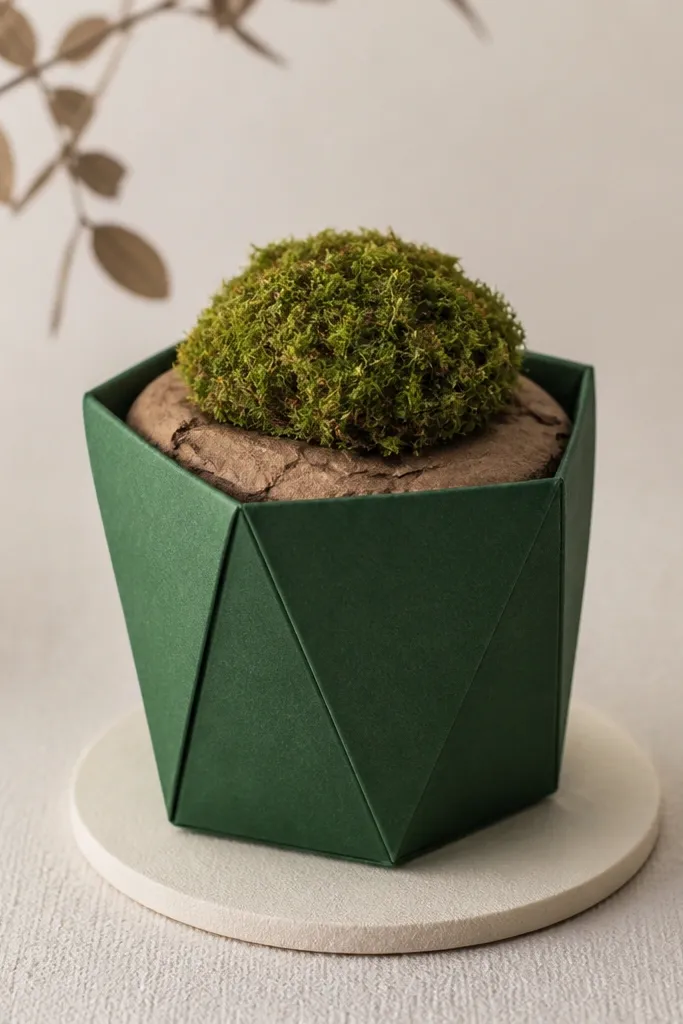
This looks like a tiny sculpture, and it’s surprisingly easy to make look neat. Real moss gives a soft green texture that reads instantly as alive, even though the “soil” is paper. I like this for friends who love tactile decor and want something that looks cute on a nightstand. The deep green pot matches moss well, and a cream base keeps the whole thing from looking too dark. It’s also a fun gift for someone who likes desk plants but doesn’t want a lot of mess.
Start by folding an origami pot from 8.5x8.5 inch deep green cardstock using a boxy pot pattern. Flatten the creases with a bone folder so it holds shape. Cut a small circle base from cream cardstock and glue the folded pot onto it. Make paper soil by crumpling brown tissue or handmade paper, then press it into the pot opening lightly. Add a small real moss pad on top using a thin dot of non-toxic craft gel or a pinched paper ring so it doesn’t slide. Mist the moss very lightly before gifting so it looks fresh without dripping.
Trim the moss to match the pot opening diameter for a clean edge.
Avoid wet moss — drips stain the paper pot and ruin the crisp fold lines.
17. Botanical Silhouette Cutout with Removable Plant Vial Backing
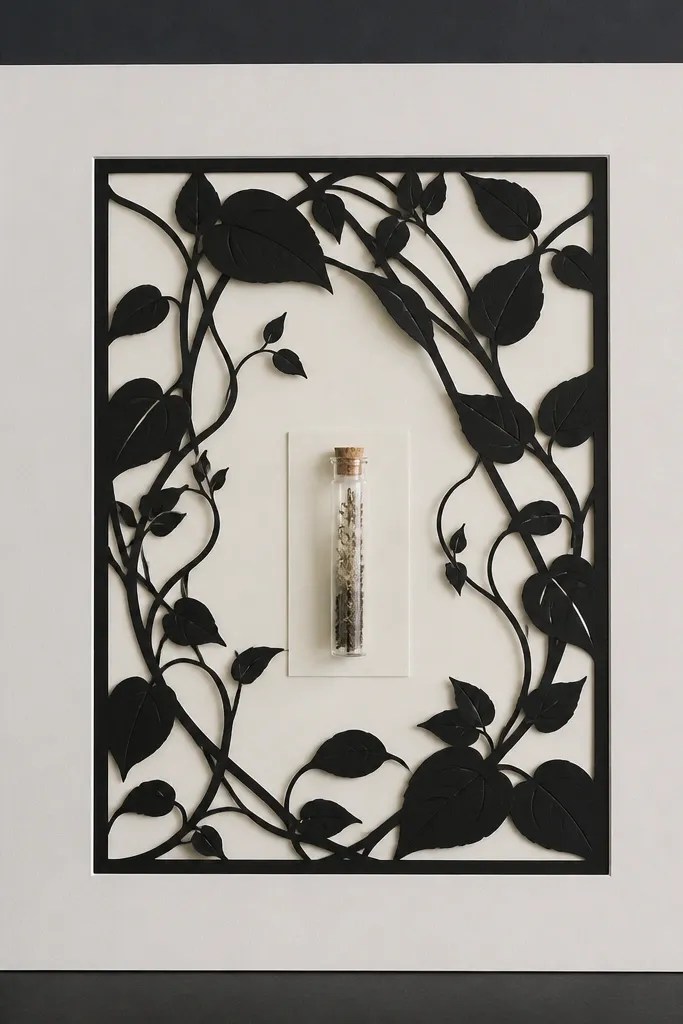
Start with an 11x14 off-white mat and a charcoal backing board. Cut leaf silhouettes from black cardstock and glue them onto the backing with only a few anchor dots so the edges stay crisp. Cut an opening behind the silhouette area to fit a clear vial pocket. Make the vial pocket from acetate sealed on three sides, then attach it to the removable backing panel so it can slide out. Insert a mini vial with a cutting and secure the backing with magnets or strong tape tabs.
This is the dramatic option that still stays handmade and personal. The silhouette cutout looks sharp, and the removable vial keeps it flexible — you can swap the plant as the cutting grows. I use black and off-white because it photographs well and makes greens read brighter. It suits best friends who like bold decor or who have a lot of light-colored walls. The silhouette approach also hides the mess of plant care because the plant sits behind a pocket, not pressed into the front.
Skip thisAvoid fully gluing the silhouette flat — paper warps and the cut edges lose definition.
Editor's noteUse a craft knife and a light touch — thick pressure makes jagged edges that ruin the silhouette look.
18. Mini Hanging Lantern with Pressed Leaves and a Water-Safe Plant Core
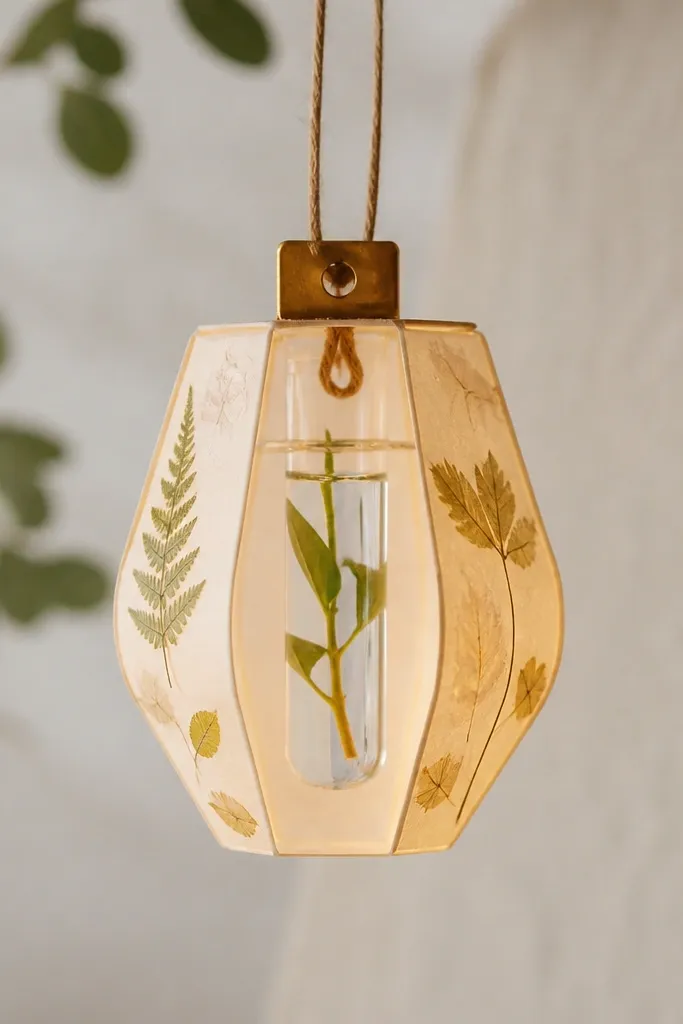
Lantern gifts feel special because they hang and catch light. Pressed leaves on the lantern sides create a delicate botanical pattern, and the clear core keeps the plant water contained. I like this for friends who decorate with warm light bulbs or fairy lights because the lantern glows and the leaves look like stained glass. The cream base flatters people with warm undertones and creates a soft look in photos. It’s also a great choice for birthdays because it feels like a moment, not a routine card.
Start with a paper lantern template and make the lantern body from 200 gsm cream cardstock. Seal the inside area with a thin matte medium so pressed leaves don’t snag. Press leaves and glue them to the lantern sides only where they won’t touch the core. Build a clear core from acetate shaped into a cylinder that fits inside the lantern, with a sealed bottom. Place a mini vial with a tiny cutting into the core and keep the water level low. Hang the lantern using a twine loop attached to the top clip, then add a small leaf charm or tag.
Use a warm white bulb if you light it — cool bulbs make cream look yellow-green.
Avoid putting the core too tight to the paper — rubbing scuffs the pressed leaves.
19. Living Herb Teacup Paper Planter with Basil Seed Tape
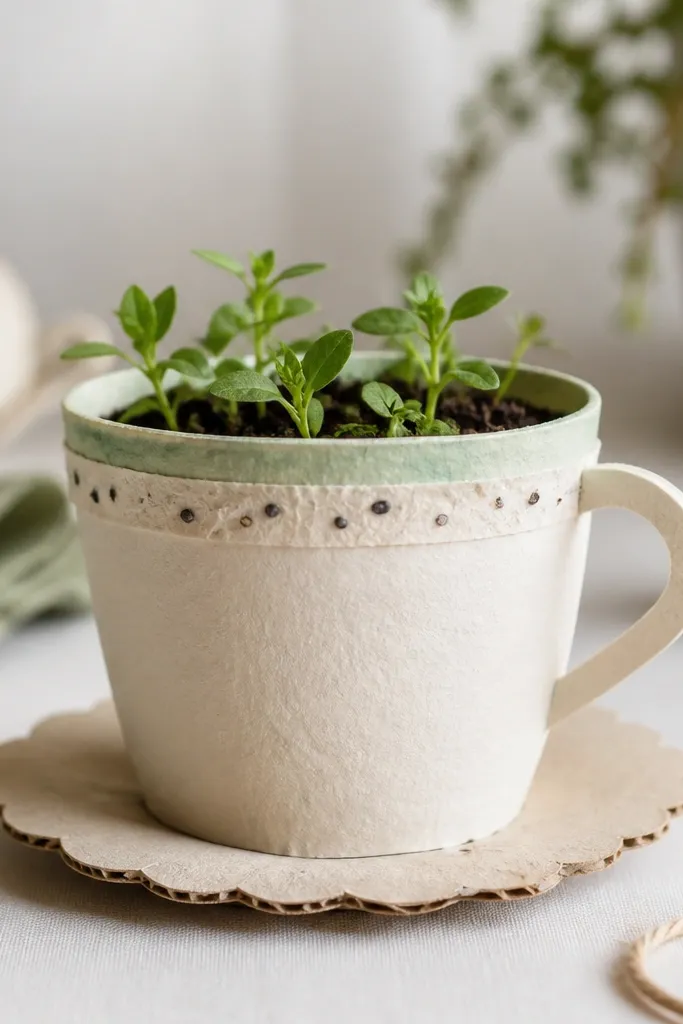
Cut a teacup shape from 2 sheets of 250 gsm cardstock. Glue them together so the cup walls are about 2 layers thick, then score and fold the base so it stands flat like a little dish. Line the inside with a single layer of compostable parchment or food-safe plant-based wax paper, then trim it so it sits just above the bottom seam. Fill with damp potting mix to about 1 cm below the rim, and press it down lightly so the surface is even. Cut a 1.5 cm wide strip of seed tape (or make your own by brushing a thin gel adhesive and sprinkling basil seeds) and lay it flat across the soil surface. Add a tiny tag on the handle made from scrap cardstock with “Mist daily for 7 days” written in dark green ink.
This gift looks like a thrifted teacup, but it actually grows herbs. The paper cup holds soil without leaking because you line it with a thin plastic-free barrier layer and keep the soil level below the rim. I like it for best friends because it feels personal and playful, and basil grows fast enough that you can see progress within a week. You also get a built-in “care story” — every day your friend can mist the top and watch the seed tape sprout. It’s a handmade paper gift for best friend with plants that doesn’t require a glass container or a complicated terrarium build.
Skip thisDon’t glue the seed tape directly onto dry soil — it lifts and the seeds drift.
Editor's noteUse a spray bottle with a fine mist and keep the soil surface visibly damp, not soaked. If the tape dries out, the seeds stall — I learned that the hard way on my first batch.
20. Pressed-Leaf Bookmark with Watercolor Soil Label and Rooted Cutting Sleeve
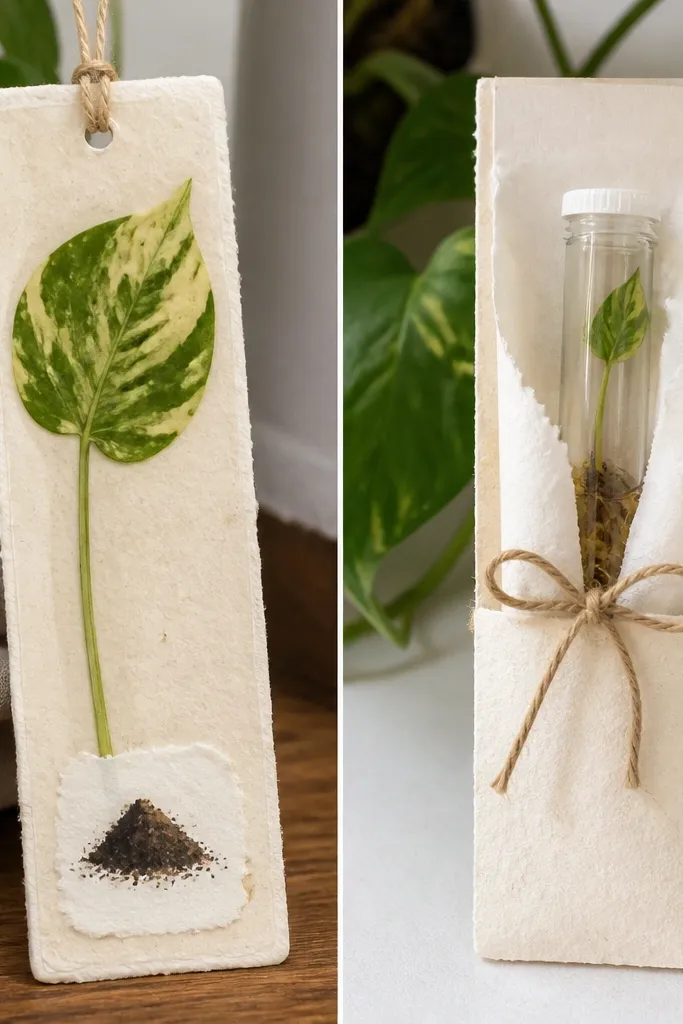
Press a pothos leaf flat for 24-48 hours, then trim it to fit a 2.5 x 4 cm window on the front of a 6 x 18 cm bookmark. Paint a thin outline of dark brown “soil” with watercolor at the bottom and let it dry completely. Coat the leaf with a very thin layer of clear gel medium, then lay it in place and smooth from the center outward using a foam brush. Seal the whole front with one more thin gel medium layer so the leaf is locked under a glossy skin. For the back, cut a 7 x 19 cm rectangle of 160 gsm cardstock, fold it to make a slim sleeve, and glue only the outer edges so the vial slides in. Slide in a small rooted cutting vial (about 15-20 ml), then tie the sleeve closed with a 10 cm piece of waxed twine.
This is the kind of plant gift that fits into daily life. Your best friend gets a bookmark for reading, plus a rooted cutting they can plant later. The pressed-leaf layer looks like stained glass when it catches light, and the watercolor soil label makes it feel designed instead of random craft-store decoration. I like that the plant part is protected in a sleeve, so it doesn’t leak or smear ink on the paper. It’s a handmade paper gift for best friend with plants that stays useful even after the cutting is planted.
Skip thisSkip overfilling the sleeve — if the vial presses too hard, it warps the bookmark and the leaf layer can crack.
Editor's noteWrite the plant name on the soil label in a waterproof pen, not a brush pen. Gel medium can smear some inks if they are still fresh.



