

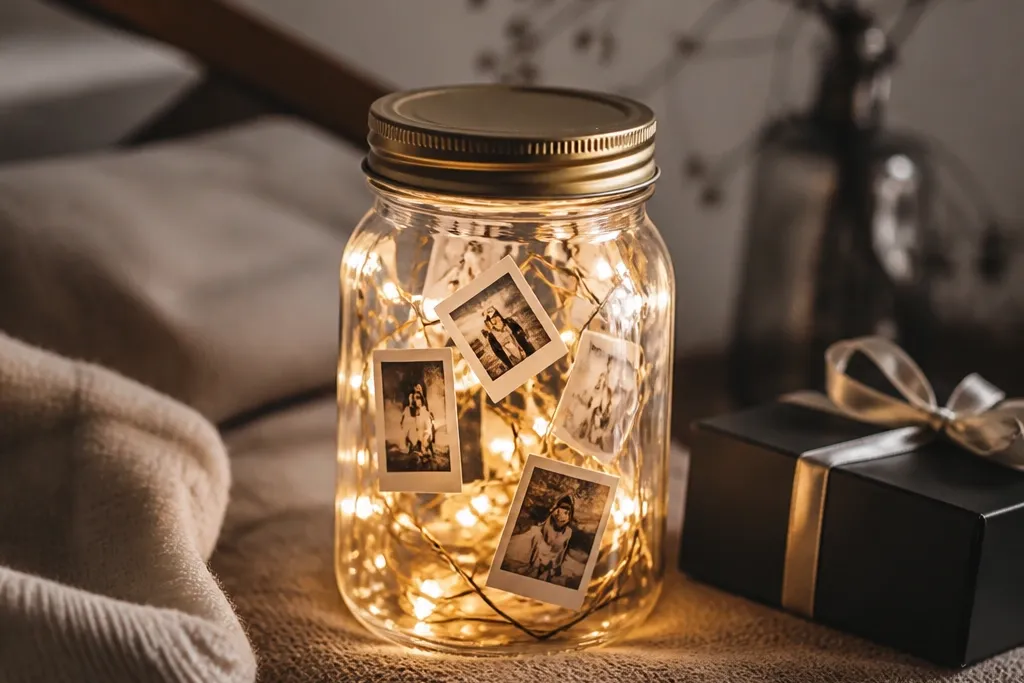
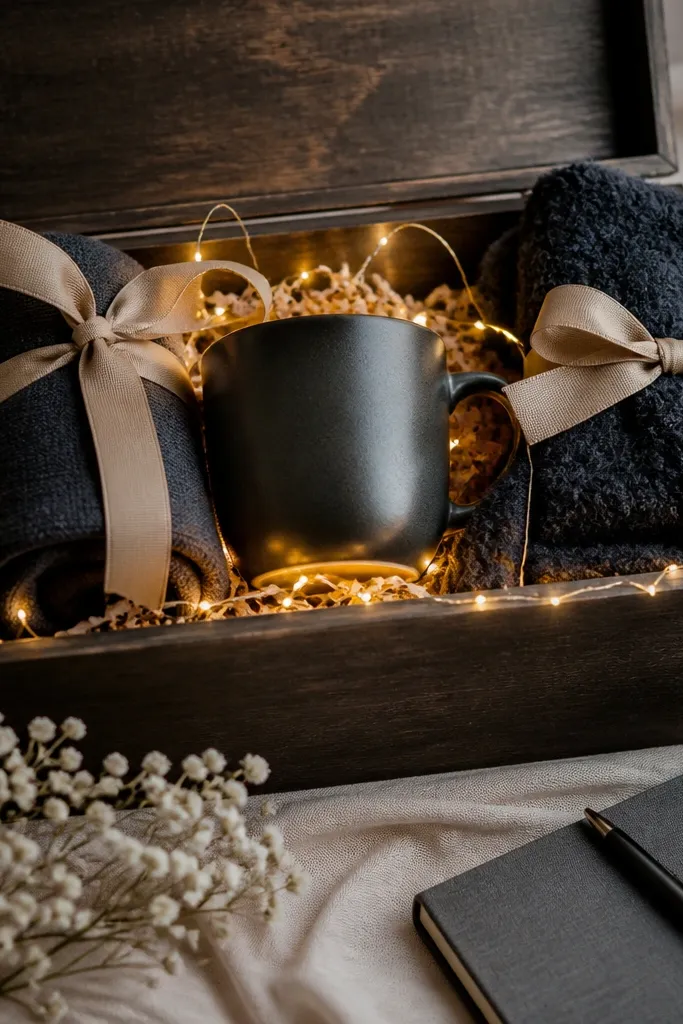
1. Star Map Shadow Box with Warm LED Halo
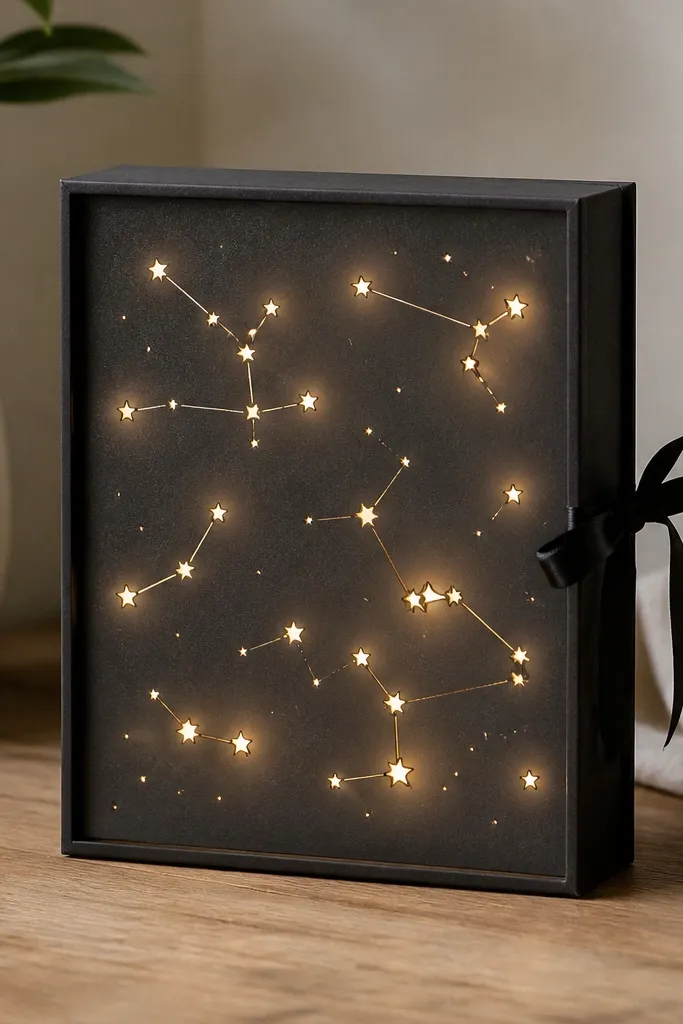
This one looks magical because the glow sits behind cut star shapes, so the front stays graphic while the background softens. I build it with matte black cardstock so the warm light reads like sunset in the room. Use a printed star map as a guide, then trace only the main constellation lines onto vellum before cutting. It looks best for boyfriends who like astronomy, travel prints, or anything dark-and-cool in their decor because the black base makes the light pop without needing extra colors.
Editor's noteDust the vellum with a tiny bit of white acrylic dry-brush on the very edges to create a softer halo around each cut star.
Start by cutting a 6x8 inch shadow box front from 2 mm craft foam or thick cardstock, then frame it with a second black layer so you get a shadow gap. Cut a constellation pattern out of the front layer with a craft knife, leaving 2-3 mm between stars so they don’t tear. Place frosted vellum behind the cutouts and glue it to the inside edges, then test-fit your warm white LED fairy lights so the glow lands evenly. Finally, hide the battery pack in the back corner and route the wire along the foam edge, then close the box with a magnetic snap or ribbon closure.
Skip thisDon’t glue LEDs directly to vellum — the hot spot shows through unless you leave a light gap.
2. Fold-Out Love Letter with Hidden LED Strip
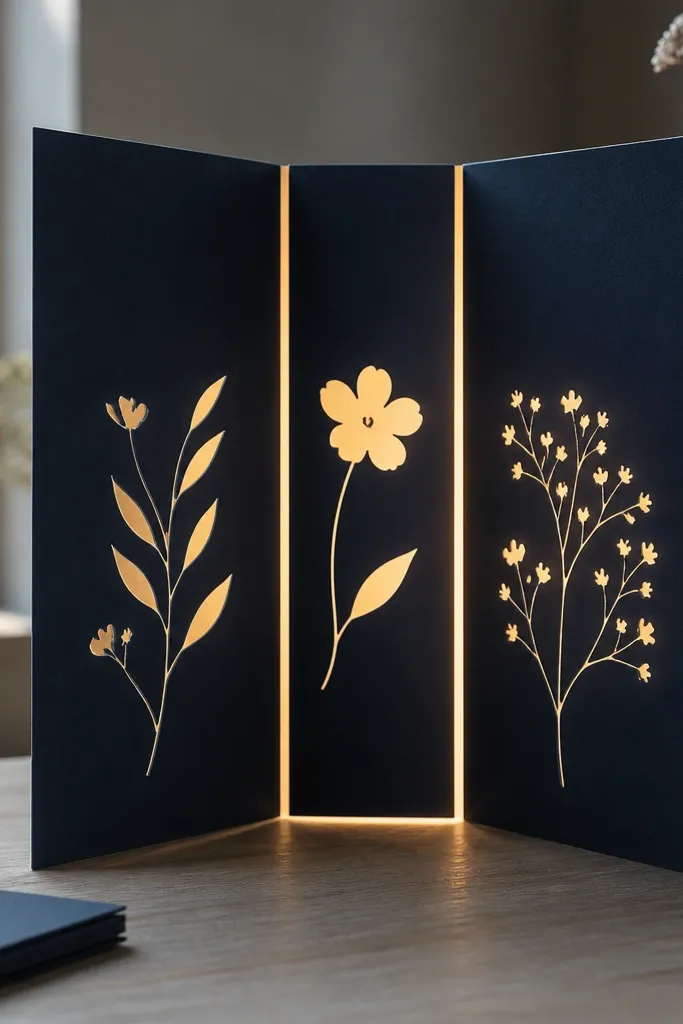
This is the “he opens it and the lights come on” card that always gets a smile. I like navy cardstock because white ink reads crisp and the warm glow looks like candlelight. The secret is that the LEDs are hidden in the fold, so you get a clean line of light that makes the typography feel backlit. It flatters any boyfriend because it turns a normal letter format into a reveal — and the glow makes the handwriting feel intentional, not random.
Start with a 5x8 inch card base in navy cardstock, scored so it folds cleanly into three panels. Cut the text area on the inside panels so the letters are “windows” — keep the strokes thick, about 2-3 mm. Glue frosted acetate or tracing paper behind the cut windows to diffuse the LEDs. Place a warm white LED strip along the center fold, then secure it with thin foam tape so it sits 3-5 mm away from the paper windows. Route the battery pack to the back of the card and put the switch under a flap so it’s easy to turn on after opening.
Use a pen with white gel ink on the outside cover only; keep the inside windows un-inked so the light stays bright.
Skip thin, hairline letter fonts — they tear and the glow looks uneven.
3. Geometric Origami Lantern Card
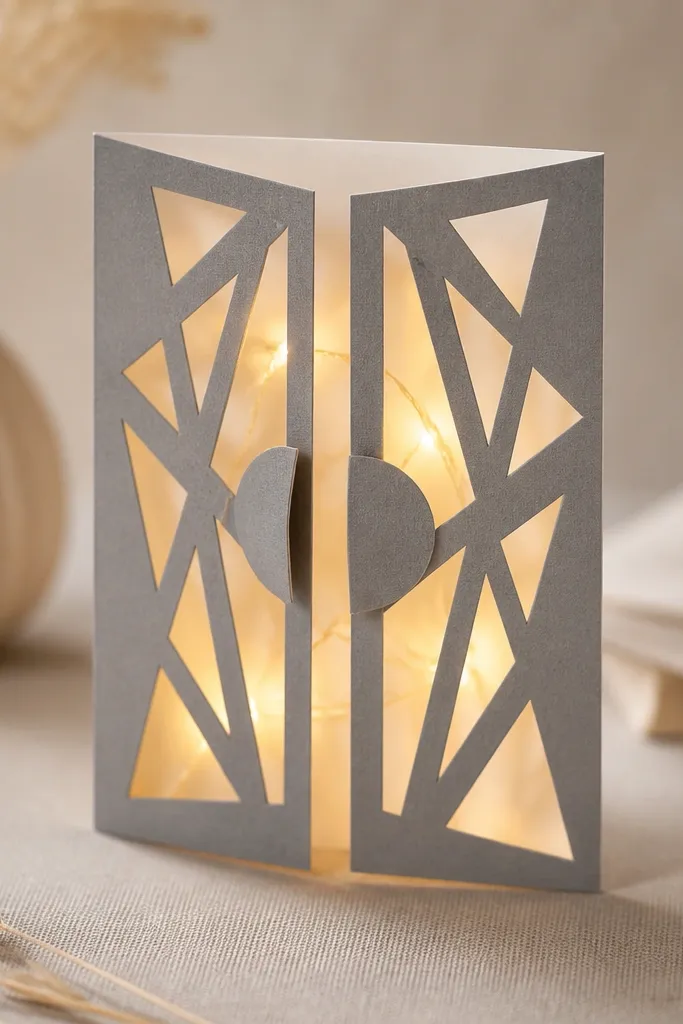
Geometric folds look “designed” even when you’re working with paper from a craft store. I use 180-200 gsm patterned paper in gray and cream because the light turns the patterns into soft texture instead of loud prints. When you build origami-style triangles and back them with diffusion, you get a lantern effect that looks great on a nightstand. This works especially well for boyfriends who like modern decor or who don’t want anything too romantic — it reads as art first, message second.
Editor's noteAdd one thin strip of metallic gold paper behind the brightest triangle pocket for a subtle sparkle when the LEDs hit it.
Cut a set of 6-8 inch square paper pieces, then fold into a simple accordion triangle structure so the panels create pockets. Assemble the triangles into a card-sized shape, leaving an open center channel for the light. Line the back of the pockets with tracing paper so each triangle glows evenly. Insert warm white mini fairy lights into the channel and secure them with small dots of glue on the paper edges, not in the glow area. Close the lantern shape with a magnetic clasp and place the battery pack at the bottom pocket so it doesn’t press against the folded sides.
Skip thisDon’t overstuff the pockets — if the lights touch the front paper, you lose the soft lantern look.
4. 3D Paper Flower Bouquet with Cool White Glow
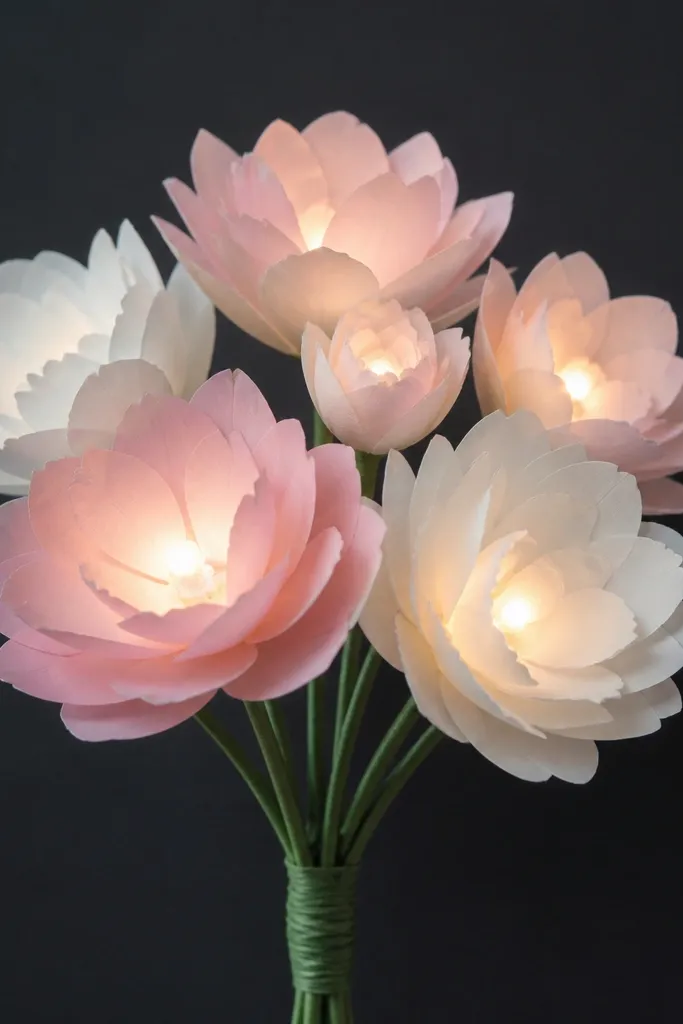
Cool white LEDs make paper flowers look like they’re lit from inside a display case, which is why this one feels special even with simple shapes. I like pale pink and off-white because the glow stays clean and doesn’t turn everything yellow. The depth comes from stacking petals at slightly different angles so the light catches edges. It’s flattering for boyfriends who like clean aesthetics or who decorate with dark colors because the contrast makes the petals look dimensional.
Start by cutting layered petals from 2-3 shades of pale paper, then curl each petal edge over a pencil so the layers don’t lie flat. Build the flower centers with small circles of thicker paper and poke a tiny hole through the center for wire stems. Wrap florist wire for stems and form a bouquet shape on a backing card. Glue a charcoal cardstock backing behind the bouquet and place cool white LEDs behind the flowers at about 4 mm from the petal layer. Finally, secure the LED wire along the stem area and hide the battery pack behind the backing with a removable panel.
Vary petal curl tightness — tighter curls reflect more light and make the bouquet look alive.
Don’t use glossy paper — it creates hot reflections that look cheap under LEDs.
5. Mini Fireplace Scene Card with Battery Tea Light
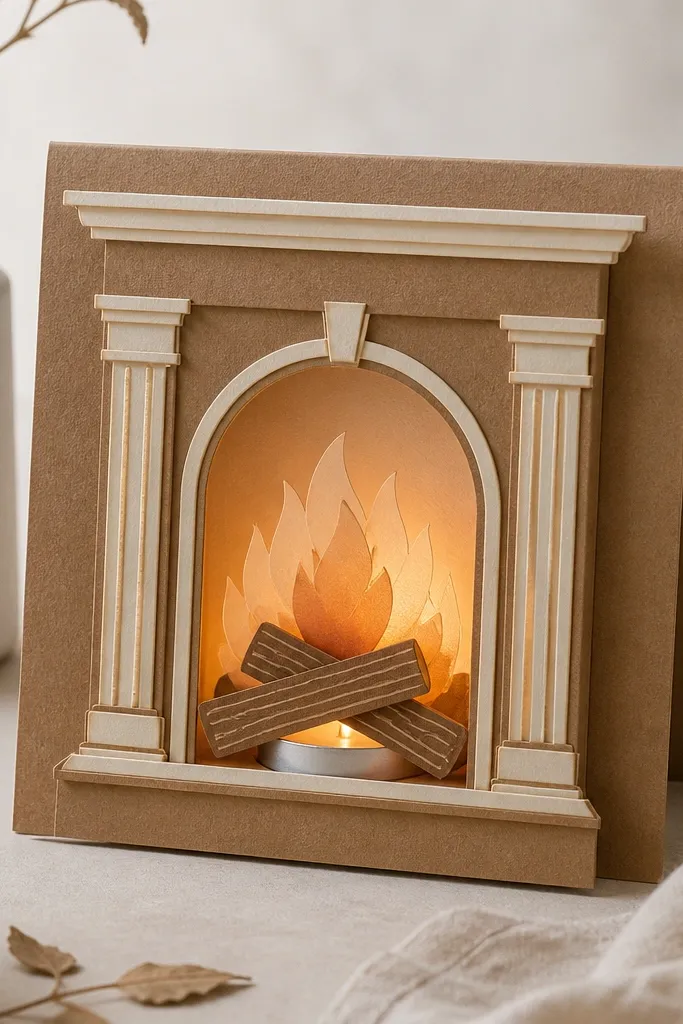
A fireplace scene looks cozy fast, and it reads like a real little stage once you add layered flame diffusion. I use battery tea lights here because the warm flicker feels like fire, but I keep it safe with a thick barrier so nothing scorches. The color combo matters: browns for the logs, cream for the wall, and orange-red vellum for the flame. This works for boyfriends who like winter stuff, gaming setups, or anything that feels warm and comforting.
Editor's noteUse two layers of flame vellum — one darker orange and one lighter amber — so the glow has depth instead of a flat orange blob.
Build the card in 8x10 inch format with a sturdy base of 250 gsm cardstock. Create a fireplace opening by cutting a centered window and attaching a thick foam frame around it, leaving room for the tea light. Layer orange-red vellum behind the window and glue it only to the frame edges so it diffuses the light without wrinkles. Place the tea light inside a compartment on the bottom of the card with a reflective foil sheet behind it to bounce light forward. Route the switch compartment so you can access it without fully opening the card.
Skip thisDon’t leave thin paper directly near the tea light — heat warps it and it looks messy.
6. Message in a Bottle with LED "Sunbeam"
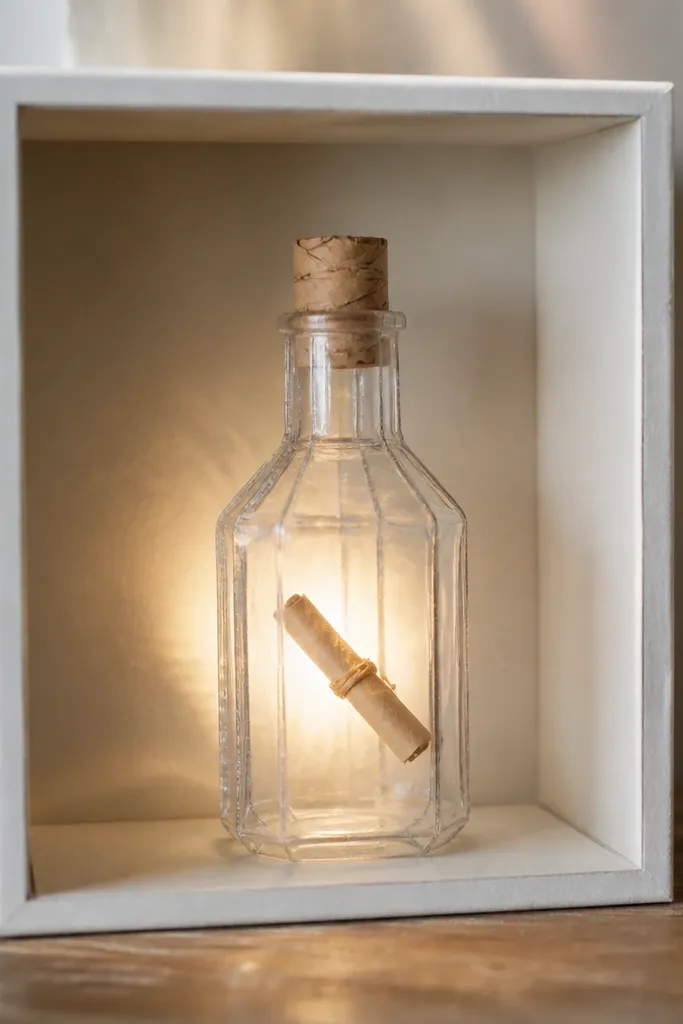
This gift looks clever because it’s a message you can physically see, plus the LED beam makes the bottle feel like it’s catching light. I make the bottle from acetate sheets layered with light-blue paper so the “glass” has depth. The rolled note sits on a small paper raft so it doesn’t sag, and the LED is positioned behind it to create a sunbeam effect. It flatters boyfriends who like quirky humor or ocean-themed decor because the whole thing reads like a tiny found-object.
Cut bottle panels from acetate and layer them over a bottle-shaped paper template so the edges stay crisp. Build a small shadow box base, then glue light-blue cardstock behind the bottle opening. Insert a single warm white LED with a diffuser tip — you can use a short piece of frosted plastic tube or a tiny frosted bead cover — and place it behind the bottle at a diagonal so the glow streaks across the note. Roll your message on a thin cardstock strip, add a small “raft” tab underneath, and glue it so it sits centered. Hide the battery pack in the back corner and cover it with a removable paper panel for easy replacement.
Tint the back layer with two shades of blue — one near-white and one deeper — so the beam looks dimensional.
Don’t use clear plastic with no diffusion — the LED point looks like a bare flashlight.
7. LED Polaroid Frame with Faux Film Strip
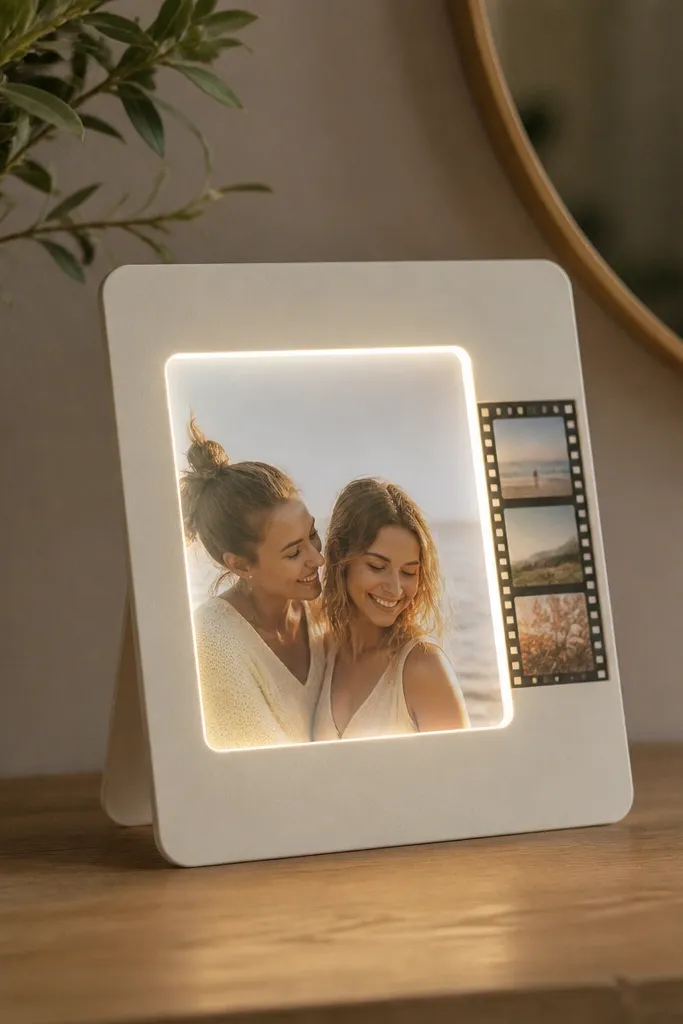
This one feels personal without requiring you to print a real photo. I keep the “photo” area blank and write a short message or paste a ticket stub, then let the LED light give it that photo-booth glow. Cream cardstock keeps the LED from looking harsh, and the faux film strip adds motion because it creates a line the light travels along. It works great for boyfriends who like photography vibes, concerts, or anything nostalgic.
Cut a Polaroid-style rectangle from cream cardstock and add a 2-3 inch border so the glow has space to spread. Create a window in the center and back it with frosted vellum, leaving the vellum flush to the inside edges. Glue a cool white LED strip along the bottom inside border so it lights upward through the vellum. Build a side film strip from thin black cardstock with small rectangle cutouts, then glue it to the frame so it overlaps the glow area slightly. Add a small stand on the back using folded cardstock tabs, and hide the battery pack behind the stand with a Velcro flap.
Write your message in pencil first, then trace over it with a fine black pen so the text stays readable under the glow.
Don’t place the LED directly behind the text — the brightest line will bleach the ink.
8. Candlelit Quote Coaster Set with Under-LED Glow
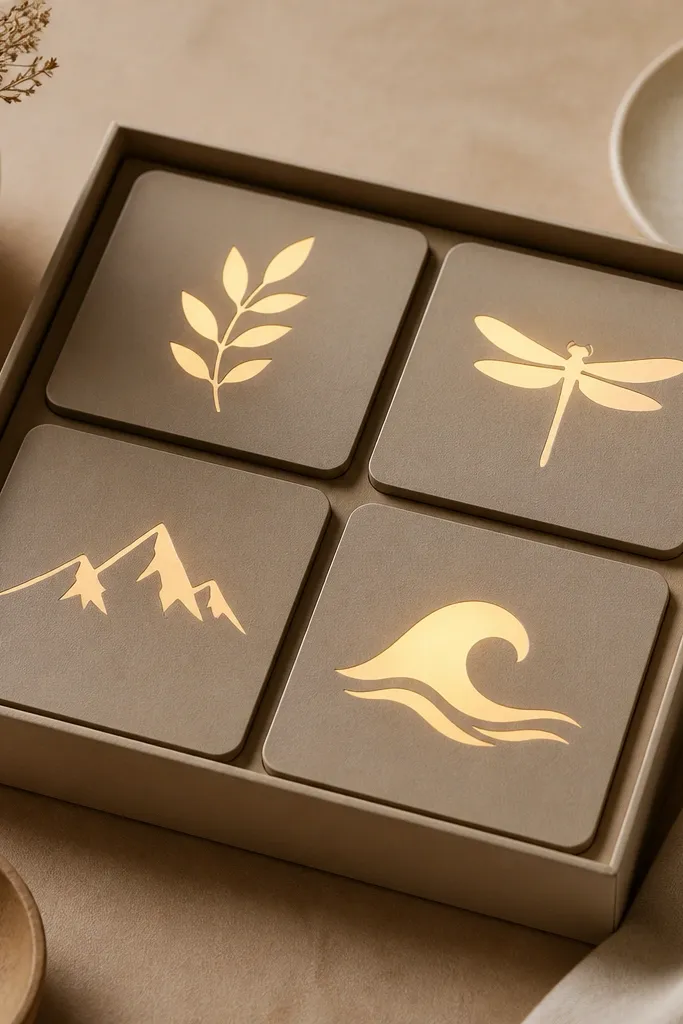
If he likes desk setups, this gift hits. The quote cutouts look like stained glass when light passes through them, and coasters give the gift a practical reason to stay on his table. I use thick paperboard so the coasters don’t warp and so the light glow stays controlled. Warm light looks best on beige and walnut-toned backgrounds; cool light looks sharper on black. This works for boyfriends who like minimal decor because it’s just text and glow, no extra clutter.
Cut four 4x4 inch coasters from 2.5-3 mm thick paperboard or layered cardstock. For each one, cut a single quote line as a stencil with a craft knife, keeping letters connected where possible for strength. Back the stencil with a thin diffuser layer like translucent vellum taped on the underside. Place a small LED puck under each coaster during assembly, then trace and mark where the LED sits so you keep the glow centered. Finally, glue a small base ring or a tray insert so the LEDs don’t slide, and route the battery pack to a single hidden compartment if you want a cleaner look.
Laminate the top surface with matte clear tape so coffee spills wipe off without ruining the stencil edges.
Don’t use cheap thin paperboard — it bows under the weight and looks uneven.
9. LED Heart Terrarium Wall Hanging
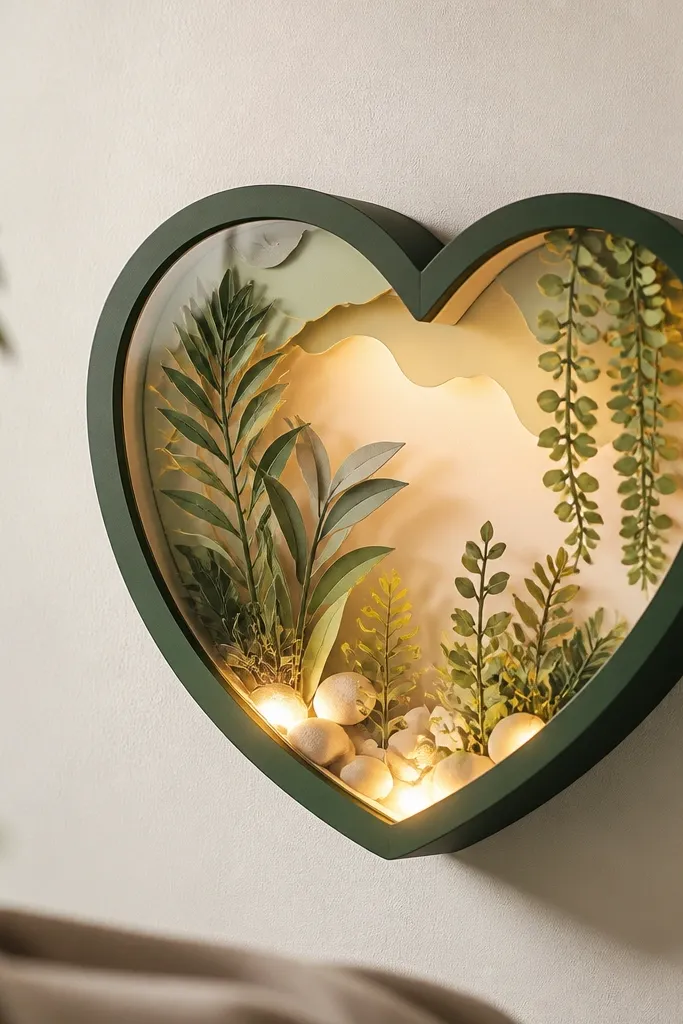
This looks like a tiny terrarium, but it’s paper and LED, which is why it feels like magic without being heavy. I frame it in dark green because it makes the warm glow feel like sunlight through glass. The inside plants are made from strips of green paper folded into small fans so they catch light at the edges. It’s especially flattering for boyfriends who like “cute but not childish” decor — the heart shape is bold, but the materials keep it grounded.
Cut a heart shape from dark green cardstock and add a clear plastic sheet behind it using a thin border so it stays taut. Build a base layer inside the heart from thick kraft paper and glue small “pebble” dots made from gray paper circles. Create plant pieces from green paper strips, fold accordion-style, and glue them so they stand 1-2 cm above the base. Place warm white LED mini lights behind the base, then cover the LED area with frosted vellum so the light spreads. Add hanging twine at the top and hide the battery pack behind a removable back panel.
Add one thin layer of glossy craft film on the inside edges for a glass shine effect.
Don’t skip diffusion — bare LEDs inside the heart show as bright dots.
10. Paper Circuit Bow Tie with Micro LED Points
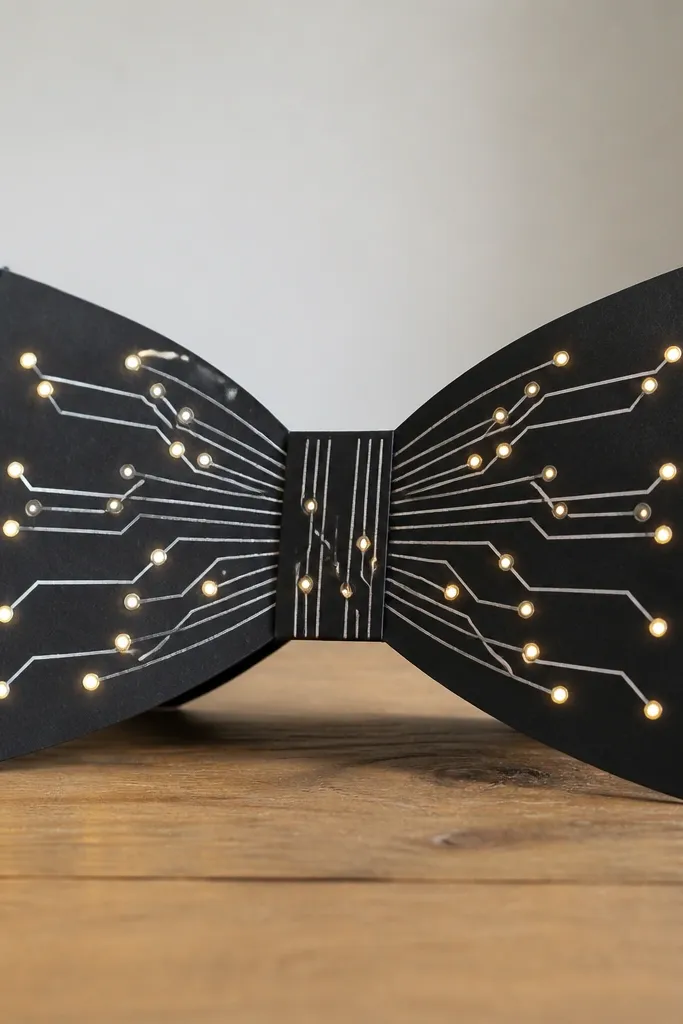
This one feels modern and nerdy in a good way. The circuit-trace lines make the lights look intentional instead of decorative, and micro LED points give you that starry, tech vibe. I build it on black cardstock with white gel pen traces so the lines look like real schematic markings. It works best for boyfriends who wear bow ties, like engineering, or just love anything that looks “designed by a person.”
Editor's noteKeep LED count low — 8-12 points looks better than cramming 30 into a small bow tie.
Cut a bow tie outline from black cardstock and score the center so it folds up into a stand. Draw circuit-like traces on the front with a white gel pen, then mark tiny LED spots where the traces would connect. Use a craft knife to poke small holes for each micro LED and glue the LED bases to the underside. Back the LED area with a thin diffuser layer so each point glows softly instead of projecting sharp beams. Mount a small battery pack at the stand base and route the wire through a hidden channel made from folded cardstock.
Skip thisDon’t use bright colored paper behind the LEDs — it changes the LED color and makes the points look messy.
11. Night Drive Tunnel Card with Moving Light Illusion
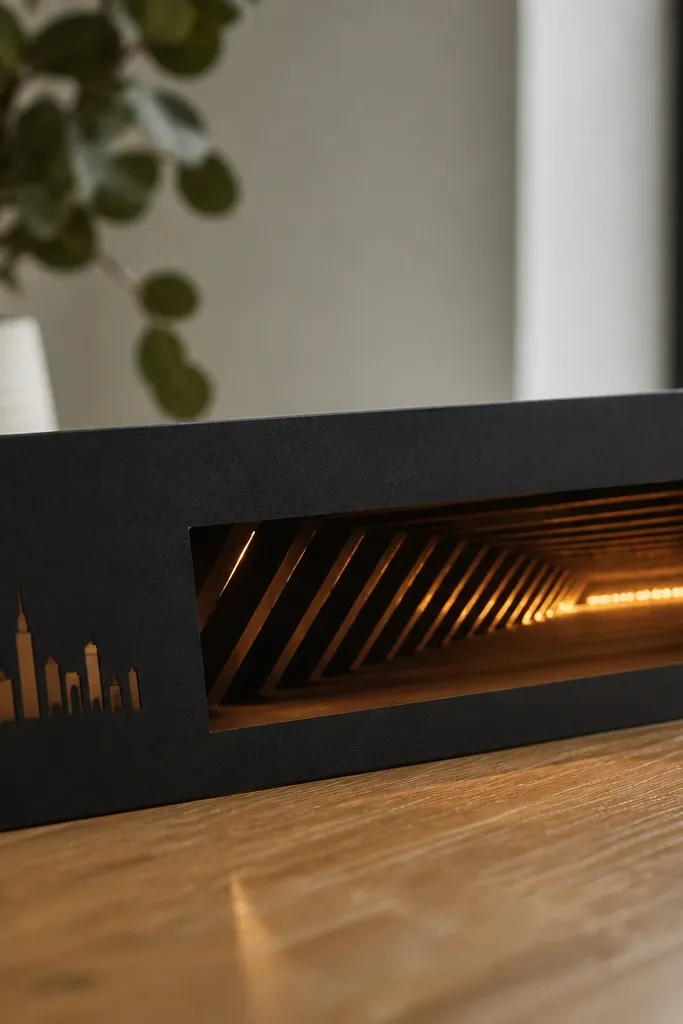
This gift looks like a tiny movie set because the tunnel shape turns one LED strip into layered bands of light. I make the tunnel walls from black cardstock with diagonal cuts so the glow breaks into stripes. When you open the card, it feels like headlights are sweeping across the scene. It’s a great choice for boyfriends who love road trips, cars, or gaming — it reads like atmosphere rather than a typical card.
Editor's noteAngle the diagonal slits slightly different on each layer for a more convincing “movement” look.
Start with a long card base, like 4x8 inches, and fold it so it opens like a book. Build a tunnel interior using layered cardstock strips, each about 1-2 cm wide, and cut diagonal slits across them. Back the tunnel with a warm LED strip placed at the far end, then diffuse it with frosted vellum so the stripes are even. Glue the tunnel layers so they create depth, then add an outside city silhouette on the front cover using a single cutout shape. Hide the battery pack in the thicker back panel and make sure the LED switch sits near the opening edge for easy use.
Skip thisDon’t make the tunnel too short — if the depth is under 2 inches, the light bands look flat.
12. Lantern Bookmark with Page-Edge Glow
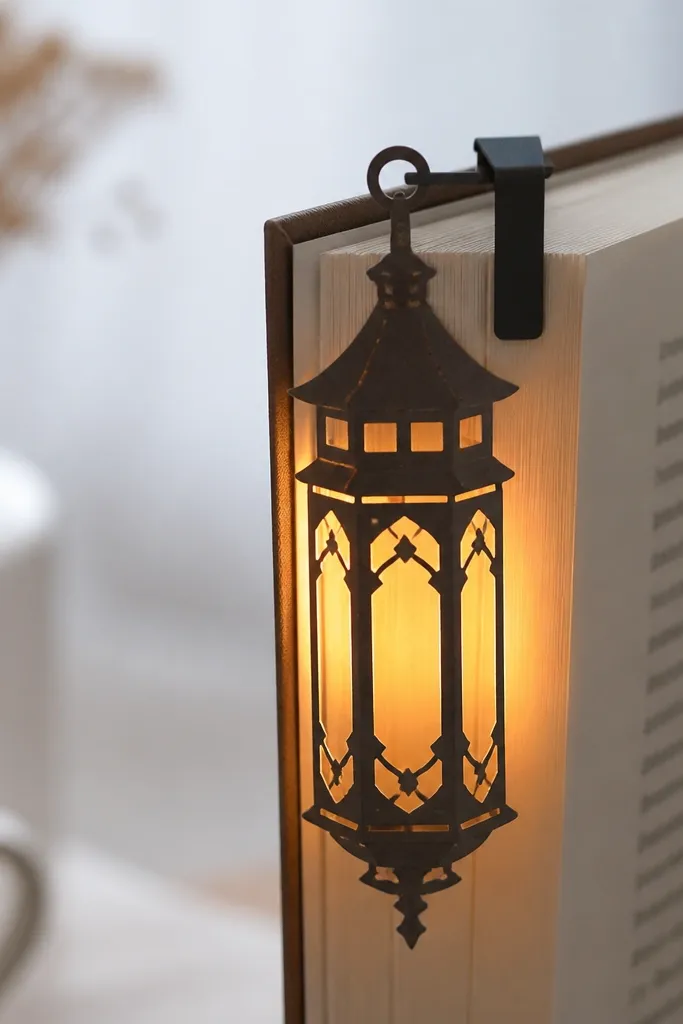
A lantern bookmark is one of the few light gifts that he’ll actually use every week. The glow is small, but the effect is strong because it lights the page edge right where his eyes land. I cut the lantern body from sturdy cardstock and use tiny window cutouts, then diffuse with a thin translucent sheet. It works for any boyfriend who reads — the gift feels personal because it’s tied to his routine, not a one-time event.
Cut a lantern bookmark from 2 mm cardstock, about 2.5x7 inches, and make a top loop hole for a ribbon if you want it. Cut window shapes into the sides, then glue translucent vellum behind the windows so the light spreads. Place a warm white micro LED behind the center panel using a small strip of foam tape to keep a 3-5 mm gap. Add a narrow battery compartment at the back edge with a snap or Velcro strip so you can replace batteries. Finally, clip the bookmark to a test page and turn it on — adjust the LED position until the glow hits the page edge evenly.
If you want extra glow, use two layers of vellum, one at the windows and one over the LED opening.
Don’t place the LED too close to the paper — it creates a bright square that ruins the lantern look.
13. Origami Crane Mobile with LED "Moon" Backlight
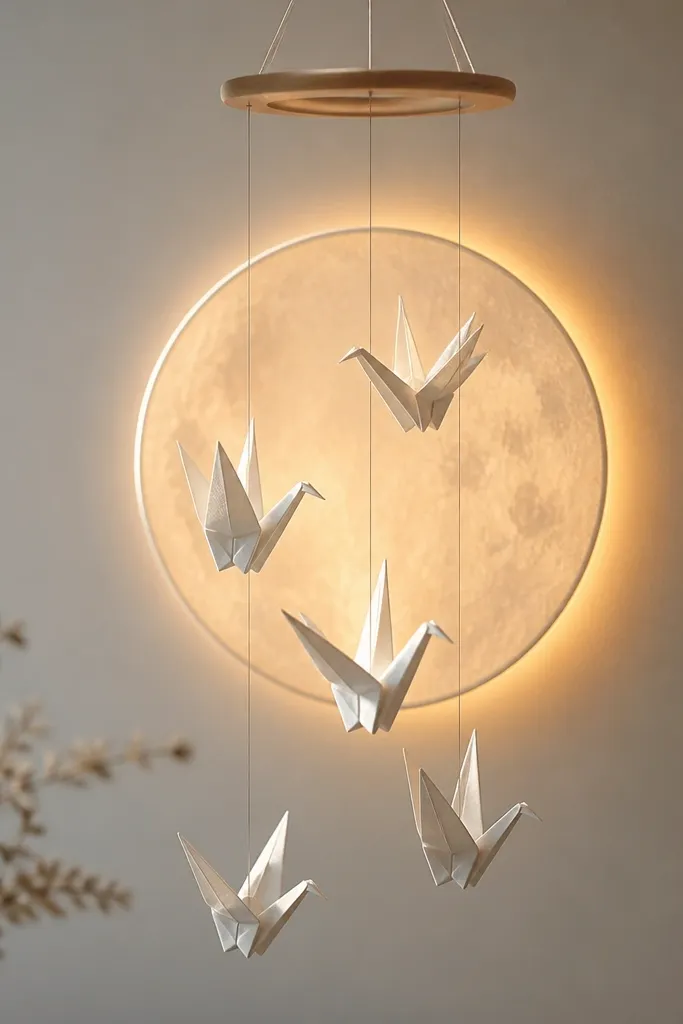
This looks magical because the cranes are light and the backlight makes their folded wings cast delicate shadows. I use off-white paper for cranes so warm LEDs don’t turn them yellow-green. The moon circle is a diffuser — frosted acetate or vellum — and it gives you a soft glow that makes the mobile feel calm instead of flashy. It’s a sweet gift for boyfriends who like minimal hanging decor, bedroom vibes, or anything that feels peaceful.
Editor's noteVary crane sizes slightly — mixing 2-3 sizes makes the shadows look more layered.
Cut a circular moon backing from frosted vellum, about 4 inches across, and attach it to a small ring made from thin wire. Fold 6-10 cranes from 20-25 gsm origami paper or thicker if you want sturdier folds, then attach each crane to the ring using different lengths of thread. Place warm white LEDs behind the moon backing, then cover the LED area with an extra layer of frosted acetate so you don’t see the light source. Hang the mobile from a small ceiling hook or a picture frame hook. Hide the battery pack near the top ring using a small zip pouch glued to the back so it’s easy to access.
Skip thisDon’t use thin, see-through paper for cranes without diffusion — the LED will show through as random bright spots.
14. Light-Up Scrapbook Ticket Wall with Pinprick LEDs
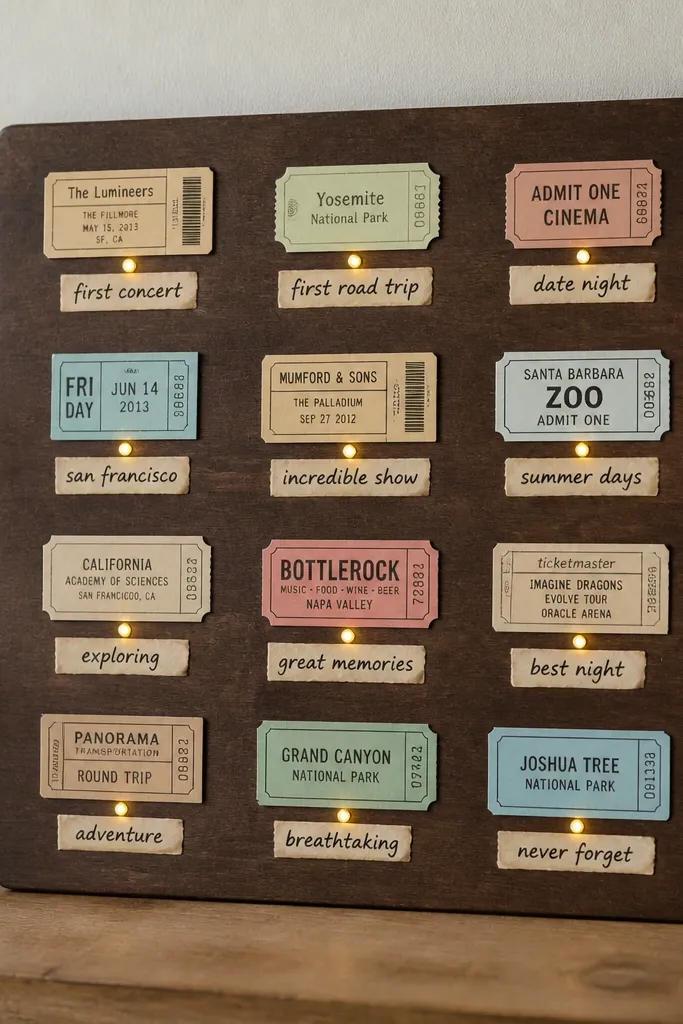
This is how you make a scrapbook look like art. Instead of one big light source, you place tiny LEDs behind small cut windows so each ticket stub has its own “moment.” I use dark brown or deep charcoal backing so the pinpricks read like night lights. It flatters boyfriends who love concerts, sports, travel stamps, or collecting little memories because the gift becomes a map of his interests. The glow also makes paper textures look richer without adding paint.
Editor's noteIf your tickets are glossy, rough up the backside with fine sandpaper so adhesive sticks and the glow stays even.
Start with a 8x10 or 9x12 inch scrapbook panel in dark cardstock. Arrange ticket stubs, photo corners, and label strips, then mark where you want the LEDs to appear — keep them behind solid label areas so the light reads as a point. Punch tiny holes (about 2-3 mm) for each LED and tape a diffuser square behind each hole with frosted vellum. Mount the ticket pieces with foam tape so the light has space to travel upward. Add a back compartment for a battery pack and switch, then test each LED spot with the panel held at an angle to check brightness.
Skip thisDon’t cram LEDs too close together — the pinpricks blur and stop looking intentional.
15. Map Fold "Compass" with LED Needle Glow
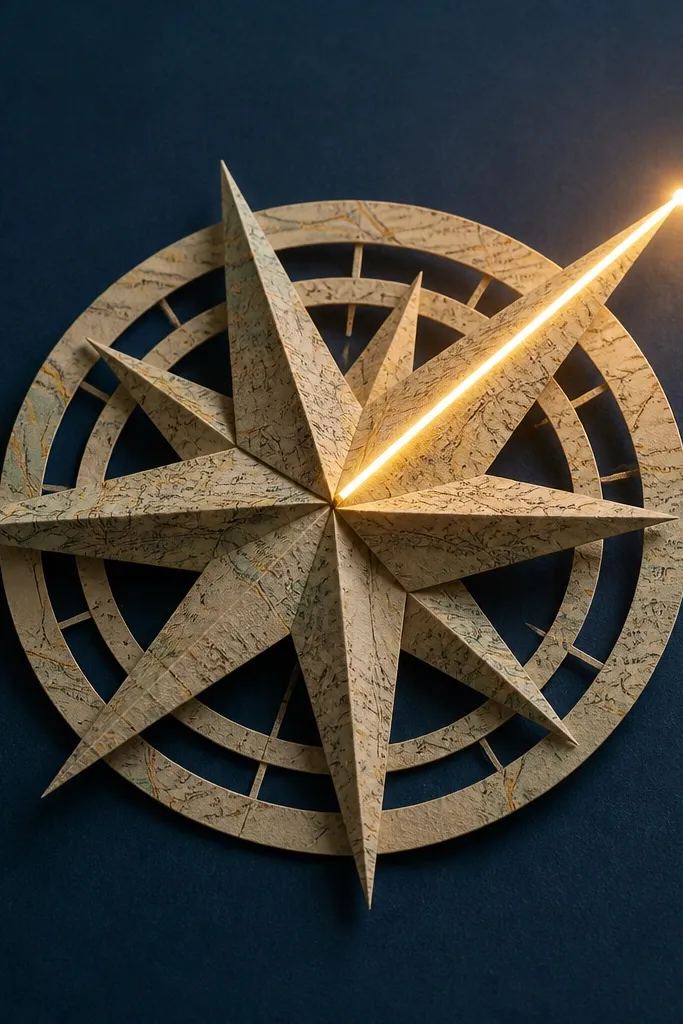
This one looks like a functional object, not a craft. The map print gives it a travel feel, and a glowing needle makes it feel like it’s pointing somewhere — even if it’s just your boyfriend’s favorite memory. I keep the compass design simple and clean so the glow is the star. It flatters boyfriends who like navigation themes, hiking, or anything with a “direction” vibe because it reads like a clever desk ornament.
Editor's noteMake the needle tip thicker than the base by 2 mm so it glows brighter and looks like a real light.
Cut a compass face from vintage map paper and back it with dark blue cardstock to frame the glow. Draw a needle shape and cut it as a window, then glue frosted vellum behind the needle so the LED diffuses. Use a thin strip of warm white LED placed under the needle path, with a small gap created by foam tape. Fold the compass layers so the needle sits raised and the glow looks like it’s hovering. Hide the battery pack in the back fold and add a small Velcro closure so you can replace batteries without tearing the paper.
Skip thisDon’t use bright neon map paper — the light will overpower the print and look messy.



