



1. Washed-Cotton Key Fob with Contrast Stitch
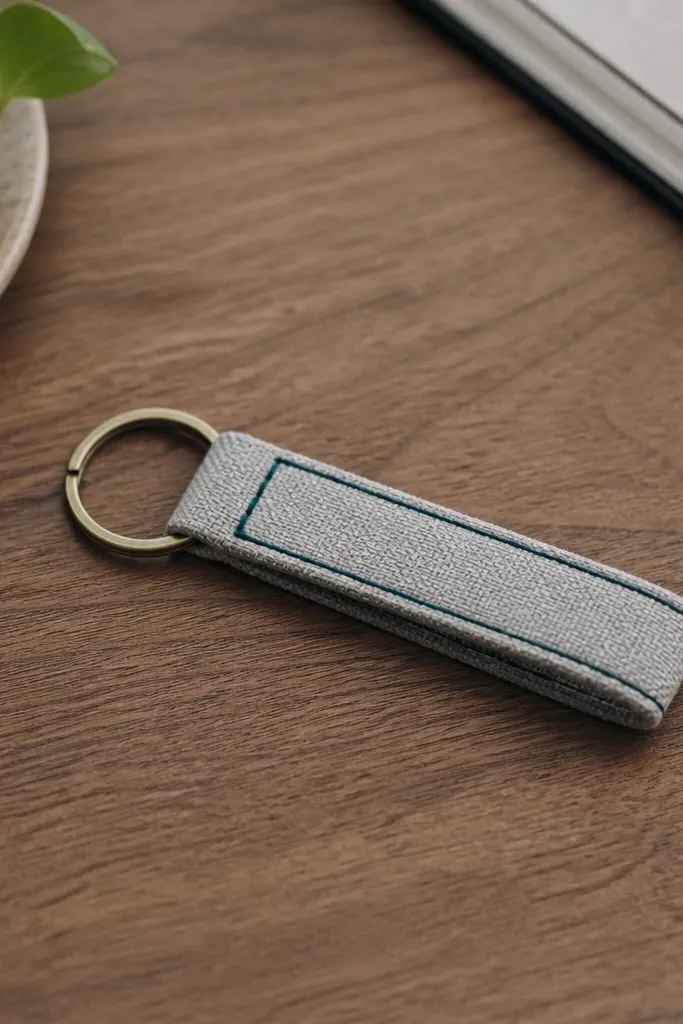
Start by cutting two rectangles 5.5 inches long by 2.25 inches wide. Fold each piece right sides together, then stitch around the perimeter with a 1/4 inch seam allowance, leaving a 1.5 inch gap for turning. Clip corners, turn it right side out, press flat, then topstitch 1/8 inch from the edge around the whole shape to close the gap. Finally, add a brass split ring through the folded end and stitch the loop area with a short bar tack so it won’t pull out.
This one looks clean because it uses washed cotton with a tight weave and a double-stitched edge. I pair heather gray fabric with deep teal thread so the stitching reads even in low light. The fob sits flat in his pocket and doesn’t twist because the strap width stays around 1 inch finished. It flatters him whether he has a lean frame or broader hands — the fob stays compact and doesn’t feel bulky on his key ring. The styling principle is contrast that’s controlled: one bold thread color, one simple fabric base, no extra patches.
Skip thisAvoid stretchy jersey fabrics — they roll at the edges and make the key fob look sloppy fast.
Editor's noteUse a heavy-duty needle (size 90/14 or 100/16) and match your thread weight to the cotton so the stitches sit tight instead of puckering.
2. Leatherette Coaster Set with Numbered Corners
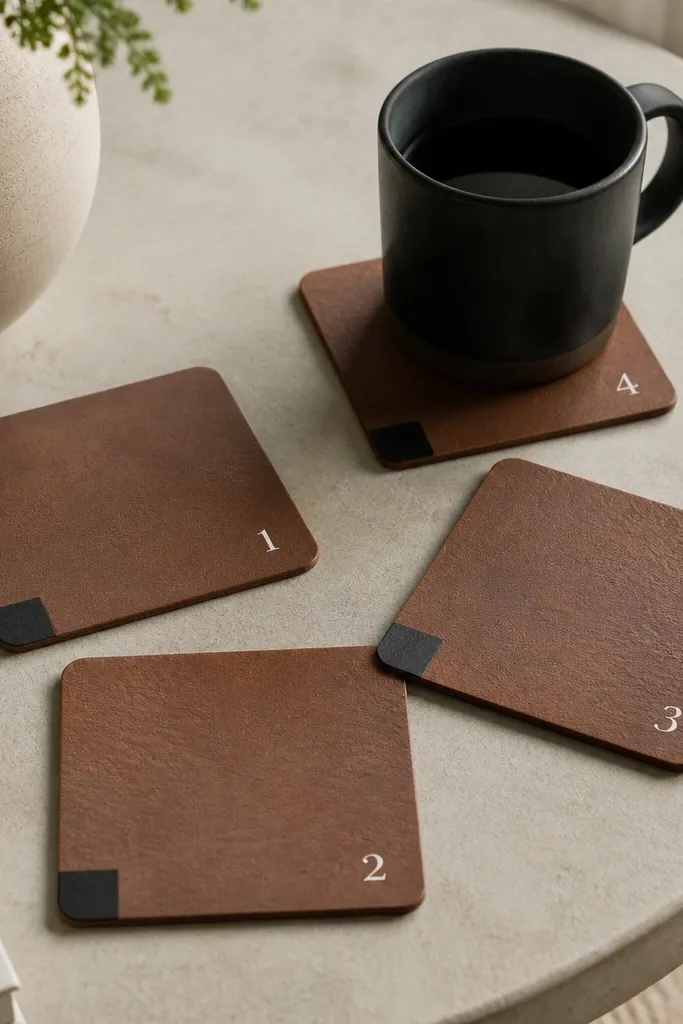
These coasters look “store-bought” because the edges are treated and the corners are consistent. I use matte brown leatherette so it doesn’t glare like shiny faux leather, and I add numbered corners so they stack without sliding. The color works on most skin tones and room palettes — warm browns look good next to wood, and the small black corner marker anchors the design. They’re great for boyfriends who host friends or who keep drinks on a desk. The styling principle is functional marking: it helps daily use and makes the set feel intentional.
Start by cutting four circles or squares — I do 4 inch squares for easier stacking. Rough up the back lightly with fine sandpaper, then glue a thin felt backing so the coaster doesn’t scratch. Paint the outer edge with black acrylic mixed with a little fabric medium so it flexes; let it dry between coats. Stamp or write tiny numbers on the top at one corner, then seal with a matte clear acrylic so it wipes clean.
Sand the edges before painting; sharp edges catch paint and look uneven.
Avoid leaving bare edges — unfinished edges make leatherette look like cheap craft foam.
3. Pocket Photo Strip in a Mini Cloth Frame
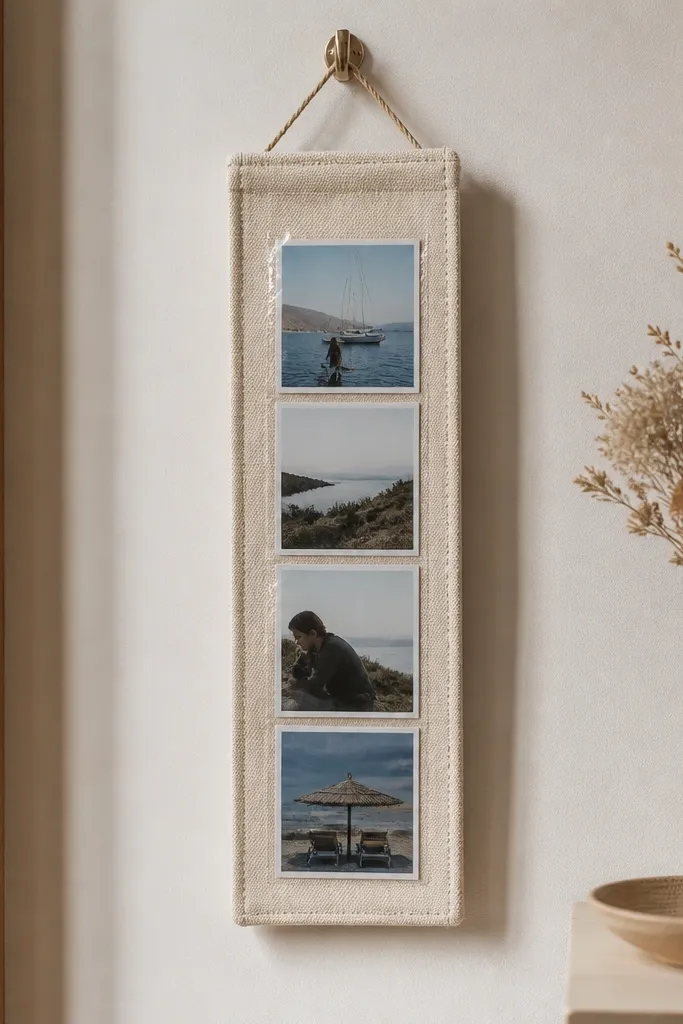
This gift hits because it’s small, wearable, and doesn’t require perfect printing. I use oatmeal canvas for the frame because it hides tiny imperfections, and I mount four mini photos in a single vertical strip so the layout stays neat. Clear plastic sleeves protect the photos from fingerprints and humidity, which matters if it lives in a bag. It’s flattering for any boyfriend style — clean and minimal for someone who likes quiet aesthetics, sentimental for someone who doesn’t want a big wall display. The styling principle is protect the photo — protection reads as care.
Cut a canvas rectangle about 8 inches tall by 4 inches wide, then fold and stitch a 1/2 inch binding on the sides. Make a simple top loop using a 1 inch wide canvas strip, then stitch it down through the top edge. Print photos as 2 x 3 inch mini prints, trim to fit, and slide each into a clear plastic sleeve pocket page. Put the strip into the frame pocket and seal the bottom with a snap or a Velcro flap so he can swap pictures later.
Use a matte photo finish — glossy photos catch glare and look cheap in indoor light.
Avoid raw photo edges exposed to air — they curl and scuff faster than you expect.
4. Candle Tin with Label That Matches His Favorite Hoodie Color
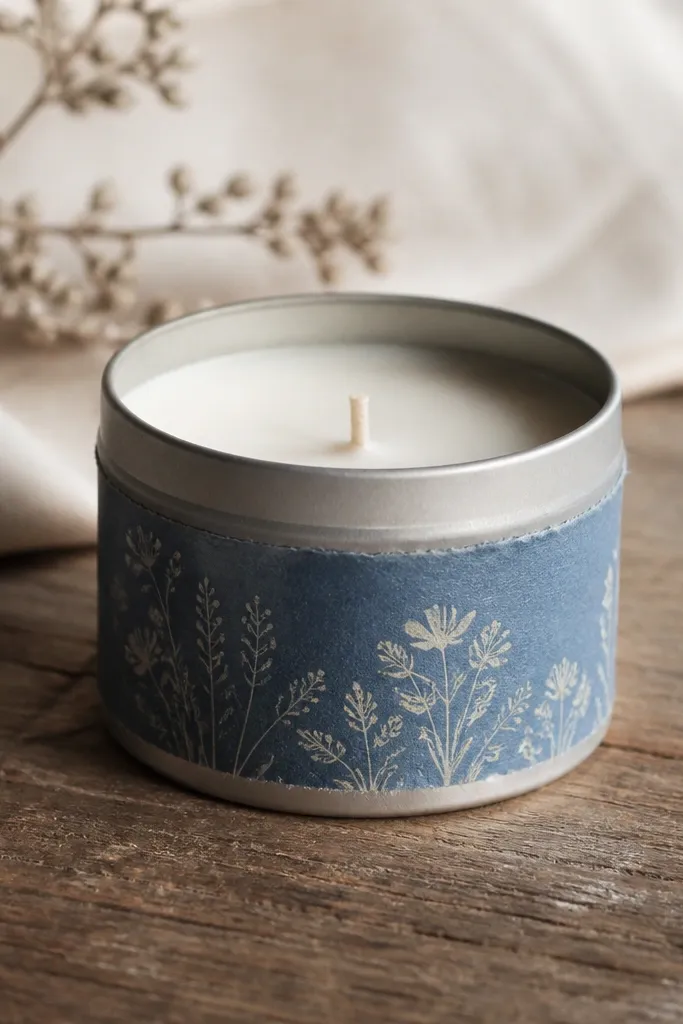
Start by measuring the tin circumference and height — mine is usually about 4.25 inches tall and 3 inches around. Cut paper to the exact height with a 1/4 inch overlap allowance, and round the corners. Print or hand-letter text in cream ink on colored paper, then seal the label with matte Mod Podge so it resists heat and smudges. Wrap the label around the tin, press firmly, and add a thin strip of double-sided tape inside the overlap so it holds under normal handling.
A candle label looks handmade in a good way when the color matches something he already wears. I’ve done this with dusty blue labels for a boyfriend who lives in that shade, and it makes the gift feel personal without being loud. The tin shape is compact, and the label wraps cleanly so it doesn’t wrinkle in the heat. It suits boyfriends who like cozy nights, car rides, or desk scents. The styling principle is one strong color match plus restrained typography.
Skip thisAvoid thin printer paper — it wrinkles around metal and reads messy.
Editor's noteHeat test: place the tin near a warm lamp for 10 minutes and check if the label curls.
5. Knit Beanie with a Turned Cuff and One Stripe
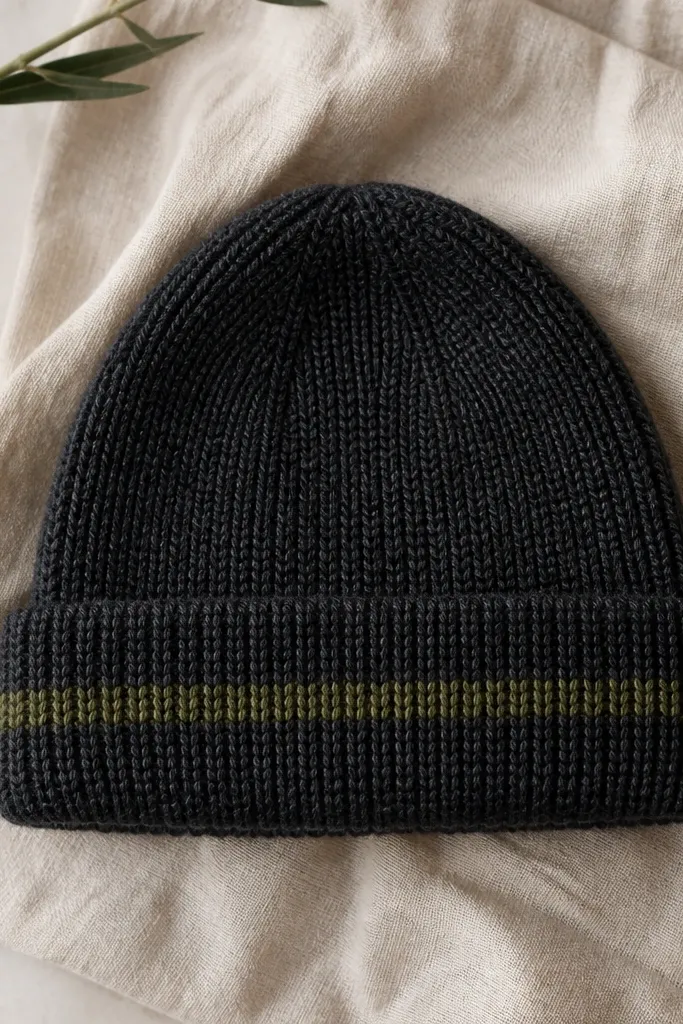
Start by measuring his head circumference with a soft tape — subtract about 1 inch for a snug fit. Cast on for ribbing, knit in 2x2 rib for 2.5 inches, then switch to stockinette for the body for about 6.5 inches. Add one stripe by knitting a 3-inch band in olive yarn where you want the cuff highlight, then finish with decreases for the crown. Bind off tightly, weave ends, and block the beanie by pinning it flat and steaming lightly.
This beanie looks right because the cuff is turned — it sits like a proper store beanie instead of a floppy tube. I knit in a medium-weight yarn (worsted to bulky depending on your tension) and keep one stripe only at the cuff so it doesn’t look busy. Charcoal plus olive is a combo that works in almost any wardrobe. It flatters most head shapes because the ribbing stretches evenly and holds its shape. The styling principle is structure first: ribbing gives the “finished” look.
Skip thisAvoid loose ribbing — it rolls and makes the beanie look unfinished.
Editor's noteWeigh your yarn skein before and after — it keeps stripe placement consistent across tension changes.
6. Denim Bracelet with Stitched Button Closure
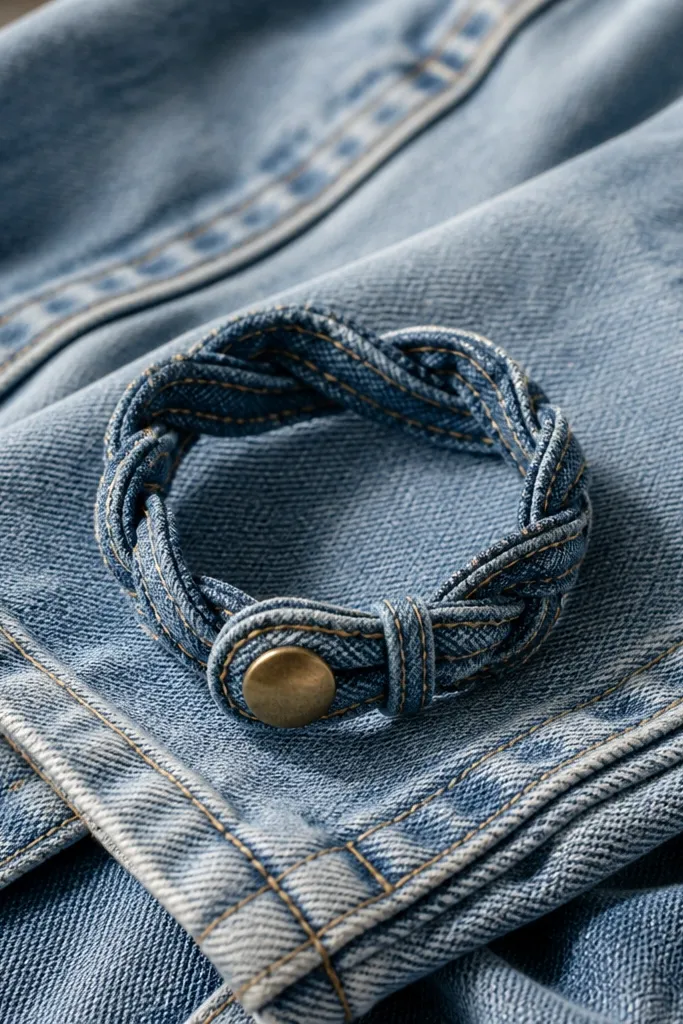
Denim bracelets look sharp because denim has a natural grain and holds shape without stiffeners. I use a narrow strip and stitch along the denim’s original seam line when possible, which gives a clean edge without extra measuring. The brass button closure reads sturdy and feels good against skin. It’s flattering for guys with larger wrists because the denim strip stays firm and doesn’t sag. The styling principle is hardware that matches the denim — warm metals pair with blue without clashing.
Cut a denim strip 1.25 inches wide and trim to the length you need (measure his wrist plus 1 inch for comfort). Fold the strip in half lengthwise and stitch 1/8 inch from the edge, then topstitch again along the folded edge for a double-line look. Add a buttonhole tab at one end by folding a small rectangle and stitching it down. Sew the brass button on the other end and test closure — you want a snug snap without pulling the denim thread.
Use upholstery thread or a thicker cotton thread so the denim doesn’t chew through your stitches.
Avoid stretchy denim for bracelets — it warps and the button closure ends up misaligned.
7. Felt Phone Stand with a Hidden Slot for a Charging Cable
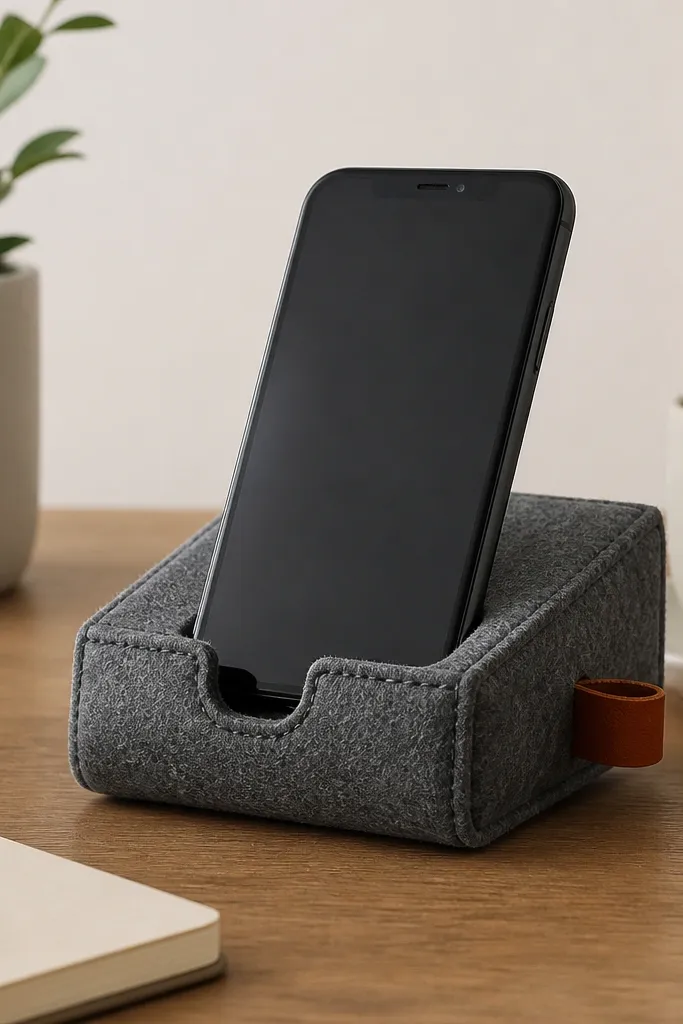
This stand looks thoughtful because it solves a real problem: cable clutter. Thick felt holds its shape and grips the phone without scratching, and the hidden slot keeps the charging cable tucked instead of dangling. I make the base wedge about 3.5 inches wide and angle it so the phone sits at a comfortable viewing tilt. It flatters anyone who works from a desk or watches videos — the stand makes the phone feel more intentional. The styling principle is built-in function, not decoration that doesn’t do anything.
Start by cutting a wedge pattern from 3-4 mm felt: a base triangle plus a front face piece. Stitch the seam along the top edge with a strong running stitch or whip stitch using matching thread. Cut a narrow slot on the front face — about 1/2 inch long and wide enough for the cable sheath — and reinforce the slot edges with a second stitch line. Add a small leather loop or stitched tab on the side to tuck excess cable length, then test with his exact phone case thickness.
Use the same material for both grip and structure — felt-only builds look cleaner than mixing with fabric glue.
Avoid cheap thin felt — it bends and makes the phone wobble.
8. Monogram Patch on a Canvas Tote with Reinforced Handles
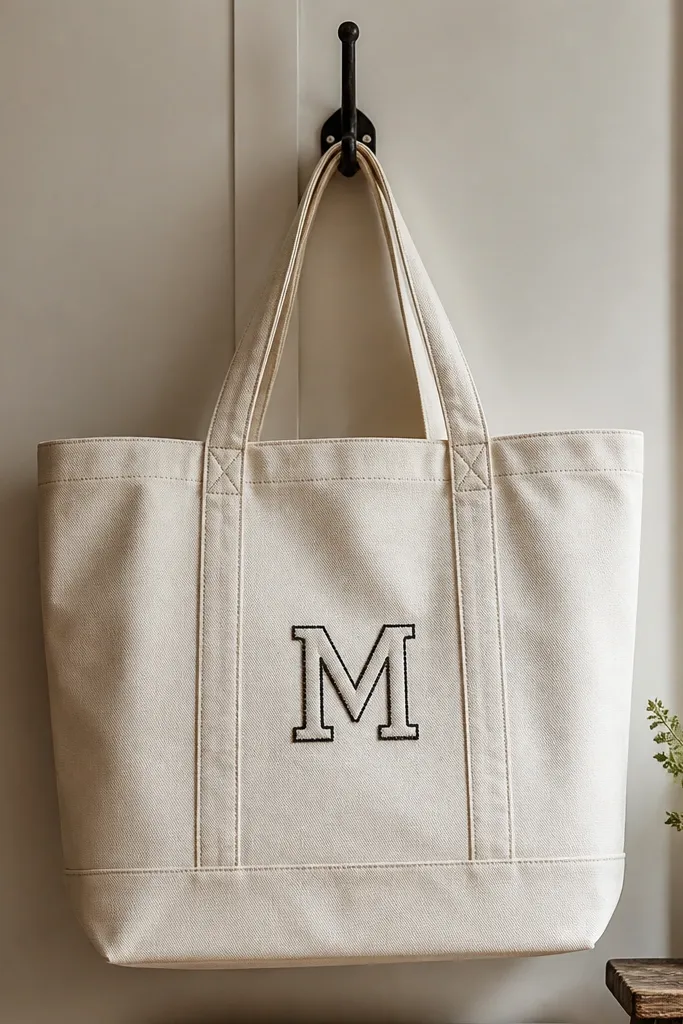
A monogram tote looks like a real gift when the handles are reinforced and the patch edges are stitched, not glued. I use natural canvas because it takes thread beautifully and looks good with black or navy monograms. The patch sits centered on the front pocket area so it reads clearly in photos. This gift fits boyfriends who carry laptops, gym stuff, or just daily groceries. The styling principle is clean placement: one patch at eye level, handles that don’t twist.
Start by picking a tote with sturdy handles or add reinforcement by stitching an extra box-X pattern where the handles attach. Cut your monogram patch from a darker felt or canvas piece — about 4 inches tall. Baste the patch in place, then stitch around the edges with a tight satin stitch or blanket stitch so the edge looks crisp. Finally, wash and dry the tote once before you sew — it shrinks the canvas so your patch doesn’t ripple later.
Iron the patch fabric before stitching — felt puckers if you skip this step.
Avoid fabric glue for the patch — it lifts at the edges after a few washes.
9. Beard Oil Bottle Label + Rubber Band Cap Grip
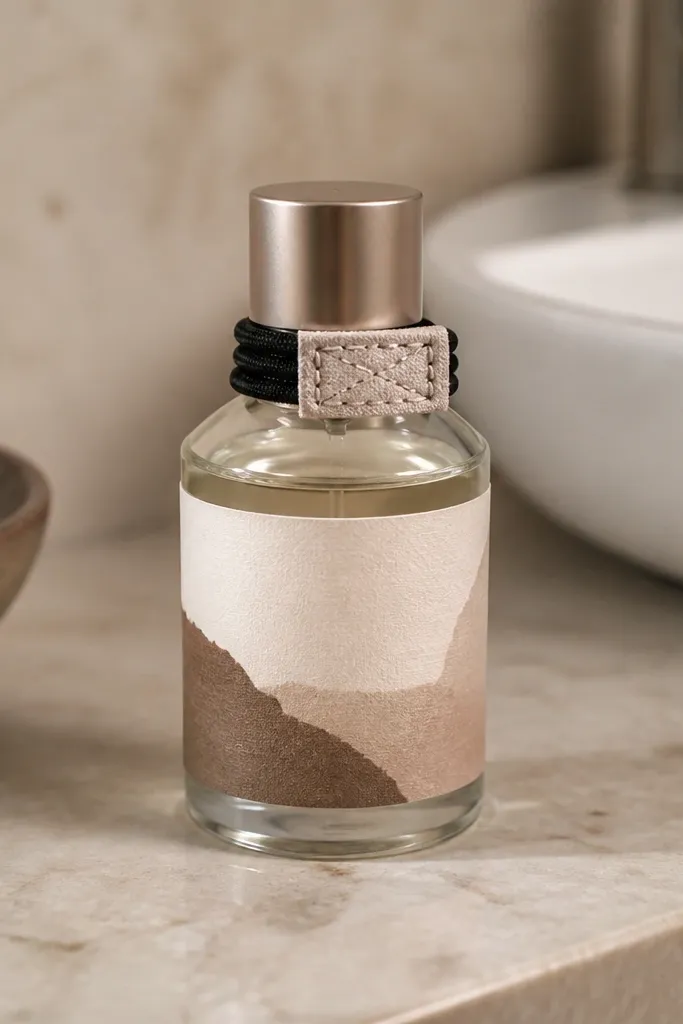
Start by cleaning the bottle with rubbing alcohol so the label sticks evenly. Cut label paper to fit the bottle circumference and wrap with a 1/4 inch overlap. Seal the label with two thin coats of matte Mod Podge, letting each dry fully. Wrap a rubber band around the bottle neck under the cap and cover it with a small strip of fabric that you stitch into a loop, then slip it over the rubber band for a comfortable grip.
This is a practical handmade gift that still looks styled. I make the label on thick cardstock with a simple brown ink design, then seal it with a clear matte finish so it wipes clean. The rubber band cap grip helps when his hands are wet — it gives purchase and stops slippery caps from flying. It’s great for boyfriends who keep facial hair, and it looks good in photos because the label is clean and centered. The styling principle is readable typography plus one functional grip detail.
Skip thisAvoid glossy finishes — they smear on bathroom counters and look messy fast.
Editor's noteUse a label that’s tall enough to cover the bottle’s glare area — it makes the design look sharper.
10. Framed Map Print with Threaded Coordinates Pin
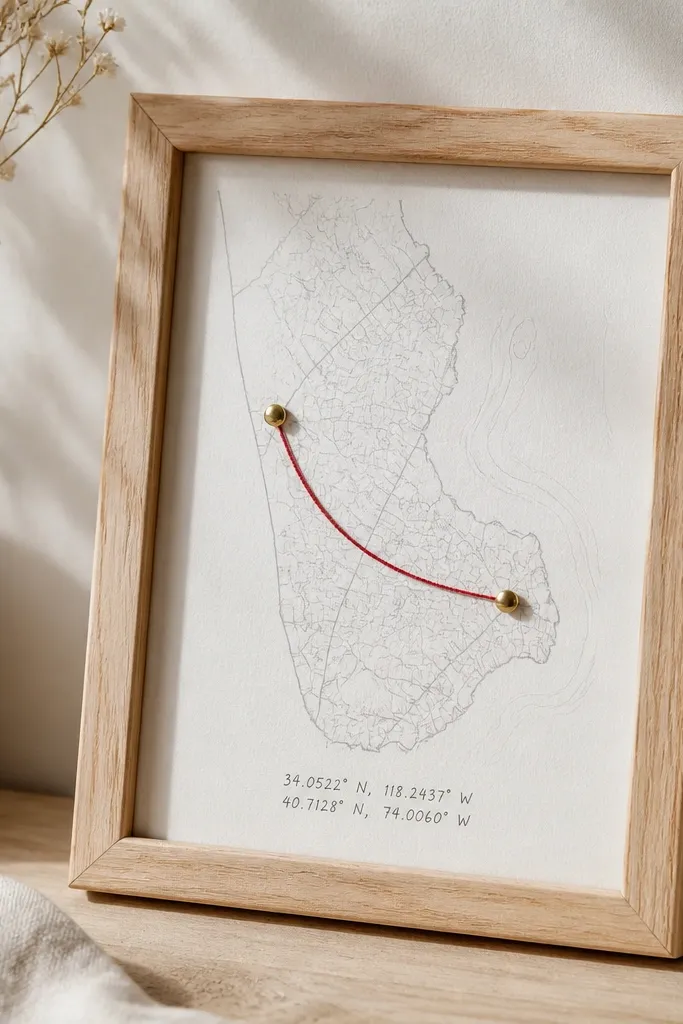
Threaded coordinates look handmade because the thread line shows your hand, not a printed graphic. I pick a minimalist map print with lots of white space, then add a thread curve between two meaningful points — first date spot and where he lives, for example. The frame matters: a simple wood frame with a matte backing keeps it from looking like a craft store poster. It flatters anyone who likes clean design and doesn’t want a cluttered scrapbook. The styling principle is negative space: the thread line is the focal detail.
Start by printing a map section on matte paper and trimming it to fit your 8x10 or 5x7 frame. Punch two tiny holes where your points are and insert pushpins from the back. Thread embroidery floss through the holes and tie the ends on the back, pulling until the line looks taut but not stretched. Write coordinates on the bottom margin with a fine-tip pen, then seal the map under glass or a clear acrylic sheet to protect the paper.
Use one strand of floss for a thinner line — it looks more precise than two or three strands.
Avoid thick marker scribbles on the map — they look like a school project.
11. Waffle-Knit Sleep Mask with Taped Edges
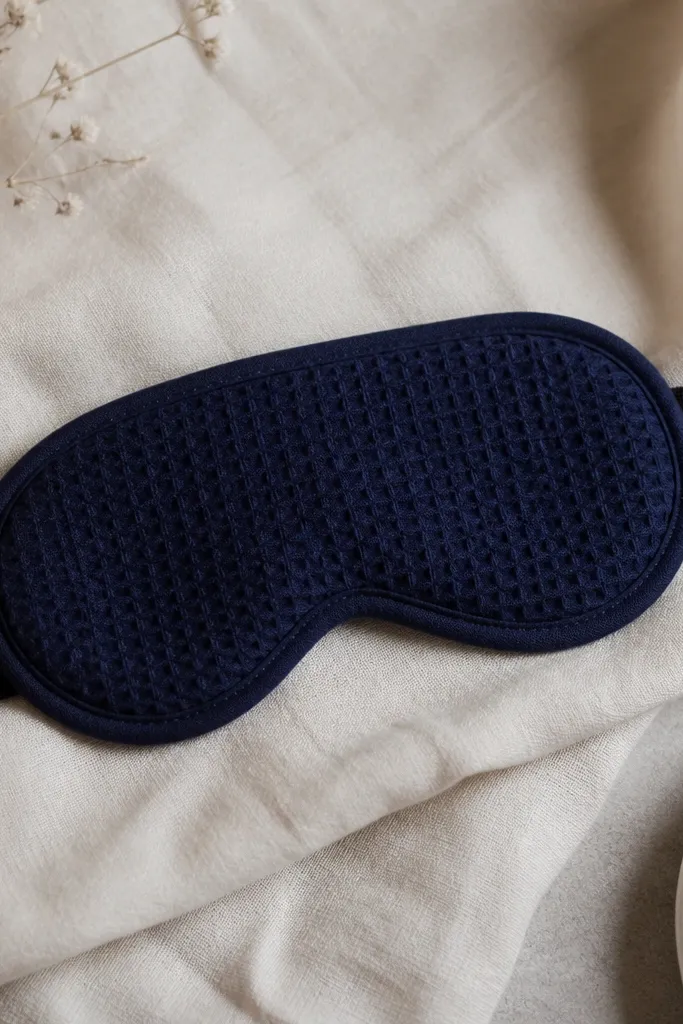
Cut two mask pieces from waffle-knit, using a pattern that covers the brow and cheekbones without hitting the nose. Sew around the perimeter with right sides together, leaving a turning gap, then turn and press. Add a clean binding strip or use bias tape to cover raw edges — I like a 1/2 inch tape folded around the edge. Attach elastic straps at the sides, then topstitch the strap anchors so they don’t twist.
A sleep mask feels personal because it’s gentle and practical, and it looks premium when the edges are finished. I use waffle-knit cotton because it blocks light slightly and feels soft without trapping heat. The taped edges or clean binding keep it from fraying, and the navy color hides tiny lint. It flatters most people because the elastic straps adjust and the fabric has enough body to hold shape over the eyes. The styling principle is comfort plus crisp finishing.
Skip thisAvoid leaving raw edges inside — it scratches skin and looks unfinished when you hold it up.
Editor's noteWash and dry the fabric before sewing so your mask doesn’t shrink after gifting.
12. Salted Caramel Candlewick Scent Tag with Twine Loop
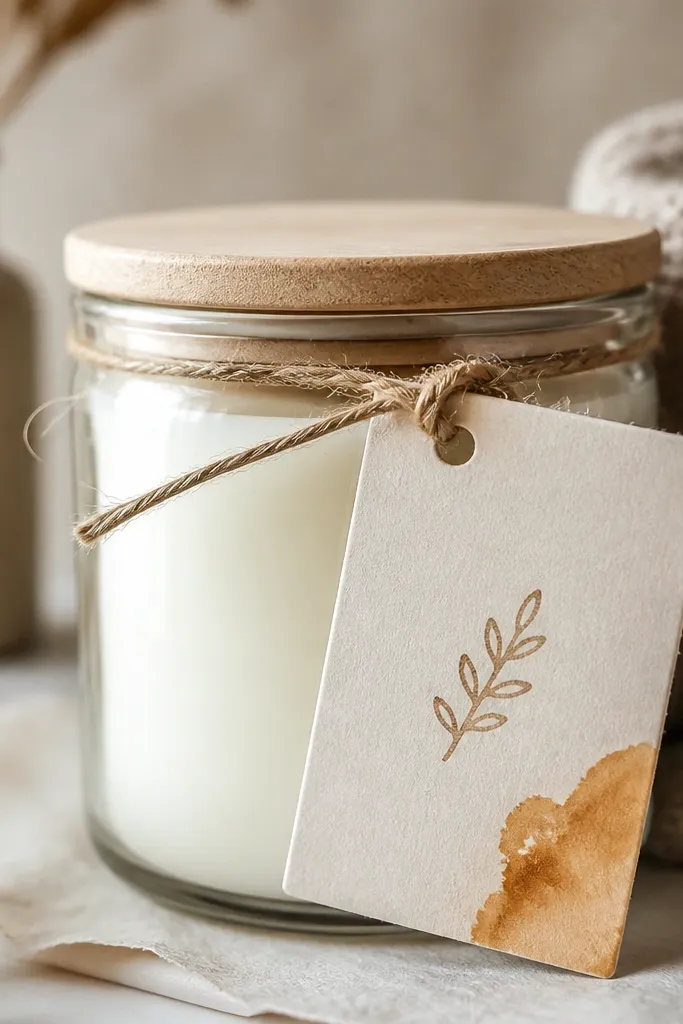
This gift is small but looks thoughtful because the scent story is visible. I use thick off-white cardstock, stamp a tiny icon, and add a watercolor caramel wash in the corner so it ties to the smell. The twine loop makes it easy to attach to a candle jar, drawer sachet, or even a gym bag. It’s a good pick for boyfriends who like subtle scents instead of strong perfume. The styling principle is match the label art to the scent you made or chose.
Start with cardstock sized about 2.5 x 4 inches and punch a hole at the top. Stamp your icon or write a short name with a fine pen, then paint a small caramel corner wash using diluted brown watercolor. Let it dry completely, then seal with matte spray or a thin matte clear coat. Attach it with twine by threading through the hole and tying a tight knot around the jar neck or around a small loop on the sachet.
Use a lighter watercolor wash than you think — dark corners look muddy once sealed.
Avoid flimsy paper — it warps when sealed and looks creased.
13. Fabric Bookmark Set with Ribbon Tabs
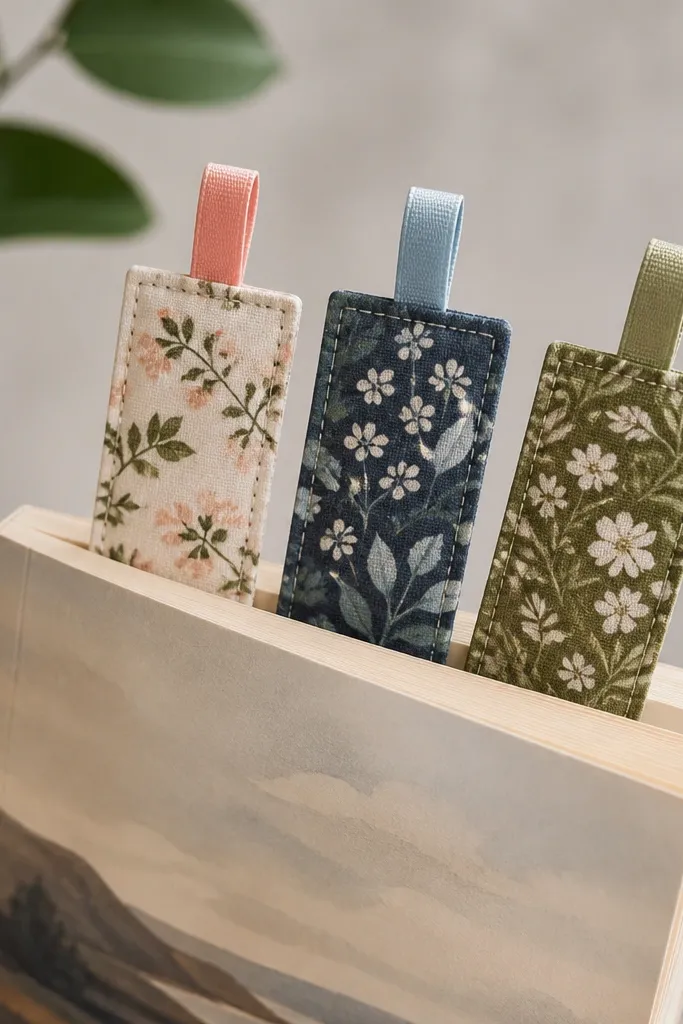
Bookmarks make sense because they’re quick to use and they don’t need perfect sizing beyond a standard book. I make them from patterned cotton so the look stays interesting, then add ribbon tabs so he can grab them easily without yanking. The stitching is visible and straight, which keeps it from looking like a school craft. This works great for boyfriends who read on the couch, at night, or during commute time. The styling principle is tactile detail: ribbon gives the “handmade” feel.
Cut three rectangles 3.5 inches long by 2.25 inches wide, then fold in half and sew along the sides with a 1/4 inch seam. Turn right side out, press, and topstitch around the edge for a clean finish. For each bookmark, attach a ribbon tab about 2 inches long at the top before you close the final seam. Finally, add a small rounded corner by trimming slightly before sewing if you want a softer look.
Use a satin ribbon that won’t fray — edge burn lightly with heat if needed.
Avoid stretchy fabric — it curls and the bookmark doesn’t lie flat in a book.
14. Desk Key Tray from Concrete Mix and Silicone Mold
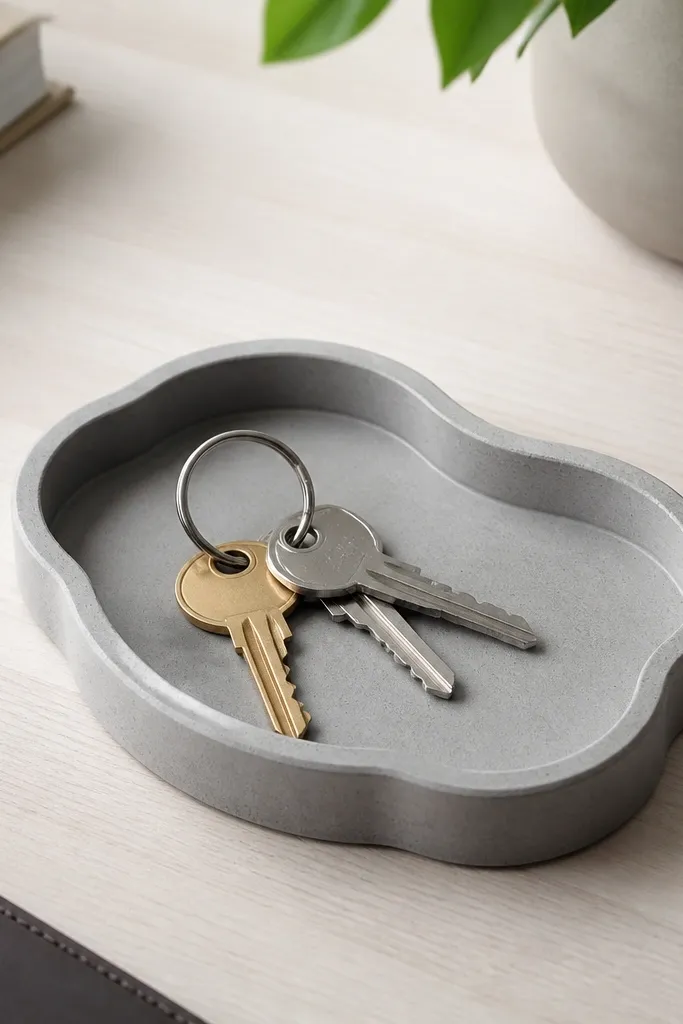
Start by mixing concrete mix with water to a thick peanut-butter consistency so it doesn’t slump. Coat the silicone mold lightly with release spray, then pour in small layers and tap the mold to pop bubbles. Add a thin piece of felt or cork sheet to the bottom once cured if you want it to protect surfaces. Cure for at least 48 hours, then sand any rough edges with fine grit and wipe clean.
Concrete trays look modern and masculine because they’re heavy, clean, and simple. I use a small silicone mold so the tray has a gentle curve that feels intentional, not like a random cast. The gray color hides minor imperfections, which matters when you’re doing DIY pours. It flatters boyfriends who like tidy desk setups — it makes keys land in one place and reduces that “where did they go” stress. The styling principle is weight and shape: the tray should feel stable the second you set it down.
Skip thisAvoid pouring too thin — it cracks or chips at corners.
Editor's noteDo a test pour with a tiny amount first so you learn how fast your mix sets.
15. Embroidery Hoop Wall Art with a Single Bold Quote Line
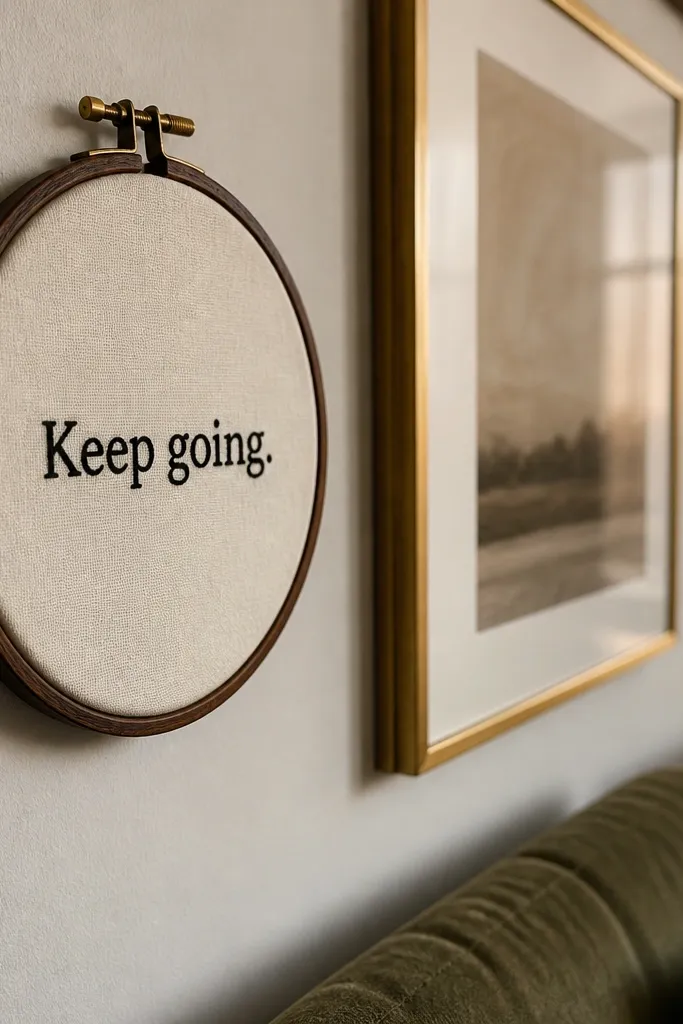
Hoop art looks good because it frames the thread like a mini gallery piece. I keep the design to one bold line — short phrase, coordinates, or his name — and embroider it in one thread color for clarity. Cream fabric makes the black thread pop, and the hoop size stays small so it looks intentional rather than childish. It flatters anyone who likes minimal wall decor. The styling principle is legibility: if the text is readable from 6 feet away, it looks expensive.
Stretch fabric tight in a 6-inch hoop, then sketch the line lightly with disappearing ink. Use a backstitch or stem stitch for clean lines, keeping the spacing even across the whole word. Tie off the thread on the back and trim any long tails. Hang the hoop using a simple nail and the hoop’s built-in hanger, then add a tiny stitched star or dot only if it balances the composition.
Use one strand for text — multiple strands thicken the letters and blur them.
Avoid messy hoop tension — slack fabric makes the stitches look uneven.
16. Sewed Fabric Wrist Wrap with Hidden Heat Pack Pocket
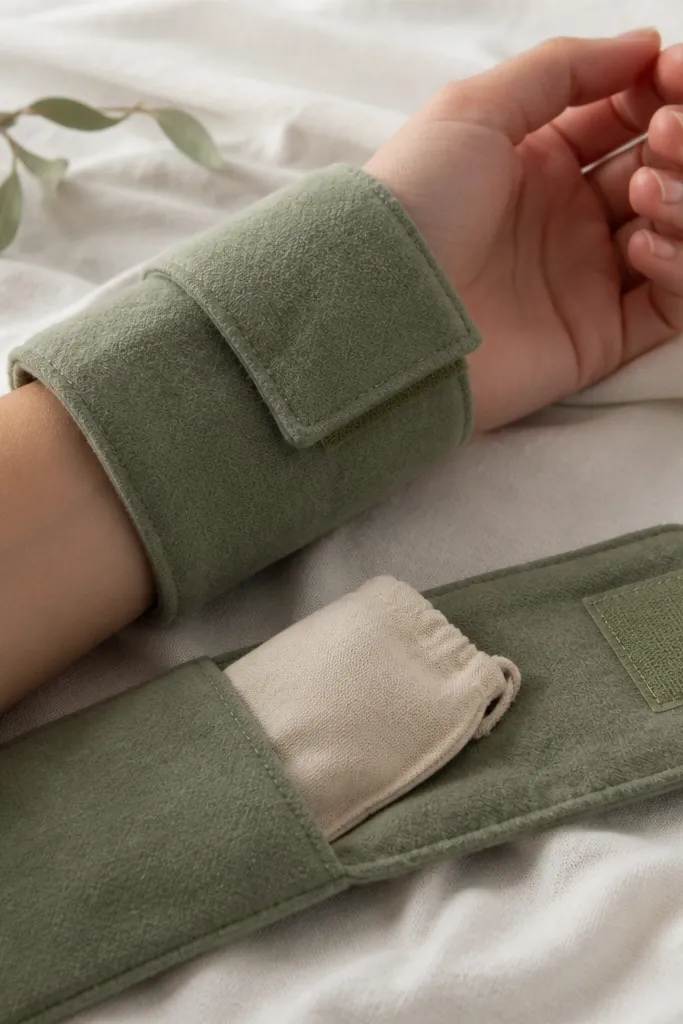
This is a gift that feels real because it helps his body when he’s sore from work, lifting, or long drives. I use flannel for the outer layer because it’s soft and warm, and I line the inside with a smooth cotton so the heat pack slides in and out easily. The strap closure keeps it adjustable and comfortable. It flatters most builds because the wrap sits snug without cutting circulation when the sizing is right. The styling principle is comfort-focused construction with an actual pocket, not a loose insert.
Start by measuring his wrist circumference and adding 1 inch for comfort. Cut two flannel rectangles and one lining piece, then sew the lining to the inside layer so it stays flat. Create a heat pack pocket by stitching a U-shape on the lining side, leaving the top open for insertion. Attach hook-and-loop straps at the ends, then topstitch around the outer edge so the wrap holds its shape after washing.
Use a hook-and-loop brand that grips well — cheap Velcro slides and ruins the fit.
Avoid skipping pocket reinforcement — a thin seam splits when you remove the heat pack.
17. Hand-Painted Tie Clip with Clear Coat Overcoat
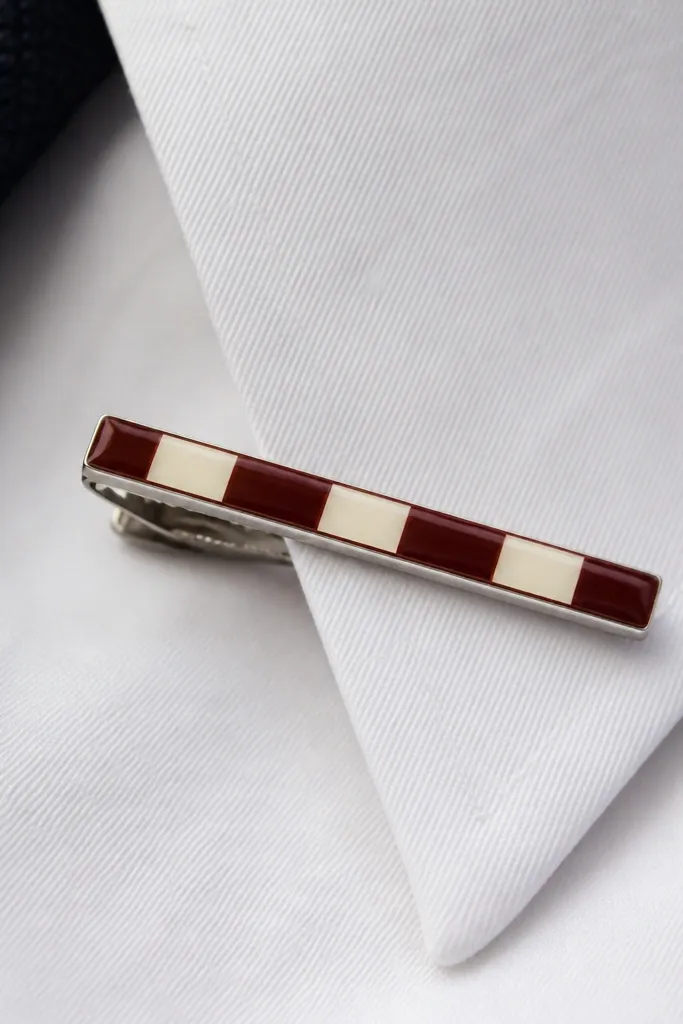
Tie clips look personal when the design is tiny and controlled. I paint a simple stripe pattern on the flat area and finish with a clear coat so it doesn’t scratch off after he clips it to a shirt. The burgundy and cream combo works with navy, gray, and black dress shirts. This is a great pick for a boyfriend who wears button-downs to work or events. The styling principle is small art on a functional item, sealed for real life.
Start by cleaning the tie clip with rubbing alcohol and letting it dry fully. Lightly scuff the painted area with fine sandpaper for adhesion. Use acrylic paint in two colors with a small craft brush, then let it dry for at least an hour. Finish with 2-3 thin coats of clear coat, drying between coats, and avoid touching the painted surface until fully cured.
Stick painters tape along edges to keep the stripes crisp.
Avoid painting directly on shiny metal without scuffing — the paint flakes off.
18. Cinch-Wrap Gift for Cologne Bottle with Fabric Belt
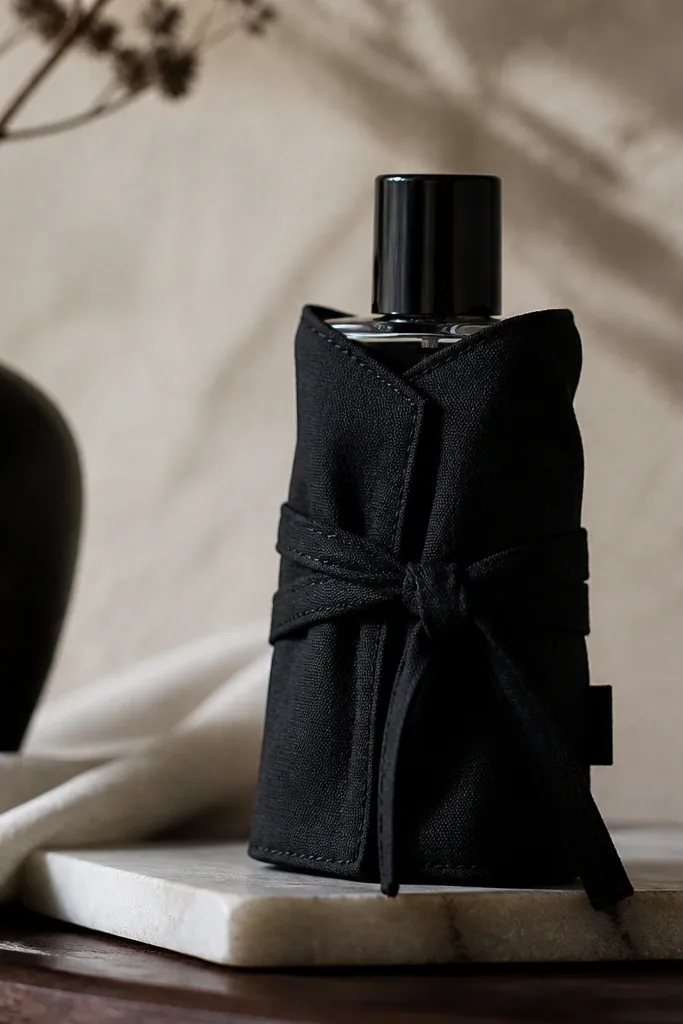
Start by measuring the bottle height and circumference with a strip of fabric. Cut a wrap panel that’s about 1.5 inches taller than the bottle and wide enough to overlap by 2 inches. Sew a clean hem along the bottom edge, then fold and press the top edge before wrapping. Add a long belt strip and stitch ends so it ties securely; attach a small fabric tag on the belt loop for the message.
This gift looks high-end because it’s a wrap that stays in place. I use a sturdy cotton like black canvas or thick cotton twill, then wrap it around the bottle and secure it with a belt tie. The belt makes the bottle feel like it belongs to a system — not like it’s sitting in a bag. It’s great for boyfriends who like fragrance and already own nice bottles. The styling principle is cinched structure: the wrap should hold tension and look smooth in photos.
Skip thisAvoid rubber bands or loose bows — they slip and the wrap looks messy by the time he opens it.
Editor's noteUse a heavier fabric than you think — thin cotton wrinkles and makes the wrap look cheap.
19. Embossed Card Wallet from Faux Leather and Heat Press
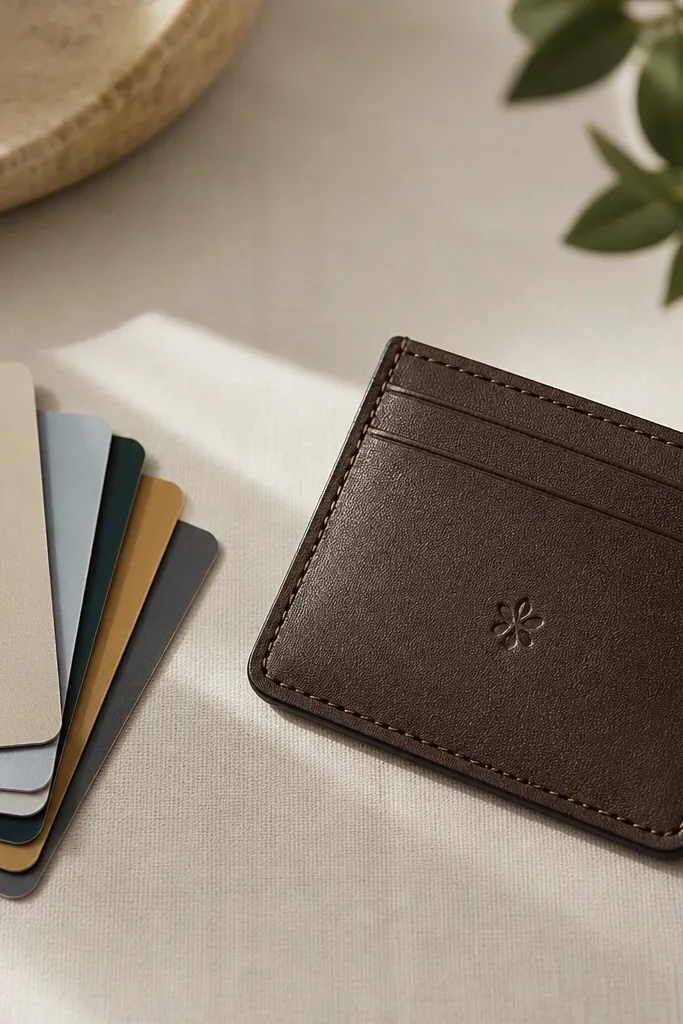
A slim card wallet looks expensive when the embossing is even and the stitching is straight. I use dark brown faux leather with a matte finish so the embossed symbol stands out without glare. The wallet is flattering because it stays flat in a back pocket and doesn’t bulk up his silhouette. It’s perfect for boyfriends who carry just cards, a transit pass, and maybe a small folded bill. The styling principle is slim construction with crisp edges and a clear front mark.
Start by cutting faux leather panels to a finished size — I do about 3.75 inches wide by 4.5 inches tall for a slim profile. Add an inner lining piece from cotton for grip and so the cards slide smoothly. Heat emboss your symbol on the front panel before assembly, then punch stitch holes along the edges with a spacing tool. Stitch the panels together with a strong waxed thread, then burnish edges lightly with a small tool for a cleaner finish.
Practice embossing on scrap first — too much heat dulls the detail.
Avoid thick bulky seams — they make the wallet bulge and look homemade.
20. Handmade Beer Coasters from Cork with Stitched Edge Border
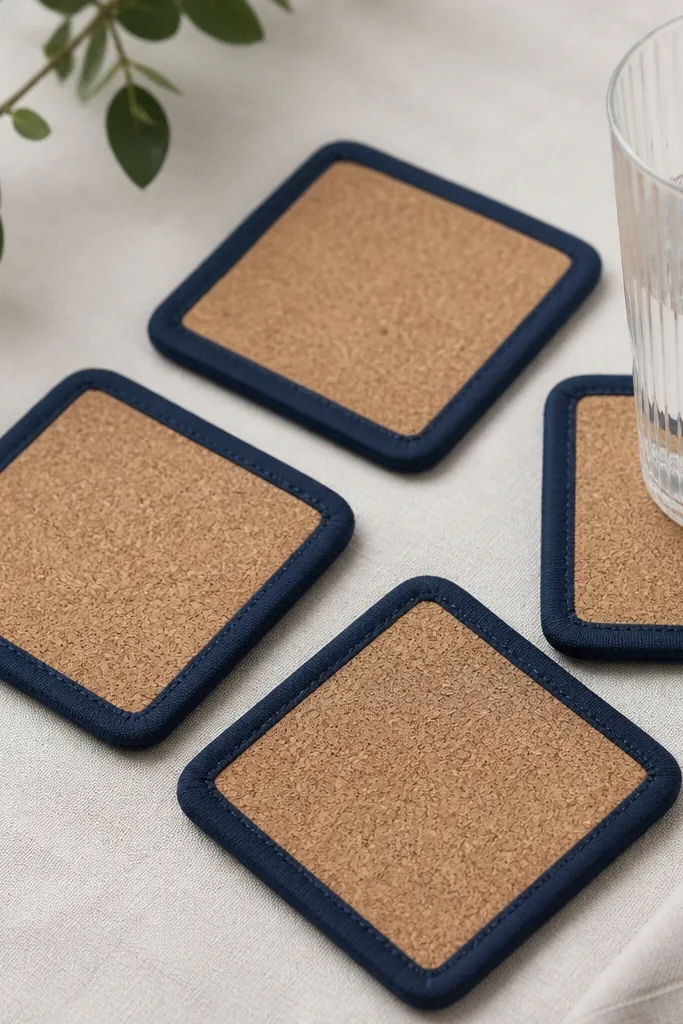
Cork coasters look great because cork has a natural texture and handles condensation better than paper. I frame cork with a stitched fabric border so it looks finished and less like a craft store kit. Navy border fabric over warm cork makes a strong contrast that looks good in photos and in real rooms. It flatters the “practical gift” boyfriend who doesn’t want more clutter but still appreciates a personal touch. The styling principle is texture framing: cork stays functional, fabric makes it look designed.
Start by cutting cork circles to about 4 inches diameter. Cut fabric circles slightly larger and glue or stitch a border ring around the edge. Sew a top border by folding a thin fabric strip over the cork edge and using a tight whip stitch around the perimeter. Let glue cure fully, then test with a cold glass — make sure the border doesn’t lift at the corners.
Use fabric that frays less — tight weave cotton keeps the border neat after washing or wiping.
Avoid soaking cork with lots of glue — it swells and the coaster warps.



