

1. Waxed Thread Leather Key Fob With Brushed Buckle
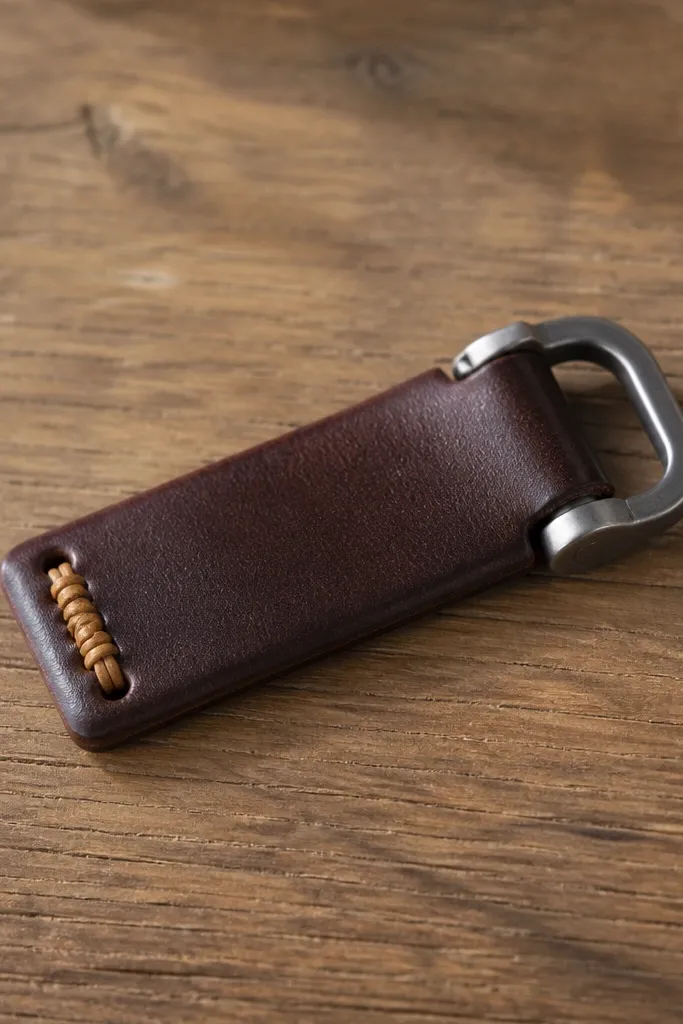
This gift works because keys are the one thing he touches every day, so the fob becomes part of his routine. I use 3-3.5 oz veg-tan leather for a firm body that still folds without creasing. The brushed buckle keeps it from looking flashy, and the waxed thread adds a warm, handmade look that doesn’t unravel. It flatters most styles — casual, workwear, and even minimalist — because the color stays grounded and the stitching is the only contrast.
Editor's noteBefore stitching the final leather, practice the saddle stitch on a 1-inch strip so your tension matches across both passes.
Cut a leather rectangle 3 inches long by 1.25 inches wide. Punch two holes 1/4 inch from the edge on the side where the buckle will sit, then burnish the edges with a scrap of denim and a little beeswax. Stitch the second side with waxed thread using a saddle stitch — go down one hole, up the other, keeping tension even. Attach the buckle with small rivets or Chicago screws, then trim the thread ends and rub a little beeswax over the stitch line so it darkens slightly.
Skip thisAvoid thin leather that flops — it makes the buckle look cheap and the stitching looks uneven.
2. No-Sew Canvas Phone Pocket With Hidden Snap
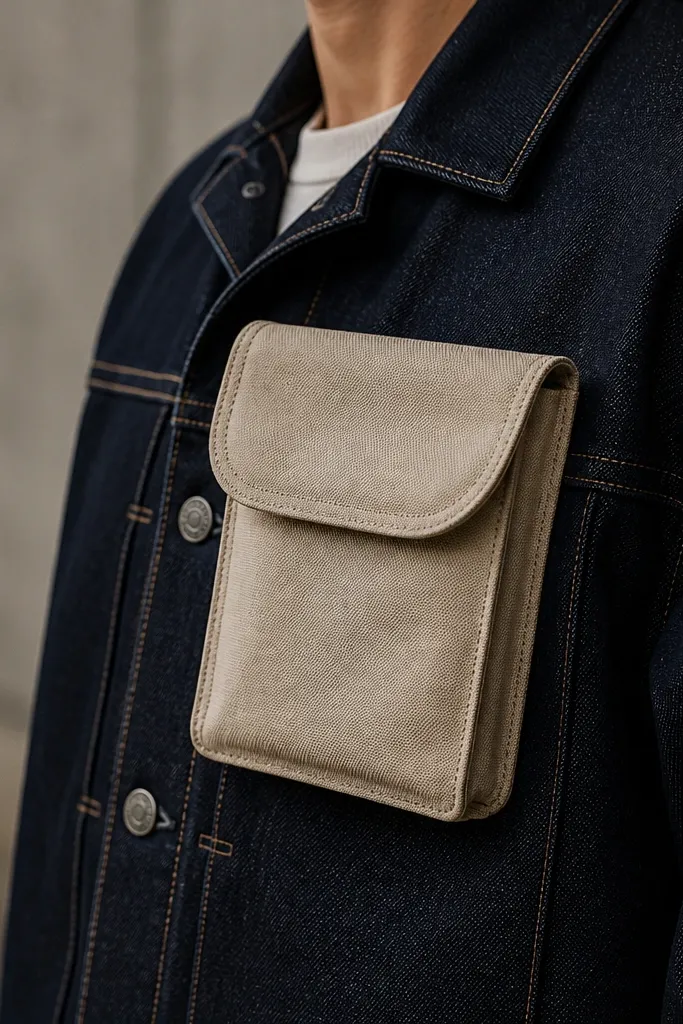
This one is for boyfriends who always lose chargers or keep their phone loose. Canvas holds structure, so the pocket keeps its shape, and the hidden snap makes it look store-bought. I use medium-weight cotton canvas in oatmeal or sand, then bind edges with matching twill tape so it looks sharp up close. The color works on olive, navy, and black jackets, and the snap gives a satisfying click that feels practical, not decorative.
Cut a rectangle of canvas 7 inches tall by 5 inches wide, then fold it in half to make a 3.5-inch pocket depth. Add a flap by cutting a second piece 7 inches by 2.25 inches and positioning it over the top fold. Bind all raw edges with twill tape using fabric glue plus a few straight pins while it dries. Install the snap under the flap so the metal doesn’t show — line up the snap halves carefully, then press firmly with a snap-setting tool.
Test the snap placement with his phone in the jacket first so the flap doesn’t press the screen.
Skip stretchy fabric — it warps the pocket opening and makes the phone sit crooked.
3. Heat-Stained Wood Coaster Set With Cork Backing
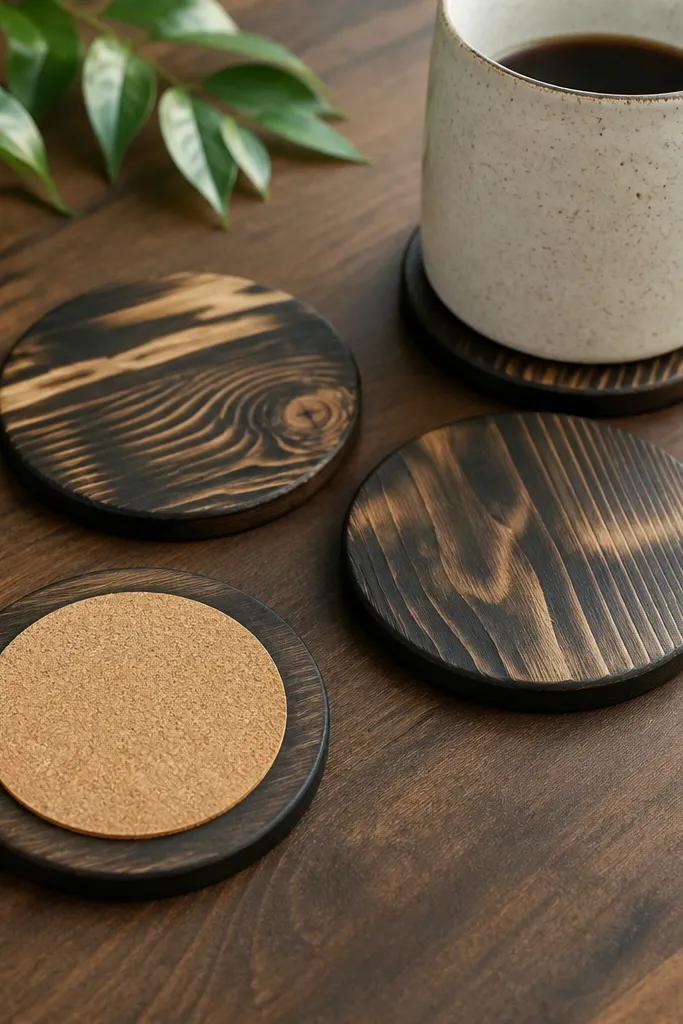
Coasters are one of the only handmade gifts that look better the longer he uses them. I heat-stain the wood grain so it has that subtle “campfire” look — not a uniform stain blob. Cork backing protects furniture and makes the coasters feel solid when he sets a glass down. This is an easy win for boyfriends who host, play board games, or just have a coffee habit.
Editor's noteMake one test coaster scrap first so you learn how long your iron needs for the darkness you like.
Use 4 matching rounds of hardwood, about 4 inches wide and 1/2 inch thick. Sand the tops to 220 grit, then heat-stain with a soldering iron on low — hold it lightly and move constantly so you don’t scorch one spot. Wipe away loose ash with a dry cloth, then apply 2 thin coats of matte water-based polyurethane on top only. Glue cork circles to the bottom with contact cement, let it cure fully, then buff the top lightly with 0000 steel wool.
Skip thisDon’t seal the cork — it reduces grip and makes the coasters slide.
4. Sewn Felt Name Tag Keychain in Block Letters
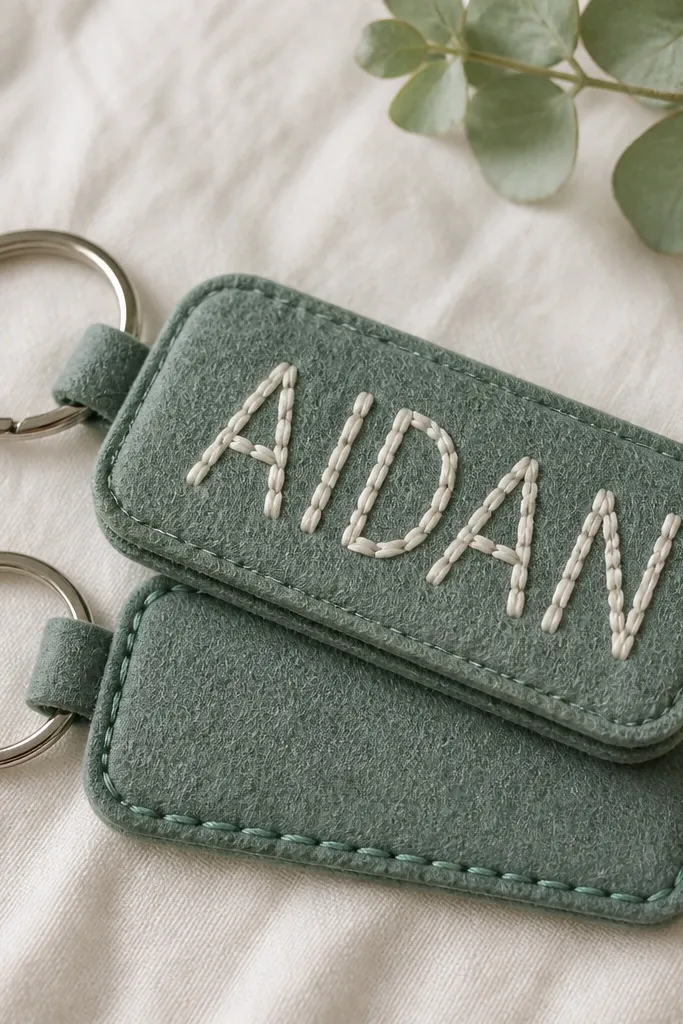
This is the gift for a boyfriend who carries a gym bag or a set of keys everywhere. Felt is forgiving, it doesn’t fray, and it’s easy to make look clean with edge stitching. I use thick craft felt (around 3 mm) so the letters don’t look flimsy, and I choose thread colors that pop without screaming — like cream thread on charcoal felt. The block-letter style reads clearly from a distance and looks good on metal rings and zipper pulls.
Cut front and back rectangles 3.5 inches by 2 inches from felt, then round the corners. Cut letter shapes from felt scraps and pin them on top — keep letters centered with 1/4 inch margins. Stitch the letters down using a straight stitch around each shape, then align front and back and stitch around the perimeter with blanket stitch. Punch a hole at the top center and attach a split ring through a small felt tab so it doesn’t tear.
Use a thicker needle (like 90/14) so your stitches sit flat and don’t pucker the felt.
Avoid thin felt — it makes the letters bend and the edges look ragged.
5. Book-Page Origami Heart in a Glass Bottle Frame
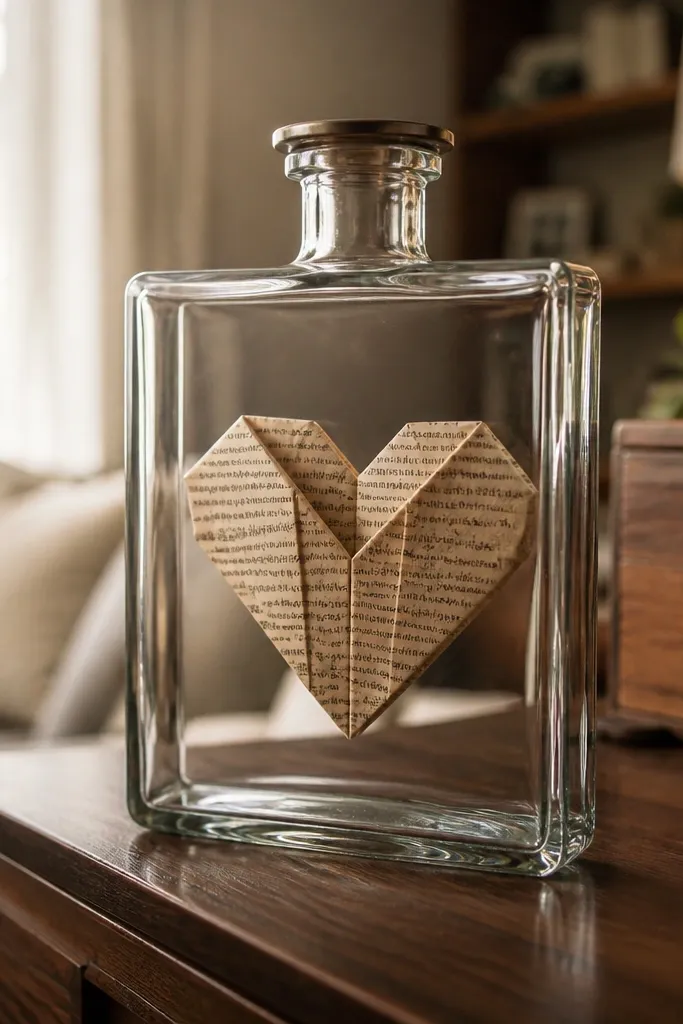
Paper hearts are romantic, but they get cheesy fast. This version looks thoughtful because the heart is “contained,” so it doesn’t flop or crease from handling. I fold the heart from old book pages for a subtle text texture, then keep it behind glass so it stays clean. The bottle frame also makes it a decor piece — it sits like a mini sculpture and catches light at night.
Editor's noteChoose pages with darker print — the heart shows better through glass than pale pages.
Pick a small clear bottle 3-5 inches tall with a wide opening. Fold a paper heart from book pages — keep creases sharp by pressing with a bone folder. Trim the heart edges so it fits inside without forcing it, then insert it gently using tweezers. Tie a thin ribbon around the neck, then seal with a cork stopper so the heart stays centered in the bottle opening.
Skip thisDon’t use glossy paper — it reflects too much and hides the folds.
6. Hand-Painted Ceramic Mug With One-Line Quote Inside Rim
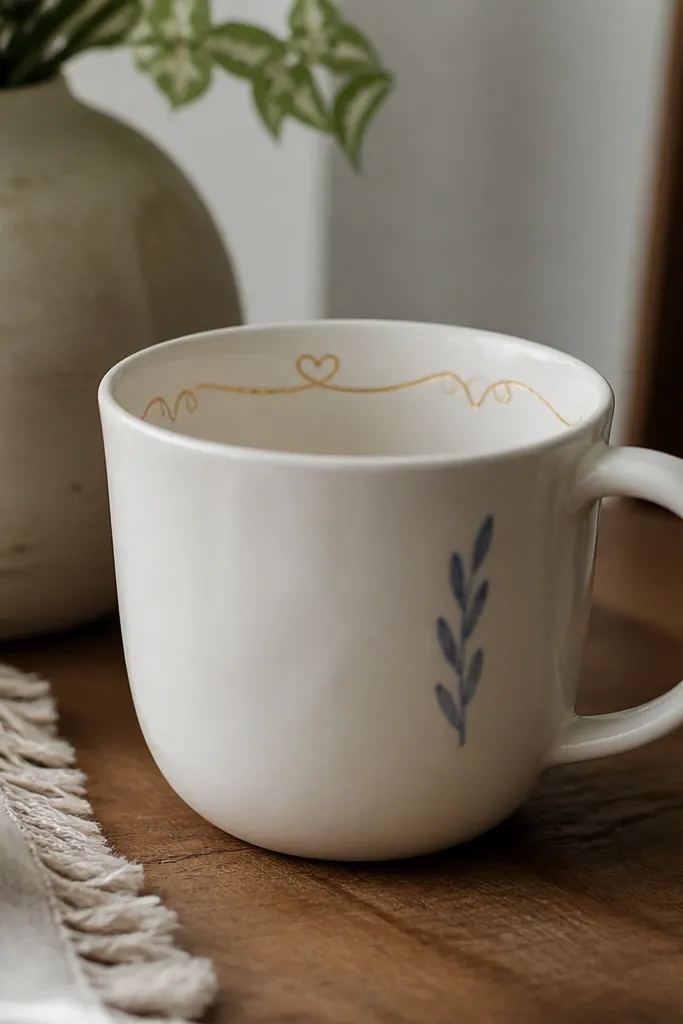
This is a "before and after" upgrade because the inside rim detail is what makes it feel personal without covering the whole mug in clutter. I paint on the outside with a tiny icon only, then put the quote where he reads it daily. The gold inside rim looks warm under coffee light and makes the mug feel fancy even if he drinks from it every day. This fits boyfriends who are sentimental but hate overly loud decor.
Editor's noteWrite the quote on paper first and measure the mug rim circumference so the letters don’t bunch.
Buy a plain white mug with a thick rim. Clean it with rubbing alcohol, then lightly sketch the icon area with a pencil. Use ceramic paint for the outside icon — I like muted slate blue or sage — and keep it small near the handle. Paint the quote along the inside rim with gold ceramic paint, then let it dry and bake according to the brand instructions. After curing, wash once by hand first, then use normally.
Skip thisSkip normal craft paint — it chips after a few washes.
7. Macramé Wall Hanging for His Desk Corner
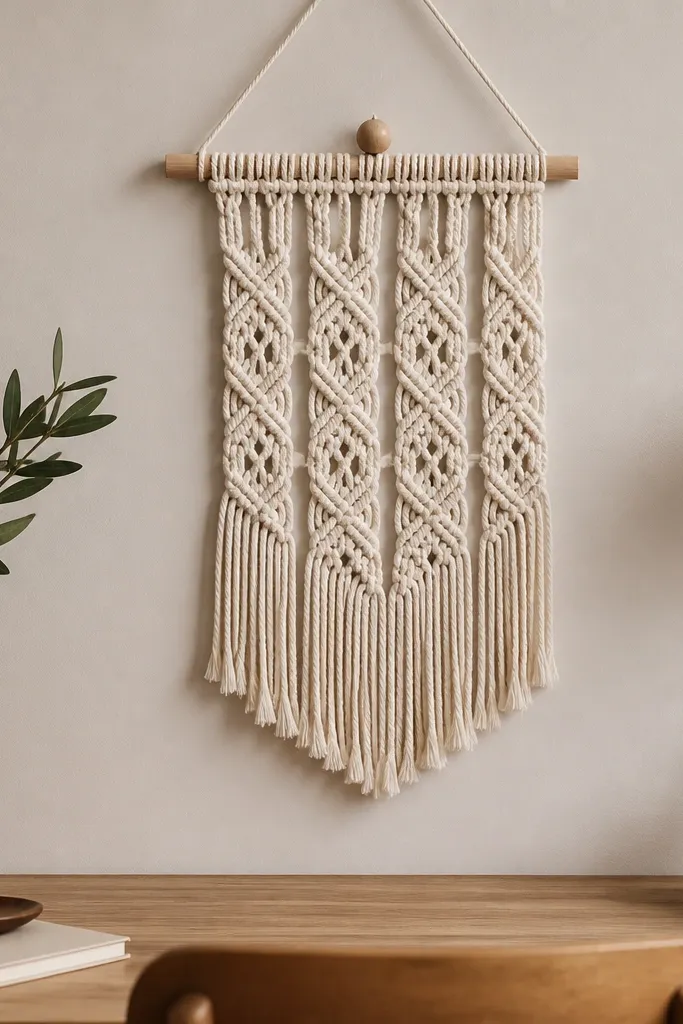
Macramé looks complicated, but a desk-corner size piece is fast and has a big impact. I keep it small — about 12 to 18 inches wide — so it doesn’t swallow the room. The off-white rope makes the corner feel softer and warmer, and the knots create texture that shows in photos. It looks good with dark wood desks, black frames, and neutral bedding colors.
Editor's noteUse a clipboard or painter’s tape to hold the dowel steady while you knot so the lines stay straight.
Cut 8 to 10 cords at 3.5 feet each for a medium fringe length. Attach cords to a dowel using a lark’s head knot, then separate into groups for your knot pattern. Do half square knots in rows so the center stays straight; keep spacing consistent by using a ruler as a visual guide. Add one small wooden bead near the top by threading it onto a center cord group before finishing the row. Finish with a simple trim — comb fringe lightly with fingers to even it out.
Skip thisDon’t use super fuzzy rope — it hides knot definition and looks messy.
8. Stitched Photo Strip With Clothespin Display
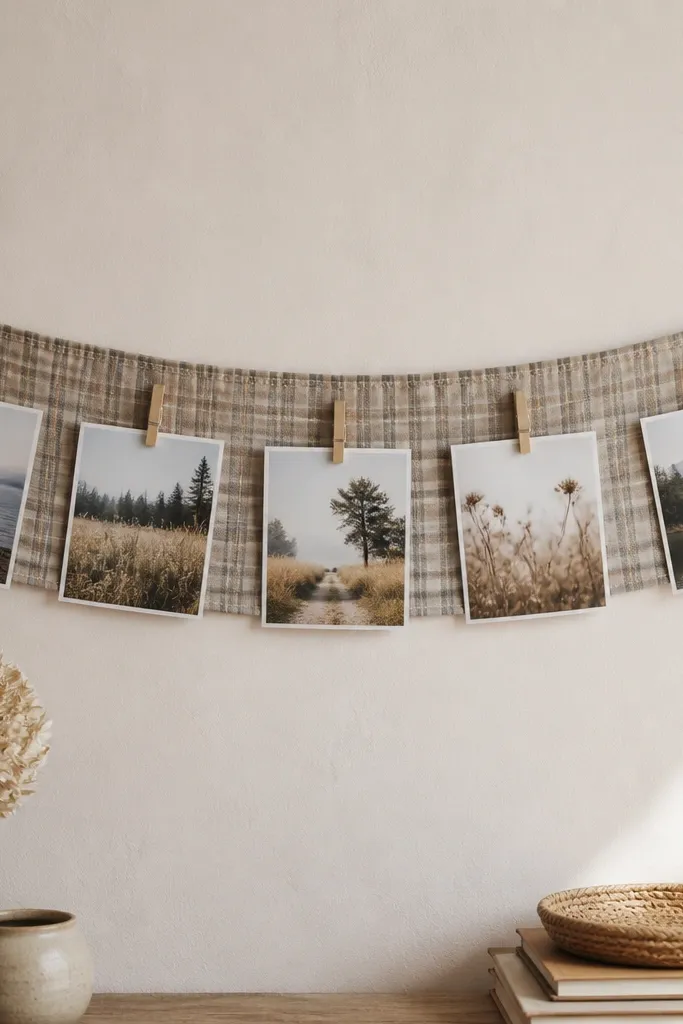
This one feels like a gift and a system. He can swap photos without you remaking the whole thing, and the clothespins keep everything casual instead of gallery-stiff. I use a fabric strip with a pattern that isn’t too loud — muted plaid or small gingham — then stitch a channel at the top for easy hanging. It works for boyfriends who like shared memories but don’t want “frames everywhere.”
Editor's notePrint photos with a small white border — it makes the clothespins look neater and hides slight cropping differences.
Cut fabric 18 inches long by 8 inches tall, then hem the sides. Fold a 1-inch channel at the top and stitch it down, leaving space for a hanging cord. Arrange photos in a line — I use 2.5 x 3.5 inch prints — and mark clothespin positions every 3 inches. Clothespin the photos to the fabric strip, then stitch a simple border or top seam so the strip looks finished even when photos change. Hang it with two nails through the channel string ends.
Skip thisAvoid flimsy fabric that wrinkles — it makes the pins look crooked.
9. Macaron-Color Candle Labels for His Night Stand
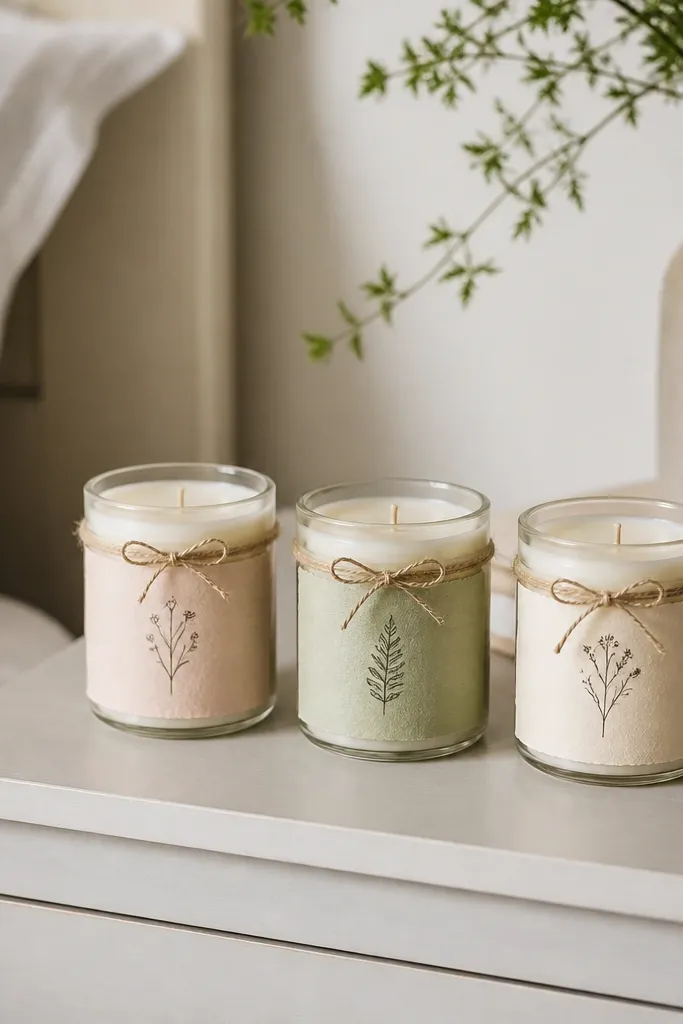
This gift works when you want “decor” without building a whole candle. I buy plain candles, then customize labels so it looks like you made the intention, not just the packaging. Pastel labels look cute on warm wood nightstands and don’t clash with bedding because you keep icons small. The best part is the label design becomes a ritual — he sees it every night when he lights the candle.
Editor's noteUse matte spray, not glossy — glossy makes the paper look cheap under warm bulbs.
Choose three candle scents he actually likes. Cut label paper 2 inches tall by the circumference of the jar, then add a 1/2 inch overlap for gluing. Print or hand-letter one word per candle — like “Rain,” “Coffee,” “Clean Air” — and add a tiny icon in the corner. Wrap the label around the jar, glue the overlap, and add a thin twine bow at the back so it hides the seam. Seal the paper with a light coat of matte spray so it doesn’t smear when he handles it.
Skip thisSkip thick glitter lettering — it catches light unevenly and looks messy.
10. Leather Watch Strap Roll-Up Travel Case
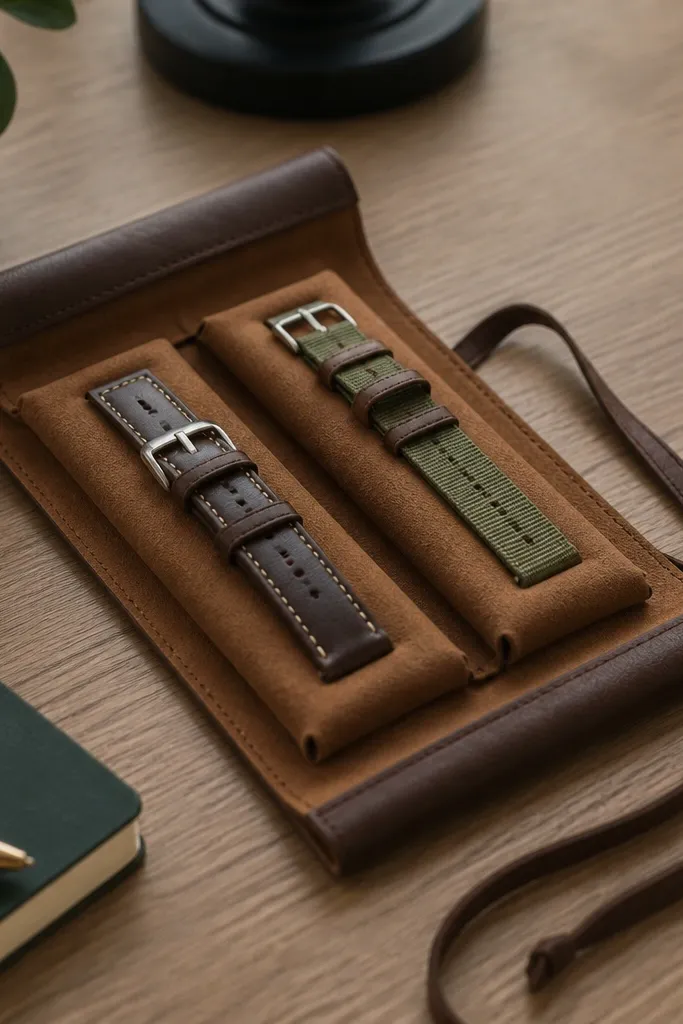
If he wears a watch, this is the kind of gift he uses immediately and doesn’t forget. A roll-up case protects straps from tangling, and the leather exterior looks clean in any bag. I line it with a soft suede-like fabric so metal hardware doesn’t scratch. The roll closure also keeps it compact, which matters when you travel or toss it into a backpack.
Cut leather pieces into a rectangle 10 inches wide by 8 inches tall, then fold to create two strap pockets. Cut two inner padding panels from felt or thin foam, about 9 inches by 3.5 inches each, and glue them to the lining. Add a lining layer from suede-like fabric and stitch the edges with a 1/8 inch seam. Punch holes at the roll end for a tie, then attach a leather tie strap. When closed, the tie should wrap snugly without compressing the straps too hard.
Measure his strap length first and leave 1 inch extra so he can roll it without bending the clasp.
Avoid hard lining — it makes the roll bulky and straps scrape against it.
11. Handmade Mini Desk Catchall Tray From Air-Dry Clay
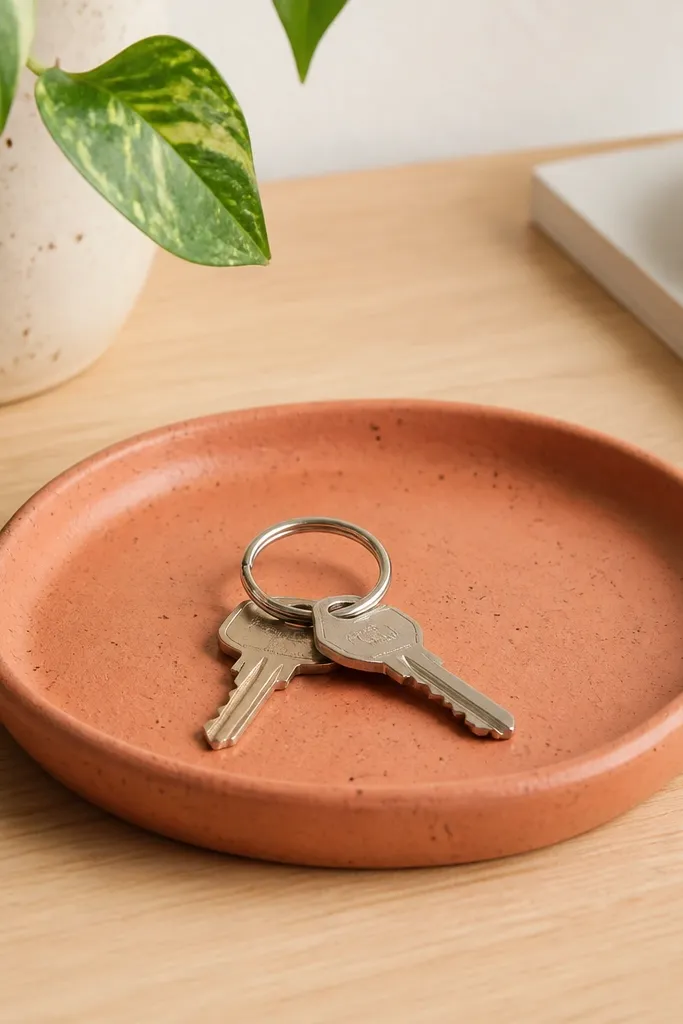
This is the gift that quietly changes his day. A catchall tray keeps small stuff off the desk — coins, earbuds case, a watch winder remote — and it looks good while doing it. I work with air-dry clay because it lets you shape a lip that actually catches items, not just a flat dish. Terracotta tones look warm next to black keyboards and dark wood shelves.
Editor's noteMake it slightly thicker than you think — thin trays crack at the rim after sealing.
Roll out air-dry clay to about 1/4 inch thickness, then press it into a small bowl mold to create the base. Flatten the rim slightly so it forms a lip, then smooth the top with a damp sponge. Let it dry until fully hard — I wait at least 48 hours in a dry room. Sand lightly with 220 grit, then seal with a matte ceramic sealer in 2 thin coats. Optional: stamp a small symbol on the side with a metal cookie cutter or bottle cap for a personal mark.
Skip thisDon’t skip sealing — unsealed clay stains from oils and water rings.
12. Stained Map-Print Canvas Tote With Heat-Fixed Transfer
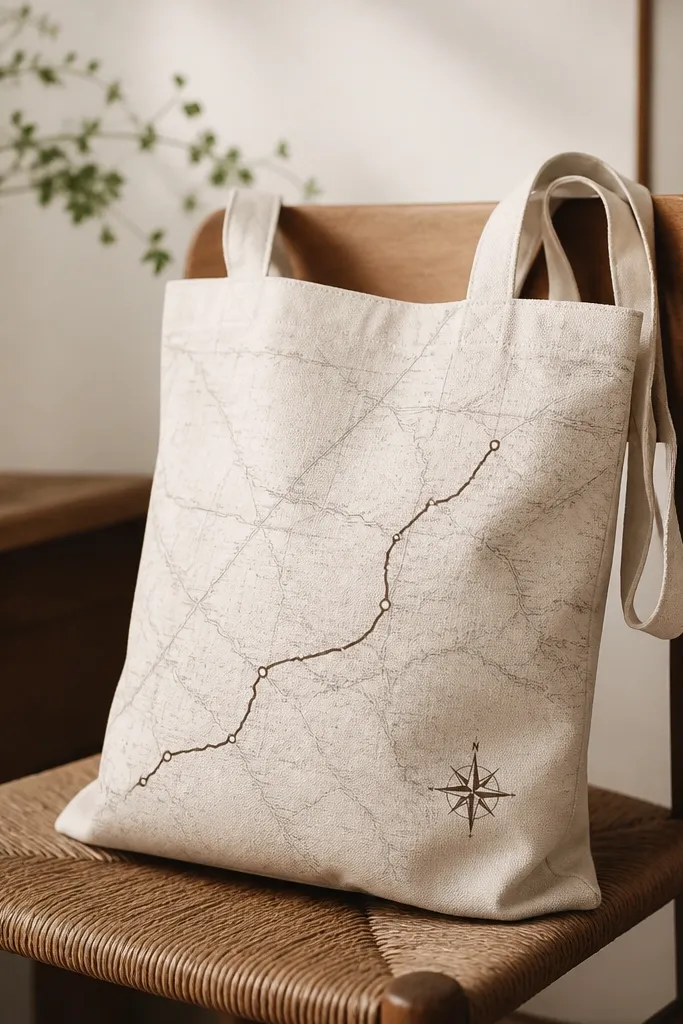
This tote makes the “before and after” effect obvious because the final print looks like it was part of the fabric. I use map-style paper or a map graphic transfer, but I don’t slap it on top — I stain the canvas lightly first so the transfer blends into the weave. The result looks vintage without being worn-out. It’s great for boyfriends who commute, travel, or carry books — the bag holds shape and the print stays readable.
Editor's noteUse a single-color transfer — brown or navy — so the tote looks clean even when the canvas wrinkles.
Wash and dry the canvas to remove sizing. Lightly stain the canvas with diluted coffee or tea using a sponge — stop when it looks like a soft haze. Transfer your design onto parchment paper, then use a heat press or iron with firm pressure and time per your transfer paper instructions. After cooling, seal the transfer with a fabric medium so it doesn’t crack when he folds the tote. Add a simple strap reinforcement by top-stitching along the strap seams for extra durability.
Skip thisAvoid high-detail transfers — tiny lines blur on canvas texture.
13. Handmade Scrabble-Tile Coaster With Numbered Grid
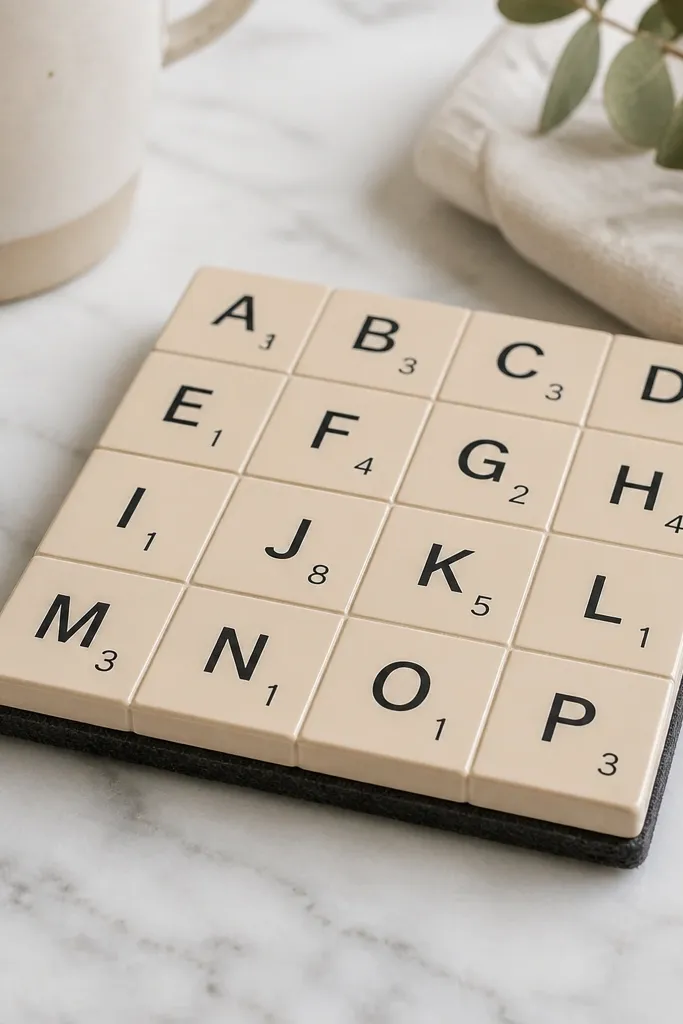
This gift hits the sweet spot for a nerdy boyfriend who likes games but also hates clutter. The coaster is small, functional, and it looks like a real object, not a craft glued together. I use tiles with clear printed characters and arrange them into a pattern that feels intentional — like a 3x3 grid or a diagonal word. It also makes a great “we play together” gift because the letters are right there when he sets down a drink.
Editor's noteChoose a grout color close to the tile background — the grid looks crisp instead of messy.
Pick 9 square tiles for a 3x3 design. Arrange them on a flat board, then dry-fit with small spacers so gaps look even. Glue tiles onto a thin backing board with strong craft adhesive, then grout the seams with a tinted acrylic grout or a paintable filler. After it cures, sand the surface lightly so tiles sit flush and edges are smooth. Attach a felt square or cork sheet to the bottom with contact cement to stop sliding.
Skip thisAvoid thick glue ridges — they make coasters wobble.
14. Satin Ribbon Bookmark With Stitched Tassel and Initial
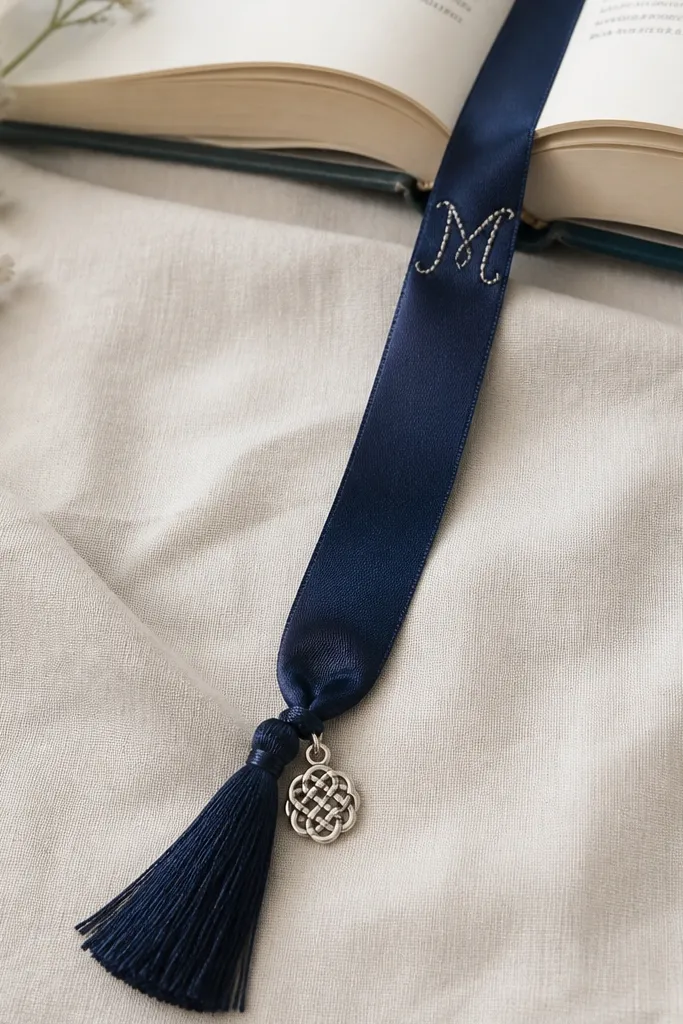
Bookmarks are underrated as handmade gifts because they’re personal without being heavy. Satin ribbon looks smooth and expensive, and the tassel adds movement when he pulls the book open. I stitch the initial instead of printing it because stitched letters survive friction better. This suits boyfriends who read at night or carry books in a bag — the ribbon lays flat and the tassel doesn’t snag pages.
Editor's noteUse a low-heat iron on a cloth to flatten the ribbon before you stitch so it doesn’t ripple.
Cut satin ribbon 12 inches long and 1 inch wide. Fold one end to make a clean top edge and stitch across it to form a small anchor seam. Cut a tassel from matching embroidery floss or thin thread — wrap around a card, tie one end tightly, then trim to even lengths. Stitch the initial near the top using a backstitch or simple running stitch with metallic thread. Attach the tassel to the bottom stitched seam, then finish with a tiny metal charm if you want the weight.
Skip thisAvoid bulky tassels — thick ones catch on pages and feel annoying.
15. Tie-Back Candle Sleeve With Embroidered Coordinates
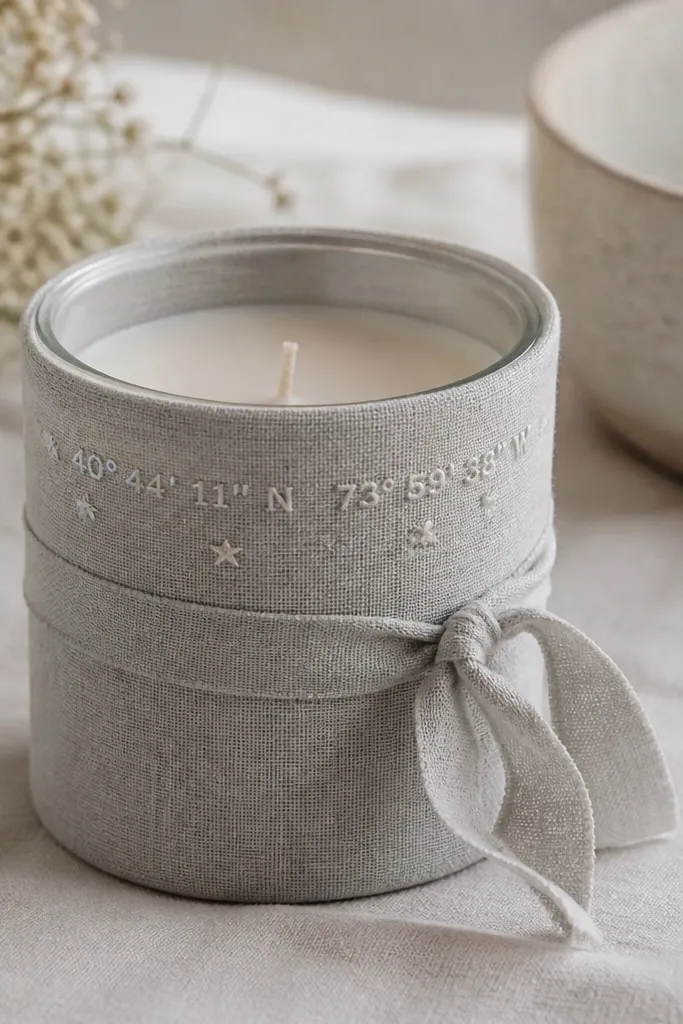
This is romantic in a quiet way because it gives a place to a memory without spelling out a whole story. I use linen because it looks natural and doesn’t cling to the jar like thin cotton. The tie-back ribbon lets him remove the sleeve and reuse it later, which keeps the gift from feeling disposable. It’s perfect for boyfriends who like subtle details and don’t want loud hearts everywhere.
Editor's noteUse a water-soluble fabric marker to place the coordinates, then stitch over it and wash the marks out.
Cut linen fabric to a sleeve size: wrap it around the jar with a 1/2 inch overlap, then cut height about 1.5 inches taller than the jar label area. Hem the bottom and stitch a casing near the top for a ribbon tie. Embroider the coordinates or a short date near the top — keep it small, about 1.5 inches wide. Wrap the sleeve around the jar and tie the ribbon into a bow on one side. If you want extra polish, add a single top seam where the overlap sits so it lines up cleanly.
Skip thisAvoid synthetic fabric sleeves — they melt or warp when the candle gets warm.



