

1. Waxed Canvas Key Clip with Brass Snap
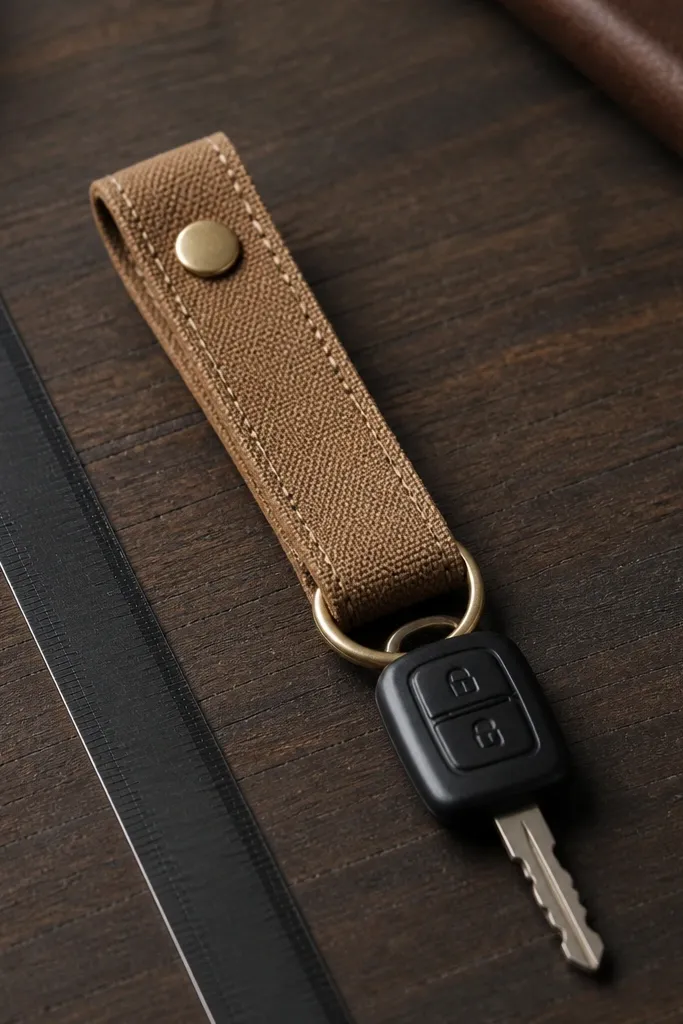
This is one of my favorite handmade gift ideas because it upgrades something he already carries. Waxed canvas has a matte, slightly mottled surface that looks better the more it breaks in, and brass hardware adds that warm, old-school feel without going flashy. I’ve made versions in tan, olive, and charcoal; tan looks best against black key fobs, olive looks great with brown leather wallets. It works for anyone, but it especially looks sharp for guys who wear jeans or boots because the canvas texture matches that rugged vibe. The styling principle is contrast: canvas stays neutral while the brass snap is the only shiny element.
Cut a rectangle of waxed canvas 5.5 in by 3.25 in, then fold it lengthwise so the clip sits flat against his keys. Mark a 1 in wide placement for the brass snap on the folded edge, then punch holes with a snap setter kit. Stitch around the edges with heavy thread (waxed thread or button-and-carrier thread) using a simple straight stitch, keeping the seam allowance consistent. Attach a short leather strap loop on the back side so keys hang without twisting. Finally, rub the canvas with a thin layer of beeswax or wax balm and buff — it darkens slightly and makes the finish feel “set.”
Use the snap kit even if you think you can “eyeball it” — alignment is what keeps it from looking homemade in a bad way.
Skip flimsy thin canvas and plastic snaps; they make the clip look like a craft project instead of a real accessory.
2. Felted Wool Coaster Set in Two-Tone Stripe
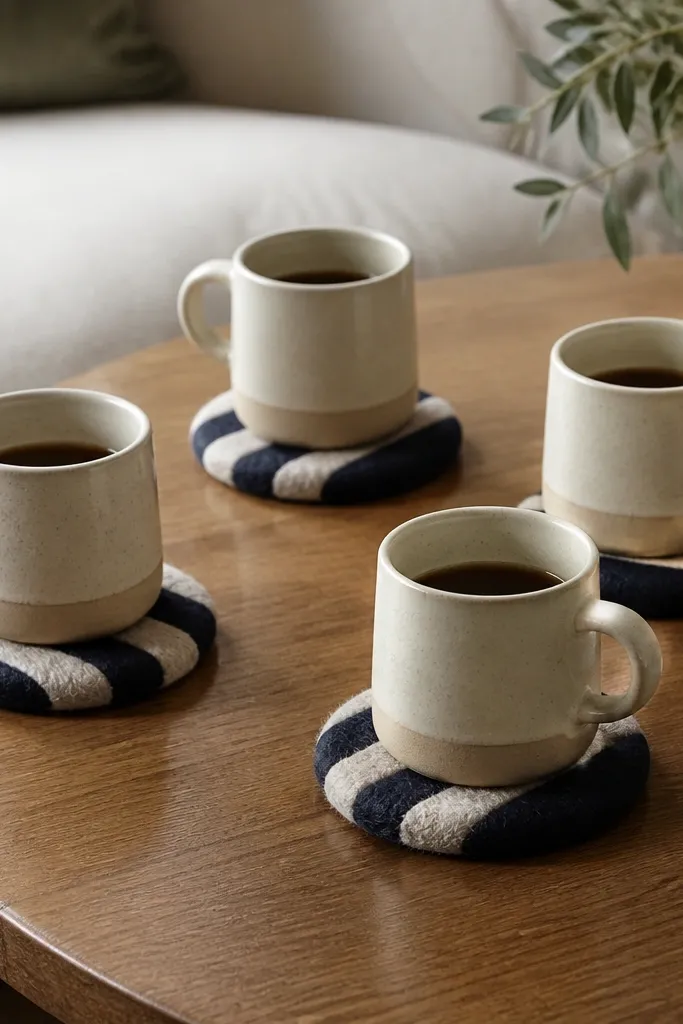
If you want a handmade gift that looks expensive but is low stress, felted wool coasters are it. The felt surface is dense and absorbs condensation without soaking through, so they feel practical right away. Two-tone stripes look clean because the color boundary is crisp and visible from across the room. I’ve used navy and oatmeal, forest green and light gray, and charcoal with cream; navy-and-cream gives the most “giftable” look. This also flatters different home styles — modern because the stripes are simple, and traditional because wool reads cozy. The styling principle is shape consistency: keep every coaster the same diameter and thickness so the set looks intentional.
Pick wool roving in two colors and felt it into a flat round using a resist pad (I use a piece of bubble wrap with a thin towel over it). Lay the first color roving in a circle, then add the second color as a single stripe band around the middle, keeping the fibers overlapping evenly. Wet with hot water and a little soap, then roll gently with your hands for a minute, switching pressure sides so it compacts. Once firm, cut circles using a 4 in template and keep felting until edges stop shedding. Let them dry flat, then lightly brush the surface with a soft nail brush to smooth the nap.
Make a batch of 6 even if you’re gifting 4 — you’ll catch any wonky ones and still have a full set.
Don’t skip the edge trimming; fuzzy, uneven edges look messy and cheap on felted items.
3. Carved Wooden Spoon for Stirring and Serving
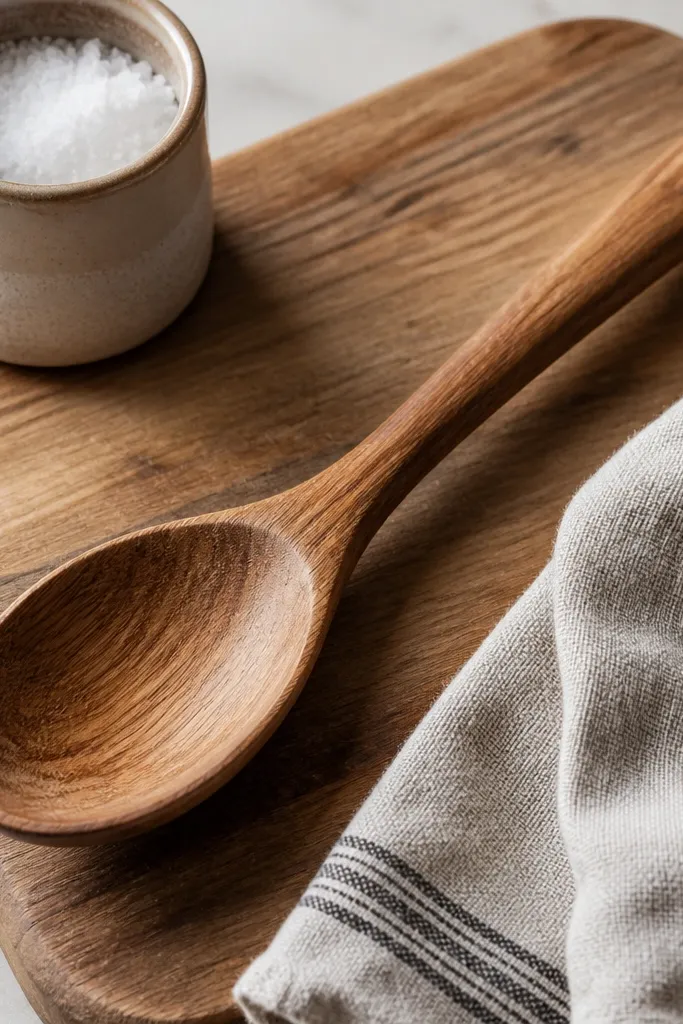
Start with a 3/4 in thick block of maple or beech, about 10 in long. Sketch a spoon bowl about 2.25 in wide and a handle that’s 1 in wide at the top, tapering to 3/4 in near the end. Carve the bowl first with a small gouge, then refine the handle with a chisel and sandpaper down to 220 grit. Burnish the surface with a cloth so it feels silky, then seal with food-safe oil in thin coats (I use mineral oil plus a beeswax blend). Let it cure overnight before wrapping in paper so the oil doesn’t smear.
A wooden spoon is one of the few handmade gift ideas that feels useful every single week. I like carving spoons from maple or beech because they finish smooth and don’t look too rustic. The best look is a spoon with a slightly deeper bowl and a handle that narrows toward the end — it feels balanced in the hand. For color, I keep it natural with a light oil finish so the grain catches warm kitchen light. This gift suits guys who cook, but it also lands with people who “only make pasta and toast” because they’ll use it without thinking. The styling principle is comfort: the grip shape matters more than fancy carving patterns.
Skip thisDon’t use paint or stain; it flakes where the spoon touches food.
Editor's noteSand the handle edges slightly rounded — sharp corners catch splinters and ruin the “gift” feel.
4. Photo Transfer Map Print with Simple Black Frame
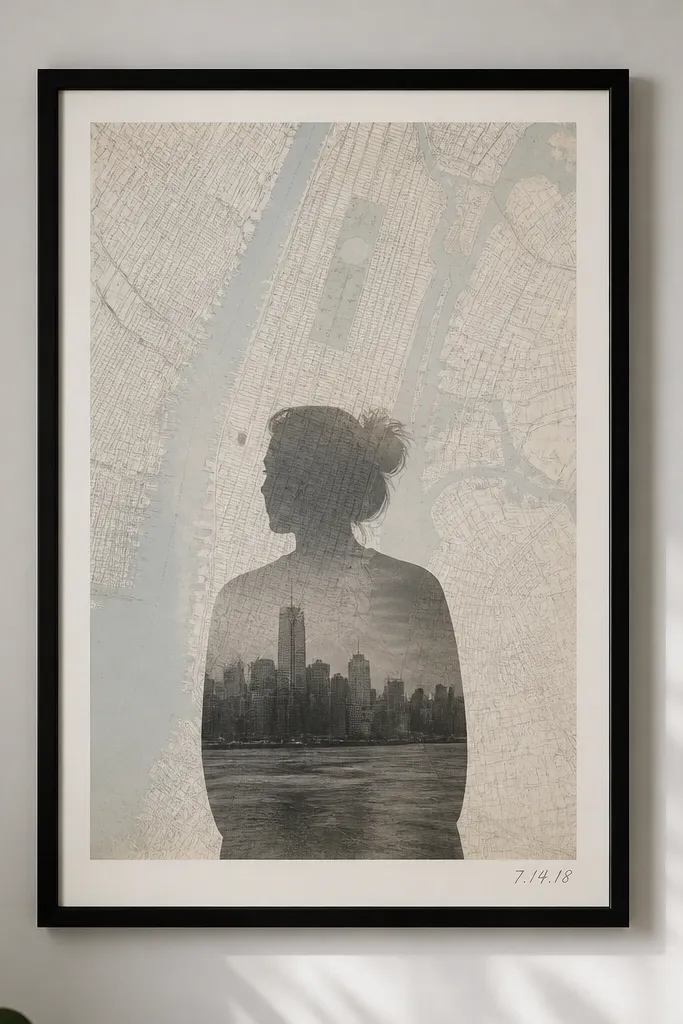
Choose a photo printed on laser paper (inkjet can smear) and trim it with a clean border. Transfer onto a map sheet using a photo transfer medium or gel medium — brush a thin layer, place photo face down, press firmly, then let it dry. Wet and rub off the paper backing slowly until you see the image, then seal with a matte acrylic clear coat. Cut the final print to fit an 8x10 frame with a white mat if you want extra breathing room. Write the date or a short location note using a fine pen in the bottom corner and keep it small.
This is a DIY gift that looks thoughtful without yelling for attention. I’ve used photo transfer onto map paper because the texture makes the image feel layered and personal, but still clean when framed. A simple black frame keeps it modern and stops the print from looking like a scrapbook page. It works best if you pick one photo with strong contrast — a portrait, a skyline, or a moment with clear shapes. The result flatters guys who like minimalist decor because the palette stays mostly muted. The styling principle is restraint: one photo, one map tone, one small date mark.
Skip thisAvoid glossy sealers; they create glare that hides the transferred texture.
Editor's noteTest one transfer on scrap first; the drying time changes how much paper you can rub away.
5. Leather Wrap Bracelet Keychain (Wearable)
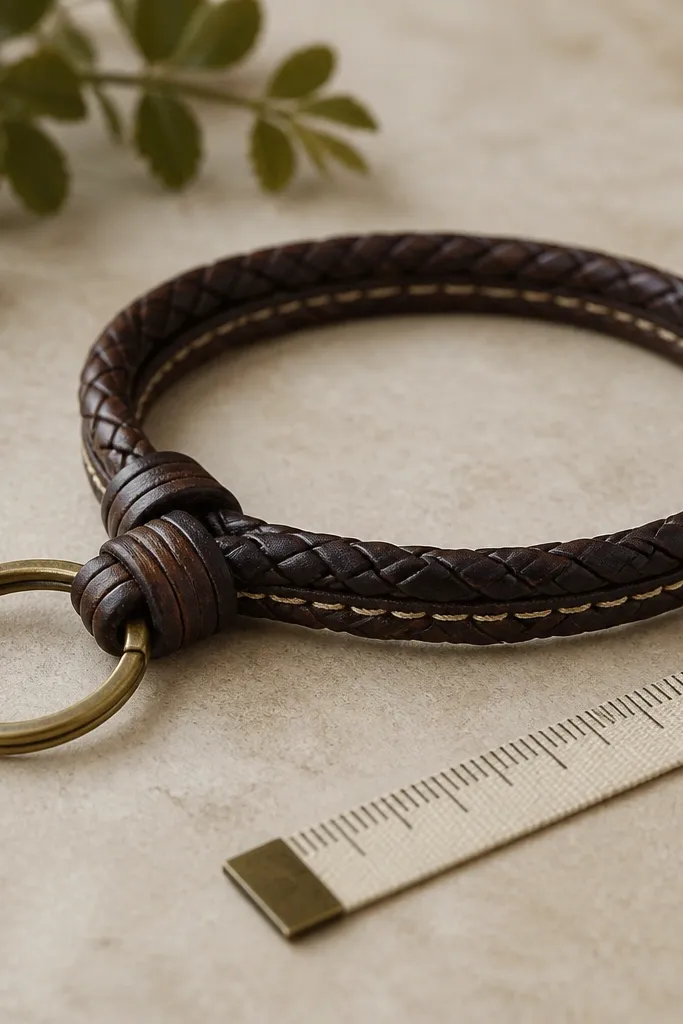
Cut two leather strips 12 in long and about 3/4 in wide, then skive one end slightly for a clean overlap. Punch holes along the edge for a saddle stitch using a spacing wheel or marked template. Wrap around a wrist form (or his wrist measurement plus 1/2 in) so it sits comfortably, then stitch the overlap. Install a small snap or tie-off loop so the bracelet closes without slipping. For the key ring, rivet or stitch a leather tab at the back where it won’t snag — keep the key ring centered and flat.
This is one of the more fun handmade gift ideas because it blurs the line between accessory and practical tool. Dark brown leather reads warm against most skin tones and looks good with watches and rings. I like a wrap bracelet style because it sits flat and doesn’t twist in his pocket. Add a small key ring and he can clip it to his belt loop or grab it when he leaves. It looks best when you keep the hardware minimal — one ring, one small snap, no extra charms. The styling principle is repetition: the same stitch line and wrap angle should show up across the whole piece.
Skip thisDon’t add too many holes; it turns the leather into swiss cheese and weakens the wrap.
Editor's noteBurnish the edges with canvas and a bit of edge dressing so it looks store-bought.
6. Embroidered Sweatshirt Name Patch with Heat-Activated Backing
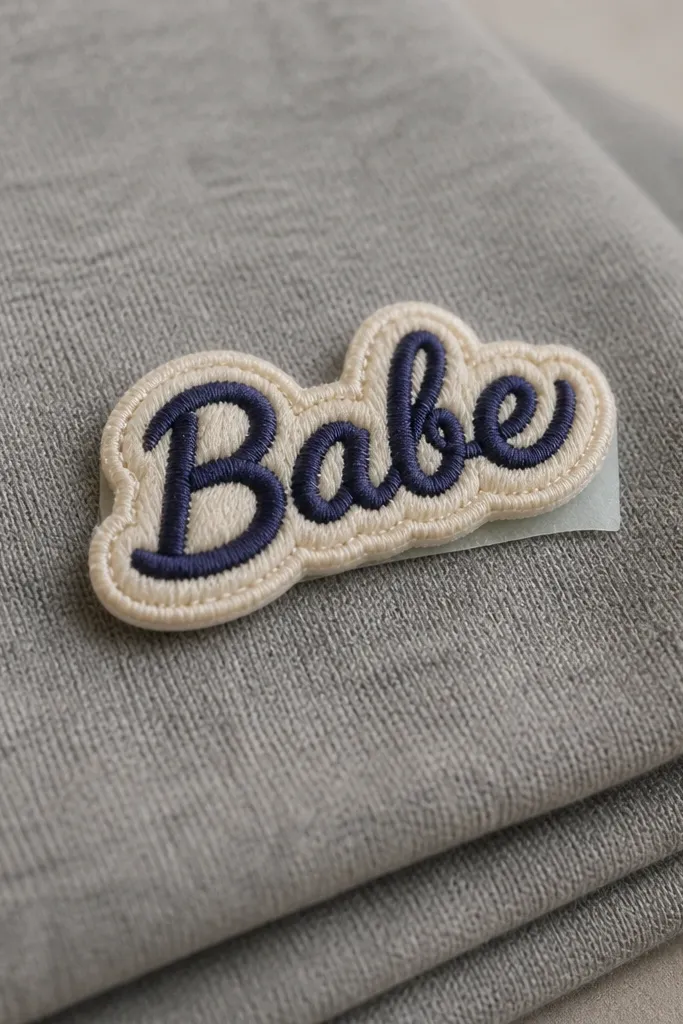
This gift works because it upgrades a piece he already owns. Embroidered patches look sharp, especially when the thread color matches the sweatshirt shade by one step (light thread on dark fabric, dark thread on light). I’ve done clean block letters in black on heather gray, and a script version in deep green on navy. The heat-activated backing makes it feel secure and neat, and the patch sits flat instead of curling like some sew-on crafts. It’s flattering for guys who wear hoodies constantly because it makes the hoodie look intentional. The styling principle is scale: keep the patch small enough to look like design, not a costume.
Choose a sweatshirt he already wears, then decide patch size: about 3.5 in wide for a name. Embroider on fabric backing using a simple satin stitch for letters, then trim close with a 1/8 in margin. Apply heat-activated interfacing or iron-on backing to the back of the patch following the product instructions. Position the patch on the chest area 2-3 in below the collar seam, centered, and protect the fabric with a thin pressing cloth. Iron with steady pressure for the full time, then let it cool flat before wearing.
Use a pressing cloth and don’t slide the iron — you’ll smear the backing and the patch edge lifts.
Skip glitter thread; it looks scratchy and sheds when washed.
7. Desk Coaster Tray from Concrete Mold + Color Wash
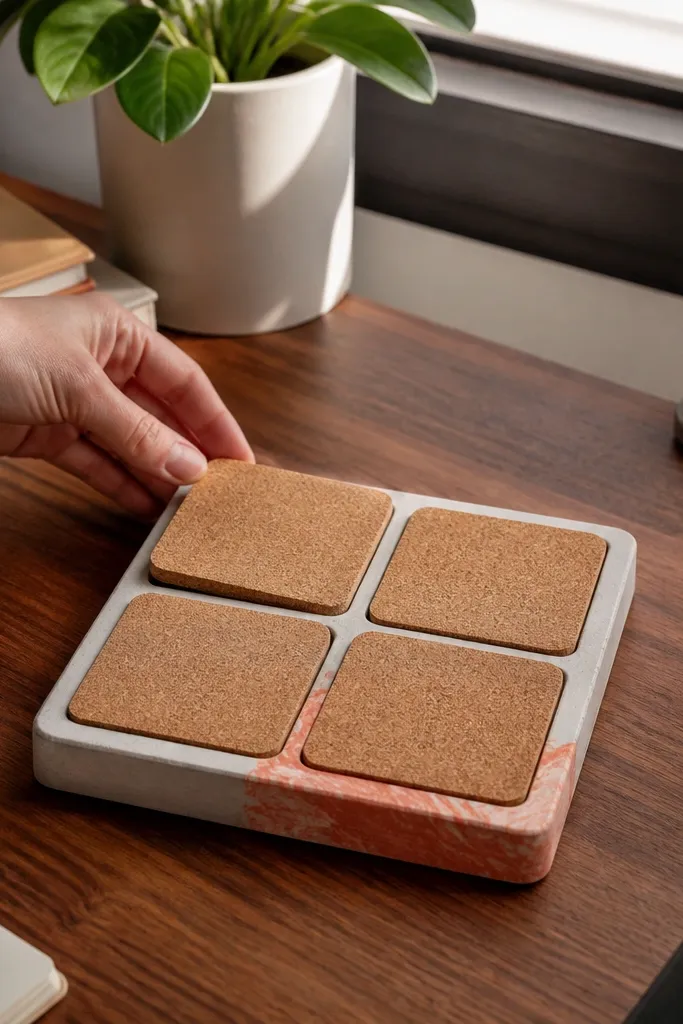
Use a silicone mold for a shallow tray and coaster set, or improvise with small casting forms. Mix concrete with the right water ratio until it’s thick like cake batter, then pour and tap the mold to pop air bubbles. For color wash, wipe a small amount of diluted acrylic pigment into the tray corner before it sets, keeping the wash thin. Let cure at least 24-48 hours, then pop out and sand edges lightly with 220 grit. Seal with a concrete sealer (matte) so it resists stains from drinks.
Concrete accessories look bold and clean on a desk, and they last. I make a small tray because it stops coasters from sliding around and it gives the set a finished look. The trick is color wash: keep the concrete mostly light gray, then add a thin terracotta or olive wash in one area so it looks designed, not messy. This gift is great for boyfriends who work at a desk and leave condensation rings everywhere. It also photographs well because the matte surface kills glare. The styling principle is weight and order — one tray keeps everything in place.
Skip thisDon’t cast too thin; thin concrete chips at edges the first time it drops.
Editor's noteSeal twice — the second coat makes it feel smoother and easier to wipe clean.
8. Stitched Denim Phone Wallet with Magnetic Snap
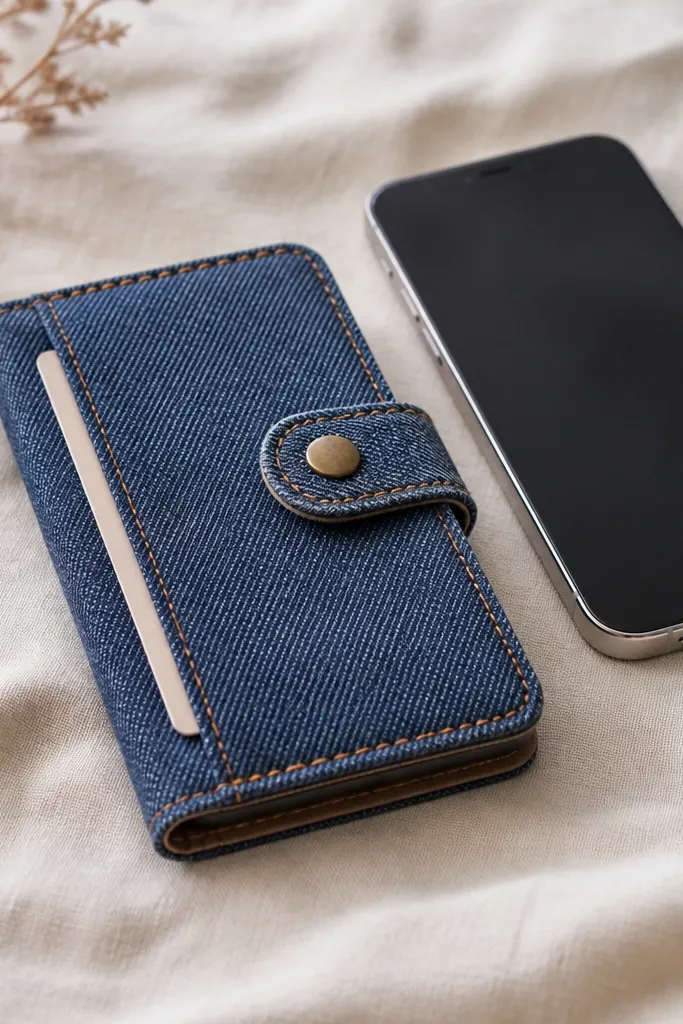
Cut denim pieces: main pocket 7.5 in by 6.5 in, card slot panel 7.5 in by 3 in, and a fold flap 7.5 in by 2.5 in. Sew the card slot panel to the inside of the main pocket with a 1/4 in seam, then fold the flap and stitch along the edges for a clean frame. Install a magnetic snap by marking placement, punching holes, and setting the snap halves with pliers. Test with his phone before final stitching — aim for a snug fit so it closes without forcing. Topstitch around the perimeter using a straight stitch and keep corners crisp.
A denim phone wallet is one of those handmade gift ideas that he uses immediately. Denim holds its shape, hides wear, and looks better as it softens. I like using medium-wash denim with contrast topstitching in off-white or tan because it reads “intentional.” Add a magnetic snap for quick access and a single card slot so it stays slim. This is flattering for guys who carry a phone and maybe one card — it keeps pockets from bulging. The styling principle is slim layering: one main pocket, one card slot, no extra bulk.
Skip thisDon’t choose a snap that’s too strong — it will pinch the lining and make the wallet warp.
Editor's noteUse a heavier needle (like size 90/100) for denim so stitches stay tight and don’t skip.
9. Hand-Poured Soy Candle in Recycled Bottle with Label Map
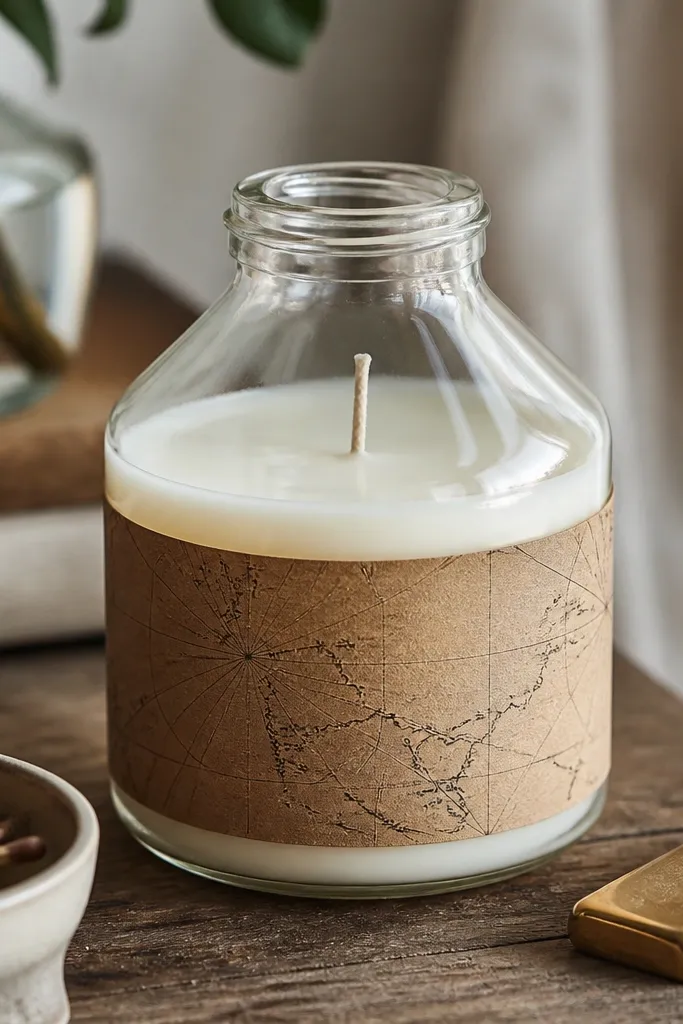
Clean and dry the bottle, then secure a wick centered on the bottom using a wick sticker. Melt soy wax in small batches and pour at the recommended temp for your wax brand so it doesn’t cause sinkholes. Add fragrance oil off heat, stir slowly for 1-2 minutes, then pour into the bottle. Make a paper label with a thin border and a map or street name, then attach with a strip of clear tape so it’s removable. Let cure 48 hours and trim the wick to 1/4 in before lighting.
Candle gifts feel personal when the container looks cool even without the flame. I pour in recycled bottles because the glass shape already has character, and soy wax looks smooth and creamy. The label can be a tiny map of where you met or a simple street name, printed small on kraft paper. Scent matters: I stick to one strong note like cedar, tobacco, or coffee, then add a second soft note like vanilla or amber so it doesn’t smell like air freshener. This works for boyfriends who like their space to smell good but don’t want perfume. The styling principle is controlled scent — one clear profile, not a complicated blend.
Skip thisDon’t overfill — wax shrinkage causes sink marks and makes the top look uneven.
Editor's noteDo a small test pour in a jar first if you’re unsure about the scent strength.
10. Knotted Rope Mug Holder for Kitchen Counter
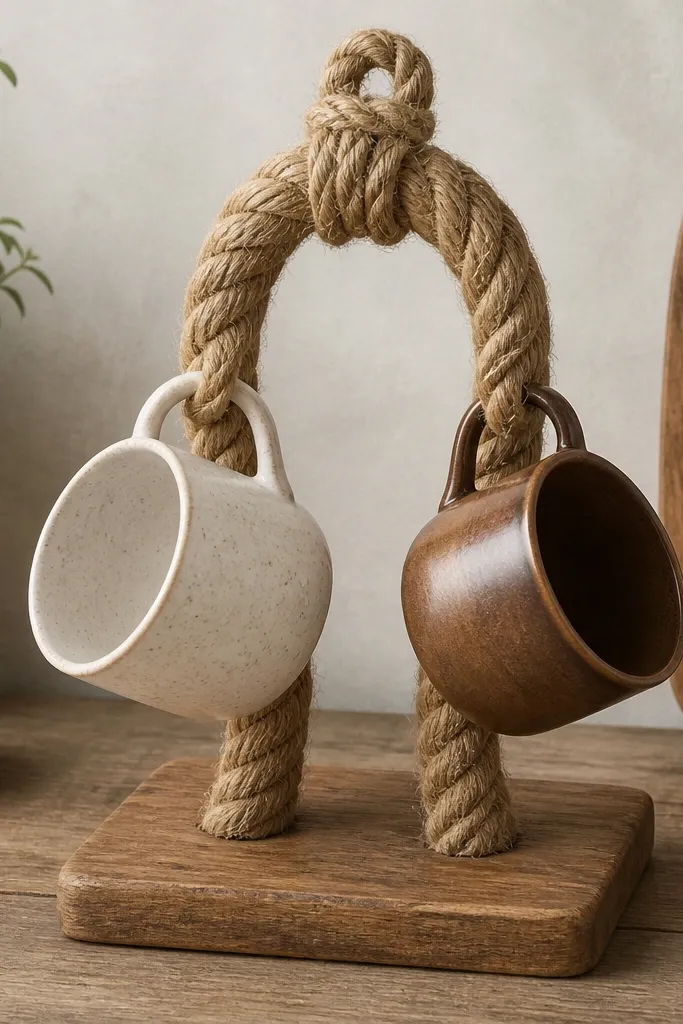
This is a practical decorative piece, and it’s one of my go-to handmade gift ideas for guys who host. Jute rope looks warm and casual, and it makes mugs feel like part of the decor instead of random clutter. I like mounting it on a small wooden board so it’s stable and doesn’t tip over when he grabs a cup. It works well in kitchens with warm wood tones, and it looks great next to a utensil crock or cutting board. The styling principle is negative space — keep the board simple and let the rope be the visual focus.
Cut a 12 in board strip and sand edges smooth, then stain lightly if you want it darker. For the rope holder, make a large loop around a mug base, then create two smaller loops for the ends where it attaches to the board. Knot the rope using a tight square knot and finish with hot glue inside the knot for security. Mount to the board using screws through the rope base into the wood, then wrap the screw heads with a small bit of rope to hide hardware. Leave 1-2 in clearance so mugs slide in without snagging.
Use a thicker rope than you think — thin rope stretches and loosens the knots.
Skip bare screws; visible hardware makes it look unfinished.
11. Screen-Printed T-Shirt Tote with Fabric Transfer Quote
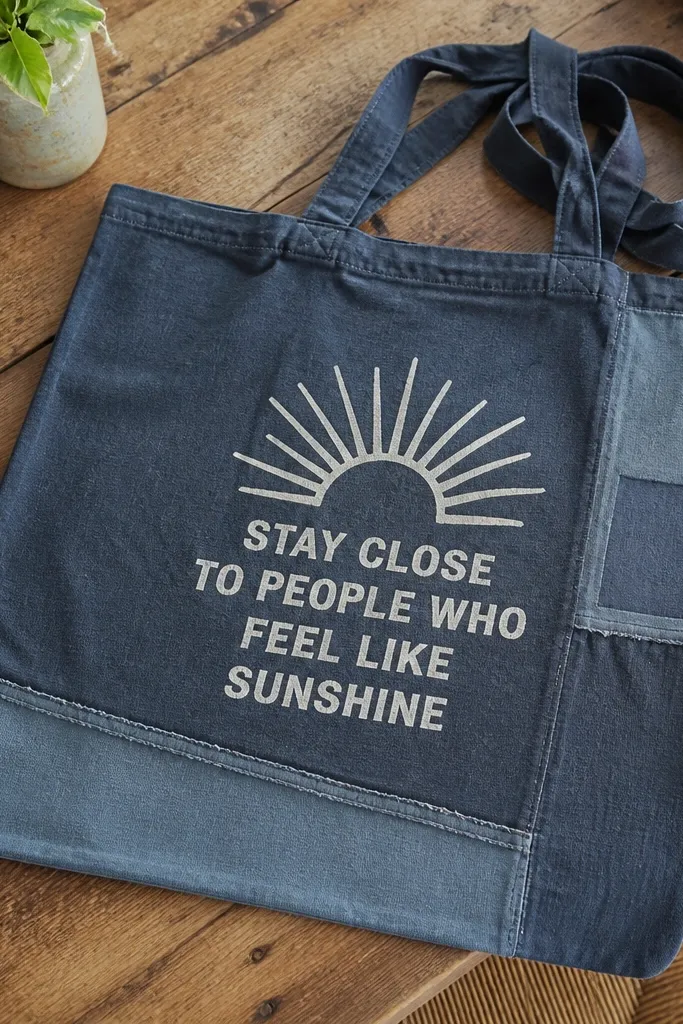
Cut the T-shirt into a tote shape: keep the front panel for the design, and use the lower hem as the bag base. Create handles from the sleeves, then stitch handles to the bag with a double row for strength. For the bottom, fold and stitch a 1 in hem so it has a flat base. Screen print or use fabric transfer paper for the quote, then heat set with an iron. Finish by adding a simple top stitch around the opening so it holds shape.
A tote is a smart handmade gift idea for a boyfriend who runs errands or goes to the gym. I make mine from a T-shirt because it already has the right drape and stretch, so the bag feels soft but not flimsy. Screen printing gives crisp edges that look clean, even if you’re not an art pro. I keep the design minimal: one symbol and one short line, in black ink on a light shirt. This gift flatters guys who like practical style — it looks like their vibe, not like a craft store item. The styling principle is durability: reinforced seams and a structured bottom.
Skip thisDon’t use transfer paper without heat pressing evenly — patchy adhesion looks cheap fast.
Editor's noteWash and dry the shirt before cutting so the fabric shrink doesn’t warp the print later.
12. Handmade Leather Card Holder with Contrast Edge Paint
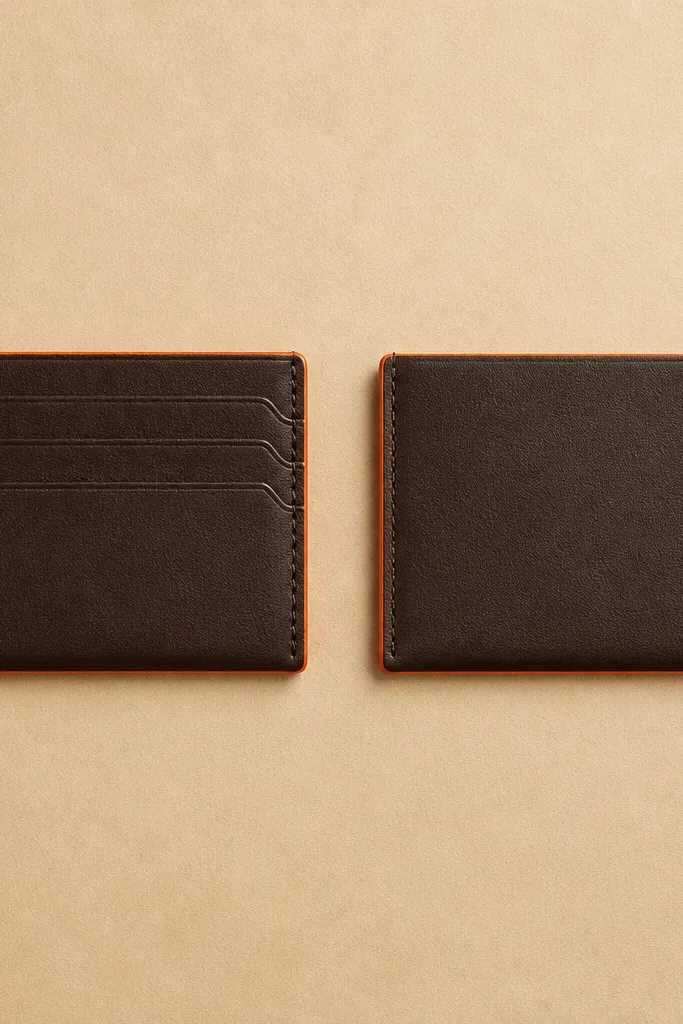
Cut two leather panels and a divider piece if you want multiple slots, then skive edges so the holder folds flat. Mark card slot openings and punch with a hole punch set before sewing. Stitch using a saddle stitch with consistent tension, then glue panels lightly to hold alignment while you stitch. For edge paint, burnish the edges first, then apply edge paint with a small brush in thin coats, letting each coat dry before the next. Finish by buffing the edge with a cloth for a smooth line.
Leather card holders look like a real purchase when the edges look clean. The best handmade gift ideas are the ones that hide the DIY — you can’t fake edge finishing, and once you get it right, the piece looks legit. I like dark brown or black leather with a contrast edge paint line in orange, burgundy, or cream because it frames the card slots. This gift fits almost every boyfriend because it’s slim and doesn’t add bulk to a wallet. It also works for guys with different skin tones since leather color sits neutral. The styling principle is edge control: the edge paint line should be straight and even all the way around.
Skip thisSkip skipping burnishing — painted edges that aren’t burnished look chalky and uneven.
Editor's noteUse a scrap strip to test your edge paint color and thickness before you paint the real edges.
13. Mini Terrarium in a Reused Glass Jar with Wood Lid
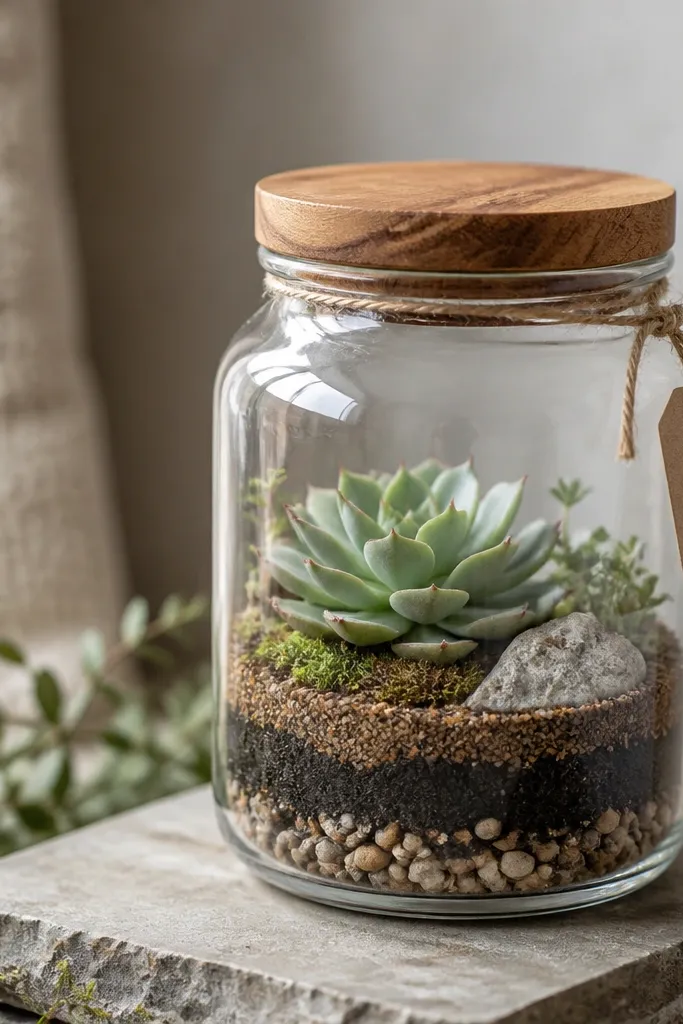
Terrariums are handmade gift ideas that feel calm and alive, and the reused jar part makes it look intentional instead of generic. I like jars with straight sides and a slightly thick bottom because they hold moisture better than thin glass. Use a wood lid with a simple hole for airflow so the plant doesn’t feel trapped. Choose plants that match the jar conditions — for closed-ish jars, use low-water succulents or small air plants with a gentle setup. This works for boyfriends who like plants but don’t want a whole desk jungle. The styling principle is layering: visible soil texture plus one clean focal plant.
Clean the jar and let it dry completely. Add a thin layer of small stones or activated charcoal, then a layer of cactus soil, then place the plant. Arrange with tweezers so the plant sits slightly off-center, and keep the top layer textured — I use a mix of sand and fine gravel. Make a wood lid and drill a small vent hole, then sand and seal the lid with food-safe or water-resistant finish. Tie a label tag with twine and write the plant name and a simple care note.
Water lightly — terrariums punish overwatering more than under-watering.
Don’t pack the soil too tight; roots need air pockets or the plant declines.
14. Heat-Stamped Leather Watch Band Strap Wrap
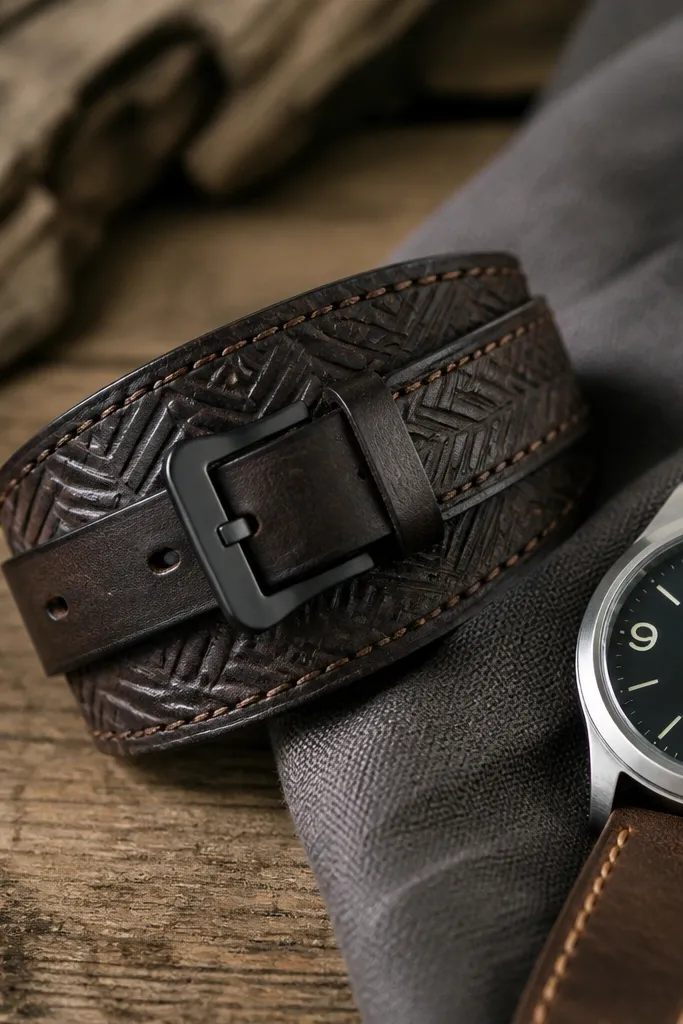
If your boyfriend wears a watch or keeps one in a drawer, a leather strap wrap is a smart way to make it feel upgraded. Heat-stamped leather gives that crisp pattern look without needing fancy tooling beyond a stamp and steady pressure. I like black or espresso leather with a subtle stamped design — thin lines, small marks, or a simple geometric repeat — because it reads classy. The leather texture looks good in low light and doesn’t glare like shiny vinyl. This gift flatters guys with clean, classic style, and it also works for sporty watches if you keep the pattern simple. The styling principle is alignment: stamp placement needs to be centered and symmetrical.
Cut a leather strip wide enough to wrap his existing strap or watch case area, usually 3/4 in to 1 in wide depending on thickness. Condition the leather lightly so stamping doesn’t crack the surface. Heat-stamp your design with a leather stamp using consistent pressure, then let it cool before moving. Stitch along the edges with waxed thread or use edge binding for a cleaner finish. Install a small buckle or loop closure so the wrap holds flat when he wears it or stores the watch.
Practice on scrap leather with the same thickness — stamping too hot blurs lines and makes the surface shiny.
Skip stamping on dry leather; it can scorch and create ugly dark spots.
15. Painted Glass Jar Spice Sachets with Tiny Labels
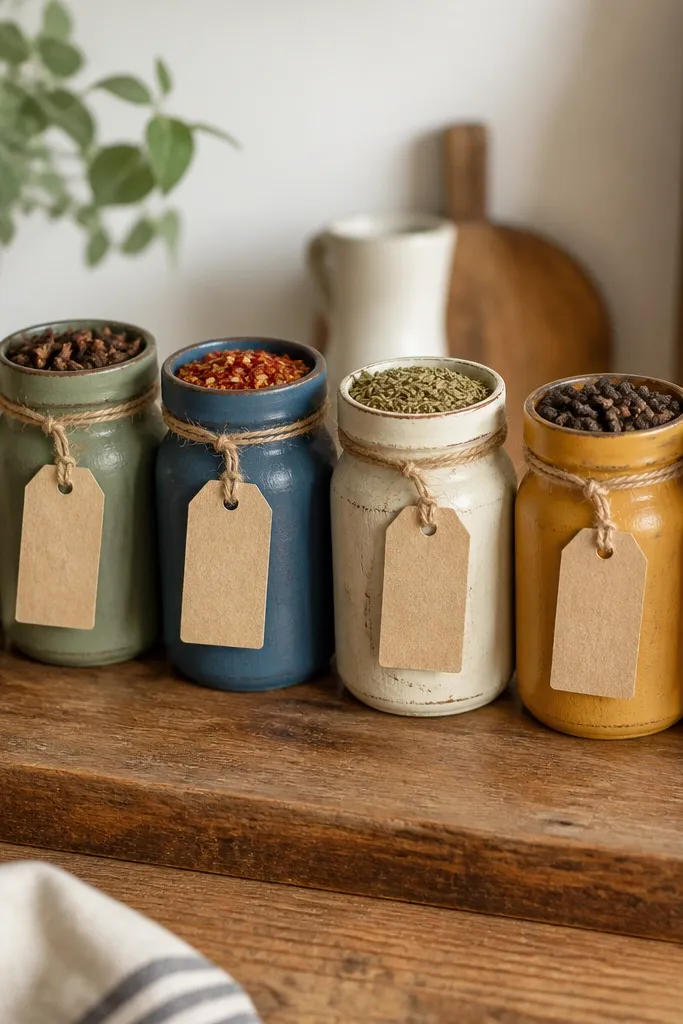
Spice jars are one of the best handmade gift ideas for a boyfriend who cooks, because they turn “random pantry” into a mini system. I use small glass jars because they look clean and let the colors show through — paprika red, turmeric yellow, cumin brown. Painting the jar lids in matte colors makes the set look designed, not like leftovers in glass. Add tiny labels so he knows what’s what without guessing. This gift flatters people who enjoy food but don’t want complicated recipes. The styling principle is color order: keep jar colors in a gradient or grouped palette so the set looks balanced.
Wash and dry small glass jars, then paint only the lids with matte craft paint, letting each coat dry fully. Fill each jar with one spice — go with 6-8 jars max so it stays manageable. Tie twine around the neck and attach a small cardstock label with the spice name and a quick use note like “for eggs” or “for tacos.” If you want extra polish, stamp the label with a simple icon and keep the font consistent. Pack the jars in a snug box so they don’t rattle and wrap with tissue paper that matches the lid colors.
Seal the spice lids tight and keep jars away from sunlight so color doesn’t fade fast.
Don’t mix too many spices into one jar; it turns into a mystery blend and he won’t use it.



