

1. Fabric Photo Memory Banner With Hidden Pockets
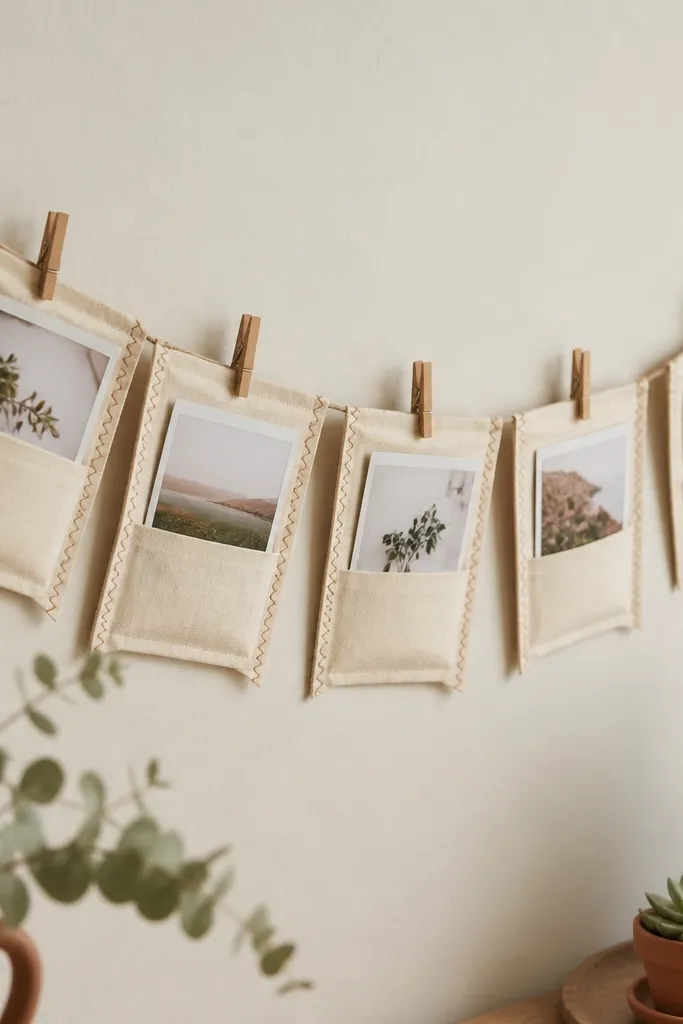
Start by cutting 8-10 strips of cotton at 12 inches long and pressing the edges flat. Make pockets by folding each strip over by 1/4 inch, stitching the sides, then leaving the top open — size the pocket so your photo slides in with a little resistance. Lay the banner on a flat surface and space the pockets evenly before you attach the twine — I used small clothespin clips so the banner stays flexible. Finally, stitch a simple running stitch along the top edge for structure, then tie the twine ends into a loop for hanging.
This gift looks intentional because the photos are framed by fabric, not taped to a string. I used cream cotton strips (about 2 inches wide) and stitched small rectangular pockets just big enough for 3x4 photos. The fabric pocket edges catch light softly, which makes the whole banner look cozy instead of messy. It works for friends who like sentiment but hate clutter because you can swap photos without ripping anything. The neutral base also flatters any room color — warm woods, cool greys, even colorful dorm walls.
Skip thisAvoid hot-gluing photos directly onto fabric — it warps edges and looks shiny.
Editor's noteUse colorfast ink for any printed photos. I swap in matte photo paper so fingerprints don’t show.
2. Stamped Leather Keychain With A Name-Size Mark
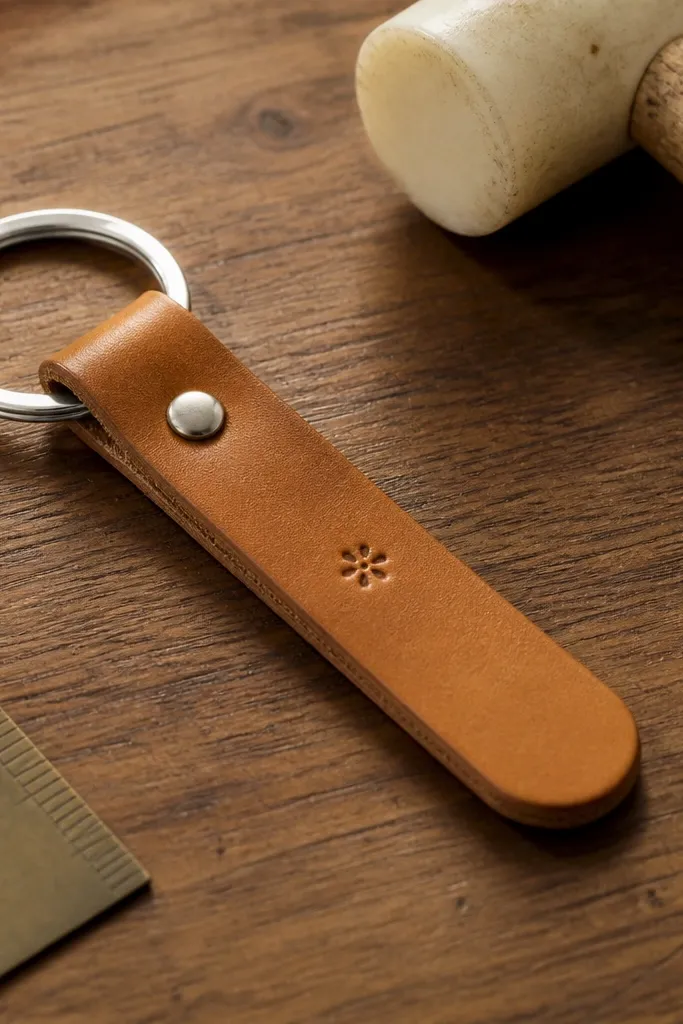
Leather keychains look expensive when the stamping is centered and the edges are burnished. I use 2.5-inch wide vegetable-tanned leather, cut a rounded rectangle, then stamp a single small icon or initials. The stamp doesn’t need to be huge — a tiny mark reads cleaner and feels more personal. It works for friends who carry keys daily and like practical gifts. The warm tan leather also looks good on any skin tone when they hold it, and it ages nicely instead of looking tired quickly.
Start by cutting your leather to 2.5 inches wide and about 4.5 inches long, then round the corners with scissors. Stamp your design while the leather is flat — keep the stamp pressure consistent so the edges don’t look fuzzy. Punch two holes at the top corners and stitch a simple saddle stitch around them, then attach a small split ring. Finish by burnishing the edges with a little beeswax or edge-gum, then buff with a cloth.
Stamp on a scrap first and adjust pressure. Leather shows mistakes fast, so test before you commit.
Avoid using thin craft leather that cracks — it makes the stamp edges flake over time.
3. Heat-Set Vinyl Tote Bag In Her Favorite Color Pair
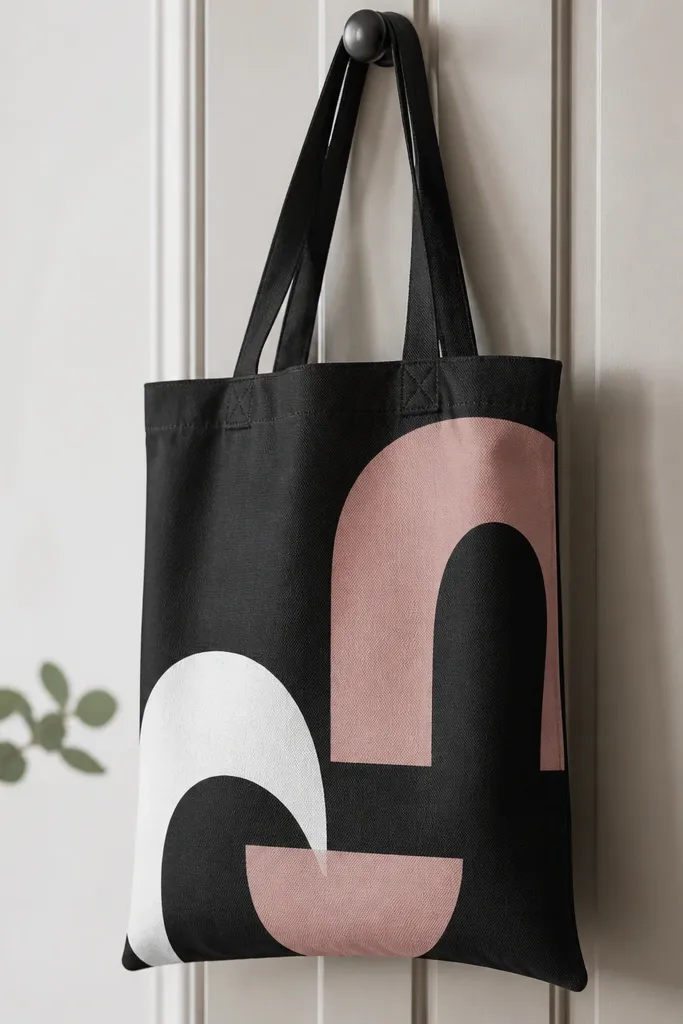
Start with a blank canvas tote — I use medium weight so it doesn’t pucker. Cut your design from heat-set vinyl using a cutting machine or craft cutter, then mirror it before you place it. Pre-heat the tote for 5-8 seconds, place the vinyl, and press with steady pressure at the vinyl’s recommended temperature for about 20-30 seconds. Let it cool fully before you peel the carrier sheet, then stitch a quick reinforcement line along the vinyl’s bottom edge if you want extra durability.
A tote bag is the kind of gift people use immediately, and vinyl gives you clean typography without a screen-print setup. I pick two colors that match her actual wardrobe: for example, dusty pink vinyl on black canvas, with a smaller white accent line underneath. Heat-set vinyl stays more consistent than iron-on fabric when applied at the right temperature and pressure. It’s also forgiving if she’s hard on bags — canvas holds up well, and vinyl is easy to replace later. The matte finish looks sharp and doesn’t glare under indoor lighting.
Skip thisAvoid putting vinyl too close to the seams. It lifts faster where the bag flexes.
Editor's noteDo a placement test: tape your design on the outside first and stand back two feet. Placement reads more “store-bought” than the font style.
4. No-Sew Felt Coaster Set With Color-Blocked Edges
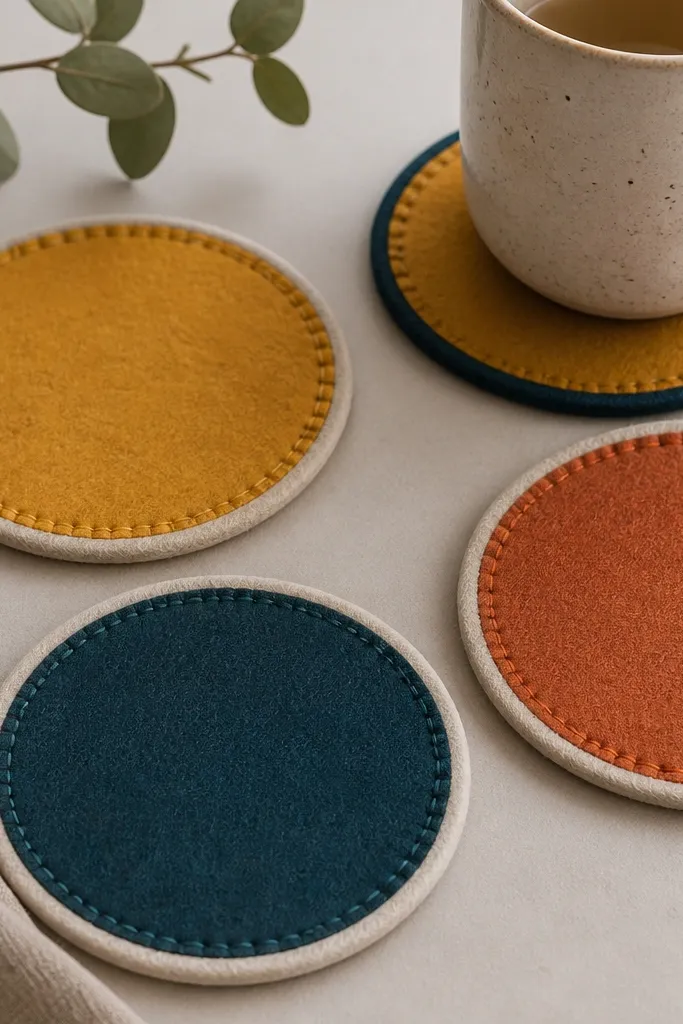
Start by tracing 4-inch circles (or the size of her favorite mug coaster) onto felt and cut two layers per coaster. Cut a border strip about 1 inch wide from a contrasting felt and wrap it around one layer, then tack it in place. Add the second layer on top and stitch around the edge with a simple whip stitch — I keep stitches about 1/8 inch apart. Finally, press the finished set flat under a heavy book for an hour so they look crisp.
Felt coasters feel cozy and look tidy because the border hides uneven cutting. I make them from 100% wool felt when I can — it doesn’t fray and it has a soft, dense look. Color-blocking with a contrasting border makes the set look designed, not accidental. This works for friends who host or who always have a drink on their desk. The thick felt also protects surfaces without leaving water rings or scratches.
Skip thisAvoid cheap acrylic felt that pills. It turns fuzzy instead of staying smooth.
Editor's noteUse a contrasting thread that matches the border, not the main felt. It ties the set together.
5. Candle Jar Labels With Real Lettering and Weathered Ink
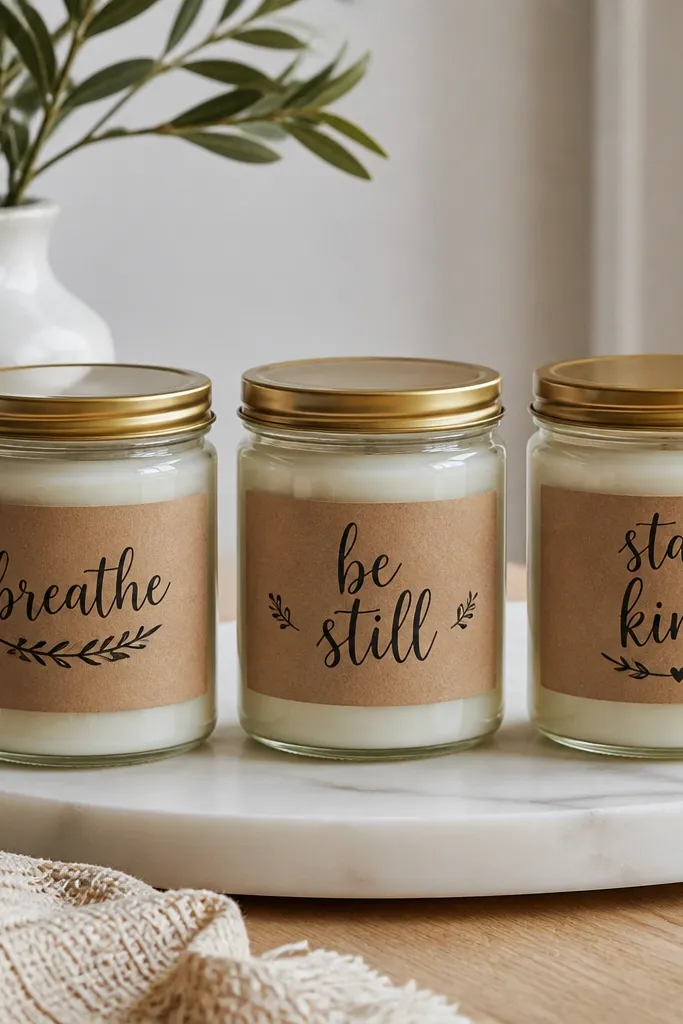
This is a small gift that still looks like effort because the label is doing the heavy lifting. I write directly on kraft paper with archival ink pens, then add a thin border line so the text looks framed. The weathered ink effect comes from lightly stamping the background with a sponge — not from messy smudging. It works for friends who like a cozy room vibe or who always have candles burning. The kraft + black combo looks good with gold, bronze, or clear glass and doesn’t clash with most decor.
Start by cleaning the jar glass with rubbing alcohol so the label sticks flat. Cut label rectangles to fit the jar height — usually about 2.5 inches tall and wide enough to wrap with a 1/2 inch overlap. Letter with an ink pen, then add a thin border using a ruler so it looks intentional. Apply adhesive label tape or a removable glue stick, wrap the label, and press firmly for 30 seconds. Finish by adding a small date stamp in the corner so it feels like a handmade batch.
Print the candle scent name in tiny type first (even from a computer) and then hand-letter the main phrase over it for balance.
Avoid using water-based markers on unsealed paper. They bleed when the jar sweats or warms.
6. Embroidered Linen Bookmark Set With One Word Each
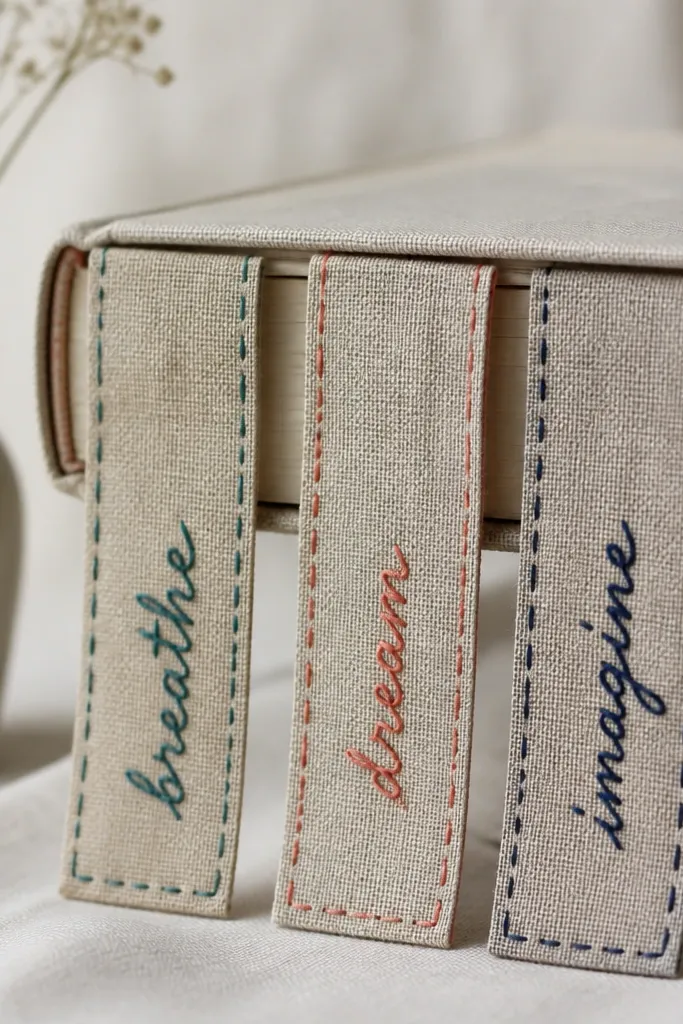
Bookmarks are a gift people actually use, and embroidery makes them feel personal without taking forever. I use linen strips about 2 inches wide and 7 inches long, then embroider one word in a single thread color — like “calm,” “brave,” or “read.” One word looks clean and avoids the cramped look of multi-line quotes. This works for friends who read ebooks but still mark pages in print journals. Linen also feels premium in the hand and doesn’t look bulky in a book.
Start by cutting linen strips and pressing them with a warm iron so they lie flat. Fold a 1/4 inch edge on both sides and press again, then stitch a straight seam along the folded edge to create a tidy border. Transfer your word using a water-soluble pen or chalk, then embroider with a satin stitch for letters that are bold and smooth. Finish by trimming threads to a consistent length and giving the bookmark a quick press under a cloth.
Use a hoop for the letters even if you hate hoop marks. Proper tension makes the satin stitch look crisp.
Avoid embroidery on slippery fabric like polyester satin. The letters wander and look crooked.
7. Mini Framed Desk Print From Her Favorite Photo
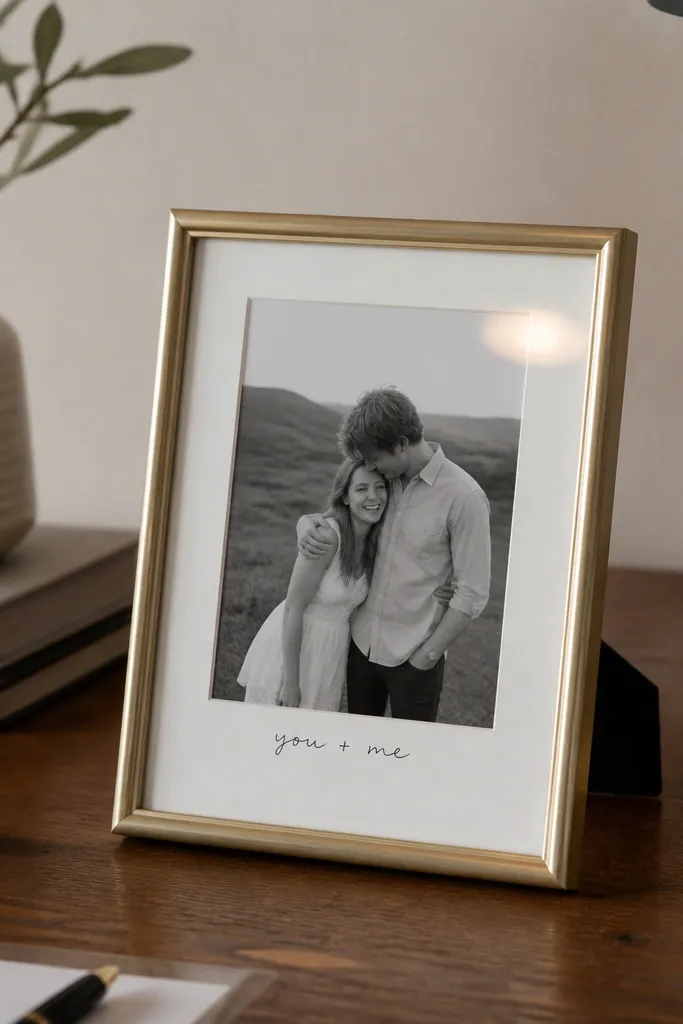
A small framed print turns a random photo into a decor piece, and the mat makes it feel gallery-like without being fancy. I print the photo in black and white on matte photo paper, then add a white mat so the image has breathing room. The handwritten caption is tiny and simple — a date or a short phrase that she’d recognize. This works for friends who love sentimental decor but don’t want a huge wall project. It also flatters every room because the frame is neutral and the mat controls the visual weight.
Start by choosing a photo with good lighting and clear faces or a strong background — I avoid busy images that look noisy when shrunk. Print at 300 dpi on matte paper, then cut a mat opening so the image sits centered with equal margins. Assemble the frame with acid-free backing and place the photo under the glass without fingerprints. Add a caption on the mat using a fine black pen, and let it dry fully before you close the frame. If you’re worried about placement, tape the mat to the frame first and check it from standing height.
If the photo has warm tones, convert to black and white. It looks cleaner at small sizes.
Avoid glossy photo paper in a frame. It reflects overhead lights and makes the print look cheap.
8. Hand-Poured Soy Wax Bar Soap With Dried Flower Confetti
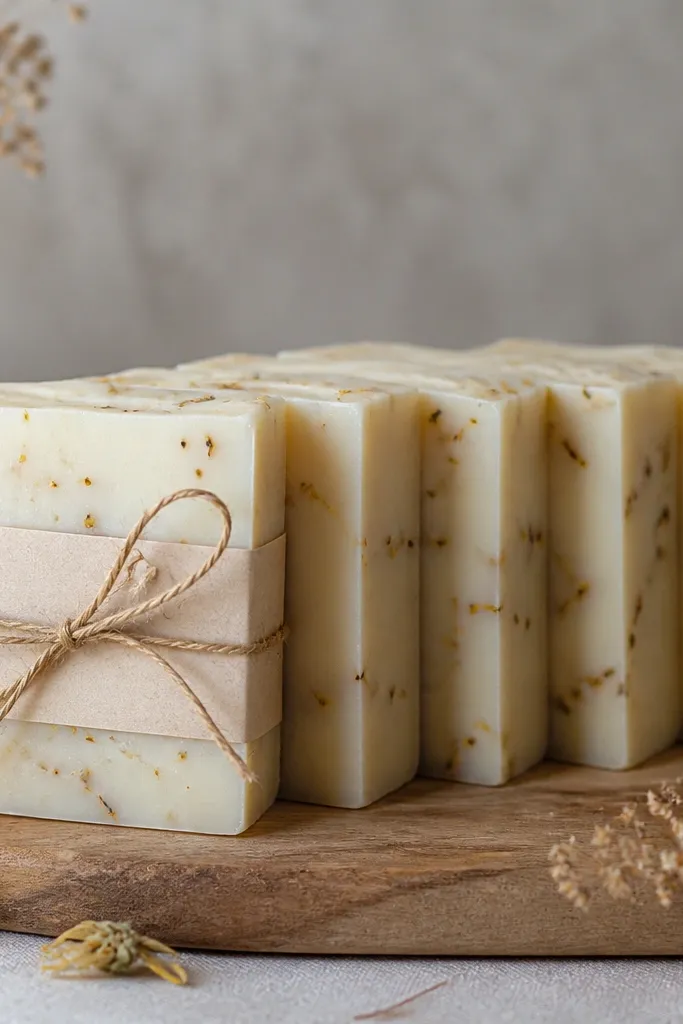
Start by melting soap base slowly in short bursts, stirring until it’s fully clear. Prepare your mold and scatter dried flower bits lightly — I tap them in with a toothpick so they distribute. Pour in thin layers if you want more even placement, then spritz the surface with alcohol to pop bubbles. Let it cure at room temperature until firm, usually 24-48 hours depending on mold size, then unmold and cut into bars with a sharp knife. Wrap each bar in wax paper so the surface stays fresh.
Soap is personal, but it looks extra thoughtful when the design is controlled. I use a simple creamy white base and add dried flower confetti in tiny amounts so it doesn’t clog the mold or float in one spot. The bars feel luxurious because soy wax gives a soft, smooth surface when it cures properly. This works for friends who like bath products and also for people who don’t wear strong perfume — you can keep scent light or skip it. The neutral color reads clean in any bathroom.
Skip thisAvoid overloading the mold with flowers. It makes the bar look speckled and uneven.
Editor's noteUse dried flowers that are already fully dry. Moist pieces cause cloudiness or sweating later.
9. Macramé Plant Hanger With A Simple Knot Map
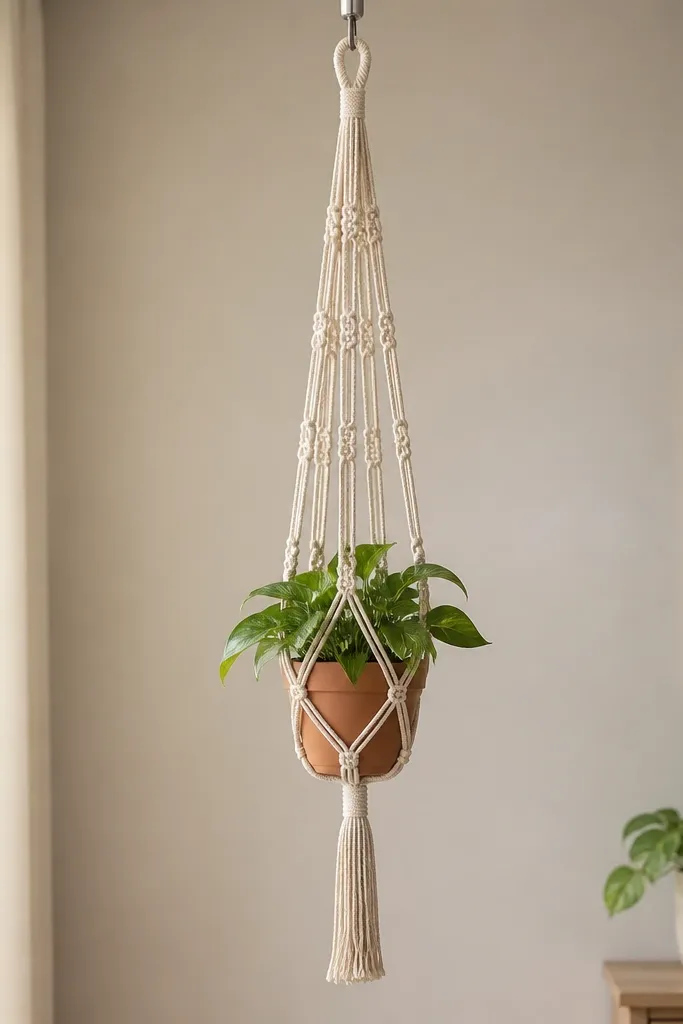
Start by measuring from the hook to the pot base, then cut cords at twice that length plus extra for tying — I usually cut 6-8 feet depending on ceiling height. Clamp the cords to a board or hanger while you tie the top knots so everything stays aligned. Tie square knots in a row, keeping tension consistent — pull until knots sit snug but cord still flexes. Place the pot and adjust the length before you complete the bottom braid, then tie off securely and trim ends evenly.
Macramé looks great when the knots are even and the pot hangs straight. I make mine with 4mm cotton cord and keep the pattern simple: square knots in a repeating section, then braided tails. The result looks airy without becoming sloppy. This gift works for friends who have plants but don’t hang them because store options look too industrial. The natural cotton color also softens rooms that are all metal and glass.
Skip thisAvoid mixing cord thicknesses. One thick section makes the hanger look crooked.
Editor's noteSteam the finished hanger lightly. It makes the knots sit flatter and look more polished.
10. Leather-Look Card Holder With Stitch Lines That Match
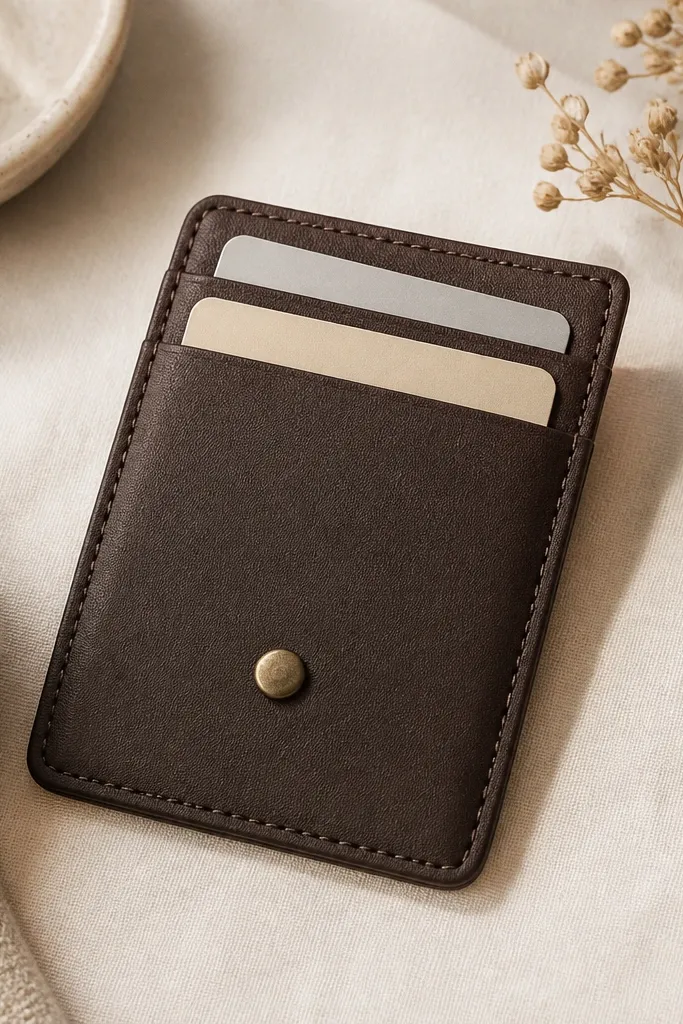
Start by cutting the body and lining pieces to the exact dimensions you want — I use about 4 inches wide and 3.5 inches tall for a slim fit. Mark stitch holes with a spacing tool or ruler so holes are evenly spaced at about 1/8 inch from the edge. Stitch the sides of the card slots first, then assemble the front and back panels. Add the snap by marking placement and punching carefully, then press the edges flat under a book while glue sets. Trim any threads so the ends are flush and neat.
A card holder is small enough to finish quickly, but it looks high-end when the stitch lines are straight. I build mine with vegan leather or vegetable-tanned leather and use a contrasting thread color like cream or light tan. The snap closure keeps cards from spilling, and the slim shape looks good in a jeans pocket. This gift flatters anyone’s style because it doesn’t depend on ring sizes or jacket cuts. It also suits friends who carry minimal items.
Skip thisAvoid skipping edge finishing. Raw edges make faux leather look thin and messy.
Editor's noteDo one test stitch on a scrap. If your thread tension is too loose, your edges will look wavy.
11. Watercolor Nameplate On Reclaimed Wood
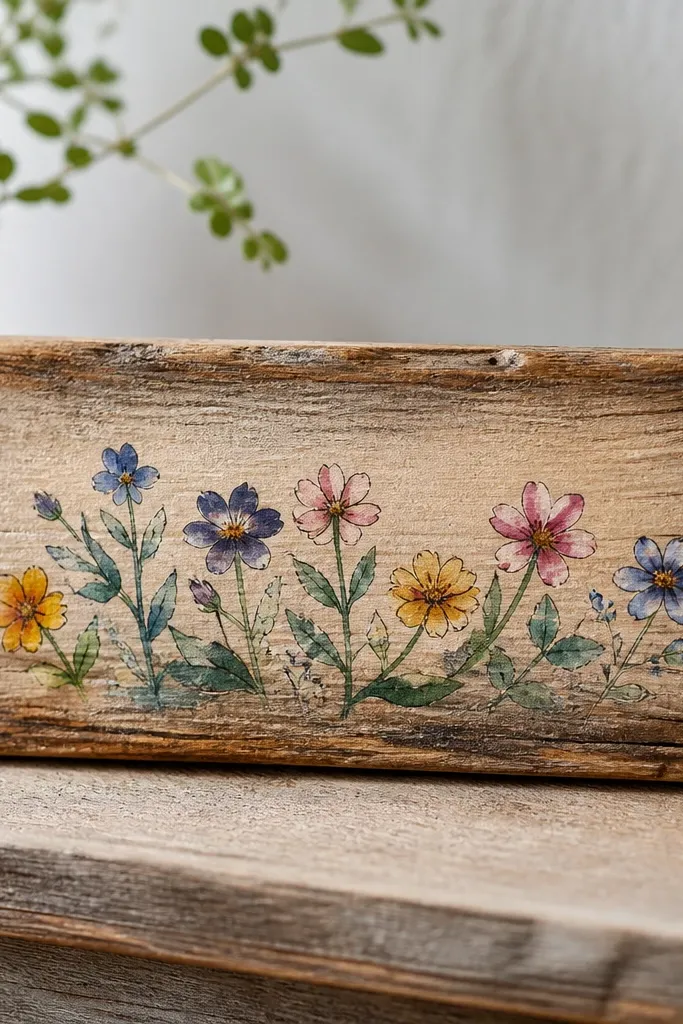
A nameplate is a practical decor gift when it looks like it belongs in her space. I use a small piece of reclaimed wood, sand it until the surface feels smooth to the fingertips, then paint her name in watercolor style with a controlled brush outline. The clear coat makes the paint look deeper and protects it from dust and light water splashes. This works for friends who have desks, entryways, or bedside tables where they like personal touches. The wood grain adds warmth without needing extra decorations.
Start by sanding the wood in two passes: 120 grit to remove roughness, then 220 grit for smooth feel. Wipe with a tack cloth, then apply a thin coat of wood conditioner or primer if the wood is very porous. Paint the name using watercolor and a fine liner for the outline — I keep lettering about 1.5 inches tall for legibility. Let it dry fully, then seal with two thin coats of matte clear spray so it doesn’t look glossy. Attach a small sawtooth hanger on the back or add a couple of stick-on pads if she’s renting.
Test your paint on a scrap piece of the same wood. Some reclaimed boards drink pigment more than others.
Avoid painting on dusty wood. Clear coat locks in dust specks and they show forever.
12. Beaded Phone Charm With A Weighty Clasp
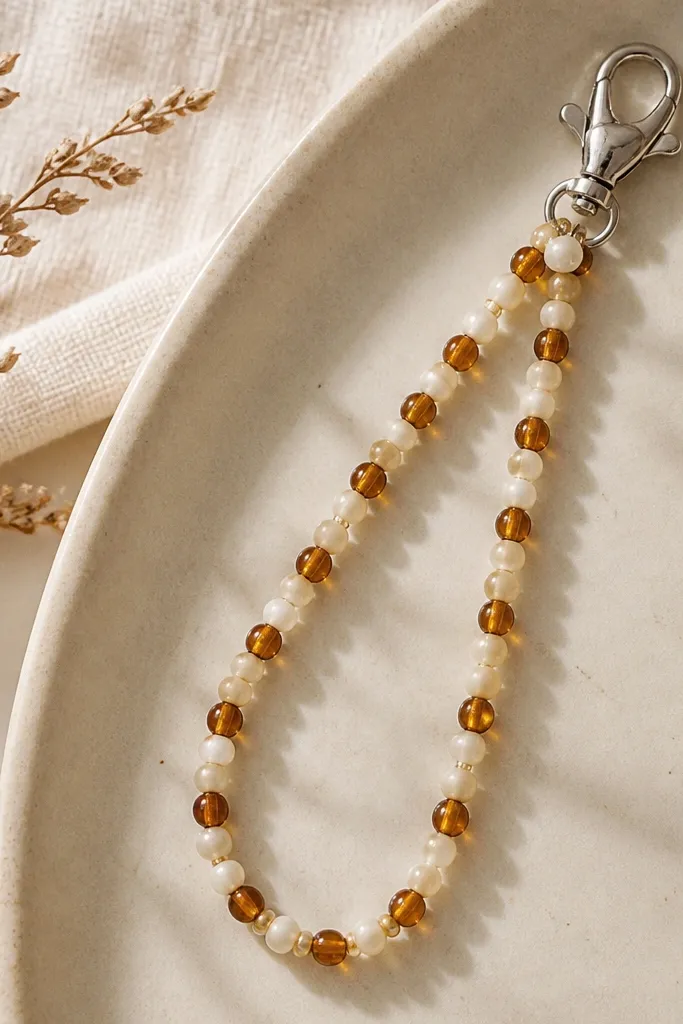
Start by choosing beads with similar size and a hole big enough for your thread or cord. Thread beads onto strong beading wire or waxed cord, leaving a small section at the top for the clasp connection. Attach a lobster clasp using a simple knot and a dab of clear jewelry glue, then let it cure before you string the final beads. Add a tiny spacer bead near the bottom so the charm doesn’t bunch. Finally, check the hang: clip it to your phone and adjust bead spacing until it falls straight.
Phone charms look cute until they flop around, so the secret is a heavier clasp and balanced bead spacing. I use small glass beads and mix two tones — cream and amber, or black and silver — so it looks intentional in photos and real life. The charm should hang straight, not twist, which comes from how you attach the clasp and how you distribute weight. This works for friends who use their phone all day and like accessories that don’t require sizing. The glass beads also catch light when she walks, without being sparkly in a cheap way.
Skip thisAvoid lightweight jump rings. They twist and turn the charm sideways.
Editor's noteMake the charm length about 3.5 inches from clasp to bottom. Longer ones snag bags and look messy.
13. Sewn Scrunchies With A Hidden Elastic Core
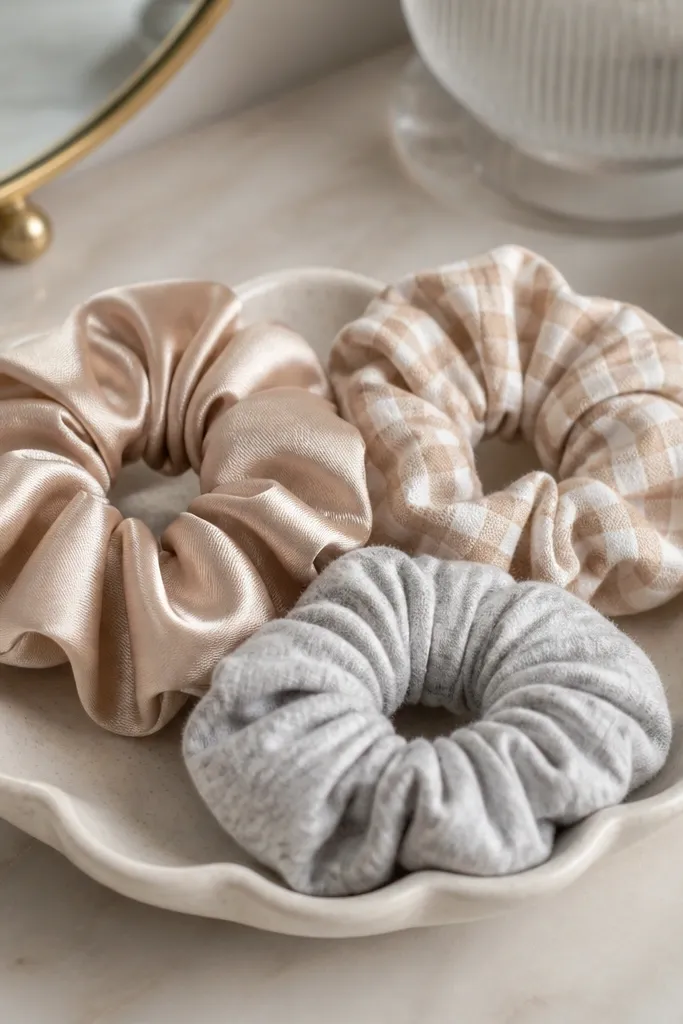
Start by cutting fabric rectangles about 9 inches long and 5 inches wide for a standard scrunchie. Fold the rectangle right sides together and stitch down the long edge, then turn the tube using a loop turner. Insert a 1/4 inch elastic piece cut to fit her hair — I start with 7 inches and adjust. Gather one end, stitch the opening closed, then make the scrunchie fuller by distributing the fabric evenly around the elastic. Press lightly with a cool iron through a cloth so the fabric stays smooth.
Scrunchies are a gift that feels personal because fabric choices show her taste. I use a hidden elastic core inside the fabric tube, then stitch the seam neatly so nothing pokes or frays. The satin ones look glossy but still soft, and the cotton gingham ones look casual for everyday wear. This works for friends with textured hair or people who just hate regular hair ties. The seam finish matters because rough seams snag hair and feel cheap fast.
Skip thisAvoid leaving raw edges inside. They shed and the scrunchie looks rough after a few washes.
Editor's noteUse elastic that is flat and soft, not twisted. Twisted elastic makes the scrunchie look uneven and uncomfortable.
14. Painted Ceramic Mug With A Thumb-Safe Handle Grip
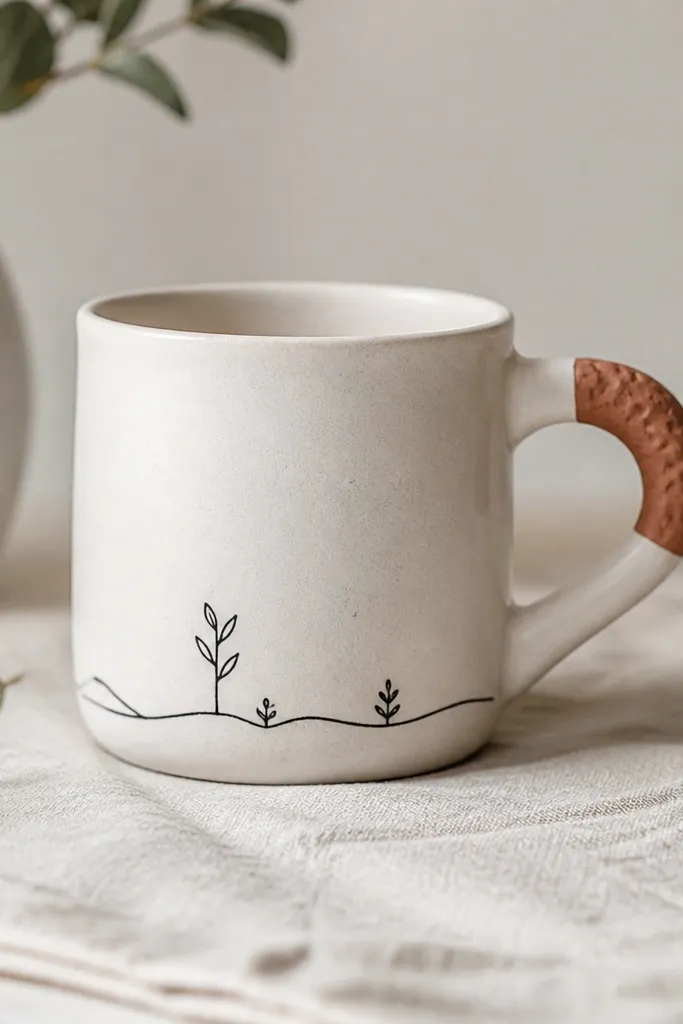
Start by cleaning the mug with rubbing alcohol so paint sticks. Use ceramic paint meant for mugs and sketch your design lightly with pencil. Paint the handle grip area with a textured finish — I blend paint with a tiny amount of medium and dab with a sponge so it doesn’t feel slippery. Add your line art near the bottom, then let everything dry fully before baking at the paint brand’s time and temperature. After baking, cure fully by waiting 24 hours before washing gently.
A custom mug feels like a daily hug, and the look is all about controlled paint placement. I paint a simple line illustration near the lower third and add a thumb-safe grip patch on the handle so it’s comfortable to hold. For color, I keep it to two shades — for example, terracotta grip with a muted green line art. This works for friends who drink coffee or tea every day and like practical gifts. The textured grip also helps if her hands get cold or she holds mugs for a long time.
Skip thisAvoid painting too close to where the mug rim touches lips. It can feel uneven and wear faster.
Editor's noteMark the mug handle grip position with tape before painting. It keeps the grip aligned even if your freehand is shaky.
15. Cinch-Bag Gift Wrap With Fabric Ties and A Hidden Note
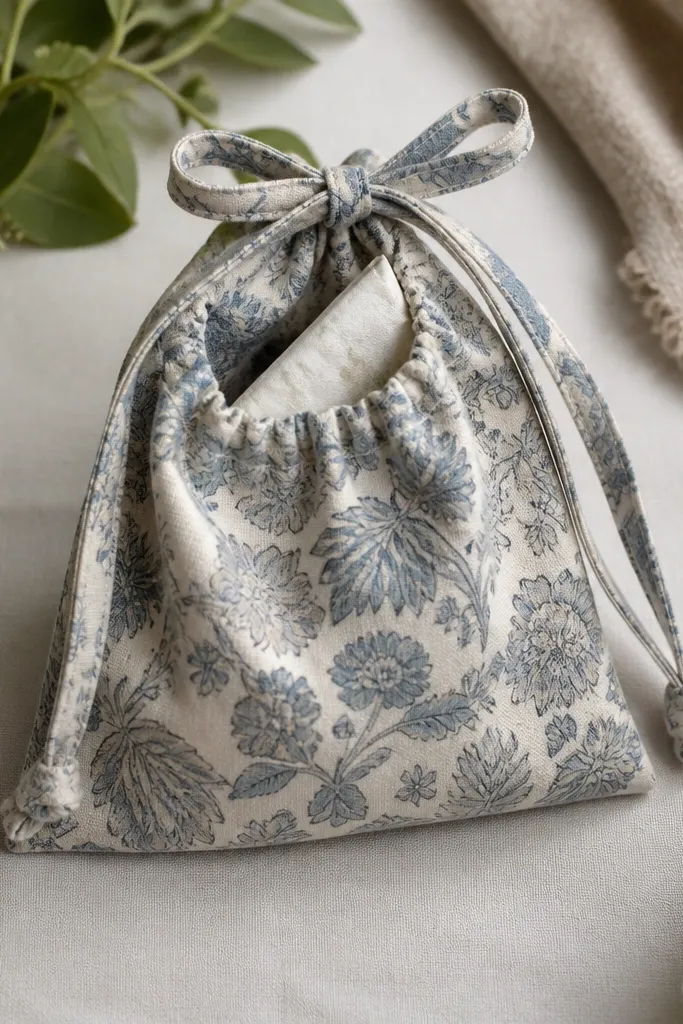
Start by cutting two rectangles for the bag body and adding a simple casing at the top for the drawstring. Stitch the side seams, then press the casing so it looks sharp. Create the hidden note pocket by sewing a small rectangle pocket to one side seam before closing it, leaving an opening for the note. Thread the ties through the casing, then tie off the ends securely. Add a label tag on the outside with a small date or inside joke so it feels like your handwriting.
This is gift wrapping that becomes a second gift. I sew a small cinch bag from cotton with a pattern she actually likes, then add a hidden pocket in the side seam for a note. When she opens it, she doesn’t just unwrap — she has a reusable bag for makeup, cables, or snacks. It works for friends who hate clutter but still want the fun of a surprise. The fabric ties also look neat and give the gift a finished silhouette.
Skip thisAvoid skipping edge pressing. Unpressed seams make the casing look uneven and cheap.
Editor's noteUse a thicker cotton for structure. Thin fabric collapses and looks sloppy when tied.
16. Knitted Dishcloth Set With A Texture That Scrubs
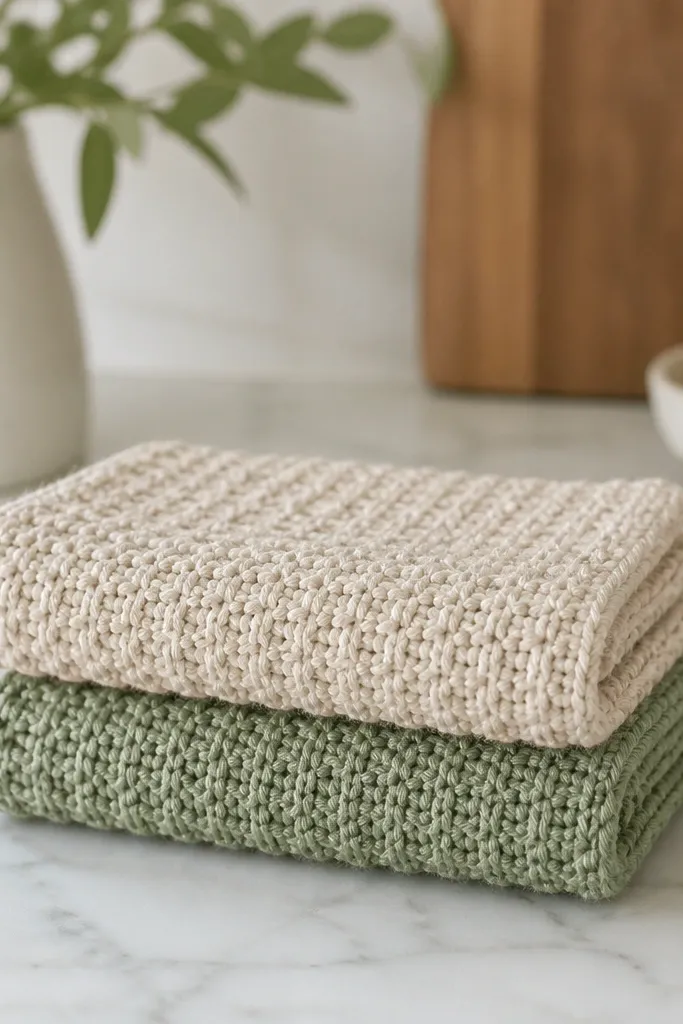
Dishcloths are one of the most useful handmade gifts, and texture makes them feel practical instead of decorative. I knit with cotton yarn so they dry fast and don’t smell. The best look comes from a simple stitch pattern like seed stitch or a tight rib that holds shape. This works for friends who live in apartments with small kitchens or anyone who hates buying sponges. The neutral colors look clean on any counter, and the texture makes the cloth feel satisfying to use.
Start by choosing cotton yarn and a needle size that gives you a dense fabric — I usually go one size smaller than you’d expect. Cast on and knit until the cloth reaches about 9 inches square, then bind off firmly. Block the cloth by misting and pinning flat so the texture pops. Stitch a small loop at one corner for hanging if she likes organization. Fold and stack the two cloths so the texture lines up neatly between pieces.
Wash and dry a test swatch first. It tells you how much the cloth shrinks before you knit the final size.
Avoid using acrylic yarn. It holds water and gets stinky fast.
17. Embroidered Denim Jacket Patch With A Clean Border
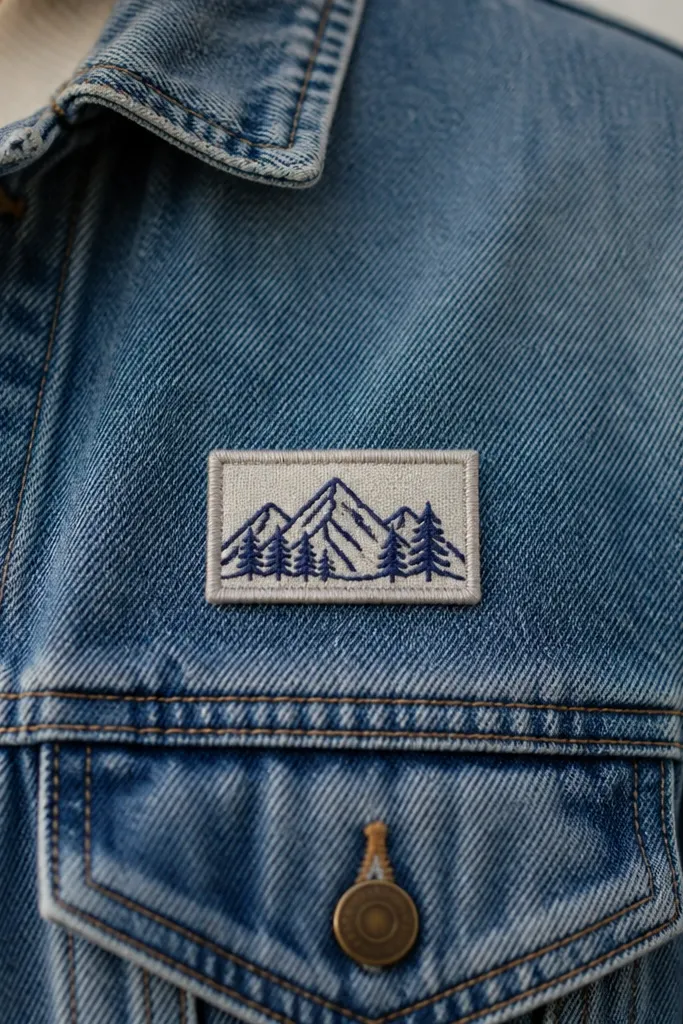
A jacket patch looks personal without needing the whole jacket remade. I make a small embroidered patch on a sturdy fabric base, then stitch it onto the denim with matching thread. Keep it single-color for the cleanest look — one thread shade against denim reads sharp. This works for friends who wear denim often and like small upgrades instead of big gifts. It also flatters different body types because the patch is small and sits where the eye naturally goes.
Start by cutting a patch base about 4x6 inches and ironing it flat. Embroider your design on the base with a simple satin stitch or backstitch, then add a satin stitch border all the way around. Position the patch on the jacket and tack it temporarily with clips. Stitch around the border using a tight running stitch or blanket stitch, then remove the clips and tie off threads inside the seam allowance. Press the patch area from the inside so it sits flat on the denim.
Use a hoop or at least keep your fabric taut while stitching. Loose fabric gives you wavy letters.
Avoid patching over heavy distressing on denim. The embroidery looks messy because the weave is inconsistent.
18. Resin Photo Coaster Set With Rounded Edges
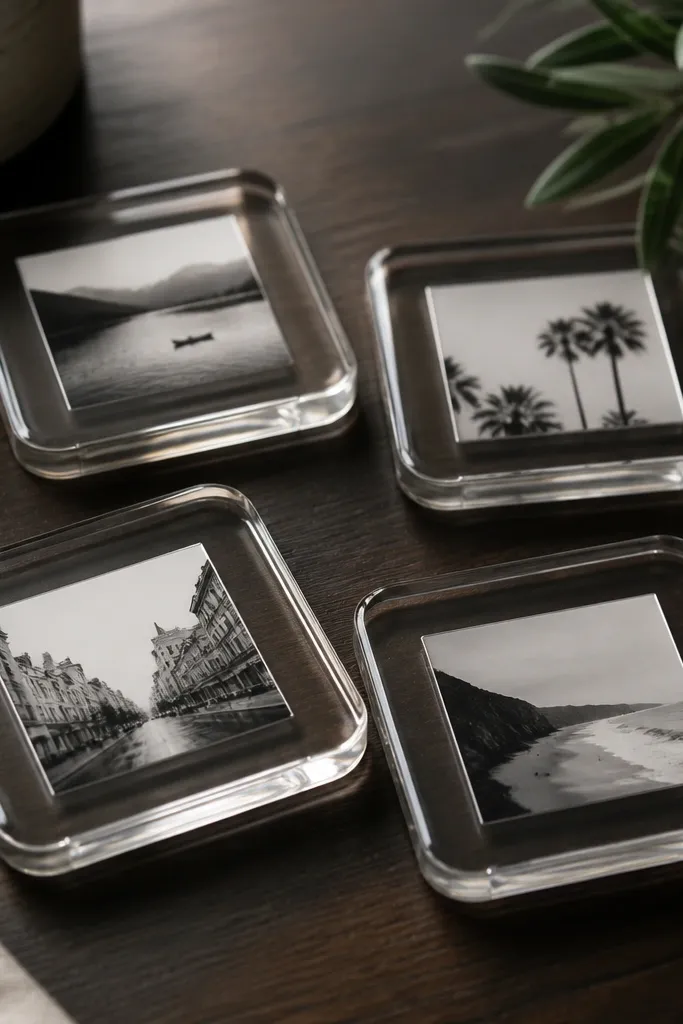
Start by cutting your photos to 2.5-inch squares and centering them on the mold bases. Mix resin carefully, then pour a thin first layer to lock the photo down — wait for it to settle before adding the rest. Pop bubbles with a quick pass of a heat gun on low or a torch from a distance. Let the coasters cure fully, then unmold and sand the edges lightly for a rounded feel. Clean the surface with a microfiber cloth so it shines without fingerprints.
Resin coasters turn a single favorite photo into something she can use daily. The reason they look classy is the rounded edge and the even resin thickness — you don’t want a thick blob or a thin, uneven pool. I embed small photo squares and seal them under a clear top layer so the image looks like it’s under glass. This works for friends who host, have a home office, or like desk aesthetics. Resin also lets you color-match with her room — black and white photos look good anywhere, and you can add a thin tint if you want warmth.
Skip thisAvoid embedding photos that are glossy. Glossy paper can create glare under resin and look hazy.
Editor's noteDo a test pour with the same resin batch. It tells you how long your resin takes to thicken before it levels.
19. Crochet Mini Bucket Bag With A Stiff Base
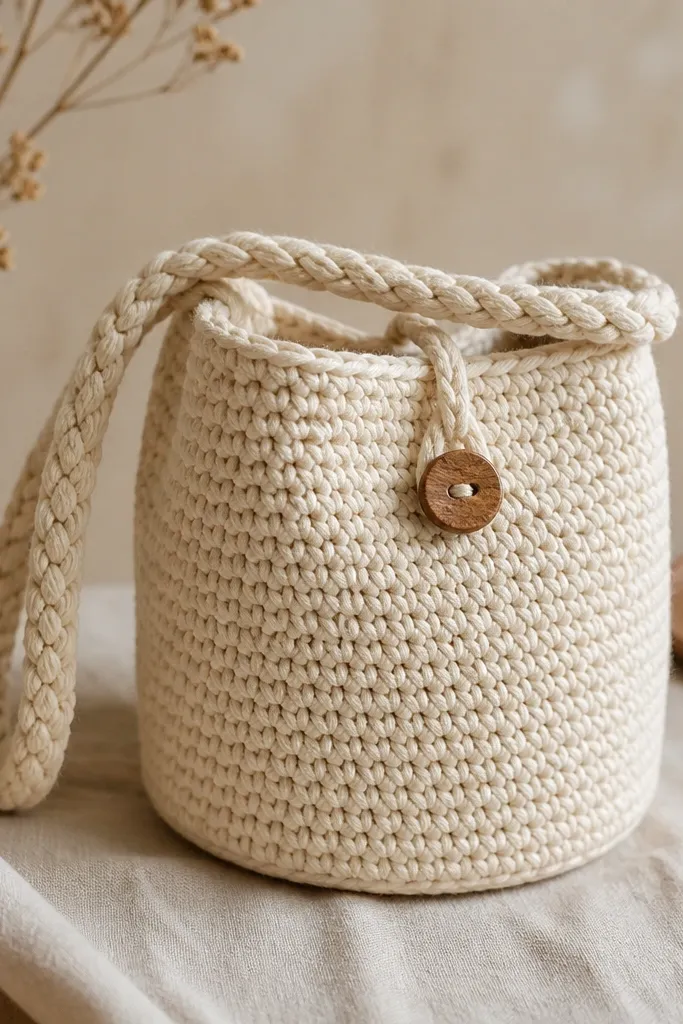
Start by crocheting a flat circle base to the size you want, then stitch it into the bottom of the bag walls. For structure, sew a thin plastic canvas circle or a stiff fabric disk into the base — hidden under the crochet. Crochet the body in simple rounds, keeping tension even so the bag doesn’t ripple. Add a drawstring or button closure at the top, then attach a strap with secure stitches. Finally, block the bag lightly by pinning it to shape while damp, then let it dry overnight.
A mini bucket bag looks cute and practical when it holds its shape. I crochet with cotton or sturdy acrylic blend and then add a stiff base insert so the bottom doesn’t sag. The color choice matters: cream yarn looks soft and expensive, and it pairs with denim, black leggings, and summer dresses. This gift works for friends who like crossbody bags but don’t want something bulky. The bucket shape is also forgiving on body types because it sits centered and doesn’t cling.
Skip thisAvoid a floppy base. A saggy bottom makes even good yarn look cheap.
Editor's noteUse stitch markers every round. Crochet bucket bags look sloppy when the rounds drift.
20. Sewn Wristlet Pouch With A Zipper That Rolls Smooth
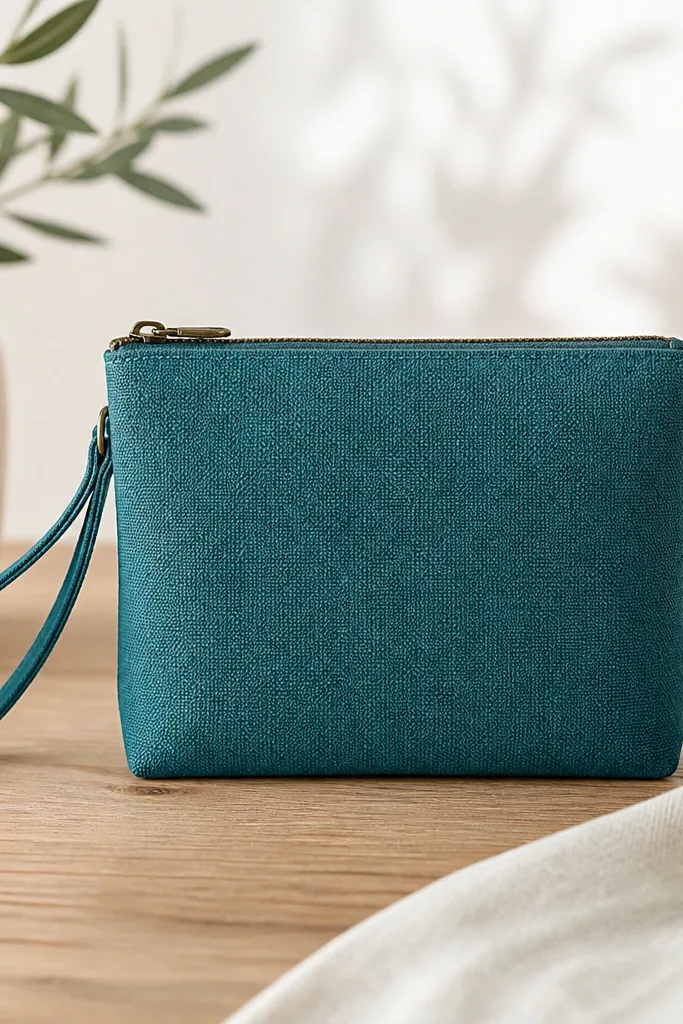
Start by cutting your outer fabric and lining to the same size, then press the edges so they don’t shift. Sew zipper tabs to the zipper tape ends, then baste the zipper between outer and lining so the fabric doesn’t creep. Stitch close to the zipper teeth on both sides, then press the seam flat. Fold the pouch right sides together and sew around the sides and bottom, leaving the zipper open to turn it. Turn, push corners out with a chopstick, then topstitch around the opening for a crisp finish.
A wristlet pouch is the kind of handmade gift that feels grown-up because the zipper line is neat. I use medium-weight cotton canvas or sturdy quilting fabric and line it with matching cotton. The reason it looks polished is how the zipper is attached: pressed seams, even stitch length, and a clean lining edge. This works for friends who carry cards and lip balm in a hurry, especially for nights out. The teal color also looks great against gold jewelry and warm skin tones.
Skip thisAvoid skipping topstitching around the zipper opening. It makes the lining look raw.
Editor's noteUse a zipper foot and go slow. The zipper seam is where “handmade” becomes “store-bought.”



