

1. Fabric Initial Keychain in Her Favorite Color
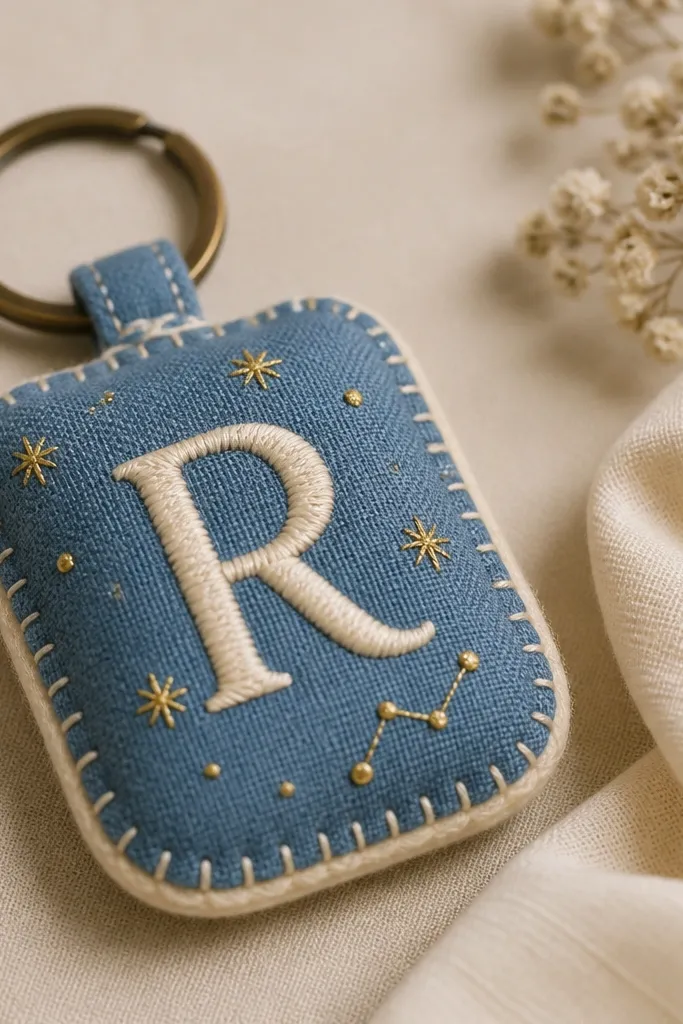
This keychain looks expensive because the letter is stitched into fabric, not printed. I make it with a tight weave cotton or lightweight canvas, then back it with thick felt so it stands up on a keyring without flopping. Choose a color that already shows up in her wardrobe — if her sweaters are cream and navy, go with denim-blue and cream thread. The stitched texture flatters hands-on gifts because it catches light when she grabs her keys. For skin tone and styling, it doesn’t matter — it’s the color contrast that makes it pop, and it works for everyone.
Start by cutting one 3.25 inch by 2 inch rectangle of fabric and one matching rectangle of felt. Fold the fabric right sides together if you want the letter on the front only, or keep it flat if you’re applying the letter directly on the front — I prefer flat for neat edges. Trace her initial onto the fabric with a water-erasable pen, then stitch it with a backstitch using 6-strand embroidery floss in a thread color that matches the gift wrap theme. Then trim the felt slightly larger, sandwich the fabric on top, and stitch around the edges with a blanket stitch. Finally, punch two small holes at the top corners and attach a split keyring using a short jump ring.
Use 6-strand embroidery floss even for one letter — it makes the stitching look fuller without adding bulk.
Don’t use thin craft thread or you’ll see loose loops that make it look like schoolwork.
2. No-Sew Felt Flower Hair Clip Set
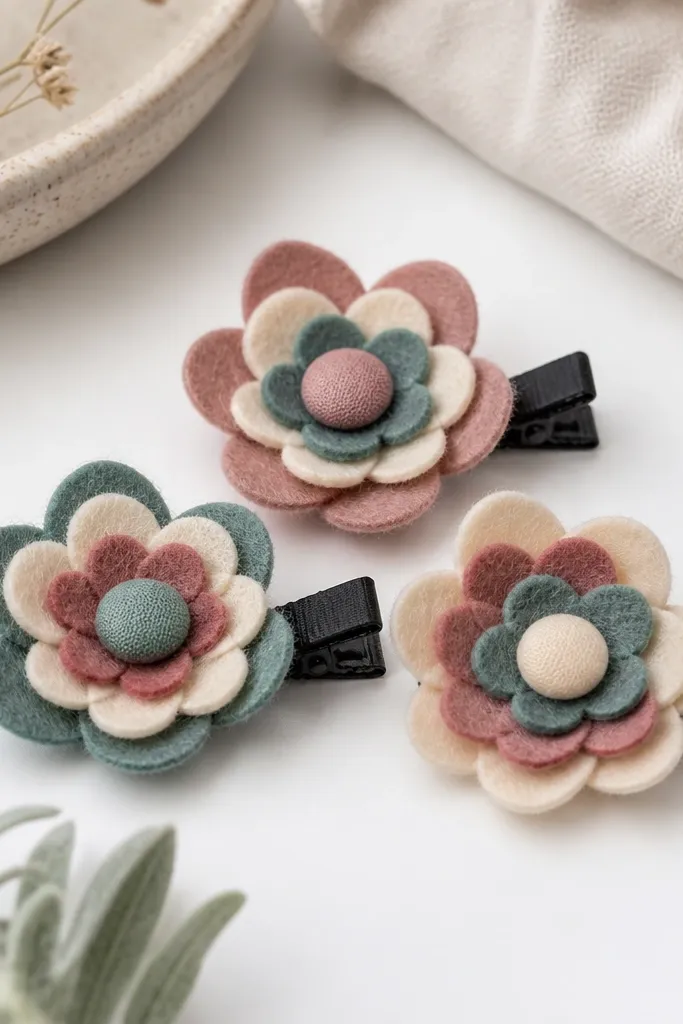
Felt flowers are the fastest way to make a gift that looks “put together” the second she opens it. I use layered felt because it holds shape, doesn’t fray, and creates soft dimension that looks good in indoor lighting. Dusty rose and cream is an easy win for most people — it reads romantic without screaming. For someone who wears minimal makeup and neutral outfits, add one accent shade like muted teal so the clip still shows up in photos. If she already wears bold accessories, keep the petals mostly solid and let the center button do the talking.
Start by cutting petal shapes from 2-3 felt colors using a small craft circle template or freehand with a consistent size. Layer the petals from largest to smallest on top of a base circle, then glue them with fabric glue or hot glue in tiny dots so the glue doesn’t squeeze out. Add a fabric button or a 6mm bead in the center for a clean focal point. Once assembled, attach each flower to a black alligator clip with glue at the base so the clip teeth still grip hair. Finally, set the clips on a flat surface under a heavy book for 10 minutes so they dry flat and don’t curl.
Press the glue spots with a toothpick tip — it keeps the glue line thin and prevents lumpy centers.
Skip glitter felt; it sheds and looks patchy after a few wears.
3. Custom Photo Transfer Mug Coaster Duo
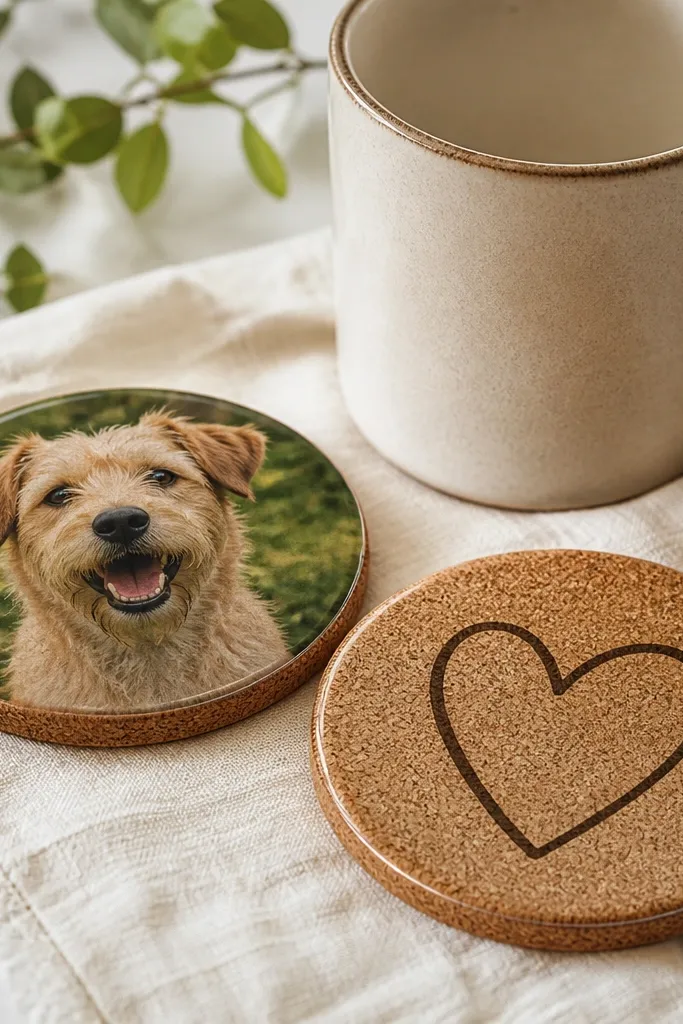
If she drinks coffee or tea every day, coasters are one of the most useful handmade birthday gifts you can make. I do photo transfers on cork because cork has a natural texture that makes the image look like it’s printed, not pasted. The key is sealing: a clear coat makes it smooth enough to slide under a mug without grabbing. I pick photos that have one clear subject and not a busy background — a face, a pet, or a simple scene. It flatters any home style because cork reads warm and neutral, and the colors come from the image itself.
Start by sanding the top of each cork coaster lightly with fine-grit sandpaper so the transfer grips. Print the photo onto transfer paper sized to your coaster, then apply it using the exact heat or pressure method your transfer paper brand calls for. Once cooled, gently rub off the top paper layer so the image stays crisp. Let the coasters dry fully, then brush on 2-3 thin layers of clear varnish, letting each layer cure before the next. Finish by sealing the edges too, so moisture doesn’t creep in from the sides.
Choose photos with high contrast — dark subject on light background makes the transfer look sharp without extra editing.
Don’t skip the varnish layers; photo transfers that aren’t sealed look dull and smear when you set a hot mug down.
4. Sage and Cream Crochet Pouch for Phone or Lipstick
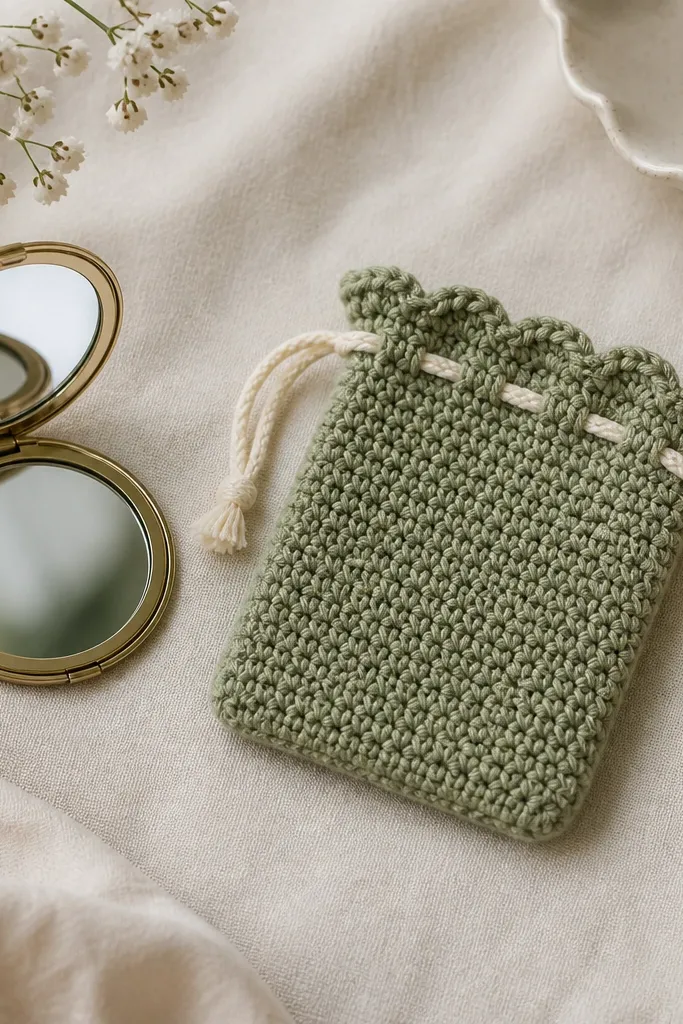
A small crochet pouch feels like a gift she’ll reach for daily because it solves a real problem: loose lip gloss and tangled charging cords. I like sage and cream because it looks calm and clean, and it pairs with almost any bag color. Crochet looks best when the stitches are tight enough that it doesn’t stretch too much — it should hold its shape when she grabs it. If she has a warm skin tone and wears gold jewelry, sage + cream looks especially flattering. If she’s cool-toned with silver jewelry, keep the sage more gray and the cream slightly brighter.
Start by measuring her phone or her favorite compact and add 0.75 inch to both dimensions for a snug fit. Crochet with a tighter stitch like single crochet in a worsted weight yarn, aiming for a fabric that doesn’t show through. Make a drawstring version: leave two short openings at the top row, then weave in a cream cord using a yarn needle. Add a scalloped or simple folded rim by crocheting one extra row and then turning it inward. Finally, block it lightly with steam so the edges look crisp and the pouch lies flat.
Weave the drawstring cord through the same row pattern on both sides so it doesn’t twist when she pulls it open.
Don’t choose super thin yarn; it stretches and the pouch sags like a grocery tote.
5. Painted Wood Spoon Rest with Her Initial
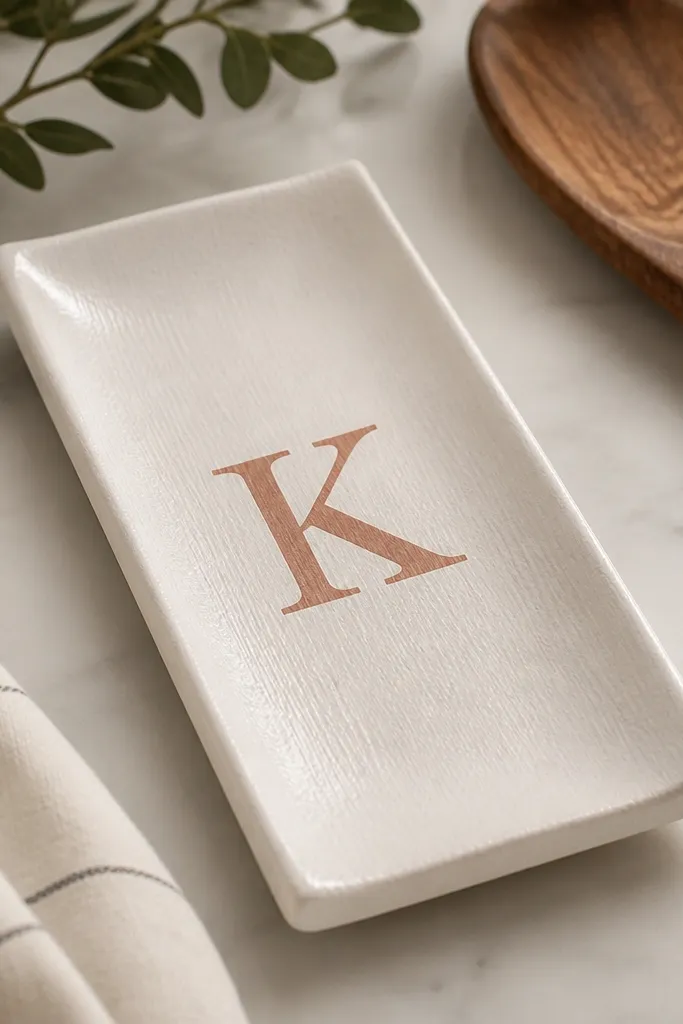
This is one of my favorite handmade gifts because it’s useful and it looks cute the second it sits on her counter. Wood spoon rests are plain at the store, so the personalization is what makes it feel like hers. I paint with matte craft paint and then seal, because a glossy finish on wood looks cheap if it’s not sprayed evenly. The off-white plus terracotta combo looks warm and works with kitchens that lean farmhouse or modern. It also photographs well — the matte paint reduces glare and makes the initial readable.
Start by sanding the spoon rest lightly, then wipe it with rubbing alcohol so paint sticks. Sketch her initial in pencil and paint it with a small round brush for clean edges. Paint the background first in off-white, let it dry, then do the initial on top so you don’t get messy overlap. After the paint cures, seal with 2-3 thin coats of clear water-based polyurethane, brushing in the direction of the wood grain. Let it dry for a full day before using so the seal doesn’t get tacky.
Editor's noteUse painter’s tape to mask the edges, then remove the tape while the final paint coat is still slightly tacky for sharper lines.
Skip thisDon’t paint over oily wood without alcohol wiping — the paint will fisheye and peel after a week.
6. Mini Pantry Label Set with Chalk Vinyl
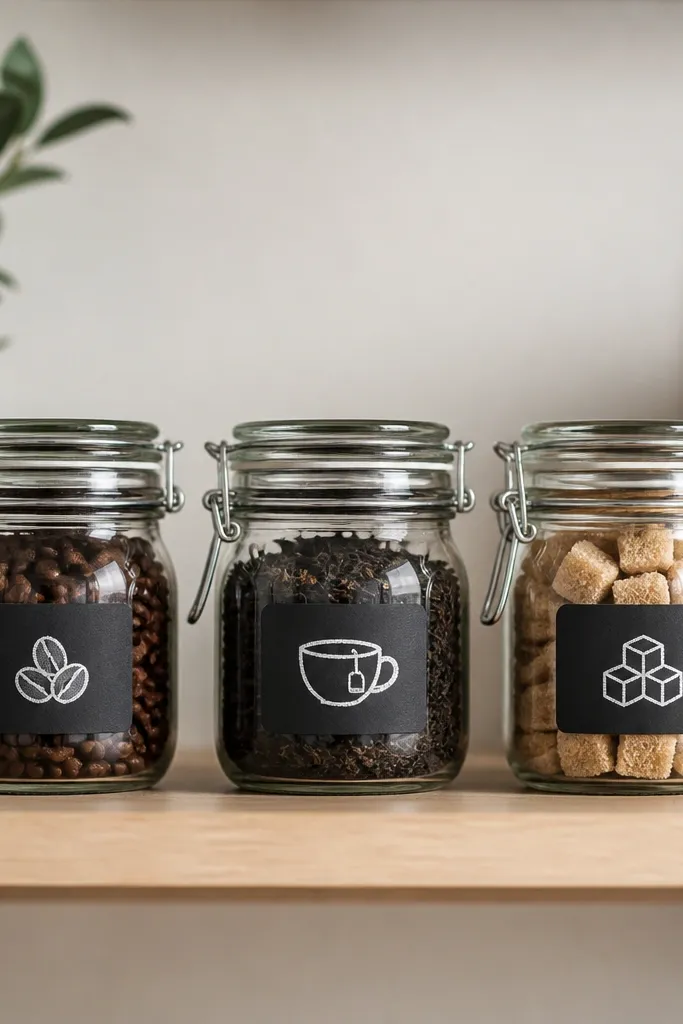
If she’s the type who reorganizes her kitchen every season, pantry labels are a gift that feels like a favor she’ll use right away. Chalk vinyl reads clean and modern, and it doesn’t look like a sticker slapped on last-minute. I use black label strips with white letters because it matches most jar lids and looks good in daylight. Add one tiny icon per jar — a coffee cup, a tea leaf, a sugar cube — because it makes the set feel designed. It flatters any decor style since the jars and lids are the base, and the vinyl text is just a tidy layer.
Start by cleaning and drying the jar surfaces so the vinyl sticks without bubbles. Cut chalk vinyl into label shapes, then weed the excess vinyl using a craft knife. Apply transfer tape on top of the cut vinyl, align it on the jar, then press firmly with a plastic scraper. For a balanced look, keep the label width about 2 inches and center it vertically with a gap of around 1 inch from the lid line. Finally, add a matching label for a “snack mix” jar if you have a photo of her pantry staples.
Editor's noteUse the same font style across all labels; changing fonts makes it look like random crafts instead of one set.
Skip thisDon’t pick glossy vinyl; it reflects light and can make letters hard to read in photos.
7. Resin Photo Keycap Charm with Tiny Glitter
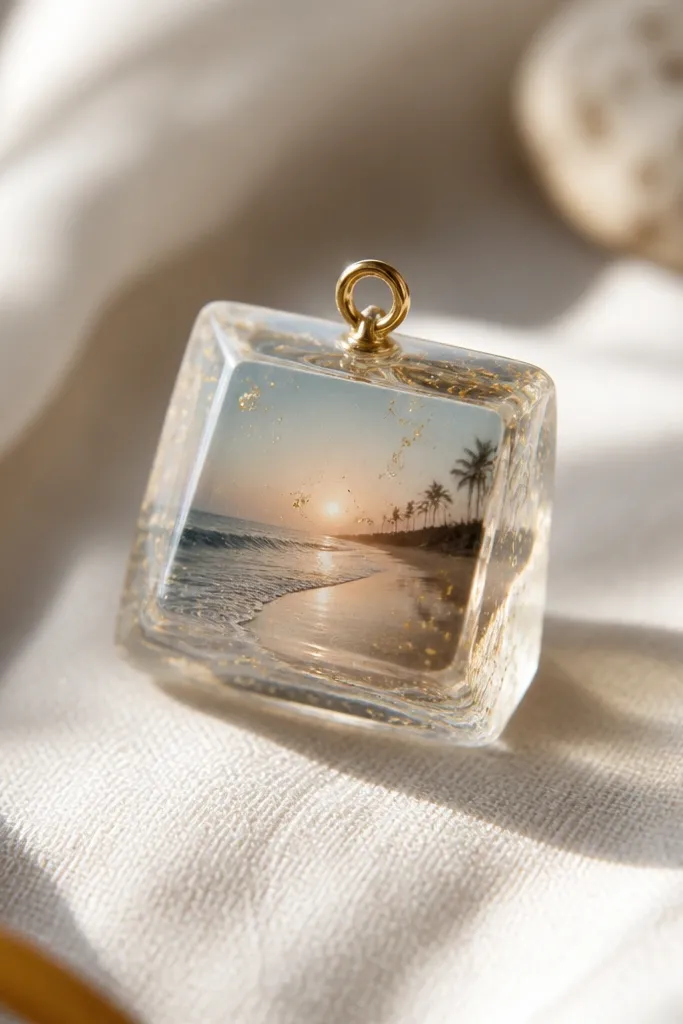
Resin charms are the handmade birthday gifts for best friend vs store bought comparison that she’ll notice immediately. Store-bought charms look flat. Resin has depth — you can trap a tiny photo and seal it in a clear dome so it looks like a miniature keepsake. I like using a keycap shape because it’s sturdy and feels cute on a backpack zipper. For color, gold glitter inside a beach or warm-toned photo looks like sunset even indoors. It suits anyone — the charm is small, and the photo does the personal work.
Start by printing a tiny photo on thin paper and trimming it to fit the keycap mold cavity. Mix resin slowly and stir for the time your brand says so it cures clear. Add a micro pinch of gold glitter to the mold, then pour a thin first layer of resin, place the photo in, and top with more resin to fully cover. Remove bubbles with a toothpick or gentle heat tool, then let it cure without moving it. After it hardens, pop it out, sand any rough edges lightly, and attach a metal loop with a small jump ring.
Seal the photo with a super-thin clear craft sealer before resin if the ink smudges when wet.
Don’t use thick photo paper; it creates a blurry layer and makes the dome look lumpy.
8. Scented Lavender Sachet in a Vintage Pillowcase Fabric
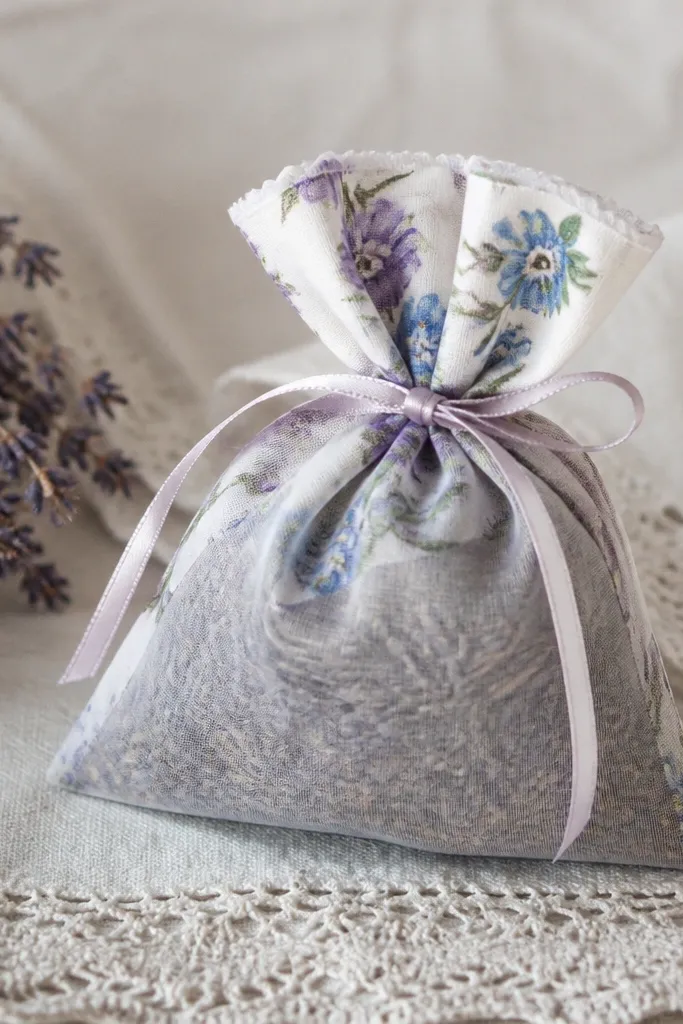
This is the gift I make when I want something that feels calm and personal without being complicated. I use lavender sachets because the smell is gentle, and the fabric feels like a memory. Vintage pillowcase fabric adds character — tiny florals, soft stripes, and that slightly worn cotton texture. If she’s sensitive to strong fragrances, stick to dried lavender only and keep the sachet small enough that it doesn’t overwhelm a closet. The gift works for anyone because you’re giving a scent plus a pretty object.
Start by cutting two rectangles of outer fabric and one rectangle of sheer muslin for the inside. Sew or glue the inner muslin to hold the lavender, then fill with 1 to 2 tablespoons of dried lavender. Place the inner pouch inside the outer fabric pieces, then sew around the edges leaving a small opening. Turn it right-side out, close the opening with a ladder stitch, and tie the top with a ribbon that matches the fabric pattern. Let it hang or rest for a day so the scent disperses evenly.
Editor's noteIf you want it stronger, add a single drop of lavender essential oil to a cotton ball and tuck it inside the sachet pocket.
Skip thisDon’t overfill; too much lavender makes the fabric stiff and the knot looks messy.
9. Embroidery Hoop Wall Art with One Quote Line
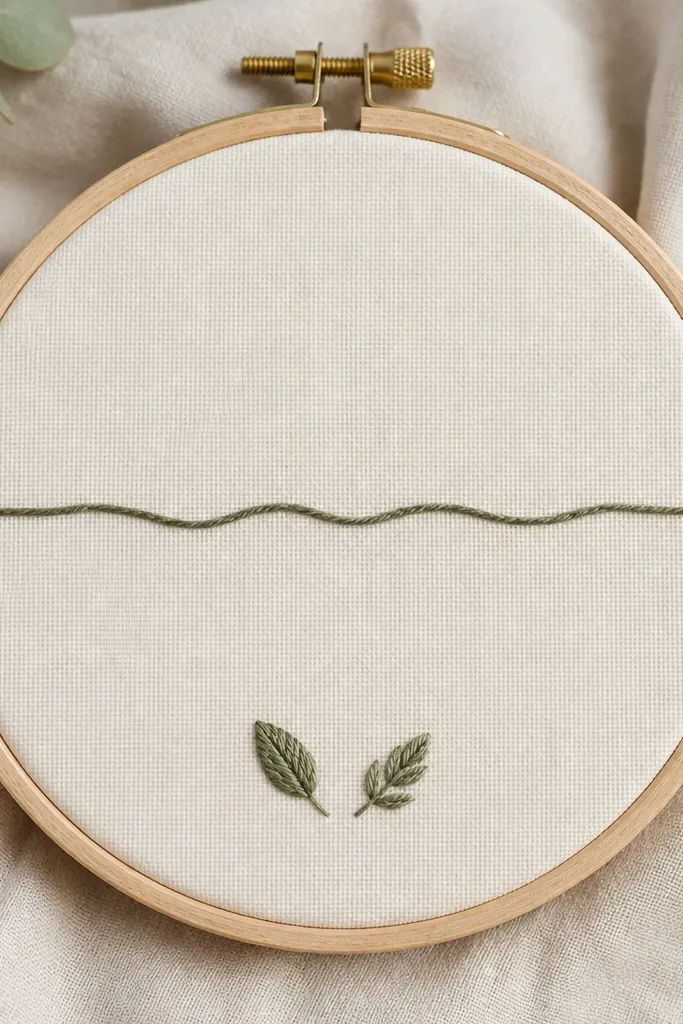
This is handmade decor that doesn’t look like a craft project because it’s limited. One quote line — not five — keeps it clean, and the embroidery thread texture adds depth. I use a small hoop, like 6 inches, because large hoops can look like a hobby if the lettering isn’t crisp. Cream fabric inside makes the thread color pop, and muted green or dusty blue looks good in most rooms. It also flatters different decor styles: modern because it’s minimal, and cozy because it’s fabric-based.
Start by choosing a hoop size — 6 or 8 inches — and stretching fabric taut, then trimming the excess. Lightly mark the quote with a washable fabric pen and plan for even spacing between letters. Stitch the letters with backstitch or satin stitch for thicker strokes, using 3 to 6 strands depending on the thread thickness. Add small leaf motifs in a corner to balance the composition, then trim the fabric edges and secure the backing. If you want a clean finished look, add a backing fabric circle and glue it down with fabric-safe glue.
Editor's noteUse a ruler to keep the baseline straight; crooked text is the fastest way it looks homemade in a bad way.
Skip thisDon’t use thick yarn for lettering; it makes the letters chunky and hard to read.
10. Knotted T-Shirt Yarn Tote with Chunky Handles
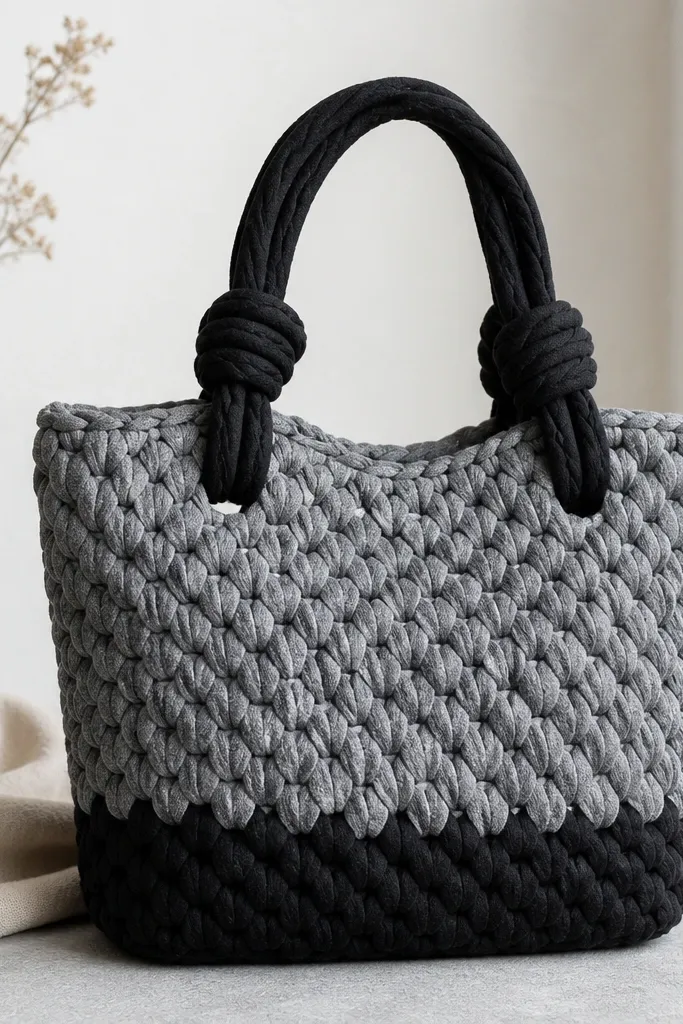
This tote is a “real life” gift because it holds weight and looks bold in photos. I make it from t-shirt yarn because it’s soft, stretchy, and doesn’t fray like regular rope. The black and heather gray combo works for almost every outfit, and the chunky handles make it feel sturdy even when it’s lightweight. If she carries a lot — laptop, books, a water bottle — this is the kind of handmade gift that actually gets used. The texture also hides small imperfections, which makes the final look forgiving.
Start by cutting old cotton t-shirts into strips and looping them into yarn using a simple fringe cutting method. Roll the yarn into balls so it doesn’t snag while you work. Crochet or braid the base with a tight stitch so the bag doesn’t sag; I do a 10-inch wide base and build sides up to about 12 inches. Then attach chunky handles by braiding a long strip and sewing it into the top corners with heavy-duty thread. Finish the top edge with a single crochet border so it looks clean and doesn’t stretch out.
Editor's noteWash and dry the t-shirt yarn before using; it shrinks slightly and makes the tote hold its shape better.
Skip thisDon’t use polyester t-shirt yarn; it feels slick and the stitches slide around while you work.
11. Embossed Leatherette Bookmark with Corner Stitch
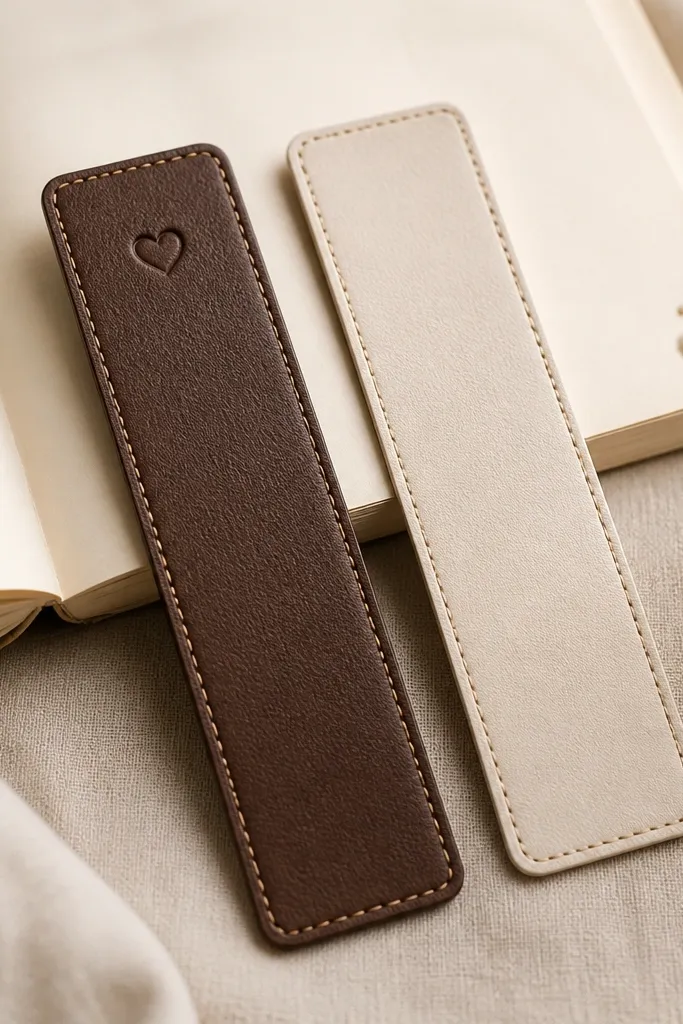
Bookmarks are a quiet gift that feels thoughtful because she’ll use it every time she reads. Faux leatherette is easy to work with, and embossing makes it look like real leather when you catch the light. I use chocolate brown because it hides wear and looks good with cream pages, and I stitch a single corner seam so it looks finished. If she reads a lot, she’ll notice the durability. The shape works for any hand size and doesn’t snag pages if you keep the tip narrow.
Start by cutting bookmark rectangles about 2 inches wide and 6.5 inches long. Lightly round the bottom corners so it slides between pages easily. If you have an embossing tool, stamp a small heart or initial near the top, then punch a tiny hole or two for stitching. Stitch around the corner with a saddle stitch look using waxed thread so the seam sits flat. If you want extra polish, glue a thin strip of matching fabric to the back so the edges look even, then trim flush.
Editor's noteWax the thread with beeswax before stitching — it tightens the seam and looks neater.
Skip thisDon’t cut bookmarks too wide; wide bookmarks catch and bend pages.
12. Hand-Painted Wine Glasses with Minimal Line Art
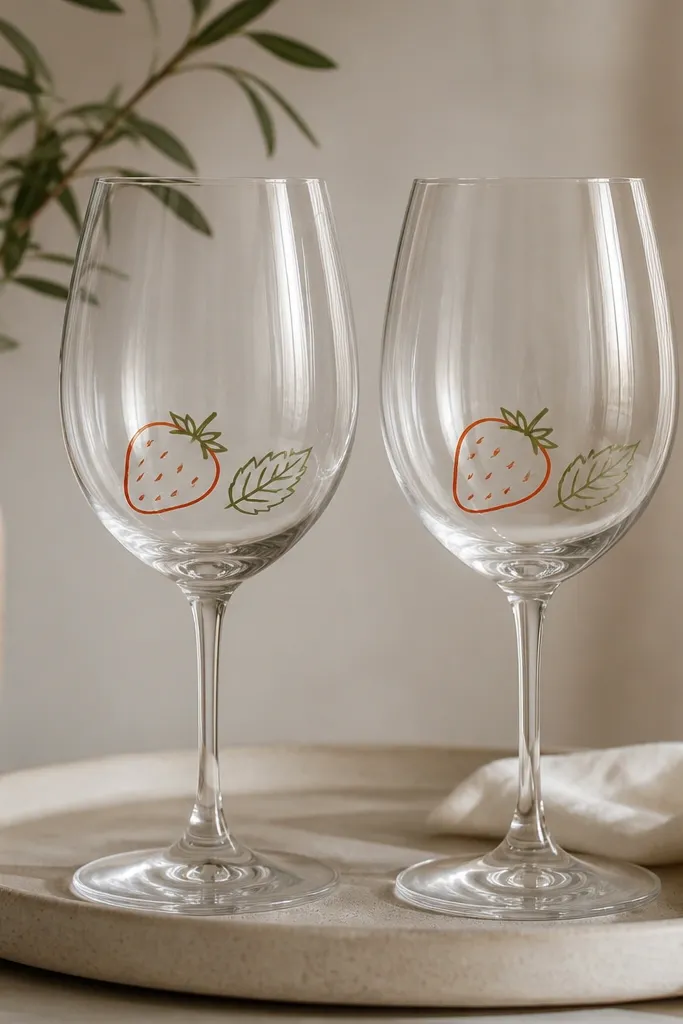
Painted glasses are the “special occasion” handmade birthday gifts for best friend vs store bought moment because they feel like a personal ritual. I choose minimal line art because it stays classy and doesn’t look like a kid’s craft when it dries. Use paint meant for glass, and keep the design near the base — it’s easier to control and it won’t smear as much with hand contact. Muted red strawberries and sage leaves look great on skin tones because the colors are warm but not neon. The glasses also flatter different table styles since the art is small and the glass stays clear and modern.
Start by washing and fully drying the glasses, then wipe with rubbing alcohol so paint bonds. Sketch the line art lightly with a pencil or use tape to mask a straight guideline for placement. Paint with glass paint in thin layers, letting each layer dry before adding another. Keep the design about 2 inches tall and centered, and add a small dot or leaf to balance the line weights. Cure the paint using the exact method on the bottle — usually air dry followed by oven curing — then hand-wash only for the first week to protect the finish.
Editor's notePractice on a scrap glass or an old jar first; your brush control will show fast on clear surfaces.
Skip thisDon’t use acrylic craft paint; it flakes when the glass goes through washing.
13. Handmade Scrunchie Set with Matching Bow Tie
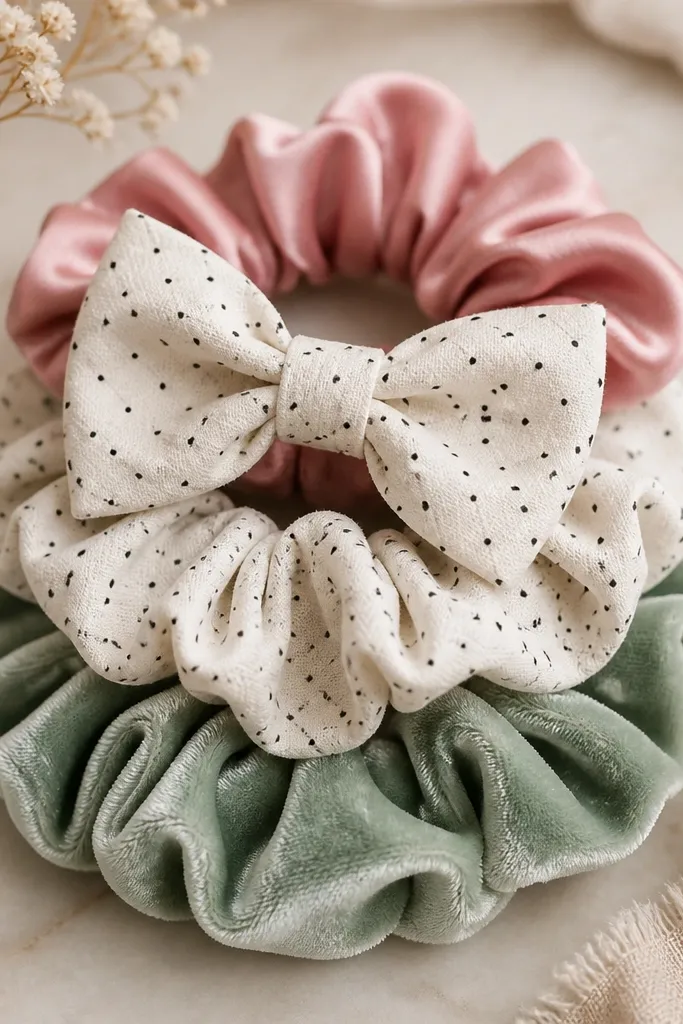
Scrunchies are a gift that feels personal because fabric choice changes everything — sheen, softness, and how it grips hair. I make them with elastic that’s wide enough to avoid that tight dent in the ponytail. The matching bow tie is a fun add-on that turns “hair accessory” into a theme. Dusty pink satin is the prettiest for photos, but I balance it with cotton and velvet so it feels wearable, not costume-y. For styling, satin scrunchies suit fine hair because they’re gentle, while velvet grips thicker hair without slipping. Everyone looks good in a coordinated set because the color tie-in makes outfits look intentional.
Start by cutting fabric strips about 2.5 inches wide and long enough to wrap around the elastic comfortably. Sew the fabric into a tube right sides together, turn it right-side out, then press flat. Insert elastic into the tube, then close the ends with a tight stitch so the scrunchie gathers evenly. For the bow, cut two small rectangles and sew them into loops, then gather at the center and stitch to a small elastic band or clip. Finally, topstitch around the bow edges for a crisp look, then set everything aside to flatten under a book while it dries.
Editor's noteUse a slightly shorter elastic for velvet scrunchies; velvet stretches and you want the gather to look full.
Skip thisDon’t skip pressing; wrinkled fabric makes the scrunchie look sloppy and cheap.
14. Personalized Seed Paper Note Cards for Planting
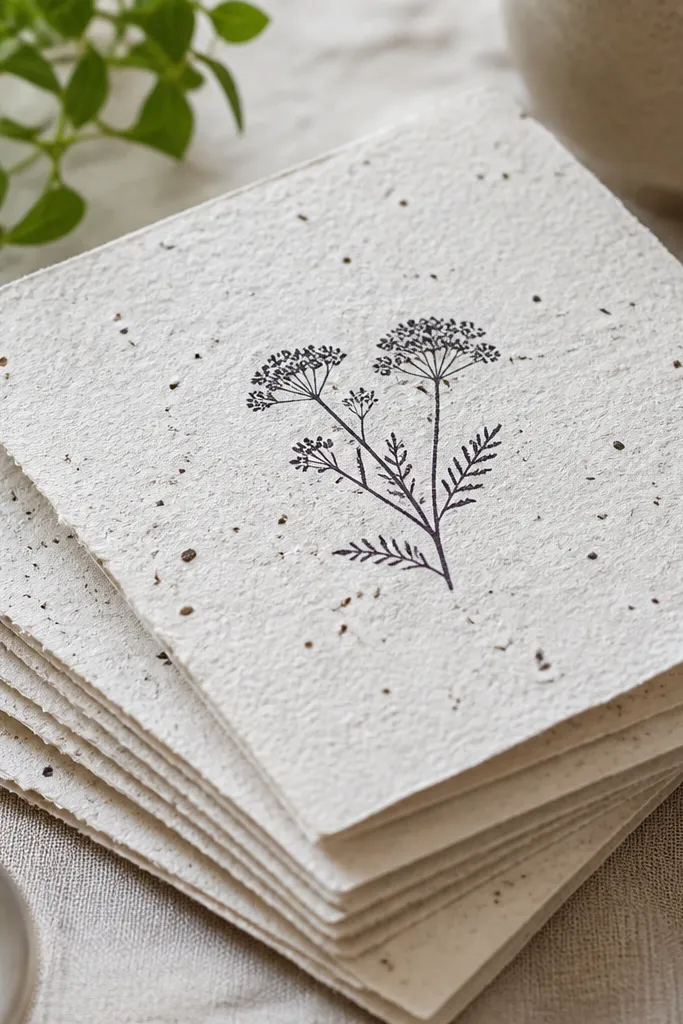
Seed paper note cards are a gift that feels like two things at once: a card and something she can grow. The best part is the personalization — you can stamp her name, a short message, or a date with clean ink. I like seed paper with visible specks because it looks real and not like a novelty. Choose a message that fits her — a “happy birthday” plus one line about what you admire, kept short so it reads clean. This works for any decor style because it’s flat, simple, and the planting part happens later.
Start by cutting seed paper into your card size, like 4 x 6 inches, and folding carefully along the grain if the paper has a direction. Stamp or use a pigment ink pen for the message, pressing firmly so the letters don’t fade. Layer the seed paper onto a plain card base — kraft or cream — so it has structure and you can write inside if you want. If you want a stronger stamp, let the ink sit for a full minute before closing the card. For the planting instruction, print a small back card that says to soak in water for 20-30 minutes, then plant directly in soil and keep it moist.
Editor's noteUse pigment ink instead of inkjet prints; seed paper absorbs ink and regular ink can bleed.
15. Linen Blend Makeup Bag with Heat-Set Vinyl Label
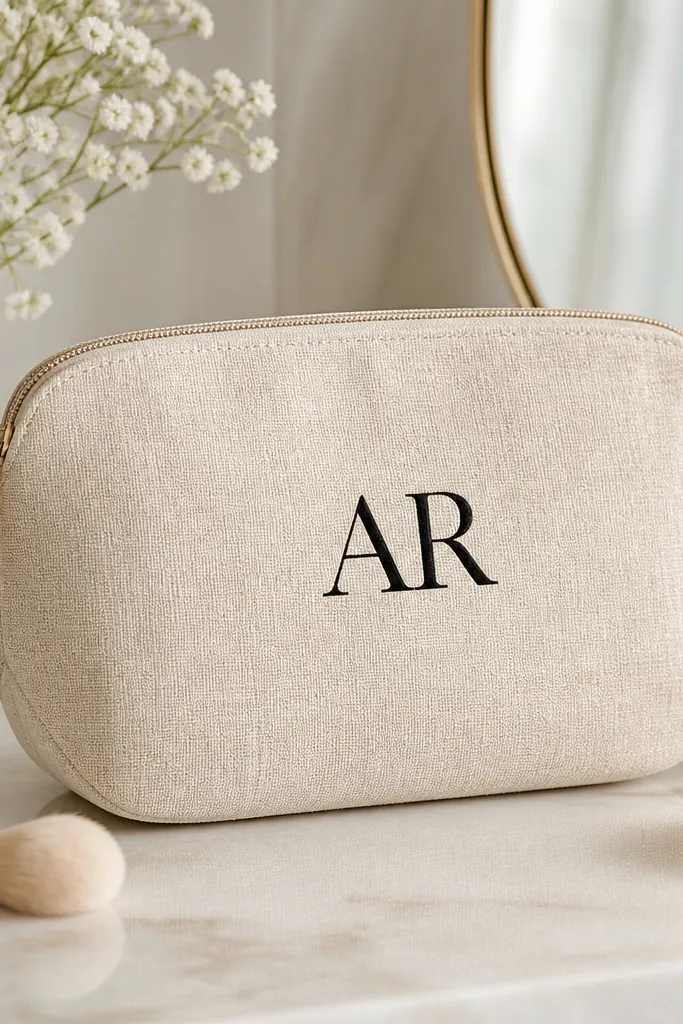
A makeup bag is one of those gifts that looks simple but lands hard because it’s used constantly. Linen blend fabric feels nicer than the shiny nylon you find in stores, and the zipper makes it feel durable. I add a heat-set vinyl label because it’s clean, readable, and resists smudging better than hand lettering. Beige + black initials is classic, and it looks good with both warm and cool wardrobes. If she’s picky about organization, this bag reads like a functional upgrade, not a random craft.
Start by cutting or selecting a linen blend makeup bag pattern with a front panel large enough for one label. Apply heat-set vinyl to the front: place butcher paper over the vinyl, press with a heat press or iron at the temperature your vinyl instructions specify, and let it cool before peeling the backing. Sew the bag if you’re making it — I recommend a boxed bottom if you want it to stand up. Install the zipper using a zipper foot, then topstitch 1/8 inch around the panel for a neat edge. Add one small interior pocket using a scrap of cotton lining if you want extra utility.
Stitch around the vinyl edge if you want maximum durability; it stops the vinyl from lifting at corners.
Don’t iron directly on vinyl — use protective paper or you’ll get bubbles.



