

1. Gold-Ink Photo Tile Coasters
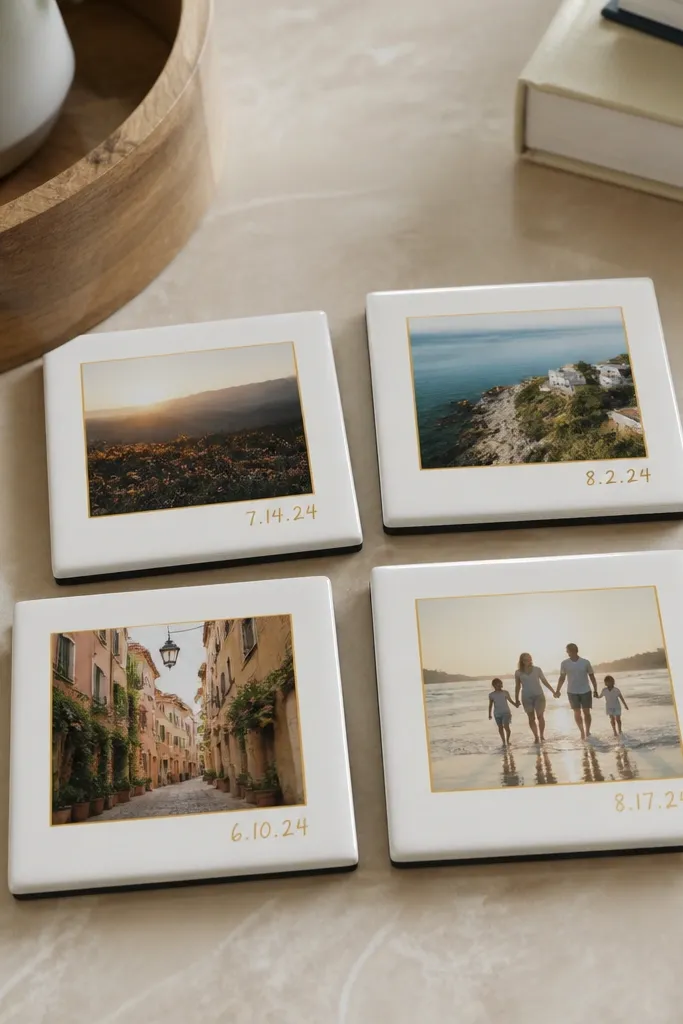
This is the gift I reach for when my best friend hates clutter but loves personal touches. The hero is a small photo center — think a close-up of her dog’s face or a candid from your last trip — framed with a thin gold-ink border so it looks like a product, not a craft. I like ceramic tiles because they feel weighty in the hand, and the glossy finish makes the photo pop without looking dull. Choose photos with strong contrast — black and white or bright backgrounds — and keep the gold border consistent on all four. It looks especially good for people who decorate with neutrals and wood, because the gold line ties into brass accents without shouting.
Start by printing four photos at 2.5 x 2.5 inches on photo paper, then trim each one with a craft knife so the edges are sharp. Brush a thin layer of clear decoupage medium onto the tile, place the photo, and smooth outward from the center with a silicone tool or old credit card. Let it cure, then seal the top with two more thin coats so the surface feels smooth under your fingertips. Finish by adding a gold paint pen border and a tiny date stamp near one corner. Finally, glue felt or cork squares to the bottom — I use 1/2-inch cork because it stops sliding on wood floors and feels sturdy.
Editor's noteIf your photos have busy backgrounds, crop tighter before printing. A cleaner crop makes the gold border look intentional instead of random.
Skip thisDon’t use thick glue layers — they create cloudy bumps that make the tiles look homemade.
2. No-Sew Fabric Bookmark Set with Faux Tassels
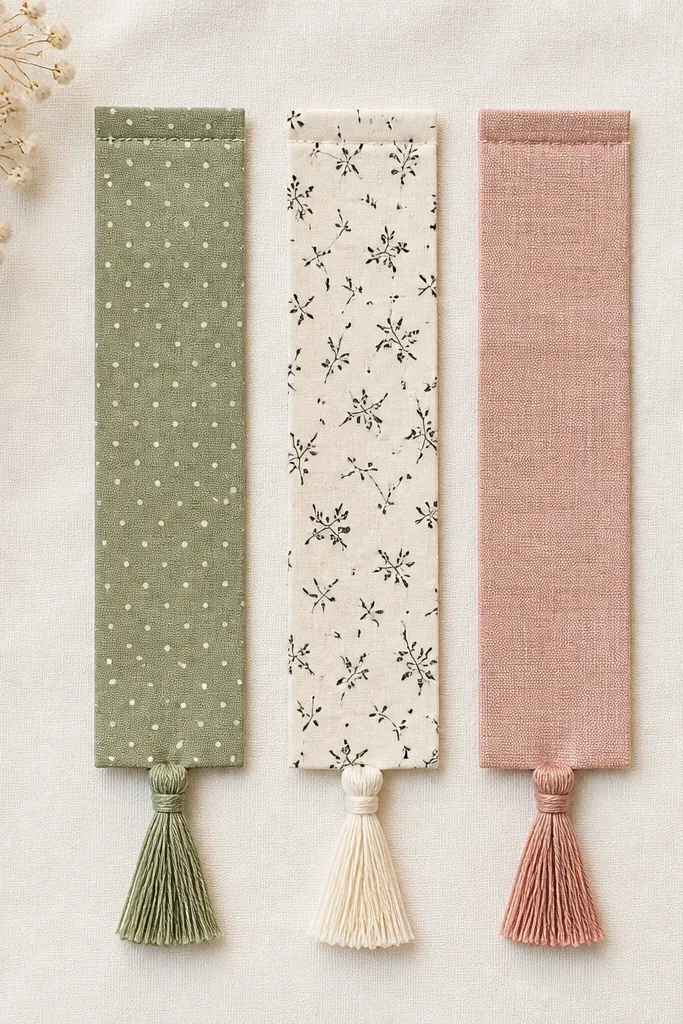
Bookmarks are small, but they’re personal in a way store-bought packs rarely nail. I make these from cotton quilting fabric because it holds crisp folds and doesn’t fray like slippery satin. The faux tassels add movement, and the folded top gives a polished, finished edge that looks like it came from a shop. This set works beautifully for a bookish friend who likes cozy aesthetics, and it flatters different skin tones because the colors sit near paper and don’t clash with her hands. If she reads in the evenings, the soft fabric texture also feels warmer than plastic bookmarks.
Cut three rectangles of fabric about 2 inches wide by 7 inches long, then cut a small 1-inch slit at the very top center of each strip. Fold the top down 1/2 inch and glue it closed with fabric glue, pressing with a flat object for a full minute. For the tassels, wrap embroidery floss around a piece of cardboard 20 times, then slide the bundle through the slit and tie it tightly with a single floss strand. Trim the tassels so they all match — mine end up about 1.25 inches long. Let everything dry flat, then add a tiny fabric “label” tag on the back with a date or a short inside-joke using a fine-tip fabric marker.
Editor's noteChoose fabrics with one clear pattern and one solid — the set looks cohesive even when the designs differ.
Skip thisSkip stretchy knit fabrics; they curl when glued and make the top edge look uneven.
3. Custom Seed Paper Gift Tags
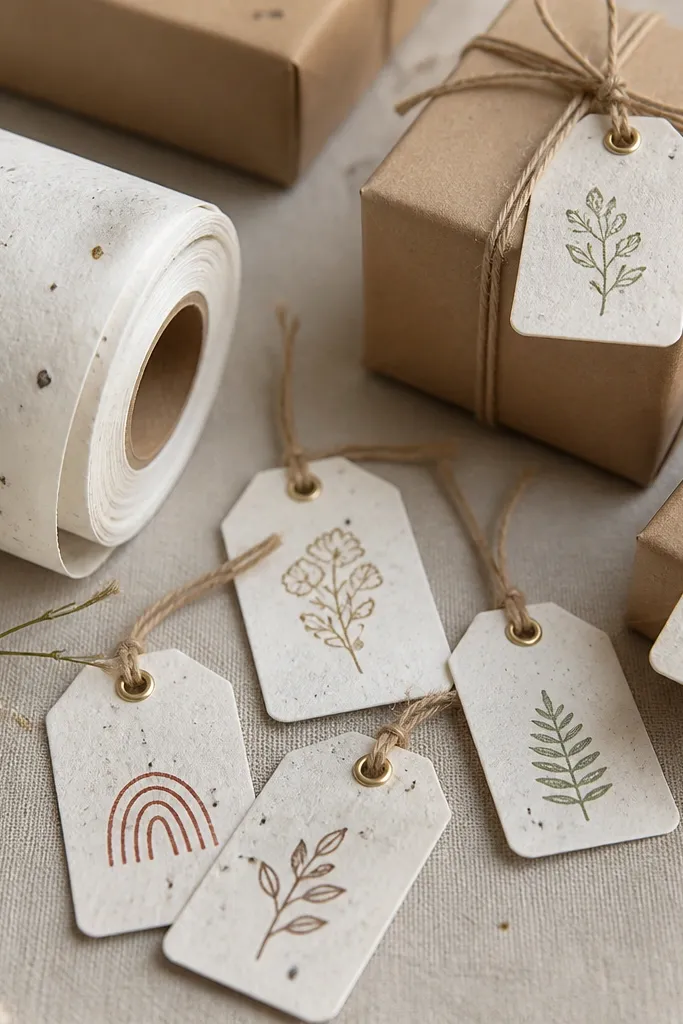
If you want something that feels thoughtful without taking over your weekend, seed paper tags are the move. They look like thick handmade cards when you stamp them, but they also grow after use, which makes the gift feel like it keeps giving. I like using seed paper for tags because the size is small enough that it dries quickly and doesn’t warp much. This works great for friends who love plants, but it also works for people who don’t — because the tag is still a tag first. The stamping style is what makes it look store-bought: clean, centered ink and consistent spacing.
Cut seed paper into tag shapes about 2 inches wide by 3.5 inches tall, then punch a hole at the top using a hand hole punch. Stamp with archival ink — I use black — keeping the stamp pressed for a full 10 seconds each time. For a polished look, add a thin line border with a fine-tip waterproof pen and a tiny date in the corner. Tie each tag to a gift box with 12-inch twine and add a small wax seal sticker if you want extra structure. Let the ink dry fully before you pack it, because wet ink smears fast on textured paper.
Write the message in all caps for the cleanest look — “GROW WITH ME” or “PLANT THIS LOVE” reads crisp.
Don’t use glossy markers on seed paper; the ink sits unevenly and looks streaky.
4. Painted Mason Jar Desk Organizer with Label Maker Font
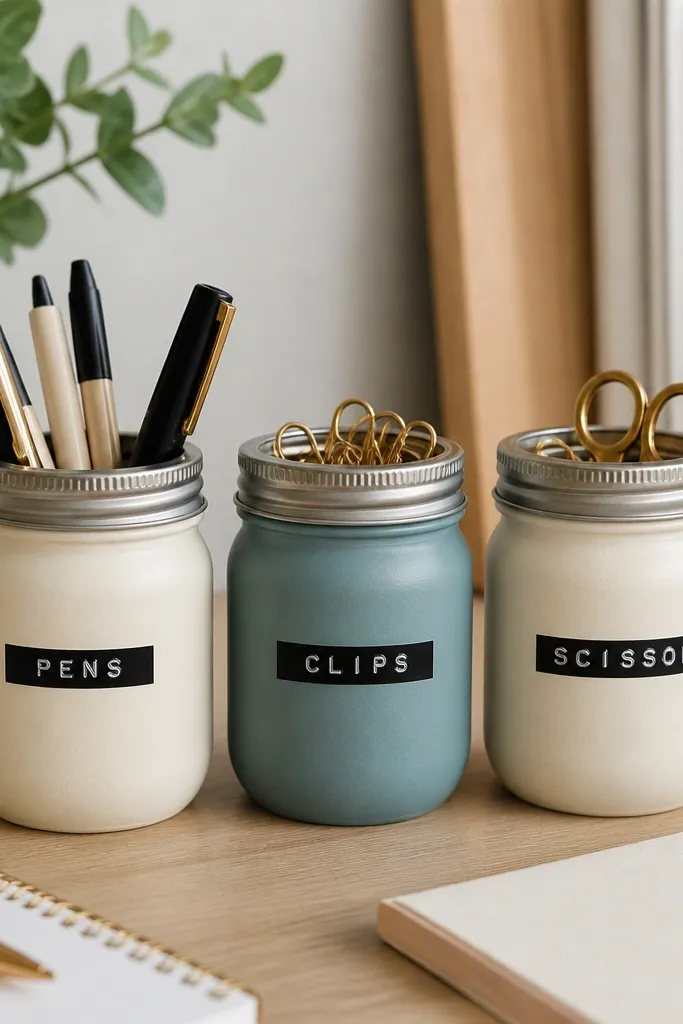
This is the DIY version of a desk accessory that actually gets used. Mason jars have weight and structure, so they don’t look flimsy even when you paint them at home. I paint in matte finishes because glossy paint looks cheap under desk lighting. The hero is the label — label-maker style text in black on a cream strip — because it makes the whole thing look intentional and organized. It flatters a friend who likes tidy desks, and it also works if she’s a messy genius; the jars separate chaos into categories.
Wash and dry three mason jars, then lightly sand the outer surface with 220-grit so paint sticks. Spray with matte acrylic primer first, then paint each jar with matte acrylic in cream and teal, letting each coat dry 20-30 minutes. After the paint cures overnight, add a label strip: cut 1-inch tape or label paper, print or write the category, and wrap it straight across the jar. For lids, I leave the metal natural and clean it with a little rubbing alcohol so it doesn’t look dull. Fill with pens and paper clips, then add a small folded note inside the organizer lid — one sentence only, like “For your next brilliant idea.”
Editor's noteUse painter’s tape to mask the jar lines for the cleanest color edge. One straight line makes the whole set look pro.
Skip thisDon’t paint over dust; even tiny specks show up as bumps and make the finish look rough.
5. Pressed Flower Candle Sleeve with Hidden Matches Pocket
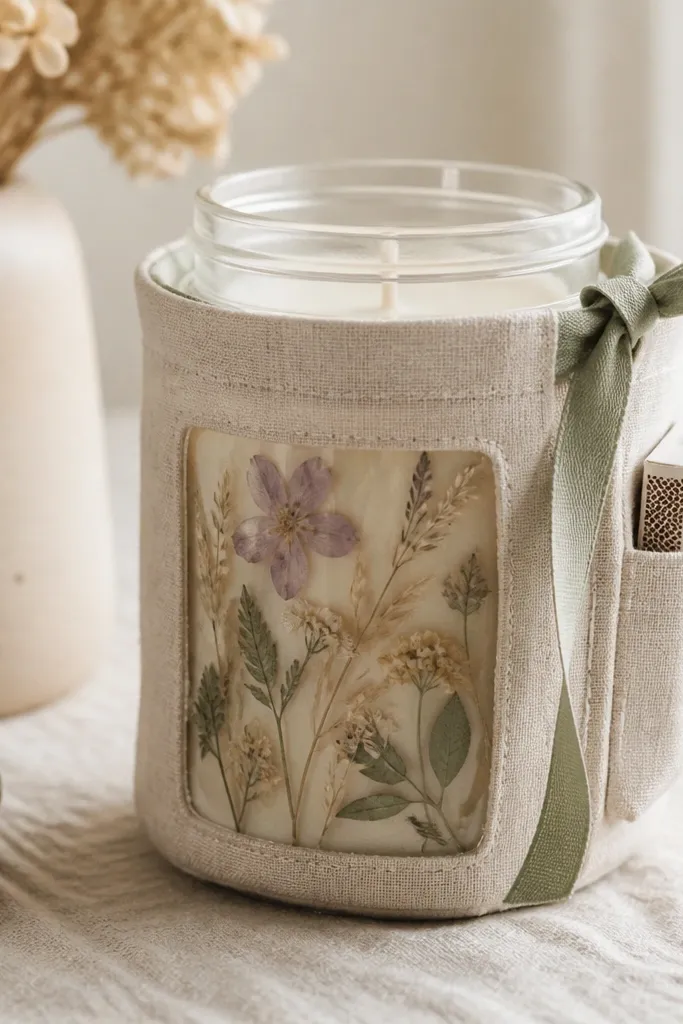
This one is for the friend who likes candles but hates plain packaging. The candle sleeve makes the gift feel like decor, not a random purchase, and the pressed flowers add that soft, romantic look. I use linen because it drapes nicely and holds shape around the jar without sagging. The hidden matches pocket is the practical detail that makes people actually use the gift instead of leaving it on a shelf. It flatters everyone because the palette stays light and neutral; you can choose the pressed flower colors to match her home — pinks for warm rooms, blues for cool spaces.
Cut a linen rectangle to wrap around the candle jar with a 1-inch overlap, then hem the bottom edge with a simple folded stitch using fabric glue if you don’t sew. Create a clear window panel from heat-safe clear vinyl or a plastic sheet made for crafts, and glue it onto the front section. Arrange pressed flowers under the clear window — keep them small so they don’t look crowded. Add a small pocket on the side using fabric scraps sized to fit a standard matchbox, then glue or stitch the pocket opening closed. Wrap the sleeve around the jar and tie with sage ribbon at the top — secure the ribbon knot so it sits centered.
Press flowers for at least 7-10 days so they don’t puff under the vinyl window.
Don’t use regular plastic bags; they wrinkle and look cloudy next to the candle glass.
6. Monogram Embroidered Key Fob on Vegan Leather
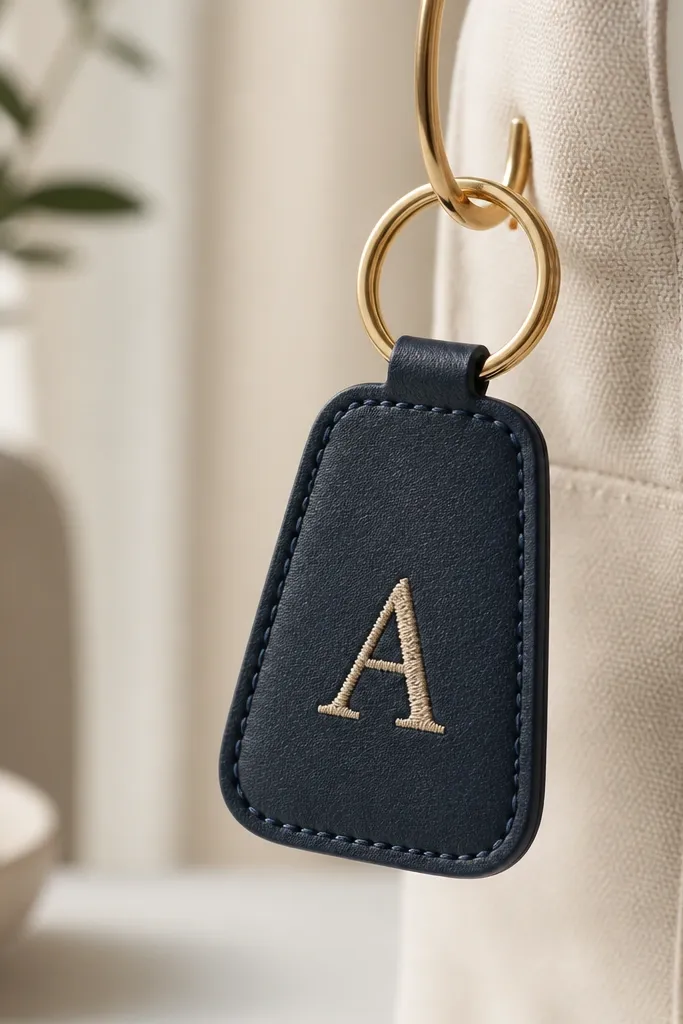
This is the DIY gift that feels personal every time she reaches for her keys. Vegan leather gives you that sleek, store-like look without the weight of thick hide, and it’s forgiving for beginners. The monogram is the hero because it makes the fob look like a custom accessory instead of a craft. I like pale gold thread on navy because it reads warm against cool tones in daylight. This also flatters different skin undertones because the thread sits against the metal ring and doesn’t fight clothing colors.
Cut a rectangle of vegan leather about 1.75 inches wide by 5 inches long, then round the corners with scissors. Fold it in half lengthwise, then punch two holes on each side near the fold for the stitching — I use a spacing of about 1/4 inch from the edge. Thread a hand needle with embroidery floss doubled, and stitch a simple running stitch across the monogram path using the letter outline as your guide. For the monogram, I trace the letter lightly with a pencil, then stitch over it with straight stitches. Finally, stitch a small strip across the top to hold the key ring loop, and burnish the edges with a fingertip or edge tool so it looks smooth.
Pick a monogram font with straight lines like a block letter. Curves stitch slower and look messy if you rush.
Don’t skip hole spacing; uneven holes make the stitching look wavy and cheap.
7. Salt-Rub Concrete Look Coasters with Color-Blocked Rim
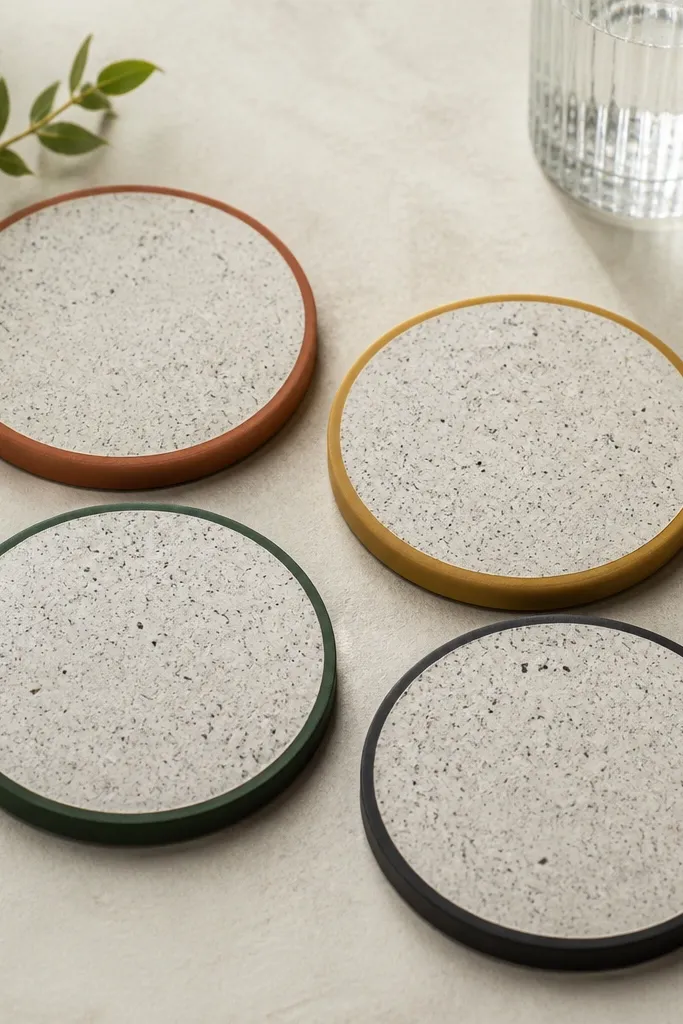
These coasters look like they came from a design store because the texture reads “material,” not “painted.” The salt-rub method creates a speckled, concrete-like surface without needing molds that cost a lot. I do a simple color-block rim so the set looks cohesive even if the center texture is similar. This gift works for friends who drink coffee or host, and it looks great in kitchens with wood, marble, or black hardware. The matte finish also hides tiny imperfections better than glossy coatings, which matters when you’re DIY-ing.
Mix a coaster batch using quick-set cement powder and water in the ratio the bag recommends, then stir until it looks like thick yogurt. Pour into round silicone molds sized about 4 inches wide, tap the molds to release bubbles, and let them set for the time on the cement instructions. When semi-set, lightly rub the surface with a damp paper towel and a pinch of salt — you’re aiming for speckles, not full destruction. After curing fully, paint just the outer rim with small foam brush strokes in chosen colors, keeping the band width around 1/8 inch. Seal with a matte clear sealer so the edges don’t chip when stacked.
Editor's noteDo a test batch of one coaster first if you’ve never used cement. The texture comes out better once you see your mix thickness.
Skip thisDon’t skip sealing; unsealed cement stains from hot mugs and looks dull fast.
8. Layered Paper Dome Keepsake Box
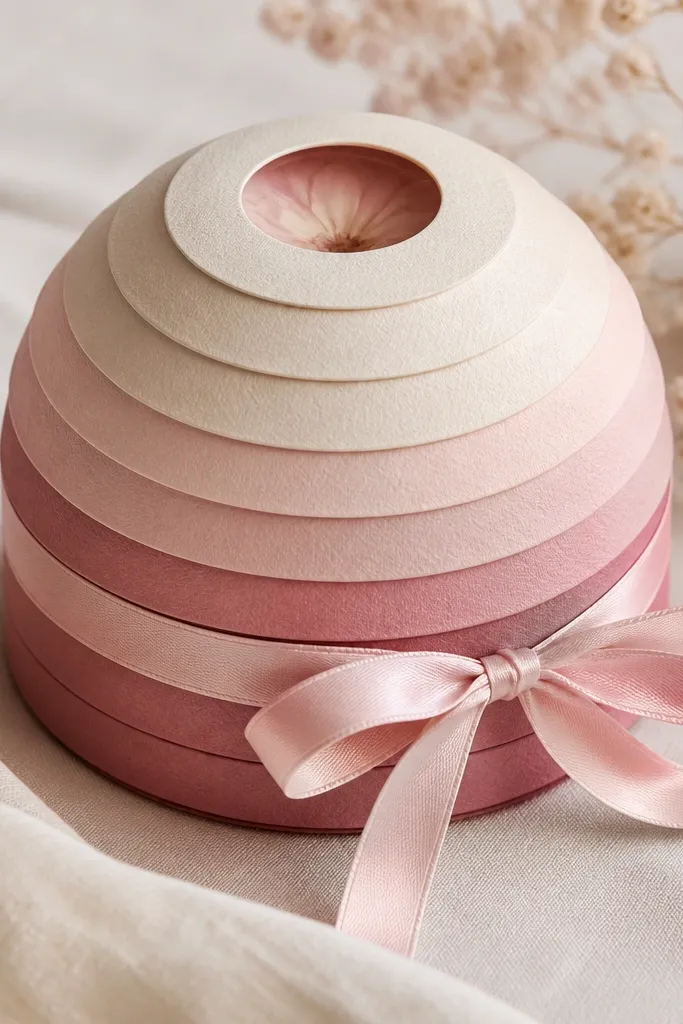
This gift is for the friend who saves tiny things — concert stubs, notes, perfume samples, little treasures. A layered paper dome looks dramatic on a desk, and the best part is you can make it match her color palette exactly. I build these with scrapbook cardstock because it holds crisp folds and doesn’t sag. The hero element is the dome top — it catches light from above and makes the whole box feel special. It flatters minimal interiors because the shape is sculptural while the colors stay soft and controlled.
Cut a base circle from thick cardstock at about 4 inches wide, then cut five more circles slightly larger for the stepped layers. For each layer, score and fold the circle into a shallow dome using a craft bone tool, then glue the seam with a thin line. Build the layers from smallest to largest by gluing the dome edges to the previous layer. Add a ribbon tie by punching two holes near the top and threading 10-12 inches of ribbon through each. Finally, line the inside with a contrasting paper strip about 1 inch tall so it looks neat when she opens it.
Use one gradient set of papers so the dome looks intentional instead of like random scraps.
Don’t use thin printer paper; domes collapse and the edges look jagged.
9. Custom Spotify-Style Playlist Bottle Labels
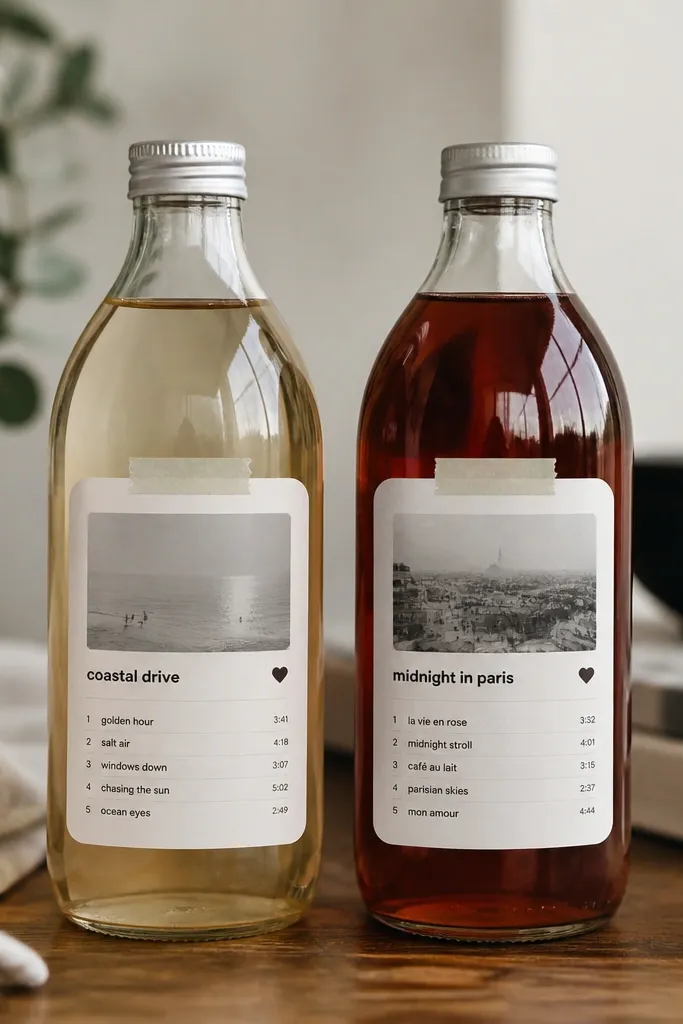
If your BFF loves music, this is the DIY that makes a boring bottle feel personal. I don’t try to recreate the whole app UI — I keep it simple: playlist name, five songs, and a short message that you and she both get. The label is the hero, and the bottle is the canvas. I use matte label paper because glossy printing looks plasticky on glass. This gift works for friends who are always turning songs into inside jokes, and it also looks good in photos because the black text stays crisp.
Pick bottles in a similar size — I use 8.5-10 oz bottles — then wash and dry them completely so the label sticks. Print labels at about 3 x 5 inches, then round the corners with a corner punch. Add five song titles you know she’ll recognize and include one short line like “Driving playlist for the next catch-up.” Tape the top with a thin washi strip so it looks layered, then apply a clear adhesive label cover or a thin layer of mod podge to protect the print. Finish by tying a small ribbon around the neck and writing the date in tiny text on the back with a fine pen.
Use one font style for all song titles and keep line spacing tight. Tight spacing makes it look designed, not handwritten.
Don’t put wet ink labels on glass; the text smears and the whole set looks rushed.
10. Sew-Free Felt Hanging Plant Tag Kit
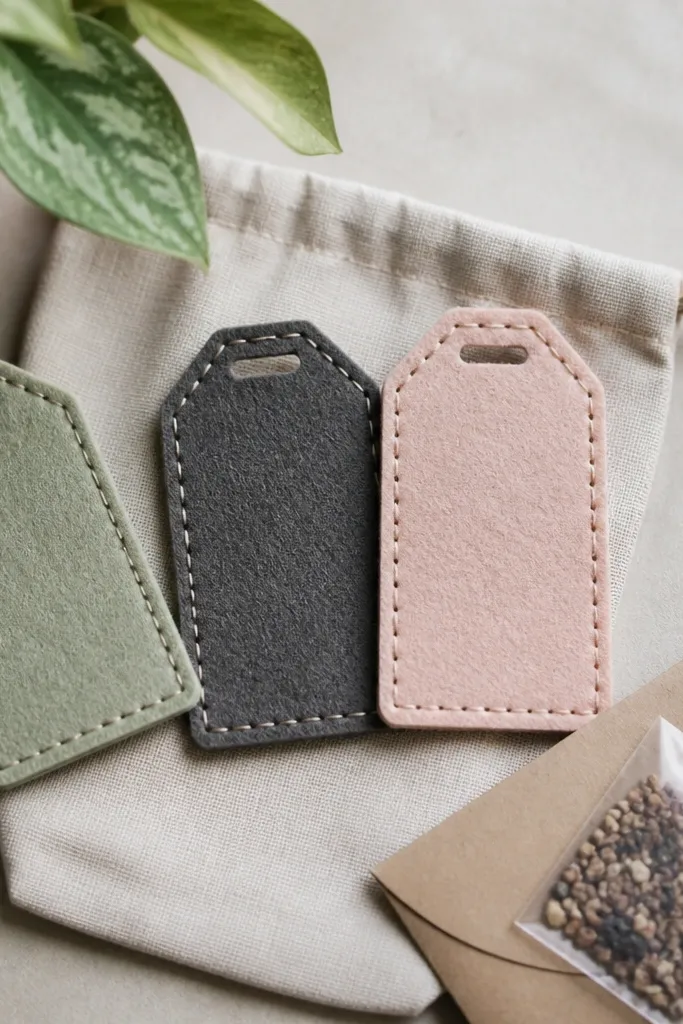
This is a gift for the friend who keeps plants alive and likes a little structure. Felt tags look cute and stay readable, and the hanging format is practical for herbs and desk plants. I like sew-free because it keeps the project fast, but the tags still look tidy when you use consistent shapes and neat edges. The hero is the felt tag itself — a clean rectangle with a small window where you can swap “month planted” labels. It flatters almost any plant setup because felt colors can match the plant pot tones without needing perfect interior matching.
Cut felt rectangles about 3 x 5 inches, then round the top corners. Add a border by gluing thin stripes of felt or using fabric glue dots along the edge for a faux stitch look. Punch two holes near the top and cut a piece of twine about 8 inches long, then feed and tie it to hang. Create a small label pocket by gluing a felt strip on the front bottom, sized to fit a 2 x 3 inch card. Write plant name and a “planted on” date in black marker, and include a small envelope of seeds tied to the twine so she can plant later.
Editor's noteUse a black Sharpie on white label cards. It stays readable through watering splashes better than colored markers.
Skip thisDon’t overfill the pocket; cards bulge and the tag looks messy.
11. Hand-Painted Ceramic Spoon Rest
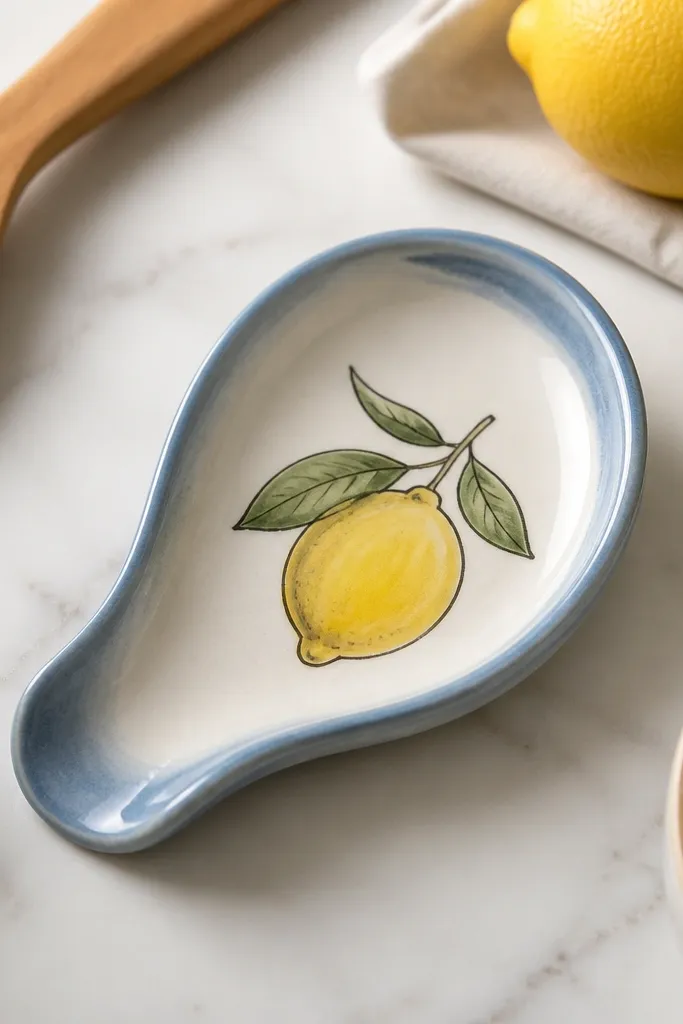
A spoon rest is one of those practical gifts people actually use daily, and painting it makes it feel personal. Ceramic holds paint well when you use the right craft paint and seal it properly, and the curved shape keeps spoons from sliding off the counter. I keep the design minimal — one fruit, one flower, or a single line drawing — because too many details look muddy on a small surface. This works especially well for friends who cook a lot and have a kitchen with visible countertop space. The glossy finish makes it feel store-bought without needing fancy packaging.
Buy a plain ceramic spoon rest or small ceramic tray from a craft store, then clean it with rubbing alcohol. Use underglaze or ceramic paint designed for firing, then paint your design with a fine liner brush — I do a lemon with 6-8 lines for the peel texture. Let it dry, then follow the paint brand’s curing method — usually a specific baking temperature and time. After baking, apply a clear ceramic glaze sealer if the paint instructions call for it. Finish by wrapping it in kraft paper with a ribbon and adding a tag that says what the design represents between you two.
Editor's noteSketch the design on paper first and transfer lightly with pencil, then trace with paint. It keeps the lines clean.
Skip thisDon’t use regular craft acrylic paint without a ceramic seal; it chips quickly from heat and washing.
12. Linen-Covered Trinket Tray with Sharpie-Resistant Topcoat
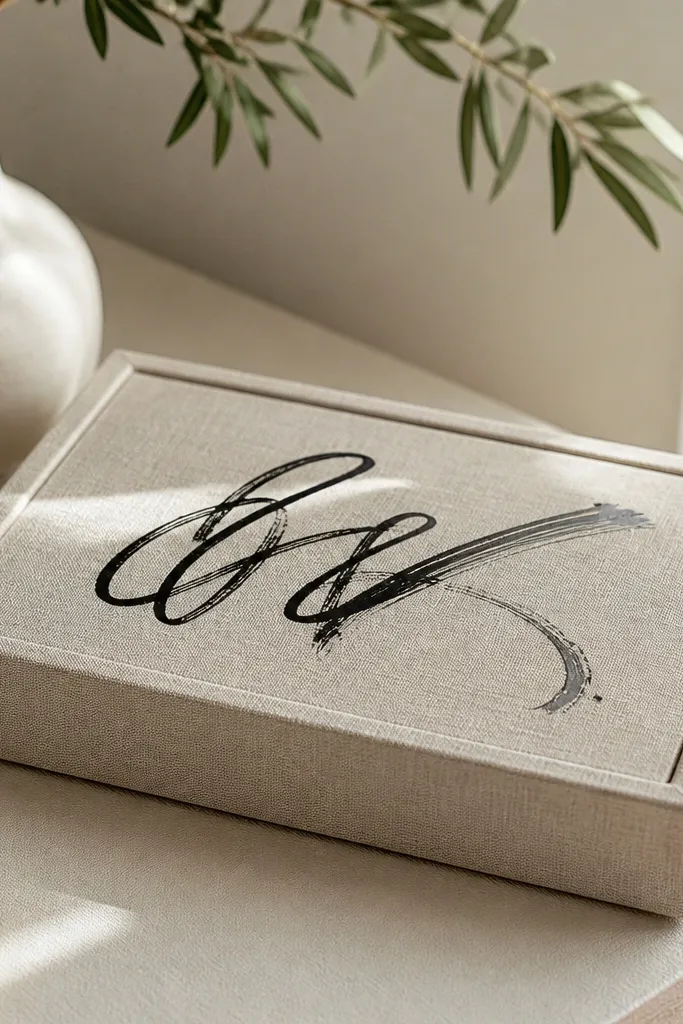
Trinket trays look like they belong on a vanity, and DIY makes them feel like a personal ritual. The linen cover gives a soft texture that looks expensive, and the key is sealing the writing so it doesn’t smear when she touches it. I like using a plain wood or MDF tray because it’s easy to wrap and holds corners cleanly. The hero is the message in the center — either a short nickname or a date — because it turns the tray into a tiny keepsake. This flatters friends who keep jewelry in sight and want their space to feel calm and organized.
Sand the tray lightly, then wipe it clean with a damp cloth and dry fully. Cut linen to cover the top and wrap the fabric under the edges — trim corners so they fold smoothly without bunching. Glue with spray adhesive or Mod Podge, pressing fabric into corners with a brayer or your fingers. Let it dry, then write the message using a permanent marker made for non-porous surfaces and let it sit 5 minutes. Seal the writing with a clear gloss or satin topcoat — I use two thin coats so it resists smudges and feels smooth.
Editor's noteDo a tiny test on the tray bottom with your marker first. Some markers bleed on certain sealers.
Skip thisDon’t skip corner trimming; bulky folds show through and make the tray look uneven.
13. Custom Tie-Dye Sock Gift with Stitched Gift Card Envelope
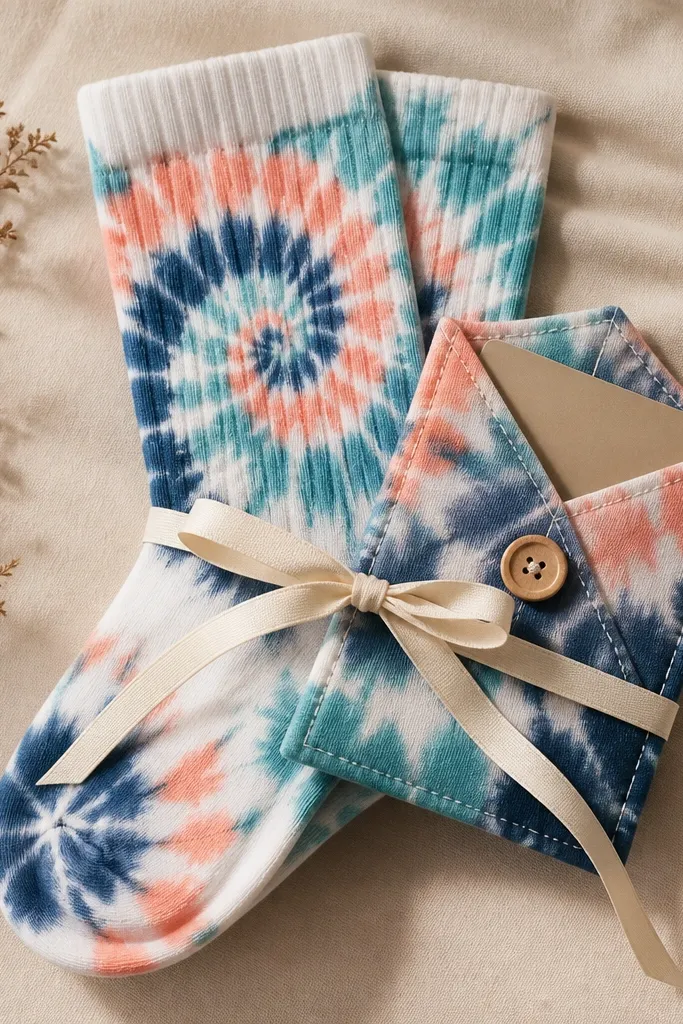
This is the best “I know you” gift when your BFF wears the same kind of socks every week and loves color. Tie-dye looks fun, but the key is keeping it clean and controlled so it doesn’t look chaotic. I stitch a matching mini envelope for the gift card so the gift feels complete even if you’re adding a small amount of money. The hero is the swirl — it looks different every time, so it feels one-of-one. This works for friends who like cozy casual styles, and the envelope keeps the card from getting lost in a bag.
Pre-wash socks and keep them damp, then twist and rubber-band them in a swirl pattern with tight bands. Mix tie-dye colors in separate squeeze bottles — I use teal, coral, and navy — and apply dye in bands around the sock. Wrap the socks in plastic and let them sit according to the dye instructions, then rinse until the water runs mostly clear. Dry fully, then stitch a small envelope from cotton fabric in one of your dye colors, around 4 x 6 inches. Add a button closure and slide the gift card inside; tie the envelope and socks together with ribbon.
Use rubber bands that are snug enough to create crisp dye lines. Soft bands create muddy edges.
Don’t use fabric softener on dyed socks; it breaks dye adhesion and makes colors fade faster.
14. Resin Nameplate Key Holder with Color-Drop Confetti
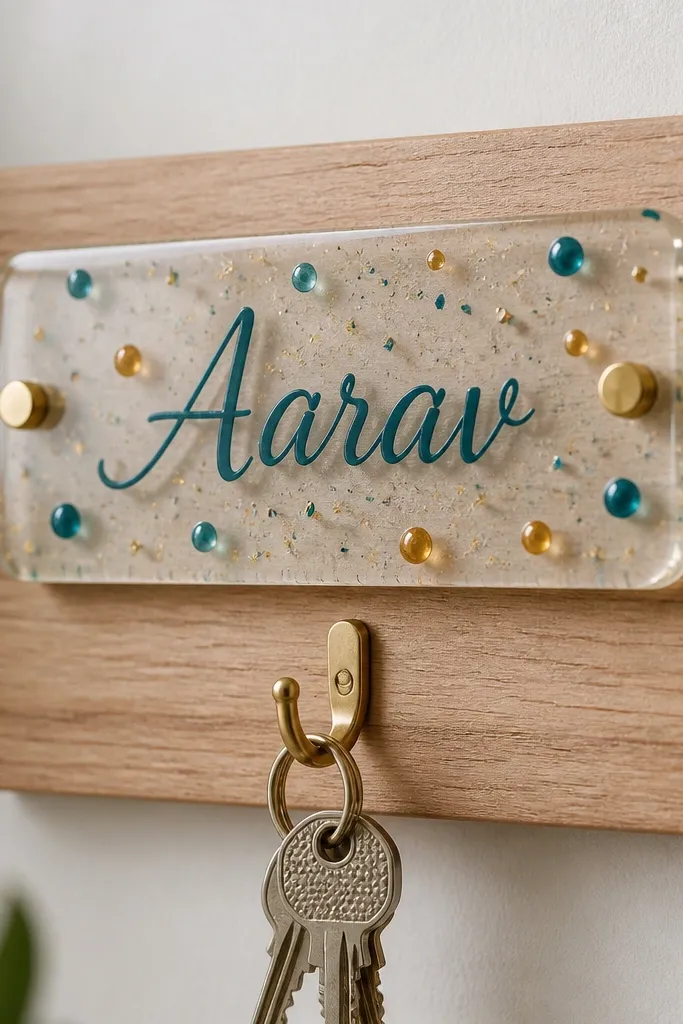
This is the DIY upgrade for the friend who loses keys in the first 24 hours. Resin nameplates look glassy and glossy, and the confetti color drops make it feel playful instead of formal. I like using clear resin over painted letters so the name looks like it’s floating. The hero is the name itself, and the confetti is controlled — small bits only — so it stays classy. This looks great in entryways with light wood, white walls, or black hooks because the resin catches light when she walks by.
Cut a small wooden base about 4 x 6 inches and sand it smooth. Paint the area where the name will sit, then write the name with acrylic paint and let it dry completely. Mix resin slowly, pour a thin layer to seal, then add micro confetti and a few tiny colored drops with a toothpick. Pour the remaining resin to cover, popping bubbles with a heat gun or torch held far away. After full cure, attach a small key hook and add a hanging loop on the back if you want it wall-mounted. Finish by wiping the surface with a microfiber cloth so it shines.
Keep confetti pieces small and spaced out. Big confetti crowds the resin and makes it look messy.
Don’t rush the cure time; handling too early leaves tacky resin that scratches.
15. Custom Fabric Heat-Safe Coaster Set with Photo Transfer
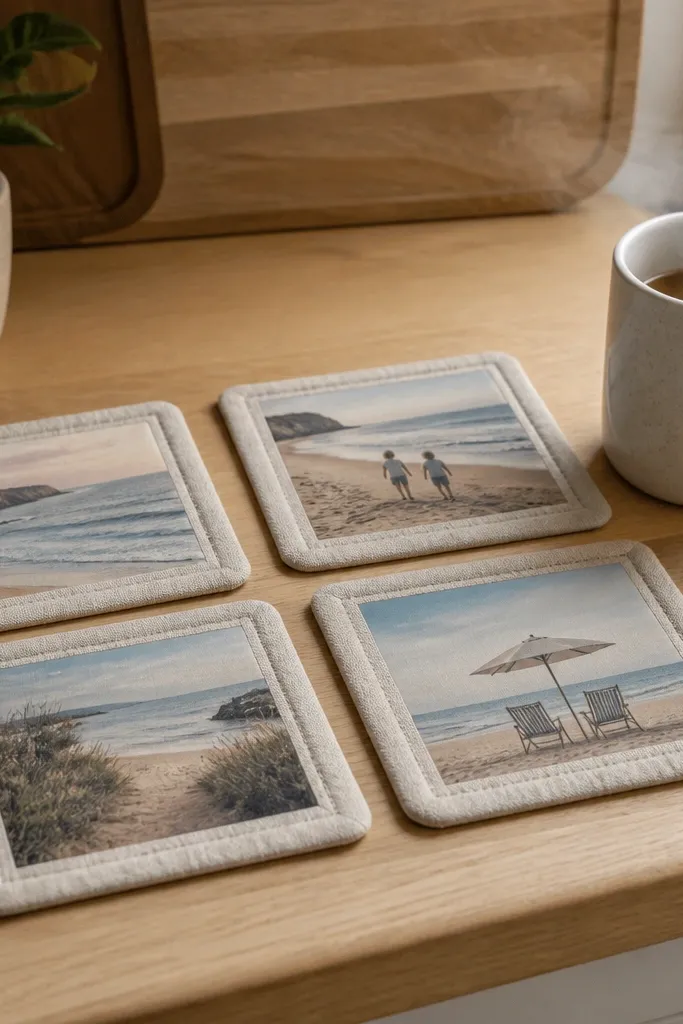
When you want a DIY gift that looks like it belongs in a home store, fabric photo coasters do it. The photo center is the hero, but fabric keeps it soft and cozy compared to ceramic. I use heat-safe transfer paper designed for fabric so the image locks in and doesn’t peel after washing. The border makes the set look intentional; it frames the photo like a picture mat. This works for friends who host and actually use coasters, and it flatters any decor because you can pick border colors that match her dishes or throw pillows.
Cut four fabric squares, each about 4 inches wide, using 100% cotton for the best transfer results. Print photos mirrored as instructed by your transfer paper brand, then transfer using a hot iron or heat press at the exact time and pressure on the package. After cooling, stitch a border around the edges with coordinating cotton — a 1/4 inch border looks clean. Layer a heat-safe backing like cork or felt on the bottom and glue it in place. Stack the coasters and tie them with twine plus a tag that names the photo moment.
Choose photos with big shapes and clear faces. Fine hair details blur on fabric transfers.
Don’t skip backing material; fabric-only coasters get damp and stain from condensation.



