

1. Wax-Sealed Letter-in-a-Glass Jar Set
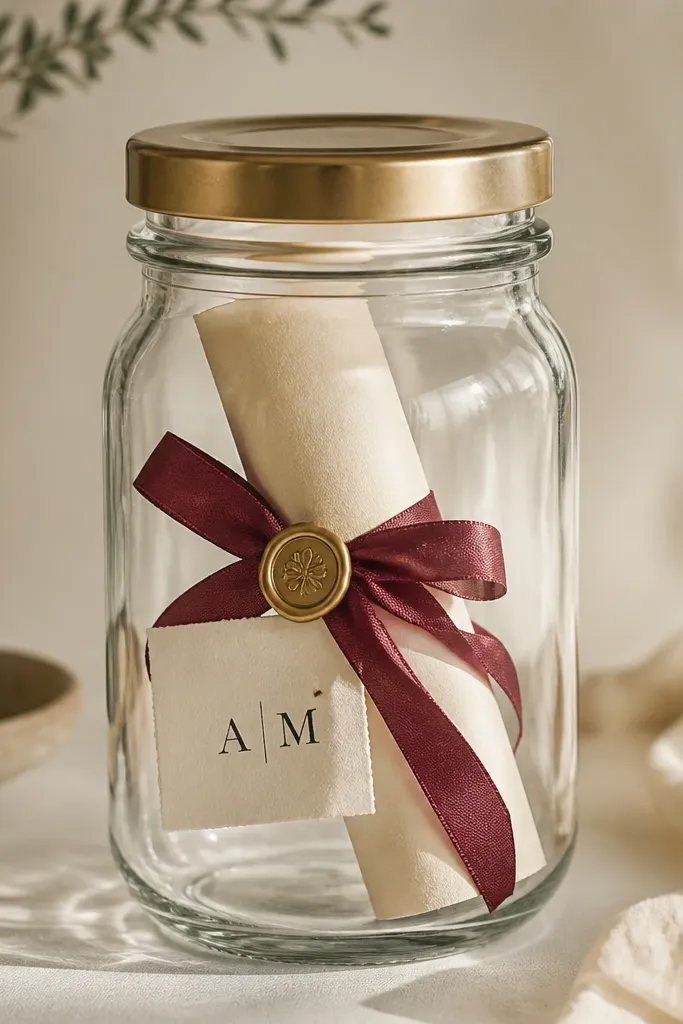
This gift looks luxury because the jar is clear, the letter is neatly rolled, and the seal creates instant “official” vibes. Use thick, off-white cotton paper so it doesn’t curl and so the wax bond looks clean. I like burgundy ribbon with a warm brass lid because it photographs like a vintage apothecary label. It flatters anyone — you can make it romantic, funny, or grounding just by how you write the letter. Keep the text short and specific to avoid that generic “you’re the best” tone.
Start by cutting your letter paper to a size that rolls tightly — I use 5x8 inches, rolled with the long side. Then roll it around a pencil, tie with 1/4-inch burgundy satin ribbon, and press wax onto the knot using a spoon or a wax stamp. Place the sealed letter into a clean 16 oz glass jar and add a thin strip of tissue in a matching color so it doesn’t rattle. Finish by stamping or writing the recipient’s initials on a small tag and attaching it to the ribbon end before you screw on the lid.
Editor's noteWrite one concrete memory in the first three lines, like a specific trip date or the exact smell of a place you both loved.
Skip thisSkip thin printer paper — it creases too easily and makes the wax seal look messy.
2. Faux-Leather Key Fob with Hidden Note Pocket
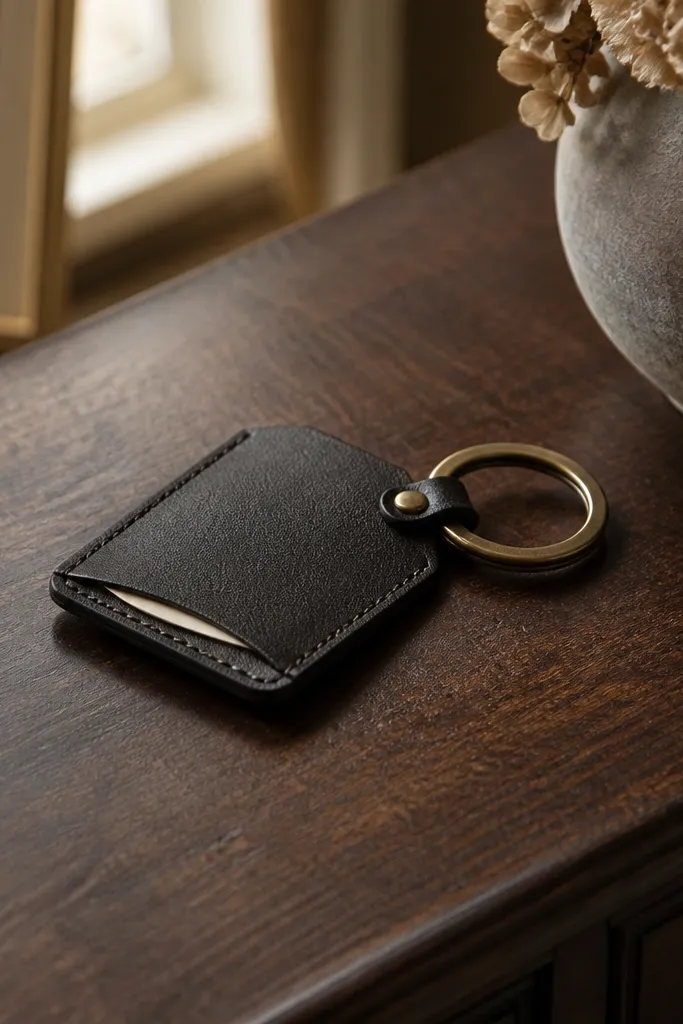
This reads luxury because it has structure. A key fob that holds its shape looks like store-bought gear, and the hidden note makes it sentimental without being bulky. Choose espresso or black-brown so the hardware (brass, antique gold) looks warm instead of yellow. It suits best friend gifts for anyone who loses keys — the note becomes a personal reminder every day. If your friend likes minimal style, keep the design to one engraved mark and one neat stitch line.
Start by cutting faux leather to about 4 inches tall by 2.25 inches wide, then cut a second piece for the back panel. Create a 1/2-inch slit pocket inside one panel by folding a thin strip of leather and stitching around the sides, leaving the top open. Assemble front and back with a straight edge, then stitch with waxed thread using a simple saddle stitch. Finish edges with leather edge paint in dark walnut, then attach a brass key ring and a small charm using a jump ring.
Editor's noteAdd the note on a strip no wider than 1/2 inch so it slides in and out without stretching the pocket.
Skip thisDon’t use floppy material — if it bends like fabric, it looks cheap fast.
3. Press-Flower Bookmark in Acrylic Frame
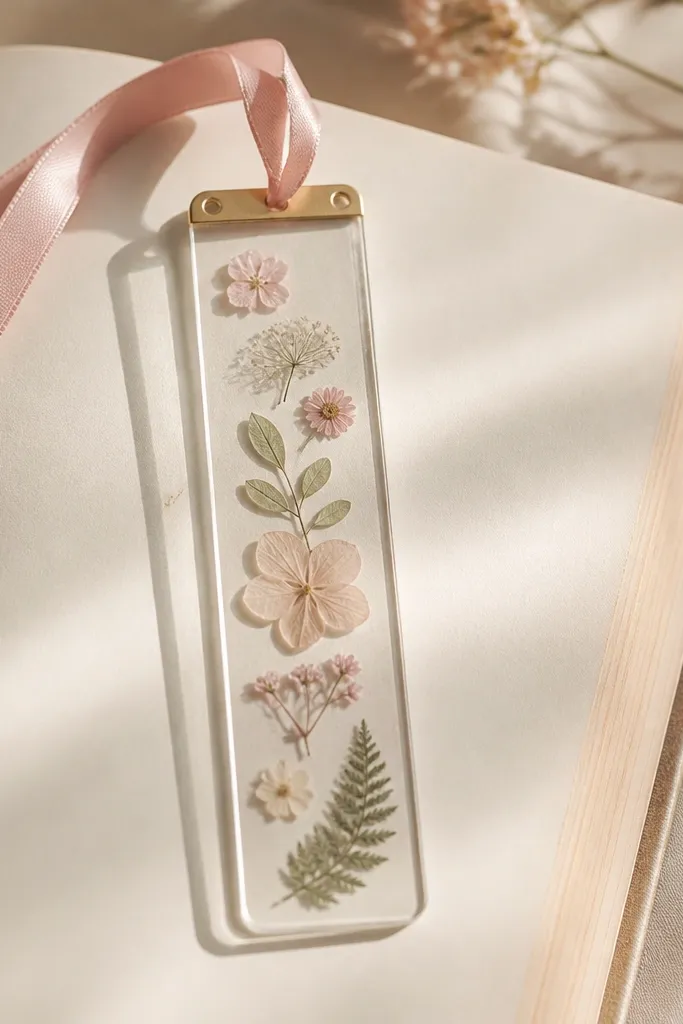
Luxury comes from clarity and spacing. When you press flowers flat and place them with breathing room inside a clear acrylic frame, it looks like a collectible art piece. Choose muted colors — blush rose, dusty green, pale lavender — because they match most book covers and won’t clash with your friend’s style. This is a great gift for best friends who read, study, or keep planners. It also ages well because pressed flowers stay stable under acrylic protection.
Start by pressing flowers for at least 5-7 days under heavy books, then trim stems so nothing pokes. Cut a rectangular piece of acrylic to about 7.5x2 inches, then add a clear protective backing sheet if your kit includes it. Arrange 3-5 small petals and leaves in the center, then seal with acrylic glue or use a heat-seal if you have a pre-made frame. Thread a 1/4-inch satin ribbon through the top holes and tie a neat bow that sits flat.
Editor's noteSeal the edges with a thin line of glue and wipe any squeeze-out immediately with a dry microfiber cloth.
Skip thisSkip crowded layouts — overlapping petals look messy under clear plastic.
4. Monogrammed Velvet Jewelry Tray with Felt Liner
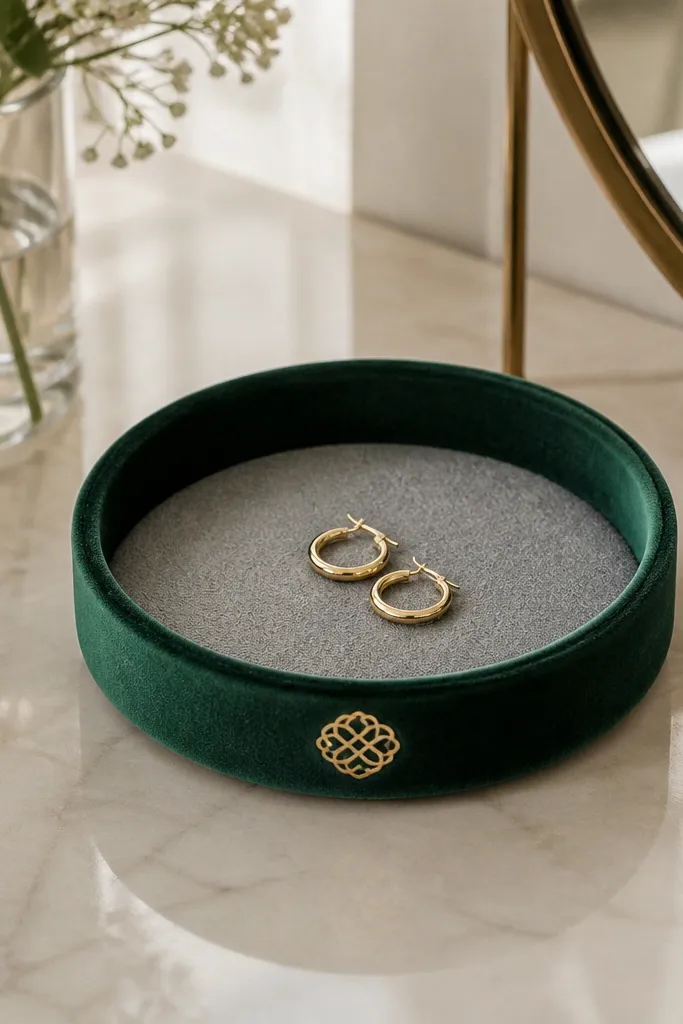
This is the kind of luxury gift that actually gets used. Velvet makes the tray feel expensive immediately, and a felt liner stops jewelry from scratching. Pick emerald, navy, or burgundy velvet — they look rich under warm bathroom lighting. The monogram adds a personal stamp without turning it into a craft project. It works for all skin tones and wardrobes because the tray is neutral-dark and the liner keeps everything tidy.
Start with a shallow wooden or MDF tray base — 6-8 inches wide. Cut velvet to cover the outer surface and bottom edges, pulling taut and stapling underneath. Line the interior with felt cut to fit, and glue it down with fabric-safe adhesive. Apply a vinyl monogram on the outer lip after you clean the surface with rubbing alcohol, then seal the vinyl with a thin clear matte spray.
Editor's noteUse a matte seal on the monogram so it doesn’t glare in photos.
Skip thisDon’t stretch velvet unevenly — puckers look like a rushed job.
5. Photo Strip Shadow Box with Handwritten Captions
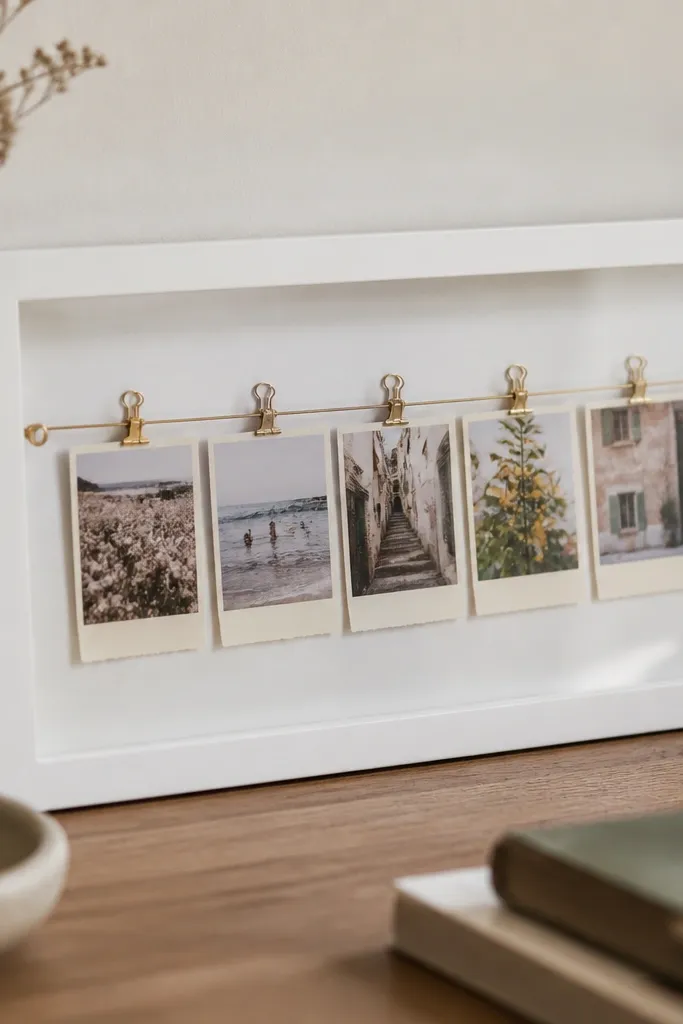
Shadow boxes look luxury because glass and spacing make everything feel curated. The trick is to use a grid layout that’s consistent, not random. I like 4x6 photos cropped to match, then printed with a matte finish so the glare stays low. Handwritten captions make it sentimental without adding bulk. This works best when your friend likes memories but also appreciates order.
Start by selecting a shadow box with a depth of at least 1.5 inches so photos don’t look cramped. Cut a backing mat from off-white cardstock and mark a simple grid with pencil lines. Place photos in a single row or two rows, then glue them down with photo corners or double-sided tape. Add captions using a fine-tip pen on 1-inch strips of cream paper, then attach them below each photo with tiny dots of glue.
Use the same ink color for every caption — black or deep brown — so the set looks cohesive.
Skip glossy prints — they reflect light and make the box look less “gallery.”
6. Satin Ribbon Memory Ornament for a Keepsake Tree
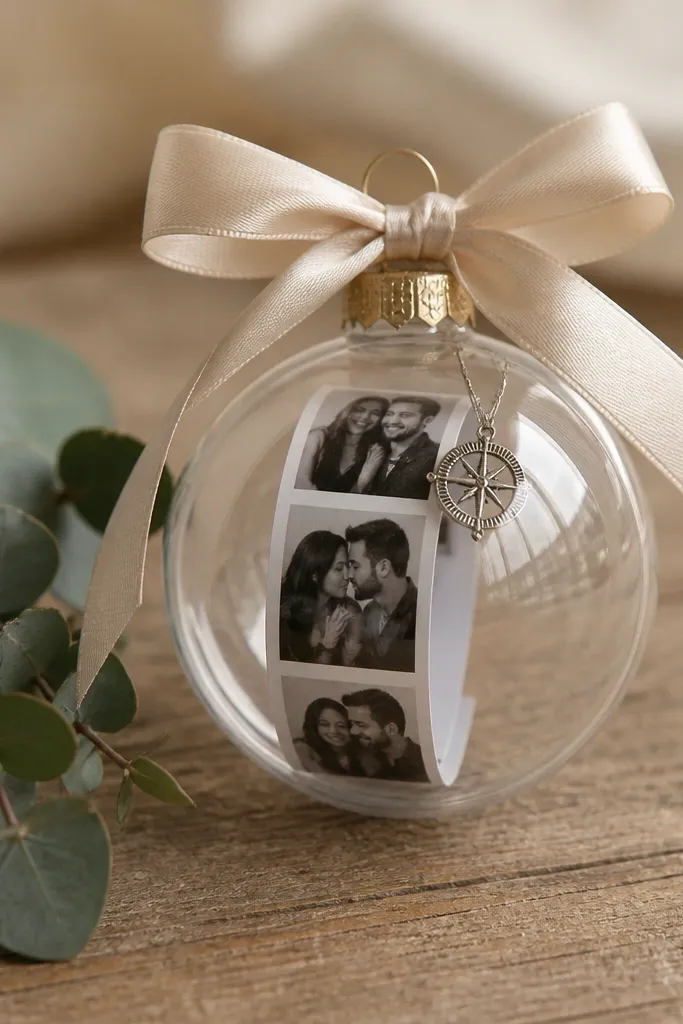
Luxury ornaments look high-end when the ribbon is clean and the inside is tidy. A satin ribbon bow in champagne or champagne-rose gives that soft, expensive look. The clear ball makes the memory visible without opening anything. This is perfect if your best friend decorates for holidays or keeps a small “year” tree. It’s also a great gift for friends who don’t want more clutter — the ornament becomes a yearly ritual.
Start by printing a narrow photo strip — 1x3 inches — and rolling it tight with clean edges. Add the roll into a clear ornament ball, then thread a tiny charm or bead onto a thin wire inside if you want movement. Tie a bow using 3/8-inch satin ribbon, then secure it to the ornament cap. Finally, add a small cardstock tag with the year and a one-line note, punched with a hole punch that matches the ribbon hardware.
Editor's noteRoll the photo on a toothpick so it stays tight and doesn’t snag inside the ornament.
Skip thisDon’t use wired craft ribbon — it kinks and looks messy at the knot.
7. Hand-Painted Ceramic Mug with Color-Blocked Heart Stamp
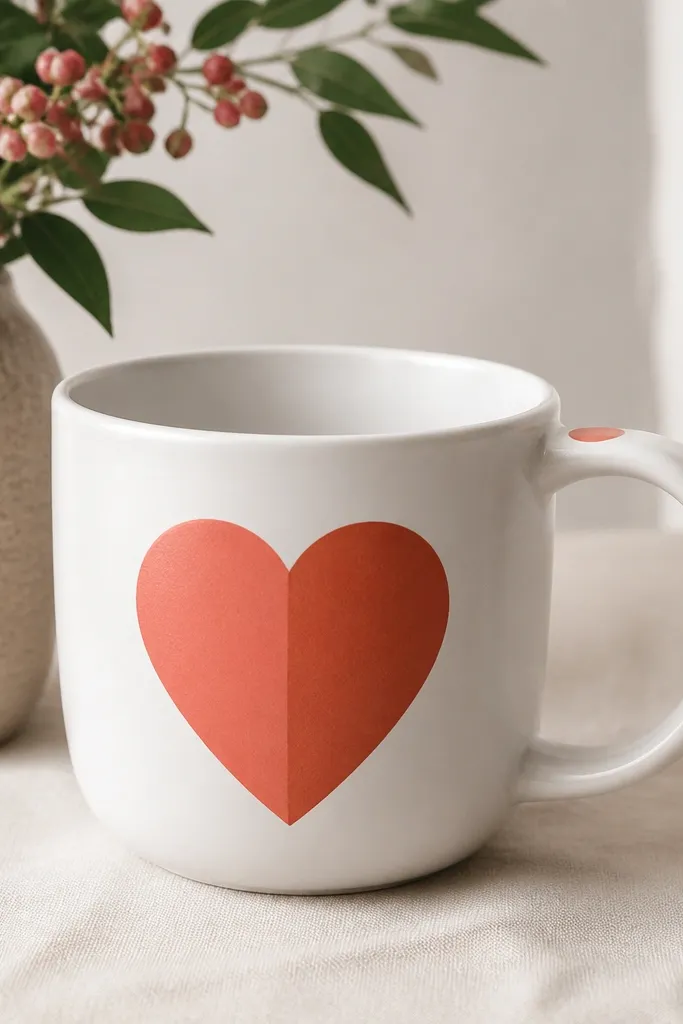
A mug turns sentiment into something daily. Luxury comes from crisp shapes and paint that holds up to washing, not from messy brush strokes. Use a color-blocked heart near the handle so it’s visible when she takes a sip. Choose one warm accent (coral, terracotta, or brick red) and keep the rest white — it looks modern and expensive. This gift suits friends who drink coffee/tea regularly and like simple, clean decor.
Start by cleaning the mug with rubbing alcohol so paint bonds. Use ceramic paint or a paint pen made for ceramics, and sketch the heart shape lightly first. Block in two colors — for example coral on top and terracotta on the lower half — then outline with a thin darker line for definition. Let it cure per the brand instructions, then bake if the product requires it. Finish by adding a small name label sticker on the inside rim area if you want a subtle personal touch.
Draw the heart template on paper first and test on a scrap tile so your edges stay even.
Skip cheap craft paint — it flakes after a few washes.
8. Leather-Look Coaster Set with Stamped Coordinates
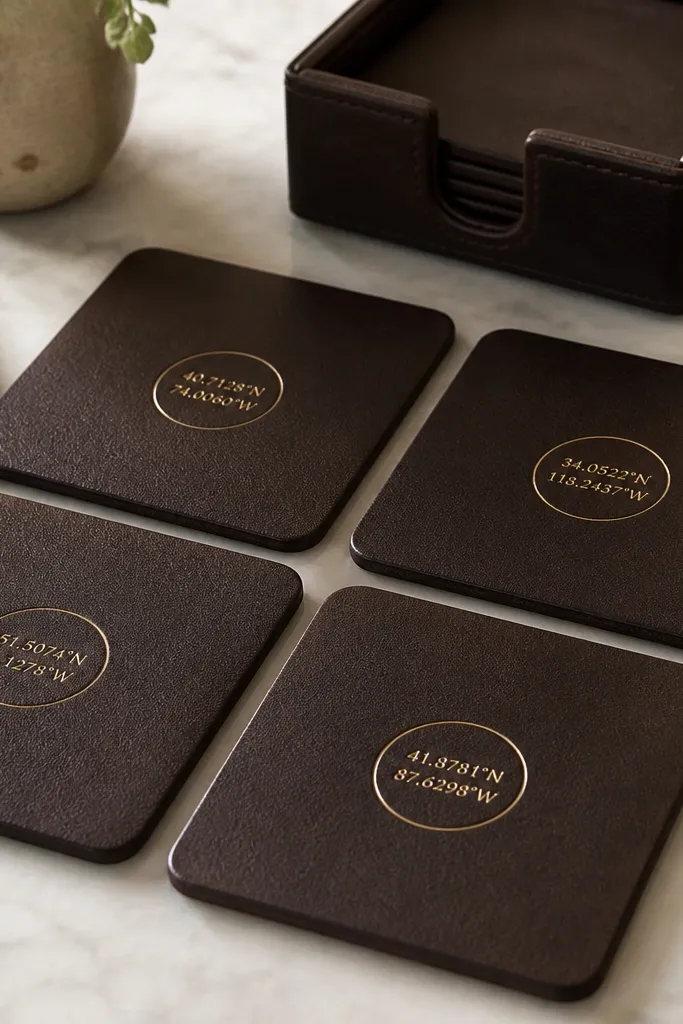
Coordinates make a gift feel specific, not generic. Leather-look coasters read luxury because the surface feels solid and the edges look finished. Gold foil stamping or a gold paint pen gives that “designer desk” effect. It works for best friends who host, drink wine, or keep their coffee table tidy. Choose coordinates that mean something — where you met, where you took a first trip, or a favorite café.
Start by cutting four squares from leather-look material — about 4 inches each. Back them with thin cork or felt so they don’t slip and protect surfaces. Use a small circle stencil and stamp with a gold foil pen or apply gold foil with a stamp tool. Seal the stamped area with a clear topcoat made for faux leather if your product requires it. Place the set in a matching tray or tie them with a ribbon for a clean presentation box.
Round the corners slightly with scissors so the set looks softer and more premium.
Don’t skip backing — coasters without cork feel flimsy and scratchy.
9. Fabric-Wrapped Candle Holder with Hidden Letter Sleeve
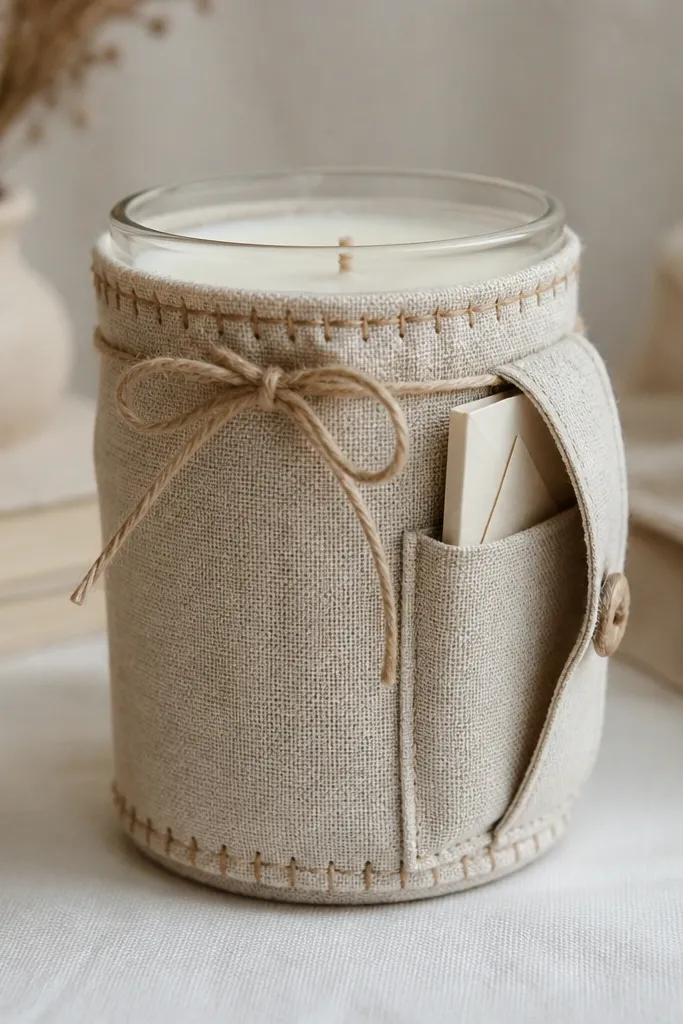
This looks expensive because the fabric wrapper makes the candle jar look like part of a set, not a store candle in a random sleeve. Linen in oatmeal or warm gray gives that calm luxury feel. The hidden sleeve adds sentiment without making the candle bulky. It suits best friends who like cozy nights, baths, and soft lighting. The key is tidy stitching and a sleeve that stays snug so it doesn’t slide when you carry it.
Start by measuring your candle jar height and circumference, then cut linen fabric with an extra inch for seam allowance. Sew a simple tube and hem the top edge, leaving one side flap as a pocket sleeve. Insert a folded letter into the pocket before you wrap the sleeve around the jar. Tie with twine or a linen ribbon and stitch a small decorative border at the bottom so it looks intentional. Place the candle inside and check that the flap closes with a neat overlap.
Editor's noteUse double-sided fabric tape under the flap to keep the pocket from shifting while you wrap.
Skip thisAvoid thin, see-through fabric — it wrinkles and reads cheap next to a glass jar.
10. Gold Foil Initials on Handmade Stationery Wallet
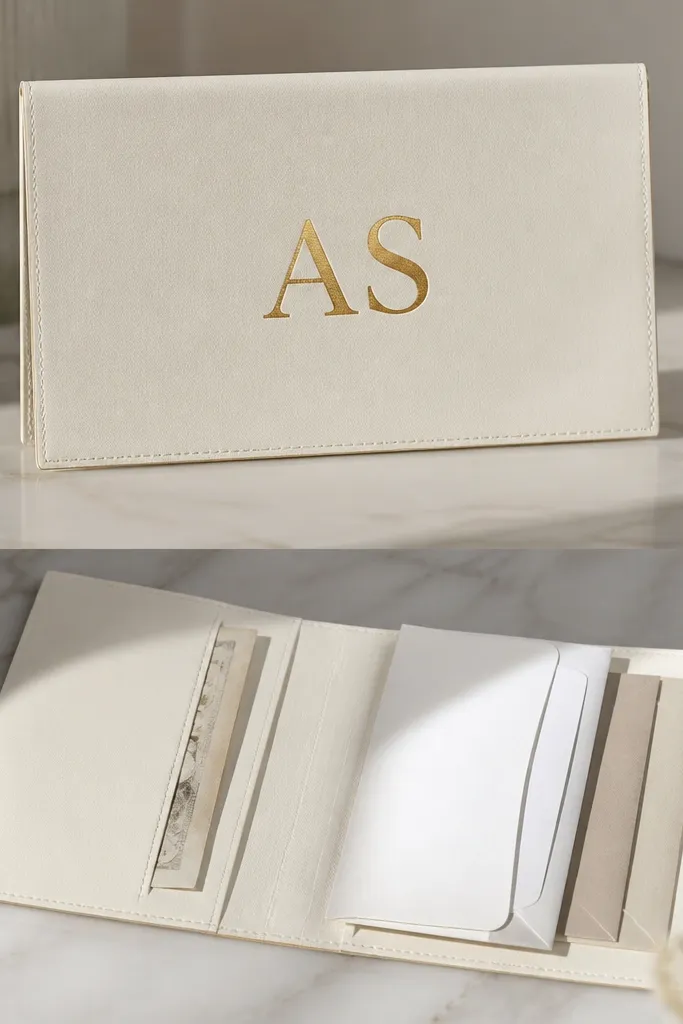
Stationery gifts feel luxury when they look like a product, not a scrapbook. Gold foil initials give a clean, high-end mark, and the wallet format keeps everything aligned. Choose cream or warm white for the base so the foil looks bright. This is great for friends who write thank-you notes, plan trips, or send cards. It also works for people who don’t want clutter — the wallet organizes paper neatly.
Start with thick cardstock or a pre-made blank stationery wallet base. Cover it with a soft-touch paper or bookcloth for a smooth feel. Apply gold foil initials using a foil transfer kit or a reliable foil pen, then let it set fully. Insert small envelopes (like 3.5x5) and a stack of matching note cards, then tape the top edges inside so they don’t spill. Fold a small ribbon loop around the closure so it snaps shut cleanly.
Editor's noteUse one paper size and stick to it — the wallet looks premium when everything matches exactly.
Skip thisSkip glossy sticker foil — it peels and looks like craft store decoration.
11. Knotted Silk Scarf Bookmark with Mini Tassel
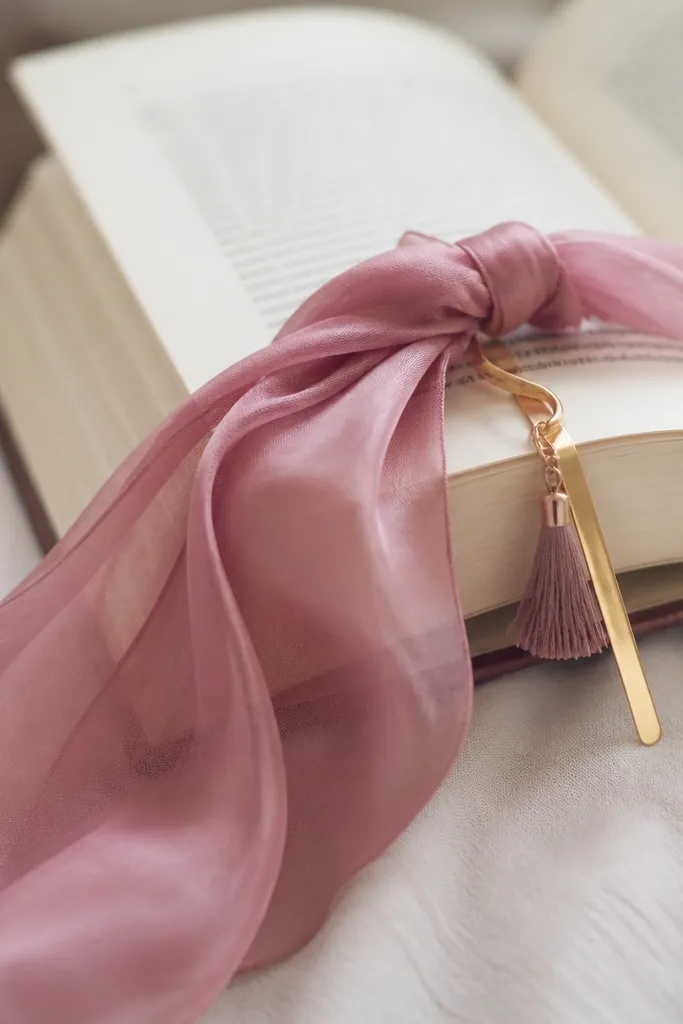
A silk bookmark looks luxurious because silk catches light softly. The knot and tassel create a little “jewelry” moment without being heavy. Dusty rose, soft navy, or olive green works because it doesn’t overpower book covers. This is a high-impact gift for best friends who read daily and love small accessories. The best part is that the bookmark becomes a habit, so your sentiment gets used every time she opens a page.
Start with a small silk scarf strip — about 8 inches long and 1.5 inches wide. Cut clean edges with sharp scissors and lightly press them so they don’t fray. Tie the strip around a thin bookmark ribbon or a slim metal bookmark base using a tight overhand knot. Add a mini tassel by tying several fine threads to a small loop and securing with a drop of fabric glue. Finish by sliding the bookmark into a book and adjusting the scarf so it hangs evenly.
Editor's noteUse a metal bookmark base if your friend likes a firm hold; use a ribbon base if she likes a softer feel.
Skip thisDon’t use polyester scarf fabric that feels scratchy — it looks dull and cheap.
12. Personalized Perfume Roller Bottle with Label and Filler Card
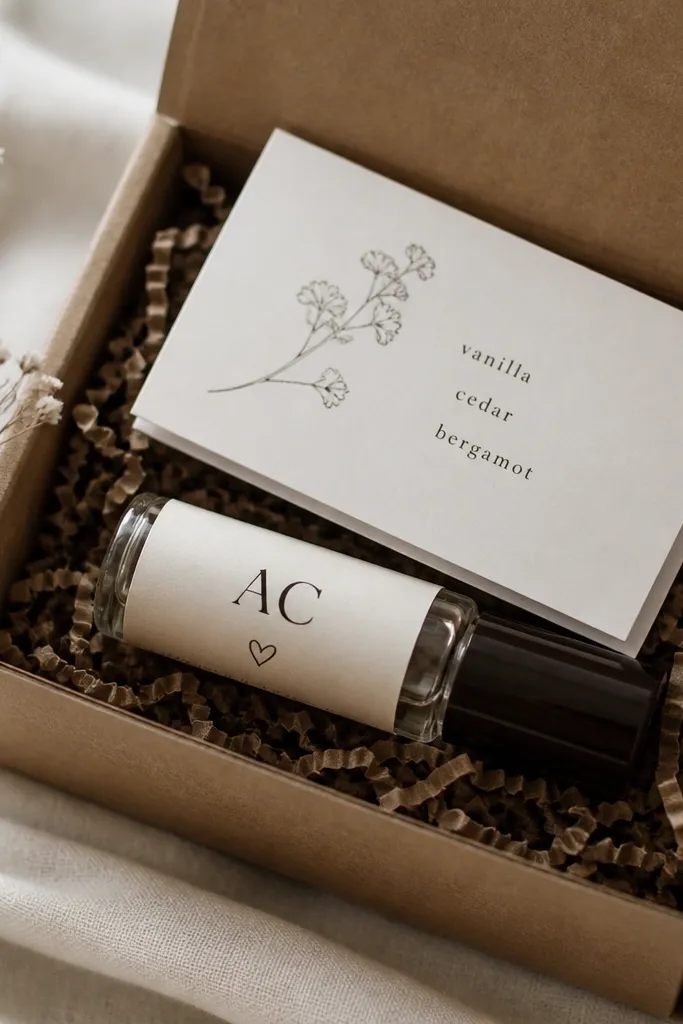
Luxury perfume gifts come from presentation and scent balance. A roller bottle is practical, and the label makes it feel custom instead of homemade. I’ve made these with a neutral scent profile like vanilla-cedar-bergamot because it works for most skin tones and doesn’t fight perfume she already wears. Add a filler card with the note breakdown so she knows how it smells and how to use it. This is ideal for best friends who like self-care and travel-sized items.
Start by choosing a 10 ml or 15 ml roller bottle with a sturdy cap. Mix or buy a roller blend with a simple structure: top note (citrus), middle (soft floral), base (vanilla or cedar). Apply a custom label with matte sticker paper so it doesn’t glare. Insert a scent card that says where to roll — wrists, behind ears, and inner elbow. Pack in a kraft box with tissue in a matching neutral and seal the lid with a small ribbon wrap.
Test the scent on your own skin first, then adjust ratios — vanilla-heavy blends can turn cloying fast.
Skip glossy labels — they look like party favors and smear under bathroom humidity.
13. Candle-Themed Photo Frame with Wax-Dipped Twine Trim
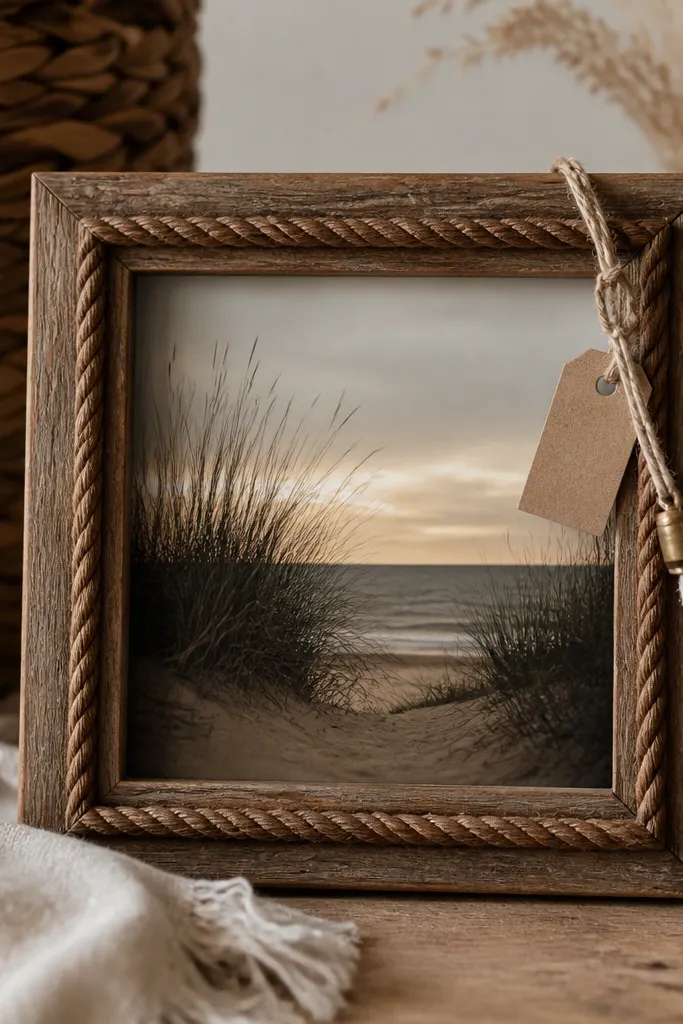
This looks luxury because the twine trim has texture and the wax gives a uniform color tone. It’s a warm, cozy style that matches candlelight and makes photos look like they belong in a home gallery. Choose a simple wood frame — light oak or honey — then trim with waxed twine for a cohesive look. Add one small charm tied with a thin ribbon so the sentiment feels specific. It’s best for best friends who love warm aesthetics and keep photos out on desks or shelves.
Start with a small wood frame, 5x7 or 6x8. Remove any glass you don’t need for painting, then seal the frame with a matte clear coat so wax sticks evenly. Dip twine into melted wax in a mug, then lay it around the frame edges and press gently to set. Add a small tag with your friend’s name and a date, then reassemble the frame with the photo. If you want extra polish, add a thin strip of gold paint to the frame inner lip.
Editor's noteUse one wax color and one twine thickness so the border looks consistent all the way around.
Skip thisAvoid random knots — they create bumps that look handmade in a sloppy way.
14. Terracotta Planter Heart with Painted Family Dates
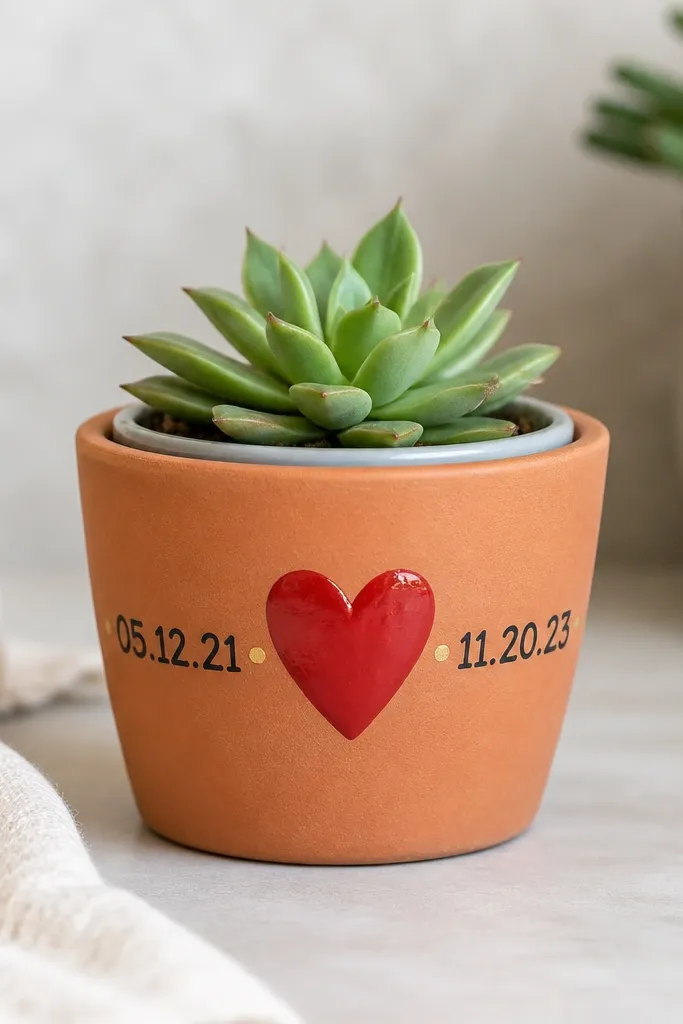
A planter becomes luxury when it’s clean, not chaotic. Terracotta naturally looks warm and expensive, and a single painted heart gives the sentiment a focal point. I keep the design to one heart plus a couple dates because too many lines makes it look like a school project. This suits best friends who like plants or who want something alive that lasts longer than a card. It also looks good in a kitchen window and in photos.
Start by cleaning the terracotta planter with a scrub and let it fully dry. Paint a heart using acrylic craft paint or ceramic paint, then outline it with a fine brush for crisp edges. Add dates in small black text on one side, leaving space between each date and using a gold dot as a divider. Let everything cure fully, then insert a small nursery pot or grow insert so the planter stays tidy. Finish with a succulent that fits — aim for a plant no taller than 4 inches so the heart remains visible.
Seal the painted heart with a clear matte seal so it won’t fade when watered.
Don’t paint directly on dusty terracotta — the paint peels.
15. Booklet Scrap with Fabric Hinges and Photo Corners
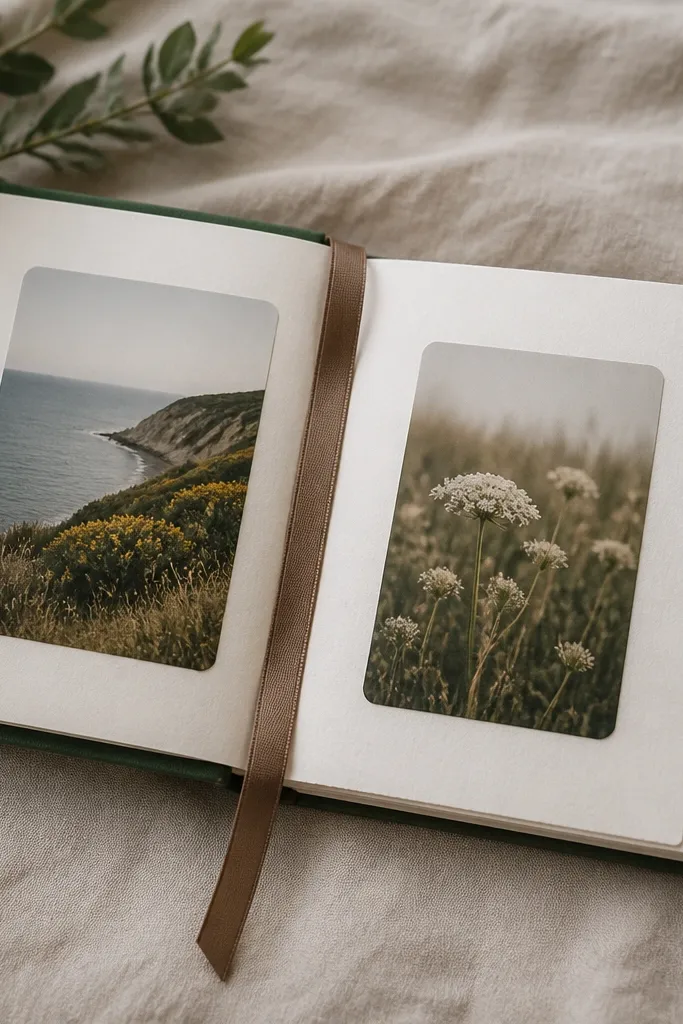
This looks luxury because the spine and hinge feel designed. Fabric hinges stop the booklet from flopping and make it open like a real mini album. Use photo corners so pictures can be swapped later or re-glued neatly — it keeps the pages looking sharp. I choose warm neutrals and one accent color so it feels cohesive. This is perfect for best friends who love reading memories and keeping them in one place instead of scattered texts.
Start by making a simple hardcover base with thick cardstock and a fabric spine strip about 1 inch wide. Cut 4-6 interior page sheets, then punch and bind with a ribbon tie or small binder rings. Add fabric hinges by sewing or gluing narrow cloth strips along the fold line so each page opens flat. Place photos using photo corners, then add handwritten captions on small strips. Finish with a satin ribbon bookmark glued at the top of the spine.
Editor's noteUse a ruler and a single corner radius punch so every photo corner looks identical.
Skip thisSkip wobbly page spacing — uneven margins instantly read as cheap.
16. Stitched Denim Bracelet with Coordinates Charm
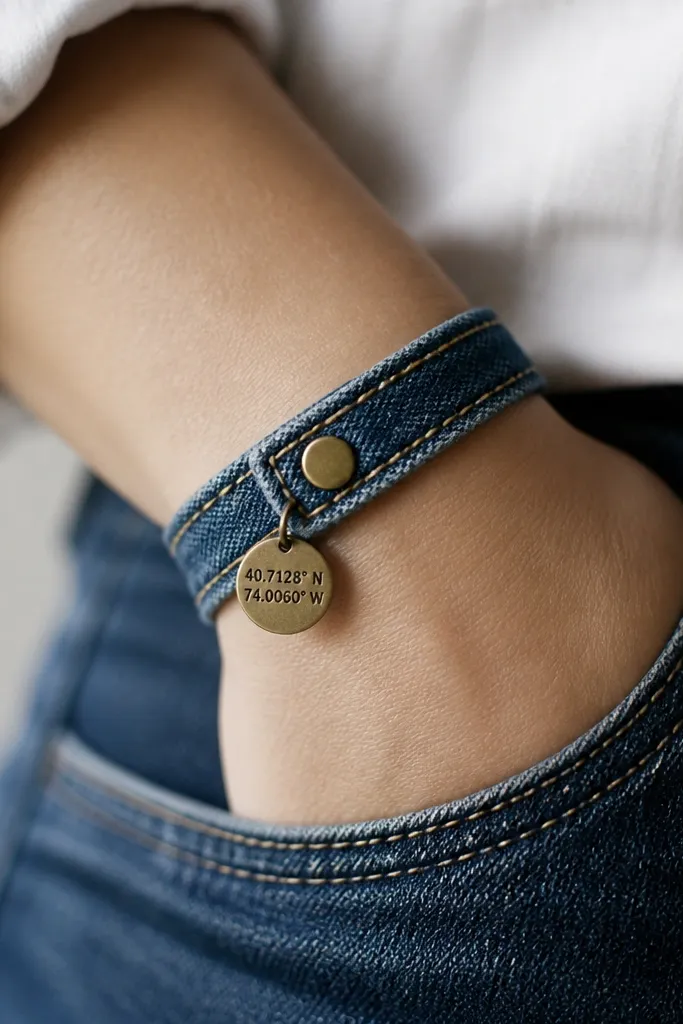
Denim looks casual until you give it structure. With tight stitches and a bronze coordinate charm, the bracelet reads intentional and personal. I like faded indigo denim because it softens the look and works with warm skin tones and cool ones. The coordinate charm keeps it sentimental without needing a big photo. This gift suits best friends who wear bracelets, like festival style, or want something that looks handmade but polished.
Start by cutting denim strips about 1 inch wide and 8-9 inches long depending on wrist size. Round the ends slightly and fold the strip in half with a thin interfacing layer so it stays stiff. Stitch along both sides using matching thread in tan or off-white, then add a brass snap closure. Attach a small bronze coordinate charm to a jump ring near the snap so it doesn’t twist. Write the coordinates on a tiny tag and glue it behind the charm if you want extra detail.
Editor's noteUse a denim needle on your sewing machine or hand-stitch with a strong waxed thread so seams stay tight.
Skip thisDon’t use flimsy denim — it stretches and the bracelet looks saggy.
17. Gold Script Name on Felt Keychain with Leather Backing
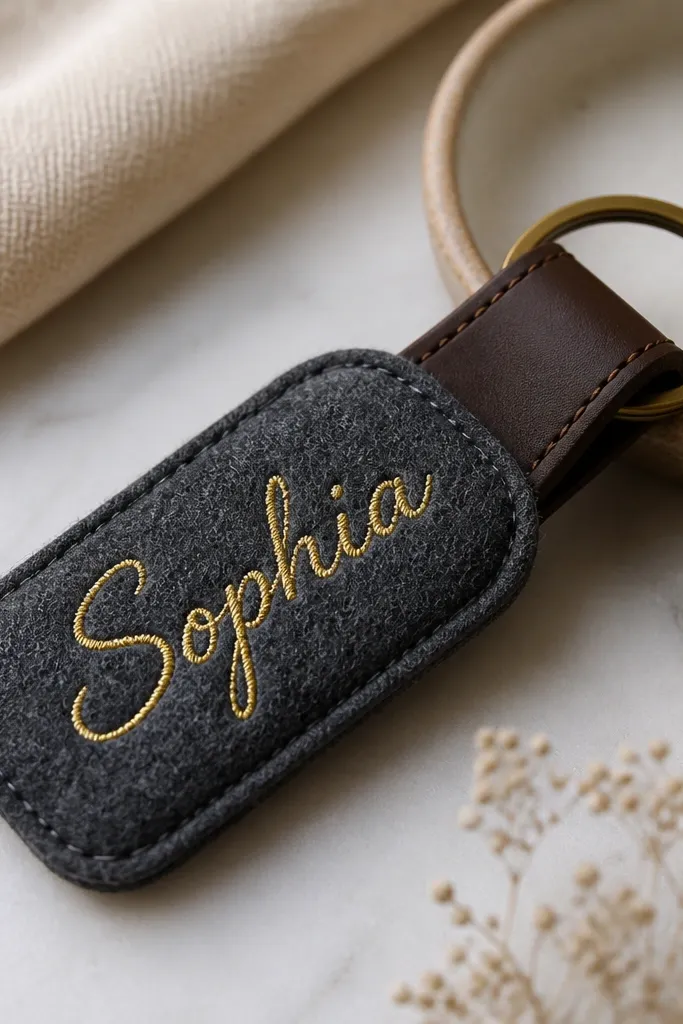
This is luxury because the materials match — felt for softness, leather for strength, and gold script for that polished finish. Charcoal felt looks expensive and hides wear, and the leather backing keeps the keychain from bending. Gold script stitching looks better than printed vinyl because it survives daily handling. This works for best friends who always have keys on them and love small personalized accessories. The best part is it’s sentimental without being fragile.
Start by cutting felt into a teardrop or rectangle shape about 3 inches tall. Cut matching leather backing slightly larger so it protects edges. Stitch the name in gold thread using a simple running stitch or satin stitch, keeping letter sizes consistent. Layer felt and leather together and stitch around the perimeter with a blanket stitch. Attach a brass key ring and a small tag with the date you became friends.
Editor's notePractice the letter spacing on paper first so the script looks even across the whole shape.
Skip thisSkip hot glue — it peels and makes the edges look uneven.
18. Silk Ribbon Wrapped Wine Bottle with Photo Band Label
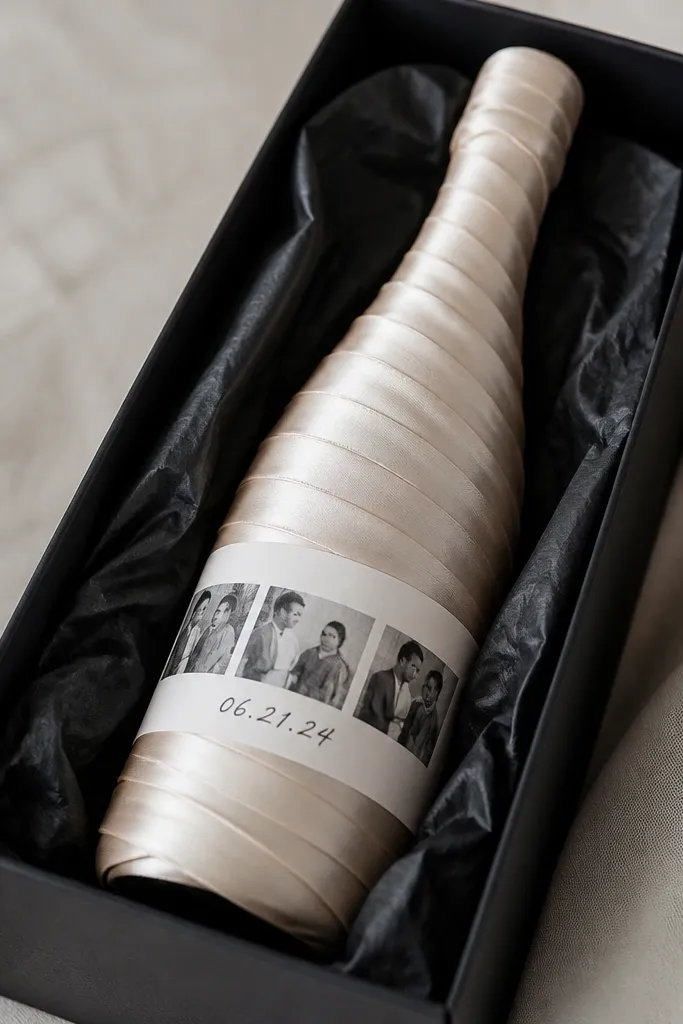
A bottle gift looks luxury when the wrapping is structured. Silk ribbon spirals look expensive because they sit flat and catch light softly. The photo band label makes it personal without turning it into a collage. Choose one photo strip and one date or inside joke so it reads classy, not chaotic. This suits best friends who love hosting, dinners, or “bring something” moments. It also works year-round if you swap the bottle type.
Start by cleaning the bottle and removing any bulky labels. Wrap the neck first with ribbon, then spiral down in even bands, securing with tiny clear tape under the ribbon edge. Create a photo band using a strip of matte sticker paper printed with a small photo strip and your handwritten date. Apply the band label straight and smooth with a credit card so it doesn’t bubble. Place the bottle in a snug box and add tissue in a matching neutral to keep it from shifting.
Editor's noteUse matte photo paper for the label band so it doesn’t glare in low light.
Skip thisDon’t use wide ribbon that bunches — narrow ribbon spirals look cleaner.
19. Custom Acrylic Charm Keychain with Photo Inside
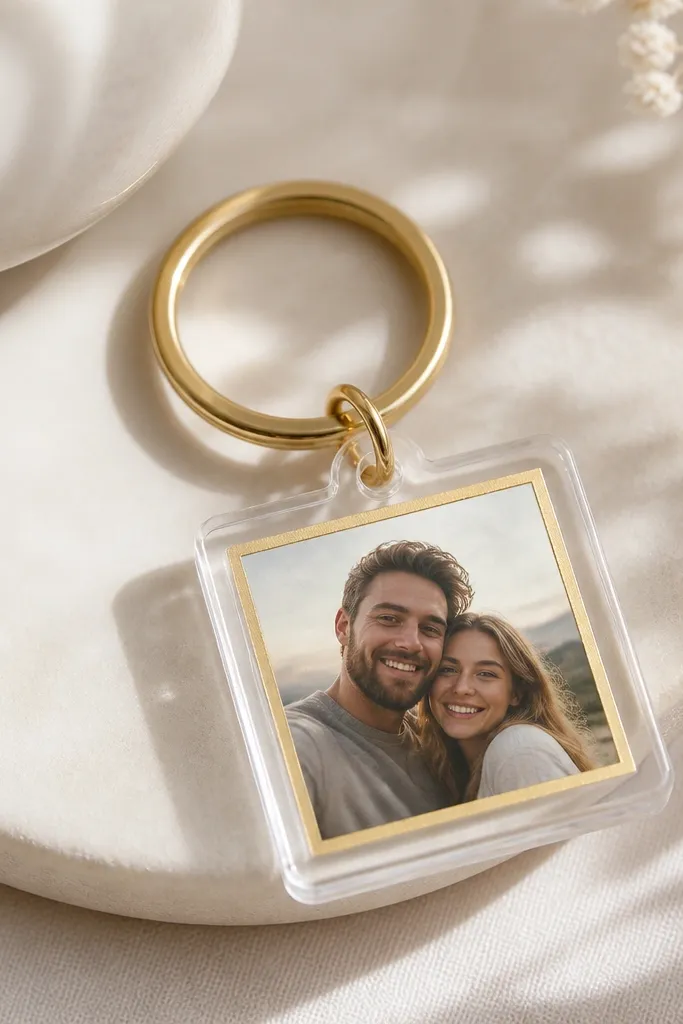
This looks luxury because acrylic is glossy and clean when it’s assembled right. A photo inside feels like a keepsake, but it’s small enough for daily carry. I like gold foil borders because they frame the image without needing extra decoration. It suits best friends who like minimal accessories but still want sentiment close by. If your friend’s style is sleek, keep the charm shape simple — round or rectangle — and let the photo do the work.
Start by printing a tiny photo sized to fit the charm window — I use 1x1 inch for round charms. Cut the photo with clean edges and add a thin gold foil border behind it if your charm kit supports it. Insert the photo carefully into the acrylic frame, then seal with the kit’s adhesive or gasket. Attach the charm to a gold key ring using a jump ring so it hangs flat. Finally, tie a thin ribbon to the ring and attach a tag with the date of the photo.
Editor's noteHandle the acrylic with gloves so you don’t leave fingerprints that show under light.
Skip thisSkip crooked photo placement — off-center images make the whole piece look amateur.
20. Handmade Travel Jewelry Roll in Structured Canvas
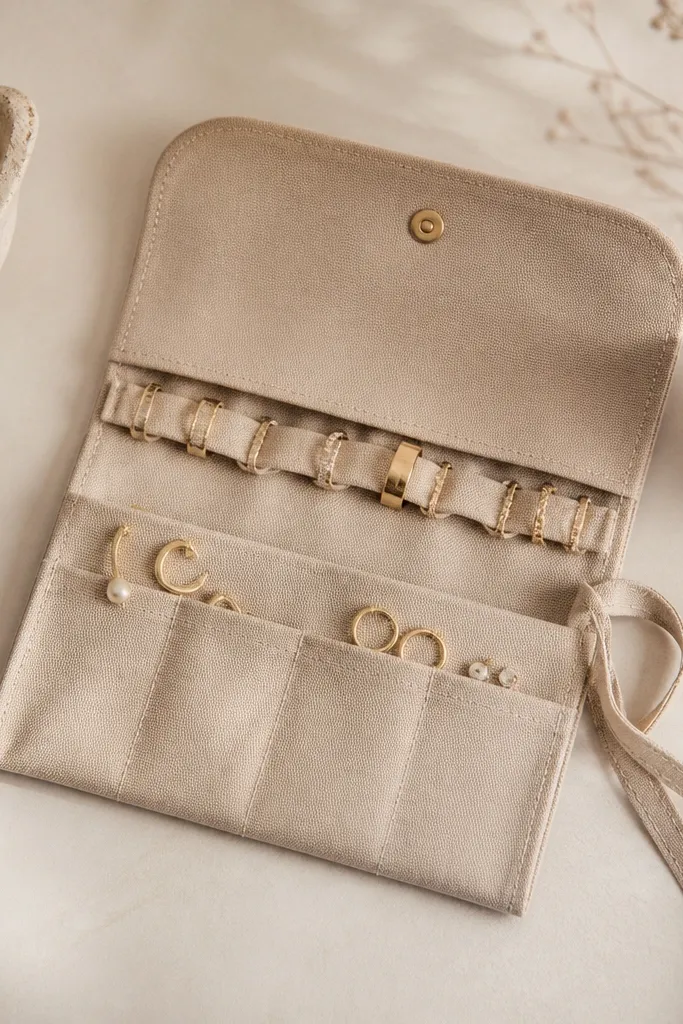
This is luxury because it’s structured and compartmented. Soft jewelry rolls look cute until they flop open; structured canvas keeps everything in place. Sand or olive canvas looks expensive and pairs with almost any outfit. Add a brass snap and a clean tie closure so it feels like a premium travel item. This gift fits best friends who travel, go to events, or keep jewelry in messy bags. The compartments make it easier for her to actually use it.
Start by choosing a canvas fabric with stiffness — upholstery-weight works well. Cut the outer fabric to about 10 inches wide and 14 inches tall, then create interior panels for pockets and elastic loops. Sew elastic strips for rings and small loops for necklaces, then add a zip pocket or slip pocket for earrings. Fold and sew the sides so the roll closes neatly, then attach a brass snap at the flap corner. Tie the roll with a 1/2-inch ribbon strip and test closure tension.
Editor's noteUse clear elastic for the loops so the jewelry is easy to see without making the roll look busy.
Skip thisDon’t skip stiff interfacing — floppy interiors look like a craft pouch.



