

1. Sealed Marble-Look Catchall Tray
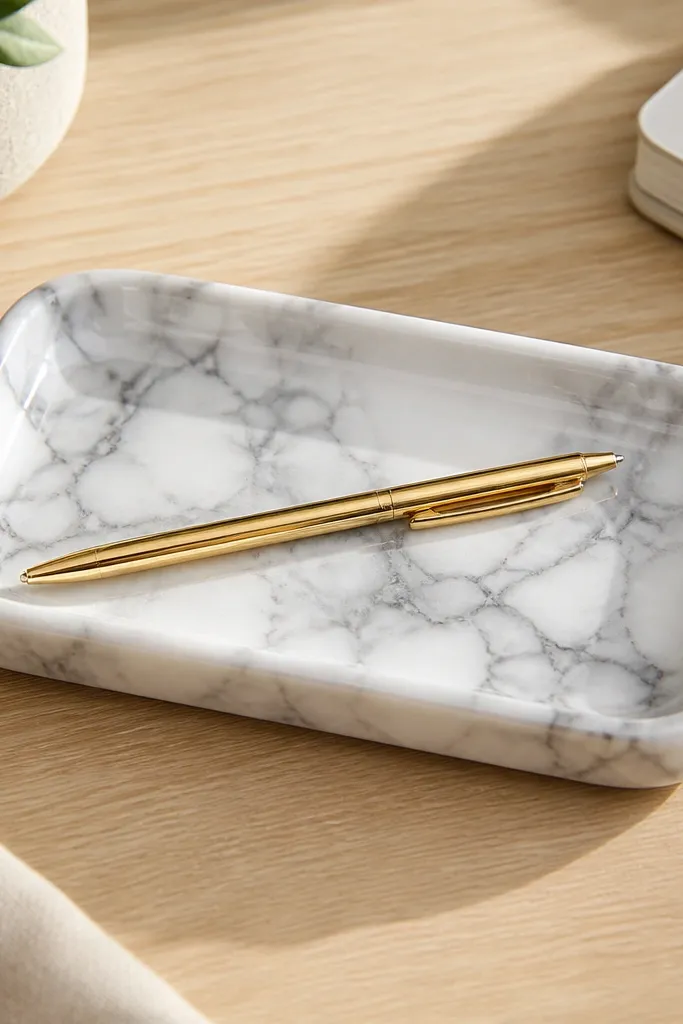
This tray is the kind of low maintenance gift that still looks like it came from a store. I make it using a flat MDF or birch plywood base, then paint a faux marble design in cool tones — white base with gray veining — and seal it with a high-gloss clear coat. The glossy finish catches light and makes everyday clutter look intentional, like keys and lip balm belong there. It works especially well for friends who keep their nightstand messy or who love neutral decor. The cool palette looks clean against warm skin tones and works in both small studios and airy rooms.
Start by sanding a small tray blank (about 8x6 inches) smooth, then wipe it with a tack cloth. Base coat the whole thing with white craft paint, let it dry 30-45 minutes, then add gray veining using a sponge and a thin liner brush. After the pattern dries, seal two coats with a clear gloss varnish, waiting at least 2 hours between coats. Finally, add small felt pads on the bottom so it doesn’t scratch furniture and looks neat on a dresser.
If you want it to look extra real, drag a slightly damp sponge through the gray while the paint is still tacky for softer marble edges.
Don’t skip sanding and wiping — glossy top coats show every bump.
2. Heat-Set Vinyl Name Bookmark Set
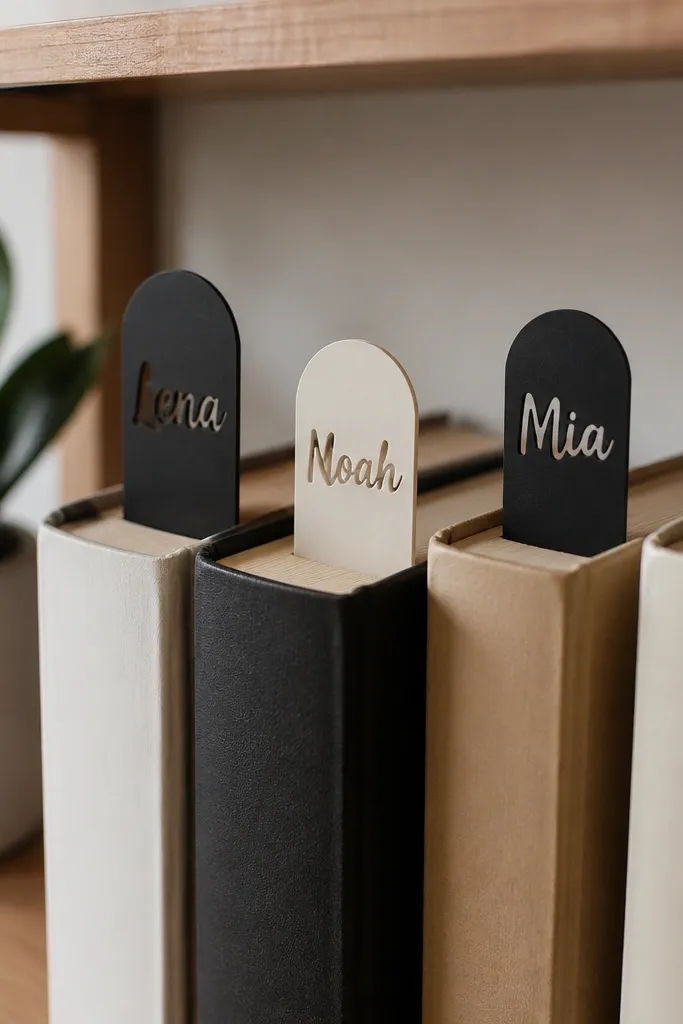
This is my go-to low maintenance gift for a best friend who reads but never keeps track of where she stopped. Heat-set vinyl holds up better than paper and stays crisp even after repeated use. I make the bookmarks in two colors — a matte cream base with black lettering, or black base with cream lettering — and I keep the design simple: her name or initials plus a tiny icon like a star or leaf. It looks clean in photos because the vinyl has a smooth, even surface. It also fits every skin tone and style because the colors are neutral and graphic.
Cut strips of vinyl about 2 inches wide and 6 inches long, then weed the design with a craft cutter or by hand using a sharp hobby blade. Press the vinyl onto a thin cotton bookmark backing or straight onto a laminated paper strip if you want it stiffer. Use a heat press or household iron with parchment paper — press for 20-25 seconds, then lift and check adhesion. Add a small tassel or ribbon loop only if she likes that look; otherwise keep it flat so it slides easily between pages.
Test heat on a scrap first — too hot makes the vinyl bubble and it won’t look sharp.
Don’t use glossy vinyl — it scuffs and looks cheap after a few weeks.
3. Candle Jar Label Upgrade with Transfer Paper
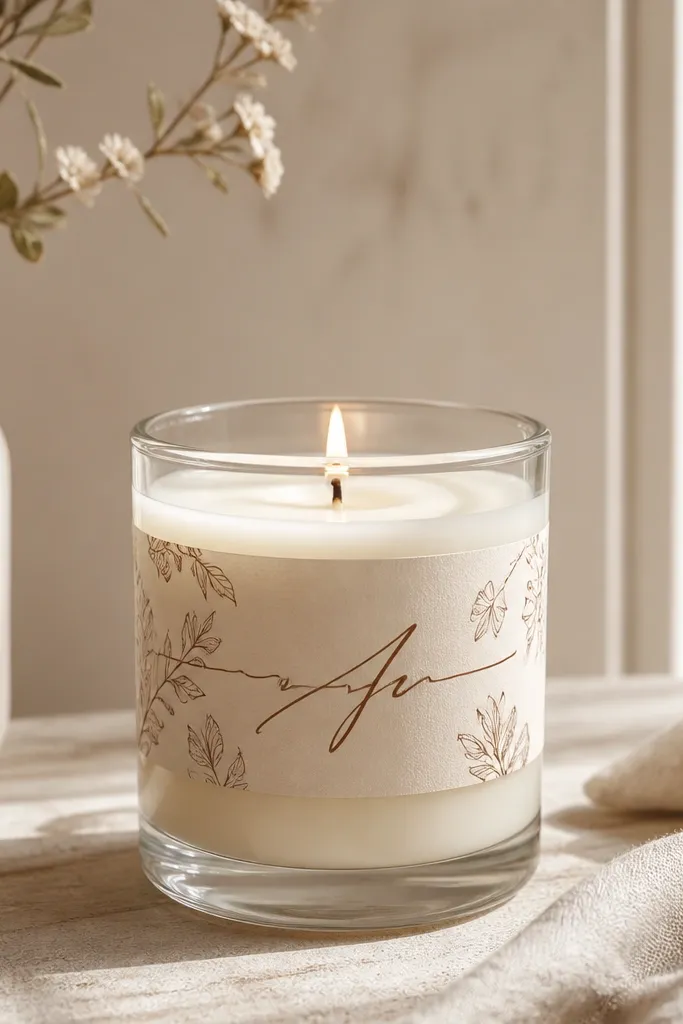
If you can’t decide what scent she likes, don’t guess — upgrade the candle she already has or buy a plain jar candle and make it personal. My favorite low maintenance version is a clean wraparound label made with transfer paper and sealed so it doesn’t smear. I use cream paper or kraft paper, then print or trace her initials and the scent name in a warm brown tone. The label gives the candle a “designed object” look without changing how she uses it. It’s flattering for any decor style because it’s mostly neutrals, and it fits friends who like calm, minimal spaces.
Start by cleaning the jar with rubbing alcohol and letting it fully dry. Cut a strip of label paper that wraps snugly with a 1/4-inch overlap. Transfer your design, then coat the label lightly with a clear matte medium so it won’t smear when handled. Wrap it around the jar, secure with a thin strip of double-sided tape, and press for 30 seconds. Finish by adding a small circle label on the bottom with burn date and safety notes.
Editor's noteIf you want it to look extra expensive, use a single font weight — one style only — and keep the layout centered.
Skip thisDon’t put the label on while the jar is still warm — condensation makes paper curl.
4. Wipe-Clean Herb Coaster Set
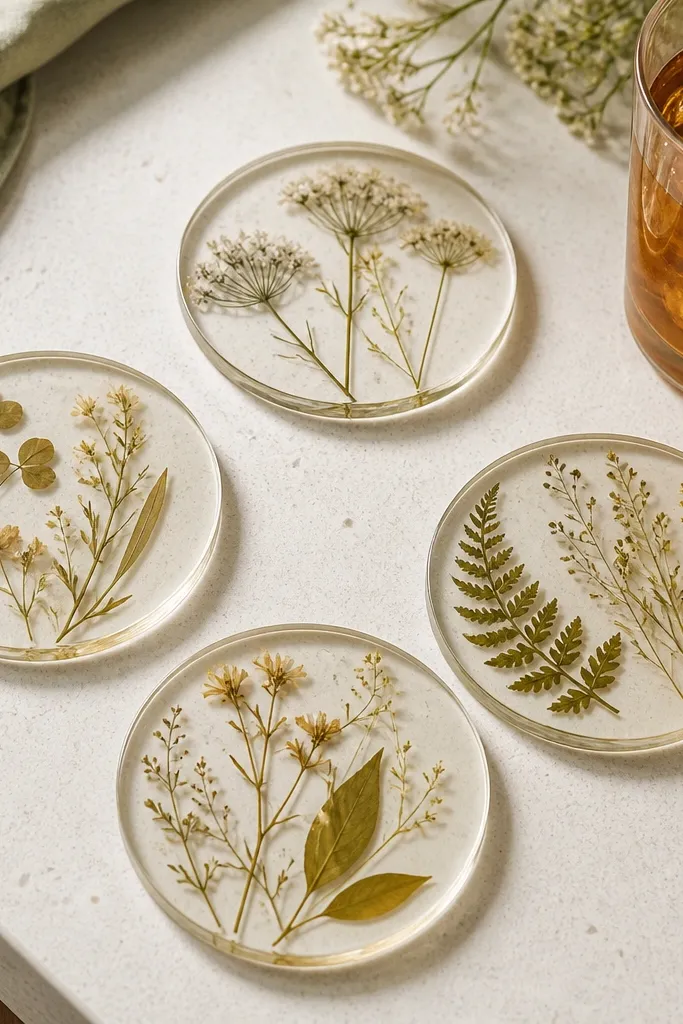
These coasters look artsy but they’re low maintenance because the surface is sealed and wipeable. I use cork rounds or ceramic tiles as the base, then press tiny dried herbs like thyme or chamomile blooms into a thin layer of clear resin or a glossy epoxy top coat. The herbs add an organic texture that looks great with both warm and cool kitchens. It’s a great gift for best friends who host, drink iced coffee, or always have water glasses on the table. The muted greens and soft creams make the room feel calmer and they don’t compete with other decor.
Start by trimming herbs so they sit flat and don’t overlap too thickly. Seal the base with a thin clear layer, then place herbs gently and pour a second thin coat to level the surface. Pop any bubbles with a toothpick and torch carefully if you have a small torch. Let cure fully — usually 24-48 hours for many DIY epoxies — then sand the edges lightly for a smooth feel. Add a cork backing only if you used a non-cork base so it won’t scratch furniture.
Editor's noteChoose herbs that are already fully dry — any moisture makes bubbles or cloudy spots.
Skip thisDon’t pour a thick first layer — it traps air and makes the herb shapes blurry.
5. Folded-Fabric Wall Hanging Organizer
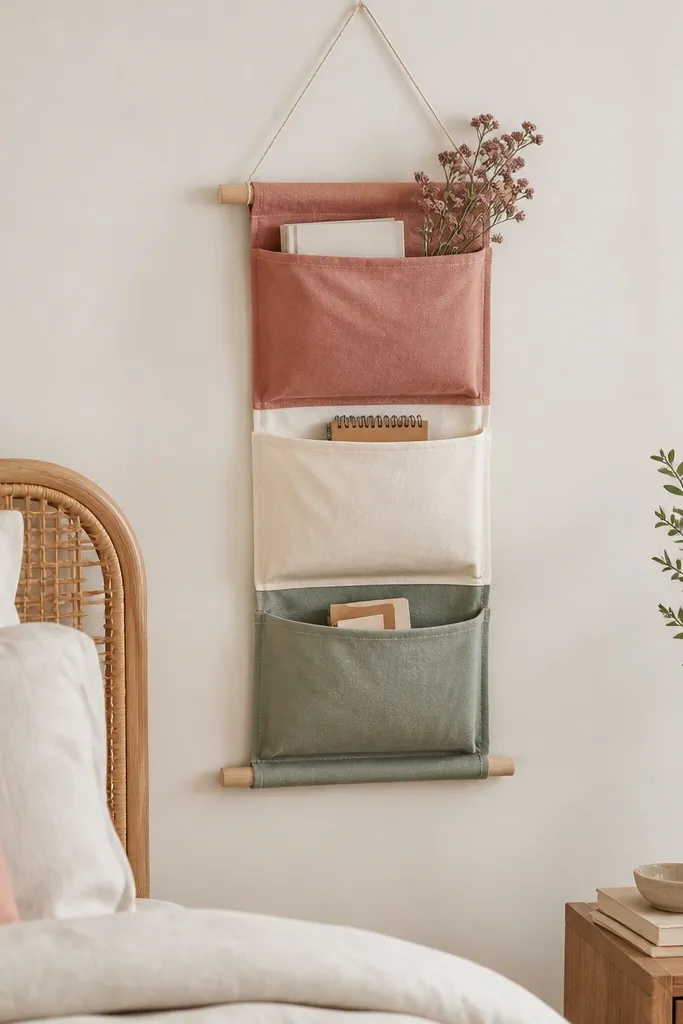
This one is low maintenance because it’s basically storage that looks cute. I sew or no-sew fold a fabric organizer with three pockets, using medium-weight cotton or cotton-linen so it holds its shape. The design is simple: a dusty rose outer panel, cream pockets, and one sage accent pocket so it looks intentional, not random. It’s perfect for a friend who loses hair ties, chargers, or mail — she can see everything at a glance. The color mix flatters most skin tones and looks good in bedrooms, entryways, and craft corners.
Measure the space on her wall, then cut fabric panels leaving a 1/2-inch seam allowance. Fold and press pocket edges so the tops look crisp, then stitch the pocket bottoms and side seams first. Attach the top to a rod sleeve made from a strip of fabric and use a simple dowel or tension rod behind it. Hang it with picture hooks rated for the wall type. Finally, iron the whole piece on the cotton setting so it hangs straight instead of drooping.
Use iron-on interfacing on the pocket fronts — it stops the fabric from sagging after a few weeks.
Don’t use thin polyester — it collapses and looks like a bag instead of a wall piece.
6. Rope-Wrapped Key Hook with Number Plate
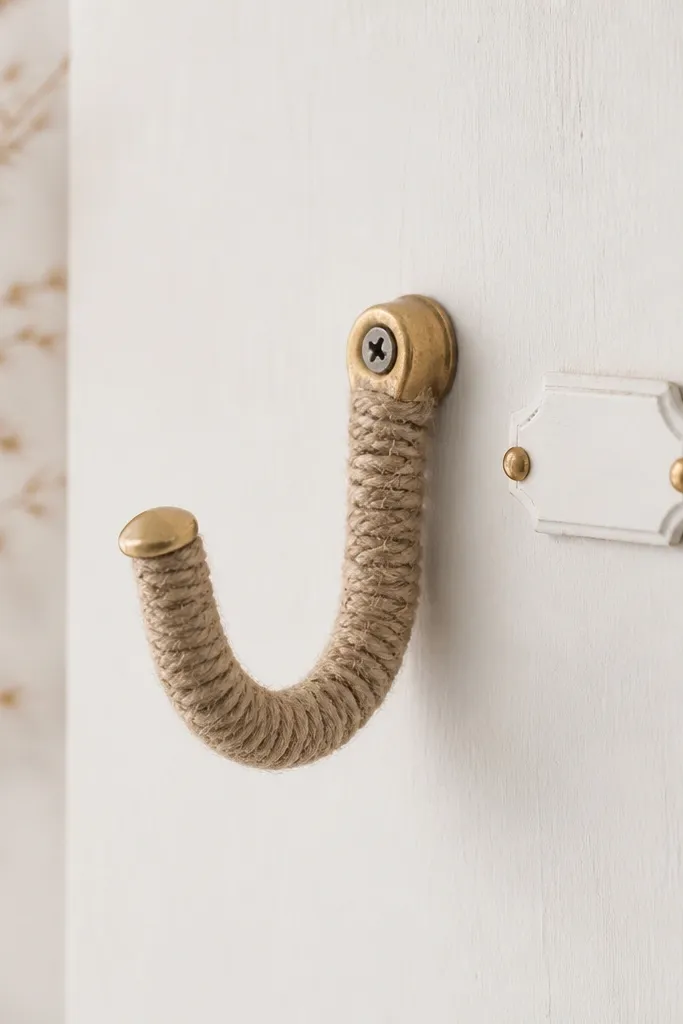
This is one of the few low maintenance DIY gifts that actually gets used daily and still looks pretty. I wrap a jute rope coil around a single heavy screw hook, then add a small white ceramic or wood number plate like 7 or 13 so it feels personal. The rope texture hides minor wall imperfections and gives a warm, handmade look. It works well for entryways, dorm rooms, and apartments where keys need a home. The natural beige and brass tones are flattering against both cool and warm interior colors.
Start by marking the hook height and drilling a pilot hole if mounting to wood or using a correct anchor for drywall. Wrap jute rope tightly around the hook base, securing with hot glue every inch so it doesn’t unravel. Add a small clear top coat or matte sealant on the rope if you want it to feel smoother to the touch. Attach the number plate with a tiny screw or strong adhesive hook strip. Hang keys after it cures so she doesn’t tug on fresh glue.
Editor's noteWrap the rope from the bottom up so the last loop sits cleanly under the screw head.
Skip thisDon’t rely on hot glue alone on the top loop — it lifts when kids or pets yank keys.
7. Painted Terracotta Mini Planter with Drainage
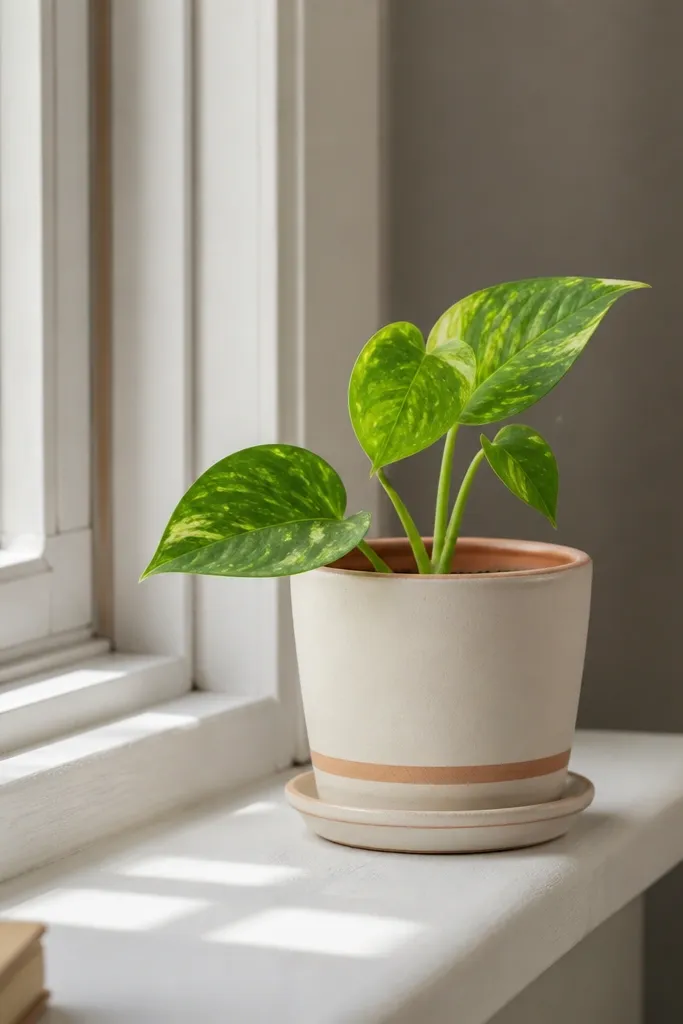
A mini planter is low maintenance because it keeps the gift useful for months, and the care routine is straightforward. I paint terracotta in muted cream or dusty blue using outdoor acrylic, then seal it so water doesn’t stain the paint. The best part is the drainage — terracotta already breathes — so plants don’t sit in soggy water. It looks great in any home because terracotta + one soft color reads warm and calm. It also flatters people who like earthy decor and friends who want a “small project” that doesn’t take hours.
Start by cleaning the pot and letting it dry. Paint two thin coats of your base color, then add a simple stripe or dot pattern with a small brush. Seal with a clear outdoor sealant, then allow a full cure time before watering. Use a matching saucer or a small felt pad under the pot. Plant a small cutting or succulent in fresh potting mix and label with care notes.
Editor's noteWrite watering instructions on a small tag: 'Water when top inch is dry' beats a vague schedule.
Skip thisDon’t paint the drainage hole area — leave it bare so water can escape.
8. No-Sew Pom-Pom Keychain with Leather Tag
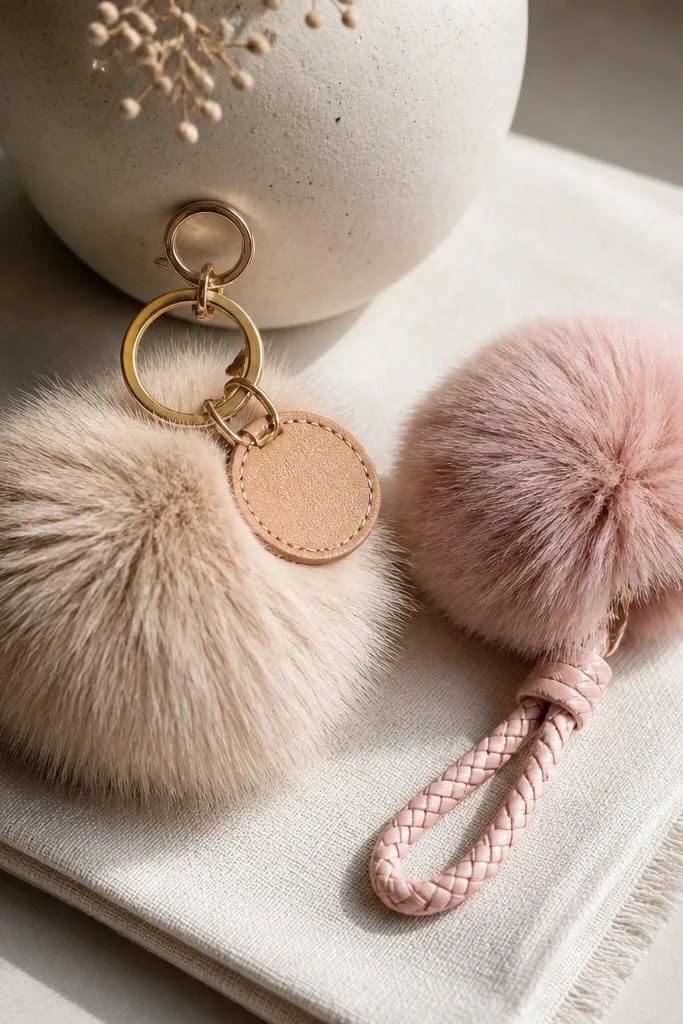
This is low maintenance because it’s quick to make and holds up in bags and pockets. Pom-poms add a playful look, but you keep it classy by adding a small leather tag with stamped initials or a printed monogram. I use thick yarn pom-poms and attach them with a sturdy split ring so it doesn’t wobble. It’s great for best friends who carry too many keys or who love small accessories. The yarn colors look good against most skin tones and match both casual jeans and dressy outfits.
Make or buy pom-poms with a consistent size, then trim them so they’re even and fluffy. Cut a small leather tag and punch a hole near the top edge. Thread a braided cord loop through the ring and knot it, then attach the pom-pom by tying tightly around the cord knot. Use a dab of fabric glue to lock the knot and let it dry flat. Finally, stamp or write the initials on the tag and finish with a light leather conditioner if needed.
Editor's noteTrim the pom-pom after it’s attached — you get a cleaner silhouette for photos.
Skip thisDon’t use cheap jump rings — they open and the pom-pom drops.
9. Seamless Photo Transfer Coaster (Polymer Sheet)
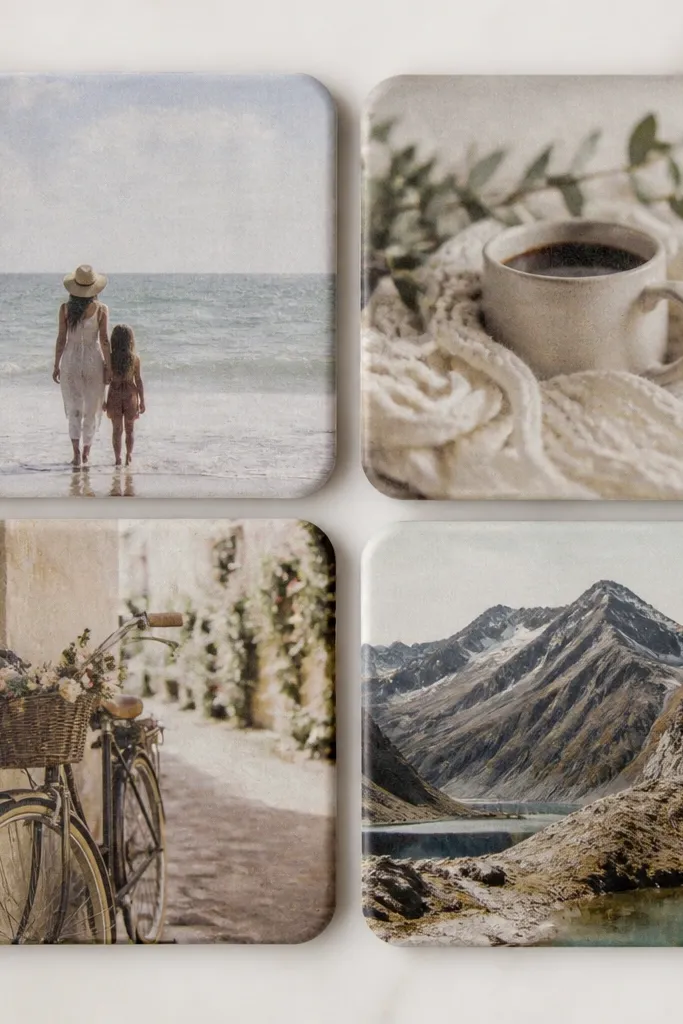
This gift looks personal without being fragile. I use polymer sheet or photo transfer film on a coaster base so the image sits under a clear top layer, which makes it wipeable. The key is choosing a photo with soft lighting and a simple background — the transfer looks clean and doesn’t smear. It’s a strong option for best friends who love photos but hate clutter. Muted tones like beige, dusty blue, and warm gray blend with almost any home palette.
Print your photo on transfer-compatible paper or use transfer film, then cut it to coaster size with a small border. Clean the coaster surface, press the transfer down firmly, and burnish edges with a plastic card to avoid air pockets. Seal with a clear top coat in thin layers for a smooth surface. Let it cure fully before stacking. Add a felt or cork backing so it feels good on tables and doesn’t scratch.
Editor's notePick photos with fewer tiny details — the transfer looks sharper and more expensive.
Skip thisDon’t sand the top layer after sealing — it turns glossy areas cloudy.
10. Macramé-Style Plant Hanger with Dollar-Store Rope
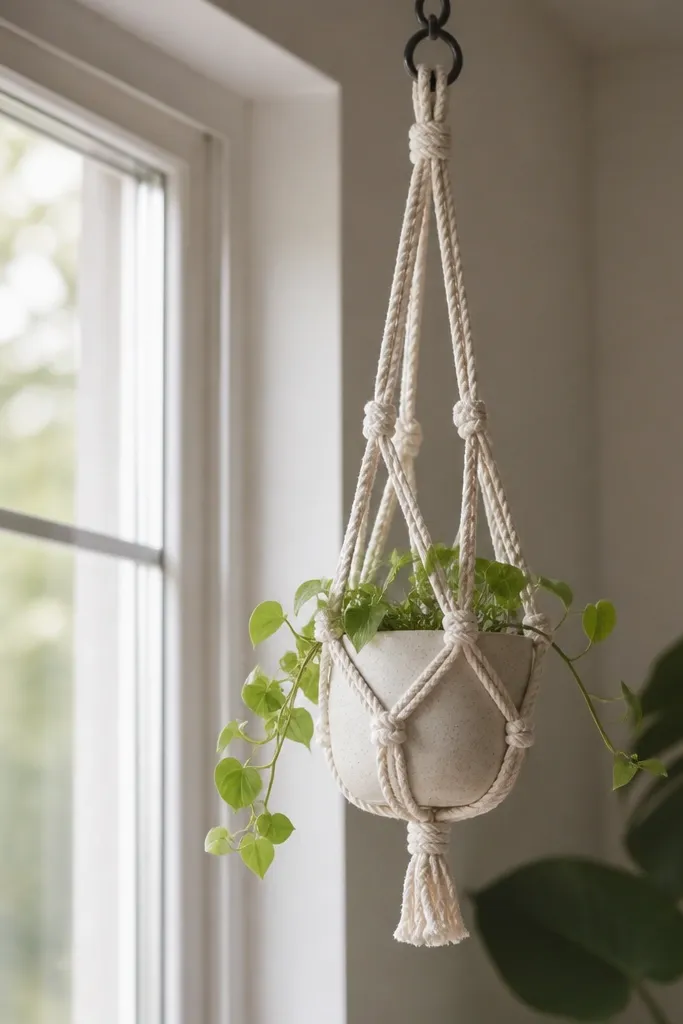
This reads handmade but it’s low maintenance because the knots hold steady and the rope hides small wear. I use thick cotton macramé rope and keep the pattern simple: two main cords, evenly spaced knots, and a clean top loop. The result looks airy and intentional, especially for small plants like pothos cuttings or snake plant babies. It works for friends with bright windows who want decor that doesn’t require daily attention. The neutral rope color works with almost every interior and flatters both warm and cool spaces.
Cut rope lengths based on desired drop — for a small pot, start with about 6-7 feet of rope per cord. Knot the top loop around the ceiling hook or a temporary dowel, then split cords into groups. Tie consistent knots at the same spacing down the length, checking symmetry every few knots. Attach the plant holder ring or pot clip, then trim ends and seal frays with fabric glue. Hang the pot and adjust so it sits centered.
Measure spacing by counting knots — don’t eyeball it the whole way down.
Don’t use thin synthetic rope — it looks stringy and frays fast.
11. Fabric Scrap Coasters with Heat-Set Interfacing
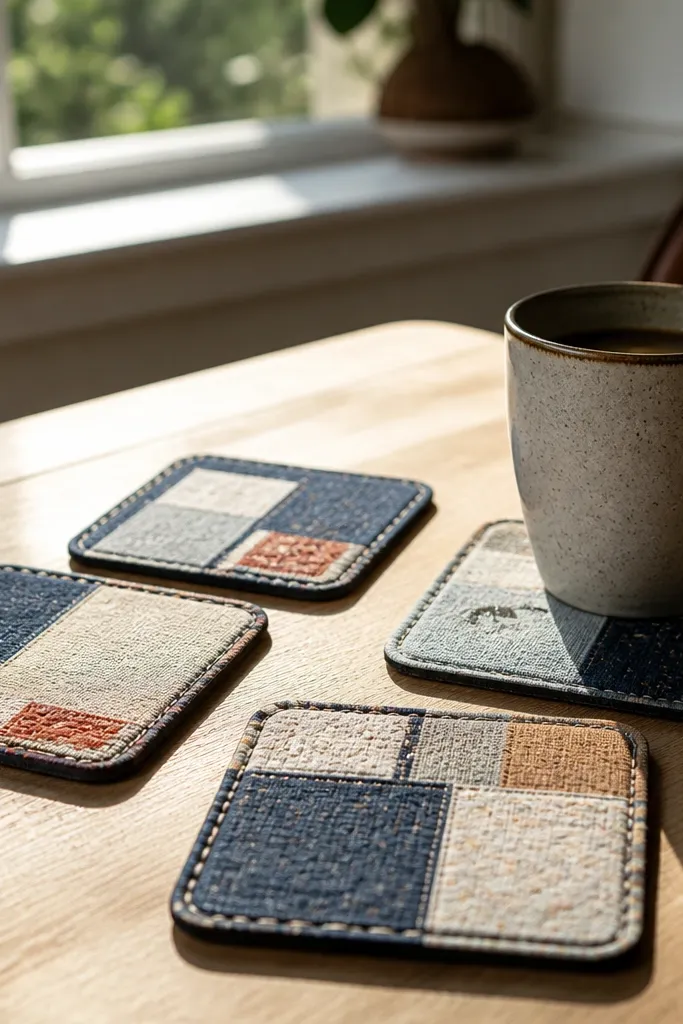
Fabric coasters are low maintenance when you build them to handle spills. I use cotton scraps, then fuse heat-set interfacing to give the coaster a firm feel, and I finish with a wipeable top layer like a thin clear vinyl or a coated fabric. The patchwork design looks cozy, but the trick is keeping the color palette tight: two neutrals plus one muted accent. This gift works for best friends who have drinks on the couch or who like a softer look than ceramic. The warm fabric tones look good in any home and don’t show fingerprints as easily as glossy surfaces.
Cut 4-inch squares from cotton scraps and fuse heat-set interfacing on the wrong side of each. Layer and stitch around the edges with a 1/4-inch seam, then clip corners and turn right side out. Press flat with an iron and trim to uniform size. If you’re using a wipeable top, apply a thin layer of clear coating before stitching the final seam. Round the edges with scissors for a softer look and better grip.
Editor's noteUse a walking foot if you have one — patchwork layers feed evenly and the stitching stays straight.
Skip thisDon’t skip fusing — thin fabric coasters collapse and look sloppy.
12. Painted Denim Tote with Iron-On Pocket Label
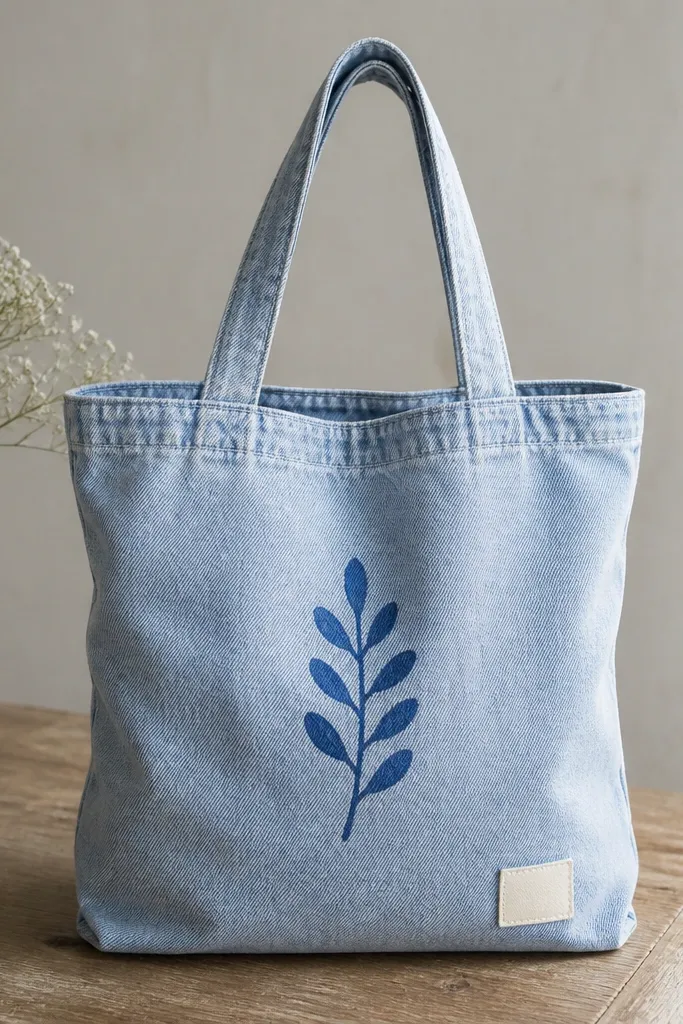
A tote is low maintenance because it’s practical and it takes paint well when you prep it right. I paint a small icon on the front — a sun, a cat silhouette, or a tiny mountain — using fabric paint, then seal it with heat so it doesn’t crack immediately. The pocket label adds a personal touch without adding bulk, and it looks neat even when the bag gets wrinkled. This works for best friends who carry groceries, gym stuff, or random life essentials. Denim blue and cream accents also look good with most outfits and skin tones.
Wash and dry the tote first so the fabric paint bonds. Place cardboard inside the bag so paint doesn’t bleed to the back. Tape off your icon area and paint with fabric paint in one or two colors, then let it dry 20-30 minutes. Heat set with an iron according to the paint instructions, and let it cool before use. Add an iron-on label to the pocket area last so it stays clean.
Keep the design small — a 3x3 inch icon looks intentional and avoids cracking from heavy wear.
Don’t use regular craft acrylic — it cracks and peels after a few washes.
13. DIY Bath Salts in Reusable Glass Jar
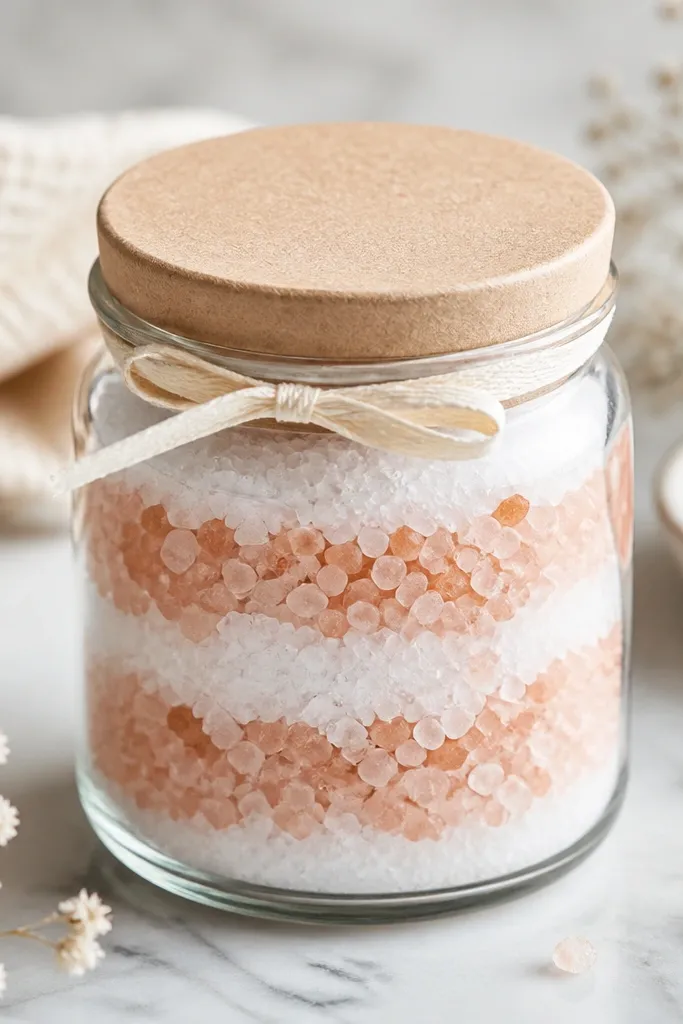
Bath salts are low maintenance because she can use them whenever she needs a reset, and the jar keeps well. I layer salts in soft tones — pale pink with white — because it looks pretty in bathroom light and matches cozy decor. You control the scent intensity with essential oils, and the jar looks gift-ready without extra packaging. This is a great option for best friends who like self-care but hate complicated routines. The gentle colors sit well with warm skin tones and neutral bathrooms.
Mix Epsom salt and fine sea salt in a large bowl, then add fragrance gradually — start with 10-15 drops essential oil per cup of salts. Add a few drops of food-safe colorant or mica for a soft tint, then separate into two bowls for layering. Pour into a clean jar in alternating layers, lightly tap to settle. Seal the lid and add a label with '2-3 scoops per bath' and ingredient notes. Tie a small ribbon only if she likes it — the jar already looks finished.
Editor's noteUse a ladle to scoop from the jar so the salts don’t get wet and clump.
Skip thisDon’t over-scent — strong oil smells turn into a headache fast.
14. Sealed Wooden Photo Clip Frames
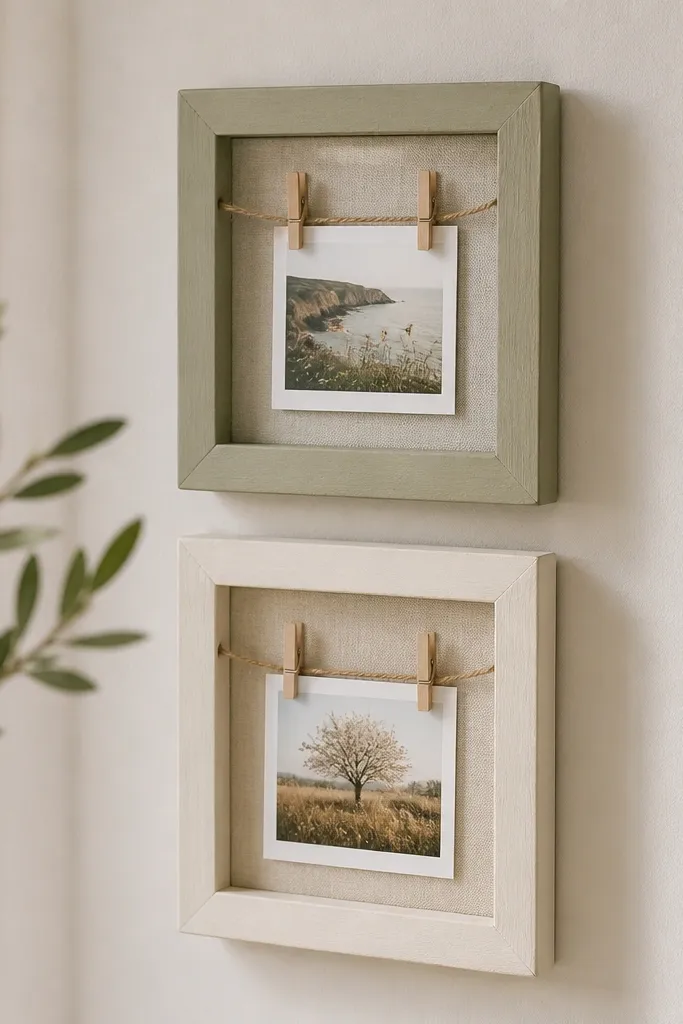
This gift looks like a gallery wall but it’s low maintenance because it’s adjustable and easy to refresh. I build mini frames from thin wood strips, paint them matte, then attach two clothespins so she can swap photos without tools. Matte paint hides tiny imperfections better than glossy, and it looks calm in daylight. It’s perfect for best friends who like changing seasonal photos, travel snapshots, or kid pictures. The sage and cream combo makes the wall feel soft and works in both neutral and colorful rooms.
Cut wood strips into a small rectangle frame and sand edges lightly. Paint one coat of primer if needed, then two coats of matte acrylic in your base color. Attach clothespins with small screws or strong adhesive designed for wood. Add a backing if you want a cleaner look, and hang with picture hooks. Insert printed photos with a little spacing so it looks curated even when she swaps them later.
Print photos at 4x6 and trim slightly — the matte frames hide minor size changes.
Don’t use flimsy clothespins — they bend and photos sag.
15. Resin-Free Epoxy-Look Key Tray with Chalk Paint
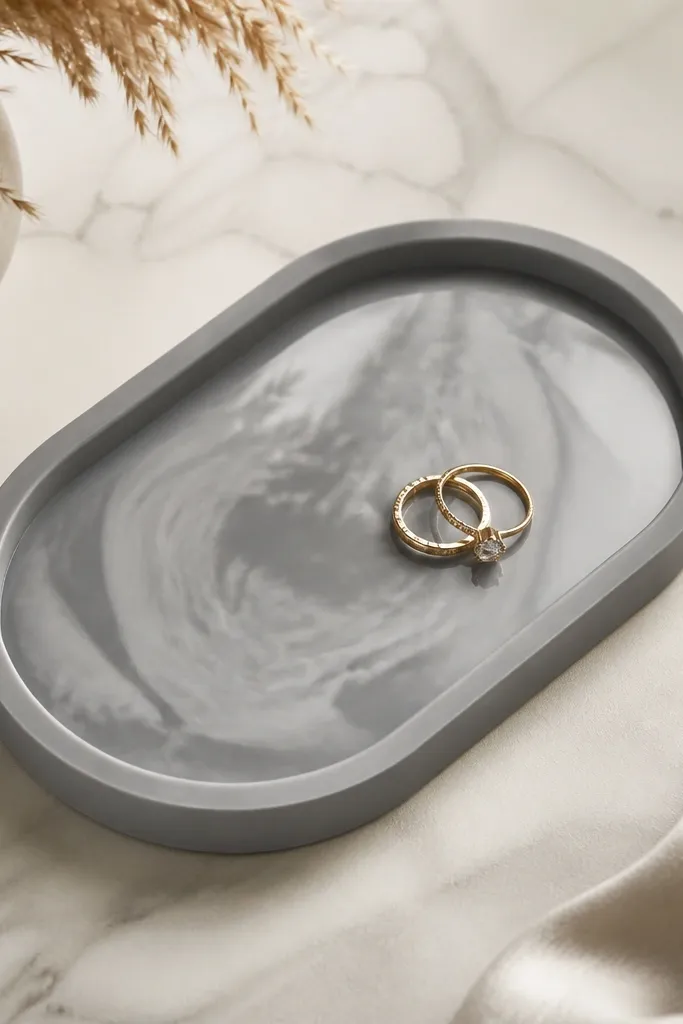
If you want the glossy resin vibe without the full resin hassle, this tray gives that smooth, photo-friendly look. I use chalk paint for body, then top with a clear water-based varnish for a glassy center. The gray base with subtle swirling is low maintenance because it wipes clean and doesn’t show every fingerprint like dark high-gloss does. It’s ideal for a friend who likes modern decor and keeps keys, sunglasses, and lip balm in one spot. The cool gray palette looks good next to warm woods and also against black frames.
Sand your tray lightly and wipe it clean. Paint a gray base in two thin coats, then add a swirl pattern using a damp cloth and a slightly lighter gray paint. Let dry fully, then brush on a clear varnish in two coats, keeping the brush strokes smooth. If you want a glossy center, mask the edges with painter’s tape before the final coat. Remove tape carefully and let cure overnight before placing items.
Editor's noteUse long, slow brush strokes and don’t go back over wet areas — it levels faster.
Skip thisDon’t rush the cure time — early contact leaves cloudy marks.
16. Monogrammed Linen Closet Tag Set
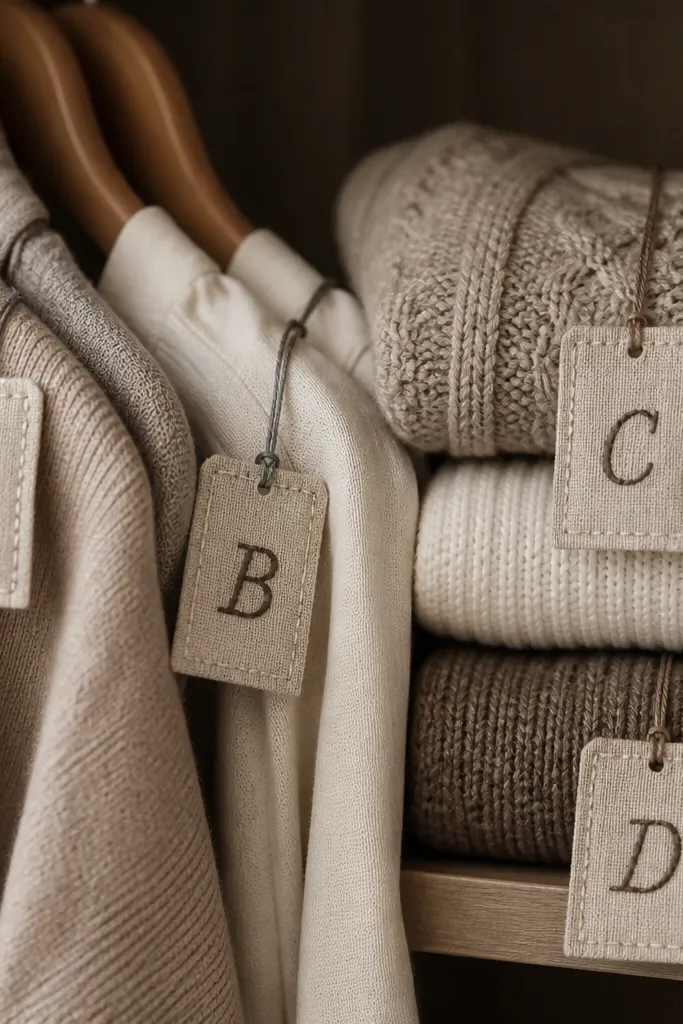
This is the low maintenance gift that upgrades daily life without needing a new gadget. Linen tags look refined, and because they’re stitched, they last through normal handling. I make four tags — one for each season or each category like 'tops,' 'bottoms,' 'sweaters,' 'work' — and embroider a single letter on each tag. The soft texture makes the closet feel calmer, and the neutral thread color works with most wardrobes. It’s perfect for best friends who love organization but hate complicated systems. The look also photographs nicely because linen catches light softly.
Cut linen strips about 2.5x4 inches, then fold and press the edges so the monogram area stays crisp. Stitch a simple monogram with backstitch or satin stitch using embroidery thread that matches the wardrobe — I like dark brown on natural linen. Add a small fabric loop at the top for hanging and stitch it in place. Attach to hangers with a small ribbon or directly loop through the hanger hook. Keep the set cohesive by using the same thread color for all tags.
Editor's notePractice the letter on scrap fabric — uneven curves show up instantly on linen.
Skip thisDon’t use stretchy thread — the letters warp after a few weeks.
17. Framed Fabric Scraps Wall Art with No-Glue Corners
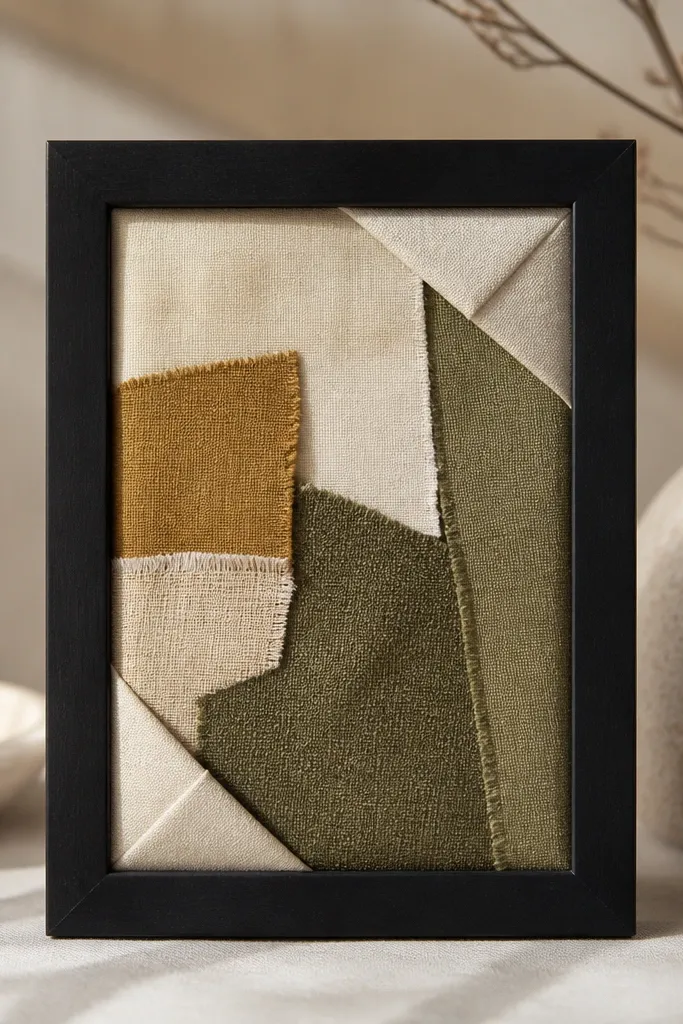
This wall art is low maintenance because it’s basically a finished “panel” that stays looking good. I use a simple frame and layer fabric scraps with folded corners instead of messy glue, so nothing warps or peels over time. The key is to pick fabrics with similar weight — cotton and linen — so the layers sit flat. The color palette is usually cream background with olive and a muted gold accent because it looks warm without screaming. It’s a great gift for best friends who want wall decor but don’t want to dust tiny objects. The framed look makes it feel polished even when the inside is playful.
Choose a frame with a backing you can remove easily and cut a backing sheet to size. Lay the fabric scraps from biggest to smallest, folding edges under so they look neat from the front. Use a light spray fabric adhesive only if the backing is smooth, but I prefer corner-fold compression — tuck corners tight and secure with the frame’s backing. Add a thin piece of batting if you want soft dimension. Hang with two hooks for a straight, weight-balanced look.
Press each fabric layer with a steam iron before folding — it prevents puckers.
Don’t mix super-stretch fabric with woven — the stretch causes bubbles under the glass.
18. Personalized Desk Organizer from Upcycled Spice Box
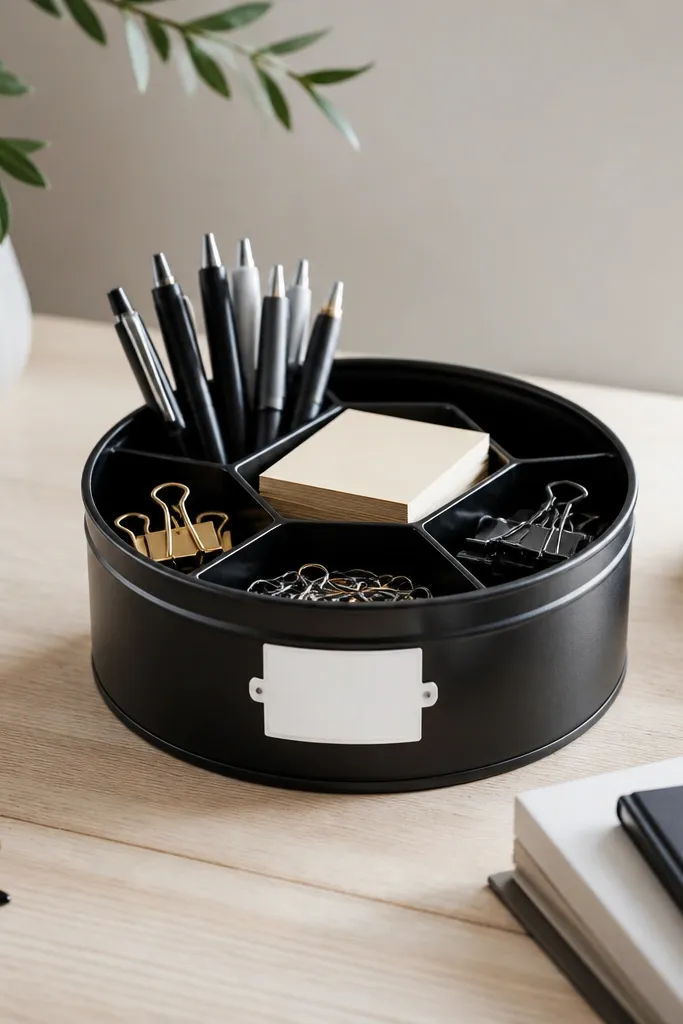
A desk organizer is low maintenance because it keeps the mess contained and it looks good even when she’s busy. I upcycle a metal spice box or small tin, paint it matte, and add a label that matches her desk vibe. The trick is to keep the compartments simple: one long pen slot, one shallow section for clips, and a tiny tray for sticky notes. It’s perfect for best friends who work from a laptop and constantly lose pens. The matte black with a white label looks sharp in any lighting and doesn’t clash with colorful stationery.
Clean the tin thoroughly, then sand lightly so paint sticks. Spray or paint matte black, then let it cure fully before handling. Add a label strip with her initials or a short word like 'NOTES' using vinyl or printed label paper sealed with clear tape. Fit a thin foam or felt liner inside to prevent rattling and scratching. Place sticky notes upright using a small folded cardboard divider and add a mini tray for clips.
Editor's noteUse a label that’s one line only — it keeps the organizer looking clean at a glance.
Skip thisDon’t skip liner — metal edges chew up paper and scratch screens when it tips.
19. Wipeable Fabric Bookmark Page Tabs
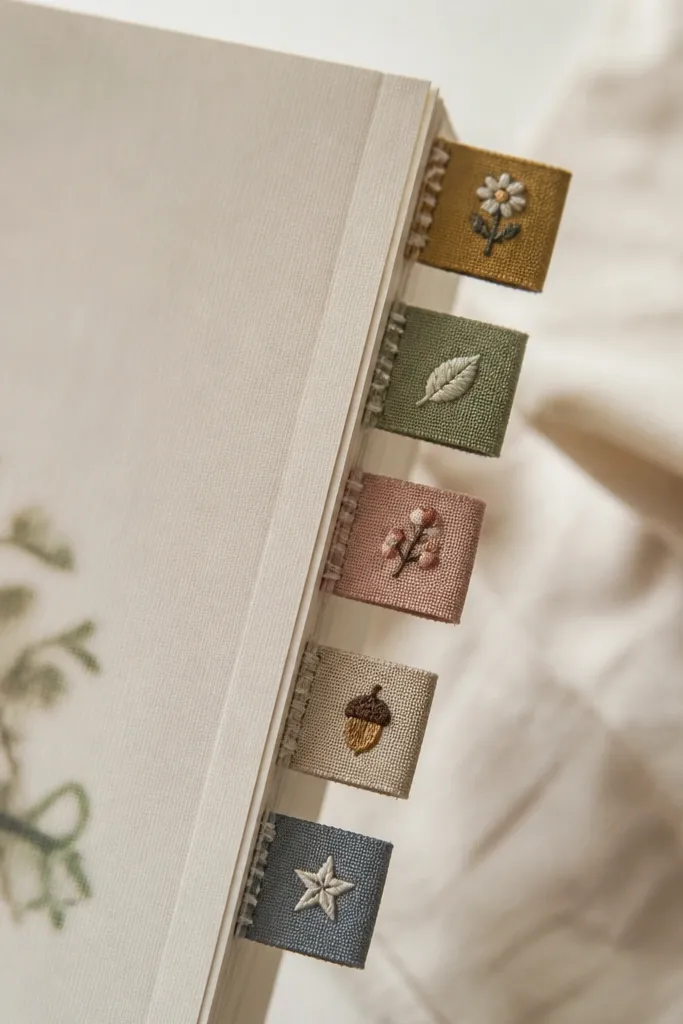
These page tabs are low maintenance because they stay put and they’re easy to clean compared to paper tabs. I use cotton fabric strips, stitch them into thin tabs, and add a tiny icon like a heart, star, or leaf so each tab is readable. The fabric grips the page without sliding, and the stitched edge keeps it from fraying. This is a great gift for best friends who read nonfiction, study, or keep reference books. The soft muted colors look calm on a cluttered bookshelf and match most home decor.
Cut fabric strips about 1 inch wide and 4 inches long, then fuse a thin interfacing layer so the tab stays flat. Fold in half lengthwise and stitch along the open edge to create a clean seam. Trim corners, then turn right side out and press. Cut tiny slots or snip the underside so the tab can slide under the page without bulk. Add one icon patch or embroidered symbol per tab, then secure them under the page at the section she reads most.
Use a color for each section — like blue for recipes, green for travel — so she remembers fast.
Don’t make tabs too thick — thick tabs pop out and look messy.
20. Mini Gift Box Candle Holder with Lid
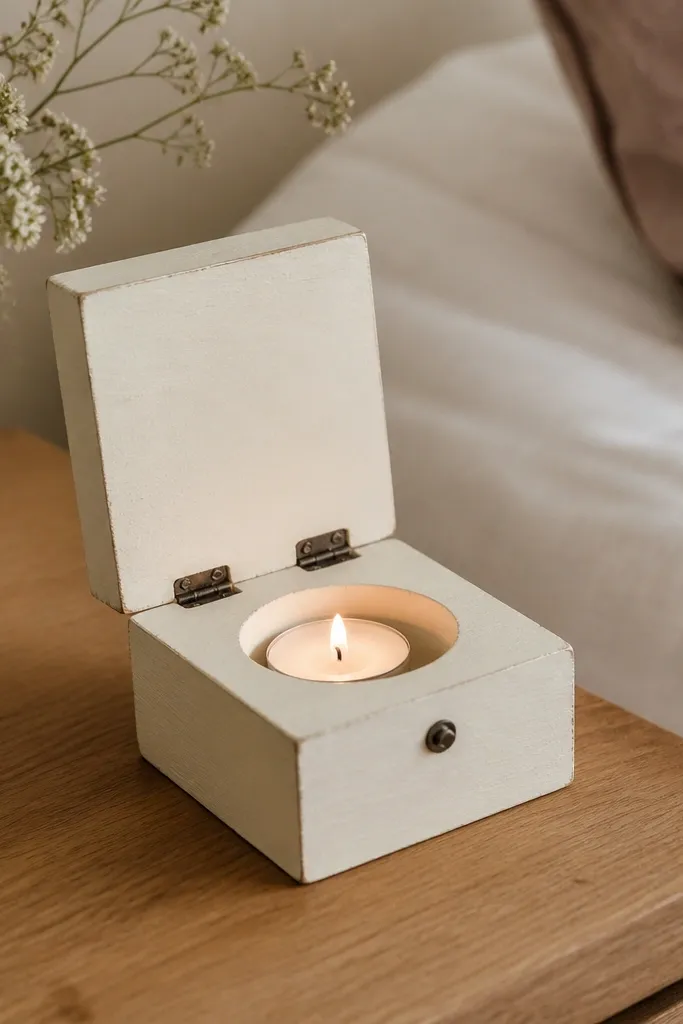
A candle holder with a lid is low maintenance because it protects the flame area and keeps dust off the top. I build the look using a small wooden box with a hinged lid, then paint it in cream and add a simple stencil icon on the front. The lid makes it safer and it also makes the gift feel extra considered. It fits best friends who like cozy nights but hate clutter — the box stores matches or a small card inside. The cream paint looks clean against dark wood and also looks good beside warm lamp light.
Sand the box, wipe with alcohol, and paint two thin coats of cream acrylic. Add a stencil design using a single accent color like soft sage or muted terracotta. Seal with matte clear so it doesn’t look slick. Place a small tealight cup or a heat-safe liner inside the box where the flame sits. Attach the lid and test opening/closing for clearance, then add a tiny label inside that says 'Matches here.'
Choose a stencil with thick lines — thin stencil edges chip faster on small boxes.
Don’t seal over raw wood without priming — the paint soaks in and looks patchy.



