

1. Embroidery-Floss Name Keychain on a Scrap Leather Tag
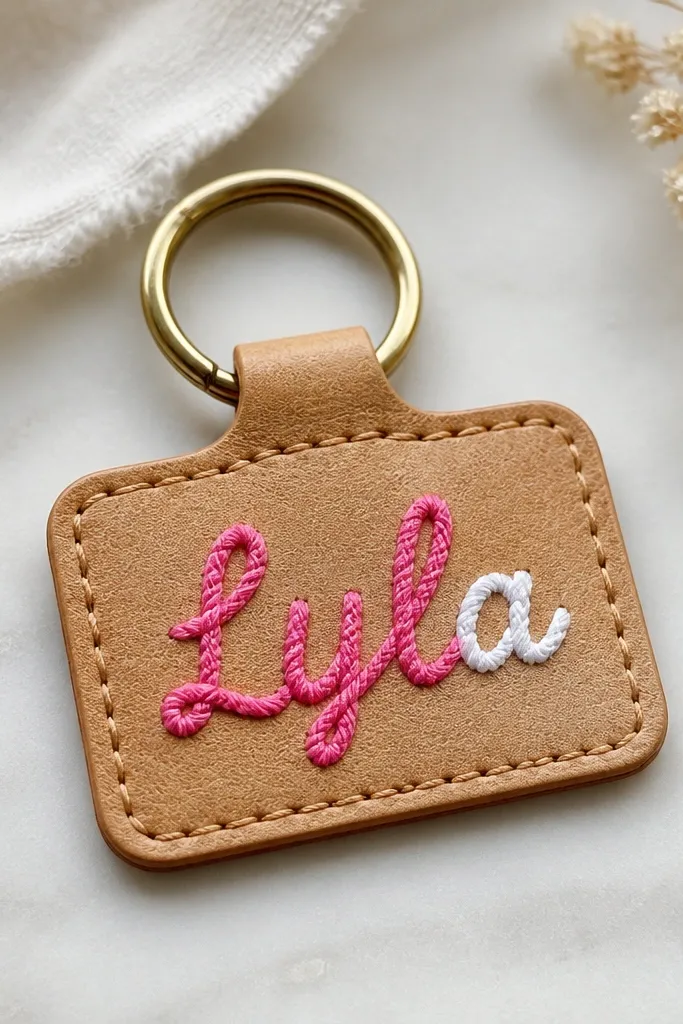
This keychain works because leather scraps look “real” even when the rest is simple. I use a small rectangle tag cut from a leftover leather strip (about 2.25 inches tall by 1.5 inches wide) and stitch a name or nickname with embroidery floss. The raised thread texture catches light in a way that printed labels never do. It looks best on friends who carry a lot of keys or a small everyday bag — the tag sits flat and doesn’t snag. Choose thread colors that match her vibe: hot pink and cream for playful, black and silver-gray for calm, or teal and navy for a cooler look.
Start by cutting your leather tag to size and punching two holes near the top for the key ring. Lightly sketch the name with a pencil so you keep letter spacing even. Use one strand of embroidery floss for a tight look, and stitch the letters using backstitch so the lines stay crisp. Then tie off the thread on the back, dab a tiny bit of clear glue at the knot, and trim the ends close. Finally, attach a split key ring through the top holes and press the leather flat so it looks smooth.
Before you stitch, practice one letter on scrap — the first try always shows you the tension you like.
Avoid using too many floss colors; three max keeps it from looking like a craft pile.
2. No-Sew Fabric Bookmark Set with Button Corners
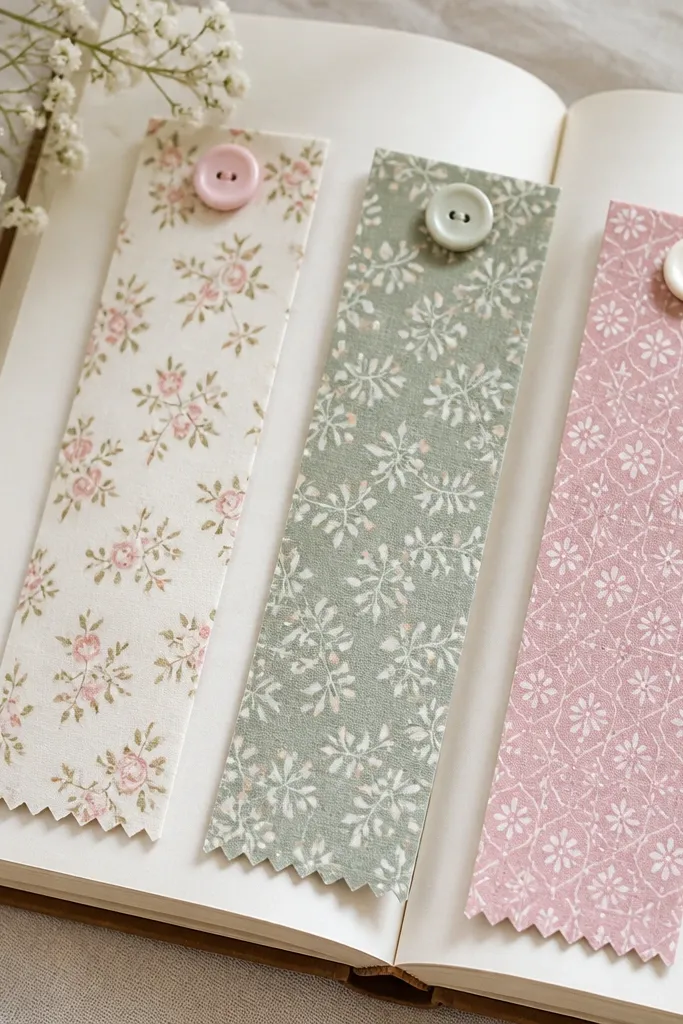
Bookmarks are cheap, personal, and they get used immediately — which is why I keep making them. I use cotton scraps or fat quarters and cut each bookmark to about 7 inches long by 2 inches wide. The button corner adds a cute “grab me” detail and helps the bookmark stay put without sliding. This works for friends who read on phones plus paper, or who keep cookbooks and planners open on the counter. Pattern-wise, pick one print with a busy motif and pair it with a solid so it looks styled, not random.
Start by cutting fabric strips and trimming the edges with pinking shears or a zigzag cut so they don’t fray as fast. Fold the top edge down about a quarter-inch and glue it with fabric glue — hold it for 30 seconds so it sets. Stitch or glue a small button at the folded corner, centered, so the button lands right where your thumb goes. Then add a second layer behind if your fabric is thin: glue a matching scrap strip and press to avoid bubbles. Package them in a small cellophane sleeve or tie with ribbon so they look like a set.
Choose buttons with a matte finish; shiny plastic buttons look cheap in photos.
Don’t skip edge finishing — raw edges look messy after a week of use.
3. Paint-Pen Ceramic Mug with a Tiny Pattern Stripe
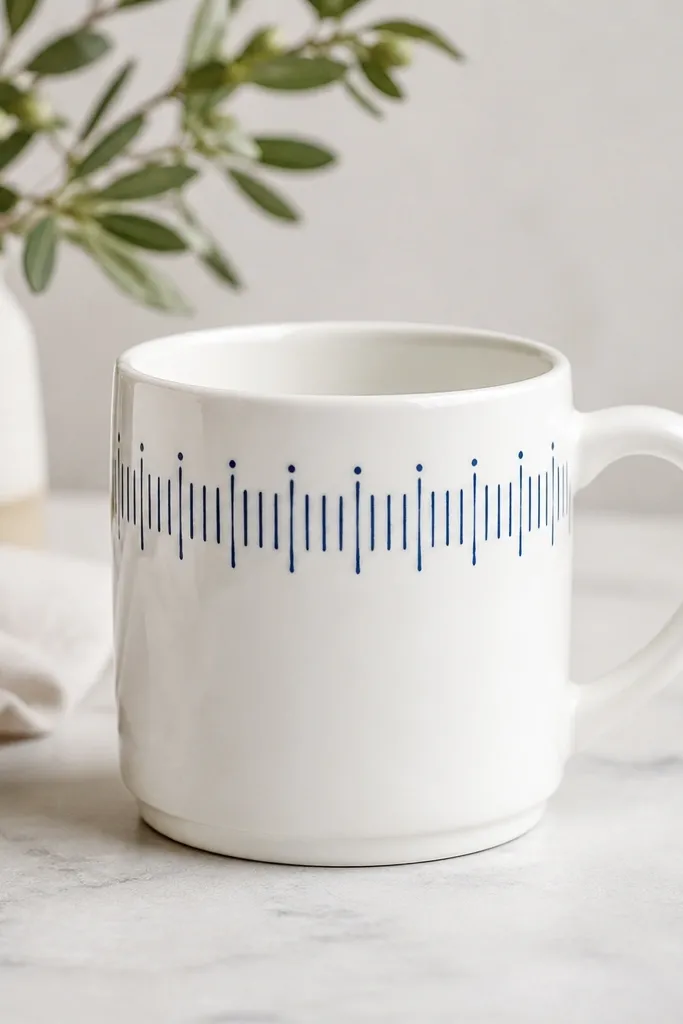
A plain mug is the easiest cheap base because it’s already useful. I give this to friends who drink coffee at home because the design is visible every morning. The trick is scale: keep the pattern small and repeat it in a narrow band so it looks intentional. I usually use a white mug and paint a navy stripe with tiny dots or short dashes in a second color like mustard. It flatters almost everyone because it doesn’t depend on body fit — it’s about contrast and clean lines.
Wash the mug with dish soap, then wipe with rubbing alcohol so the surface isn’t oily. Use a paint pen made for ceramics (oil-based marker won’t hold up) and lightly plan the stripe with painter’s tape as a guide. Draw the stripe around the mug, then add dots in a consistent rhythm — I count spacing as “one dot per inch” so it stays even. Let it dry fully, then bake it according to the pen instructions (usually 20-30 minutes at a set temperature). Cool completely before wrapping, and add a small note card tied with twine.
If you mess up, cover the mistake with a slightly thicker dot cluster — it reads like design, not error.
Avoid skipping the alcohol wipe; fingerprints cause dull patches that never fully disappear.
4. Pressed-Flower Candle Label on Brown Kraft Glass
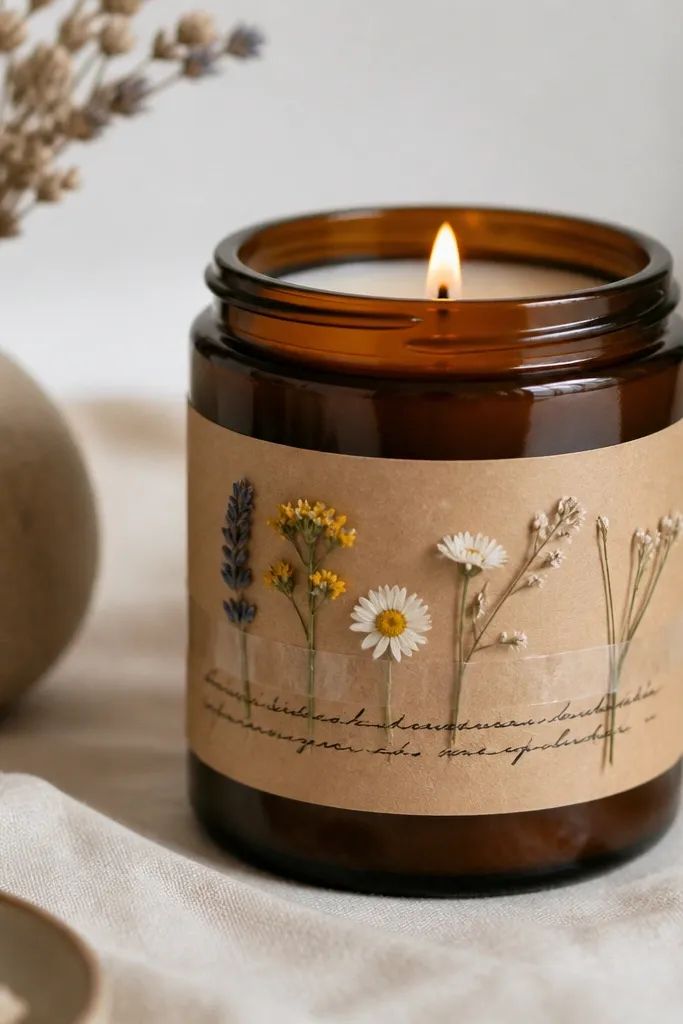
This looks like you paid for packaging because the jar shape does the work. I use a simple brown or clear glass candle (the kind you can find cheap at discount stores) and replace the label with a handmade kraft wrap. Pressed flowers add a delicate, giftable feel, and the brown kraft paper makes the colors look warm instead of washed out. It’s a great fit for friends who like cozy nights, skincare routines, or desk aromatherapy — the label makes it feel personal without adding bulk. Pick flowers that press flat: tiny daisies, baby’s breath, or small fern bits.
Editor's noteUse matte clear tape, not glossy; glossy tape creates glare and makes the flowers look flat.
Start by removing the original label and cleaning the glass with glass cleaner so the paper sticks cleanly. Press flowers for 24-48 hours between paper under a heavy book, then trim extra stems. Cut a strip of kraft paper so it wraps around the jar with a 1-inch overlap, and write your message before taping. Arrange the pressed flowers on the label area you want, then seal them under a small piece of clear packing tape or clear contact paper. Wrap the paper around the jar, smooth it tight at the overlap, and finish with a thin strip of tape underneath so it doesn’t lift.
Skip thisAvoid hot glue on the glass — it can leave shiny bumps that look messy.
5. Yarn-Wrapped Picture Frame with a Chalkboard Back
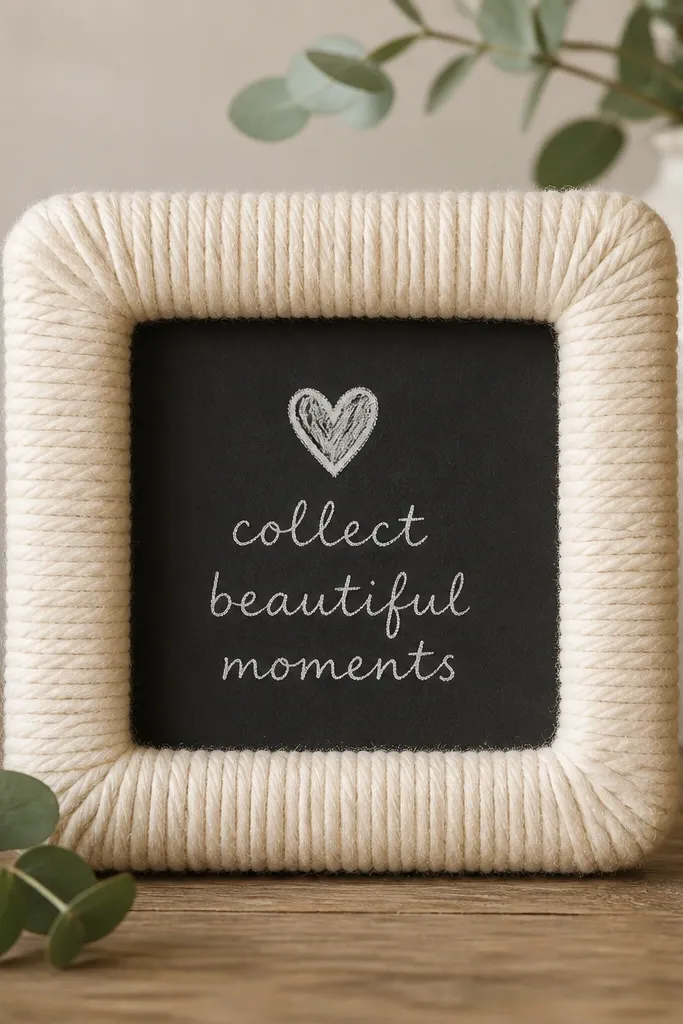
If you want a cheap gift that still feels “crafted,” this frame does it. Yarn wrapping hides tiny scratches and makes the frame look handmade even if it started as a plain thrifted piece. I like adding a chalkboard back so your friend can write the date, a quote, or who the photo is of. The yarn texture looks cozy on warm skin tones and pairs well with neutral outfits, especially in kitchens and desks. Keep yarn thickness consistent so the wrap looks smooth and not lumpy.
Editor's notePaint the frame edges black before wrapping if the wood shows; it prevents ugly color peek-through.
Start by removing any glass and backing from the frame. Cut yarn so you can wrap in even bands, and use a hot glue gun sparingly — glue only on the wood, not in huge blobs. Wrap from the top down, pressing the yarn tight against the last turn so there are no gaps. When you reach the corners, trim yarn neatly and glue the ends flat on the back. Cut a small chalkboard insert to fit the backing, glue it in, and reassemble so it’s ready for a photo or note.
Skip thisAvoid wrapping too loose; gaps are what make yarn projects look unfinished.
6. Mini Macramé Key Hanger from a Dollar Store Rope
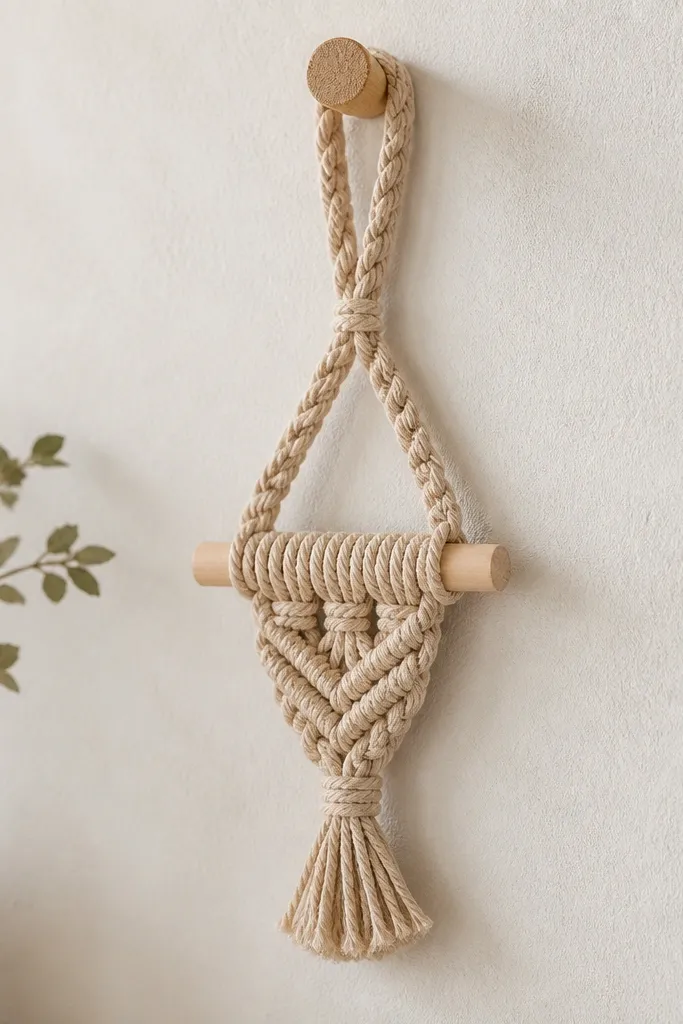
Macramé looks fancy, but you can make it cheap with thick cord and a simple knot pattern. This mini hanger gives your friend a place to toss keys by the door, and it looks cute in entryways, dorm rooms, and bathrooms. The knot texture adds visual interest without needing color changes. It’s also forgiving for beginners because the shape is small and you’re not trying to cover a big surface. Choose rope colors that match her space: natural tan for warm homes, black for modern looks, or white for bright kitchens.
Editor's notePull knots tight as you go and keep tension consistent; loose knots sag and look lopsided.
Start by cutting 6 to 8 strands of rope about 20 inches long each. Bundle them and tie a tight overhand knot 2 inches from the top, then attach to a hook or dowel for stability. Make square knots in the middle — move left strand over, then right over, then pull tight — until you get a 3-inch section. Finish with a simple braid or a few alternating knots, then trim ends and lightly seal with clear nail polish if the rope frays. Hang it on a small wall hook using the top loop.
Skip thisAvoid thin, fuzzy rope — it tangles and makes knots look messy.
7. Handmade Salt-Scrub Labels for a Sugar Jar Set
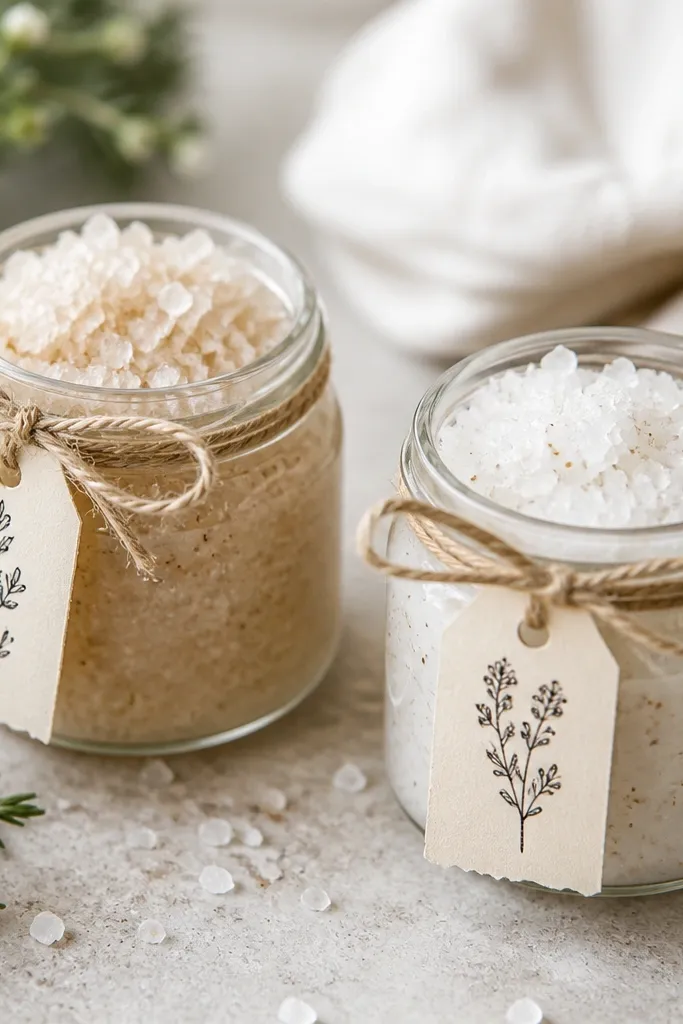
A scrub jar is one of the fastest cheap gifts that still feels like a treat. The secret is not the scrub recipe — it’s the labeling and jar presentation. I use small glass jars, fill them with a simple sugar-salt scrub, and seal the lid with a paper gasket or cellophane wrap so it looks clean. Labeling makes it personal, and it gives the gift a “use me” cue. This works for friends who love baths, body care, or keeping their hands soft for winter weather.
Start by making the scrub and letting it sit so the texture looks even in the jar. Choose two jars, wipe them dry, and tie twine around the lid for a tidy look. Cut label rectangles from cream cardstock and write a name plus instructions like “Scoop — massage — rinse” in black ink. Sprinkle a few sugar crystals on top before you close the lid so it looks fresh. Finally, wrap the jar in a small cellophane sleeve or tie a ribbon so the label stays crisp.
Use waterproof ink on labels; condensation can smear cheap marker ink in humid bathrooms.
Avoid putting wet labels directly on glass — the paper curls.
8. Tote Bag Charm with Braided Ribbon and a Lobster Clasp
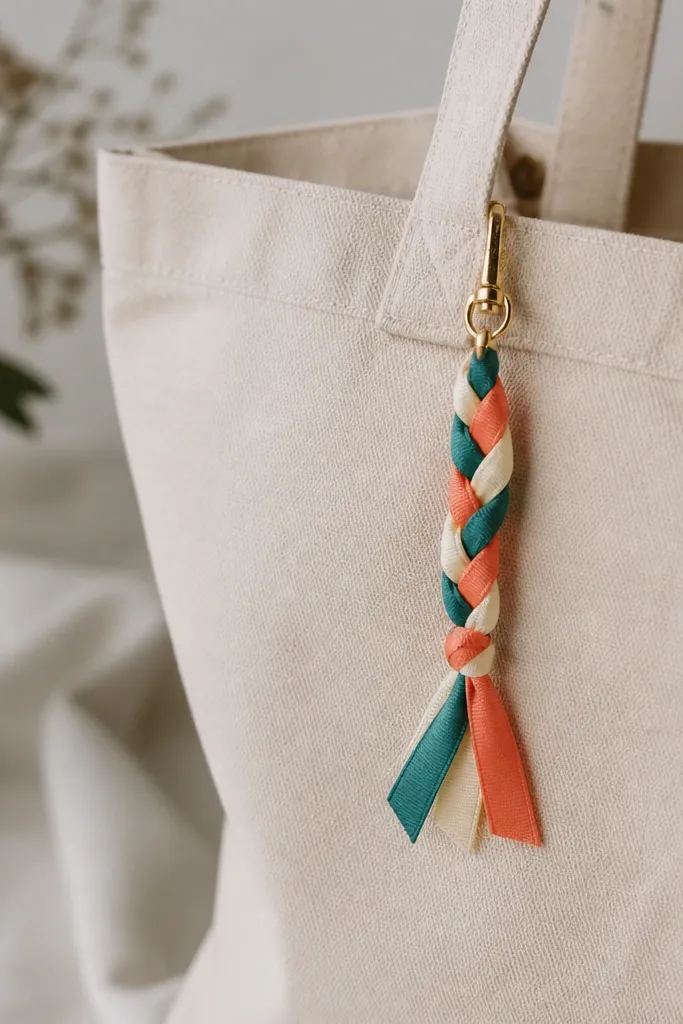
This is my go-to when someone says they want something cute but low-cost. A tote bag charm adds personality to a bag without changing the bag itself, and it’s easy to match to her favorite colors. I braid three ribbon strands and attach a lobster clasp so it clips on and off. It looks best on friends who carry canvas totes, grocery bags, or book bags — the charm moves and catches light. Stick to one color family so it looks coordinated, not like leftover ribbon.
Editor's noteUse ribbon with a slight sheen; matte ribbon looks flat unless you add a metallic charm bead.
Start by cutting three ribbon strips, each about 16 inches long and 1/4 to 1/2 inch wide. Tape the top ends together and braid tightly, keeping the braid thickness consistent. At the bottom, tie a small knot and trim ends cleanly, then seal ribbon edges with clear nail polish. Attach a lobster clasp to the top loop using a jump ring or small eyelet. Clip it onto the tote strap where it sits comfortably — usually near the middle of the front side.
Skip thisAvoid loose braids — they look sloppy fast when the ribbon gets tugged.
9. Upcycled Sweater Cozy Coaster Set
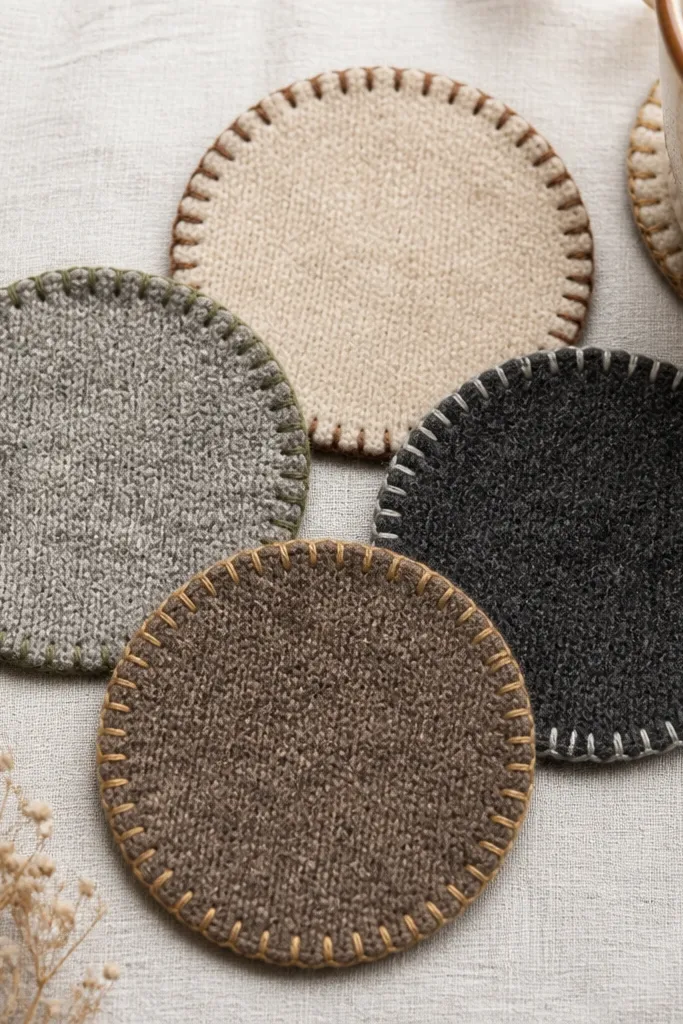
Coasters are practical, and sweater fabric makes them feel like a winter gift even when the supplies are basically free. I cut circles from an old knit sweater and stitch the edges so they don’t unravel. The fuzzy texture absorbs condensation and feels cozy under mugs. This gift fits friends who host — or anyone with a desk cup that leaves rings. Choose sweater colors that match her home: oatmeal, deep green, or navy look calm and expensive.
Start by washing and drying the sweater so the knit doesn’t shrink later. Cut four circles using a bowl or a small plate as a template, about 4 inches across. Fold fabric over a thin seam allowance and stitch around using a simple running stitch or whip stitch, keeping the thread tension even. Add a small patch of contrasting fabric in the center if you want a focal point. Let the thread sit flat, then test-fit with a mug to confirm it doesn’t slide.
If the knit stretches, iron it with a damp cloth first so the circles stay round.
Avoid leaving raw sweater edges — they fray quickly and make the set look worn.
10. Fabric Scraps Bow Keychain with a Snap Clip
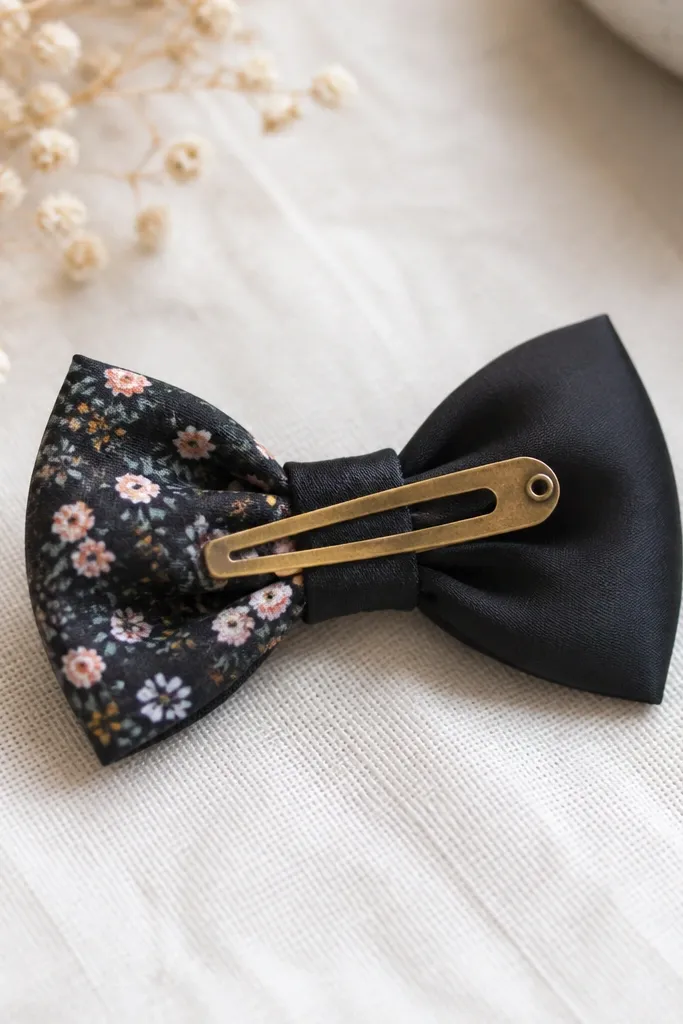
This one is small, cute, and made from scraps — and it looks way better than a single ribbon bow. I use two fabric layers: one patterned and one solid, then stack them so the bow has depth. The snap clip makes it easy to attach to a bag strap, backpack, or even a hoodie pocket. It works for friends who like accessories and anyone who carries a lot of bags. Choose fabrics that are stiff enough to hold shape — cotton poplin or heavier quilting cotton.
Editor's notePress with a hot iron through a thin cloth so the bow edges stay crisp.
Start by cutting two bow rectangles from fabric, about 6 inches long and 3 inches wide each. Fold lengthwise right sides together, sew or glue along the long edge, then turn right-side out and press. Fold the center section in to create the bow loop, then stitch or glue in the middle to pinch it. Layer the solid bow behind the patterned one so the top fabric shows cleanly. Attach a snap clip to the back with a small fabric strip so it sits flat and doesn’t twist.
Skip thisAvoid stretchy jersey for bows — it collapses and looks limp after a week.
11. Hand-Poured Soy Wax Sachets in Old Tea Bags
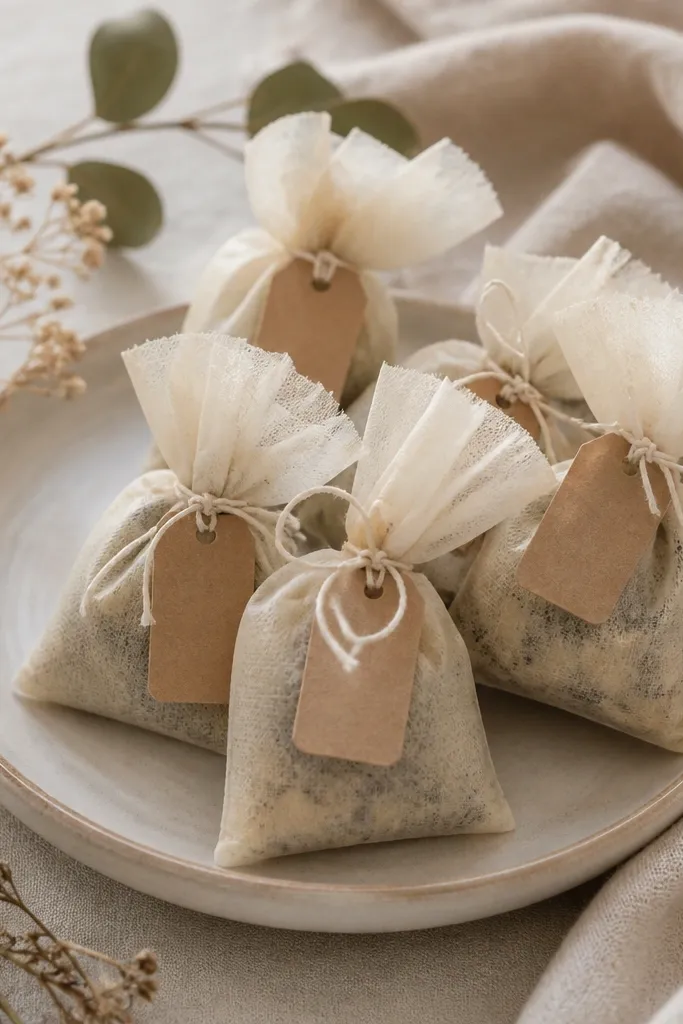
Scented sachets are cheap to make and feel thoughtful because they’re small and usable. I pour soy wax into repurposed tea bag sachets and tie them with string, then write a scent name on the tag. The tea bag mesh lets a gentle fragrance drift into drawers and closets. This gift is perfect for friends who love clean-smelling laundry or who keep a small space — like an apartment bedroom. Choose scents that don’t punch you in the face: vanilla, lavender, or cedar.
Editor's noteUse parchment under the tea bags so wax doesn’t glue to your counter.
Start by saving empty tea bags and drying them completely. Melt soy wax in a microwave-safe container in short bursts, then stir in fragrance oil according to the oil bottle ratio. Pour carefully into each tea bag, then tie the top with cotton string and let it cool flat on parchment. Once set, trim any uneven edges and add a small paper label tied to the string. Place one sachet in each jar or gift wrap as a set of two or three.
Skip thisAvoid overfilling; if wax touches the tie, it can make a hard lump.
12. Thread-Wrapped Mason Jar Pen Holder with a Mini Quote Tag
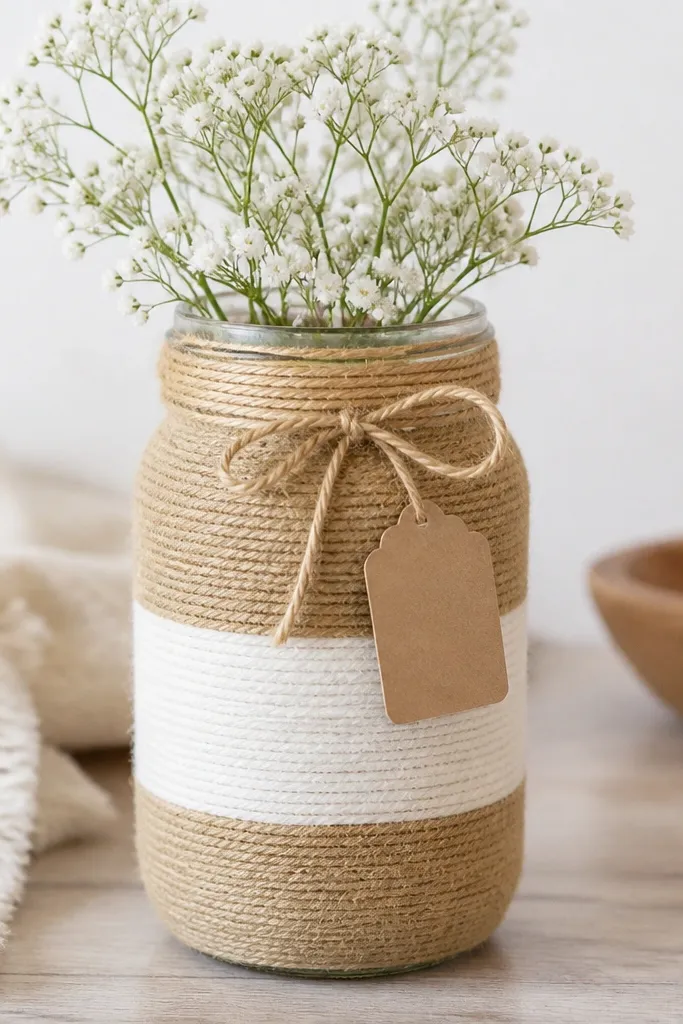
This is one of my best cheap desk gifts because it upgrades a boring jar into something your friend wants to see every day. Thread wrapping looks handmade and neat when you cover the jar evenly. I add a tiny tag so it feels personal, but I keep the text short and readable from across the desk. This flatters almost any decor style because thread comes in neutral tones — tan, cream, gray, and black. It’s especially good for friends who journal, do nails, or use planners.
Editor's noteIf the thread slips, tack it with tiny dots of glue under the thread — only where it’s hidden.
Start by cleaning the jar and letting it dry completely so the glue sticks. Brush a thin layer of craft glue on a small section of the jar and press thread down, wrapping in horizontal rows. Overlap slightly so you don’t see glass gaps, and keep tension consistent — you want smooth lines, not slack loops. When you reach the lid area, wrap down to the bottom of the lid, then cover the rim for a clean edge. Tie a paper tag with twine and slide it under the last thread wrap so it stays secure.
Skip thisAvoid thick glue blobs; they dry cloudy and show through the thread.
13. Pressed-Leaf Soap Dish from a Dollar Store Tray
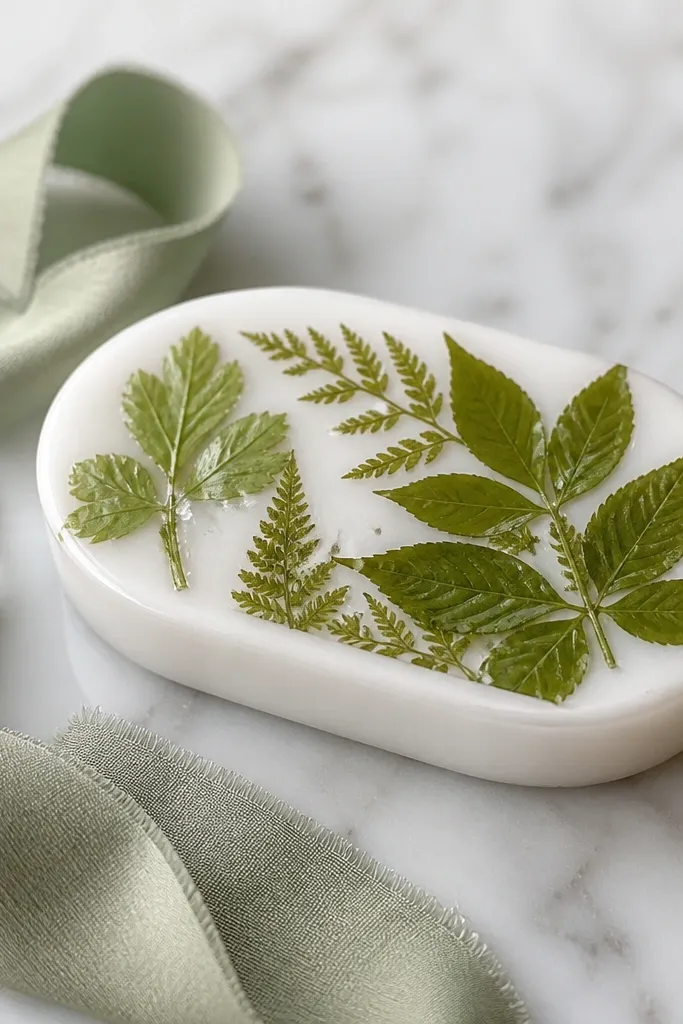
This turns a plain plastic or ceramic dish into a handmade bathroom moment. I press small leaves and seal them under clear finish so they look embedded, not pasted on top. It’s a gift for friends who keep their bathroom organized and like pretty details near the sink. The leaf shape gives a natural variation that looks expensive without adding cost. Stick to one leaf type for a cleaner look, like small eucalyptus sprigs or tiny herb leaves.
Editor's noteUse leaves that are already flat and dry; fresh leaves cause bubbles under clear coatings.
Start with a clean, dry soap dish. Arrange pressed leaves on the dish surface — I keep them in a corner so you don’t cover the whole base. Brush a thin layer of clear Mod Podge or clear acrylic medium over the leaves, then add another thin layer after it dries. If any leaf edges lift, press them down gently with a foam brush tip. Let it cure fully before using, then wrap with a ribbon so it feels like a set with the soap.
Skip thisAvoid thick coating in one layer; it wrinkles and can trap air under the leaves.
14. Paper Flower Wall Clip Garland for Photo Corners
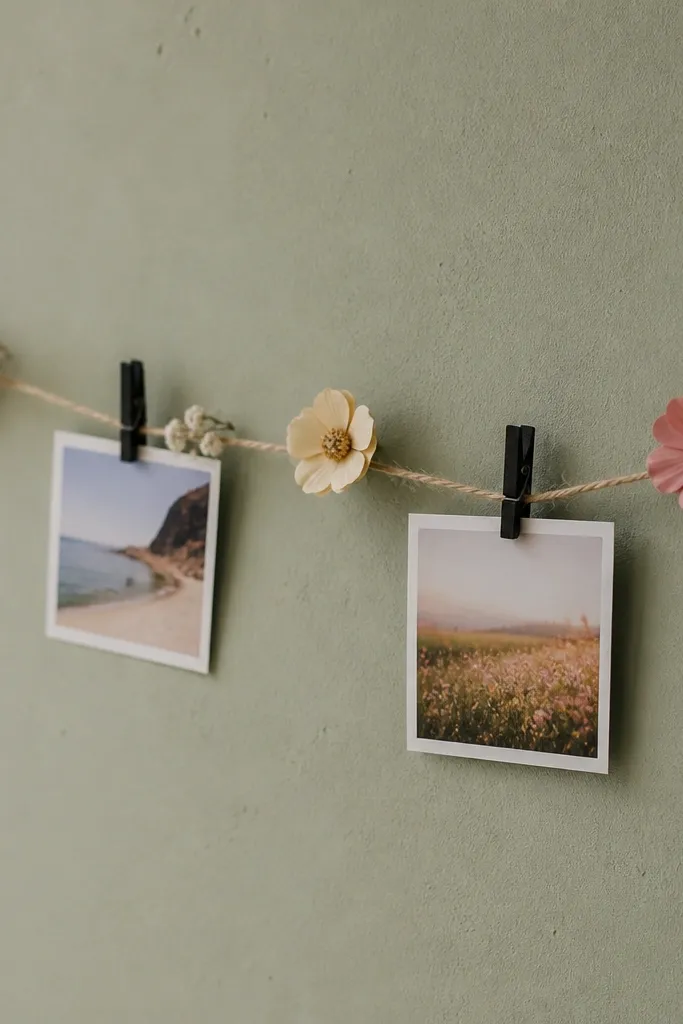
Paper flower garlands look cute, but the expensive look comes from the display — not just the flowers. I make a short string garland and add clothespins so your friend can swap photos. It works for friends who print pictures occasionally and want a place to put them without committing to a full frame. The flowers add softness, while the clips keep it practical. Choose a tight color palette: blush + cream + sage, or red + ivory + black for a more graphic look.
Start by making or buying simple paper flower templates, then punch a small hole at the base of each flower. Thread a piece of twine through the flower holes and tie it off so the spacing is even. Attach small clothespins to the string at intervals where photos will hang — I space them about 4 inches apart. Create a backing board from cork or foam board and pin the garland in place. Add a few matching paper circles as photo backers so the photos don’t look lost against the board.
Use matte cardstock so the flowers don’t glare under indoor lighting.
Avoid overloading flowers; too many makes the photo area feel cluttered.
15. Sew-Quick Fabric Scrunchie with Two-Color Bias Tape
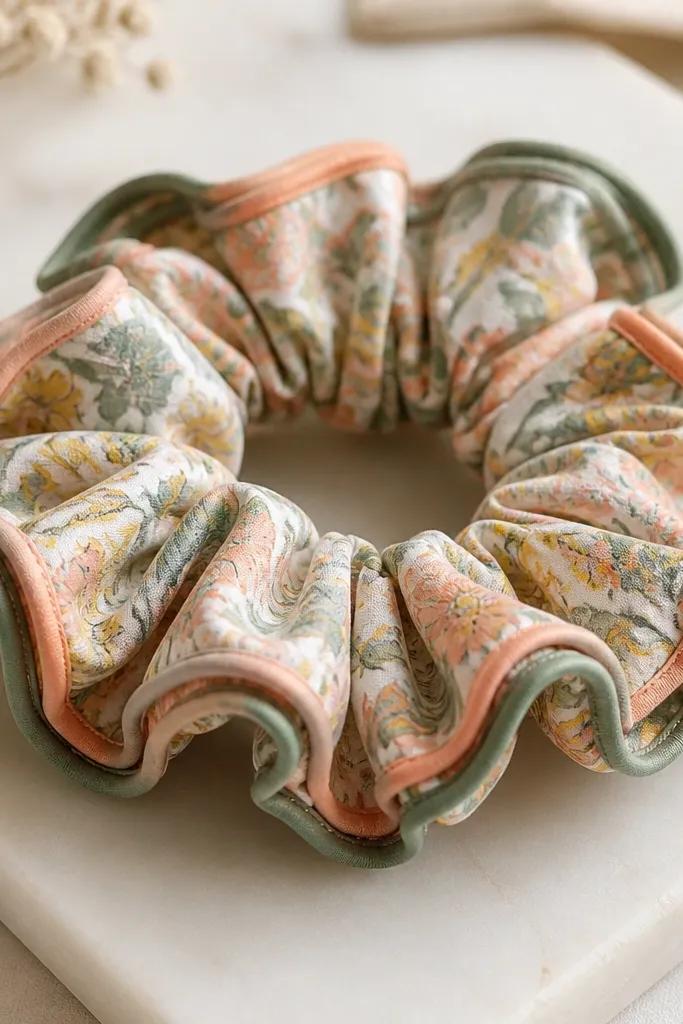
Scrunchies are one of the cheapest gifts that still feels personal because your friend actually uses them. This style looks nicer than a basic circle scrunchie because the bias tape frames the edge and creates clean lines. I use a soft woven fabric and elastic, then stitch the seam so it sits flat. It works for friends with thick hair and thin hair because you can adjust fabric width — just keep the scrunchie bigger than you think you need. Choose bias tape in a contrasting color like black with a floral inside, or cream with teal.
Editor's noteIf your friend hates bulky hair ties, use a narrower fabric rectangle and shorter elastic.
Start by cutting a rectangle of fabric about 10 inches long and 5 inches wide for a fuller scrunchie. Fold fabric right sides together and sew along one long edge, then turn it inside out and press. Cut a piece of elastic about 7 inches and thread it through the fabric tube using a safety pin. Sew the ends together and close the opening, then wrap the bias tape around the outside seam and stitch it down. Finish by trimming any uneven fabric at the ends and steam-pressing the scrunchie so it gathers evenly.
Skip thisAvoid using thin, cheap elastic — it snaps and the scrunchie loses shape fast.
16. Salt-and-Pepper Pantry Label Set with Chalk Vinyl Stickers
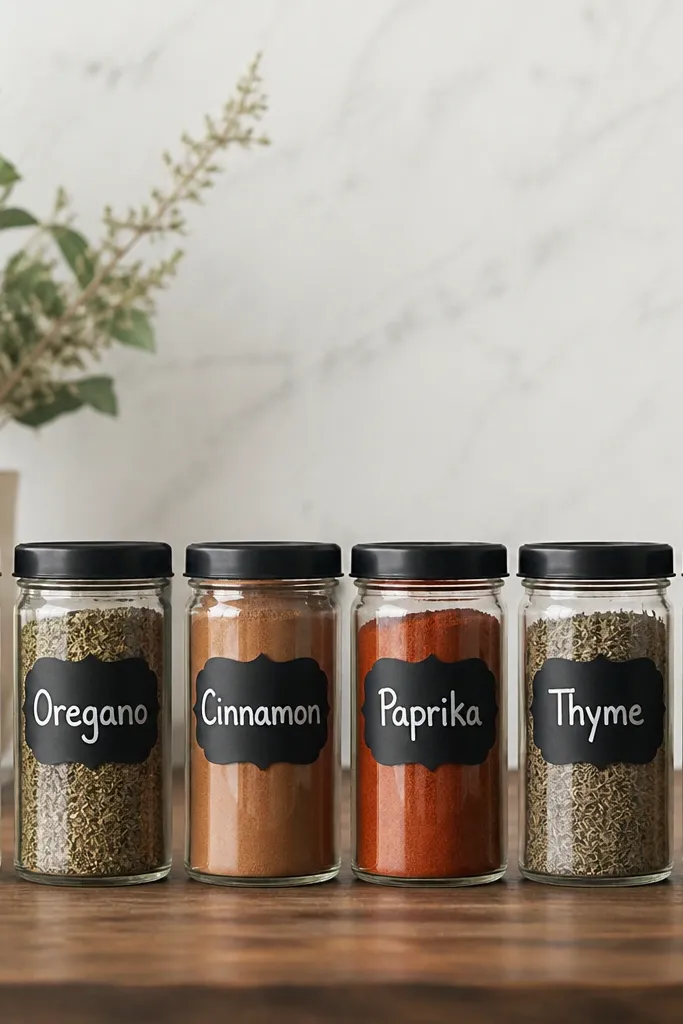
Pantry labels look like a whole kitchen refresh, but the materials are cheap. I use chalk vinyl labels so the label surface stays writable — your friend can update dates or swap spices later. The clean black vinyl with white lettering reads crisp and intentional, even if you’re using regular jars. This is best for friends who host, cook, or keep a tidy counter. Pick a set of four to eight labels so it feels like a gift bundle, not a single sticker sheet.
Start by cleaning jar lids and glass with rubbing alcohol so vinyl sticks. Cut chalkboard vinyl into label rectangles, then line them up on the jar before peeling backing. Press vinyl firmly from one side to the other to avoid bubbles. Use a white chalk marker to write names like “Sea Salt,” “Smoked Paprika,” or “Garlic Powder” — keep the font size consistent. Seal edges with a tiny wipe of clear tape if your friend tends to wash lids often. Bundle the jars with matching twine or wrap so the labels feel part of a set.
Write your labels on scrap vinyl first; spacing looks off if you wing it on the final pieces.
Avoid glossy vinyl; it reflects light and makes the lettering look faded.
17. Ribbon-Wrapped Wine Glass Charms for Parties
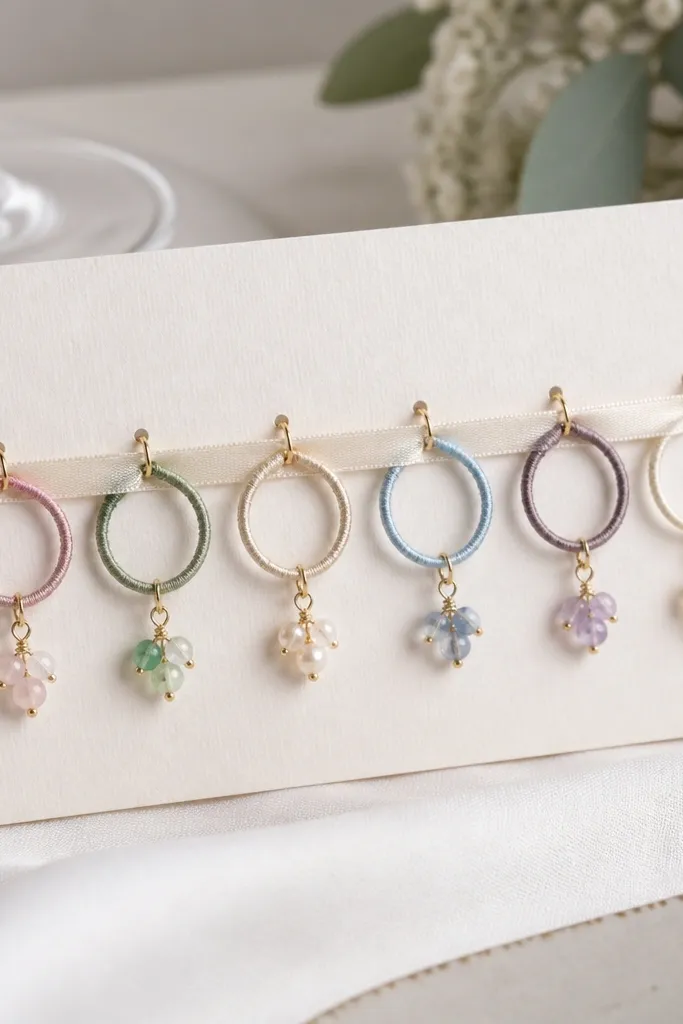
If your friend hosts, glass charms make a party feel organized and cute. The best part is that they’re cheap — your cost is mostly in ribbon and a few beads. I make them from thin wire loops wrapped with ribbon so they slide onto the stem easily. The charm looks pretty in photos because the ribbon catches light and the beads add sparkle. Choose colors that match her decor or her go-to holiday palette.
Editor's noteUse satin ribbon, not grosgrain, if your friend has light-colored glassware; satin looks smoother.
Start by bending wire into small loops sized to fit over a wine glass stem, about 1.25 inches tall. Wrap ribbon around the wire, overlapping turns so the metal isn’t visible. Tie the ribbon at the top with a tiny knot and secure with a dot of clear glue under the wrap. Add 3-5 small beads at the center by threading them onto the wire before final knotting. Finally, attach the charms to a gift card with a ribbon tie so they stay together and look intentional.
Skip thisAvoid heavy charms; thick beads make the ribbon pull and slide off.
18. Fabric-Covered Clip-On Earring Card with Magnet Back
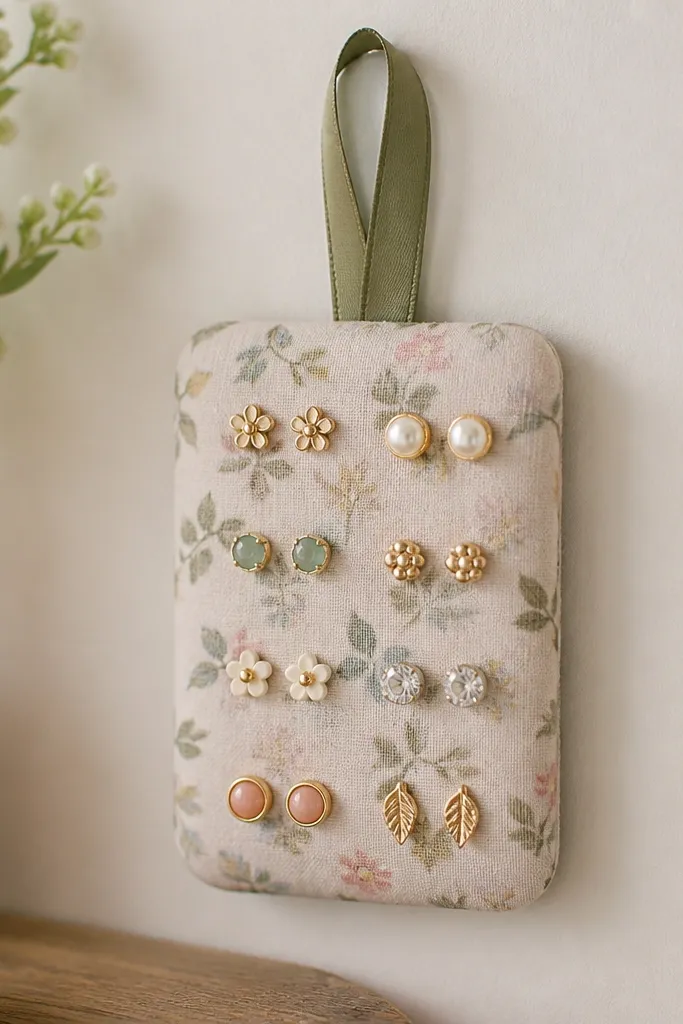
This is a gift for friends who own more earrings than they can find. A fabric-covered card makes it easy to store and display without a plastic box. The magnet back helps keep tiny studs from sliding off, and the fabric cover makes the card look handmade instead of store-bought. I like it for dorm rooms and small apartments because it keeps jewelry in one spot. Pick fabric that matches her clothing style: black and white gingham for classic, or muted florals for softer looks.
Start by cutting a stiff cardboard piece about 5 inches by 7 inches. Cover it with fabric using craft glue, smoothing wrinkles from the center out. Cut a thin magnet strip to fit behind the earring area and glue it to the back — leave the front clean. On the front, mark a simple grid for earring placement and hot-glue small earring hooks or push pins. Pin or clip earrings in place and add a ribbon loop at the top for hanging in her closet. Let glue cure before handling so the fabric stays tight.
Use a seam roller or a hard plastic card to press fabric down evenly while glue sets.
Avoid stretchy fabric covers; they distort and make the card look warped.
19. Wooden Spoon Rainbow Spoon Rest with Burnt-Edge Finish
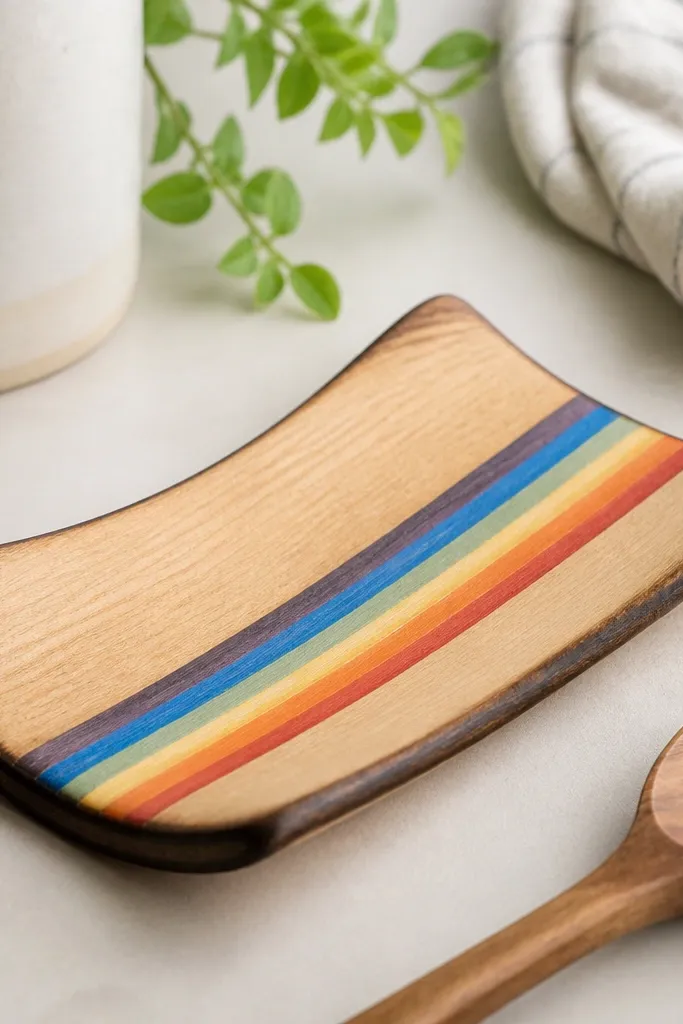
A spoon rest is one of those gifts people use constantly and forget to buy. This one looks handmade because the rainbow stripe is centered and the edges have a rustic burnt finish that hides small DIY imperfections. I make it for friends who cook and keep a lot of utensils on the stove. The color stripe makes it cheerful without turning the kitchen into a theme park. Pick one rainbow order — red through violet — and keep it clean so it doesn’t look like messy paint.
Start by sanding a flat wooden spoon rest blank (or a small board cut to rest size) until it feels smooth. Paint a centered stripe band using painter’s tape so the edges are crisp; let each color dry before the next. For the burnt edge, use a wood-burning tool lightly along the outer rim, then wipe dust away. Seal the whole piece with a food-safe clear finish, usually two thin coats. After curing, set it on the counter and test with a spoon — it should look stable and not wobble.
Use thin craft paint and multiple coats; one thick coat drips and looks cheap fast.
Avoid skipping sealing — unsealed wood stains and gets grimy quickly.
20. Spray-Painted Photo Clip Frame with Mini Pegs
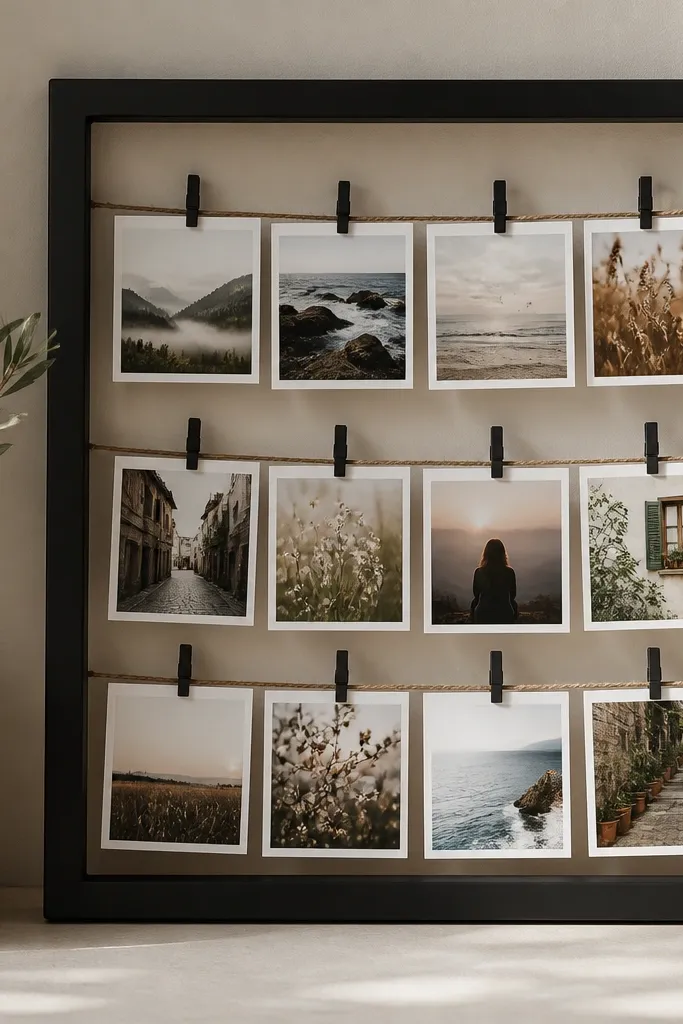
This turns a basic frame into a functional photo display, and it looks sharp in modern spaces. I use matte spray paint because it hides small dents and makes the frame look uniform. The mini pegs let your friend swap photos without taking the whole thing apart. This is a good gift for friends who like to keep travel photos or group pics visible but don’t want to pin everything on a wall. Stick to one frame size so the photos line up and the whole piece looks intentional.
Editor's noteIf you can see the wood grain through paint, add one more thin coat instead of pressing harder with the next spray.
Start by sanding a cheap thrifted frame lightly, then wipe with a tack cloth. Spray matte black in thin coats, letting it dry between coats, and avoid heavy overspray. Remove the back and string or attach a thin wire line where the photos will hang. Clip mini clothespins or small pegs onto the wire line, evenly spaced. Place photos behind the pegs and reattach the backing so it holds tight. Wrap the frame with tissue and add a note that says which photo to start with.
Skip thisAvoid glossy spray paint; it makes fingerprints show and it looks less handmade.



