

1. Satin Ribbon Bookmark Set with Heat-Set Rounded Ends
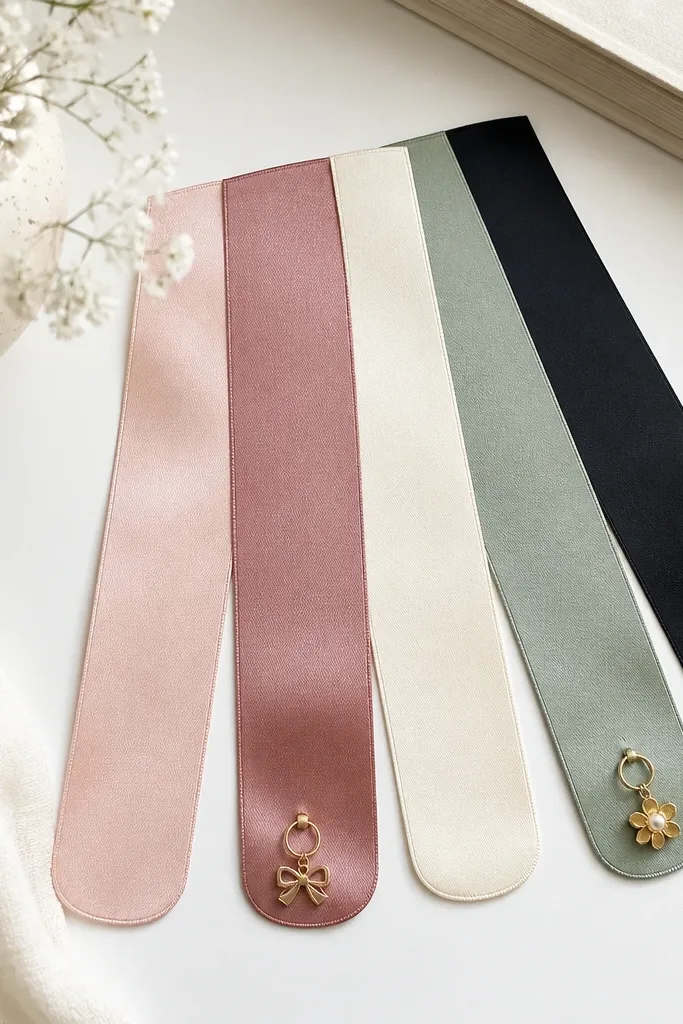
This one is for the friend who reads on the couch and leaves books open like a messy little lifestyle brand. I make these with 1 inch satin ribbon because it folds cleanly and looks luxe when it catches lamp light. The rounded, heat-sealed ends stop fraying and keep the edges crisp, which is the difference between “cute” and “gift.” Choose two colors from her wardrobe — I’ve used blush and cream for fair skin with warm undertones and black with sage for friends who wear cooler tones. The charm should match her metal preference: gold jump rings for gold jewelry, silver for silver necklaces.
Start by cutting ribbon lengths to 9 inches each, then add a 2 inch segment you’ll later fold for thickness. Heat-seal the ends with a lighter until the ribbon edges melt smooth, not scorched — keep the flame moving. Thread a gold or silver jump ring through a folded ribbon end, and knot with a thin nylon thread so the charm sits flat. Finish by pressing the folded section against a hard surface for 20 seconds so it holds a smooth crease. Package them in a small kraft box or cellophane sleeve so the set looks intentional, not random.
Editor's noteWrite a tiny note on the inside lid of the box with the first line of the book she’s currently reading — it turns a simple bookmark into a memory.
Skip thisSkip cheap satin that looks wrinkled; it shows every fold and makes the whole set look tired.
2. Marble-Style Clay Ring Dish with Leaf Texture
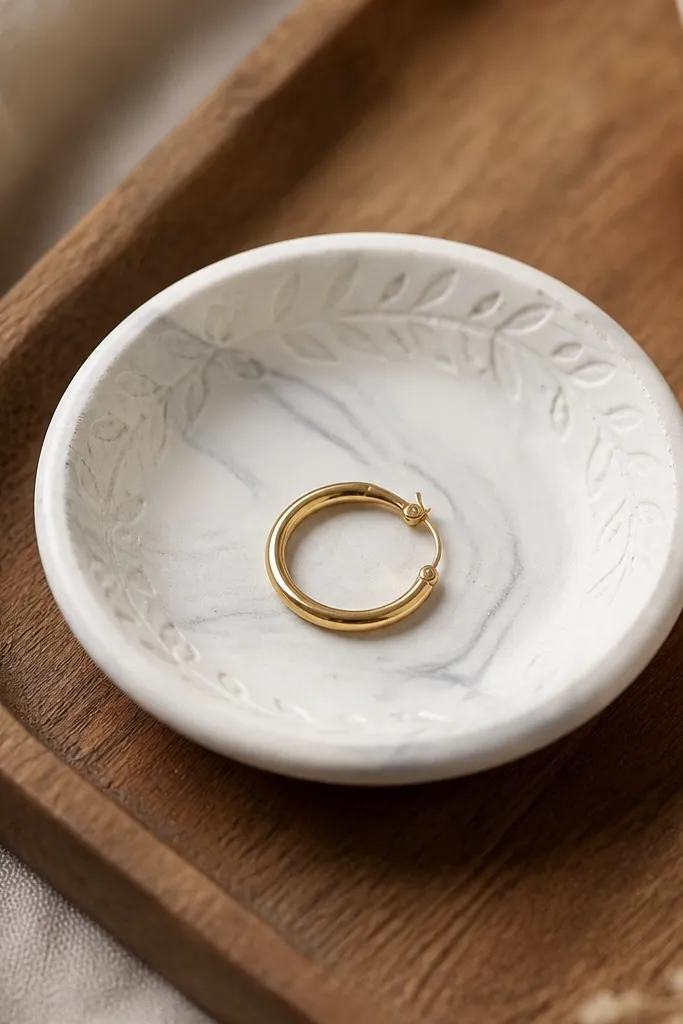
This gift is small but it hits the “I care about your daily routine” spot. I press leaf texture into air-dry clay first, then marble it with gray pigment so it looks like stone, not craft foam. After sealing, it holds up to fingerprints from rings and small earrings, which matters because ring dishes get touched constantly. For fair skin friends, white-and-gray reads clean and bright; for deeper skin tones, the contrast looks crisp and high-end. Keep the dish shallow so it catches jewelry light — a deep bowl hides the rings.
Start by rolling air-dry clay into a 1/4 inch thick slab and cutting a 3.5 inch circle. Press a real leaf vein texture (or a silicone leaf mat) into the outer ring area using light hand pressure. Mix gray acrylic paint with a little white to create marble swirls, then dab with a sponge so you get speckled movement instead of streaks. Seal with two coats of clear matte or satin varnish, letting each coat dry fully. Finally, sand the rim lightly with 220 grit so it feels smooth under fingertips.
If your friend has a lot of gold jewelry, use warm gray (more beige) in the marbling so it matches her metal tone.
Don’t skip sealing; unsealed clay stains from lotion and perfumes fast.
3. Photo Transfer Coaster Set with Mod Podge Gloss
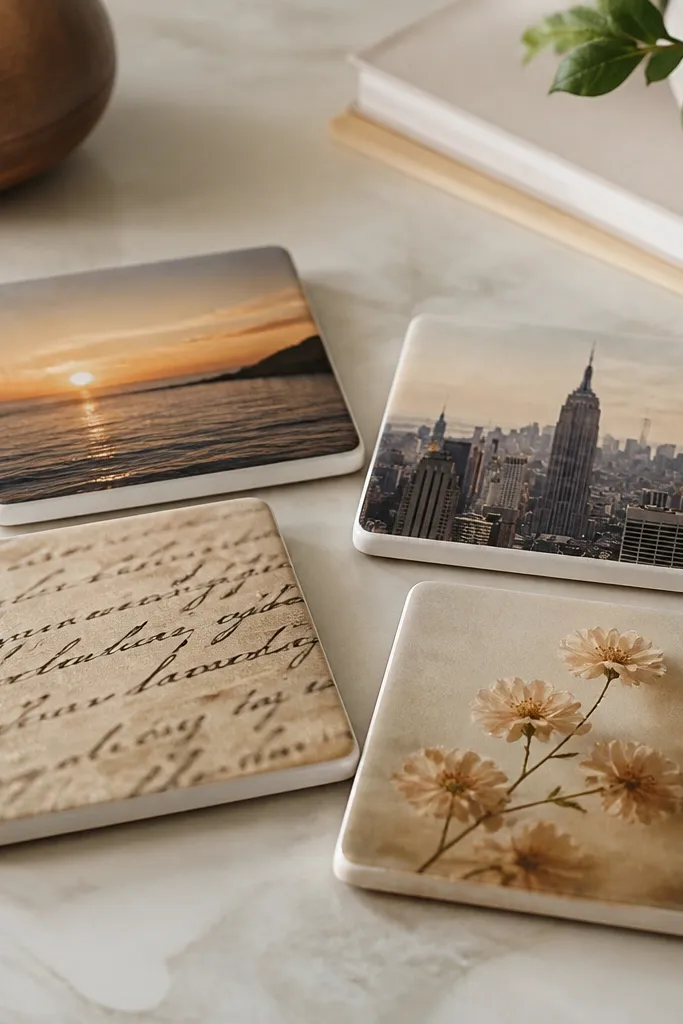
This is the “we’re best friends” gift that still looks grown-up. I use printed photos with a laser printer and transfer them onto cork or wood coasters, then seal with gloss so the images look like they’re under glass. Gloss is the key — matte makes transfers look grainy. Pick images with bold contrast: sunsets, black-and-white portraits, or simple line drawings. For friends who like minimal decor, use one solid theme image repeated across the set. For friends who love color, pick four photos that share one color — like teal sky tones.
Start by sanding cork or wood coasters lightly so the surface grips the transfer medium. Print your photos in laser mode, cut close to the image, and place the photo face-down on the coaster. Brush Mod Podge Photo Transfer Medium over the back, then rub gently after it sits until the paper releases. Let it dry overnight, then apply two to three coats of Mod Podge Clear Gloss, drying between coats. Seal the edges too so they don’t soak up water from cups.
Editor's noteBefore sealing, run your finger over the image — any raised paper texture means you need one more round of rubbing before the gloss coats.
Skip thisAvoid inkjet photos; they smear and look cloudy after transfer.
4. Mini Terrarium Jar with Faux Moss Topper
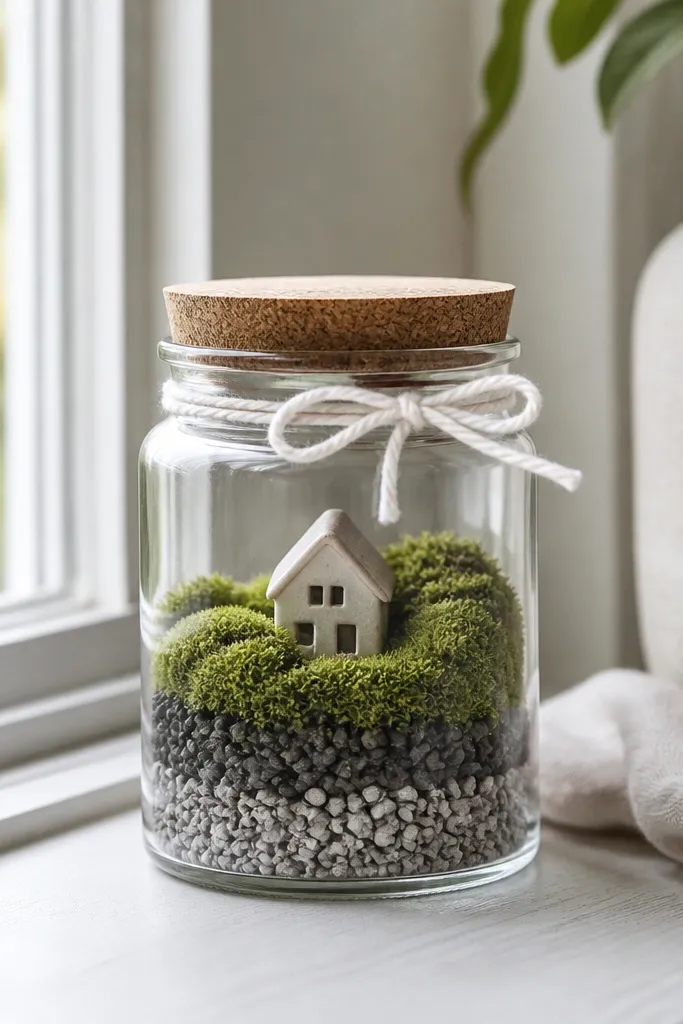
If your friend’s plant skills are more “hope and prayer” than watering schedule, this jar gives terrarium vibes without the stress. I build the look with real texture layers: pebbles, a small decorative figure, and faux moss that stays soft and green. The jar shape matters — use a straight-sided mason jar so layers look stacked and neat. This gift looks amazing on a desk, shelf, or bathroom counter. It flatters most decor styles because the palette is neutral gray stones with one green pop.
Start by cleaning a 12 oz mason jar so dust doesn’t get trapped under the moss. Add a base layer of small stones, then a thin layer of activated charcoal if you want odor control with no plants. Place a tiny ceramic object in the center — house, star, or moon — and pack stones around it so it doesn’t wobble. Add faux moss on top in a thick mound, then secure with a few hidden stitches through the jar lid band if you want it to stay put. Finish by tying twine around the lid and adding a small label with a date.
Editor's noteUse moss that’s dense enough to hide the stones — thin moss looks patchy after a week of handling.
Skip thisSkip glitter inside the jar; it falls and makes everything look messy.
5. Candle Jar Labels with Heat-Safe Vinyl and Tiny Icons
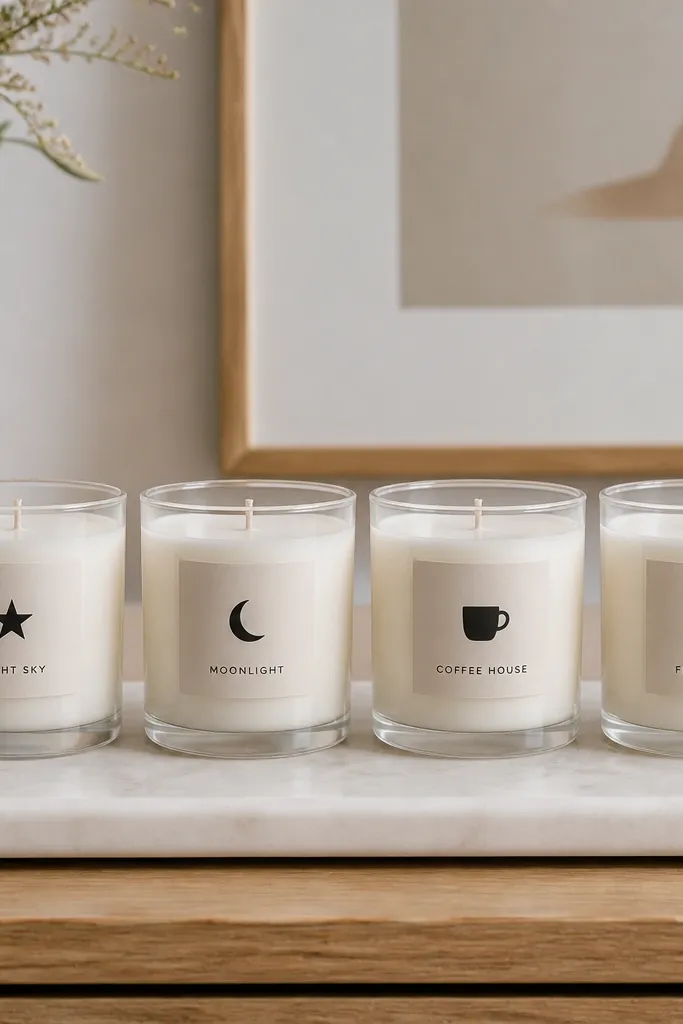
This is a gift for the friend who buys candles but never labels them. I print or design scent labels and cut them from heat-safe vinyl so they stay readable after the first burn. The look is clean and modern because the label is minimal and aligned, and the icon adds personality without turning it into a sticker sheet. I’ve done this for friends with both warm and cool palettes by using black vinyl on glass for cool styles and dark espresso brown on glass for warm styles. It also works as a “set” gift when you include matching matches and a small card.
Start by choosing candle jars you can clean fully — wipe with rubbing alcohol and dry. Design labels that are 2 inches wide and about 3.25 inches tall, leaving space at the top where heat builds. Cut heat-safe vinyl, weed out the extra pieces, and apply with transfer tape for clean edges. Burn-test one jar first: light it and check label edges after 10 minutes. If it lifts, reduce label height and reapply with a new batch.
Editor's noteAdd a tiny icon for each scent so your friend can pick quickly even in low light.
Skip thisDon’t use regular craft vinyl; it warps and peels when the candle gets hot.
6. Painted Glass Bottle Vases with Dip-Dyed Bottom Fade
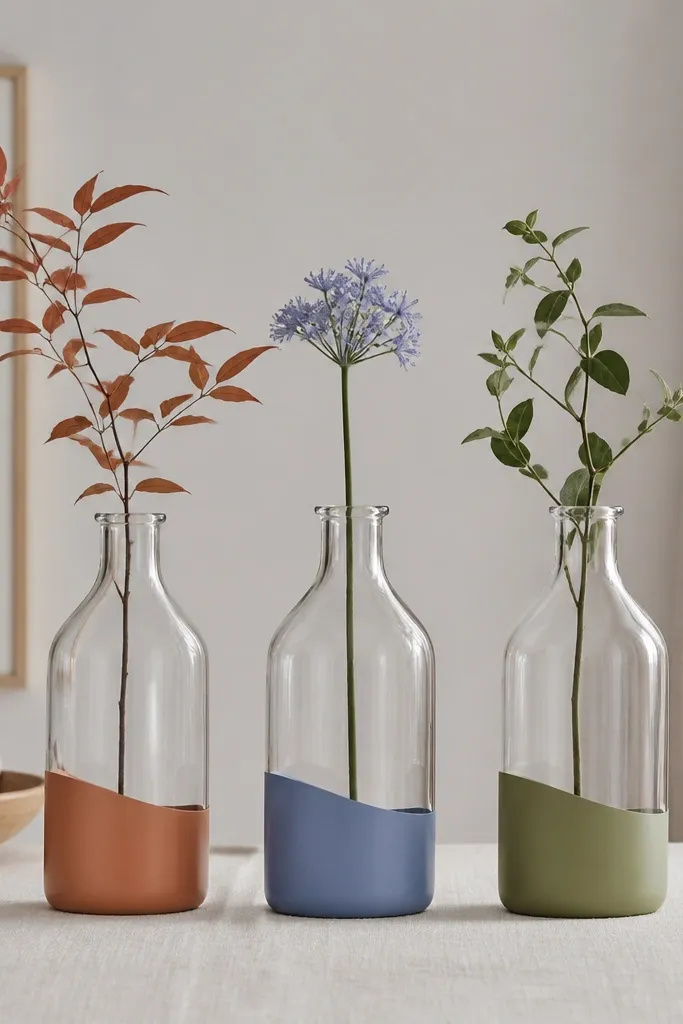
This is one of my favorite birthday gifts because it looks artful without complicated tools. I do a dip-dye style fade on the bottom of clear bottles using glass paint, then bake or cure per brand instructions. The gradient makes the bottle feel intentional instead of “painted.” For friends who like warm neutrals, terracotta and olive look gorgeous on cream walls. For cooler aesthetics, dusty blue and slate gray match white and charcoal decor. The single-stem styling makes it feel like a mini gallery piece.
Start by washing and drying bottles completely, then mask the area above where you want the fade to stop using painter’s tape. Mix glass paint with a small amount of medium if your paint is too thick, so it levels smoothly. Dip the bottle bottom into the paint for 2 seconds, let it drip, then dip again with less paint for a softer gradient. Remove tape carefully while paint is still tacky so the line stays curved and clean. Cure the bottles as directed, then add one long stem each so the color fade shows.
Editor's noteUse a paint color your friend already wears — I’ve matched terracotta to rust earrings and it always lands.
Skip thisSkip thick paint layers; they crack and make the fade look blotchy.
7. Fabric Gift Bag with Corner-Boxed Pleats and Matching Tissue
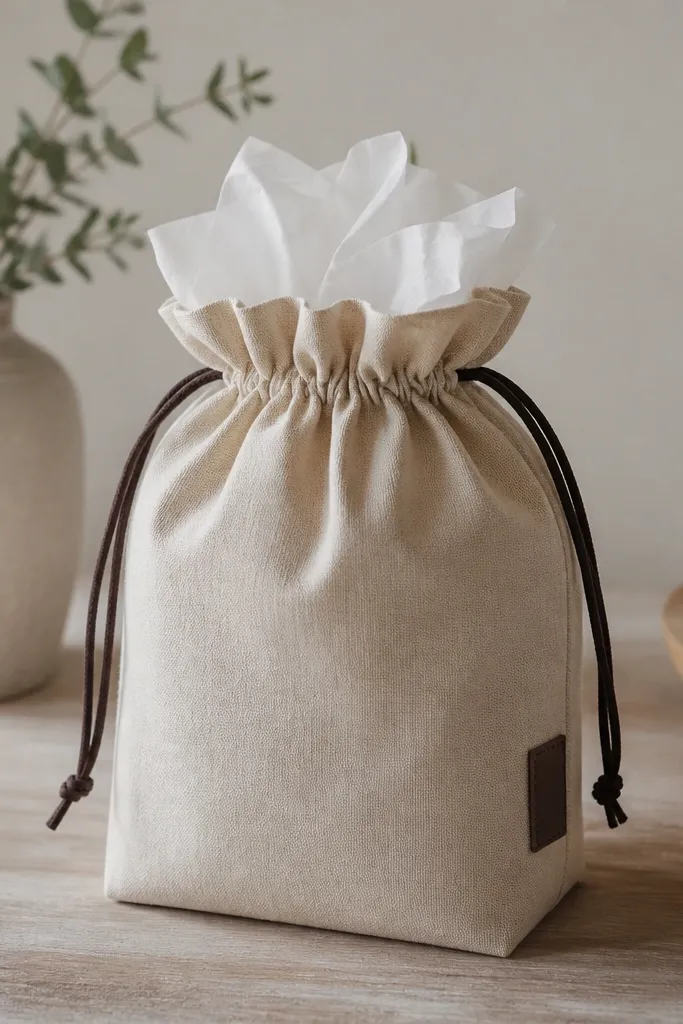
A reusable fabric bag is the kind of gift that keeps getting used, and it looks handmade in a good way. I sew the boxed-corner pleats so the bag holds shape — flat bags slump and look cheap on the shelf. The drawstring closure looks neat and hides the mess if you overfill. Choose a fabric that has weight, like cotton canvas or linen-cotton blend. Warm beige and dark brown reads classy on almost anyone’s decor, and it doesn’t clash with bright gift contents like candles or snacks. This is a great “all year” gift for birthdays and small holidays because it fits different presents.
Start by cutting two rectangles of fabric 16 x 14 inches and pressing 1/2 inch hems on the top edge. Create boxed corners by folding each bottom corner into a triangle and stitching across it to form a flat base — then trim the excess seam allowance. Sew the sides with a 1/2 inch seam and attach a drawstring channel by folding down the top edge. Thread a 1/4 inch cotton cord through with a safety pin, then tie the cord ends into small knots. Finish by adding a small fabric label on the front and pairing with tissue in a matching tone.
Editor's noteWash and dry your fabric before sewing so it doesn’t shrink later and warp the bag shape.
Skip thisAvoid flimsy quilting cotton; it collapses and makes the bag look like a craft project.
8. Keychain Charm Photo Frame with Clear Resin Coating
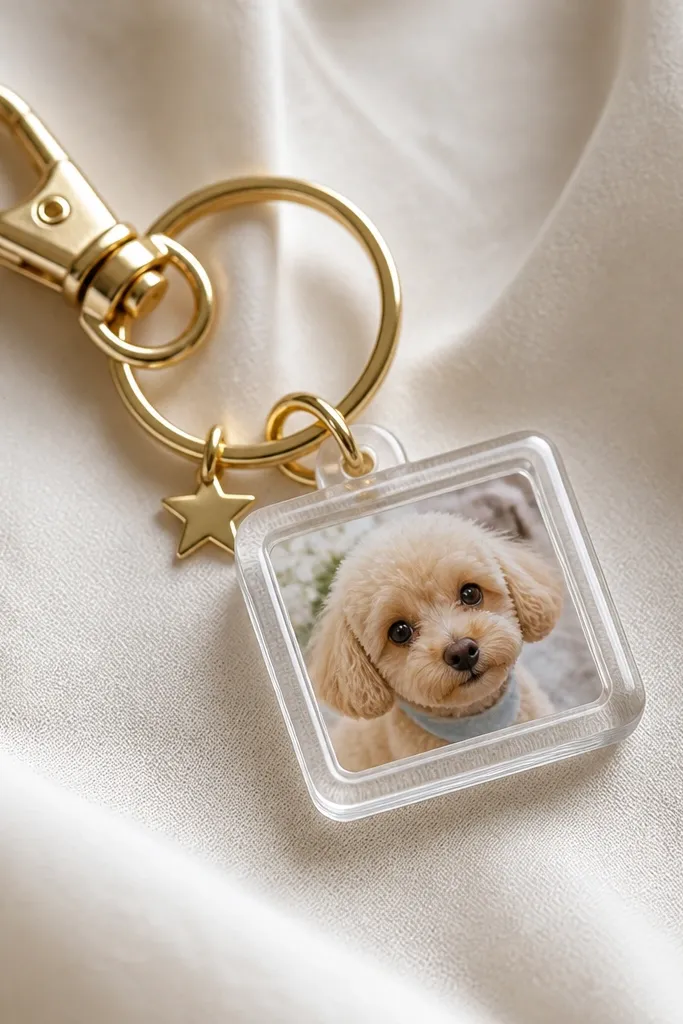
This one is personal in a way that still fits her everyday. I use a tiny photo because it’s instantly recognizable, then coat it with clear resin so it looks like a glass dome. The resin finish matters: it turns a flat print into something dimensional. For friends who like cute accessories, add a tiny star or heart charm that matches her necklace chain color. If she dresses in neutrals, keep the resin frame clear and let the photo do the color work. If she loves bold outfits, pick a photo with strong contrast so the charm pops on keys.
Start by printing a tiny photo on thick photo paper and cutting it to fit your resin frame insert size. Mix resin exactly by weight if your kit uses it, and stir slowly so you don’t whip bubbles. Pour a thin first layer into the frame, place the photo, then top with more resin. Pop bubbles with a toothpick and a quick pass of heat from a hair dryer held far away. Let it cure fully, then attach the resin piece to a keyring with a jump ring.
Editor's noteSeal the photo with a quick thin layer of clear gloss medium before resin if your print looks too glossy.
Skip thisDon’t rush cure time; tacky resin attracts dust and fingerprints.
9. Pressed Flower Bookmark with Lamination and Rounded Corners
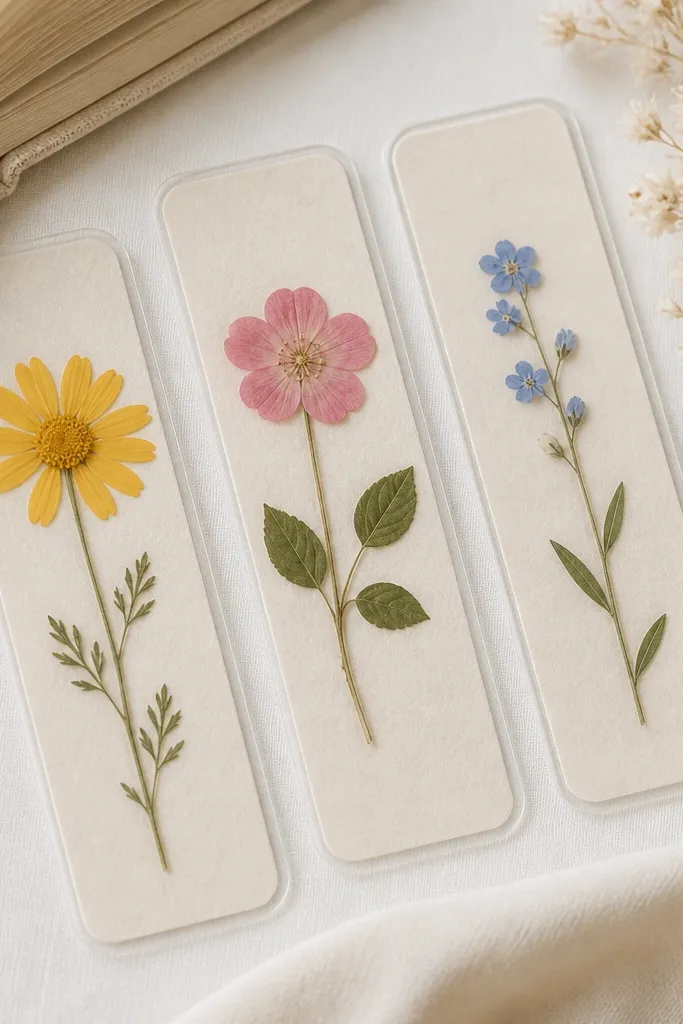
Pressed flowers feel romantic, but only if they’re sealed so they don’t get damaged. I laminate the pressed pieces between thin cardstock so they stay flat and protected from book moisture. Rounded corners make them feel store-bought and prevent lifting at the edges. Pick flowers that dry flat — small daisies and baby’s breath style pieces — and choose a background cardstock in cream or pale gray so the flowers stand out. This works for any skin tone because it’s color-light and doesn’t fight with clothing colors. It also pairs well with a book gift without looking random.
Start by pressing flowers for 1-2 weeks in a book with parchment paper between pages. Cut cardstock strips to 2 x 7 inches and place the pressed flower in the center. Cover with a clear laminating sheet, then use a laminator on the lowest heat setting that still seals. Trim edges and use a corner punch to round them. Finally, add a small tassel or ribbon loop at one end with a glue dot so it’s easy to pull from pages.
Press flowers with parchment so the petals don’t stick and tear when you remove them.
Skip thick flowers like large roses; they won’t flatten and will create lumps under lamination.
10. Painted Ceramic Mug with Stencil Constellation Inside Rim
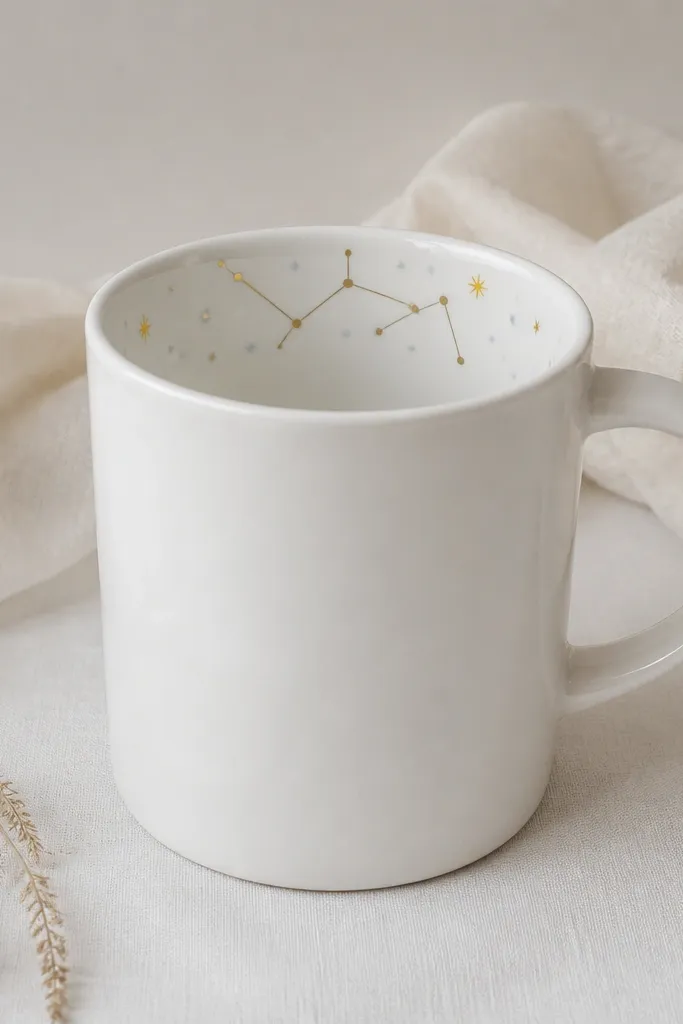
This is a gift that feels thoughtful every single time she makes coffee. I paint constellations inside the rim because it’s a surprise when she lifts the mug, and it stays protected from daily scrapes. Use a stencil and a small dotting tool so the stars look intentional, not messy. I’ve done this with gold paint for warm-toned friends and muted blue for cooler palettes. It also works well for people who love astronomy, but it doesn’t scream theme — it’s subtle and classy. The rim placement makes the mug look custom without covering the whole surface.
Start by cleaning the mug with rubbing alcohol and letting it dry. Tape a stencil so it sits just inside the rim, then dab paint with a sponge brush or dot tool for small, controlled marks. Let it dry for the recommended time, then bake the mug if your paint requires it. Add a second layer only if the first looks thin — too many coats makes paint crack. Seal with a dishwasher-safe clear glaze product if your paint brand calls for it.
Editor's notePractice the dot spacing on paper first so the constellation doesn’t look crowded on the mug curve.
Skip thisDon’t paint the outside rim — it chips faster from knocks on counters.
11. Embossed Card Set with Stitched Faux Leather Envelopes
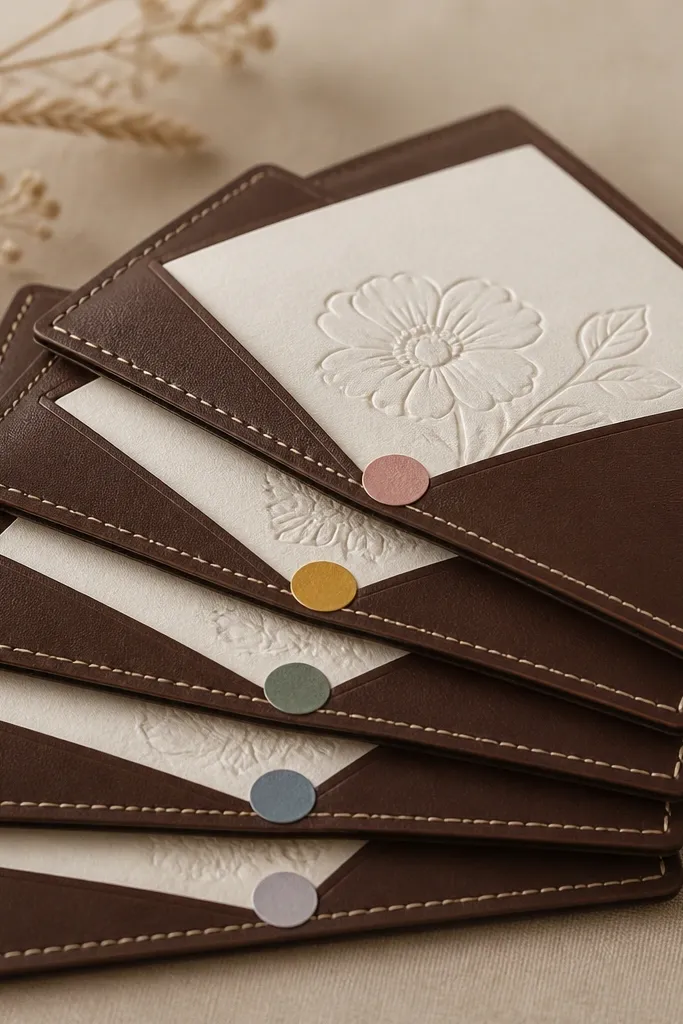
Greeting cards should feel like an object, not a paper slip. I emboss thick cardstock with a simple floral or geometric pattern, then pair it with faux leather envelopes so the whole set looks cohesive. The embossing looks clean because the cards are heavy (at least 120 lb) and the design is small enough to stay crisp. Choose envelope color based on her vibe: chocolate brown for cozy friends, deep navy for cool minimalists, and black for glam lovers. This gift works for birthdays and also for “just because” days — she can pull one from the stack when she needs a card fast.
Start by buying 6x8 inch thick cardstock and a basic embossing folder set. Run the cards through an embossing machine or use a hand embossing tool for shallow embossing. Cut faux leather envelope panels and sew the sides with a straight stitch, leaving a flap opening. Add a strip of double-sided tape to the flap and reinforce with one small snap if you like. Finish each card by stamping the inside with a tiny icon and adding a small belly band from ribbon to hold the set.
Editor's noteUse cream thread with dark envelopes — the contrast makes it look like real leatherwork.
Skip thisDon’t use flimsy paper; it creases and the embossing loses definition.
12. Wood Slice Coaster with Burned Initials and Clear Seal
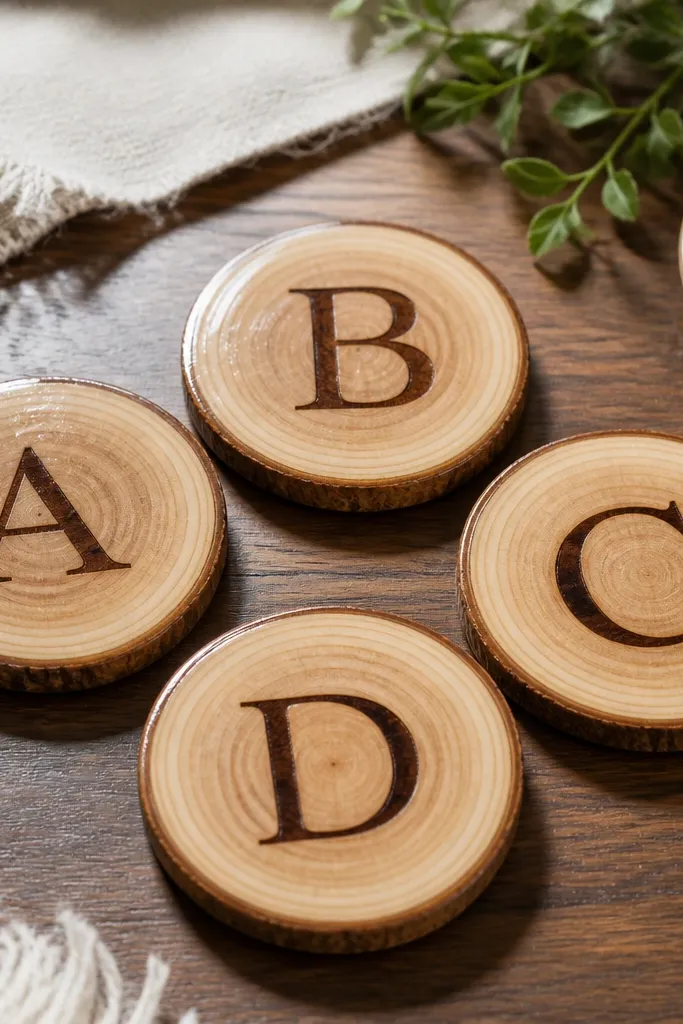
This is the gift I reach for when I want something that looks handmade but not fragile. Wood slices with burned initials feel personal, and the clear seal keeps them usable under cups. The burned letters look best when they’re simple — one initial, no fancy script — because complex fonts burn unevenly on wood. For fair skin friends, the warm wood tone looks cozy; for deeper skin friends, the contrast between dark letters and pale wood looks sharp. It also works for both minimal and rustic decor because you can keep the design clean.
Start by buying uniform wood slices, about 4 inches wide, then sand the top surface lightly. Use a wood-burning pen set to a medium heat and trace one initial centered in the slice. Wipe away soot with a dry cloth — don’t use water. Apply a clear protective finish like polyurethane or a food-safe sealer if your product is rated for it, using thin coats. Let it dry fully, then buff lightly with a soft cloth so the surface isn’t sticky.
If the wood slice has a lot of natural texture, center the letter slightly higher so it stays readable from the table angle.
Skip thick varnish layers; they look plastic and can peel at the edges.
13. Chevron Friendship Bracelet with Braided Thread Ends and Charm Bar
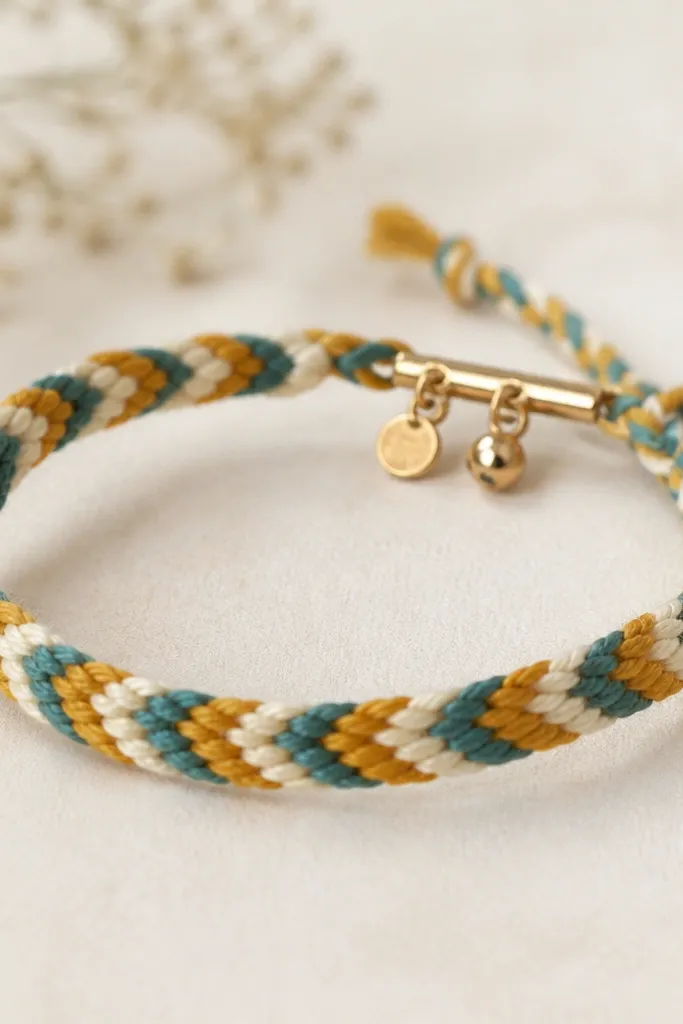
A friendship bracelet is still a great birthday gift when you make it look intentional. I use braided thread with a tight chevron pattern because it looks clean from far away and gives that “I made this for you” texture. Add a charm bar at the clasp so it looks like jewelry, not craft string. Color choice matters: mustard + cream reads warm and bright, and teal adds a cool pop that looks good against most skin tones. This works for any age because you can make it subtle — narrow bracelet, small charms — or more playful with bigger charms.
Start by cutting 8-12 strands of embroidery floss, each about 30 inches long, and knot them onto a clipboard. Arrange strands in the order you want the chevron to form, then braid using the chevron method: take the outside strand, cross it inward, and repeat to create the V. Keep tension even so the pattern doesn’t warp. When you reach the end, braid the remaining threads for 1 inch, then tie off. Attach a small charm bar clasp using jump rings so the bracelet closes cleanly.
Editor's noteUse tape on your work surface to keep strand order from shifting — the chevron only looks perfect if alignment is stable.
Skip thisDon’t overstuff charms; heavy charms twist the bracelet and ruin the chevron shape.
14. Desk-Sized Sticky Note Holder from Cardboard Wrapped in Patterned Paper
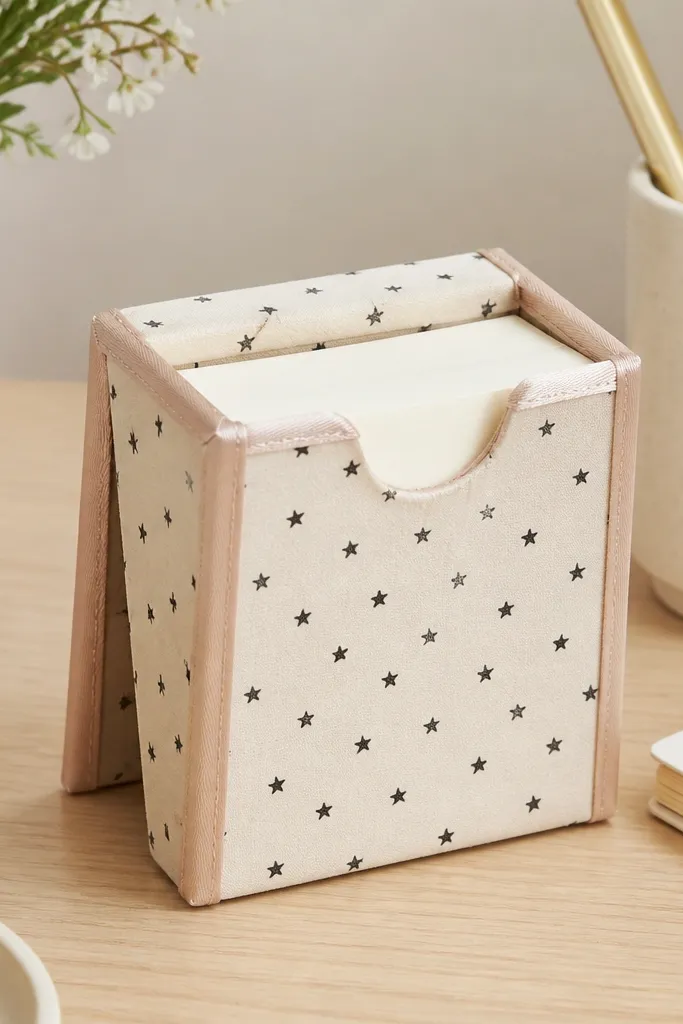
This gift is practical and looks cute on a desk, which is why it lands well for coworkers and classmates. I build it from sturdy cardboard first, then wrap with patterned paper so the final piece looks like it came from a design shop. The slot at the top should be tight enough to hold sticky notes without slipping. Choose patterns that match her stationery style — dots, stars, or small florals — and keep colors to two tones so it looks calm. It’s also a good “all year” gift because you can pair it with pens or a mini candle and it still fits.
Start by building a box template: cut cardboard into a 5 x 3 inch base and two side panels, then glue into a standing holder. Cover edges with thin strips of paper so corners look sharp instead of bulky. Wrap the main panels with patterned paper using a thin layer of glue, smoothing with a plastic card. Cut the sticky note slot by measuring the note thickness and leaving 1/8 inch clearance. Add a ribbon edge wrap around the front panel, then press under a heavy book for an hour.
Editor's noteSand the cardboard edges before wrapping — it stops the paper from wrinkling at corners.
Skip thisSkip thick glue blobs; they create bumps that show through the paper.
15. Scented Soap Bar in a Silicone Mold with Dried Citrus Bits
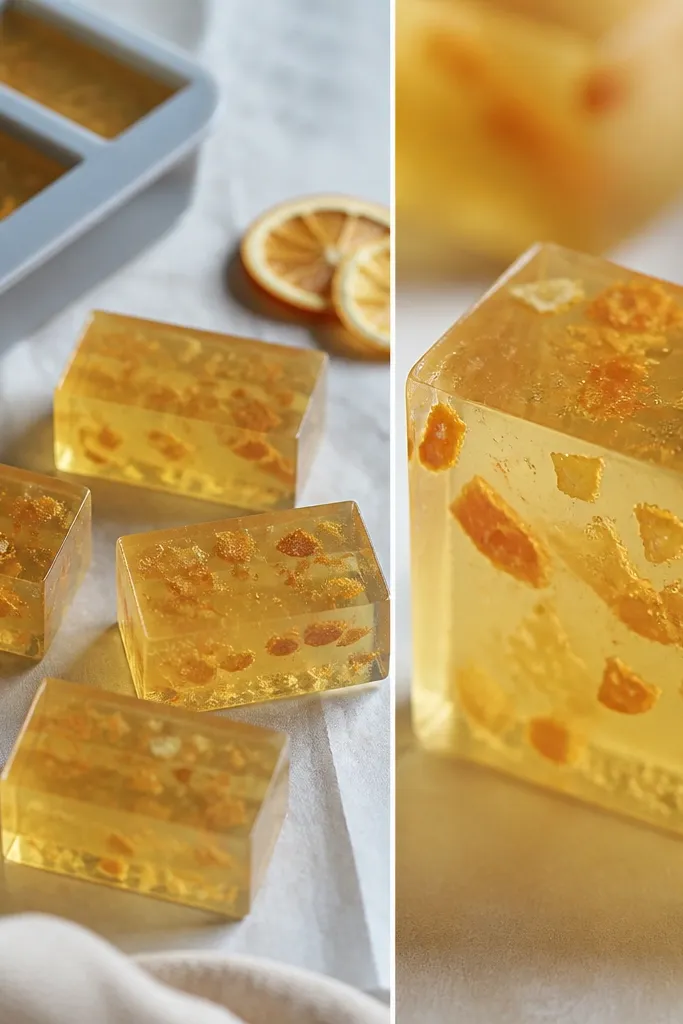
This is a gift for friends who notice details in the bathroom. I make soap with a clear or honey base so the dried citrus bits look suspended, not scattered on top. The scent should match the season: grapefruit or lemon for spring and summer, vanilla or cinnamon for fall and winter. Citrus looks great with warm skin tones because the golden color is flattering, and it also looks clean against white towels. The silicone mold gives consistent shapes, so the set looks professional.
Start by melting soap base in short bursts so it doesn’t scorch, then add fragrance oil and stir gently. Pour a thin first layer into the silicone mold, sprinkle dried citrus bits lightly, then pour the remaining soap base. Let it cool and set at room temperature — don’t rush with the freezer or you get cracks. Unmold carefully and trim any rough edges with a sharp knife. Wrap each bar in parchment or tissue and label with scent and date.
Editor's noteUse tiny citrus pieces — large chunks sink and look clumpy after curing.
Skip thisDon’t add too much fragrance oil; it can cause sweating or soft bars.
16. Macrame Key Organizer with Driftwood Bead and Two Hooks
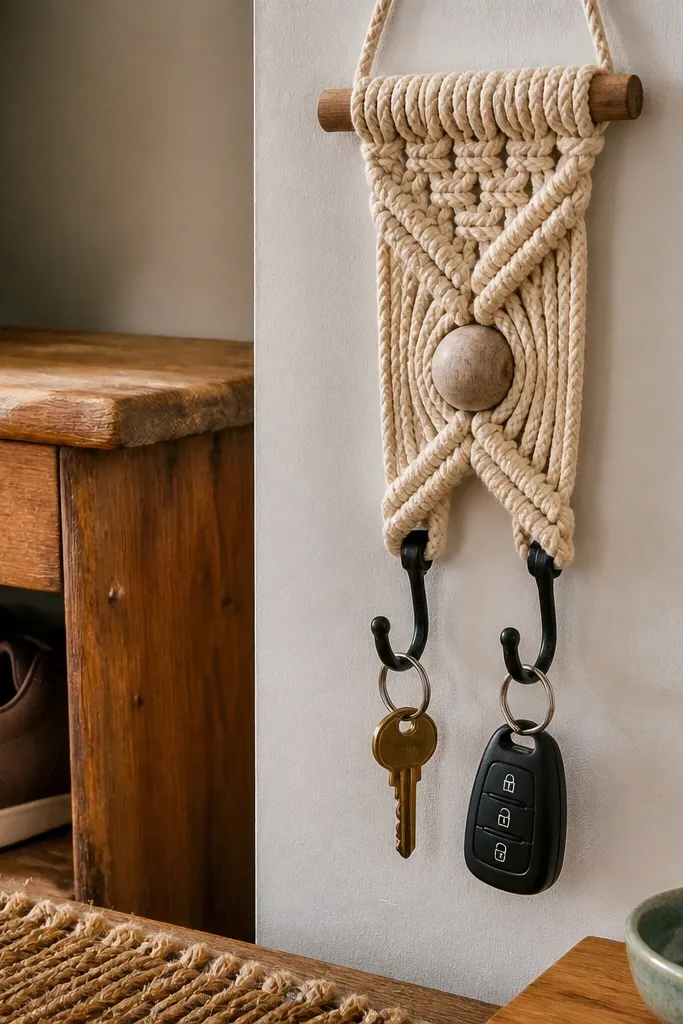
This is the gift for a friend who has keys everywhere — on counters, in tote bags, and mysteriously under couch cushions. Macrame makes it look artsy, but the key organizer part makes it useful. I add two hooks so she can separate house keys from a car fob. The driftwood bead keeps it natural and gives the piece weight visually, so it doesn’t look like a tiny wall decoration. Natural tan cord also works with almost every home color palette, from white walls to warm wood rooms.
Start by cutting cord strands long enough for knots plus the hanging length, then attach them to a dowel using a secure knot or a loop method. Create a simple row of square knots down to the hook height, then add a driftwood bead by threading it onto the cord and tying a knot above and below. Separate strands into two groups for the hooks, then tie knots and attach hooks with a small ring. Trim and fray only the ends you want to show, then seal the knots with a tiny dot of fabric glue. Mount using two screws into studs for stability.
If your friend has a lot of keys, use larger hooks and test weight before gifting by hanging a heavy key ring for 10 minutes.
Don’t mount with drywall anchors only; keys pull and the organizer shifts.
17. Linen-Covered Jewelry Roll with Snap-Button Closure
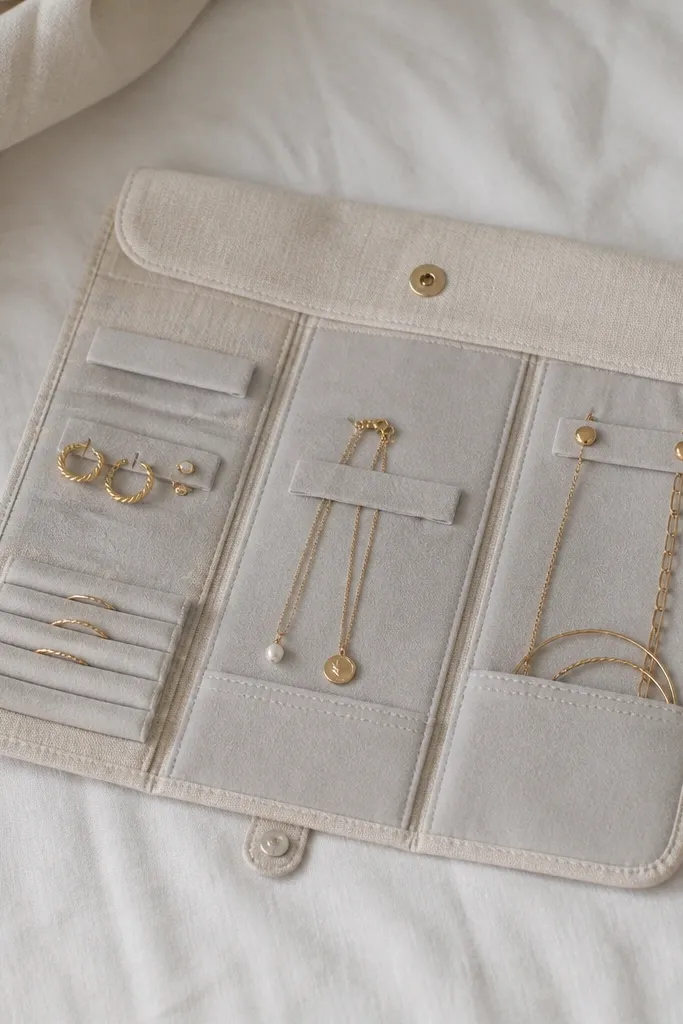
This is one of the most useful birthday gifts I’ve made because it solves a real problem — tangled necklaces and missing earrings. Linen outer fabric looks clean and expensive, and the felt interior grips jewelry so pieces don’t slide. I make three compartments so rings don’t get mixed with earrings. Snap closure is better than ties because it stays shut inside a bag. Choose felt in a neutral tone like light gray or cream so it doesn’t stain from dark metals. This gift works for fair and deep skin tone friends since it’s neutral and lets the jewelry colors do the work.
Start by cutting linen fabric to the roll size, about 12 x 9 inches when folded. Sew felt pockets inside: two small strip compartments for earrings and one larger panel for necklaces, leaving a 1/2 inch margin. Stitch a dividing seam between compartments so they keep shape. Fold the roll and sew the outer edges, leaving one side open if you want to insert a lightweight backing. Add a snap button near the center so it closes flat, then press with a warm iron through a cloth.
Editor's noteAdd a small elastic loop on the inside for a bracelet clasp — it stops the roll from opening while traveling.
Skip thisSkip slippery satin linings; jewelry slides and dents during travel.
18. Personalized Seed Paper Gift with Mini Flower Line Art
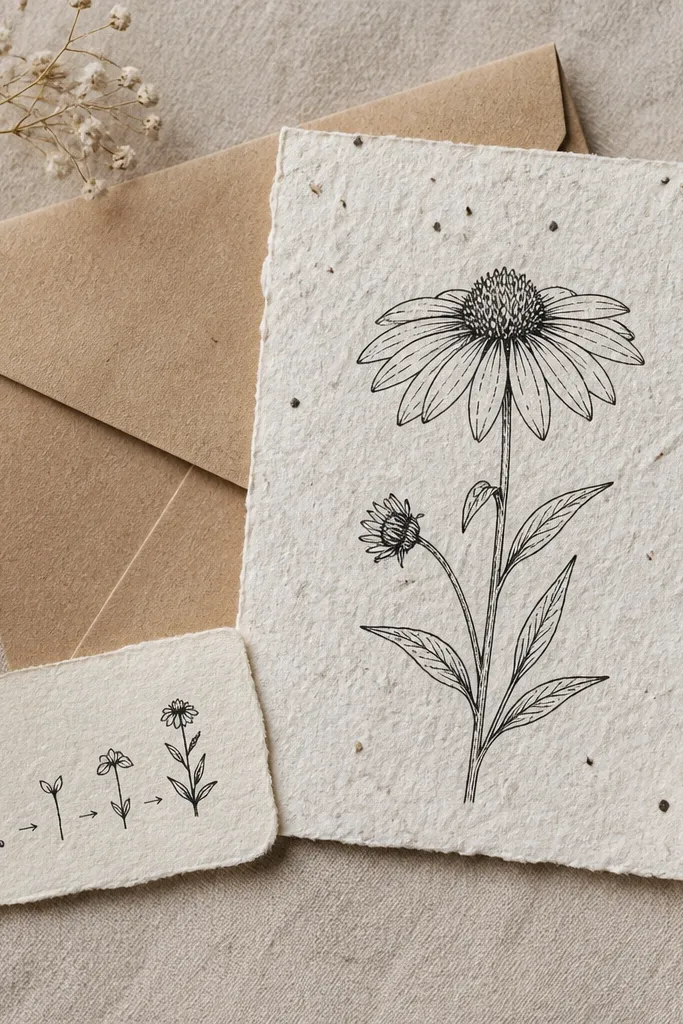
Seed paper is one of those gifts that feels playful and meaningful without requiring a big setup. I add simple line art in waterproof ink because it doesn’t bleed when the paper gets wet. The fiber specks show through, so pick line art that’s bold and minimal — one flower or one small sprig. This is perfect for friends who live in apartments because it still works: plant it in a small pot, not a yard. Choose seed paper with a texture that’s not too thick, or it becomes hard to tear and plant.
Start by cutting seed paper into 4 x 6 inch pieces. Draw your line art with waterproof pen or stamp it with archival ink, then let it dry 10 minutes. Write a planting instruction card that includes a simple step: dampen the paper, bury 1/4 inch in soil, mist daily. Place the seed paper inside an envelope with a small sticker that says “plant this.” For a nicer finish, add a folded corner crease so the envelope looks crisp.
Editor's noteUse a small spray bottle instead of pouring water so the ink line stays sharp while planting.
Skip thisDon’t use regular marker ink; it smears and looks messy when wet.
19. Hand-Painted Coquette Style Trinket Tray with Gold Leaf Edges
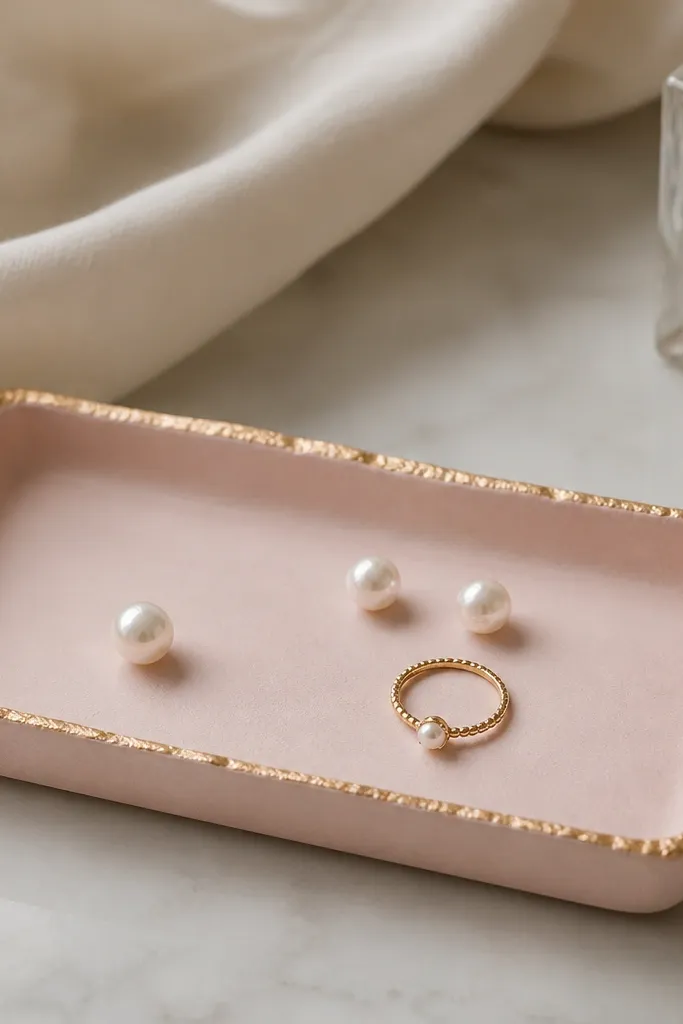
This is for the friend who leaves jewelry on her nightstand and wants it to look like decor. I paint a shallow tray in a light matte color, then add gold leaf to the edge because it gives that “pretty but not childish” look. Gold leaf is messy to work with, but the payoff is worth it when you keep the leaf only on the border. Blush pink flatters warm undertones and looks great with gold metals. The tray’s rectangle shape also makes it easy to place on shelves or beside a phone charger.
Start by sanding a small wood or resin tray lightly so paint sticks. Paint with two thin coats of matte acrylic, letting each coat dry and then sanding once with 400 grit for smoothness. Apply a gold leaf adhesive along the edges only, then lay gold leaf and press gently with a soft brush. Burnish the surface lightly to remove extra leaf from the paint area. Seal the painted areas with a matte clear coat, leaving gold leaf protected with a careful thin seal if your product allows it.
Editor's noteUse a tray size around 6 x 8 inches; it looks like a gift on a dresser instead of a toy.
Skip thisAvoid painting over gold leaf; it dulls the shine and makes it look like paint, not leaf.
20. Personalized Mug Cozy with Fabric Applique Initials
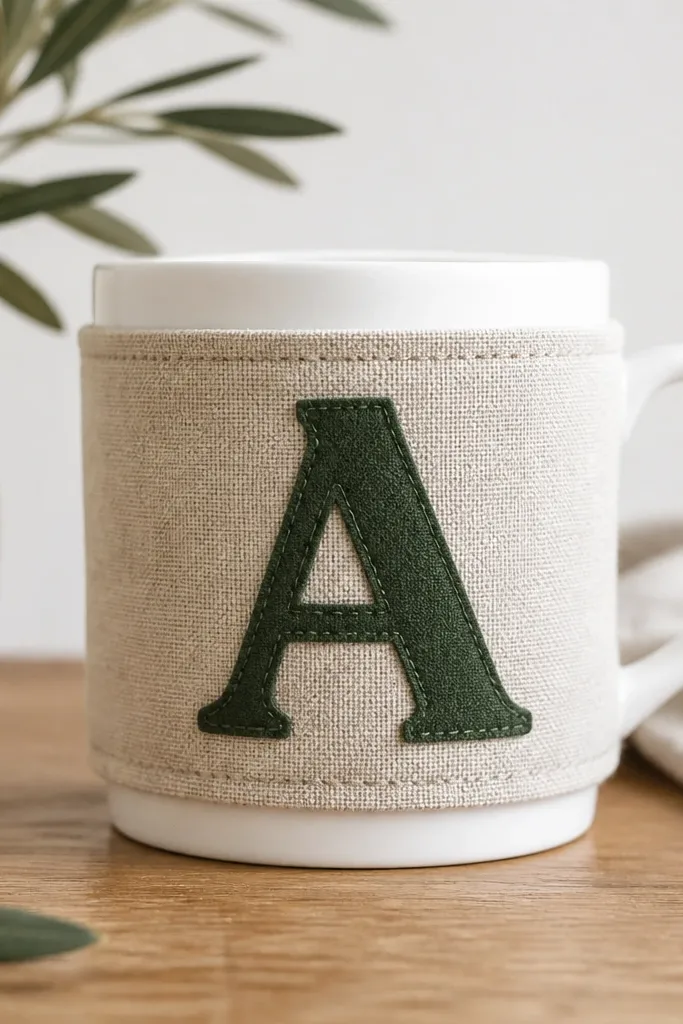
A mug cozy is a “use it every day” gift that still feels personal. I use a thick cotton or canvas for the outside and a heat-resistant lining so it grips the mug without slipping. The applique initials are easy to customize and look better than iron-on transfers because the stitching makes the edges crisp. Deep green on oatmeal looks great for friends who wear earthy colors and it also hides small stains from coffee splashes. This gift works for anyone because it’s sized to fit standard mugs — no guessing about exact mug dimensions if you measure with a tape first.
Start by measuring your friend’s mug circumference around the middle and add 1 inch for comfort. Cut two fabric pieces and one lining piece, then sew them right sides together leaving the top open. Place applique initial fabric on the outside, stitch along the edges with a tight zigzag stitch, and trim threads. Turn the cozy right-side out and press flat, then topstitch around the top edge for a clean finish. Add a small elastic tab inside if you want it to stay snug on the mug handle.
Editor's noteUse a narrow seam allowance and press after stitching; pressing makes the cozy look store-bought.
Skip thisSkip stretchy knit fabric; it stretches out and the cozy slips.
21. Mini Wall Hanging from Embroidery Hoop with Tulle Pom Trim
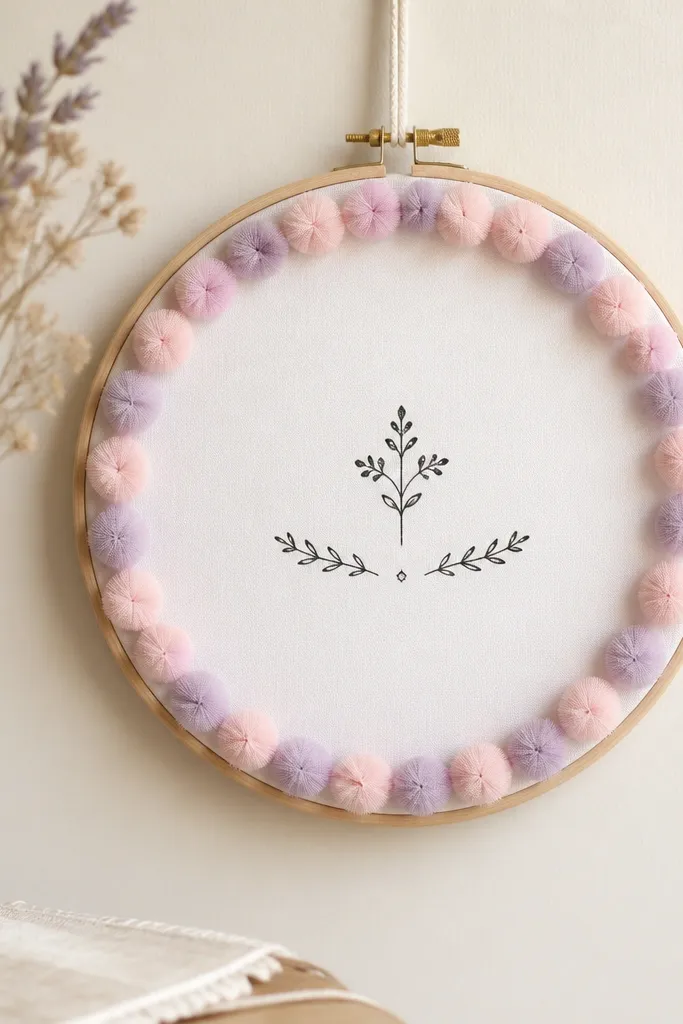
I like hoop wall hangings because they look cute even when the room is messy. This version uses a 6 inch hoop so it’s visible without dominating a wall. The tulle pom trim adds softness and texture, and it looks extra sweet in daylight. I keep the center design minimal — a simple printed line or tiny stitched symbol — because the pom trim already brings the visual interest. It flatters most decor styles because the base fabric is neutral and the color accents are pastel. If your friend loves cottagecore or soft glam, this lands instantly.
Start by removing the screw from a 6 inch hoop and trimming fabric to 2 inches larger than the hoop diameter. Stretch fabric tight and secure with the hoop ring, tightening evenly so it stays smooth. Add tulle pom trim around the inner ring by hot gluing in small sections, then press each pom down so it adheres. Stitch or print a small center detail — a tiny star, flower, or short date — and place it slightly above center. Add a ribbon hanger on the top so it sits flat against the wall.
Editor's noteIf your friend hates clutter, reduce the pom trim density — fewer pom clusters look cleaner and still cute.
Skip thisDon’t glue pom trim all at once; it shifts and makes uneven spacing.
22. Roasted Coffee Scrub Jar with Brown Sugar and Cocoa Oil
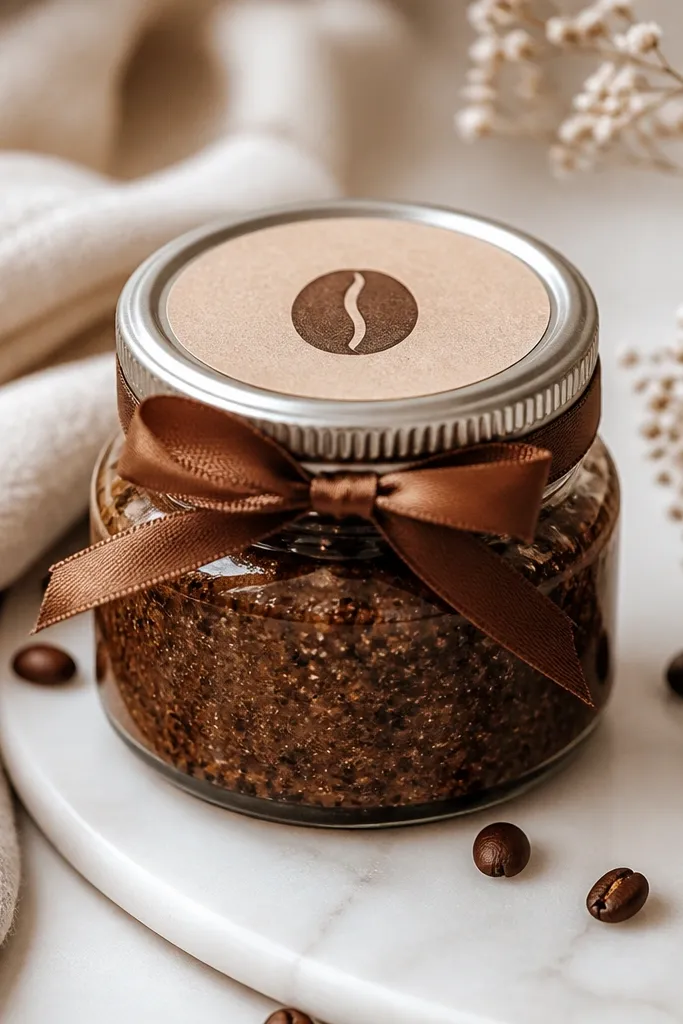
This gift feels like a spa day, and it still looks good on a bathroom shelf. I make the scrub thick enough to scoop — brown sugar holds the texture and cocoa oil makes it smell warm and chocolatey. The jar looks extra polished when the label is clean and centered, and the color is rich without needing glitter. It flatters almost everyone because the brown tone looks natural and doesn’t clash with white towels. Use it for birthdays, winter gifts, and “you’ve been working hard” moments.
Start by mixing brown sugar with finely ground roasted coffee and cocoa oil until it forms a thick paste. Add a small splash of vitamin E if your oils need stabilization, then stir until it’s uniform. Spoon into a clean, dry jar and tap gently to level the surface. Label the lid with usage instructions like “use 1-2 times a week, rinse well.” Seal the jar lid tight and wrap the outside with a simple ribbon so it looks like a finished product.
Editor's noteUse a jar size that fits one hand — 8 oz looks like a real gift and doesn’t take over the bathroom counter.
Skip thisSkip wet ingredients; water makes the scrub separate and get gritty.
23. Paper Flower Topper for Gift Wrap with Wire Stem
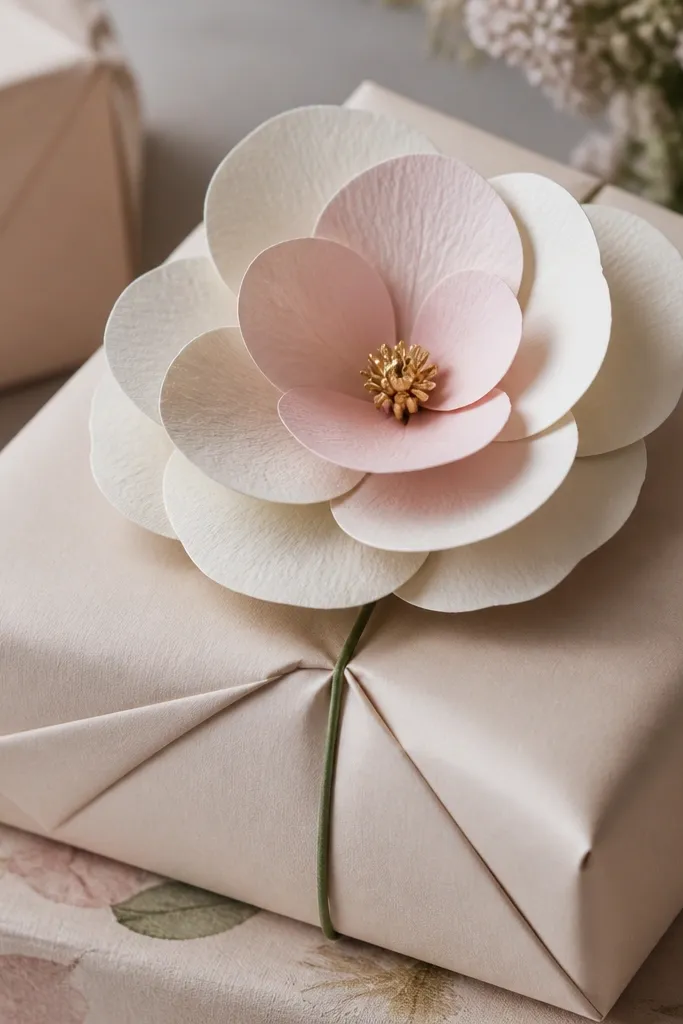
This is for the friend who keeps gift wrap and turns it into decor. A paper flower topper makes the whole package look like a styled photo even if the inside gift is simple. I use layered petals in two shades so it has depth, then add a wire stem so you can tuck it into the wrap and keep it upright. The gold center catches light and makes the flower feel celebratory. Cream and blush works with most wrapping paper colors, and the wire stem makes it stable on corners and bows.
Start by cutting 5-7 petal layers from cardstock, each layer slightly smaller than the last. Shape petals by gently curling them over the back of a spoon, then glue layers from largest to smallest. Add a gold circle center and a small ring of tiny dots if you want extra texture. Twist a green floral wire into a short stem and glue it to the back of the flower. Tuck the stem into the wrapped gift corner and secure with a tiny strip of tape behind the paper fold.
Make one extra topper and store it flat in an envelope — you’ll reuse it for quick birthdays all year.
Don’t use single-layer flowers; they collapse and look like school crafts on wrapped gifts.
24. Stitched Fabric Bookmark with Contrast Topstitch and Tassel
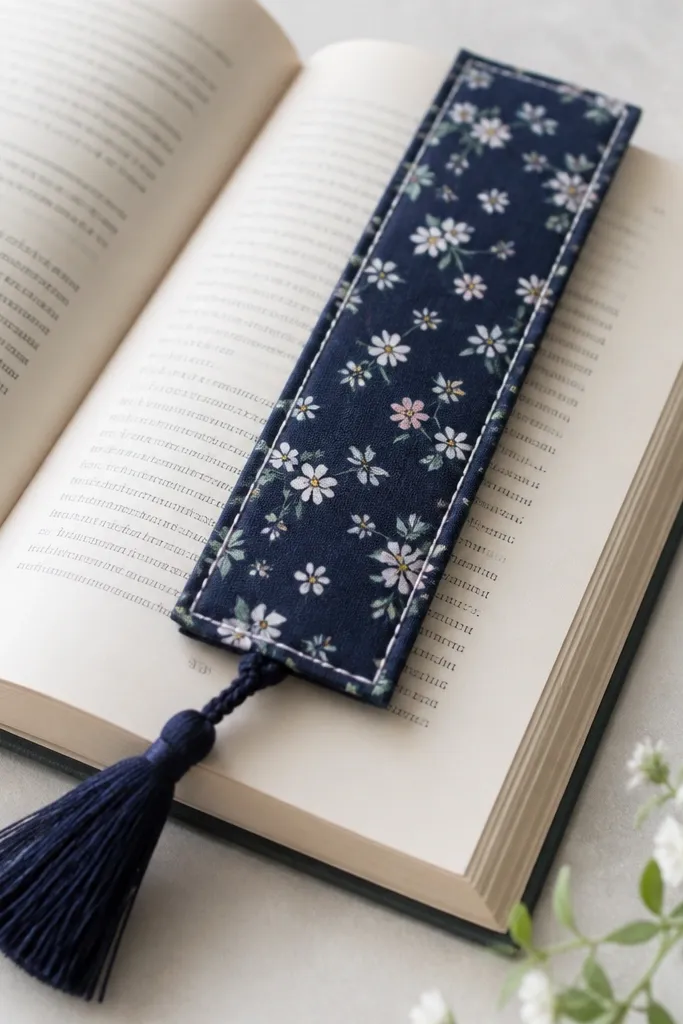
This is a gift for the friend who tears through books and keeps losing bookmarks. Fabric bookmarks stay put because the fabric has weight, and the double-layer design prevents fraying. The contrast topstitch makes it look neat and intentional, like something you’d buy at a craft market. Pair patterns with solids: a navy solid backing with a tiny floral front looks classy and doesn’t get loud. For fair skin friends, bright contrast thread pops on dark fabric; for deeper skin friends, choose a lighter solid backing so the bookmark reads clear on the page edge.
Start by cutting two bookmark rectangles 2 x 8 inches, then place right sides together and sew along the sides and bottom with a 1/4 inch seam. Turn it right-side out using a chopstick and press flat. Add tassel by cutting embroidery floss strands about 6 inches long, folding in half, and stitching the loop into the top seam. Topstitch along both long edges with a straight stitch for crisp lines, then trim any uneven corners. Package with a small card about the book she’s reading.
Editor's noteUse heavier thread in the bobbin — thin thread makes topstitch look wobbly.
Skip thisSkip unpressed seams; folded corners make the bookmark look sloppy.
25. Reusable Produce Bag with Fabric Paint Hand-Stamped Motto
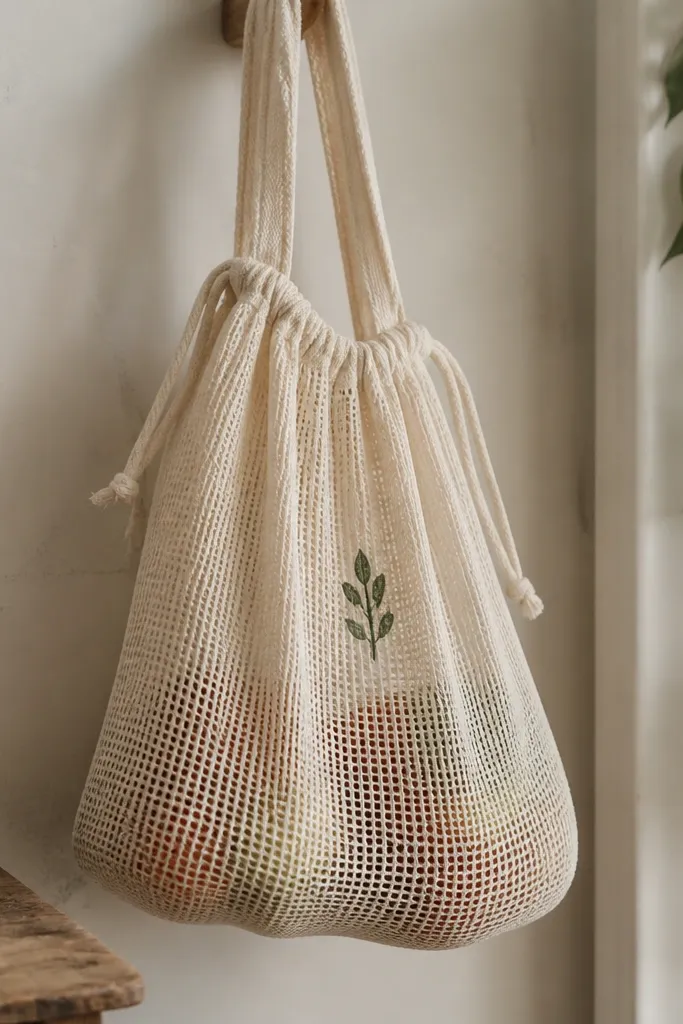
This is the practical gift that still looks handmade and personal. A produce bag is used constantly, and a hand-stamped message turns it into a “this is you” item instead of a generic reusable bag. I use fabric paint stamps because they create crisp edges and don’t smear like freehand marker. Choose a single icon and short word so the design stays elegant and easy to read. Olive green or terracotta stamps look great on natural mesh. This gift fits friends who cook, shop at farmers markets, or care about eco habits without making it preachy.
Start by washing the bag so paint sticks evenly. Make a simple stamp from a rubber stamp or carve a foam stamp with one icon, then test on scrap fabric first. Secure the bag flat on a cardboard piece and stamp using fabric paint with a light press and quick lift. Let it dry fully, then heat-set if your paint requires it. Add a label on the inside drawstring area with a date and your friend’s name so it feels like a custom item.
Editor's noteStamp in one direction only; rotating the stamp makes it look careless fast.
Skip thisAvoid fabric paint that stays tacky; it transfers onto hands and clothes.



