

1. Marble-Style Coaster Set with Gold Edge Labels
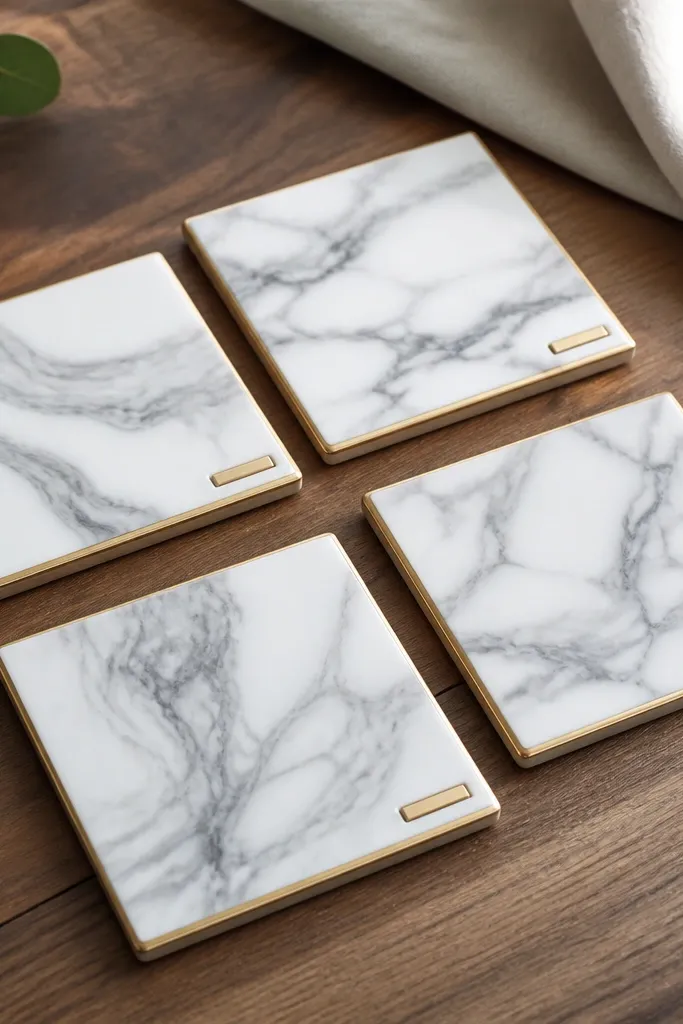
Start with four plain cork coasters or felt-backed tiles in a uniform size, like 4x4 inches, because the clean shape makes the marble effect look intentional. Use a warm white base (not bright hospital white) so it matches beige decor and skin tones in photos. For the veining, I use a gray acrylic wash plus a tiny brush for thin streaks, then I add a couple of thicker lines so it looks like real stone. The gold edge label ties the set together and gives that “designer stationery” vibe when your friend sets down her drink.
Step one: paint the surface in two thin coats of warm white acrylic, letting each coat dry 20 minutes. Step two: dab gray paint with a sponge for soft patches, then drag a damp fine brush through it for the veining; stop before it looks muddy. Step three: once dry, paint a 1/8-inch gold line around the edge using a steady hand or painter’s tape as a guide. Step four: cut label strips from label paper or matte sticker sheets, add black text, and seal the labels with a clear matte Mod Podge layer.
Editor's noteSeal the marble with two coats of matte Mod Podge so the gray stays crisp when it gets wiped.
Skip thisDon’t flood the coaster with too much water-based medium during veining or the cork texture will warp the pattern.
2. Vanilla Latte Scented Candle Label Upgrade
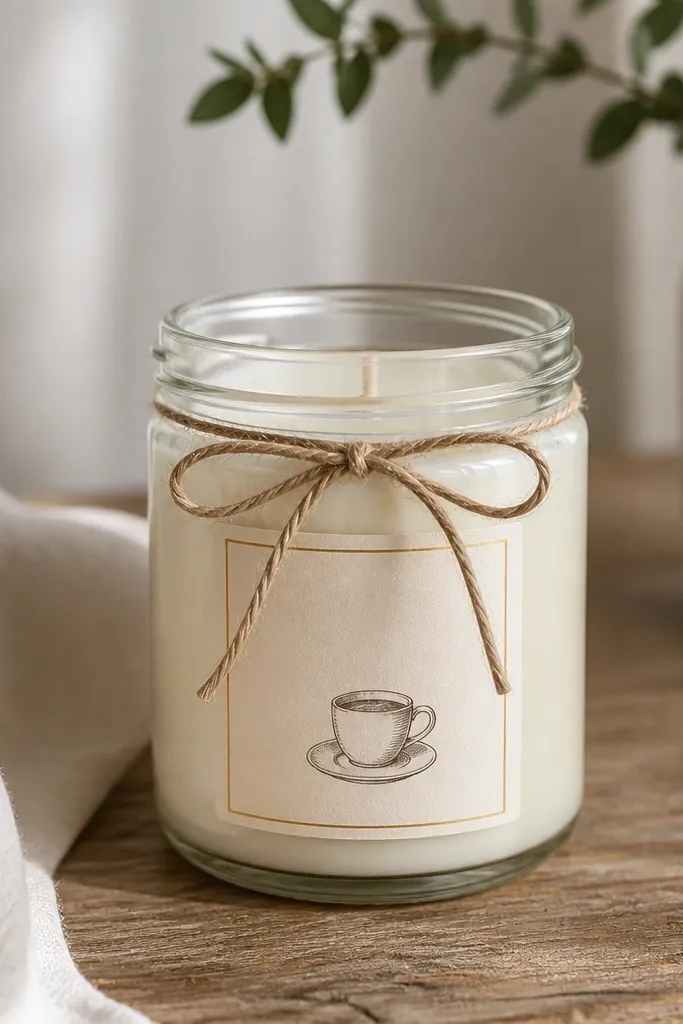
This is an aesthetic gift that looks custom without you making wax. Buy a plain jar candle in vanilla or latte scent, then replace the label with a design that matches your friend’s room palette. I like cream paper with black ink and one gold line because it reads calm and luxe on camera. If your friend has warm-toned decor, choose kraft paper labels; if she has cool grays, use bright white paper. The twine bow at the top makes it feel handmade even though the candle is store-bought.
Step one: remove the original label with warm water and a plastic scraper, then wash and dry the jar fully. Step two: design your label on matte label paper — aim for a label height of about 2.5 inches on a standard 8-10 oz jar. Step three: wrap the paper around the jar and glue the seam with a thin strip of glue or double-sided tape; smooth bubbles down with your thumb. Step four: seal the label edges with a thin brush of Mod Podge, then tie twine around the lid and trim the ends evenly.
Editor's noteUse a ruler to keep the gold border perfectly straight; crooked borders are the fastest “cheap DIY” tell.
Skip thisDon’t add glitter directly to the label — it sheds when the candle heats.
3. Macrame Keychain with Bead-Thread Tassel
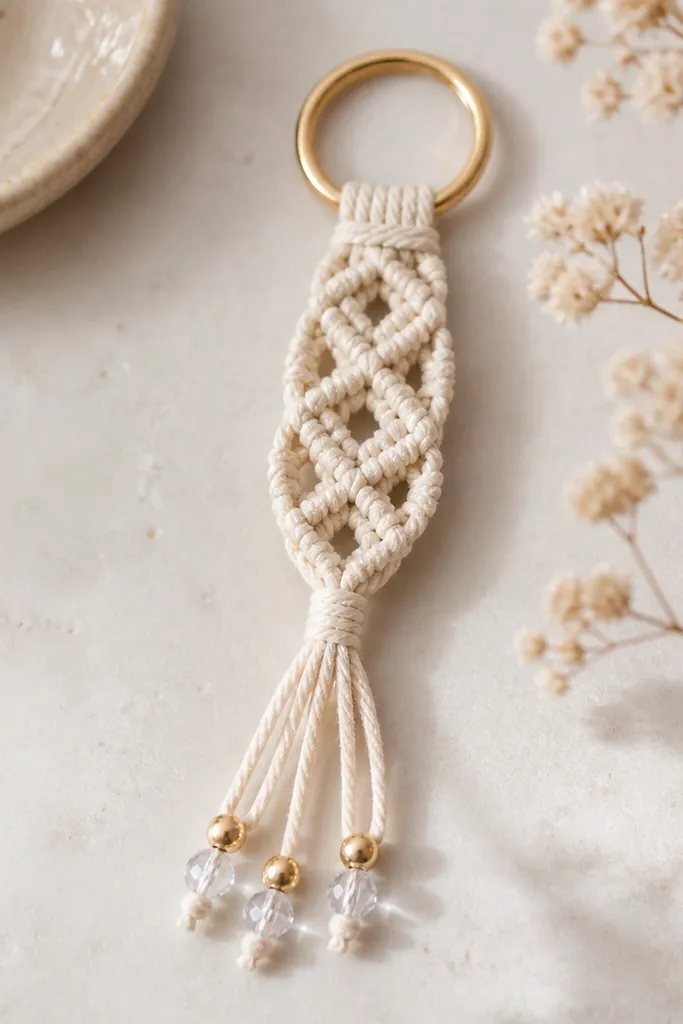
This one is small, but it looks like something from a boutique shop. Use 3mm cotton macrame cord in cream or oat, because it hangs softly and photographs warm against dark coats. The bead-thread tassel adds movement and light hits, which is what makes it feel aesthetic instead of plain. If your friend wears mostly neutrals, keep the beads in gold and clear; if she loves color, swap in tiny pastel beads like blush pink or mint. It’s also a great gift for someone who always has her keys in her hand or on a bag.
Step one: cut four cords about 18 inches each, fold in half, and knot them to a small keychain ring using a tight lark’s head. Step two: braid or knot a simple diamond pattern for about 2 inches, keeping tension consistent so the pattern stays symmetrical. Step three: for the tassel, trim the cords to 3.5-4 inches and separate them; thread beads onto three strands, then tie a tight overhand knot under the last bead. Step four: trim the ends with sharp scissors and burn the tips quickly with a lighter to prevent fraying.
Measure cord length by your friend’s hand — a tassel that’s too long swings and looks messy.
Don’t use fuzzy polyester cord; it looks shiny and cheap next to cotton macrame.
4. Photo Strip Frame with Color-Matched Washi Tape
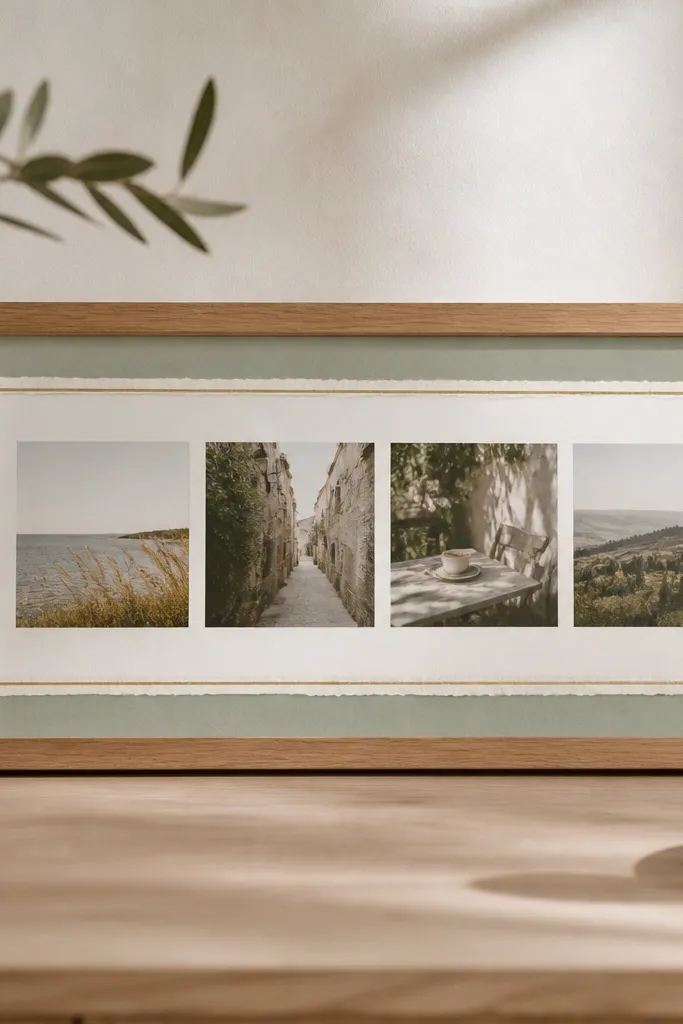
A photo strip frame is one of the easiest ways to make a “you know me” gift. I build it around a single color-matched wash tape set so it looks styled, not slapped on. Use a plain frame in natural wood or matte white so the photos stay the focus. For the photos, print on matte paper or use a matte photo paper setting — gloss makes fingerprints and glare in daylight. Washi tape placement works best when it frames the whole strip: two horizontal bands and one small accent corner.
Step one: choose four photos that share the same lighting vibe, like window light or night street lights, then crop them to the same height. Step two: cut wash tape strips to the frame interior width; I like 1 inch wide tape for visibility without covering faces. Step three: place the bottom tape band first, stick the photo strip, then add the top tape band to lock it in. Step four: print a tiny date or inside-joke label on sticker paper, stick it at the bottom right, and seal the tape edges with a thin matte Mod Podge coat.
Use one wash tape pattern plus one solid color tape; too many patterns makes it look like party craft.
Don’t cover the entire frame with tape — leaving negative space makes it look intentional.
5. Desk Tray from a Thrift Tray + Leatherette Liner
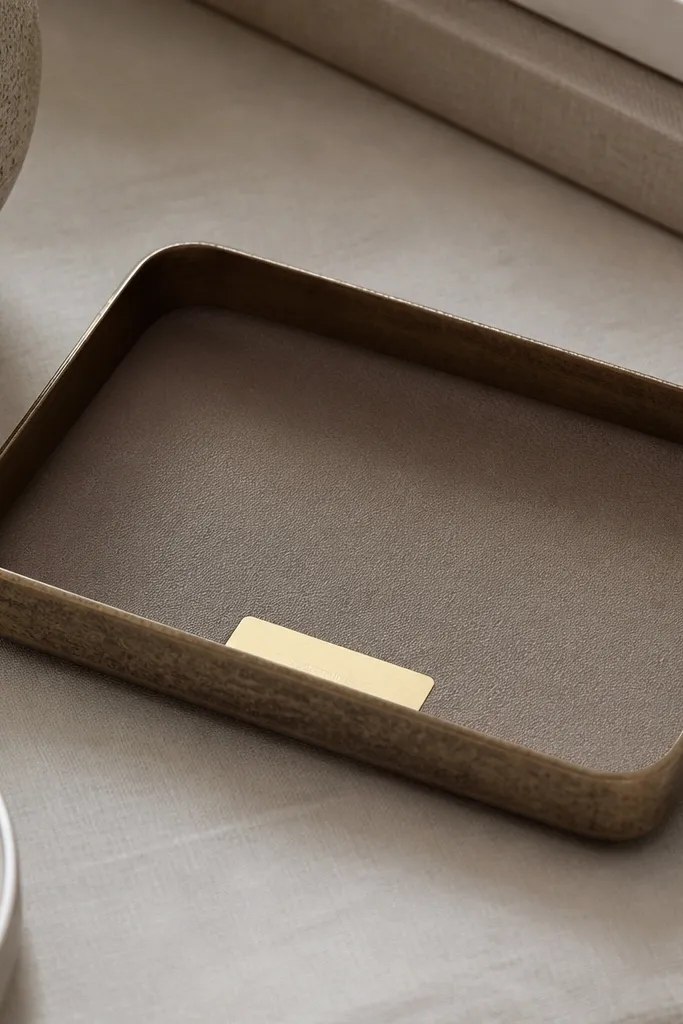
This gift is a workhorse. Your friend will drop keys, lip balm, or a watch in it every day, and it looks neat doing it. I start with a thrifted metal tray because the shape is already “designed,” then I line it with leatherette or faux suede in a neutral shade. Dark taupe, espresso brown, and black-brown look expensive and hide scratches. The gold foil label on the front makes it feel personalized without adding clutter.
Step one: wipe the tray with rubbing alcohol so the liner adhesive sticks. Step two: trace the inside bottom onto leatherette and cut with 1/8-inch extra for a snug fit. Step three: glue the liner down with contact cement or a strong fabric glue, then press the corners so they sit flat. Step four: cut a label from gold foil sticker paper, add your friend’s initials, and place it centered on the front lip.
Editor's noteBurnish the corners with a plastic card so the liner edges look crisp.
Skip thisDon’t use hot glue for the whole surface; it can lift and leave bumps.
6. Custom Name Wall Hangings on Embroidery Hoop
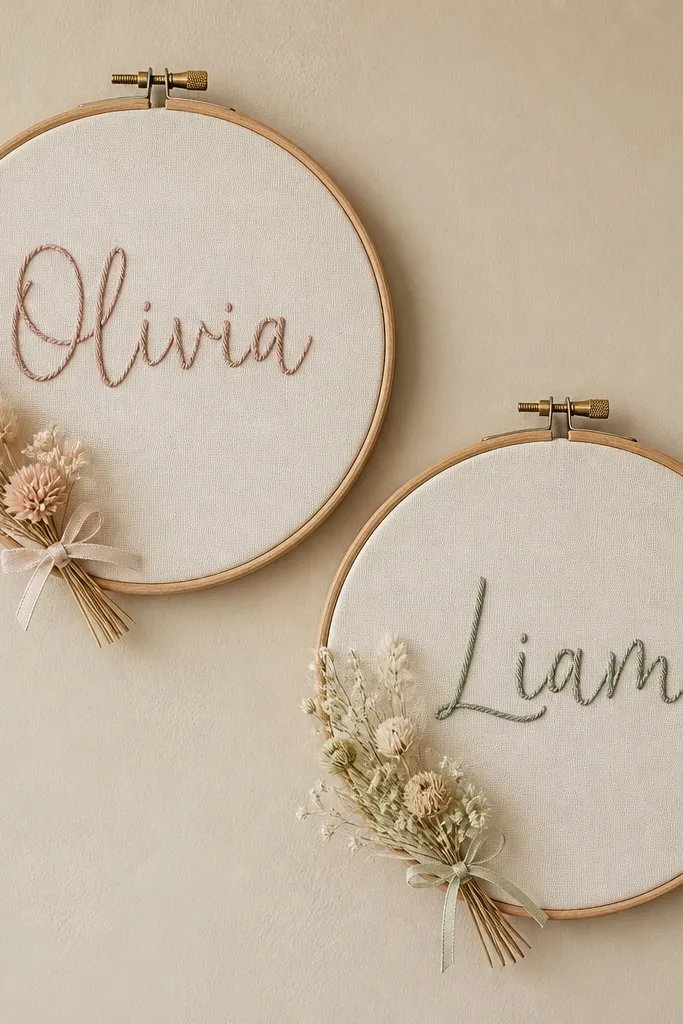
Embroidery hoop wall pieces look aesthetic because they have built-in shape and a clean border. Keep it simple: one name or short phrase, one fabric background, and one small decorative element. I use linen-look fabric or cotton muslin in cream because it doesn’t reflect light harshly. For the lettering, paint pens or fabric markers work, but stitching makes it feel more personal. Dried flowers are optional; if you add them, keep the bundle small and secured so it doesn’t look like a craft store bouquet.
Step one: loosen the hoop, stretch fabric over the inner ring, and tighten until there are no wrinkles — pull from opposite sides. Step two: sketch the name with pencil lightly, then outline with a black fabric marker or stitch it with contrasting thread. Step three: glue or stitch a tiny dried flower cluster in the bottom corner, using twine or a dot of hot glue under the petals. Step four: tighten the hoop outer ring, then add a ribbon loop at the top for hanging.
Use a 6-inch hoop for a name piece; larger hoops look like projects unless your lettering is very clean.
Don’t pick a shiny satin background; it makes marker lines look messy.
7. Lip Gloss Organizer with Acrylic Paint Dividers
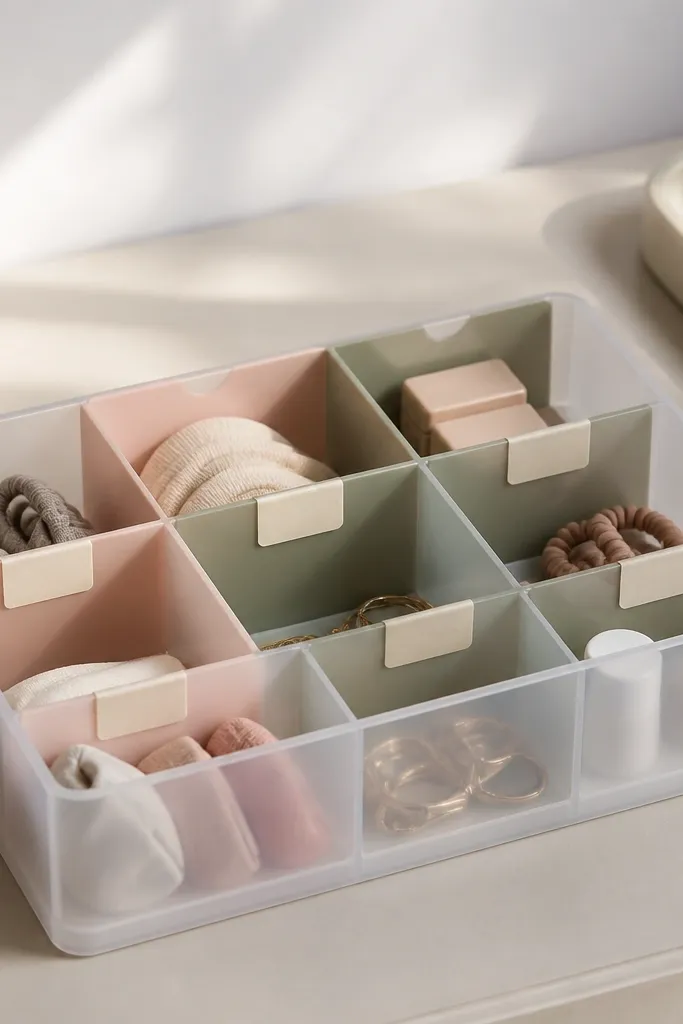
If your friend has too many lip products, this gift saves her time and looks cute on her vanity. Clear organizers look clean, but they can look boring unless you add color-coded dividers. I paint the dividers with matte acrylic so it doesn’t glare in mirror light. Choose two gentle colors — blush and sage, or cream and dusty rose — then keep the labels in black or dark brown for readability. It flatters everyone because vanity colors match skin tones instead of clashing with lip shades.
Step one: remove the dividers if they come out, then sand lightly with fine-grit sandpaper for better paint grip. Step two: paint dividers with matte acrylic in two colors, letting each coat dry fully before a second coat. Step three: assemble the organizer and place labels on the outside of each section with label tape or sticker paper. Step four: spray a light clear matte seal over painted dividers only, and let it cure overnight before using.
Label by category, not brand — “lip liner,” “gloss,” “balm” reads better than tiny names.
Don’t use glossy paint; it reflects and makes the organizer look greasy.
8. Sage + Cream Hanging Planter Jar with Twine Macrame
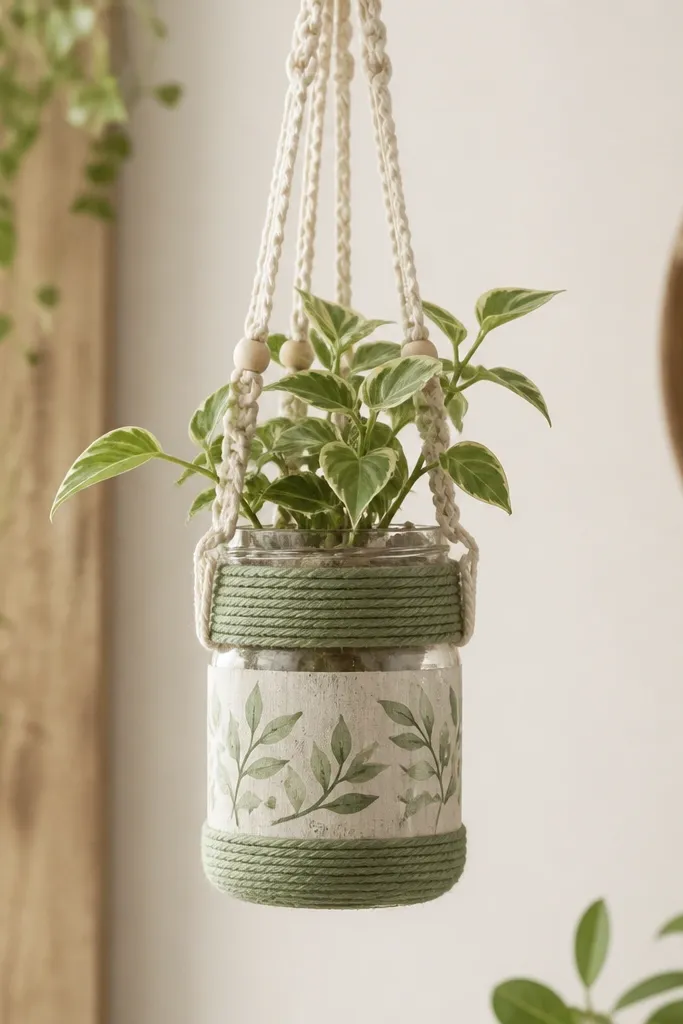
This is a gift for a friend who loves plants but hates complicated care. Use a small glass jar so you can see soil moisture, and hang it at desk or shelf height with simple macrame. Sage and cream look soft and calm, and the twine texture adds warmth. A hand-painted label makes it aesthetic without needing fancy typography. It works well for light-medium skin tones too because the sage hue complements most warm undertones.
Step one: clean the jar with rubbing alcohol and wrap the middle band with sage twine using hot glue dots at the top and bottom edges. Step two: make a simple hanger with four cord strands — loop over a hook, then knot every few inches to create a neat taper. Step three: paint a small label on kraft paper or directly on the jar with acrylic; seal it with clear matte sealant. Step four: add a small plant and a layer of decorative pebbles on top so the jar looks styled even when the plant is small.
Editor's noteUse a plant that tolerates inconsistent watering, like pothos or a small philodendron cutting.
Skip thisDon’t paint directly with thick layers; it cracks when the jar flexes.
9. Custom Bookmark Set with Pressed Flower Laminated Edges
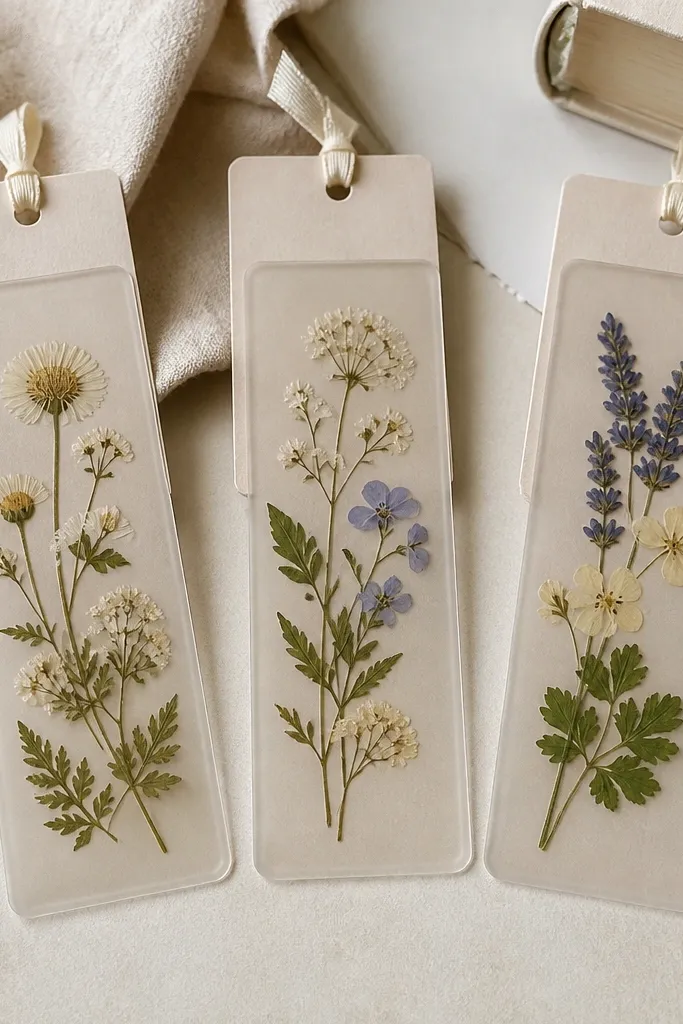
Pressed flowers look gorgeous in bookmarks because the page texture shows through and the color stays gentle. The key is to laminate with clear sheets so the flowers don’t get crushed or fade fast. I like thin bookmarks with rounded corners because they slide into books without snagging. For aesthetic consistency, use a limited palette of flower colors like blush pink, pale yellow, and soft lavender. This gift fits a reader’s lifestyle and still looks pretty on a nightstand.
Step one: press flowers between book pages for at least 5-7 days, then trim them into small shapes that fit a bookmark size like 2 x 6 inches. Step two: lay the flower on a clear laminate sheet, cover with another sheet, and seal the edges with a laminator or heat-seal method. Step three: trim to shape and round corners with a corner punch. Step four: add a small matte label on the back with the friend’s name or a date, then seal that label under the laminate flap if possible.
Cut the flower smaller than you think; flowers that touch the edges look messy after trimming.
Don’t use thick petals like marigolds; they bulk up and create uneven laminate ridges.
10. Heatless Hair Ribbon Wrap with Satin Bow Tag
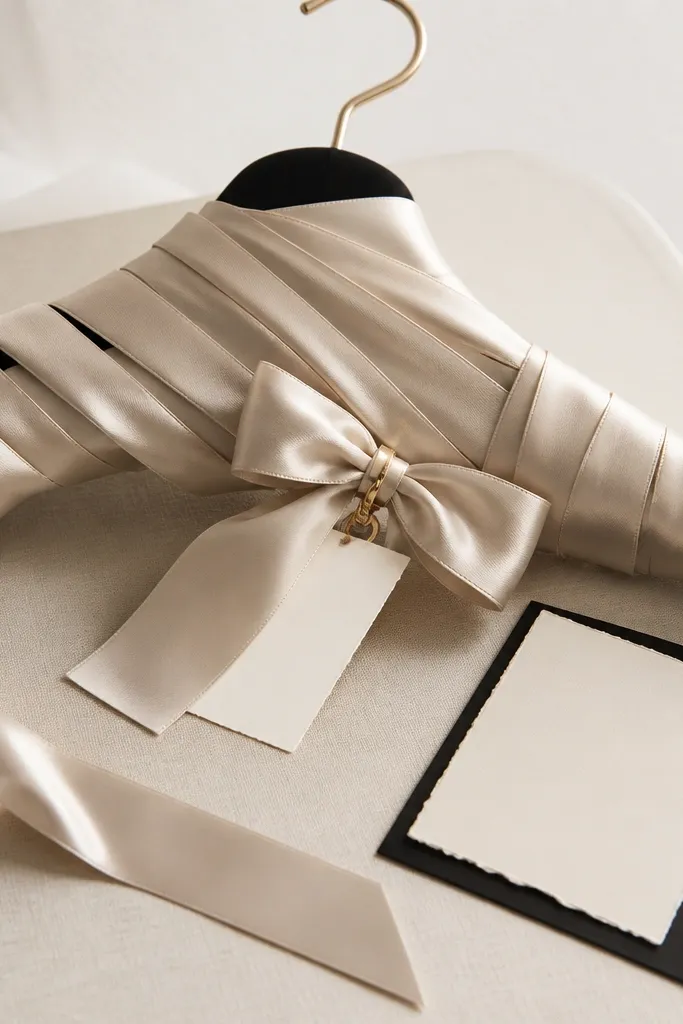
This is a genuinely useful aesthetic gift that also looks cute when stored. Choose a soft satin ribbon in champagne, dusty rose, or black-brown. Add a bow tag so the gift looks intentional the moment she opens it. The ribbon wrap itself should be about the width of a hairband and long enough to wrap around the head once without choking. It works for all hair types because the satin is gentle, and the bow adds a polished touch for friends who like beauty routines.
Step one: buy or cut satin ribbon into a length around 40 inches and fold it into a loop shape. Step two: wrap the loop with a thin elastic band at one end to keep it from twisting, then stitch or secure with fabric glue. Step three: attach a small fabric ribbon tag with your friend’s name using a gold clip or a stitched loop. Step four: add a label card with a tiny instruction diagram — fold it into a triangle so it stands upright when she stores the wrap.
Use a satin that is not slippery like cheap polyester; it should feel smooth but grip slightly on hair.
Don’t tie the bow with bulky knots; they create bumps on the head.
11. Cobalt + Cream Ceramic Effect Mug with Paint Pen Rim
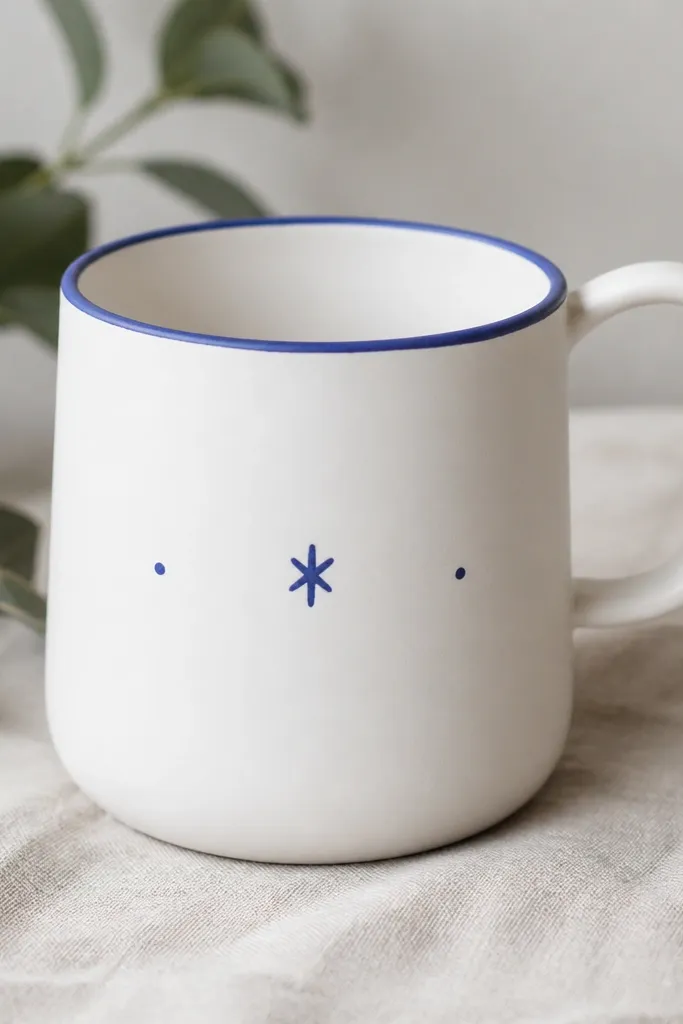
If you want a gift that feels personal but still looks neat on a counter, customize a plain mug. The aesthetic comes from limiting details to small, high-contrast marks. I paint a cobalt rim because it frames the drink area and pops against the white mug. Then I add one tiny symbol (a star, heart, or coffee bean) so it’s not crowded. This works for friends who like minimal decor and for anyone who drinks coffee or tea daily.
Step one: wash the mug with dish soap and dry completely, then wipe with rubbing alcohol where you’ll draw. Step two: outline the rim with a paint pen — keep the line thickness consistent by going slow and steady. Step three: add two small dots or a single star on the side, keeping the spacing about 1 inch apart. Step four: bake according to the paint pen instructions (usually 20-30 minutes at around 350°F), then let it cool fully before washing.
Practice your rim line on paper first; the mug curve makes shaky lines obvious.
Don’t use regular craft paint without baking — it washes off and looks sad fast.
12. Matte Black Earring Stand with Wrapped Wire Base
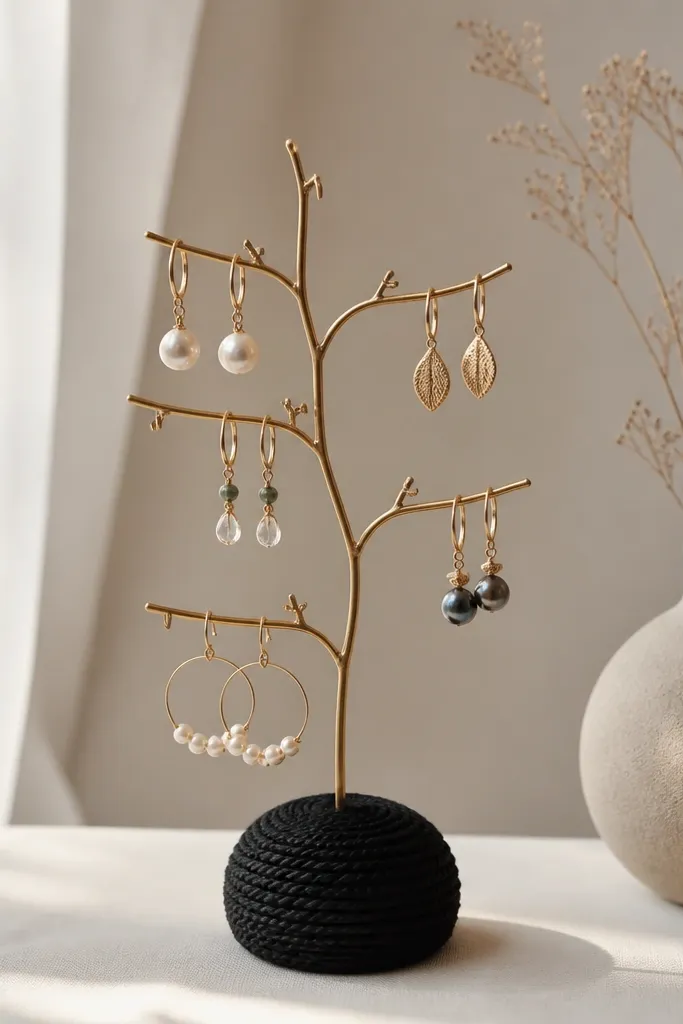
Earring stands look aesthetic because they organize while showing off jewelry. I like building one from wire and yarn because it hides the construction and gives a soft matte finish. Use matte black yarn and a thin gold wire branch for contrast. If your friend wears gold jewelry, match the hooks to gold; if she wears silver, swap the wire. It flatters most rooms because black + gold works with almost any color scheme, and it makes small earrings visible without digging through a drawer.
Step one: bend a wire into a branch shape, then twist small loops for hooks where earrings will hang. Step two: wrap the base area with black yarn and secure with hot glue every inch. Step three: paint the gold wire hooks with metallic paint if needed, then let dry. Step four: mount the base on a small wood square or heavy candle plate using strong glue, and add a small label card tucked behind the stand.
Space the hooks so each pair hangs flat; crowded hooks make earrings look tangled.
Don’t use glossy yarn; it reflects light and makes the stand look plastic.
13. Herb-Scented Bath Salt Jar with Chalk Labels
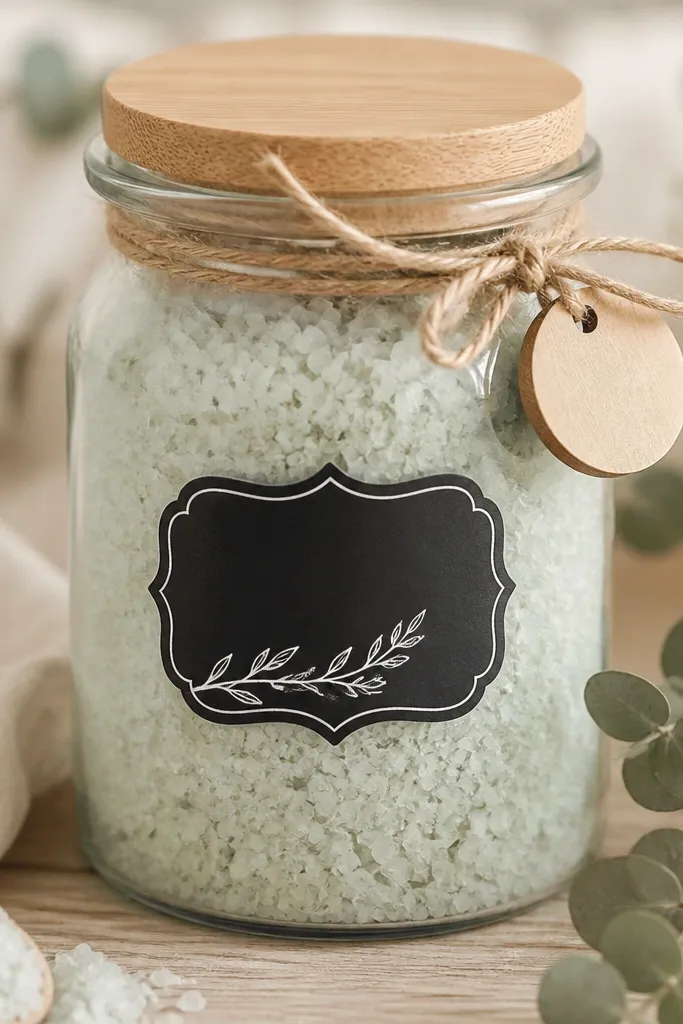
Bath salt gifts look expensive when the label is clean and the color is consistent. I make mine with pale green salts because it reads spa-like and pairs with cream towels in photos. Chalk-style labels are trendy but they need protection, so I seal them with a clear matte top coat. Choose a herb scent your friend likes — eucalyptus, lavender, or rosemary — and keep the jar filled to the same level each time so it looks styled. This gift fits friends who like self-care nights and also looks good on bathroom shelves.
Step one: fill a clear jar with bath salts (aim for 3/4 full) and tap the jar gently to settle the crystals. Step two: write the label on a small piece of label paper or directly on a wooden tag using chalk marker, then seal it with matte Mod Podge once dry. Step three: tie twine around the lid and attach the tag with a tiny knot. Step four: add a simple instruction strip for usage, like “1/2 cup per bath,” on a small label at the bottom of the jar.
Editor's noteIf the salts clump, stir them with a fork and let the jar sit open for 30 minutes before labeling.
Skip thisDon’t use wet glue on labels; moisture makes chalk marker smear.
14. Gradient Scrunchie Pack with Fabric-Matched Card
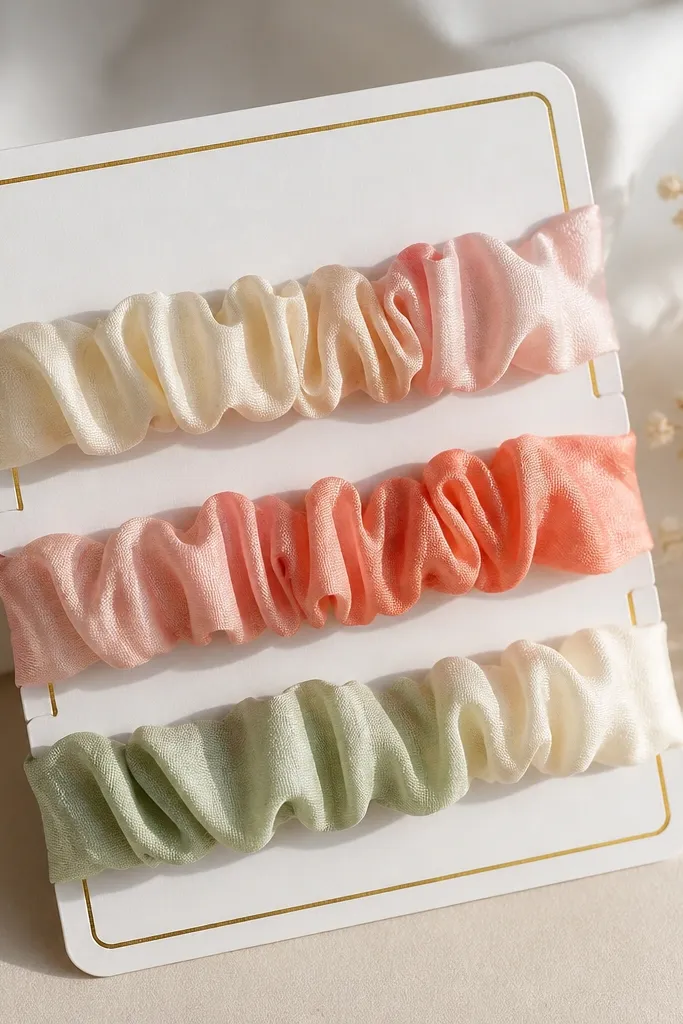
Scrunchies are the kind of gift that feels personal because they match daily outfits. For a gift aesthetic, make a mini set of three with a deliberate gradient rather than random colors. Choose fabrics that feel consistent, like cotton sateen or brushed cotton, so the set looks like a collection. The matching card keeps it from looking like loose hair ties thrown in a bag. This works for any hair type and for friends who wear their hair up constantly.
Step one: cut three strips of fabric about 3.5 inches wide and 12-14 inches long, depending on how chunky you want the scrunchies. Step two: sew each strip into a tube, turn right-side out, and insert elastic; stitch the ends shut. Step three: wrap each scrunchie in the same order of colors to create a gradient set, then gather and secure with a tight seam. Step four: place scrunchies on a card and attach with two small glue dots under the fabric edge so they don’t slip.
Use a tight stitch at the elastic ends; loose seams look messy after a few wears.
Don’t mix fabric textures like jersey with satin; the set will look uneven.
15. Clear Label Water Bottle Wrap with Name Tape
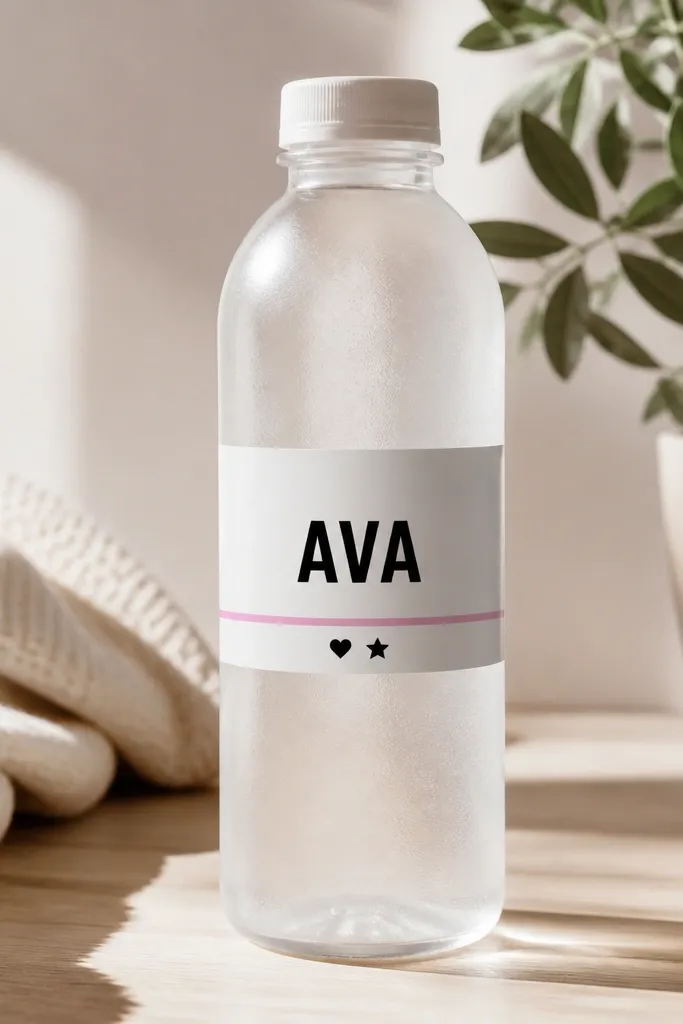
This is a practical gift that still looks styled. The aesthetic comes from label placement and clean typography, not from fancy materials. I wrap bottles with a clear label film or matte clear tape so the design stays protected from water splashes. Use a single accent stripe color like lilac, cobalt, or terracotta, then keep the rest black and white. It works for gym friends, office friends, and anyone who loses water bottles — the name makes it easy to return.
Step one: clean the bottle and dry it fully, then wipe with rubbing alcohol for adhesion. Step two: cut a label strip about 3 inches wide and center it at mid-height; add name and a short line like a nickname. Step three: add a thin accent stripe at the top of the label using washi or colored label tape. Step four: cover the entire label with a clear matte tape layer or clear contact film, smoothing bubbles out with a credit card.
Measure label height with a ruler; centered labels look intentional even when the design is simple.
Don’t put labels on a wet bottle; the edges peel in a day.
16. Satin Ribbon Bookmark with Tiny Charm Clip
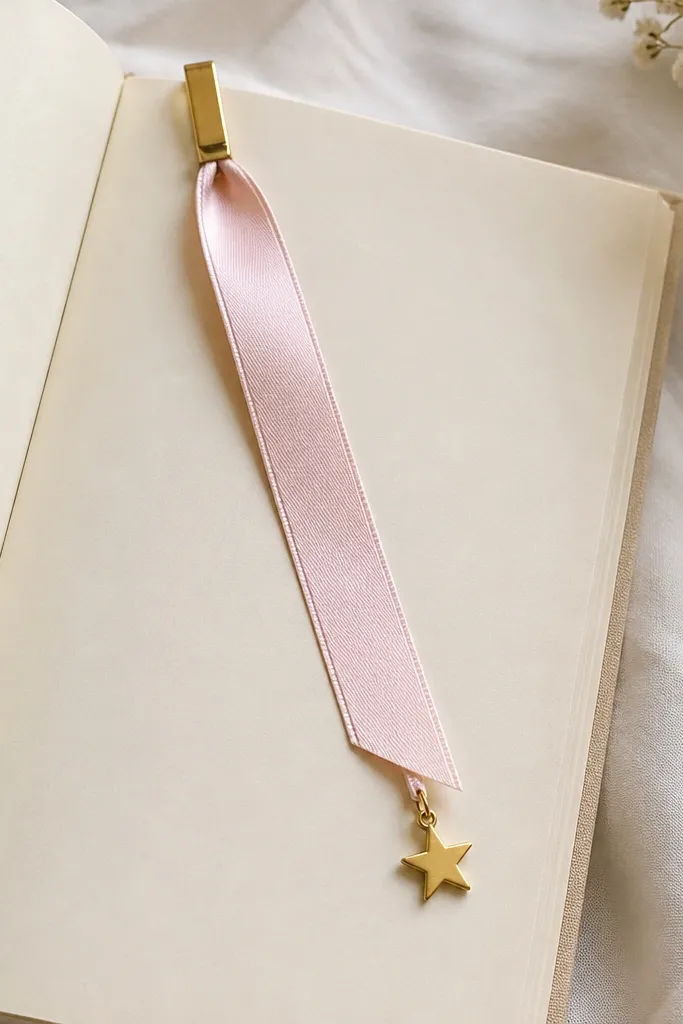
This is the kind of bookmark that looks like it came from a gift shop, but it’s fast and cheap. Satin ribbon is smooth and catches light, which reads “aesthetic” right away. The charm clip gives you movement when your friend flips pages, and the gold star works with most jewelry styles. Keep the ribbon color close to your friend’s vibe — soft pink for romantic decor, deep wine for moody shelves, cream for minimalist rooms. It also makes a good add-on gift if you’re building a bigger bundle.
Step one: cut ribbon to about 10-12 inches long and gently singe the ends to stop fraying. Step two: attach a small alligator clip or binder clip to the top of the ribbon using hot glue at the metal hinge area. Step three: thread a tiny charm onto a jump ring and attach it at the ribbon end using pliers or a pre-made charm chain. Step four: tuck a small label card behind the ribbon clip so it stands up when gifted.
Use a clip with a flat hinge; round hinges make the ribbon twist.
Don’t use thick grosgrain ribbon; it looks more casual and less “soft” on camera.
17. Thrifted Frame Restyle with Fabric Mat and Tiny Quote Card
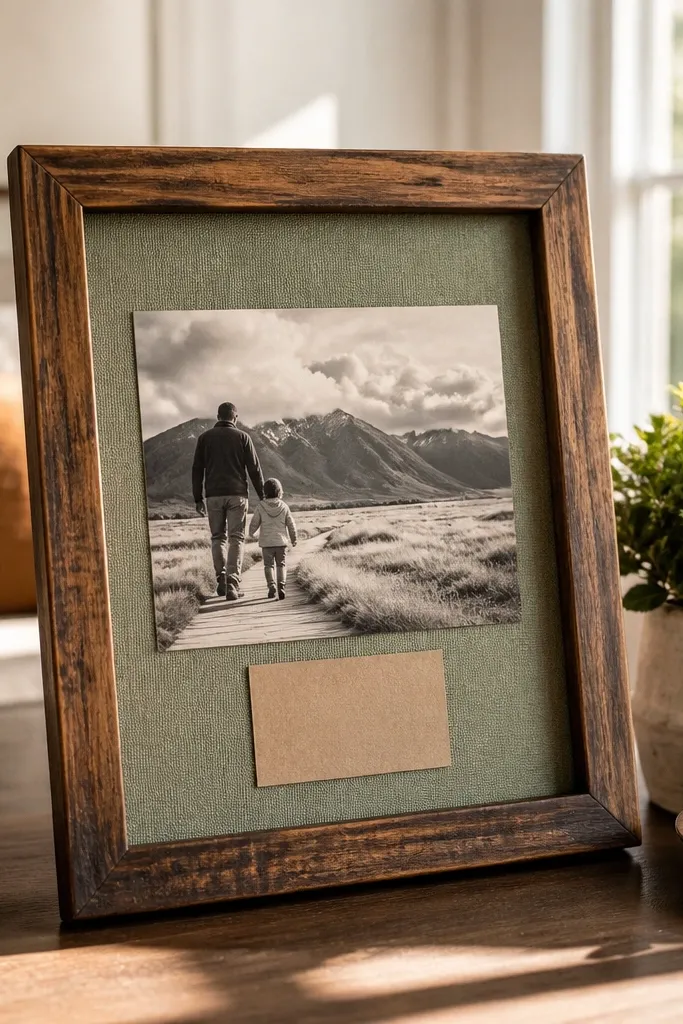
A restyled frame looks thoughtful because it changes the whole background, not just the photo. I thrift frames, then replace the backing mat with linen-look fabric so the photo sits in a softer “gallery” space. Choose a fabric that matches your friend’s home palette — oatmeal, sage, or light gray. The tiny quote card at the bottom adds meaning without taking over the image. This gift looks good on desks and shelves because it has a clean, calm composition.
Step one: remove the back and glass, then sand the frame lightly and wipe clean. Step two: paint the frame with muted white or warm gray acrylic in two thin coats, drying between. Step three: cut fabric to fit behind the photo opening and glue it around the edges so it looks tight and flat. Step four: place the photo and add a small quote card using double-sided tape at the bottom center, then reassemble the frame.
Editor's noteUse fabric with a visible weave; it adds texture that reads “designed” in photos.
Skip thisDon’t pick a fabric with loud patterns; it competes with the photo.
18. Mini "Rescue Kit" Pouch with Label Tabs
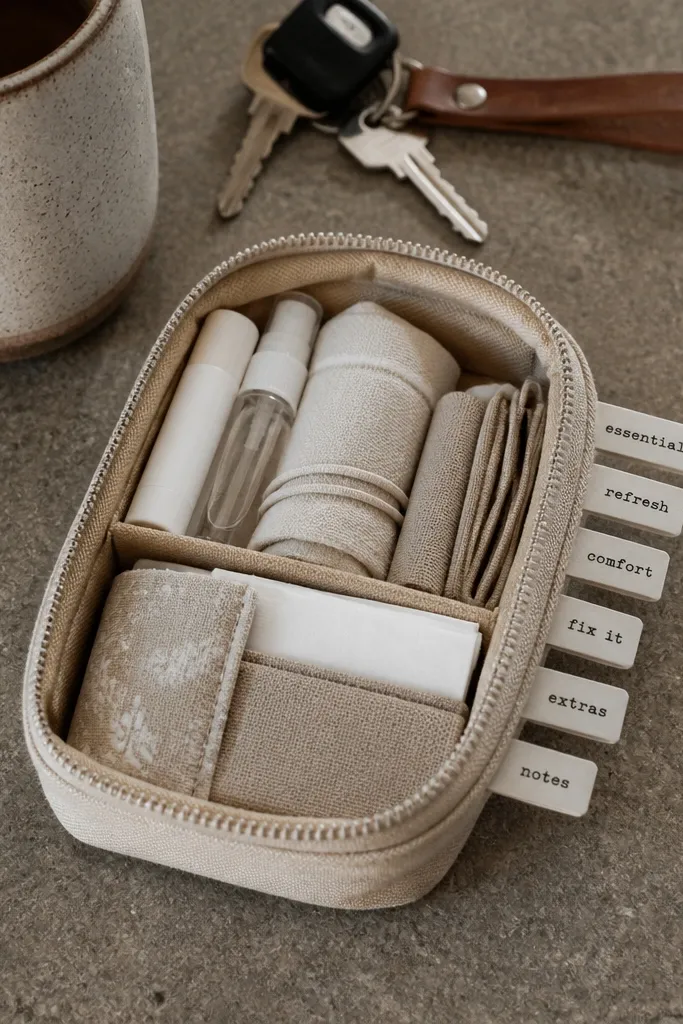
A rescue kit pouch is aesthetic because it’s organized and labeled, not because it’s flashy. Choose a neutral pouch — beige, oat, or black-brown — then add small label tabs that match each other. I like to use thin label tape in black lettering so it looks like a planner sticker. Fill it with a tight set of items your friend actually uses: lip balm, blotting papers, mini hand lotion, bobby pins, and a couple of pain relief tablets. This gift fits friends who go out a lot and also friends who just want peace of mind in their bag.
Step one: pack the pouch first, then measure where you can place tabs without blocking zippers. Step two: label small pieces of label tape or sticker paper with category names and stick them to small mini pouches or zip bags inside the main pouch. Step three: arrange items by size so the tallest items sit at the back and flatter items sit in front. Step four: add a tiny “how to use” card on the inside of the lid using a clear pocket or tape.
Editor's noteUse two sizes of tabs: bigger for main items and smaller for add-ons so the layout looks designed.
Skip thisDon’t cram random items; a cluttered pouch looks messy instead of aesthetic.
19. Champagne Glitter Nail Polish Ornament for a Shelf
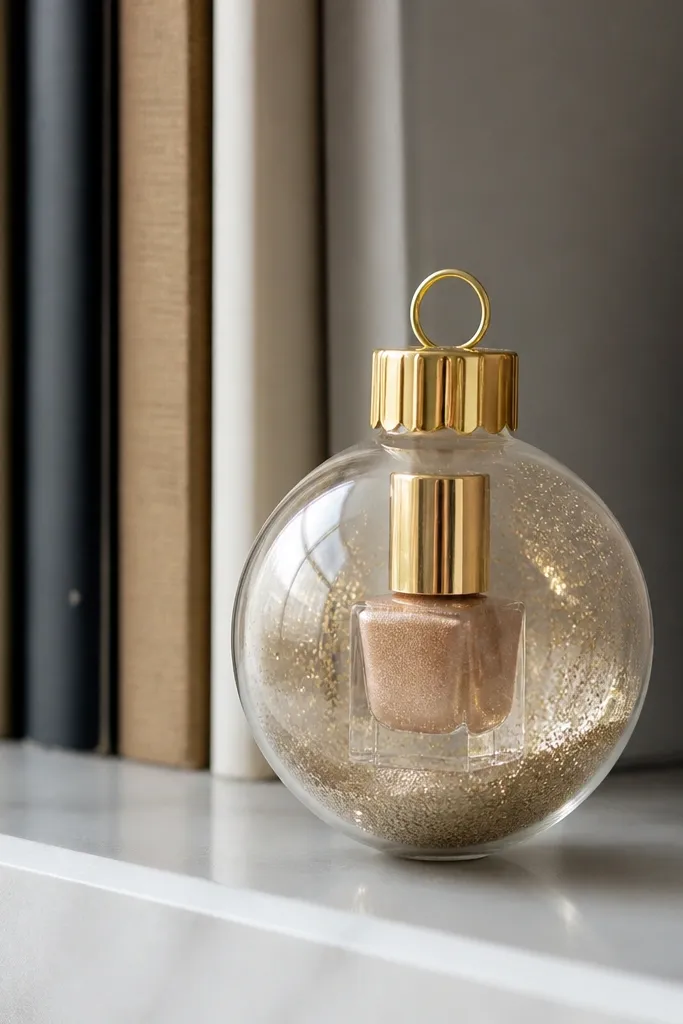
This one is playful but still looks pretty because it uses a consistent color family: champagne glitter and gold hardware. I make it for friends who love nail polish and also for seasonal decor that can sit out year-round. The ornament format is aesthetic because it’s self-contained and looks good from multiple angles. Keep your glitter fine, not chunky, so it looks like sparkle dust. It’s also a clever way to turn a small bottle into decor instead of something that sits in a drawer.
Step one: choose a clear ornament ball or mini clear acrylic sphere and remove the cap or opening top. Step two: pour in a small amount of fine champagne glitter, then add a tiny strip of tissue or a small nail-related charm so it doesn’t all settle at the bottom. Step three: attach a miniature nail polish bottle charm or a small label tag inside the ornament using strong craft glue. Step four: close the ornament, then add a gold ribbon loop and hang it on a shelf hook or dresser knob.
Shake the ornament gently after closing so the glitter distributes evenly.
Don’t use chunky craft glitter; it looks like confetti and looks cheap fast.
20. Pressed Cookie Tin Gift for a Cozy Desk
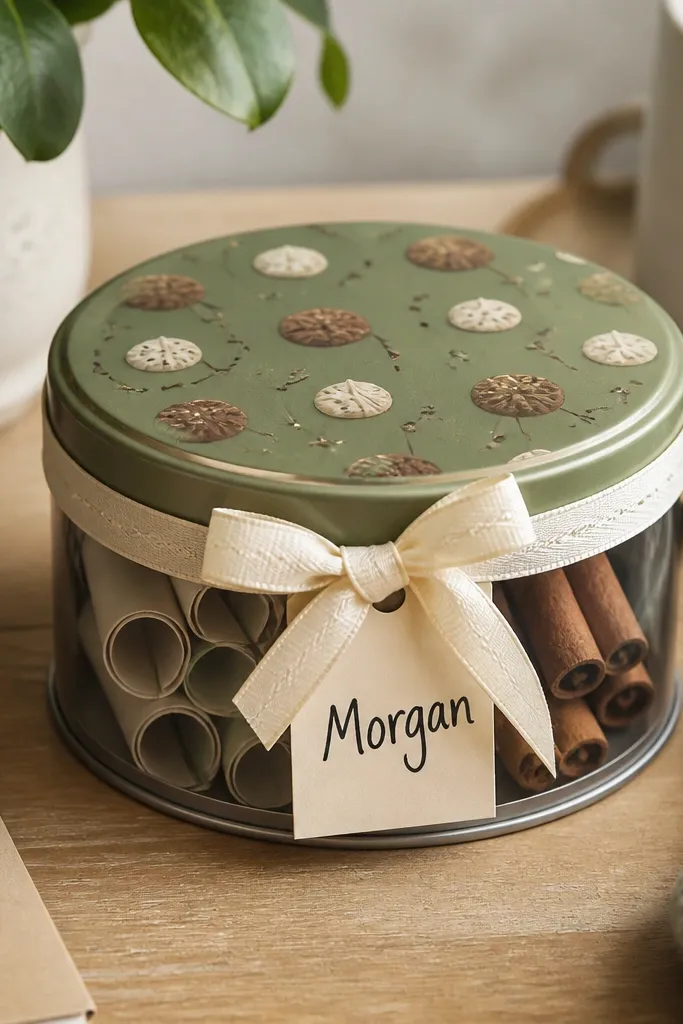
This is one of my favorite gift ideas for best friend aesthetic because it looks styled even when the contents are simple. I built it around a cheap cookie tin I found at a grocery clearance shelf, then made the lid look like it’s covered in “pressed cookies” using paper and clear film. The result reads cozy and slightly whimsical, not childish. It also holds little desk treats — notes, a couple spices, or a tiny candle — so it feels like a real gift instead of decoration.
Start with a small round cookie tin with a removable lid, preferably one with a smooth flat top. Clean the lid with rubbing alcohol, then cut a circle of patterned paper the same size as the lid minus 1-2 mm so it doesn’t overhang. Print or draw your “cookie” pieces on the paper — brown circles for cookies and thin white lines for frosting — then seal the art by covering it with a single flat sheet of clear contact paper or clear packing tape laid down slowly from the center outward. Wrap a cream ribbon around the tin body and tie a short bow on one side, then add a name tag using cardstock punched with a small hole and secured with a thin piece of twine. Fill the tin with rolled mini notes (I use 3 x 5 index cards rolled tight), one or two cinnamon sticks, and a tiny sachet of tea or bath-safe fragrance sachet if you want it to smell good when opened.
Use contact paper instead of glossy Mod Podge on the lid — it dries instantly and you avoid bubbles that show up under desk lamp light.
Skip using thick paper that lifts at the edges; it wrinkles under the clear film and ruins the pressed-cookie look.



