
1. Confetti Dot Beads with Clear Elastic and Tiny Gold Caps
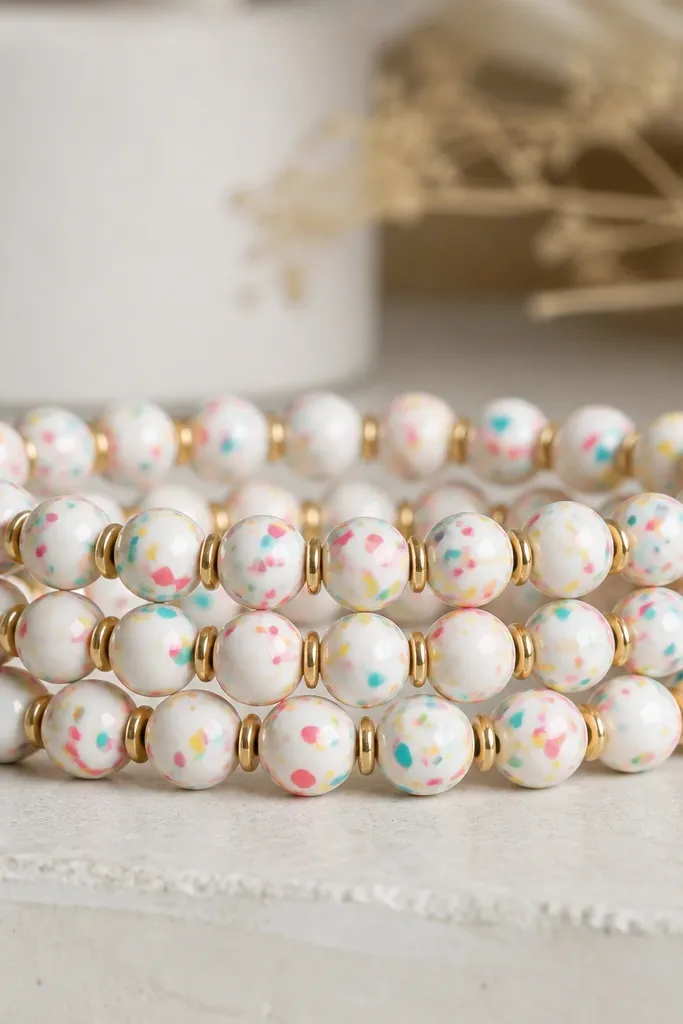
This one looks like store-bought charm bracelets because the bead faces have a repeated pattern. Make the base color off-white, then press dot details using the blunt end of a needle or a silicone clay shaper. The tiny gold caps add a "finished" rhythm so the bracelet doesn't look like plain beads. I've worn versions of this with a denim jacket - the bright dots pop without needing extra charms.
Roll polymer clay into a smooth log, then cut into small cylinders and round them into beads (about 8mm). Use a toothpick to poke the hole straight through before baking. After baking and cooling, slide gold micro bead caps over the cord path, then knot elastic with a double-back method using a 2mm crimp bead or a tight overhand knot.
Pro tipKeep your dots consistent by dipping the needle tip in a tiny amount of color clay and wiping it on scrap first so every dot lands the same size.
AvoidDon't make the dots too thick - raised dots can snag on elastic and make the bracelet twist.
2. Marbled Pink-Orange Beads with Black Stretch Cord
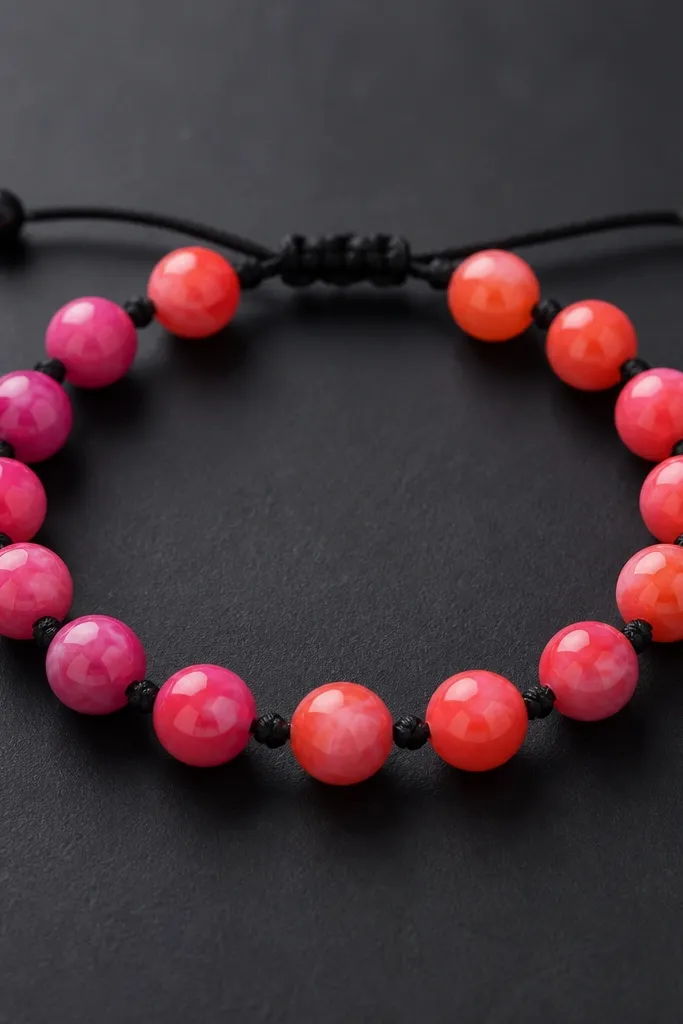
Marbling looks hard, but it's fast once you keep the color count low. I use two warm colors plus a thin line of white to "lighten" the mix, then I roll and fold it a few times so you get streaks instead of muddy blobs. Black cord makes the warm beads look sharper and helps hide cord knots.
Knead pink and orange polymer clay until smooth, then tear in a thin white strip. Fold and twist the clay 3-5 times only, then roll into ropes and cut into 7-9mm beads. Poke holes with a toothpick, bake, and let cool fully. String on 1mm black stretch cord, then finish with a surgeon's knot and a drop of clear glue inside the knot area.
Pro tipIf the marbling looks gray, add a tiny pinch of bright white and fold once more before shaping beads.
AvoidDon't over-fold the clay - too many twists turn it into one flat color.
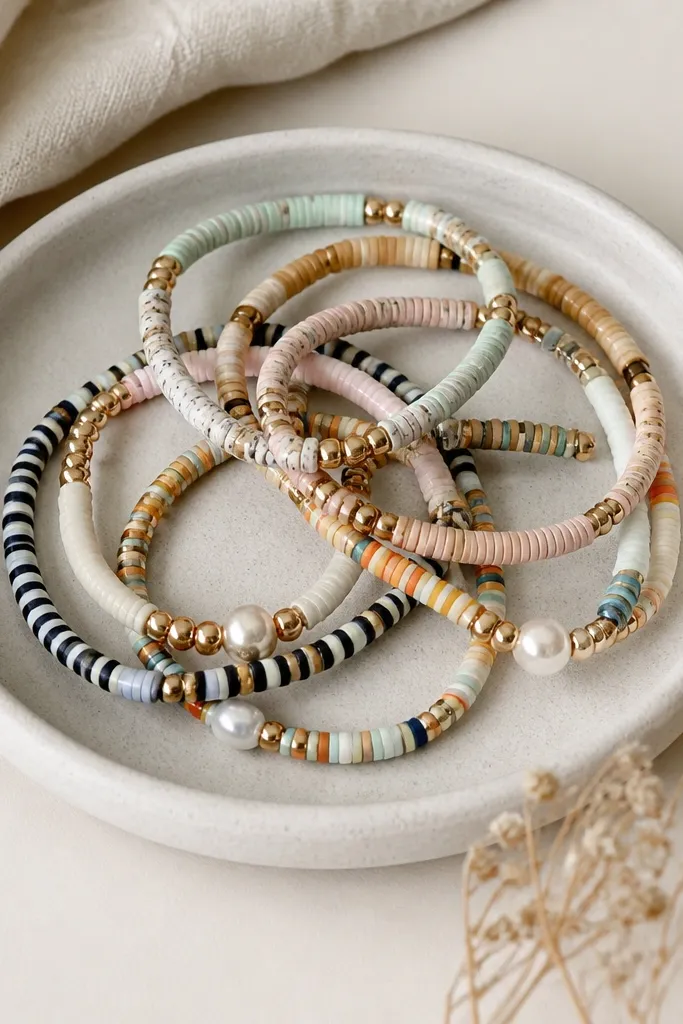
3. Lace-Pressed Beads with Antique Brass Spacers
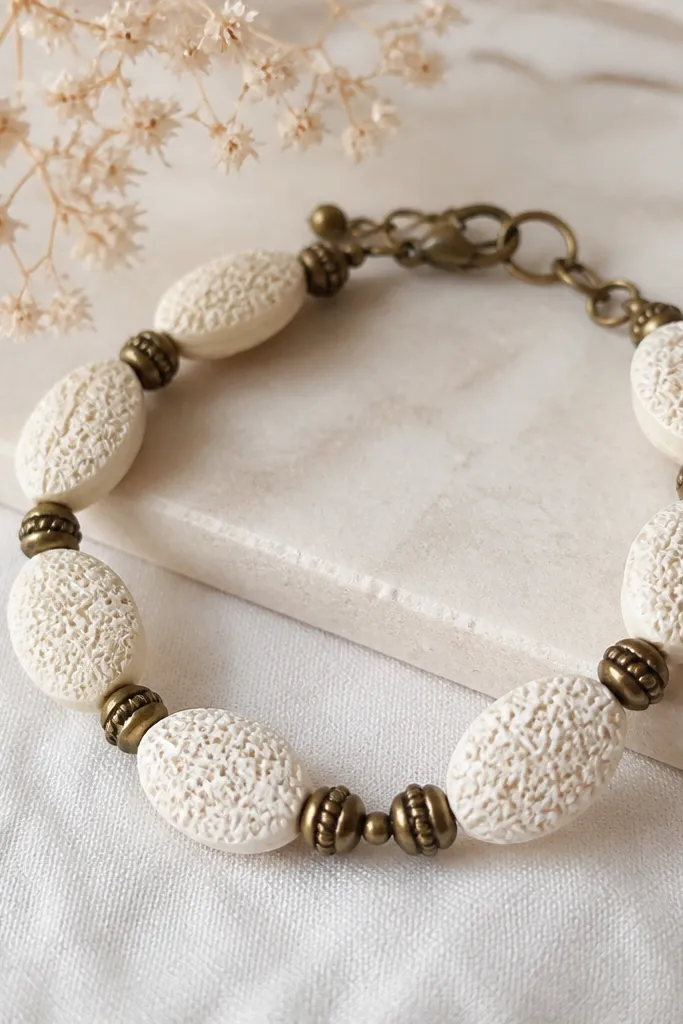
Pressed texture makes air-dry clay look expensive because the surface catches light even without shine. Use cream or light beige clay and press a lace piece into each bead face to create a clear pattern. Antique brass spacers warm up the palette and make the lace pattern read better than silver hardware with matte beads.
Shape air-dry clay into ovals about 10x7mm, then press lace onto one side. Let them dry until fully hard - I wait 24-48 hours depending on thickness. Seal with two thin coats of matte sealer and let it cure. Thread onto stretch cord with brass spacers between beads; finish with a small toggle or a knot hidden under a spacer.
Pro tipCut your lace strip into a small square so you press evenly - a wrinkled lace edge gives messy texture.
AvoidDon't skip sealing air-dry clay - unsealed beads shed dust and the bracelet feels rough.
4. Rainbow Stripe Tube Beads with Wood Slider Button
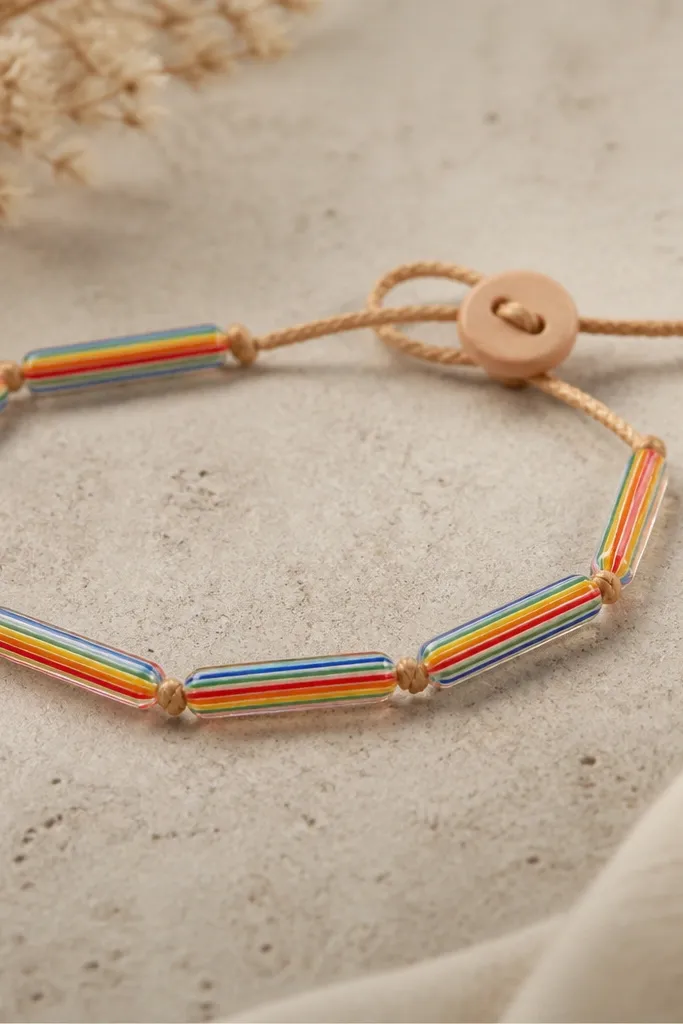
Tube beads let stripe colors look intentional instead of scattered. If you keep stripes thin and evenly placed, the bead reads like a mini candy roll. A wood slider button gives a casual craft vibe and works great for summer outfits because it looks natural with bright colors.
Roll polymer clay into three thin sheets: red, yellow, and blue (or any rainbow you like). Stack the strips, roll into a tube, then cut 10-12mm lengths. Gently round the edges, then poke holes through the center length before baking. Bake, cool, and string onto waxed cotton cord with a wood slider button - add one small metal spacer to stop the beads from bunching.
Pro tipUse a ruler to cut tube lengths the same size - the bracelet looks neat even if your holes are slightly off.
AvoidDon't compress the tube too much - squeezed tubes lose the stripe pattern.
5. Monochrome Speckle Beads in Black, White, and Gray
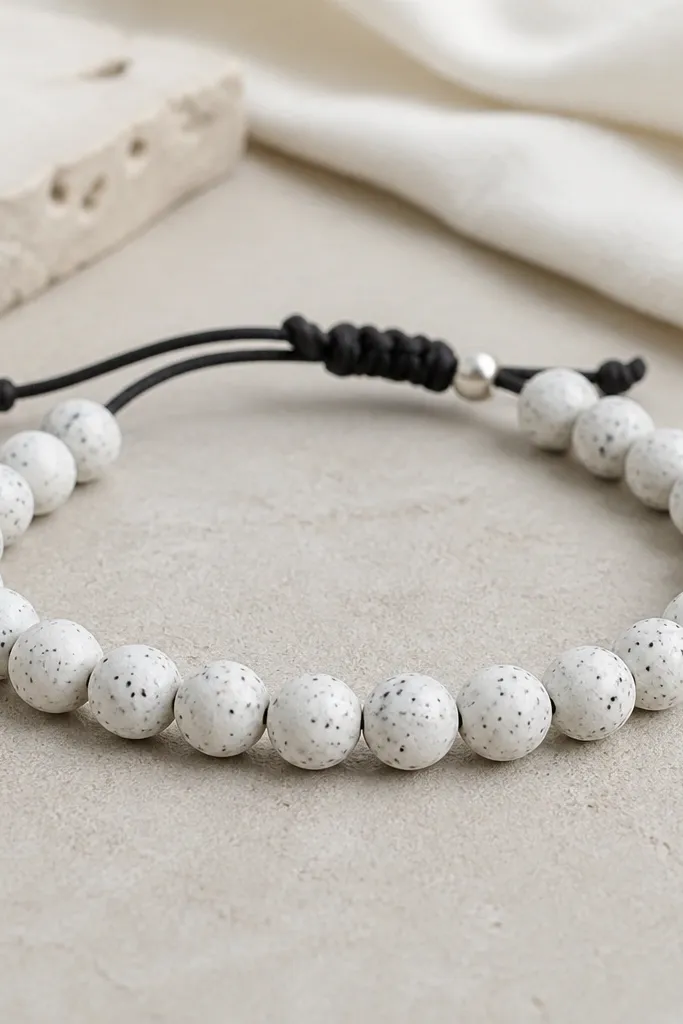
Speckle beads create a "designed" look without needing swirls or complicated shapes. I like white clay with black specks because it shows texture clearly and doesn't clash with most outfits. Keep hardware minimal - one silver spacer bead is enough to make it look styled.
Mix a small amount of black clay into a pinch of gray, then tear tiny bits and press them onto white beads. Roll beads to 8mm, then poke holes with a needle. Bake polymer clay and let cool. Use black nylon thread or stretch cord, then finish with a simple knot and a tiny drop of glue on the knot for grip.
Pro tipMake a little scrap "speckle tray" by pressing bits of black and gray onto a flat piece of clay - it makes repeating the speckle pattern faster.
AvoidDon't use too many colors in speckle - it turns into mud instead of crisp pepper dots.
6. Citrus Slice Beads with Clear Glassy Topcoat Look

Slice beads are the quickest way to get a themed bracelet that looks like jewelry. The trick is to build layers: outer ring, inner center, then a thin white line so the slice reads clearly. If you use polymer clay, you can get a "glassy" finish by sanding lightly and using a clear glaze.
Roll orange clay into a thin sheet, then cut circles. Add a smaller circle of pale yellow in the center and a thin white ring around it. Build a shallow bevel by pressing the edge inward slightly so it looks like a slice. Poke holes near the top edge, bake, sand the rim lightly, and apply clear glaze. String on caramel waxed cord with gold spacers.
Pro tipUse a craft knife to carve a shallow groove around the edge for extra slice realism.
AvoidDon't skip sanding before glaze - glossy glaze on rough clay looks patchy.
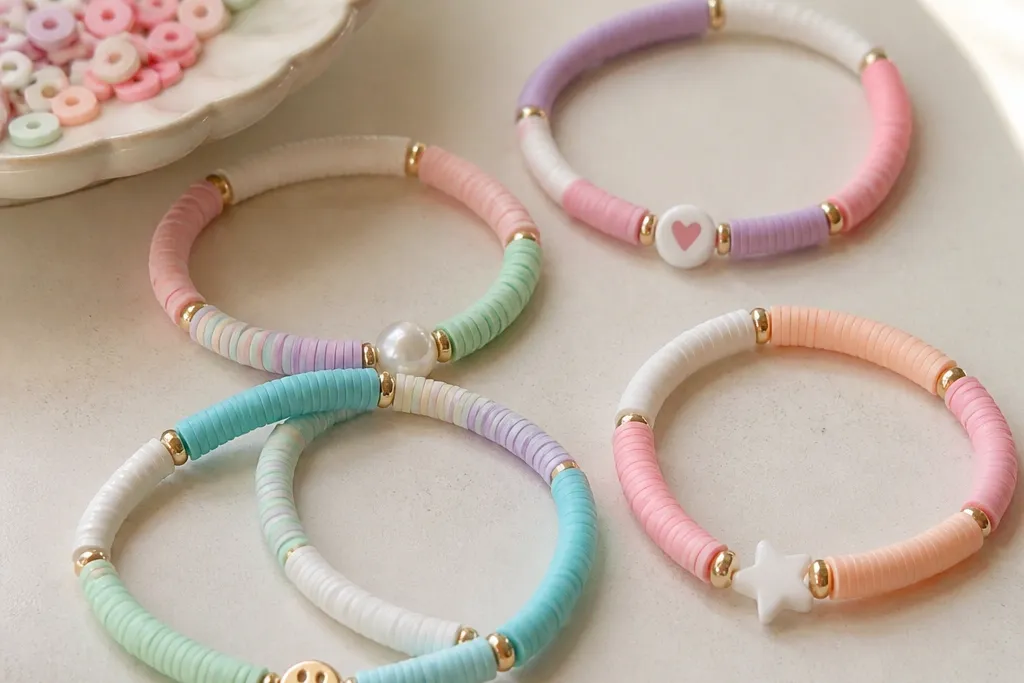
7. Pastel Geometric Cubes with Stretch Cord and One Charm
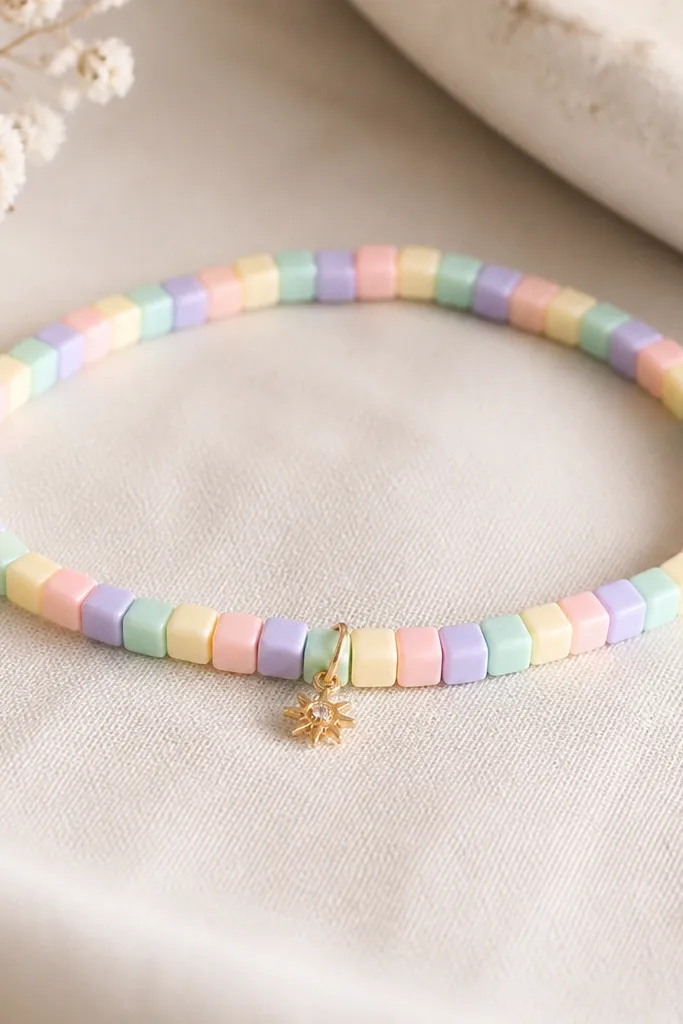
Cubes look modern and tidy, and they hide small imperfections better than tiny round beads. Pastels keep it soft, and one charm gives a focal point without turning it into clutter. I like using a small star or circle charm in silver because it balances the light colors.
Roll polymer clay sheets in 4 colors, then stack and slice into evenly sized cubes (about 6-7mm). Compress gently so edges stay crisp, poke holes through the center of each cube, and bake. Use stretch cord, add one silver charm charm with a small jump ring, and keep the charm near the middle bead for symmetry.
Pro tipIf cubes wobble on a flat surface, lightly sand the sides after baking to square them up.
AvoidDon't poke holes too close to an edge - cubes crack when the cord pulls.
8. Pressed Leaf Beads with Olive Cord and Brass Toggle
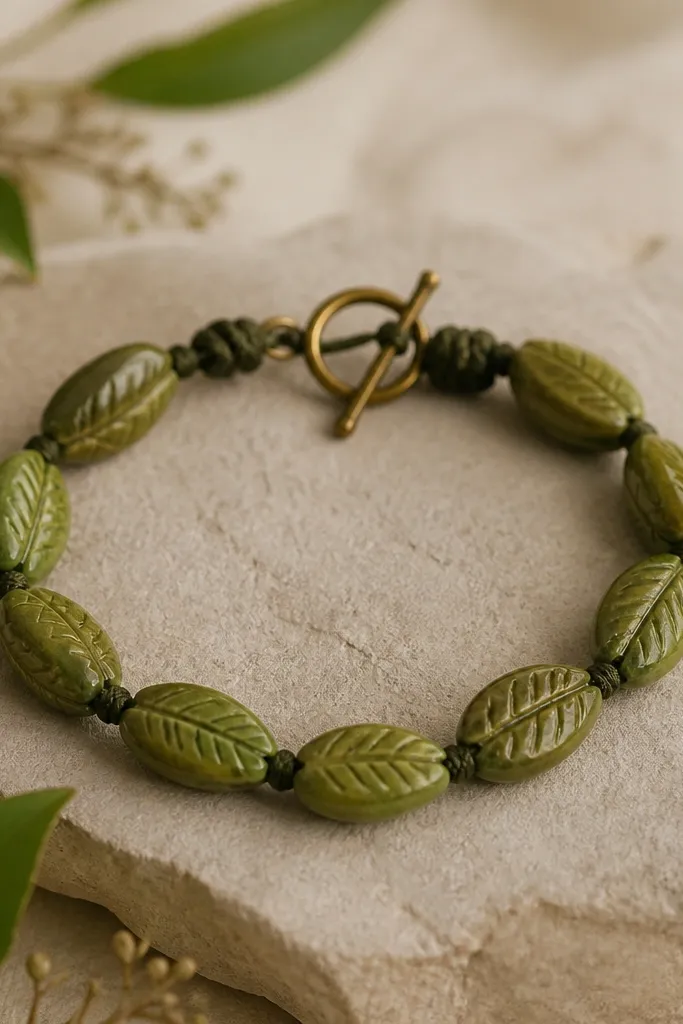
Leaf textures read instantly, even when the bead is matte. Olive cord makes the green beads feel intentional instead of "random craft green." I use leaf texture to avoid painting - the pattern does the work for you.
Roll air-dry clay into ovals, about 12mm long. Press a fresh leaf imprint (or a silicone leaf mold) into one side, then seal the edges so they dry without cracking. After drying, sand the back lightly, then apply a satin sealer. String with olive waxed cord and a brass toggle clasp; add two tiny brass seed beads between textured beads so the pattern breathes.
Pro tipChoose leaves with strong veins - thin leaves make faint impressions that disappear after sealing.
AvoidDon't press too deep - you'll weaken the bead and it can break when you thread.
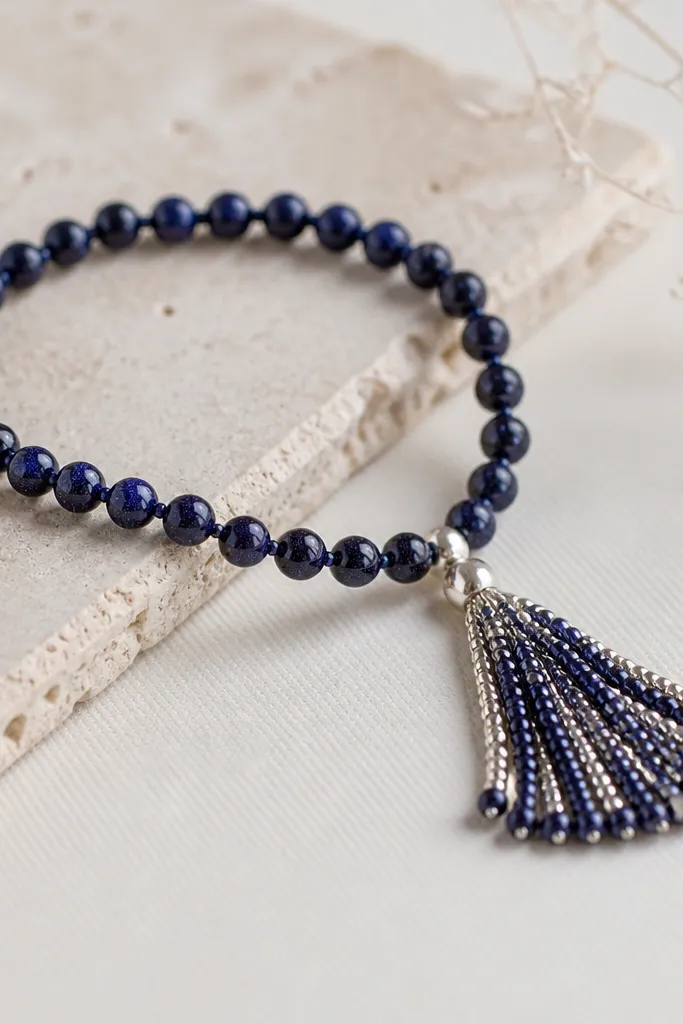
9. Galaxy Swirl Beads with Silver Chain Extension
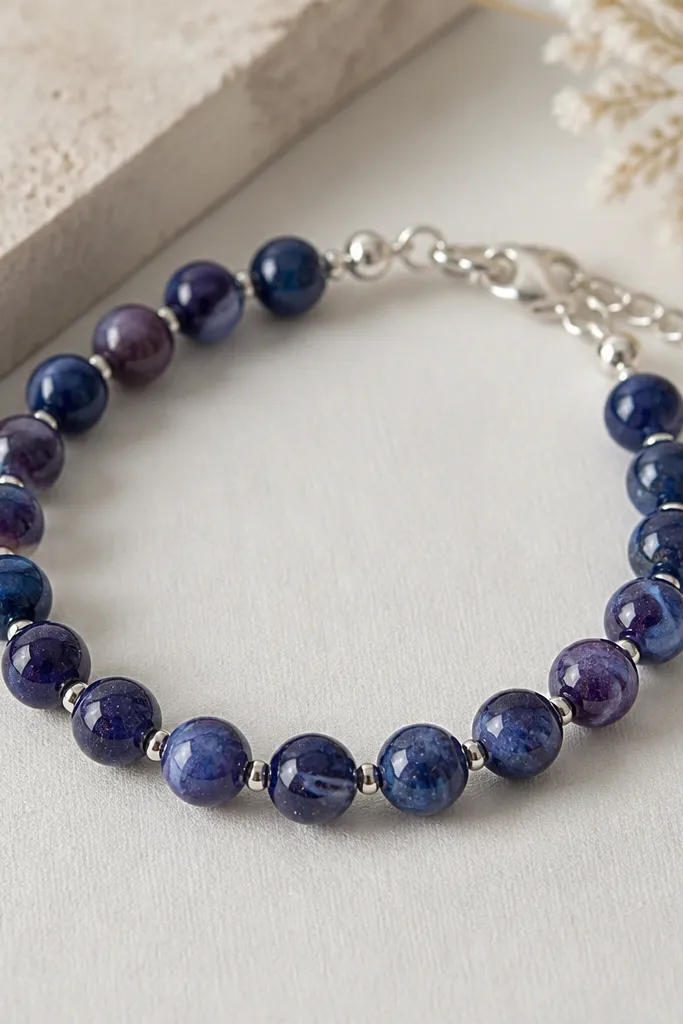
Galaxy beads look best when you keep the background dark and let the swirls be lighter, not bright. I add micro "stars" with white clay dots so the bead surface feels alive. A short silver chain extension makes it wearable for different wrists and keeps the clasp from tugging on the clay beads.
Blend navy and purple polymer clay, then fold in a thin strip of black and a thin strip of dark violet. Swirl 3-4 times, cut into 8-9mm beads, and poke holes. Add tiny white dots on top before baking. After baking, use silver jump rings to connect bead segments to a chain extension with a lobster clasp.
Pro tipUse a fine needle to place star dots - it keeps them tiny and evenly spaced.
AvoidDon't put stars on every bead if your dots are big - it turns into confetti instead of space.
10. Marble Heart Bead Drops with Gold Jump Ring Centers
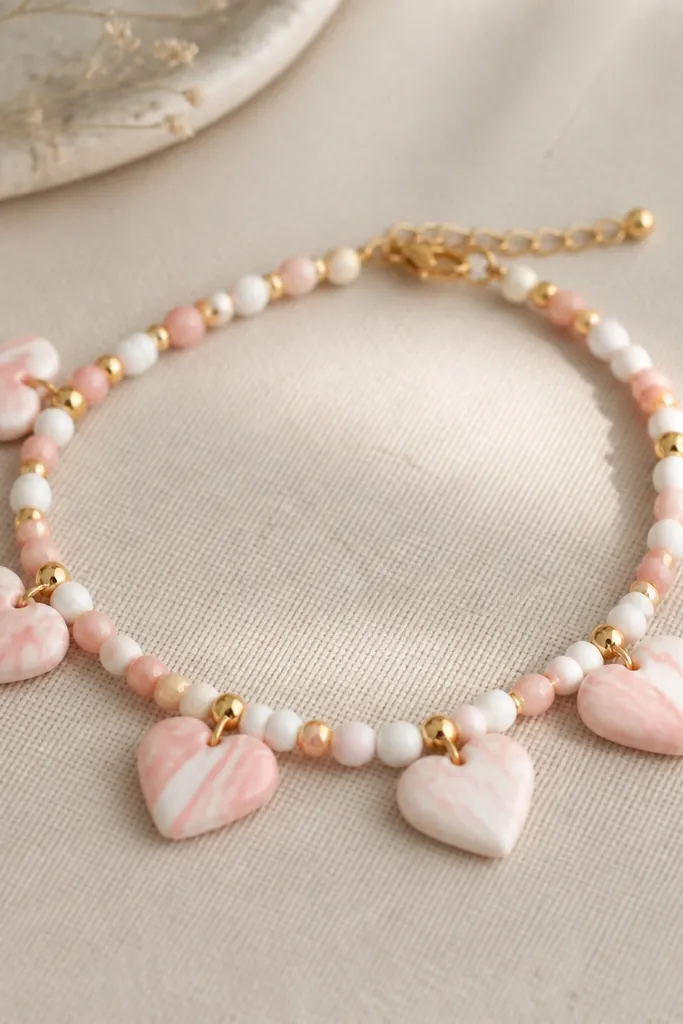
Heart drops add charm without needing extra charms, and marbling keeps them from looking flat. The gold jump ring center gives you a jewelry look immediately because it mimics a pendant setting. I like pairing hearts with tiny round beads so the bracelet stays balanced.
Roll two polymer clay colors (soft pink and white), swirl lightly, then press into a heart mold or freehand heart shape about 14mm tall. Poke a hole through the top point area, bake, and add a single gold jump ring to anchor the heart to the stringing. Use small round spacer beads between hearts for spacing - about 6-8mm rounds.
Pro tipIf hearts look uneven, reshape the bottom with your fingertip after molding - clay is forgiving before baking.
AvoidDon't use a thick heart edge - heavy hearts crack around the hole.
11. Terrazzo Beads in Speckled Teal and Cream with Clear Bead Spacer
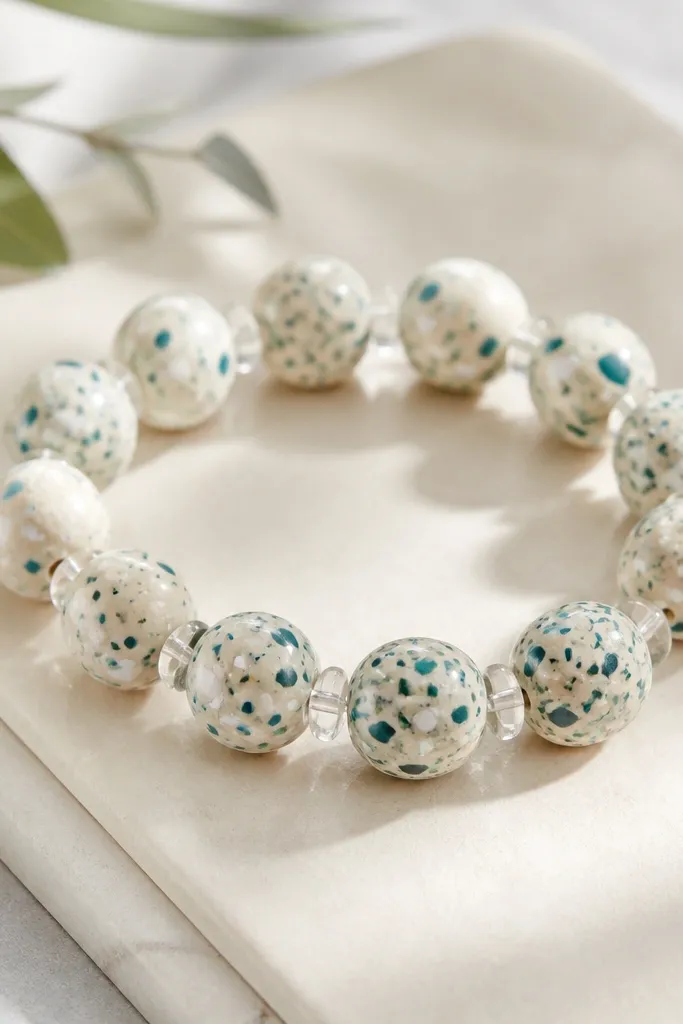
Terrazzo beads look like mini stone, and they're surprisingly forgiving. The irregular speckles hide small tool marks and make each bead unique. Clear spacers add sparkle without adding color, so the teal and cream stays the star.
Use polymer clay with a cream base. Press in tiny bits of teal, white, and a pinch of gray, then roll into rounds. Keep sizes consistent around 9mm. Bake, cool, and string with clear acrylic spacers between beads. Finish with a simple toggle or elastic knot plus one small crimp to keep tension even.
Pro tipFor better terrazzo texture, chop the colored clay bits small with a sharp blade - big chunks look more like lumps than stone.
AvoidDon't smooth the beads too much - terrazzo needs texture on purpose.
12. Monogram Initial Bead with Striped Surround Beads
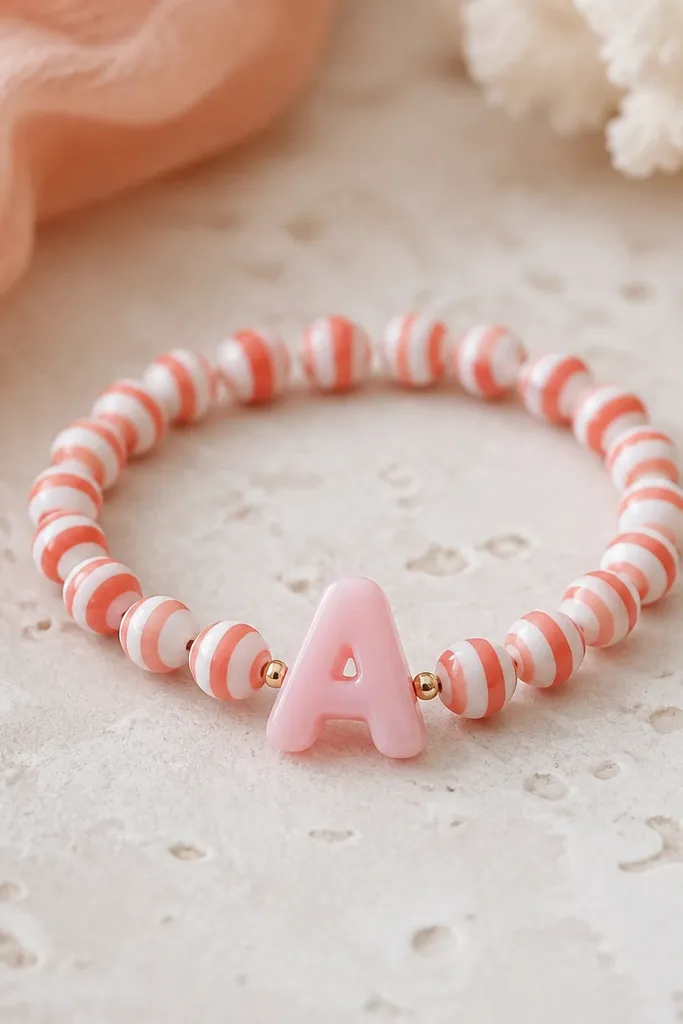
A single initial bead makes the bracelet feel personal fast. The striped surround beads keep it from looking like one random charm - they echo the color theme. I've made these for friends and the letter bead is always what people ask about first.
Roll polymer clay and create a letter bead about 12-14mm tall. Use a stencil or carve with a craft knife for clean edges. Bake the letter bead, then make small striped rounds by layering thin strips of white and coral, rolling, slicing, and rounding. String with matching cord or elastic and keep the letter bead centered by counting bead positions before knotting.
Pro tipPractice on scrap clay first for the letter shape - one minute saves you from redoing the focal bead.
AvoidDon't make the letter too thin - thin clay breaks around the hole.
13. Soda Pop Tube Beads with Red-Orange Cord and Brass Crimps
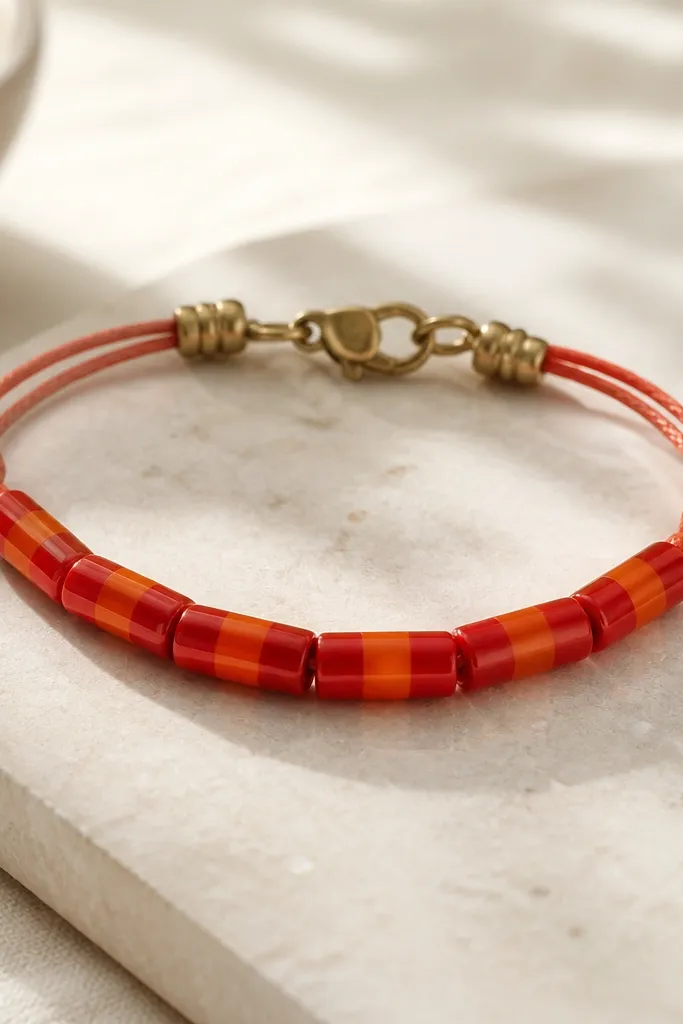
Tube beads with stacked bands look like candy and read clearly from across the room. Brass crimps make the bracelet look like jewelry-making hardware, not just cord and clay. This is one of the designs I grab when I want something bold but still quick to assemble.
Roll two colors of polymer clay into thin sheets and stack them with a narrow gap of white or cream between. Roll into a tube, then cut 10-11mm segments. Poke holes through the center before baking. After baking, string onto waxed cord, then use brass crimp beads on each end with a small jump ring for the clasp.
Pro tipUse the same thickness for both color bands so the stripes line up cleanly on every slice.
AvoidDon't skip brass crimps - knots on cord can slide and twist the bracelet.
14. Textured Bubble Beads with Pearl-Like Luster Finish
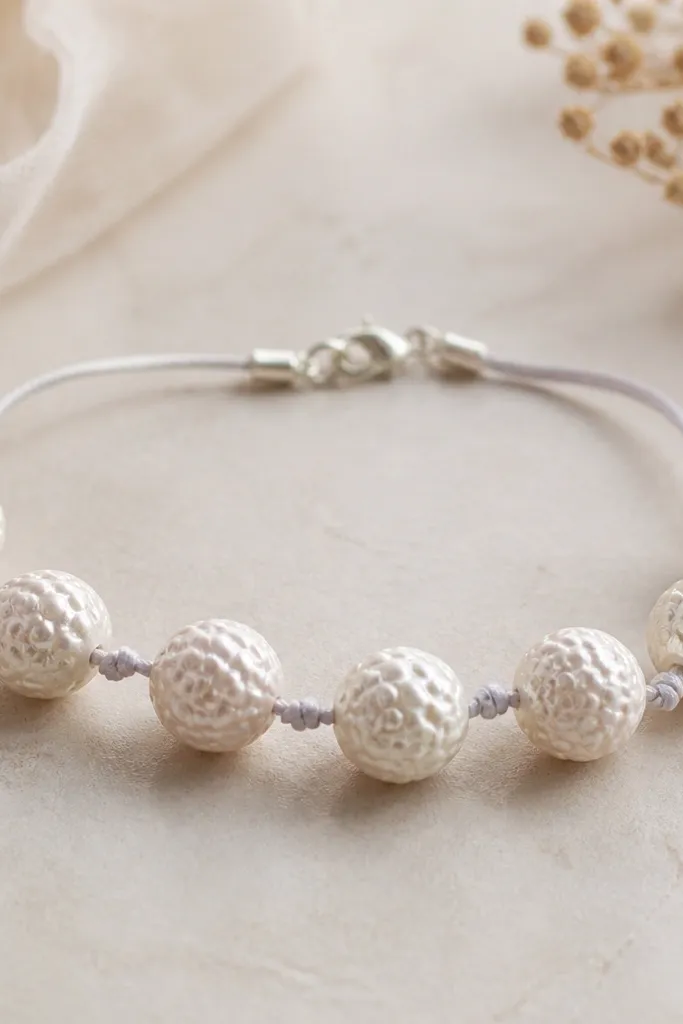
Bubble texture makes plain clay look like it has depth, and the pearly finish keeps it classy. I use a pearl mica powder over sealed clay beads for a gentle shimmer. These bracelets look great with sweaters and long sleeves because the texture catches light when you move.
Roll polymer clay into 8mm beads, then use a ball stylus to press small dimples all over. Bake, cool, and seal. Mix pearl mica powder with a tiny amount of clear craft medium (or pearly glaze) and brush a thin layer on the beads. String on satin cord with a small clasp; add one tiny silver spacer bead between every two bubble beads.
Pro tipTest mica on one spare bead first - too much mica can feel gritty.
AvoidDon't apply mica to unsealed beads - it soaks in and looks dull.
15. Ombre Bead Line Bracelet with Sliding Knot Closure
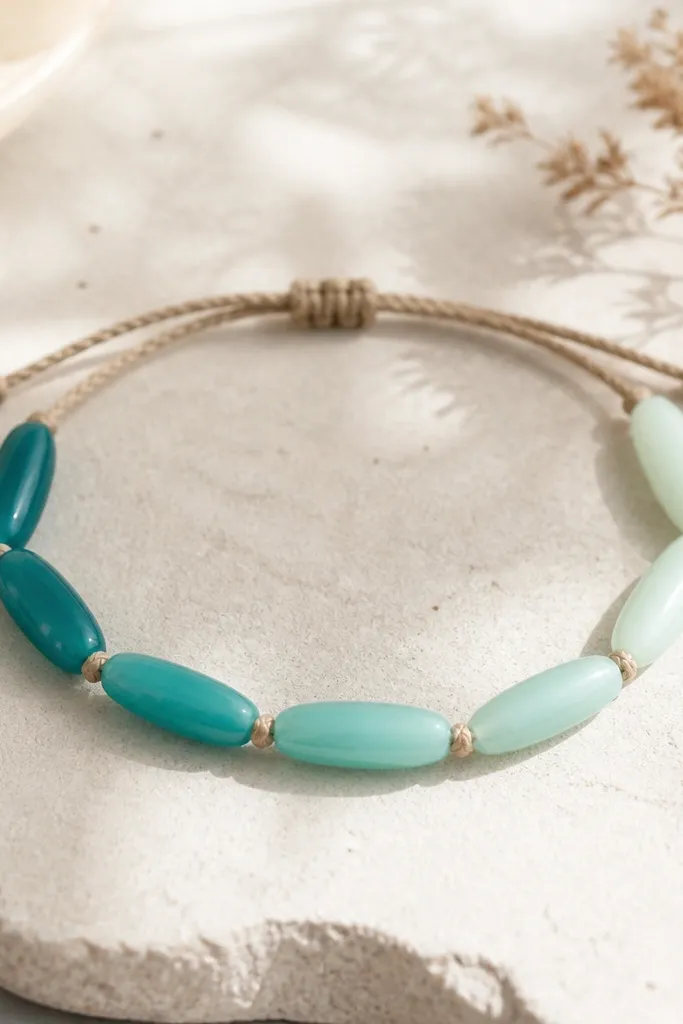
Ombre looks calm and expensive when the beads are the same shape and size. I use elongated beads because the color shift looks more gradual across the bracelet. A sliding knot closure lets you size it without adding metal hardware.
Roll polymer clay into a gradient by blending teal into aqua in 5 steps. Form elongated beads about 10x5mm, poke holes, and bake. Thread on waxed cord and separate beads with 2-3mm micro spacers so the ombre line stays smooth. Finish with a sliding knot: tie a knot at the end, then pass cord back through to create a loop that tightens.
Pro tipMake your gradient steps before bead shaping so each bead batch is consistent.
AvoidDon't mix random colors inside one bead - ombre needs clean transitions.
16. Mini Galaxy Star Beads with Seed Bead Fringe End
Seed bead fringe makes a clay bracelet feel like a statement piece without adding bulky charms. Keep the clay beads small so the fringe stays the focal point. I like a dark blue and silver combo because it reads like night sky.
Bake small polymer clay beads (6-7mm) in navy with white star dots. String 10-12 beads onto stretchy thread. At one end, attach a jump ring to a small spacer bead, then stitch seed bead fringe: use a 12mm length of seed beads and secure with thread back through the spacer ring. Finish with a clasp or tie-off knot.
Pro tipHang fringe after you've strung the bracelet once - you'll see the length in real life and can trim cleanly.
AvoidDon't make fringe longer than 15mm - it tangles easily with sleeves.
17. Botanical Speckle Beads with Tiny Leaf Charms
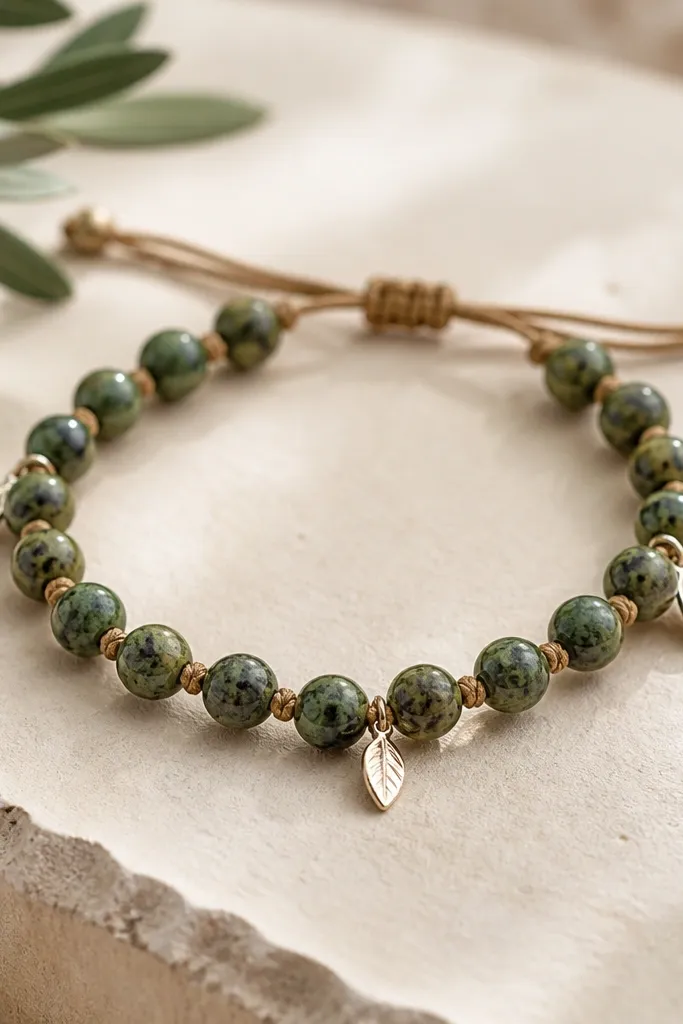
This design uses the clay surface for texture and the metal charms for movement. The green speckles look like plants under sun, and the small leaf charms make the theme obvious without painting. I like it because it's wearable year-round - not just spring.
Roll polymer clay in a muted green base. Press tiny white and darker green specks onto beads (8mm), then poke holes. Bake and cool. String beads on light brown waxed cord with 4-6 tiny leaf charms spaced out using jump rings. Keep charm count low so the bracelet doesn't clink too much.
Pro tipIf your leaf charms rattle, add one small spacer bead between each charm and the next clay bead.
AvoidDon't overload charms - too many makes the bracelet feel heavy and noisy.
18. Rope-Cord Wrap Bracelet with Flat Clay Medallions
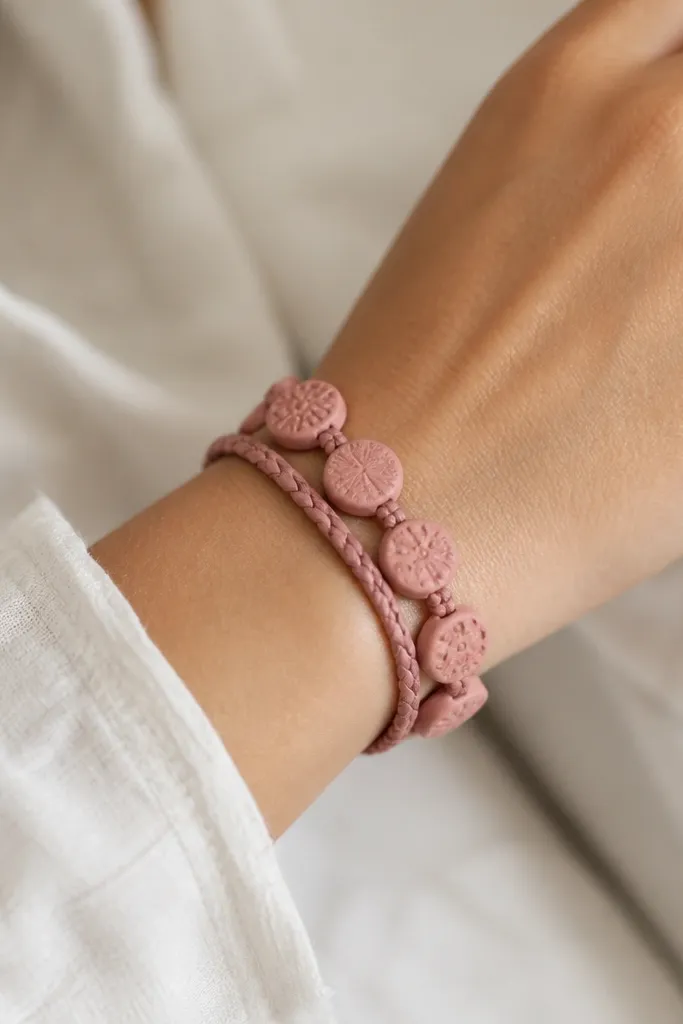
Flat medallions look like tags and give a bracelet an easy, fashion-forward vibe. Wrap bracelets also hide small bead stringing mistakes because the clay pieces are stitched or tied into place. Dusty rose keeps it soft and works with both casual and dressy outfits.
Make flat polymer clay medallions about 18mm wide and 3-4mm thick. Press a texture stamp lightly or carve a simple wave line with a craft knife. Bake, then attach each medallion using a thin jewelry wire loop or by tying cord through a hole in the center edge. Wrap the cord twice around the wrist and tie at the back.
Pro tipUse a leather punch or needle to make holes before baking - it keeps the edges cleaner than post-baking drilling.
AvoidDon't make medallions too thick - thick pieces lift and snag on sleeves.
19. Crackle Finish Beads with Clear Elastic and Tiny Stopper Beads
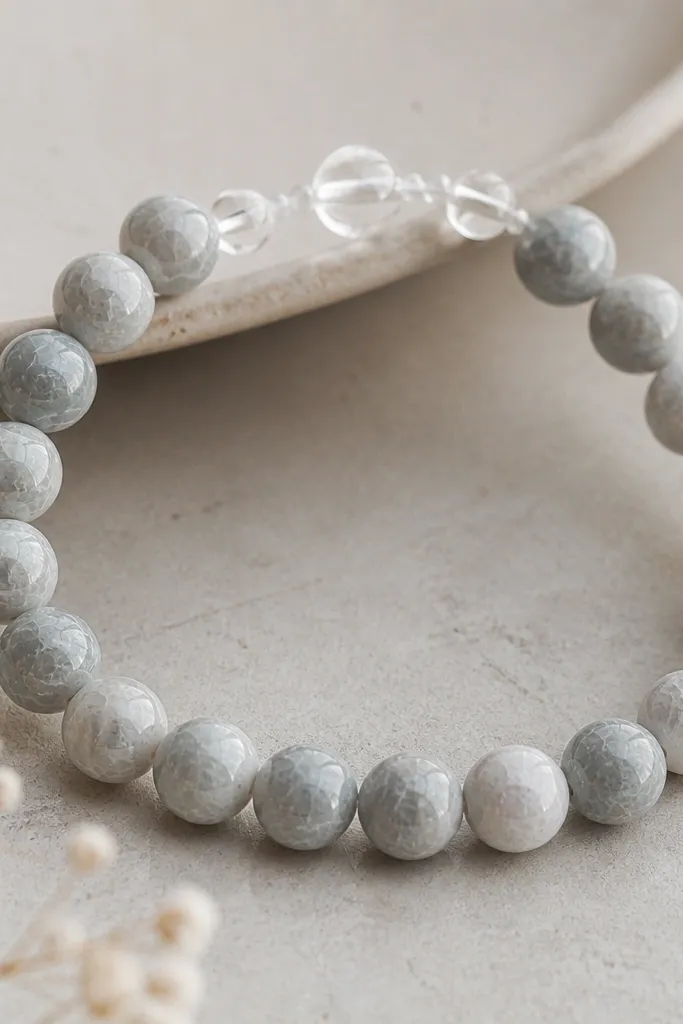
Crackle beads make clay look like ceramic. The crackle pattern adds visual interest so you don't need extra colors or charms. I like gray and white because it feels modern and it matches almost everything.
Use polymer clay and create crackle by layering two colors and baking - then lightly coat with crackle effect glaze if you have it. Shape into 8mm rounds, poke holes, bake fully, and cool. Thread onto clear elastic, then add tiny stopper beads near the knot so the knot doesn't shift and twist the crackle pattern.
Pro tipStretch test your elastic before assembling - if it fights you, you'll end up with a twisted bracelet.
AvoidDon't handle crackled beads too soon after baking - the surface can be fragile while warm.
20. Tiny Beads with One Big Center Slider Bead
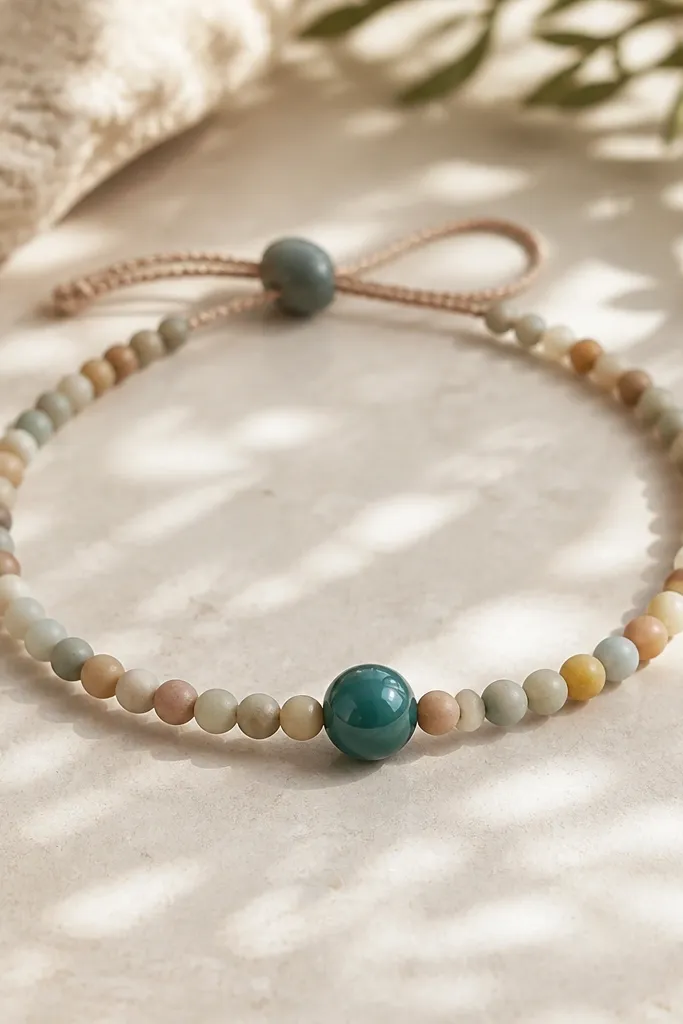
This is the easiest way to get "designer" balance: small beads fill the space, and one big bead gives the focal point. The slider bead lets you adjust the look - you can move it to the center when wearing. I've made this for myself and it's the one I reach for when I want something pretty but not fussy.
Make or buy small round polymer clay beads in 3 muted colors. Create one larger slider bead about 15-18mm with a smooth hole large enough for cord to slide. Bake and seal if needed. String small beads first, then thread the slider bead onto the cord, then add end beads or knots to limit movement. Use a cord that has a bit of grip, like nylon stretch with a clear finish.
Pro tipTest the slider bead fit on scrap cord before committing - if it's too tight, it won't move comfortably.
AvoidDon't make the big bead hole too small - you'll stress the cord and it will fray.
21. Butterfly Wing Beads with Pearl White Base
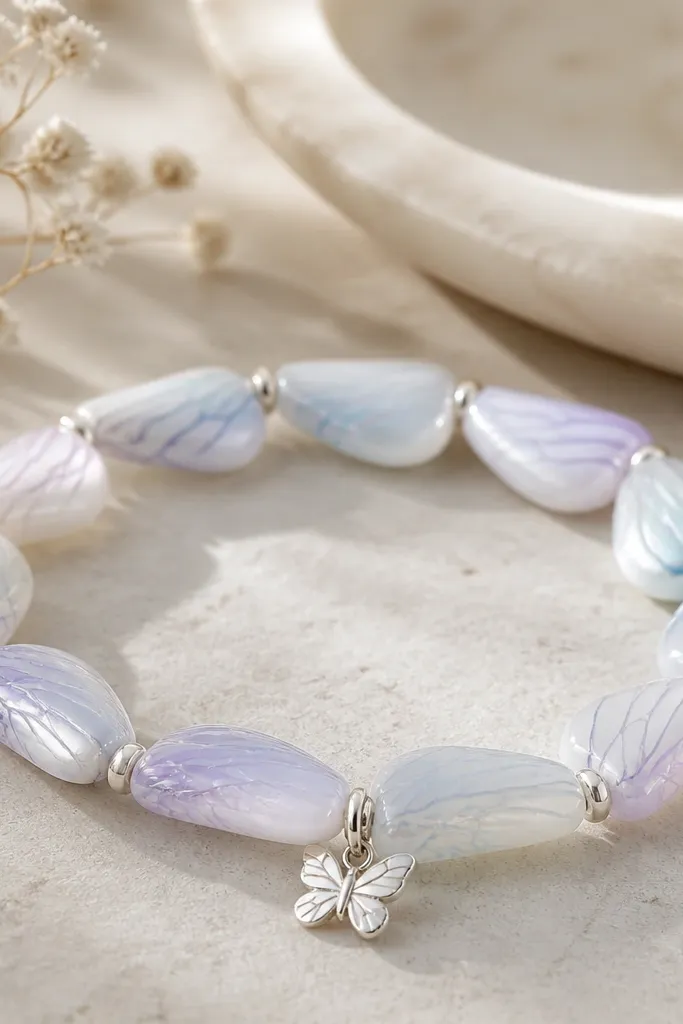
Butterfly wing beads look delicate but they're straightforward: you create a pearl base and add thin translucent color lines. The wing effect comes from layering thin sheets and gently blending edges. I like this bracelet because it feels light on the wrist even with multiple beads.
Use polymer clay for a pearl white base (or paint air-dry clay after sealing). Roll thin translucent blue and lavender sheets and place them on top of the base bead, then lightly blend the edges with a fingertip. Press a wing vein texture stamp or use a silicone leaf vein pattern. Bake, then add silver spacer beads between each wing bead and one tiny butterfly charm.
Pro tipBlend edges with a damp cotton swab instead of your finger if you want cleaner transitions.
AvoidDon't overmix the translucent layers - blending too hard removes the veining.
22. Gold Foil Edge Beads with Matte Clay Body
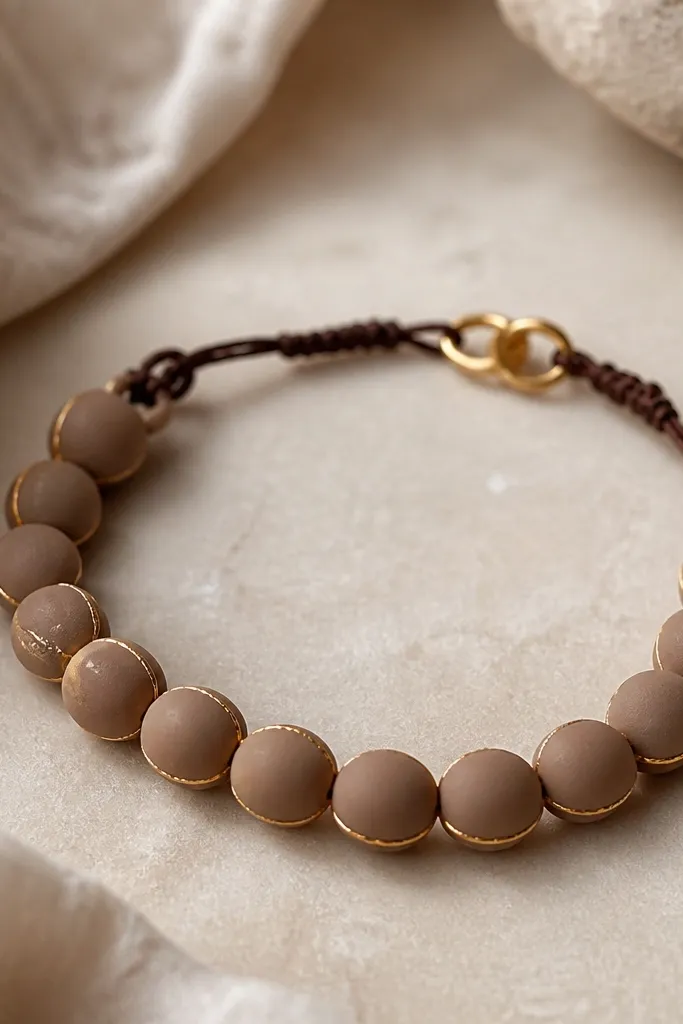
Gold foil edges make plain matte beads look like they belong in a jewelry store. You only need a narrow gold band around each bead, not full gilding. Warm taupe keeps the gold from turning flashy, and the dark cord grounds the look.
Make polymer clay beads in taupe and bake. After cooling, apply a thin layer of leaf adhesive to just the bead edge and press gold foil onto the rim. Seal with a matte or satin topcoat so the foil doesn't rub off. String on dark brown waxed cord with a small gold clasp and one gold spacer bead between every two clay beads.
Pro tipRotate the bead under good light while applying adhesive - it helps you keep the foil band even.
AvoidDon't seal before the foil fully bonds - you'll smear it and lose the crisp edge.
23. Storybook Candy Stripes with Clear Slider Spacer Bead
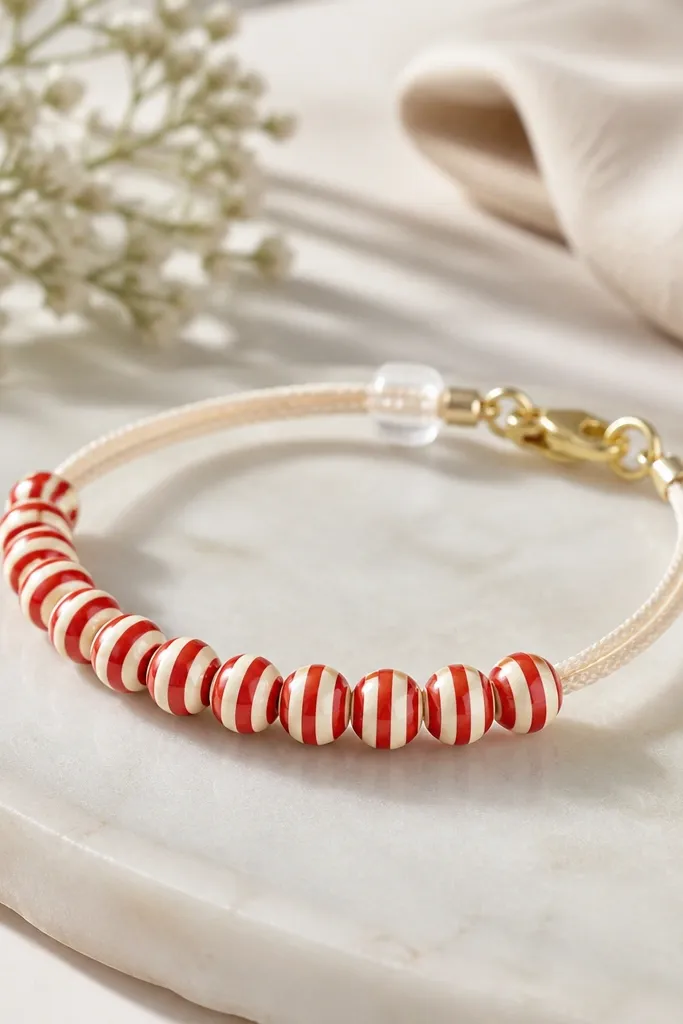
Candy stripes are a great beginner win because the pattern is simple and repeatable. The clear slider spacer bead is practical too - it keeps the bracelet from bunching and makes the fit adjustable. This is the design I make when I want something cheerful but still tidy.
Roll polymer clay into red and cream stripes, roll into a tube, slice into 10mm beads, and round the edges slightly. Poke holes before baking. After baking, string onto clear elastic or thin nylon cord. Add the clear slider spacer bead near the clasp, then finish with a charm or a small knot cover.
Pro tipSlice the tube with a single decisive cut - jagged slices create uneven stripes.
AvoidDon't skip rounding the edges - sharp bead corners chew through elastic over time.