

1. Cork Coaster Set with Burnt-Edge Lettering
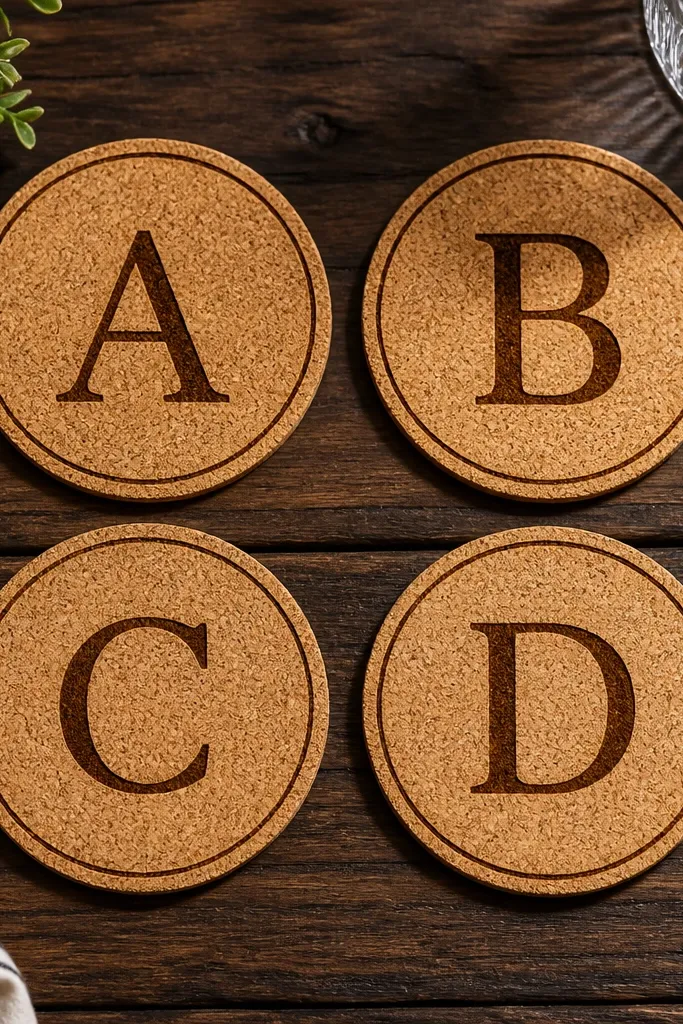
This is one of my go-tos for easy DIY gifts to make because it looks intentional on his desk right away. Cork has natural speckling that hides small DIY imperfections, so the set can be made with basic tools and still look clean. Burn the lettering in a single color — dark brown from a wood burner — and keep the design to one letter per coaster for a modern look. He’ll feel the texture every time he sets down a mug, and it works especially well if he likes coffee, whiskey, or just a neat office. If his style leans industrial, pair the cork with black or charcoal lettering; if he likes warm tones, go for a lighter cork and keep the burn lighter.
Start by buying 4-8 round cork sheets cut into 4 inch circles, or cut cork with a craft knife and trace a cup for consistency. Sand the top surface lightly with 220 grit so the burner doesn’t skip. Use a wood-burning pen to burn one monogram letter centered on each coaster, keeping the lines narrow and stopping before you over-blacken the edges. Seal with a thin coat of clear matte Mod Podge or a water-based clear sealer so the cork doesn’t darken with use. Let it cure overnight before stacking them in a small tray.
Editor's noteBefore you commit, test your burn setting on a scrap cork circle for 10 seconds and check the darkness in daylight.
Skip thisDon’t write cursive for the first try — thick loops look messy on cork.
2. No-Sew Felt Key Fob with Stitched Look
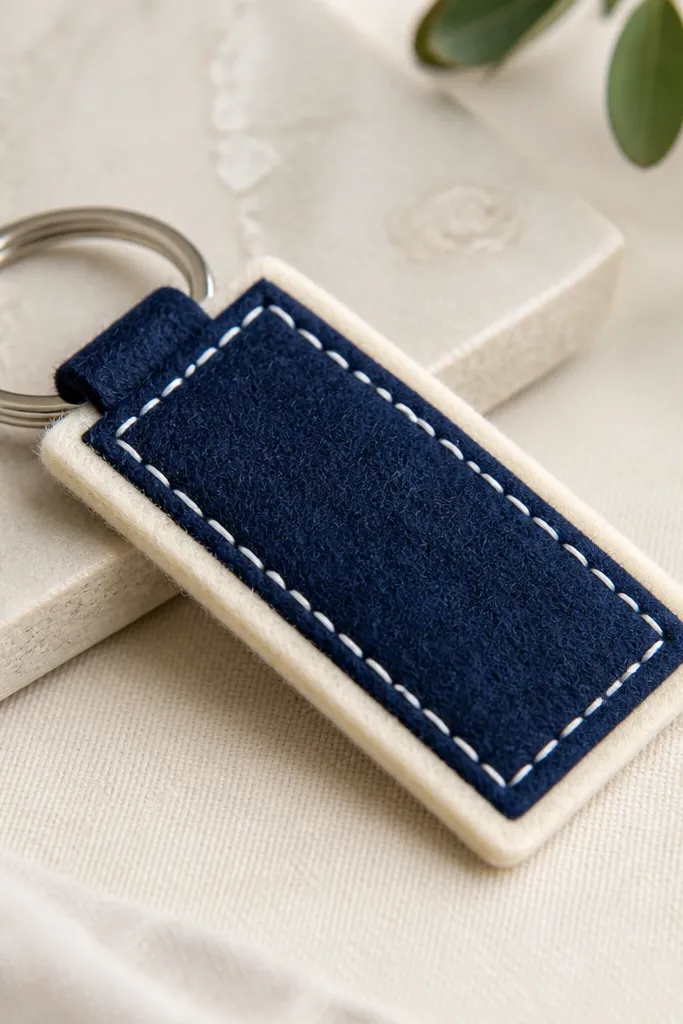
This gift is small, but it hits the “cute and useful” target every time. Felt holds its shape, so even if you’re not a sewer, the finished piece looks structured. I like deep navy or charcoal felt with a cream faux stitch line because it reads clean against dark keys. It flatters him if he carries bulky keys — the fob keeps them from chewing up his pockets and bag lining. If he dresses more casual, add a small metal tag with a single stamped number or initial.
Cut a rectangle of felt to about 4.5 inches long and 2 inches wide for one key fob body. Fold it around the keyring area so the seam sits on the back, then glue the edges with a fabric glue or hot glue that won’t soak the felt. Make faux stitching by running a thin line of white fabric marker or paint pen 1/8 inch from the border, then add 2-3 short horizontal lines to mimic seam steps. Add a small felt loop tab on one side for a keyring strap, glue it in place, and press for 30 seconds. Finish by trimming any uneven edges with sharp scissors.
Editor's noteUse a fabric marker that dries matte; glossy markers look cheap on felt.
Skip thisAvoid thick glue blobs on the front — they create shiny lumps that catch light.
3. Leatherette Desk Key Tray with Corner Punches
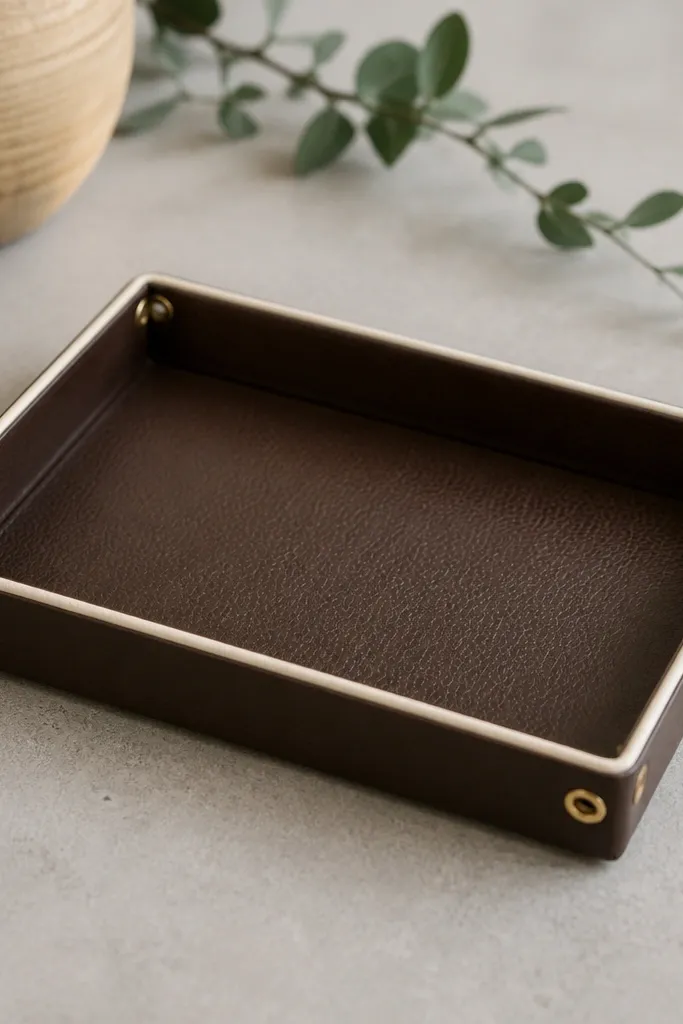
This one looks like something you’d buy for him, not make for him. Leatherette gives you that smooth, uniform surface that hides minor cutting mistakes, and the tray shape keeps keys from clattering. I like dark brown leatherette with a cream binding because it frames the tray and makes it look crisp on a nightstand. It flatters a guy who likes tidy surfaces, and it also works well if he has a console table where keys always end up. For color matching, keep the binding in the same tone as his wallet or belt hardware.
Start with a rigid base like a foam board sheet or a thin plywood scrap cut to about 7 x 4 inches and 1 inch tall sides. Cut leatherette to wrap the base plus extra for folding over edges, then glue the leatherette down starting with the long sides. Fold and glue corners tightly, then punch small holes at each corner and add brass eyelets or grommets for a finished look. If you want extra structure, add a thin strip of leatherette as an edge binding and glue it around the top lip. Let glue cure fully before dropping keys in.
Editor's notePress the wrap with a flat weight for 20 minutes so the leatherette stays smooth.
Skip thisDon’t use paper-thin base material — floppy trays look unfinished fast.
4. Photo Transfer Mug with One-Word Caption
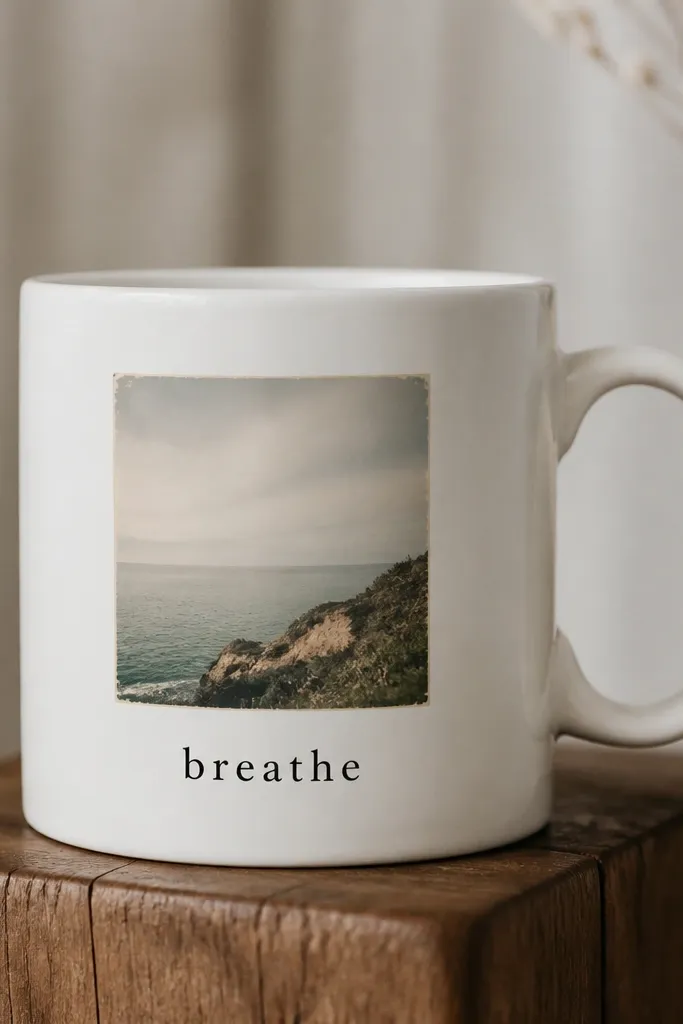
A mug is the easiest “everyday” gift, and a photo makes it feel personal without getting sentimental in an awkward way. I keep it to one photo and one word because too much text looks cluttered. Choose a photo with strong contrast — like him in a jacket in shade — and print it so the subject fills most of the square. The word should be short: “Always,” “Weekend,” or “Driver” for a running joke. This works best for guys who drink coffee, tea, or hot chocolate daily and don’t mind a little personal decoration on their desk.
Print your photo on laser printer paper sized to fit about a 2.5 inch square, then cut it with a clean border. Use a photo transfer medium made for ceramics or follow the method that matches your medium; I’ve had the most consistent results using a ceramic transfer film set. Place the photo on the mug where you want it and burnish gently with a spoon so there are no air pockets. Apply any required sealant layer and cure according to the product directions, usually involving a low-heat bake. Let it cool completely, then hand-wash only for the first week.
Use a matte-finish photo print if your medium shows glare — it makes the image look more natural.
Don’t pick a low-contrast photo — the transferred image turns gray and looks washed out.
5. Map-Page Wall Frame for His City Memory
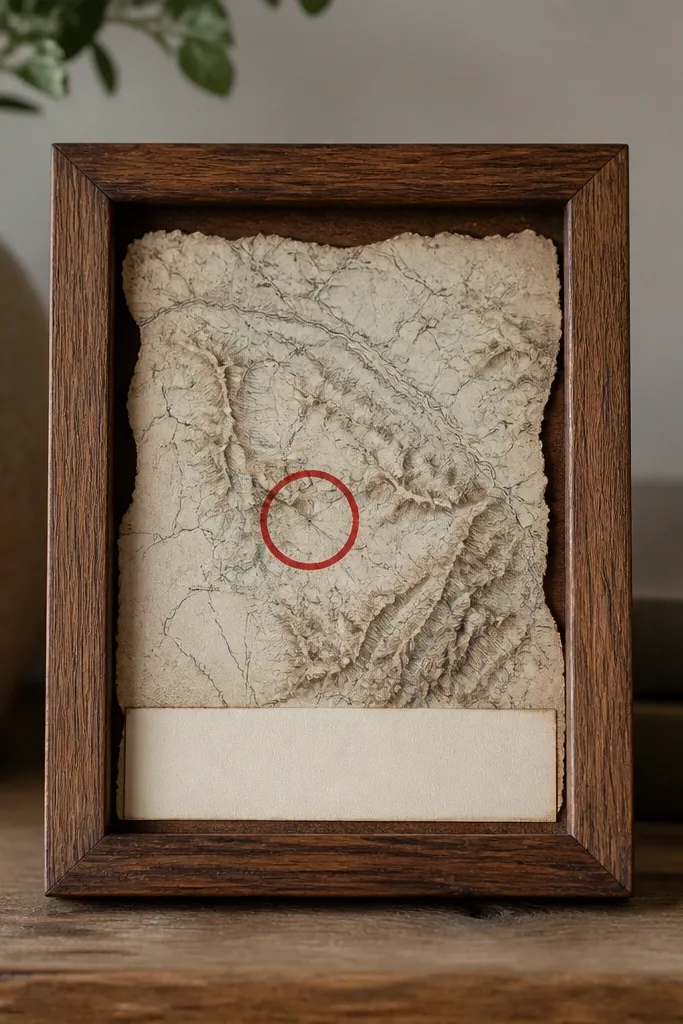
If he loves travel or has a hometown he talks about, this feels personal without needing a big scrapbook. The map page gives texture and history, and the red circle makes the location instantly readable. I like frames that are 5 x 7 inches, because that size looks good on a hallway wall or shelf. Keep the label simple — one line with the city name or a date. This works great for people who don’t want photos everywhere but still want something meaningful to look at.
Find a map page with the right scale — cities with bold street lines look best. Tear the map to fit the frame opening, then distress the edges with a quick rub of sandpaper for a soft worn look. Draw a circle around the location with a fine red marker and add a small arrow pointing to the exact street. Cut a cream label strip from cardstock and glue it at the bottom center with the city name in black marker. Insert into the frame with the glass, and tighten the backing so the paper lies flat.
Use a white gel pen to add tiny street highlights so the red doesn’t carry everything.
Avoid glossy map paper — it reflects light and makes the drawing harder to see.
6. Wood Slice Coaster with Clear Epoxy River
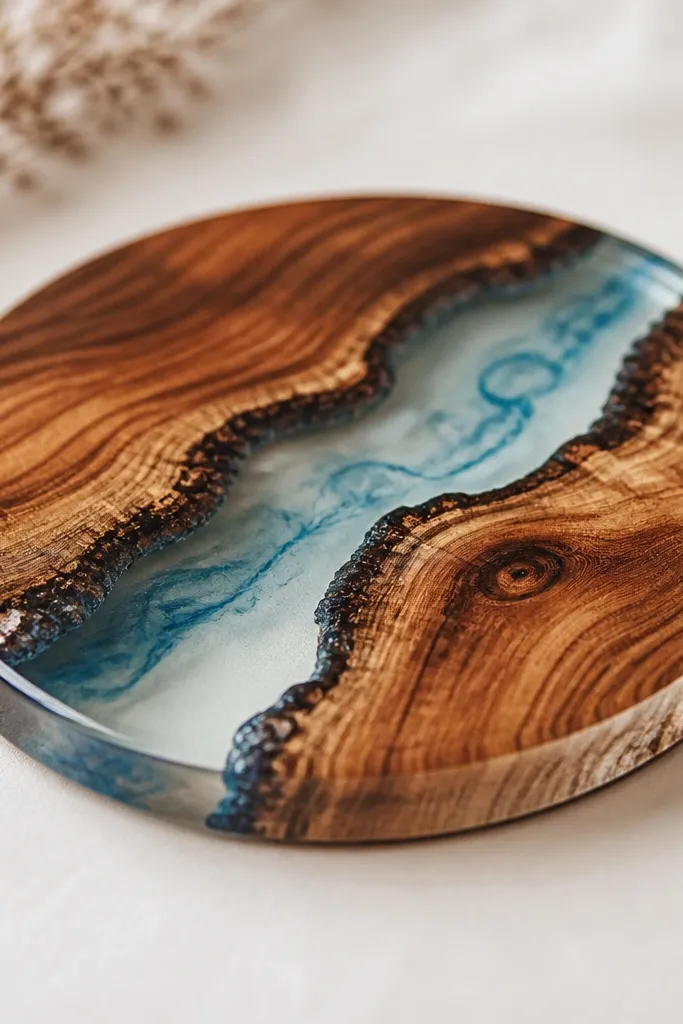
This is a “wow” looking gift that stays beginner-friendly if you keep the design simple. A wood slice gives you real grain, and a clear epoxy river adds that calm, water-like movement. I like tinting the epoxy with a small amount of blue pigment so it looks like sky or river water, not candy. It suits guys with a cabin vibe, woodworking hobbies, or anyone who loves natural textures. If he uses coasters every day, this gets used, not displayed once and forgotten.
Start with a 4 inch wood slice coaster, sand both sides and edges to remove roughness. Seal the wood with a thin wood sealer so epoxy doesn’t soak in unevenly. Mix a small batch of clear epoxy and add just a few drops of blue tint, then pour a thin line across the surface to create a river shape. Use a toothpick to drag the tint slightly so it forms gentle swirls. Let cure fully — then sand the top lightly and add a final thin clear coat for a glassy finish.
Editor's noteWarm the epoxy bottle in your hands for 2 minutes so bubbles rise faster.
Skip thisDon’t pour thick in one go — it can cure cloudy and crack.
7. T-shirt Yarn Keychain with Braided Loop
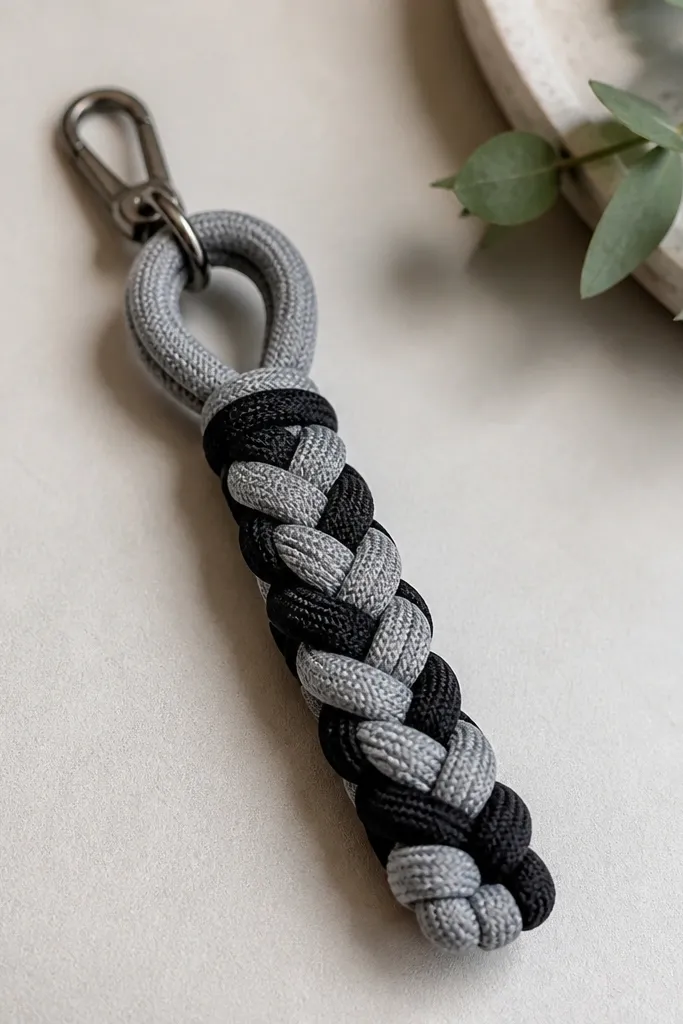
This is the kind of easy DIY gifts to make that recycles something he already loves. T-shirt yarn has a soft stretch and a matte look that feels cozy, not craft-store. Use two colors that match his wardrobe — heather gray + black is a safe combo, or olive + tan for outdoorsy guys. The braided loop is sturdy, and the keychain keeps keys from jangling. It works especially well for someone who always has keys on a belt loop or lanyard.
Cut strips from an old cotton t-shirt about 1 inch wide, then stretch each strip to curl slightly into yarn. Tie three yarn strips at one end and braid them tightly, keeping tension consistent. Add a small knot at the end and trim, then glue the last braid tail with fabric glue or a tiny hot glue spot. Create a loop by folding the braid back on itself and stitching or gluing it in place. Attach a metal key clasp and seal the knot area with a thin glue coat.
Editor's noteUse a thicker strip width (1.25 inches) if you want a bulkier, more premium look.
Skip thisDon’t use slippery fabric like polyester — the yarn braid loosens.
8. Custom Bottle Cap Fridge Magnet Set
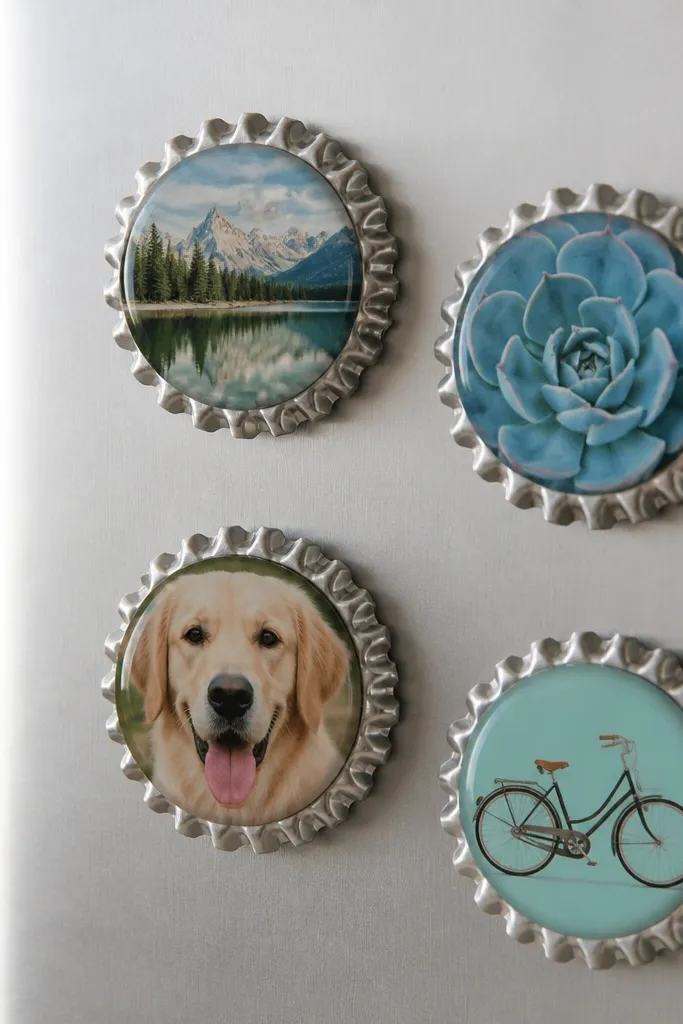
This is a fun gift that looks neat, not childish, and it’s fast. Bottle caps give you a hard, round frame, and the clear top makes the image look glossy like a tiny badge. I keep the set to four magnets so it feels like a gift, not a random craft pile. Pick photos with strong faces or simple logos — they read clean at fridge distance. It’s perfect for guys who keep a messy fridge with takeout menus and sports schedules.
Pop open bottle caps and clean them with warm soapy water, then dry fully. Print small circles of your image on photo paper and cut them to fit the inner cap area. Mix or use clear resin designed for crafts, or use a clear-domed resin kit, then glue the image into the cap and pour resin to cover. Attach a strong round magnet to the back with epoxy or heavy-duty glue. Let cure 24 hours so the magnets don’t peel.
Editor's noteUse matte photo paper under resin — it reduces glare and makes colors look richer.
Skip thisDon’t skip cleaning oil residue — resin separates from the metal.
9. Canvas Wash Bag with Sharp Corner Piping
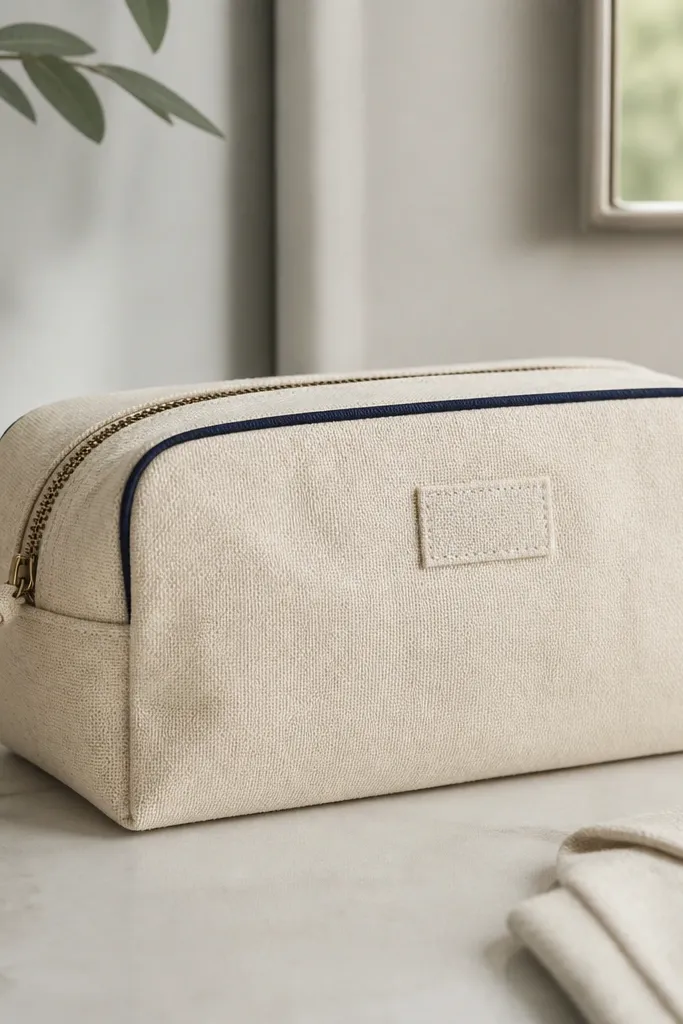
A wash bag is one of the most practical easy DIY gifts to make because it gets used on every trip and every gym day. Canvas holds structure, so the bag doesn’t flop like thin fabric totes. The piping adds that store-bought finish even if you only sew straight seams. I like natural canvas with navy piping and a navy zipper because the contrast looks clean in photos and in real life. It flatters him if he keeps his toiletries organized — and it’s also great for someone who always borrows someone else’s bag.
Cut canvas fabric to about 10 x 14 inches for the front/back panels and 3 x 14 inches for the sides if you’re boxing corners. Add a lining if you want it to wipe clean — use a thin cotton or polyester lining fabric. Sew piping to the top edge first, then attach the zipper between front and back panels. Create boxed corners by folding side seams so the bottom forms a small rectangle and sewing across it. Finish by adding a small label patch on the front with hand stitching or a fabric glue patch.
Press seams with a warm iron before you sew the next step — crisp edges make it look professional.
Don’t skip lining if he’ll use it for wet items — unlined canvas stains.
10. Shoe-Lace Bookmark Set with Metal Eyelet Ends
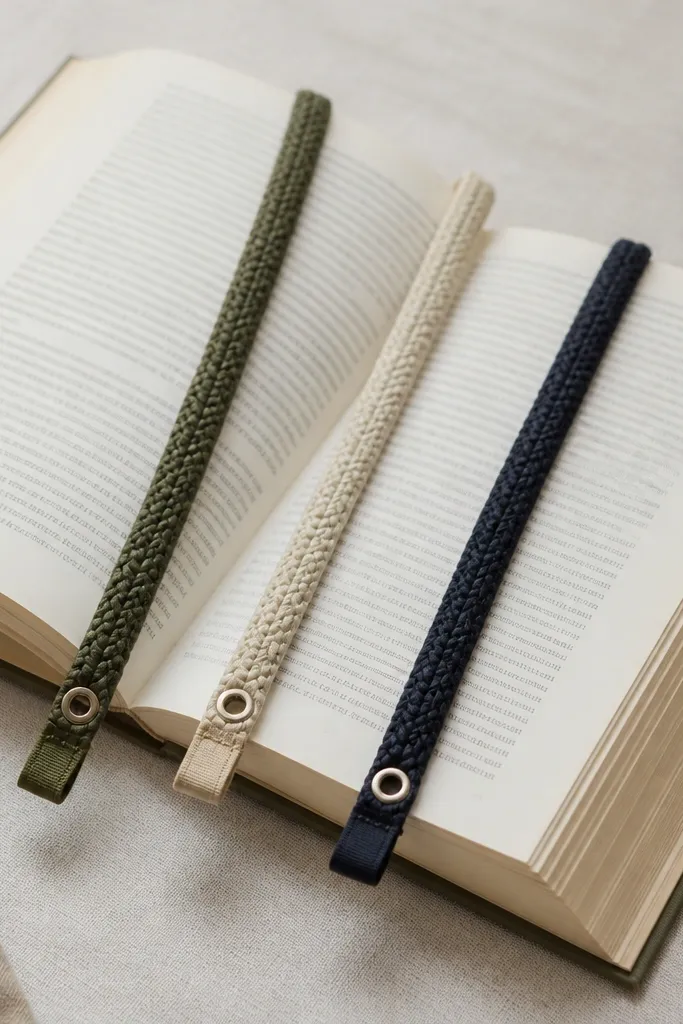
This gift is perfect when you need easy DIY gifts to make that don’t take up space in his life. Braided laces are sturdy, and the metal eyelet ends keep the tips from fraying or bending. I make sets of three in matching tones — black, charcoal, and a single accent like tan — so he can mark different books or re-read sections. It works well for guys who read paper books, study, or keep notebooks. The look is sporty and clean, not messy, especially if you keep the lace ends short and even.
Cut three shoe laces to about 10-12 inches long each, trimming ends straight. Add metal eyelet end caps by threading the lace through a small eyelet loop, then secure with a tiny stitch or fabric glue at the fold. Fold a small loop at the top of each bookmark and stitch it down so it hooks over a page without slipping. If you want a more finished look, wrap the top loop with a thin strip of matching leatherette and glue it. Let glue dry fully and test on a book page before packaging.
Editor's noteUse a waxed lace for less fray and a smoother slide through pages.
Skip thisAvoid long bookmarks that drag — cut them so they sit 2-3 inches above the page edge.
11. Handmade Soap Bar Labels with Letterpress Look
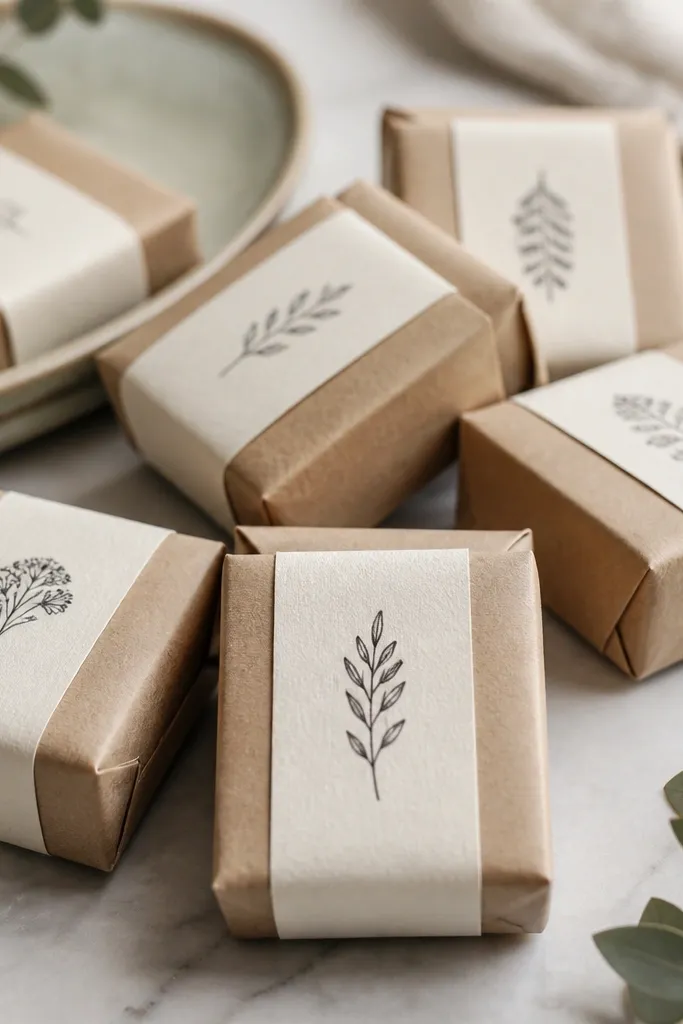
If you want easy DIY gifts to make that feel grown-up, custom labels on a simple soap bar do the trick. The soap is the practical part; the label is the design part. I use brown kraft paper wrap and black ink labels with one tiny icon like a star, a wrench, or a mountain, because it looks graphic and masculine. This works for guys who like gym gear, who travel with toiletries, or who keep a bathroom that needs small upgrades. It also flatters darker skin tones and lighter skin tones equally because the label style is high-contrast and clean.
Buy plain melt-and-pour soap bars or glycerin soap bars and let them fully cure if you made them. Cut label strips from 80-100 lb cardstock and print or hand-letter in black. For a letterpress look, press the ink label with a rubber stamp using a slightly drier ink or add faux emboss by tracing the design with a stylus on the back of the label before stamping. Wrap soap bars in brown kraft paper and tie with twine or a thin ribbon so the label stays centered. Seal edges with a tiny dab of glue and add a small icon stamp on the wrap.
Editor's noteWrite the label text with a fine-tip paint pen so the ink stays crisp on textured paper.
Skip thisDon’t use glossy vinyl labels — they look plastic against kraft paper.
12. Bracelet of Paracord with Reflective Edge Stitch
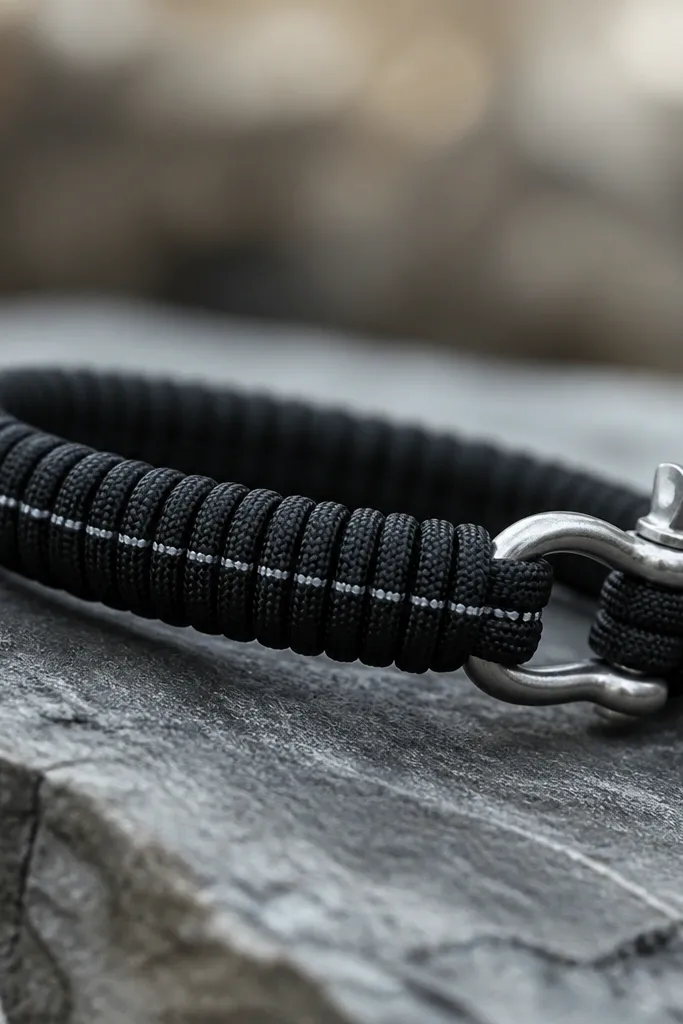
Paracord is the material that makes a DIY gift look tough without being hard to build. The bracelet shape is simple, and reflective stitching adds a “gear” vibe that looks good in daylight and at night. I stick to black paracord and a silver reflective thread because it matches most watches and belts. It’s ideal for a boyfriend who likes outdoors gear, motorcycles, or just wears darker clothing. If he has a slimmer wrist, make it narrower by using fewer strands; if he has a wider wrist, keep the weave tighter.
Measure his wrist with a string, then add 1 inch for comfort. Cut two lengths of paracord — one for the base, one for wrapping — typically 6-8 feet total depending on your knot style. Anchor one end with a clamp or tape, then wrap the paracord around in tight coils. When you reach the center, stitch a straight line along one edge using reflective thread and a needle, then tie off and seal thread ends with a tiny dab of clear glue. Finish by attaching a metal buckle clasp or using a paracord knot closure and trimming frayed ends neatly.
Editor's noteBurn the paracord ends lightly so they seal and don’t fray after a week.
Skip thisSkip loose coils — a sloppy weave makes the whole bracelet look cheap.
13. Mini Wall Shelf for Keys and Sunglasses
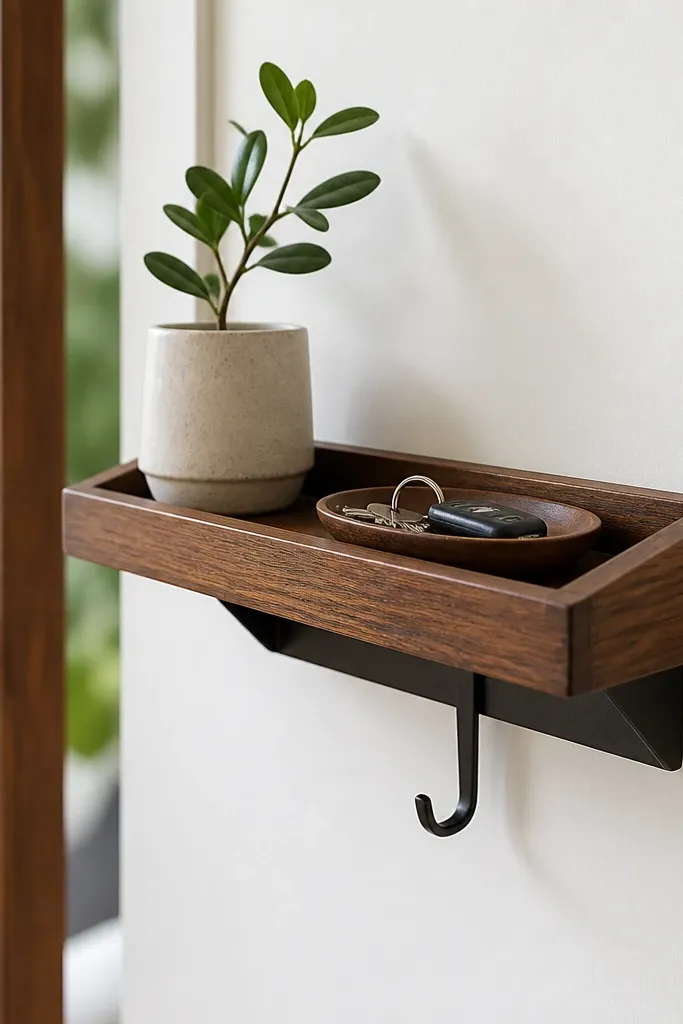
A mini shelf is one of the few easy DIY gifts to make that looks permanent. Even a small 12-inch shelf changes how he uses his entry spot, because keys and sunglasses stop living on the counter. I like a simple lip at the front so items don’t slide off, and I add one small hook for a lanyard or headphones. This works best for guys who have a dedicated entry area and keep forgetting where things go. The shelf also looks good with warm wood stains and a matte black hook — the contrast reads intentional.
Cut a wood board to about 12 x 5 inches and sand it to smooth edges, then stain or paint. Add a 1-inch tall lip by attaching a thin strip along the front edge and securing it with wood glue plus small brad nails. Sand the lip edges so they don’t feel sharp. Install a small mounting bracket or use a floating shelf method with sturdy anchors, then add a single hook under the shelf. Seal with a matte clear coat so it resists fingerprints and wipes clean.
Editor's noteMark stud locations with painter’s tape before drilling so you don’t guess on the wall.
Skip thisDon’t mount to drywall without anchors — a key shelf pulls loose fast.
14. Spiral Notebook with Handmade Fabric Spine
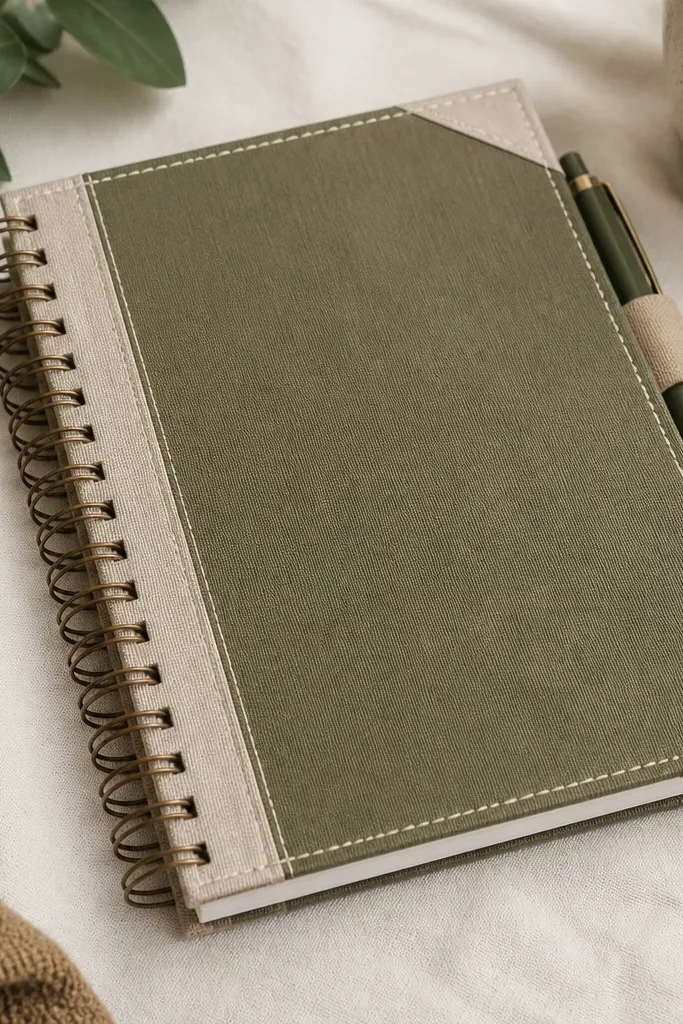
This is a practical gift that looks artsy without being complicated. The spiral notebook format is forgiving, so you can cover the outside and keep the inside neat. A fabric spine and corners give structure and hide uneven edges, especially if you use thicker cotton canvas. I like muted olive or charcoal fabric with a cream border because it looks like a designed stationery set. It flatters him if he writes lists, uses notebooks for workouts, or carries notes in his bag. The pen tab also makes it useful on day one.
Pick a notebook with a plain cover and remove any loose covers if needed. Cut fabric to wrap the front and back panels with extra for folding over edges, leaving the spiral binding area exposed. Glue fabric down with a fabric-safe adhesive, then fold and press edges along the corners. Add a stitched-looking border by sewing with a thick thread or using a fabric paint pen to draw a clean double line. Make a pen tab by folding a small strip of fabric into a pocket and gluing or sewing it to the inside front cover.
Use a roller or a clean burnishing tool to press glue into fabric fibers for a flatter surface.
Avoid thin, stretchy fabric — it wrinkles around the corners.
15. Personalized Beer Coaster Tray with Felt Bottom
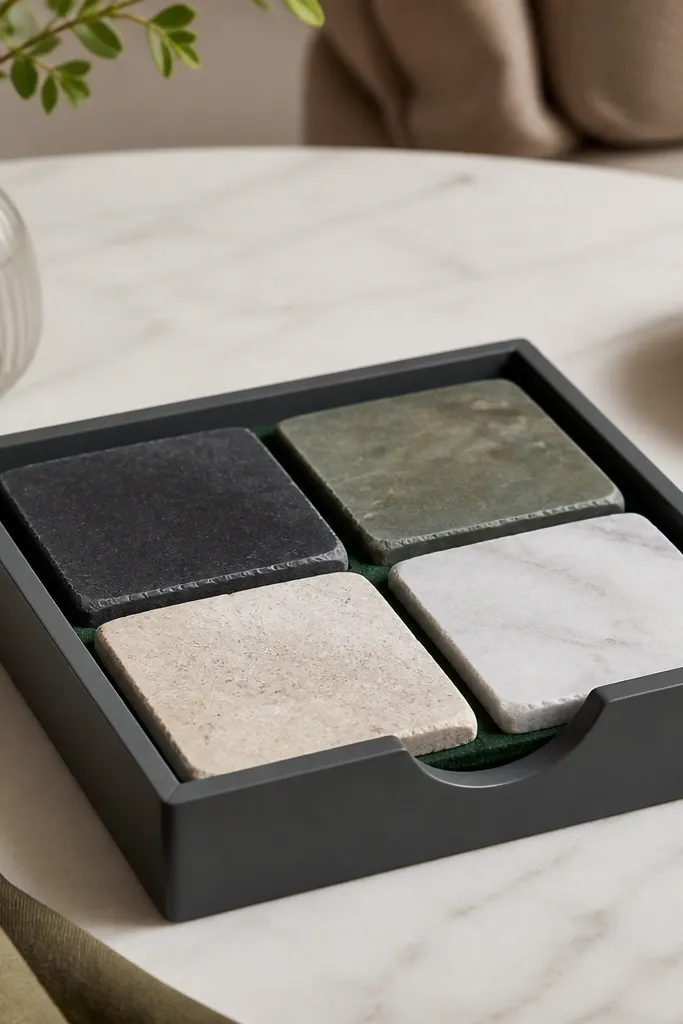
If he’s a beer guy, this makes his bar setup look organized without buying a matching set. The tray keeps coasters from sliding around, and the felt bottom protects surfaces like wood tables. I paint the tray dark gray or matte black and apply a label with his initials or a short phrase — keep it under 3 words. Square coasters look more modern than round ones, and the felt lining makes the whole thing feel soft and intentional. This works great for guys who host friends or who spill “just one drop” constantly.
Start with a small wooden tray — about 8 x 6 inches — and sand it lightly. Paint with matte acrylic or craft paint in dark gray, then let dry and apply a second coat. Line the bottom with felt cut to fit, using fabric glue. Print coaster labels or use stencils to add initials on four cork or ceramic coasters, then attach them to the tray with small dots of glue or place them loose if you want easy swaps. Finish by sealing the tray top with a clear matte coat so it wipes clean.
Editor's noteUse painter’s tape as a stencil guide for crisp letters on the tray front.
Skip thisDon’t skip sealing the tray — paint chips if it takes repeated condensation.



