

1. Latitude Longitude Keychain Charm (Navy + Cream)
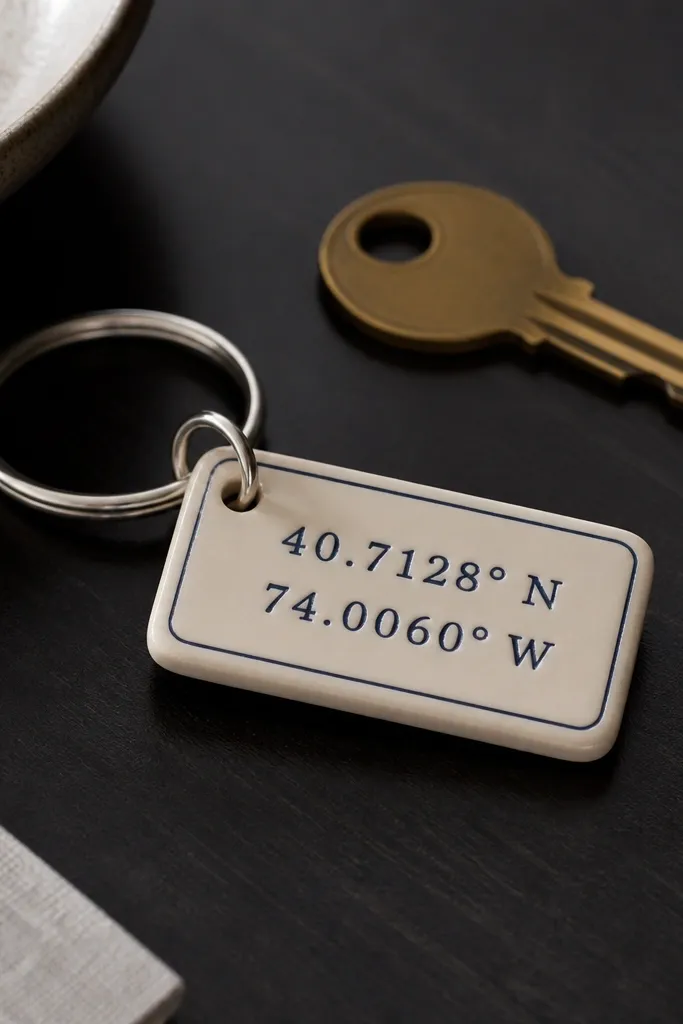
This is the kind of gift that looks personal without looking messy. I used cream polymer clay for the charm and navy permanent ink for the coordinates, then sealed it with a thin clear coat so the ink stays sharp. The cream background reads bright against dark key fobs, and the navy border gives it a finished frame. It works best for boyfriends who carry keys daily and like subtle personalization, not loud quotes. If his skin tone is warm or medium, the cream charm looks flattering because it has that soft, off-white warmth. The styling principle is “one message, centered,” so the coordinates stay crisp instead of getting crowded.
Start by rolling polymer clay to about 3 mm thick and cutting a rectangle roughly 1.5 x 2.5 inches. Bake according to your clay brand directions, then let it cool fully. Use a ruler and painter’s tape to mask a thin border line, stamp or write the coordinates in navy, and let the ink dry 10 minutes. Seal with 2 thin coats of clear acrylic or polymer sealant, letting each coat dry before the next. Finish by punching a hole near the top corner and attaching it to a split ring with a short chain so it doesn’t twist.
Editor's noteWrite the coordinates one last time on paper and check the commas before you commit to the clay.
Skip thisAvoid thick clear coats that pool around the stamped ink — they make the letters look fuzzy.
2. Framed Ticket-Stub Shadow Box (Movie Night Edition)
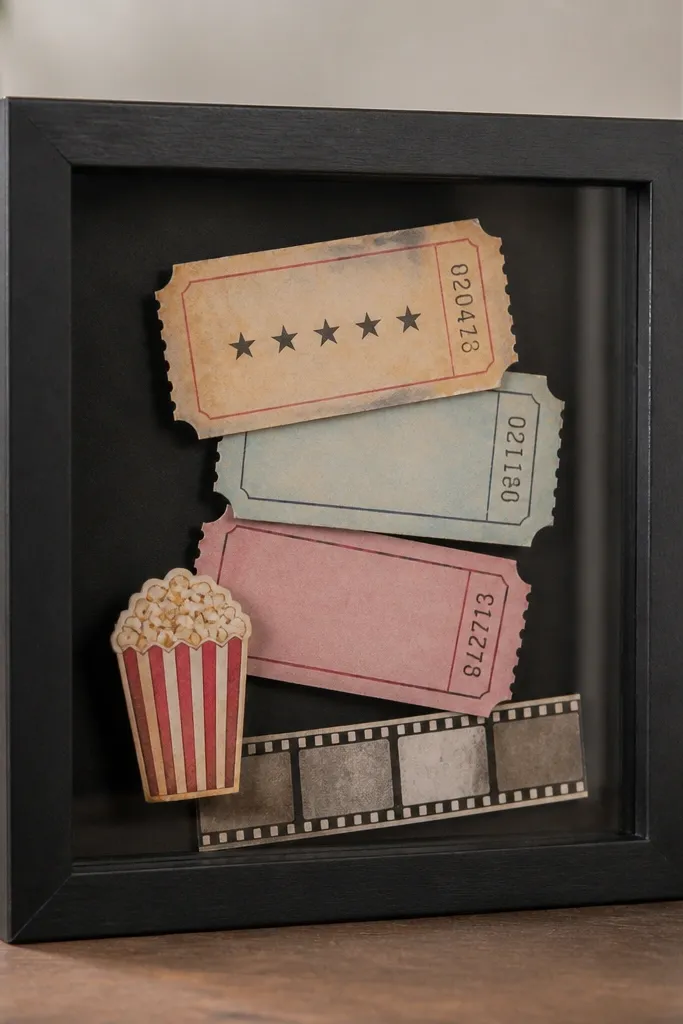
This gift looks like you bought it from a boutique frame shop, but it’s just careful layering. I used a black matte backing so the paper pieces pop, and I spaced the stubs at different heights with thin foam tape. The film strip tape adds a horizontal texture line that pulls the eye across the box. This works for boyfriends who remember dates and like nostalgic, low-pressure sentiment. If he wears mostly dark shirts, the black backing makes the colors on the stubs look richer. The styling principle is depth: even small height differences make the whole thing feel intentional.
Choose a frame size that matches your stash, like 8 x 8 inches, and remove the backing. Cut a black cardstock sheet to fit snugly, then mock up your layout on the table before gluing. Layer the tallest piece in the back, then add the ticket stubs using 1-3 mm foam squares so edges cast a soft shadow. Add a thin strip of film tape or washi tape along the bottom like a baseline. Seal any ink-heavy pieces with a light spray fixative, then place everything behind the clear front and close the frame.
Editor's noteTake a quick photo of the mock layout before you glue — it’s the fastest way to catch crooked spacing.
Skip thisSkip hot glue for paper layers — it warps edges and makes uneven lumps.
3. No-Sew Map Fabric Wall Hang (Cream + Forest Green)
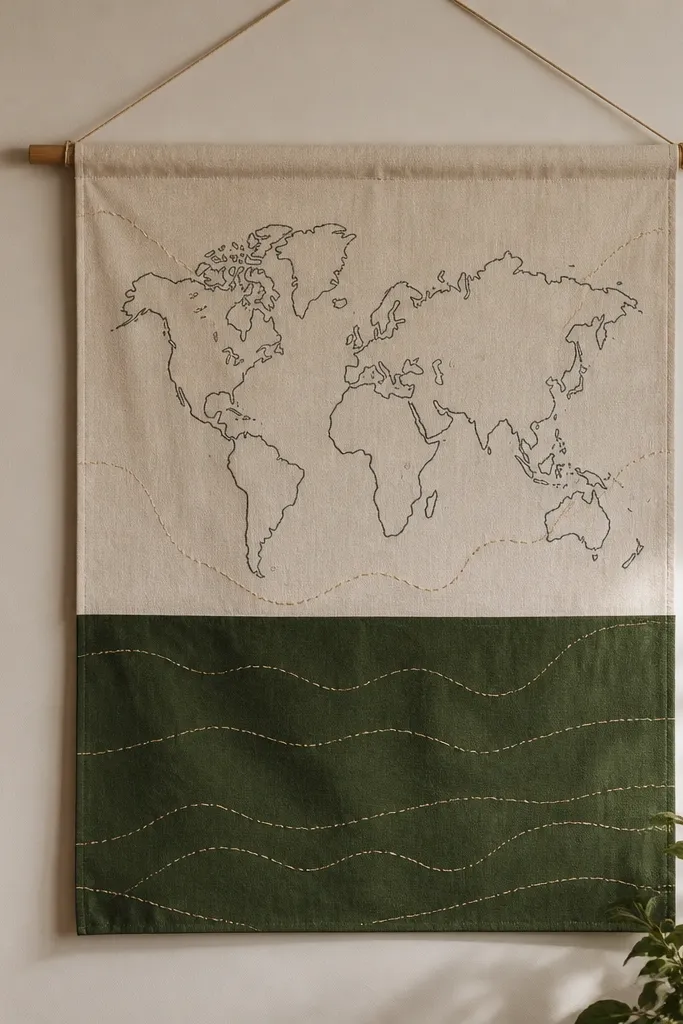
If he likes clean decor, this one is a win because it looks graphic, not crafty. I used cream canvas for the base and forest green fabric for the side band, then printed or transferred a simple map line design in dark ink. The “no-sew” part is real: I use fabric glue to attach strips and keep the edges flat, so it doesn’t look homemade in a bad way. This works especially well in a bedroom or office corner where neutral tones already live. For lighter skin tones, the cream reads bright and friendly in photos; for deeper tones, the green band adds contrast without being harsh. The styling principle is simple geometry — big blocks, one line motif, no clutter.
Start by cutting a cream rectangle about 18 x 24 inches, plus a forest green side strip around 4 inches wide. Lay the fabrics on a flat surface and tape the edges down, then apply a thin line of fabric glue and press for the glue’s set time. Transfer your map linework using iron-on transfer paper or print-and-trace with fabric marker, then let it dry completely. Add a top dowel sleeve by folding the top edge 1.5 inches and gluing it down. Finish by stringing the dowel with two small hooks or a single picture wire at the back.
Editor's noteUse fabric glue sparingly — thin lines dry flatter and look like real seams.
Skip thisAvoid wrinkled fabric — glue won’t fully flatten creases once it sets.
4. Cork Coaster Set with His Initials (Burnt Umber + Black)
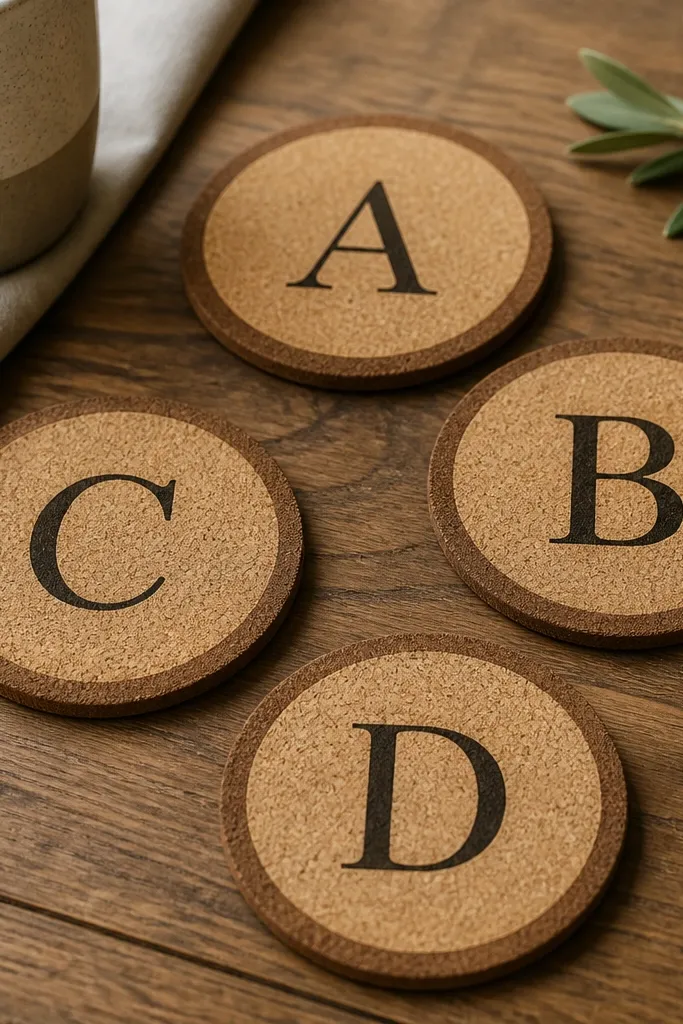
This is a practical anniversary gift that still feels personal when you get the contrast right. I used plain cork coasters because they already have texture, then added burnt umber stain to the edges to frame the center. For the initials, I used a black vinyl stencil or a paint marker so the letters stay bold. It looks especially good in a kitchen or coffee corner because cork hides small scuffs. If he has tattoos or darker wrist hair, the black letters look crisp against the warm cork tone. The styling principle is framing: edge color + center mark, nothing else.
Start by cleaning the cork with a dry microfiber cloth so no dust blocks stain. Tape around the center area with painter’s tape to create a clean “no stain” circle, then apply burnt umber stain to the exposed edges with a foam brush. Let it dry fully, then either apply vinyl stencil letters or hand-paint initials with a fine brush. Seal the entire coaster with two light coats of matte water-based sealer so drinks don’t soak in. Arrange them as a set in a small tray or wrap them in kraft paper with a ribbon.
Editor's noteIf you hand-paint, do one thick pass, then don’t go back over it — that’s how you avoid streaky edges.
Skip thisAvoid glossy sealers — they make cork look sweaty and cheap.
5. Leather-Look Key Organizer Tray with Painted Dots
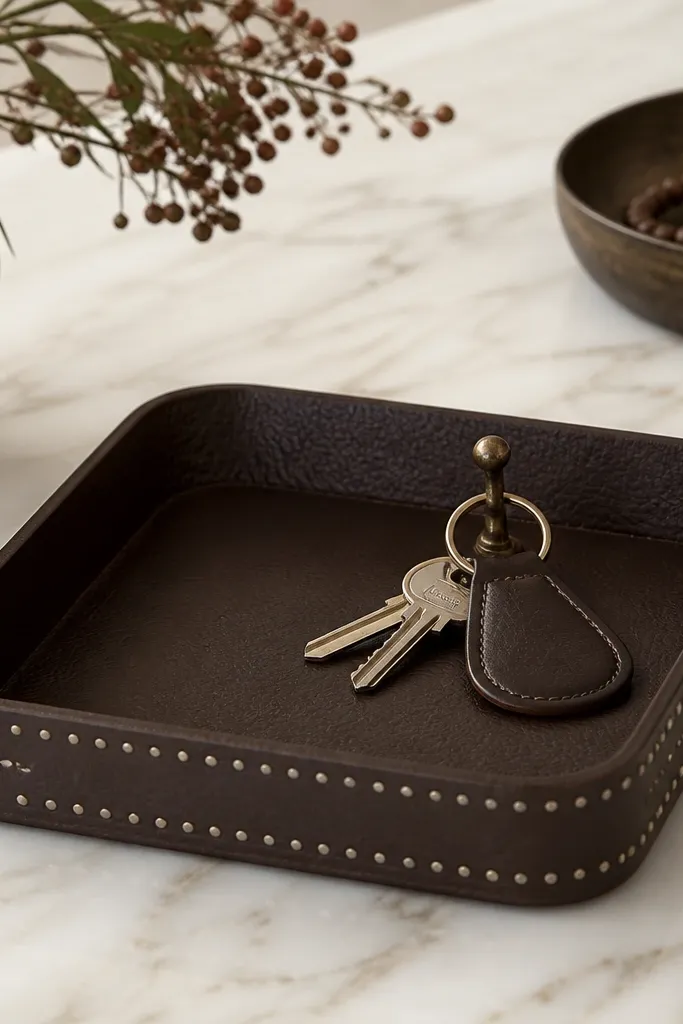
This one gets used immediately, which is why it feels like a real gift. I built a shallow tray from a thin wood board, then covered it with leather-look vinyl and burnished the edges so it doesn’t lift. The cream dot pattern on the rim adds a playful touch without turning it into a kids craft. It suits boyfriends who dump keys in a bowl and hate clutter — the tray gives that spot a home. Cream dots pop nicely for all skin tones because they’re high-contrast. The styling principle is “one accent pattern only,” so the tray stays classy.
Start with a board cut to about 8 x 5 inches and sand the edges. Spread contact cement on the top and sides, press leather-look vinyl down, then trim excess with a sharp utility blade. Burnish edges with a plastic card so corners stay tight. Paint a ring of cream dots around the rim using painter’s tape to keep spacing even, then seal with a flexible clear coat. Screw a small brass hook inside the tray and let everything cure 24 hours before using.
Editor's noteMark dot spacing with a ruler and tiny pencil dots first — your hands will follow the guide.
Skip thisSkip fabric glue on vinyl — it peels when you move the tray.
6. Photo Strip Lightbox Frame (Warm White LEDs)
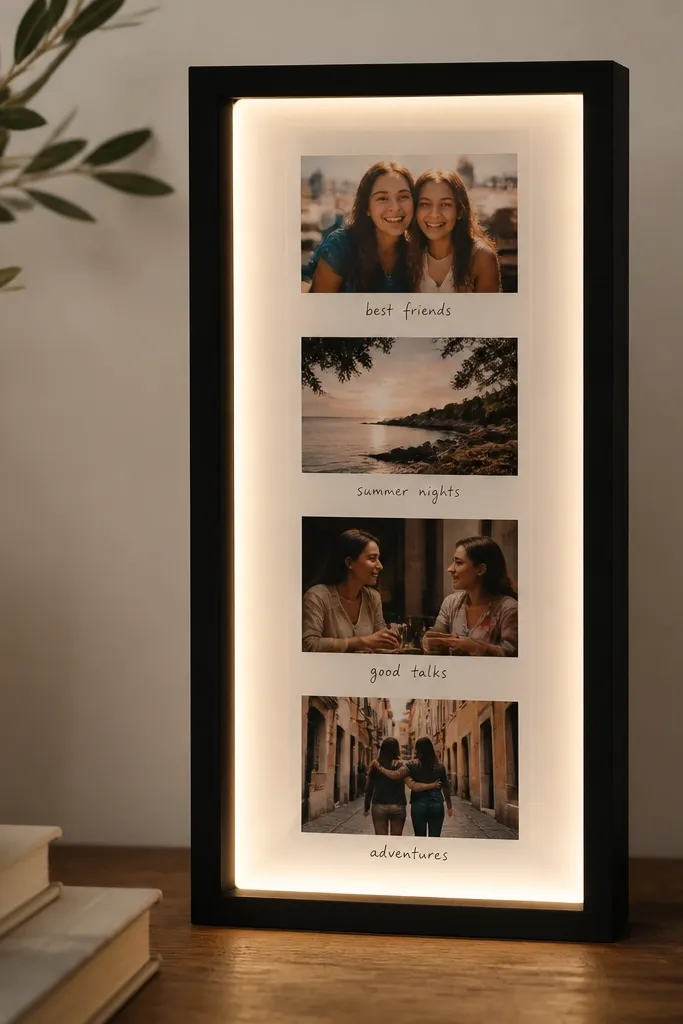
This gift makes him feel seen every time he walks by. I used a simple lightbox frame and placed a vertical strip of four printed photos, leaving even margins so nothing looks crowded. Warm white LEDs are the difference — cool LEDs make skin look gray in photos. The black border gives the whole piece structure and keeps it from looking like a DIY lantern. This works best if he has a desk, nightstand, or hallway spot where you can see it daily. The styling principle is negative space: margins matter as much as the photos.
Buy or build a small frame with a clear front, like 8 x 10 inches. Cut white foam board to fit the inside and drill or route a spot for the LED wire. Print photos at a consistent size and trim them to the same height, then tape a guide line so you can align the strip. Place photos on the foam board with thin double-sided tape, then insert the foam board behind the LED-lit area. Test the LEDs before fully closing the frame, then power it with a battery pack or USB depending on the frame design.
Editor's notePrint on matte photo paper — glossy prints glare under LEDs.
Skip thisAvoid overstuffing photos — four looks intentional, six starts to look chaotic.
7. Paint-Pour Coaster with His Birth Month Color
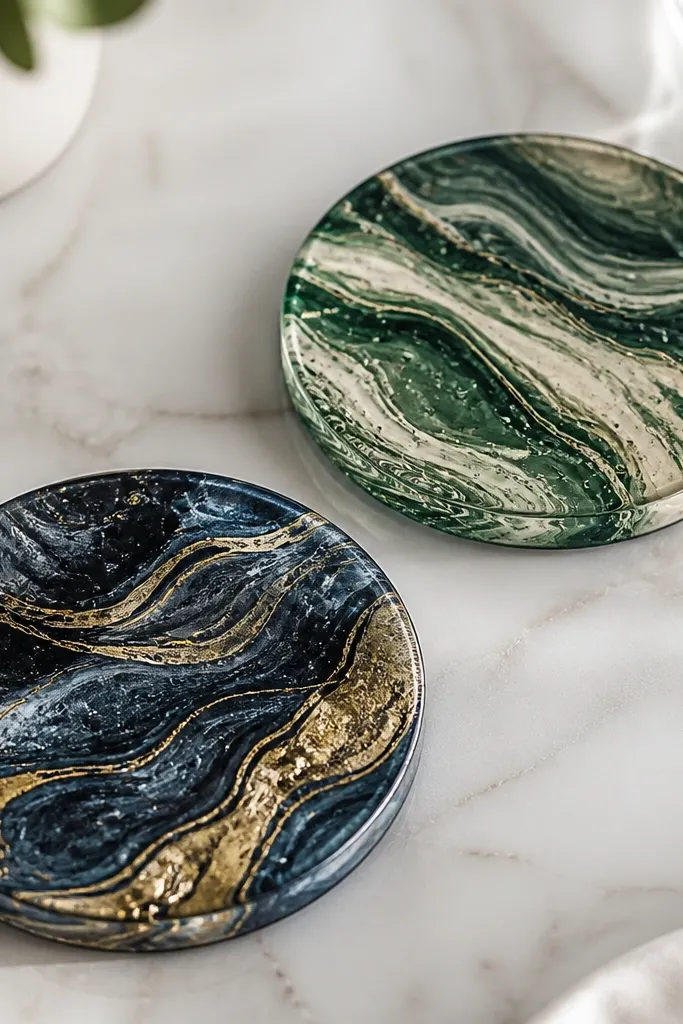
This is an anniversary gift for the boyfriend who likes color and doesn’t mind a little art on the table. I used round silicone molds and a limited palette so the pour looks controlled instead of chaotic. One coaster uses navy plus a gold metallic line, the other uses forest green with cream wisps. The gloss topcoat makes it look like store-bought resin art, even though it’s just layered pours. It flatters most spaces because the colors are anchored in neutrals. The styling principle is limited colors — two main colors plus one metallic accent.
Start by mixing paint with pour medium to a yogurt-like thickness so it spreads without tearing. Tape the mold rims and place silicone molds on a level surface. Pour the base color, then add drops of the second color and drag lightly with a toothpick for thin streaks. Add a clear resin topcoat in a thin layer, pop bubbles with a heat gun briefly, and let cure fully. Pop coasters out and check edges — sand any sharp rim spots with 400-grit paper.
Editor's noteWear gloves and keep a level surface — pours hate tilt.
Skip thisAvoid using too much metallic paint — it can separate and create patchy spots.
8. Repurposed Sweater Mug Cozy with Stitched Date Tag
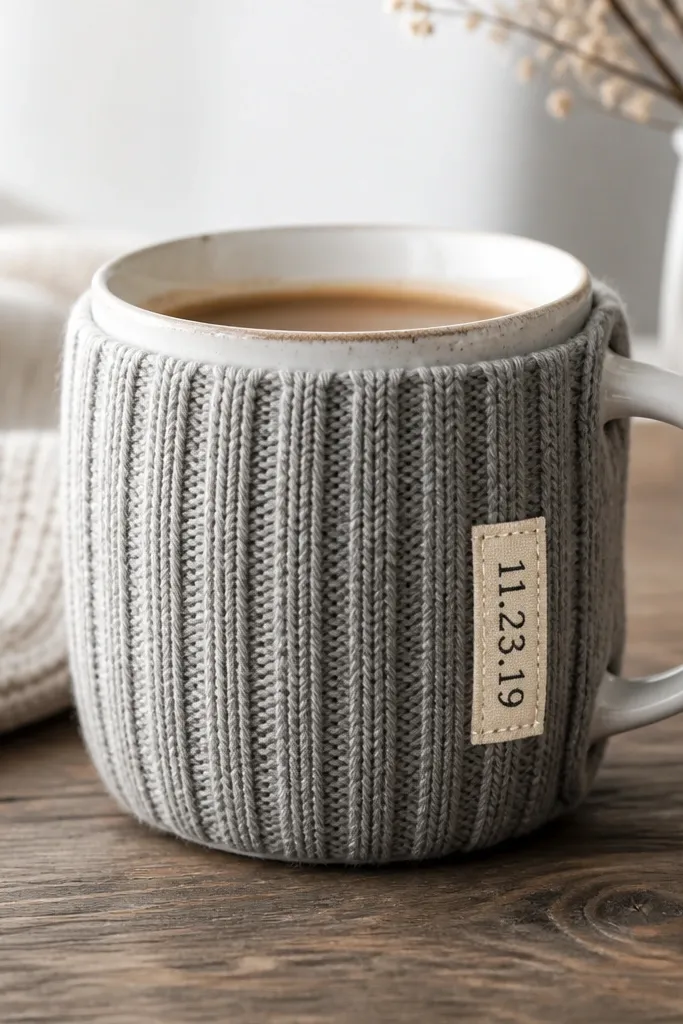
This gift feels warm even when it’s just sitting on the counter. I used an old sweater sleeve because the knit stretches and grips the mug without fancy sewing. I added a small fabric date tag — like 09.14.2026 — using thick thread so it reads clearly even from a distance. The heather gray base looks clean and works with almost any kitchen color. This is great for boyfriends who drink coffee at home or keep a mug at their desk. The styling principle is texture — knit gives you visual interest without needing lots of decoration.
Cut a sweater sleeve section about 7 inches tall and 4 inches wide, depending on your mug diameter. Stretch it onto the mug to check fit, then trim excess so the cozy sits snug without bunching. Sew a small date tag from scrap cotton or felt and stitch it onto the side near the top seam. Fold the bottom edge inward and sew a simple hem so it doesn’t fray. Finish by washing the cozy once so it relaxes and looks natural.
Use thick embroidery thread for the date — thin thread disappears into knit texture.
Skip stretchy lace trims — they flip and catch on the mug handle.
9. His Favorite Cologne Bottle Labels - Vinyl Edit Set
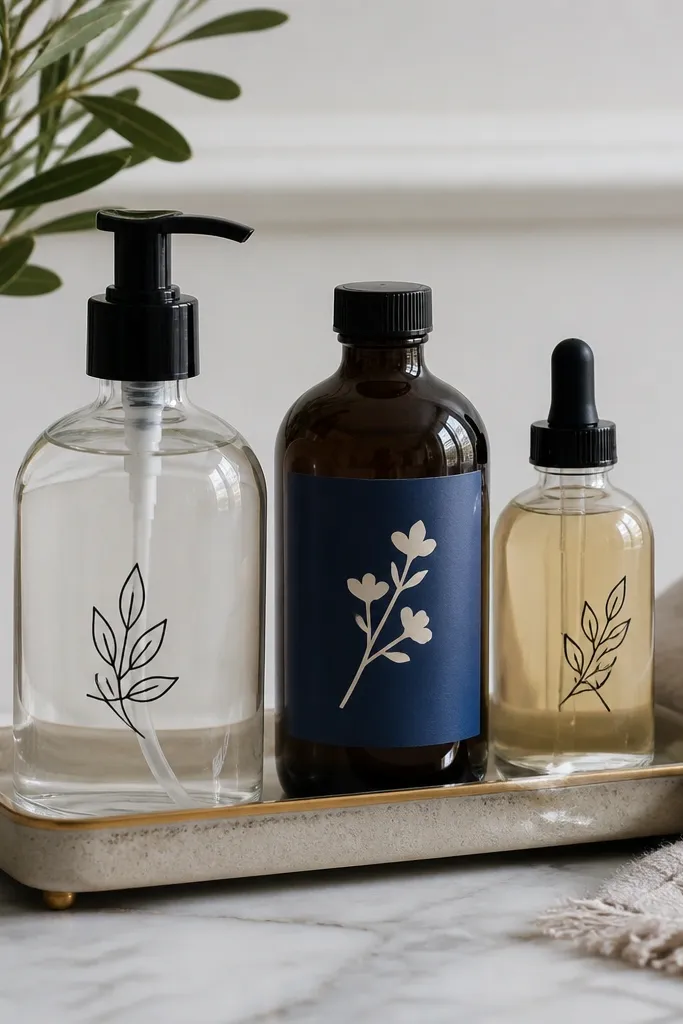
This is a sneaky-good gift for a boyfriend who cares about how he smells but never updates the presentation. I made custom vinyl labels that mimic store labeling — clean fonts, consistent spacing, and a simple border. Clear vinyl with black text looks classy, while a navy label with cream text looks bold. It works best when the bottle shape already looks good; your label just upgrades the finish. If he has a darker dresser or bathroom shelf, the navy label pops hard. The styling principle is alignment: every line hits the same baseline so it looks intentional.
Measure the label area on each bottle and cut vinyl to fit with a 1-2 mm margin. Clean glass with rubbing alcohol and let it dry completely so vinyl sticks. Use a vinyl cutting machine or print-and-transfer method, then apply the label slowly with a squeegee or credit card to avoid bubbles. Add a thin border line if you want extra polish. Let the vinyl set for 24 hours before handling, then place the bottles in a small tray for a “set” presentation.
Editor's noteDo a dry run with painter’s tape first — getting it straight saves the whole look.
Skip thisAvoid glossy laminate over vinyl — it creates wrinkles on curved glass.
10. Salt Dough Initial Ornament with Transparent Photo Insert
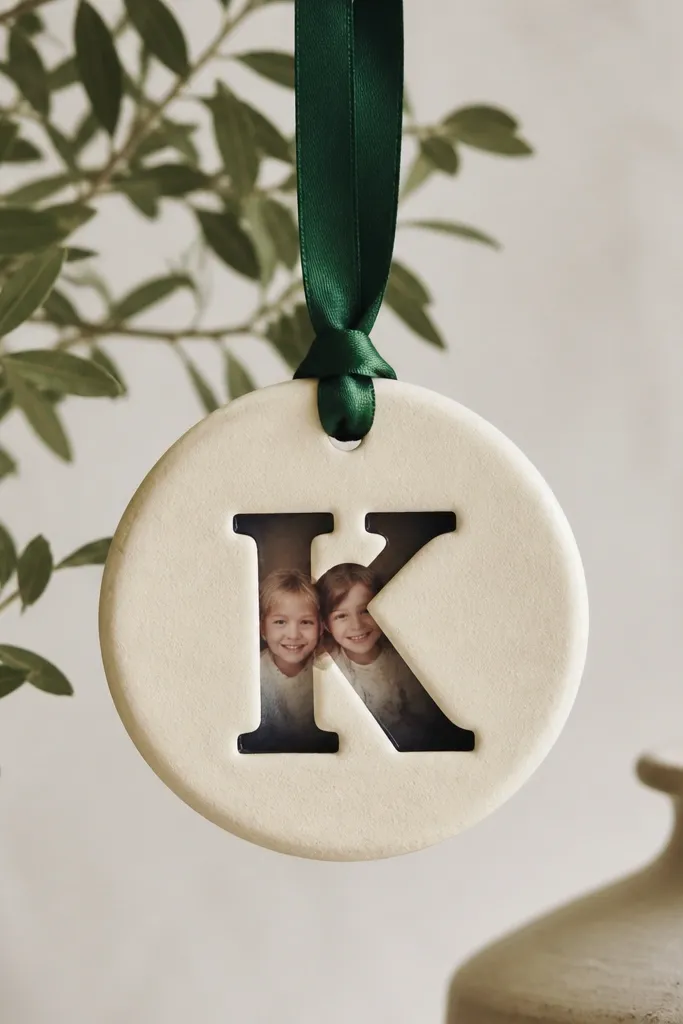
This is sentimental without being fragile, and it looks great on a tree or a wall hook. I pressed salt dough into a circle and cut a small window area so a tiny photo sits behind it. The cream paint makes the initial readable, and the clear window gives that “photo trapped in time” effect. It suits boyfriends who like Christmas decor or who appreciate handmade keepsakes that don’t look childish. Deep green ribbon looks rich against most skin tones when he’s holding it up. The styling principle is one focal point — the initial — with the photo as a supporting detail.
Mix salt dough (2 cups flour, 1 cup salt, 3/4 cup water) until it forms a firm ball. Roll to about 1/4 inch thick and cut a circle, then cut a small window using a craft knife. Bake at low heat until hard (about 2 hours at 250F, checking for dryness), then cool fully. Paint the circle cream, paint around the window edges black, and glue a mini printed photo behind the window with a clear craft medium. Tie the ribbon through a pre-made hole near the top and let everything cure before hanging.
Spray a light fixative on the photo paper before inserting so it doesn’t smudge.
Skip thick dough — thick ornaments take forever to dry and crack.
11. Wood Slice Coasters with Burned Mountain Line Art
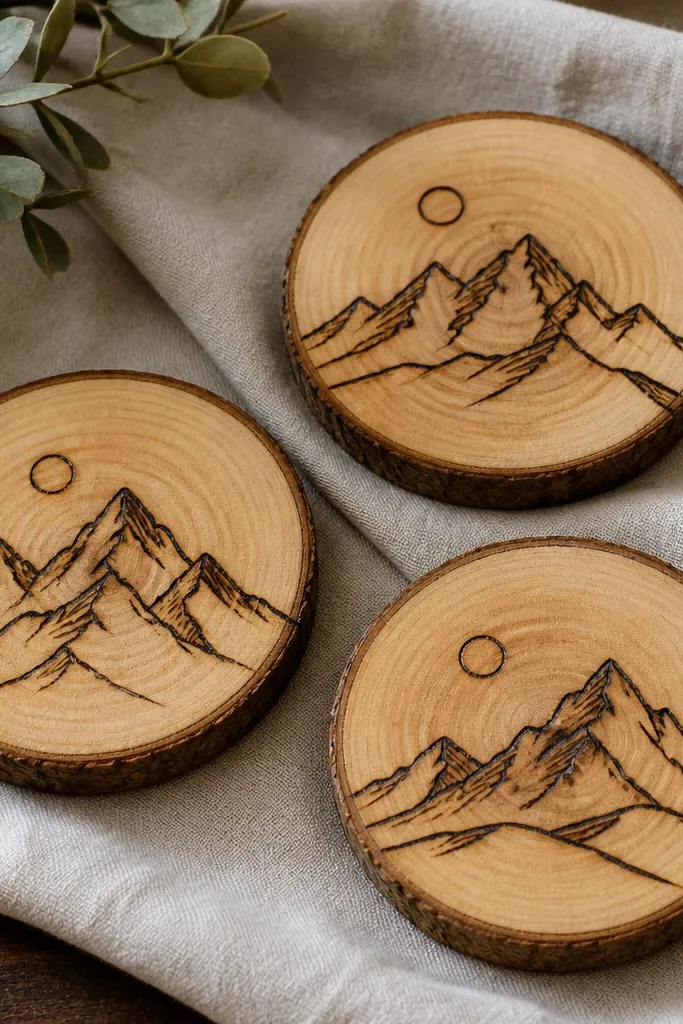
This is for the boyfriend who loves outdoors stuff but doesn’t want a cheesy gag gift. I used small wood slices and burned thin mountain line art with a wood-burning tool, then sealed them so the surface feels smooth. The burned lines look sharp and clean, not like messy marker art. Natural wood makes it match almost any home style, from modern to rustic. If he has lighter hair, the dark burn lines create a strong contrast in photos; if he has darker hair, the lines still read because the wood grain stays visible. The styling principle is “thin lines only,” so the art looks crisp at coaster size.
Buy wood slices at a craft store or cut your own and sand both sides lightly. Use a pencil to lightly sketch a mountain range with a small sun or simple horizon line. Burn the lines with a wood-burning tool at medium heat, keeping your hand steady for thin strokes. Sand again with 220-grit after burning to smooth any rough edges. Seal with food-safe clear topcoat like polyurethane designed for wood, then cure fully before using with drinks.
Editor's notePractice on a scrap slice first — your heat setting changes line thickness.
Skip thisAvoid heavy shading — it makes coasters look dirty once they get handled.
12. Felt Calendar Countdown Banner (Weeks to Anniversary)
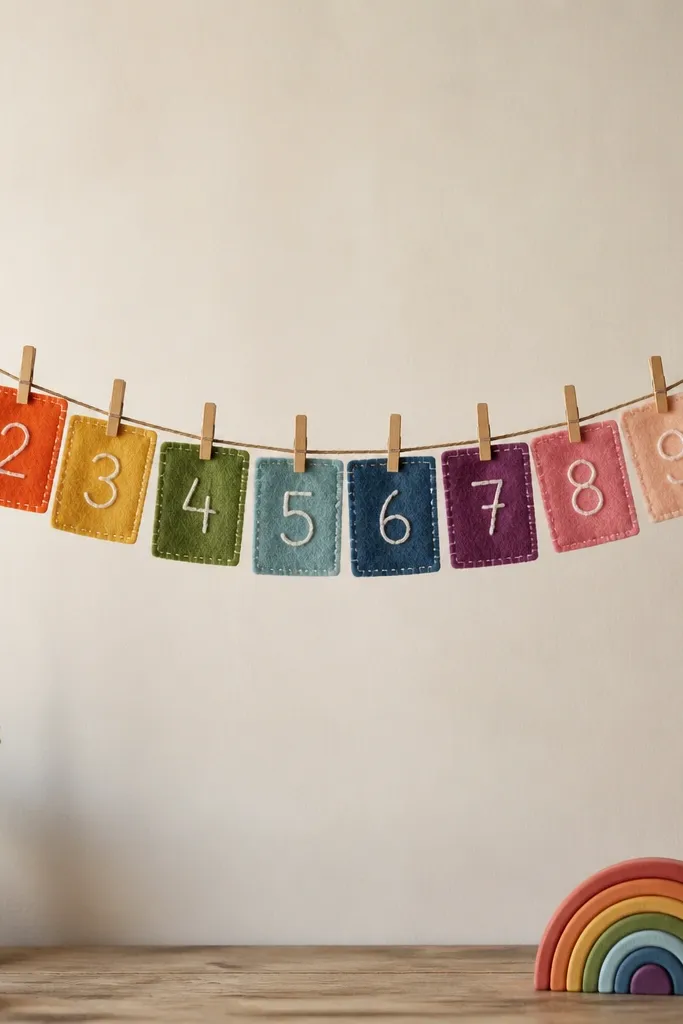
This gift works when your anniversary is close and you want a fun build-up instead of one big moment. I made a felt banner with numbered squares that he can flip or move each week. Felt holds shape, so the banner stays tidy even if he touches it daily. The color system matters: I used three colors max, like navy, cream, and mustard, so it looks intentional on a wall. This is especially good for boyfriends who like games or who get excited about small daily rituals. The styling principle is “repeatable units” — each square is the same size and spacing so it looks neat.
Cut felt squares about 2.5 x 2.5 inches and punch a small hole at the top corners. Stitch or use fabric paint to add numbers in white, spaced evenly. String twine across two dowels and attach squares with small clothespins or ribbon ties so he can move them. Add a title strip at the start with heat-transfer vinyl or stitched letters like “Weeks Together.” Hang it in a spot he passes, not behind a door, so he actually sees it every day.
Editor's noteUse a fabric pen for the first draft, then stitch over it — you get clean numbers without wobble.
Skip thisAvoid too many colors — it turns into a craft-store mess fast.
13. Painted Glass Photo Frame with Crackle Topcoat
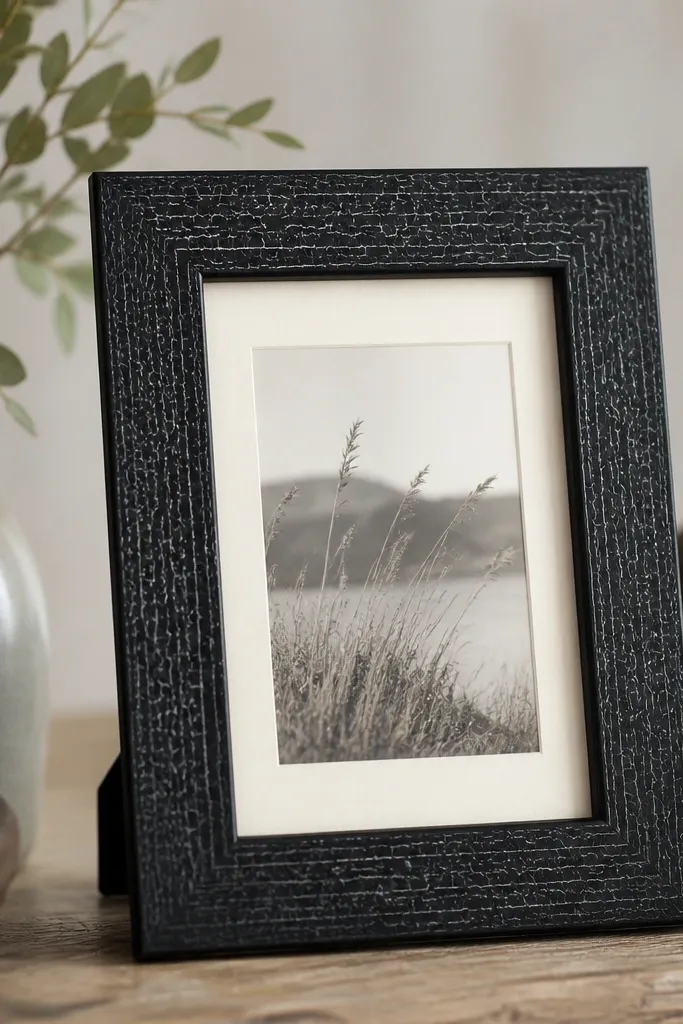
This one looks like thrift-store vintage even though you made it. I used a glass frame, painted the edges matte black, then brushed on crackle medium and a thin top layer of off-white so the cracks show through. The crackle effect gives texture that looks expensive in low light. It’s best for boyfriends who like moody decor or who keep photos on a shelf. If he has a warm-toned room, the off-white layer keeps the effect from looking harsh. The styling principle is controlling the crackle: you want fine lines, not big peeling chunks.
Start by removing the glass and backing, then clean everything with rubbing alcohol. Spray or paint matte black on the outside edges and let it dry overnight. Brush crackle medium in one direction, then apply your top color lightly — too thick and it won’t crack evenly. Let it dry until it reaches the crackle stage, then seal with a clear matte topcoat so it doesn’t rub off. Reassemble with a cream mat and place the photo centered for a clean look.
Editor's noteDo test strokes on a spare scrap piece first — crackle thickness changes the pattern.
Skip thisSkip heavy sanding after crackle — it flattens the texture.
14. Resin Phone Stand with Embedded Scrap Map Paper
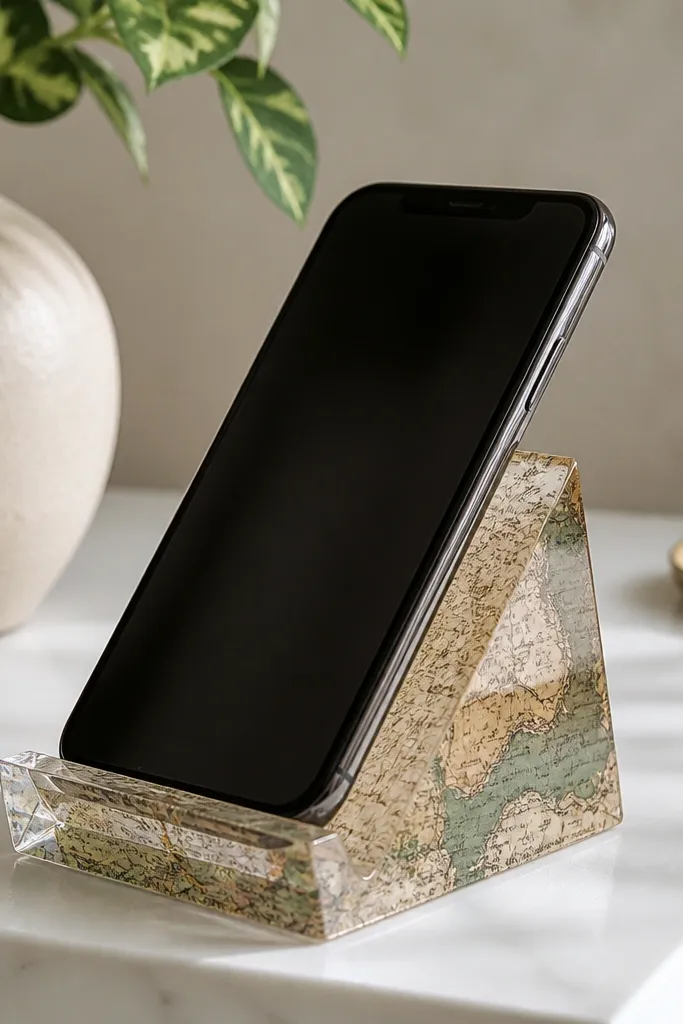
This gift looks futuristic and personal at the same time. I used a basic resin mold to make a wedge stand, then embedded small scraps of map paper — just corners and shapes — so it doesn’t look like a full collage. The resin makes the paper look sealed and “floating,” which is why it reads premium. It’s great for boyfriends who watch videos at their desk or use their phone for recipes while cooking. If his room has neutral tones, the muted map colors blend without clashing. The styling principle is restraint: small paper fragments only, no busy patterns.
Choose a resin stand mold and seal it with mold release if your resin requires it. Prepare resin in small batches so it doesn’t kick off before you place paper. Tear map paper into tiny irregular pieces and place them on the mold base, then pour a thin resin layer to lock them down. After the first pour cures, add the rest of the resin to fill the stand to the final height. Pop out the stand and sand any rough edges with 600-grit, then wipe clean.
Editor's noteUse a heat gun gently over the surface to pop bubbles — stop before it smokes.
Skip thisAvoid over-embedding paper — too much paper turns the stand cloudy.
15. Drawer Matchbox Message Set with Mini Envelopes
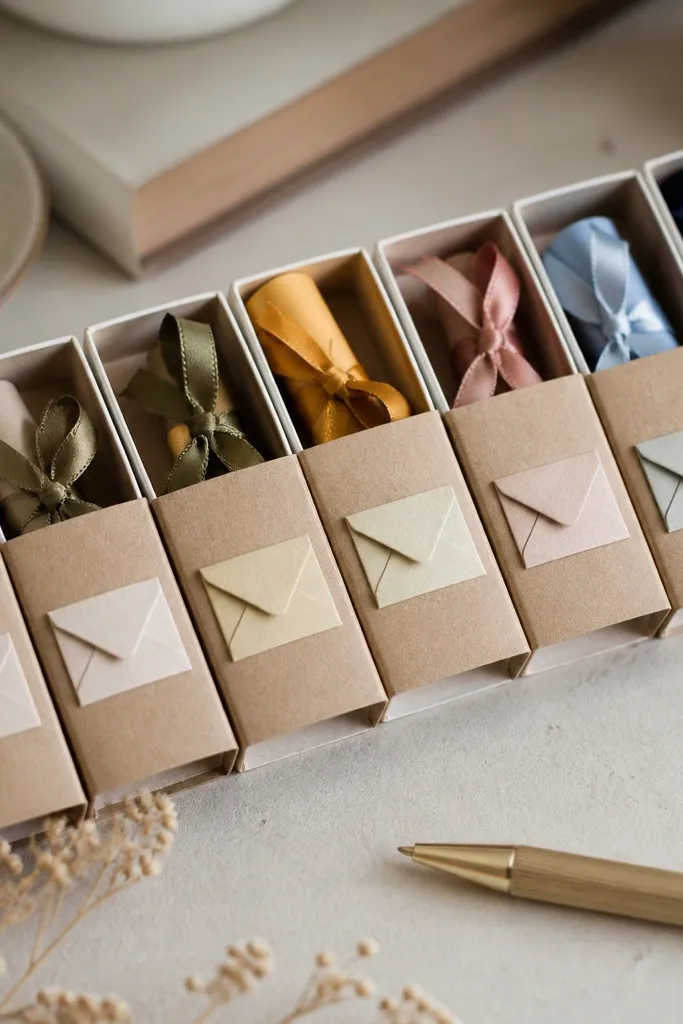
This is a gift that keeps paying off because he opens one message at a time. I used matchbox-sized containers because they look tidy and stack well in a drawer. Each container holds one short note, and I labeled them with simple categories like “Before work” or “After dinner” on the outside so he picks without thinking. It suits boyfriends who like practical affection, not big speeches. The kraft paper and small labels look good with both dark and light rooms. The styling principle is organization: every note is the same size, rolled the same direction, and tied neatly.
Start by buying empty matchboxes or making small boxes from cardstock. Cover each with kraft paper and add a tiny label panel on the front using a printed label or neat handwriting. Cut mini envelopes, then roll your notes and tuck them into each envelope. Use a tiny strip of ribbon or paper tie to keep the roll closed. Stack them in a drawer tray or wrap them with a belly band so the whole set looks like one unit.
Write notes that match his calendar — one for Mondays, one for late nights, one for when he needs a win.
Skip long paragraphs — short notes fit better and feel more readable.



