


1. Kraft Paper + Cream Bloom Wall With Golden Centers
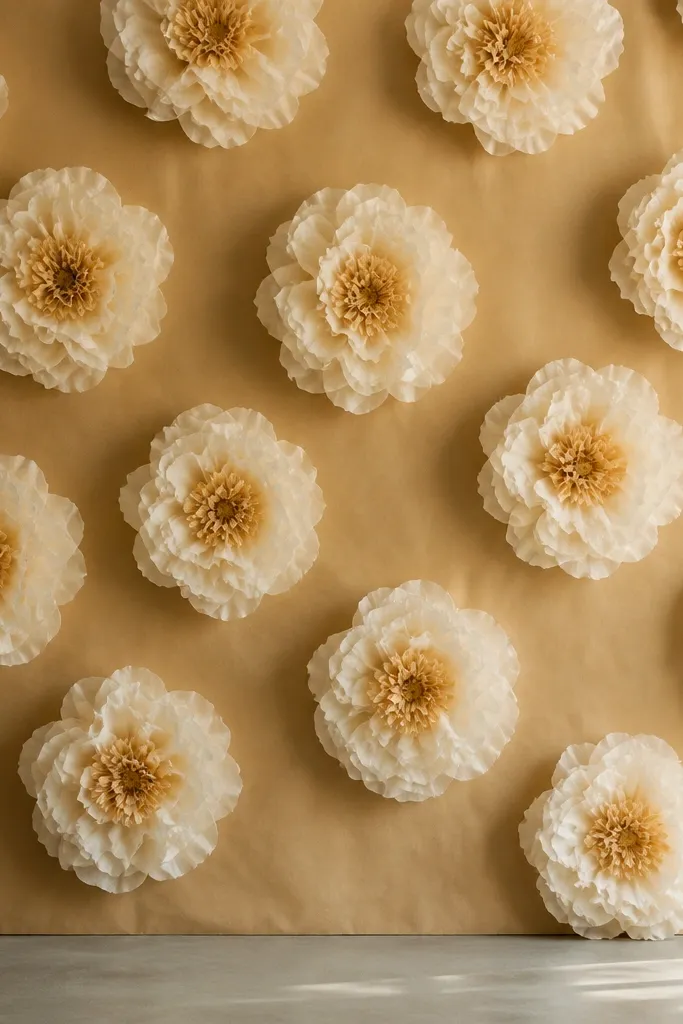
I love this one because kraft paper makes the tissue look warmer instantly, even under yellow bulbs. Use cream and warm ivory tissue for the petals, then add a small burst of muted gold in the center so the flowers feel “lit from within.” This palette looks flattering on most skin tones in photos: it doesn’t pull faces green like cool whites. It also works great for birthdays, baby showers, and cozy engagement shoots because the background reads like texture, not clutter.
Editor's noteUse a warm light source behind the camera (like a lamp at the side) so the kraft texture throws soft shadows through the petals.
Start by covering a wall or big board with kraft paper, smoothing it so there are no big wrinkles. Make cream tissue flowers in two sizes: medium 12-inch flowers and a few big 18-inch flowers, keeping the outer petals slightly larger than the inner layers. For the center, cut 2-inch strips of gold tissue, fringe them lightly, then roll into a tight coil and glue it into the middle. Space the flowers with 8 to 10 inches between centers so each bloom has room to breathe, then add a few extra small flowers near the bottom for balance.
Skip thisSkip bright white tissue on kraft — it can look stark and cheap under warm lighting.
2. Blush Fabric Drapes With Peach Tissue Flower Cascade
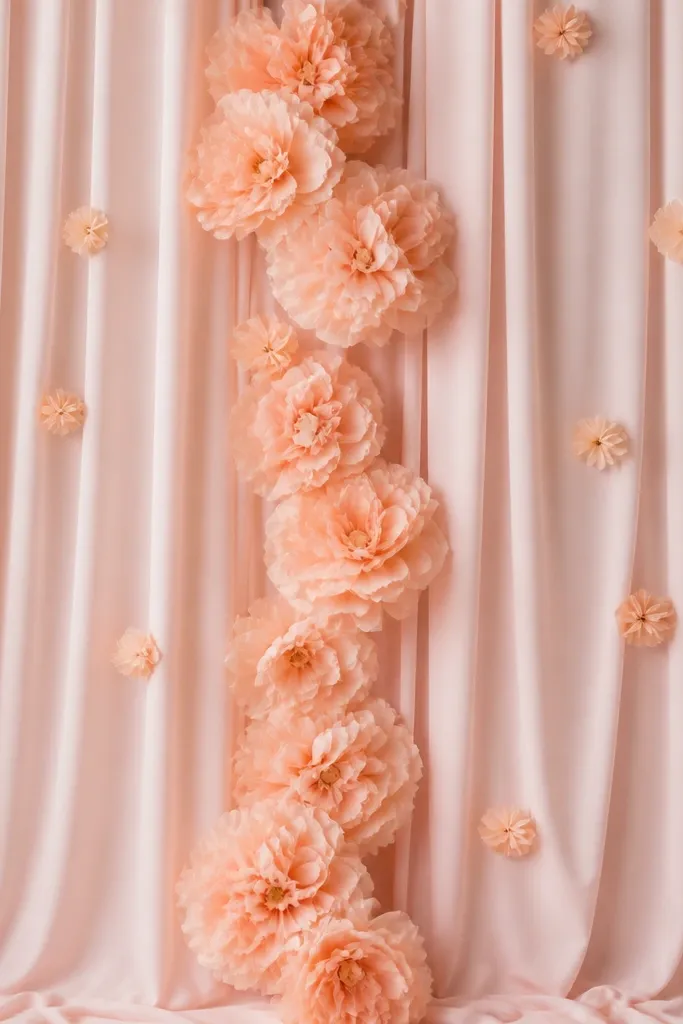
This is the prettiest option when you want “cozy” more than “party.” Blush fabric gives you movement and softness, while peach tissue flowers add that warm, romantic glow. I’ve used this for bridal showers and small birthday dinners where you want photos that look gentle, not loud. People with fair skin look especially good because peach doesn’t overpower; deeper skin tones also look great because the blush fabric adds contrast without going harsh.
Hang blush fabric panels or a long sheer-blush curtain on a tension rod or backdrop stand, then let them fall in uneven lengths for natural drape. Build peach tissue flowers in mostly one size (14-inch) and add a smaller 10-inch bloom every 2 to 3 flowers. Attach the blooms by tying them to thin clear fishing line and anchoring the line to the top rod, then adjust lengths so the cascade curves downward. Place the biggest flowers at chest height in photos, then taper the sizes as you go down so the lower half doesn’t feel crowded.
Mist the fabric lightly with water and let it dry before hanging — it takes the static out and makes the folds look less “crisp.”
Don’t glue tissue directly to fabric — it stiffens the petals and can peel when the fabric shifts.
3. Warm White Fan Backdrop With Caramel Ombré Roses
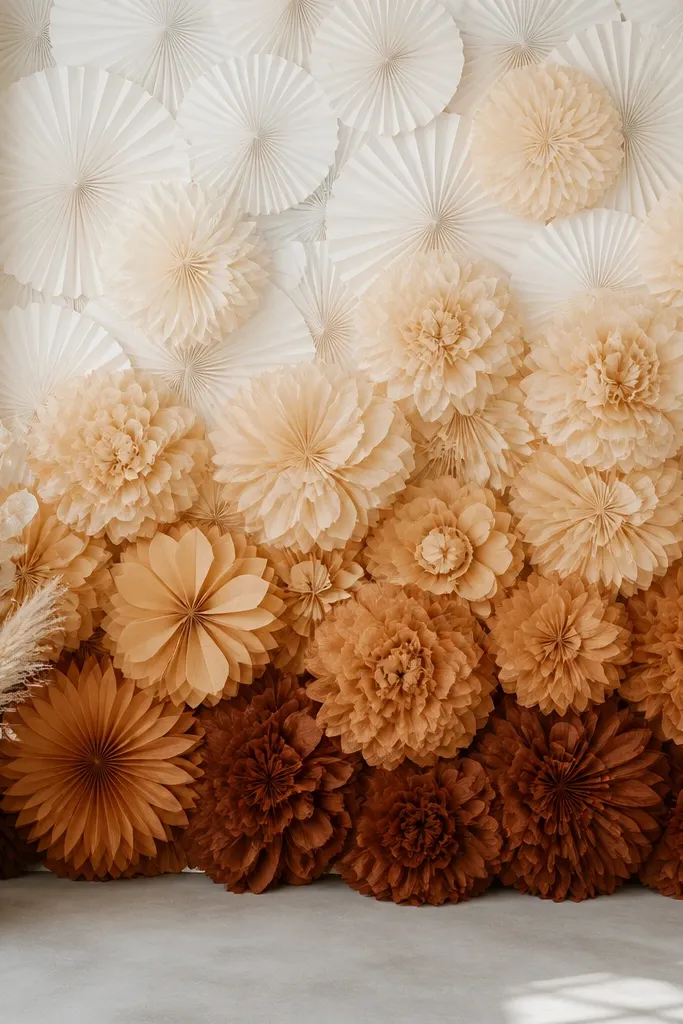
Paper fans create that airy, high-end look because they add depth behind the flowers. The ombré caramel roses make the whole setup feel styled, not random, and caramel tones look great in daylight and evening indoor lighting. I’ve used this for fall birthdays and holiday parties because the palette reads warm without turning into a red-only theme. It flatters everyone in photos because the gradient gives the background a soft gradient instead of a flat wall.
Editor's noteAngle your fans slightly outward (about 10 degrees) so light catches the ridges and the tissue petals cast real shadows.
Make or buy warm white paper fans and mount them to a board or directly to the wall in a tight grid so no wall shows through. Create three caramel shades: light caramel, medium caramel, and deep toasted brown tissue. Build your roses so each bloom uses layered petals with a slightly darker outer ring, then place light caramel flowers at the top row, medium in the middle, and deep at the bottom. Keep your flower centers consistent (use the same darker tissue for the center on every bloom) so the ombré stays clean, then add one or two smaller blooms near the corners for framing.
Skip thisAvoid mixing too many caramel shades — five different browns turns into mud on camera.
4. Terracotta Half-Moon Arch With Apricot Flowers
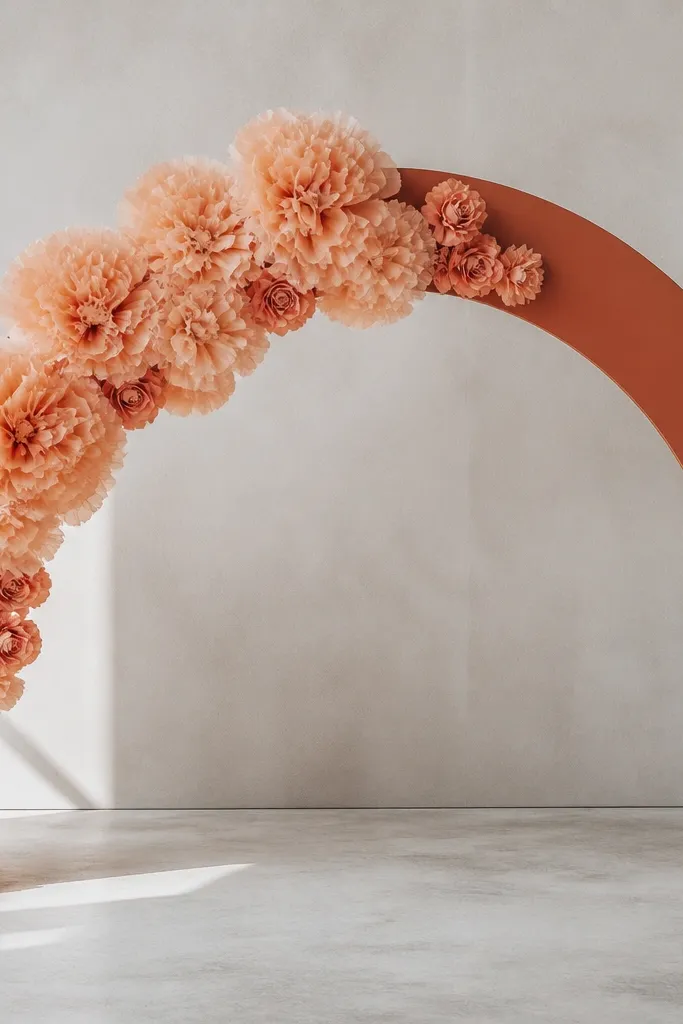
An arch is the fastest way to make a tissue backdrop feel like an event space. Terracotta adds warmth and structure, and apricot flowers soften it so it doesn’t look like a construction project. This is perfect for cake tables, welcome zones, and first birthday photos because the arch naturally frames faces. In my experience, apricot looks especially flattering for warm undertones and pairs well with gold accessories.
Editor's noteLeave a 2-inch border of the terracotta wrap around the edge so the arch looks finished even when flowers shift slightly.
Cut a half-moon arch shape from foam board or thick cardboard, then wrap it in terracotta craft paper or paint it with matte terracotta acrylic. Make apricot flowers in two sizes: 16-inch for the center cluster and 10-inch for the outer curve. Attach flowers to the arch using hot glue at the base of the center, starting with the largest blooms at the top-middle and bottom-middle points. Fill gaps with smaller blooms until the arch looks dense but not sticky, then add a thin strip of matching terracotta tissue fringe along the inner edge if you want extra movement.
Skip thisDon’t overpack the arch with identical blooms — the curve gets heavy and the petals blur together.
5. Sunset Palette Backdrop With Peach-Pink Mix and Cream Base
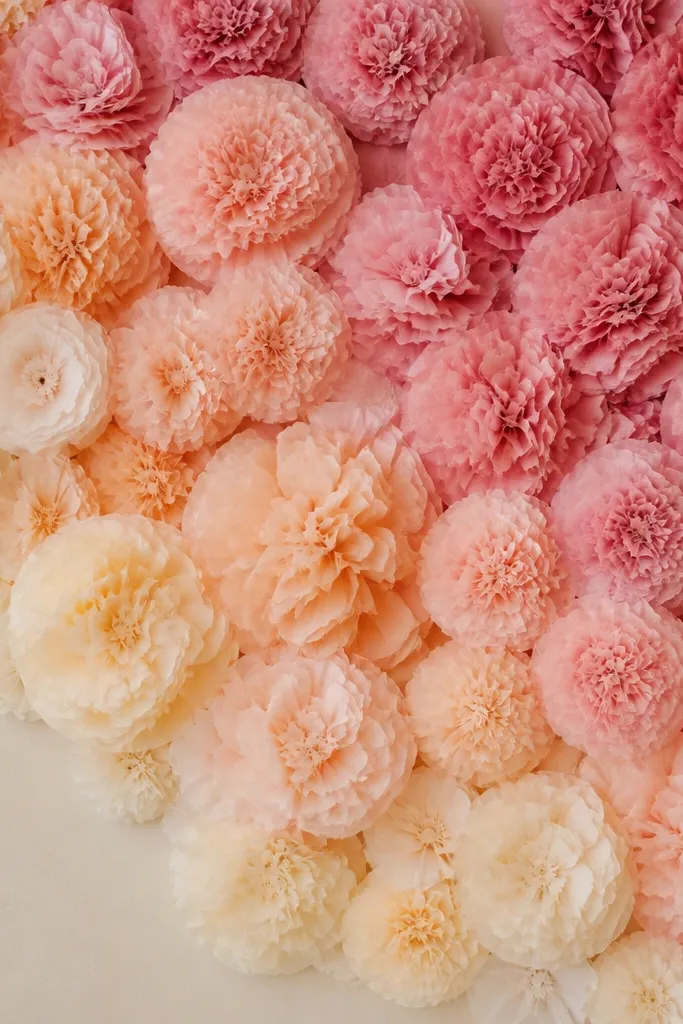
This setup looks like a warm sunset without needing any printed backdrop. Cream base keeps it cozy, while peach and dusty pink create that gradual “glow” effect when people stand in front. I used this for an outdoor dinner where the light kept changing — the colors stayed flattering because the cream anchors everything. It works with all kinds of outfits, too, because it doesn’t force a single color theme.
Editor's noteTake one quick phone test photo from where guests will stand before you add the last few flowers — it tells you if the gradient reads clearly.
Use a cream backdrop board or a sheet hung flat, then set your flower colors: 60% peach, 30% dusty pink, 10% a darker rose for accents. Build peach and dusty pink flowers in one main size (14-inch), then add a few 18-inch statement blooms. Arrange them in a diagonal gradient: place darker rose blooms closer to the upper right, then fade into lighter peach toward the lower left. Leave small negative spaces (about 3 to 4 inches) so the cream base shows through, which keeps the photo bright instead of crowded.
Skip thisDon’t center every flower perfectly in a grid — sunsets look best when the spacing has a gentle flow.
6. Giant 3D Pom-Style Tissue Flowers on a White Foam Board Grid
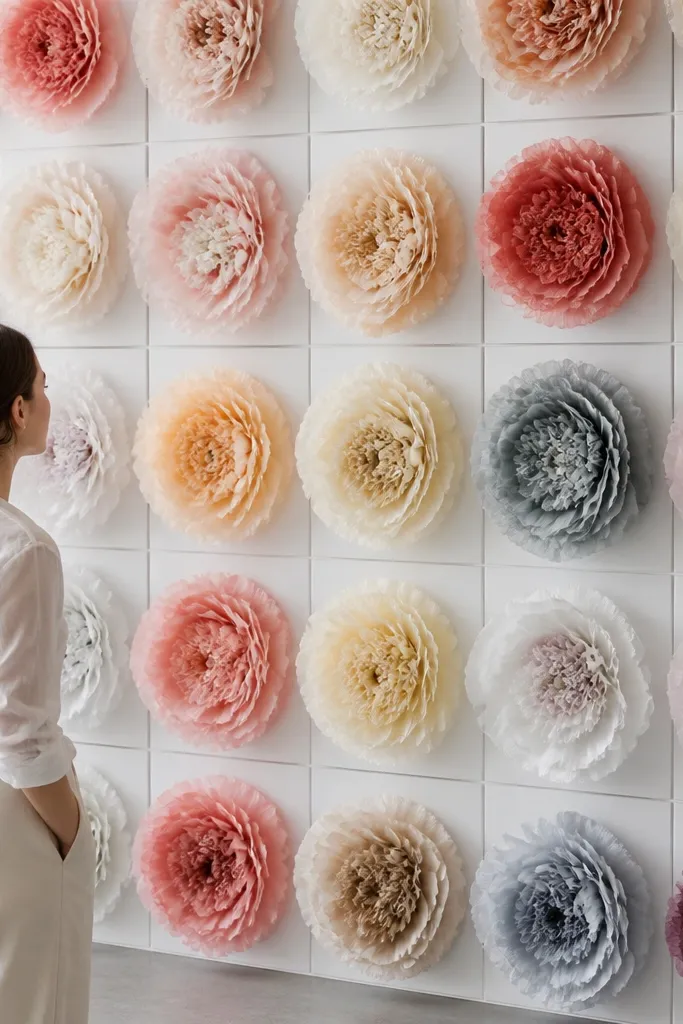
If you want maximum “wow” without complicated structures, this is it. The foam board grid makes every flower sit upright so petals don’t slump, and the 3D pom style gives a soft, full look from far away. I’ve used this in small rooms where you need the backdrop to read clearly even when people are close to the camera. It also flatters because the rounded bloom shape creates a flattering halo behind faces.
Editor's noteUse a matte white foam board, not glossy — glossy reflects overhead lights and flattens the flower depth in photos.
Cut foam board into a size that fits your wall or stand, then draw a light pencil grid with 12-inch spacing. Build giant tissue flowers using thicker stack counts: use multiple tissue sheets per layer and add an extra outer layer so the petals are full and round. Glue each finished bloom to the foam board at the center base, pressing for 10 seconds so the bond sets quickly. Start with the largest flowers at the center of the grid, then move outward with slightly smaller ones so the composition feels intentional. Finish by adding two or three mini flowers in the corners to prevent dead space.
Skip thisAvoid thin, under-stacked petals — they look flat and won’t hold the pom shape.
7. Wreath-Style Flower Frame for a Cozy Entryway
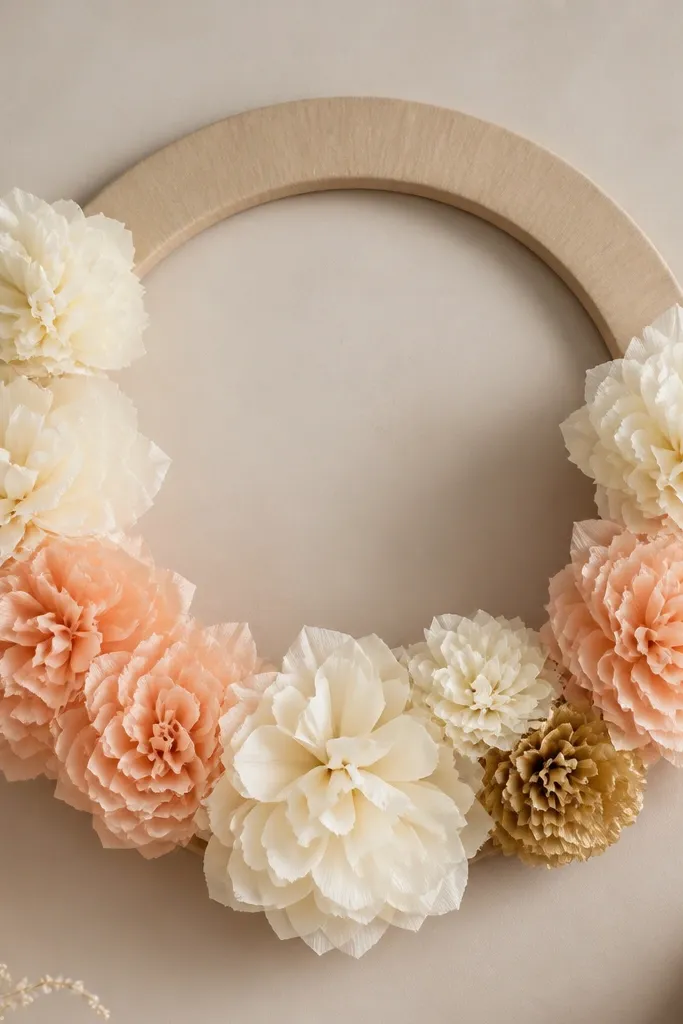
This is a cozy decor option when you don’t have space for a full wall. A wreath frame gives a photo spot and a warm greeting at the same time. I like it for winter months because the warm tissue tones contrast nicely with darker doors and entry corners. It also looks good on camera because the circular shape pulls attention toward faces and keeps the background tidy.
Editor's noteWrap a thin ribbon around the back of the ring for hanging so the frame sits flat and doesn’t tilt.
Cut a ring from thick cardboard (about 18 to 22 inches wide outer diameter), then cover it with warm beige craft paper. Make cream and peach tissue flowers in 12-inch and 10-inch sizes, plus one smaller 8-inch accent bloom in muted gold. Attach flowers along the ring edge, starting with the largest blooms at top and bottom, then fill sides with medium flowers. Leave small gaps so the ring backing shows through; too many blooms make it look like a padded blanket. Finish by adding a few curled tissue leaf shapes made from thin strips twisted around a pencil and glued behind petals.
Skip thisSkip over-gluing the petals — it can make flowers look shiny and stiff.
8. Ceiling-to-Wall Hanging Clusters With Warm White Tissue Stars
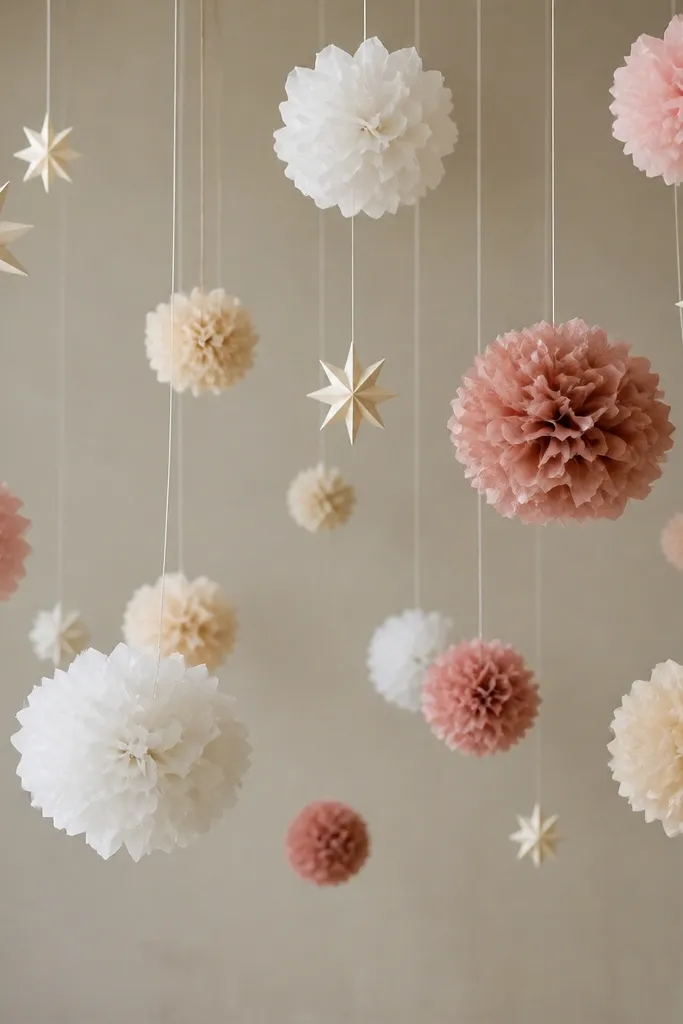
Hanging clusters make a room feel bigger because you get depth in three dimensions. Warm white tissue stars add a gentle sparkle effect without glitter, and the whole thing reads airy even in smaller spaces. I used this when I had a narrow wall and didn’t want to cover everything with paper. People look good in photos because the background isn’t a flat rectangle — it’s a soft cloud.
Tie fishing line to lightweight curtain hooks near the ceiling, then bring the line down to different lengths so clusters sit between 5 and 7 feet high. Build small tissue flowers (8 to 10 inches) and attach them to the fishing line by their center with a tiny loop of thread, not glue. Add warm white tissue star shapes made from folded paper or tissue panels, then place them around the clusters so they peek between petals. Space the clusters so there’s at least 10 inches between groups, then adjust heights until the densest cluster sits behind where faces will be.
Use clear line with a slight tension so clusters don’t sway like wind chimes.
Don’t hang everything at the same height — it looks like a row of crafts instead of a floating scene.
9. Matcha-Gold Mist Tissue Flowers With Cream Backdrop for a Soft Glow
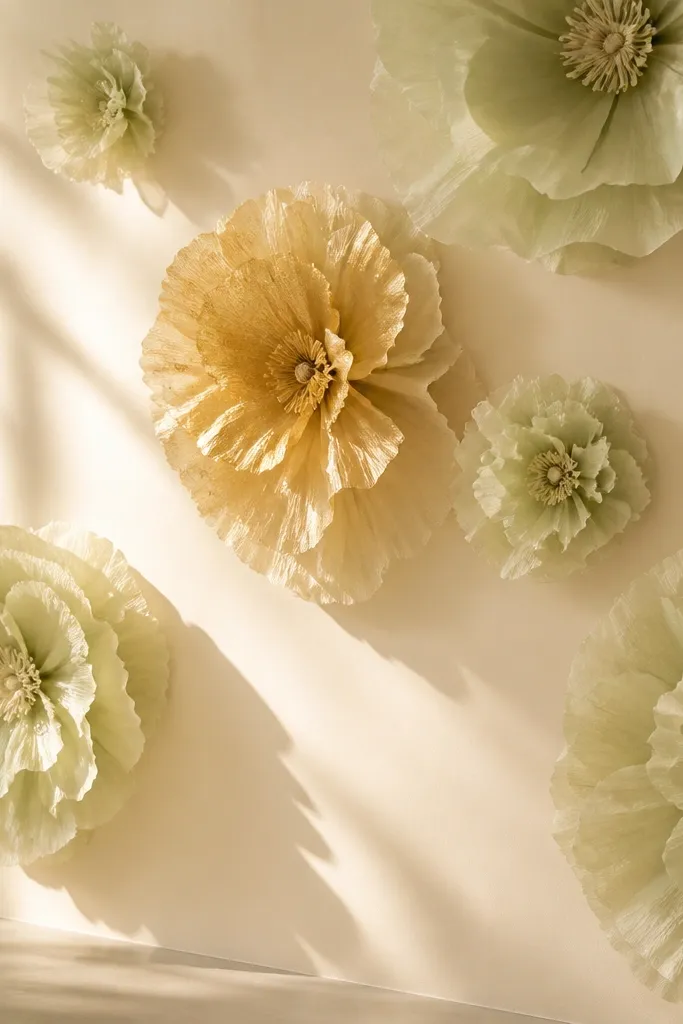
Pale matcha is one of my favorite “cozy but not pink” choices. Pair it with cream backing and a muted gold center, and the whole setup feels warm without looking like a Valentine theme. I’ve done this for spring birthdays and even baby showers because it photographs cleanly and doesn’t fight with floral outfits. It’s also forgiving on skin tones — cream keeps it bright, matcha adds interest, and gold gives warmth.
Cover your backdrop with cream paper or a white sheet, then choose tissue in pale matcha (light green) and cream. Build matcha flowers in one main size (14-inch) and add a few cream flowers for contrast so the green doesn’t take over. Make the center by rolling thin gold tissue strips into a tight coil and gluing it in place. Arrange flowers in a loose pattern: cluster three together on one side, then leave more space on the other side so the background breathes. For extra depth, angle a couple of blooms slightly outward by gluing only the center base and leaving petals free.
If you can, place a warm lamp to the side of the backdrop so the matcha tissue picks up golden highlights.
Avoid neon green tissue — it reads harsh and turns the whole backdrop into a color block.
10. Checkerboard Tissue Flower Panels for a Photo Booth Wall
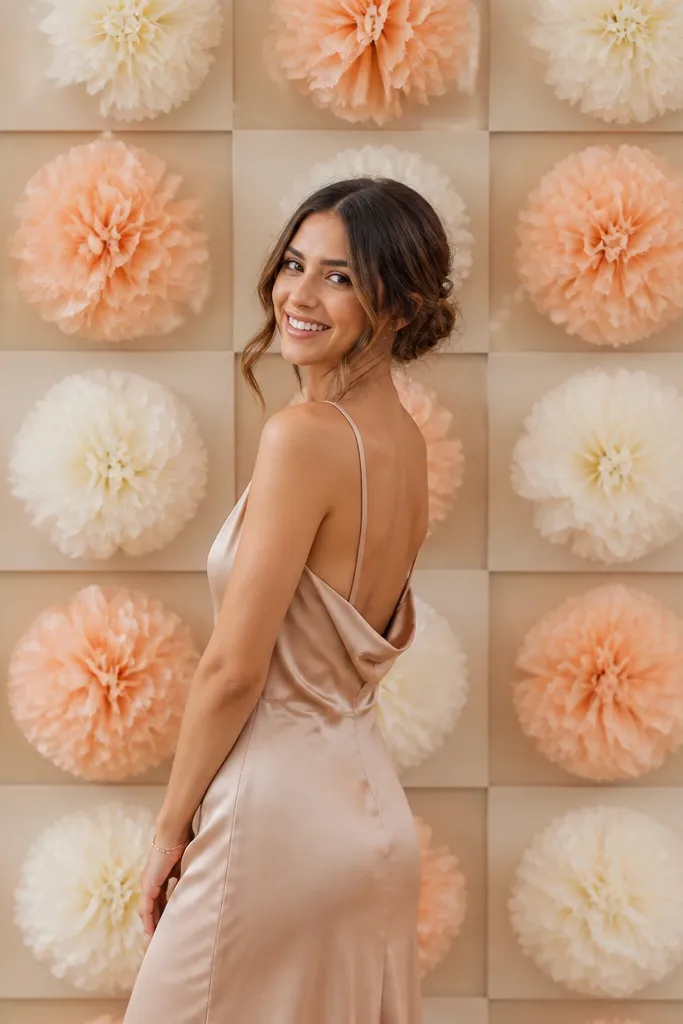
This is the option I go to when I need the backdrop to look good from any angle. Checkerboard spacing creates a clean structure, and alternating flower colors keeps the wall from feeling flat. I’ve used it in narrow hallways where people stand at different spots; the pattern still looks intentional. It flatters because it gives a consistent background texture behind faces, not random gaps.
Editor's noteUse painter’s tape to hold each flower in place temporarily before gluing — it prevents crooked mounts.
Build a backing from foam board or a large plywood sheet and mark a grid with 16-inch squares. In alternating squares, mount either 12-inch cream flowers or 12-inch peach flowers, keeping the centers aligned so the pattern stays crisp. Use hot glue to attach the center base only, then press down for a few seconds so petals don’t shift. Leave the grid lines visible by using a warm neutral backing paper between squares. Add one larger 16-inch flower in the center square if you want a “main character” bloom.
Skip thisDon’t skip the grid — random placement looks messy even if individual flowers look perfect.
11. Tea Party Pastel Backdrop With Micro Flowers and One Big Bloom
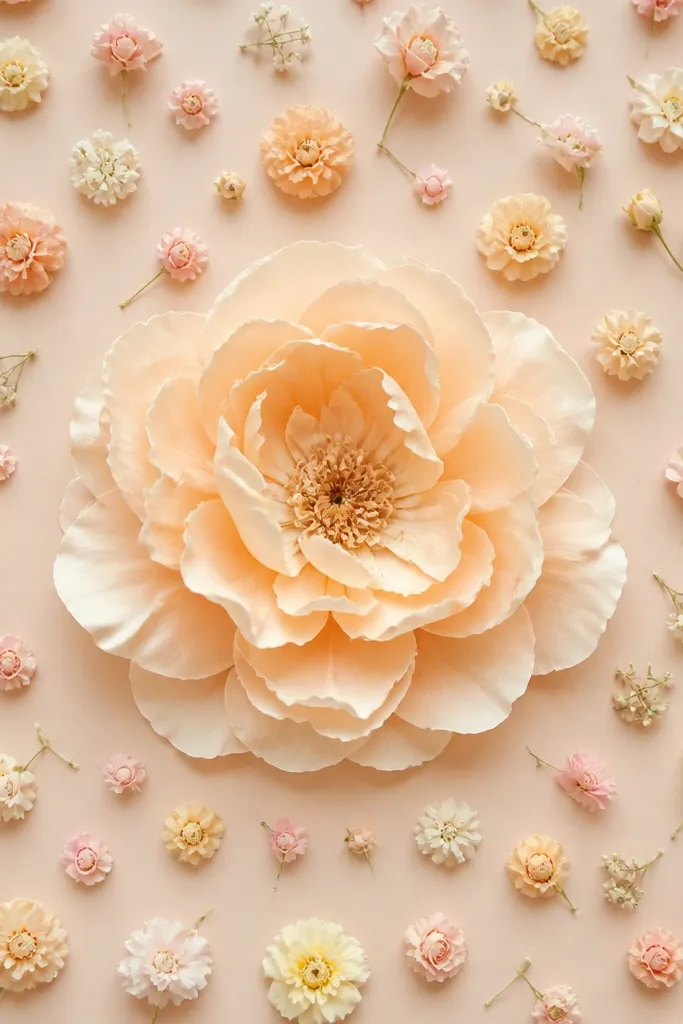
Micro flowers make the backdrop feel like it’s alive, and one big bloom gives the eye a place to land. This is the best setup for tea parties, bridal showers, and any “soft and sweet” event where you want the background to look delicate. In photos, micro flowers blur slightly at the edges, which makes the whole scene feel dreamy without looking fake. It flatters most outfits because pastel tones don’t overpower patterns.
Start with a plain butter cream backdrop (fabric or paper), then make micro tissue flowers at about 5 to 6 inches wide. Mix three tones: pale pink, soft peach, and cream, and keep the centers consistent so the look stays tidy. Scatter micro flowers evenly with about 4 to 5 inches between them, then add one oversized 18-inch bloom in the center. Glue the big bloom first, then fill around it so you don’t cover the center. Finish by adding a small second medium bloom near the bottom right for balance.
Use a thin craft wire to pinch and shape petals slightly so micro flowers look dimensional instead of flat circles.
Avoid too many large blooms — the pastel background turns busy and loses the cozy tea-party vibe.
12. Chocolate Brown Backdrop With Cream and Mocha Roses
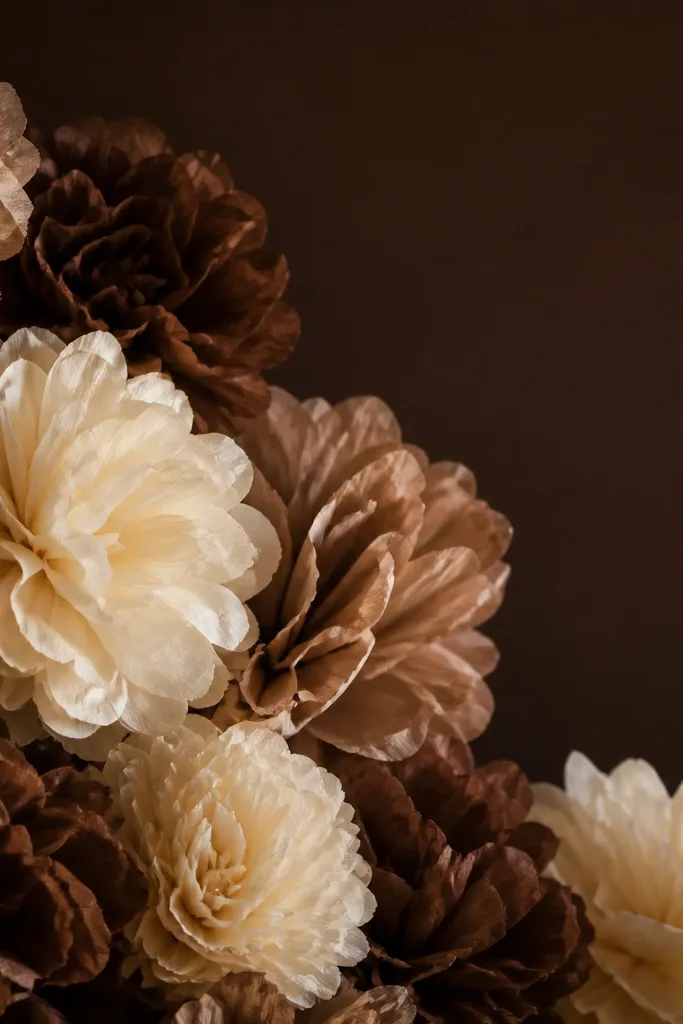
Dark backdrops make tissue flowers look richer because the petals catch light and edges show more clearly. Chocolate brown is cozy in a way white backdrops never are, especially for evening events. I’ve done this for winter birthdays and dessert tables, and the flowers made the whole area look intentional. It flatters because cream petals brighten faces, and mocha tones add warmth without pulling the scene cold.
Editor's noteIf you have overhead lights, turn one lamp on behind the camera for softer shadows on the brown backdrop.
Cover your backdrop board with matte chocolate brown paper or fabric so it doesn’t reflect glare. Make cream flowers in two sizes: 14-inch and 10-inch, then create mocha flowers in 12-inch size. Arrange the clusters like this: place cream flowers at eye level and mocha flowers slightly lower or around the edges. Add a few extra cream blooms to corners so the whole backdrop looks balanced. Use centers made from layered tissue in a slightly darker shade (cream centers with a thin mocha ring looks best).
Skip thisAvoid shiny brown foil paper — it creates hotspots that wash out tissue texture.
13. Rainbow Warm-Tone Mix With Soft Border Frame
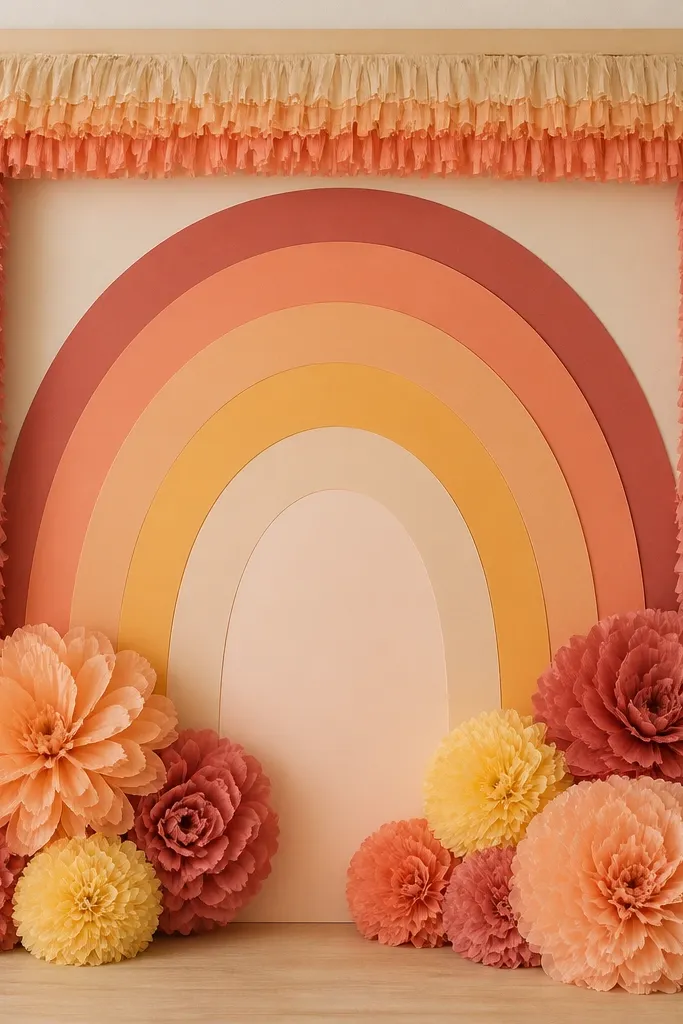
You still get a “wow” color story, but it stays cozy because the palette is warm-toned and the frame is soft. I like this for family birthdays where you want color without the harsh primary look. The border helps the eye stay focused and makes the flowers feel like a designed panel. It flatters in photos because warm colors create a gentle warmth around faces, and the neutral frame keeps everything from looking chaotic.
Build a simple rectangle frame from foam board and cover it with warm beige paper. Cut tissue fringe strips in coordinating colors — warm yellow, coral, and muted rose — and glue them along the inner border edge. Place tissue flowers inside the frame in a loose rainbow band: start with peach and coral on the left, warm yellow in the center, and muted rose on the right. Use one main flower size (13 to 14 inches) and add a few smaller (9 to 10 inches) to fill gaps. Keep spacing consistent so the colors read like a gradient rather than random blobs.
Use the same center color for every flower (like warm golden tissue) so the rainbow looks cohesive.
Avoid adding cool colors like teal or icy blue — they break the cozy warm look fast.
14. White Lace-Effect Tissue Flowers With Blush Veil Backing
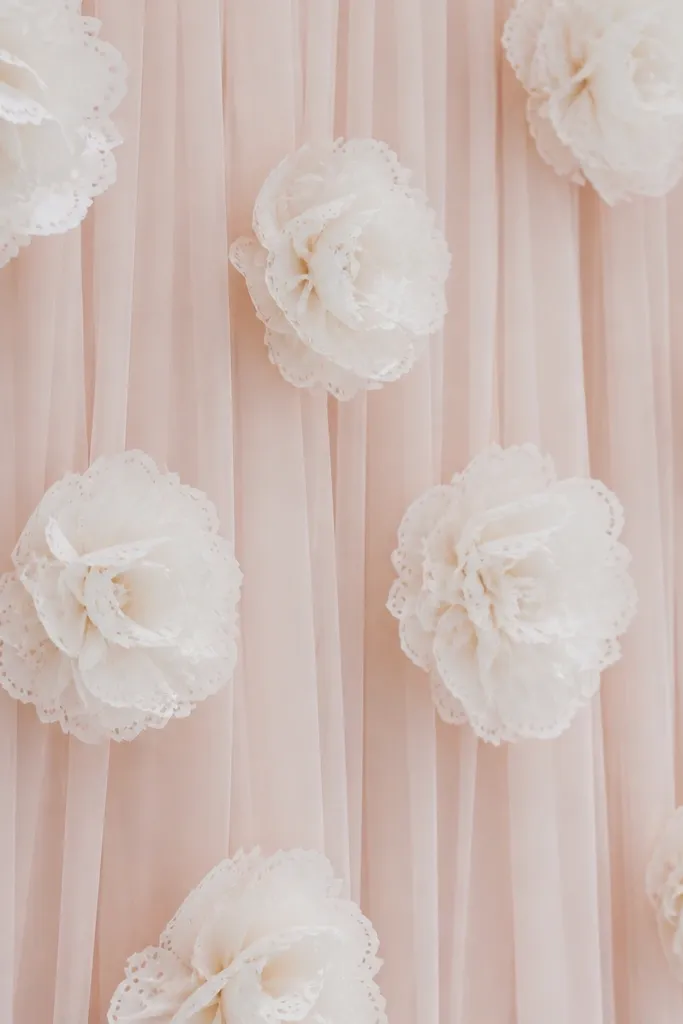
This is the option I use when someone wants “bridal but not formal.” A blush veil backing gives you a soft filter, and white tissue flowers with scalloped petals look like lace. It’s stunning for engagement parties, wedding showers, and indoor photos where you want a dreamy look. It flatters because the blush veil warms skin tones, and white petals brighten without looking harsh like bright white paper.
Editor's noteUse a handheld steamer on the veil before hanging; it keeps the folds from looking wrinkled on camera.
Hang blush veil fabric on your backdrop stand so it drapes and breathes, then place a white or warm cream board behind it if you want extra brightness. Make white tissue flowers with scalloped edges by cutting petal strips with small arcs before layering. Keep the centers soft: use pale champagne tissue strips rolled into a coil, then glue into the middle. Attach flowers so they sit slightly away from the veil by gluing them to thin cardboard tabs and then taping the tabs to the backing. Arrange in clusters of 3 with small gaps so the veil texture shows through between blooms.
Skip thisDon’t press the petals flat when assembling — lace effect needs gentle lift and curl.
15. Soft Sage Paper Lantern Backdrop With Tissue Peony Medallions
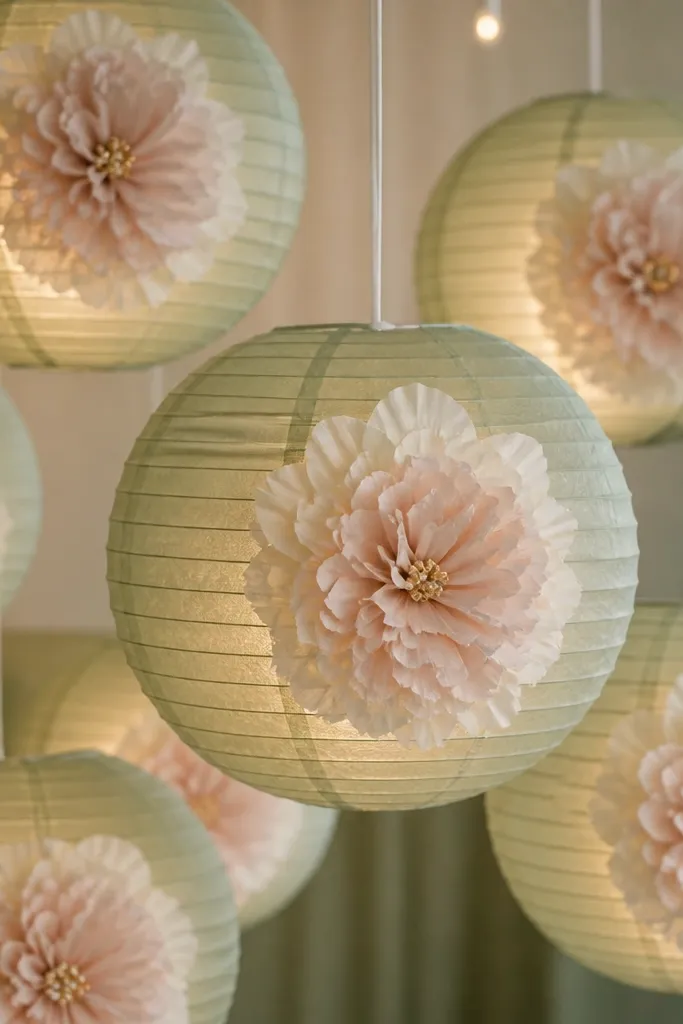
This backdrop mixes two textures that photograph really well together — translucent lantern paper and thick, sculpted tissue petals. The sage color makes the warm tissue flowers decor feel calm instead of sugary, and it hides smudges better than bright pastels when you’re setting up in a hurry. I’ve used this for birthdays where guests keep walking up to the flowers for pictures, and the lanterns give you depth even when the camera is straight on. The peony medallions look like they’re pinned to the lanterns, so you get a clear focal point without needing a huge wall of paper.
Editor's noteUse matte sage lantern paper if you can find it. Glossy lanterns reflect overhead light and make your tissue edges look washed out in photos.
1) Hang 6 to 10 paper lanterns (about 10-12 inches wide) on clear fishing line from a tension rod or ceiling hooks, spacing them 8-10 inches apart. Cut a simple “rail” for the medallions by tying a string line across the lantern cluster at their mid-height so you have a guide for placement. 2) Make tissue peony medallions using 8 to 10 layers of 20x20 inch tissue sheets in cream and pale blush, folded like a fan and gathered at the center with floral wire. Trim the outer edges into soft points so the petals look irregular, not like a perfect flower cookie cutter. 3) Glue a small foam dot or a folded square of cardboard behind each medallion, then press it onto the lantern front at the center. For the gold look, dab 3 to 5 tiny dots of metallic craft paint or gold gel pen in the middle so it reads as a warm center even from a distance. 4) Turn off overhead lights for photos and use warm white LED tea lights or battery string lights inside the lanterns so the tissue edges glow instead of flattening.
Skip thisSkip hanging the lanterns too close together — if they touch, the peony medallions blur into one big blob on camera.



