

1. Kraft + Black Ink "Firsts" mini timeline pocket page
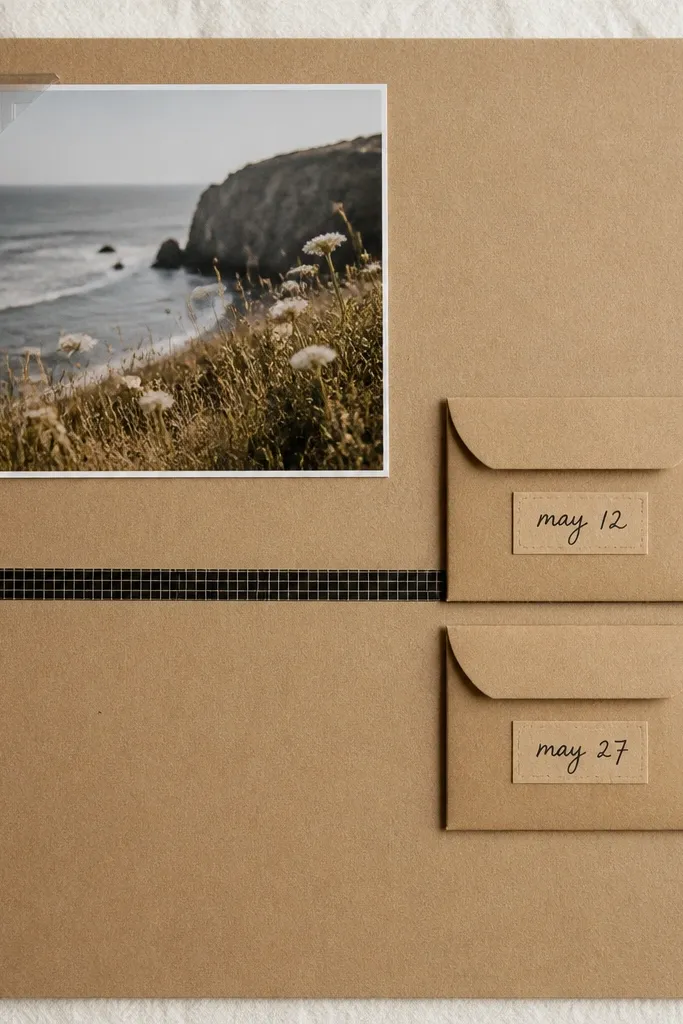
This layout works because it gives your boyfriend a clear story arc without needing big decorations. The kraft base makes skin tones look warmer and photos look less washed out, especially if you print in matte. I keep the ink black and the labels simple so the page reads cleanly even with small elements. If your boyfriend likes practical stuff, this feels like a neat record of milestones rather than a messy collage. The styling principle is one strong graphic line — the timeline strip — that organizes everything else.
Start by trimming a kraft cardstock page to 6x8 and drawing a light pencil guide 1/4 inch from the edges. Add a 1/2 inch strip of black washi tape across the page at mid-height, then write three short dates on it. Make two small envelopes from 65 lb cardstock, sized about 3x4 inches, and tape them to the right side with the tops open. Place a printed photo (about 2x3 inches) into a clear photo corner on the left, then tuck a journaling card into the left envelope. Finish by sealing the envelope bottoms with a thin line of glue so they don’t flap when you flip pages.
Write the journaling on a small card using a fine-tip white gel pen on black paper so it pops against kraft.
Skipping the 1/4 inch margin makes pockets scrape the binding and makes the page look sloppy.
2. Denim blue "date night" ticket pull-out with stitched edge
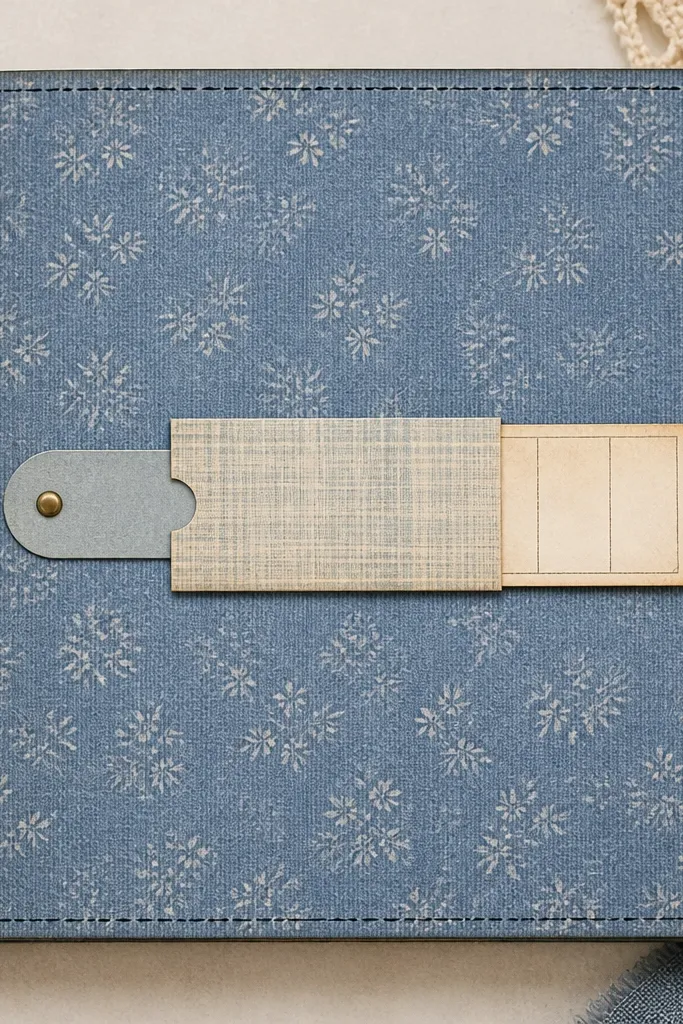
A pull-out ticket layout feels personal because it literally holds the proof — your movie night, restaurant receipt, or parking stub. Denim blue pairs well with both warm and cool skin tones in photos, and it hides fingerprints better than light paper. The stitched edge marker adds a handmade vibe that doesn’t require actual fabric. This style suits boyfriends who like streetwear or sports because the denim tone feels “real life.” The principle is using one interactive element so the page stays interesting even in a small book.
Editor's noteUse a receipt-sized strip of vellum under the ticket so it looks layered when you pull it out.
Cut a denim-blue sheet to 6x8, then add a black stitched-look border by drawing short looping dashes with a 1 mm marker around the edges. Make a pull tab from 2x6 inch cardstock, fold it accordion-style so it tucks under the top layer, and punch a small hole at one end. Attach a metal brad through the hole and set it into the left side of a ticket pocket panel sized 3x5 inches. Glue a 3x2 inch photo at the top of the pocket panel, then slide ticket strips into the pocket. Pull the tab out to check closure before you glue the top flap down fully.
Skip thisUsing thick cardstock for both the pull tab and the pocket makes the book bulge and won’t close right.
3. Polaroid corners + 3-photo mini grid for tiny prints
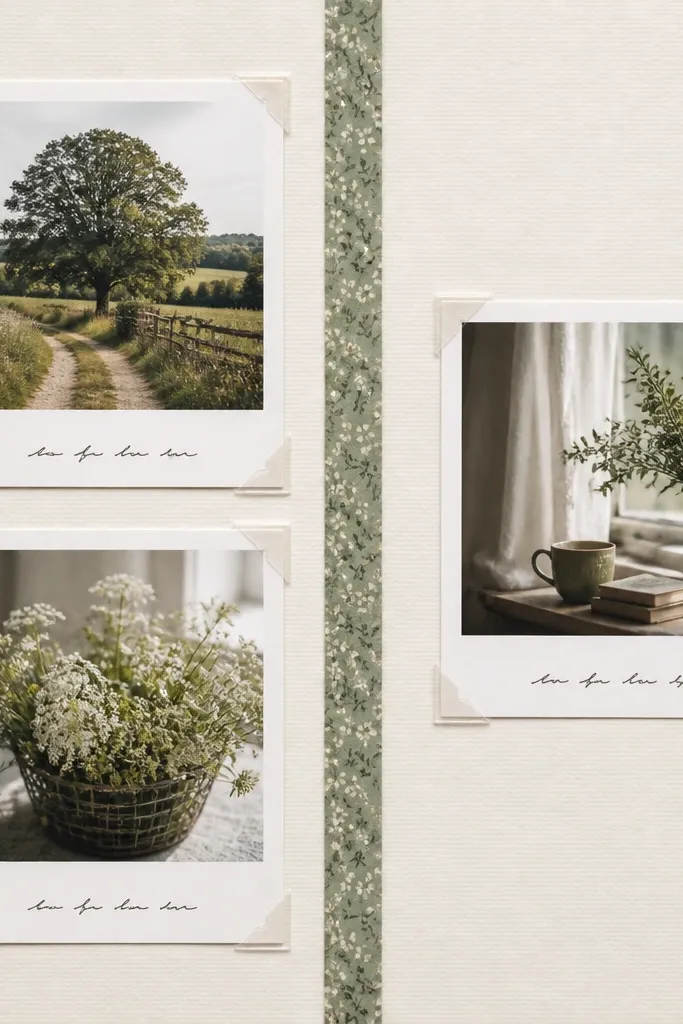
If your photos are small or you printed from your phone at 2x2 inches, a mini grid keeps them from looking lost. The Polaroid corners give structure, and the white borders make the images pop without extra embellishment. This is perfect for compact small space scrapbook ideas for boyfriend because it uses photo spacing as the design. It looks good on both light and dark photo backgrounds, since the white frames standardize the look. The styling principle is consistent photo sizing — everything stays tidy.
Editor's notePrint captions on tiny label paper with a label maker, then hand-underline one word for a human touch.
Trim three photos to 2x2 inches. Cut three white cardstock frames sized 2.5x2.5 inches and glue photos centered inside, leaving a 1/4 inch border. Place the frames on a 5x7 page with 1/4 inch gaps between them, and anchor each photo using clear photo corners instead of full glue coverage. Add a vertical divider strip of patterned paper (about 1/2 inch wide) between the left and middle photos. Write a short caption under each frame using a black fine liner, keeping the letters under 1 inch wide so they don’t crowd.
Skip thisTaping the photos flat with no corners makes them look like a random sticker sheet.
4. Receipt ledger page with faux "accounting" journaling lines
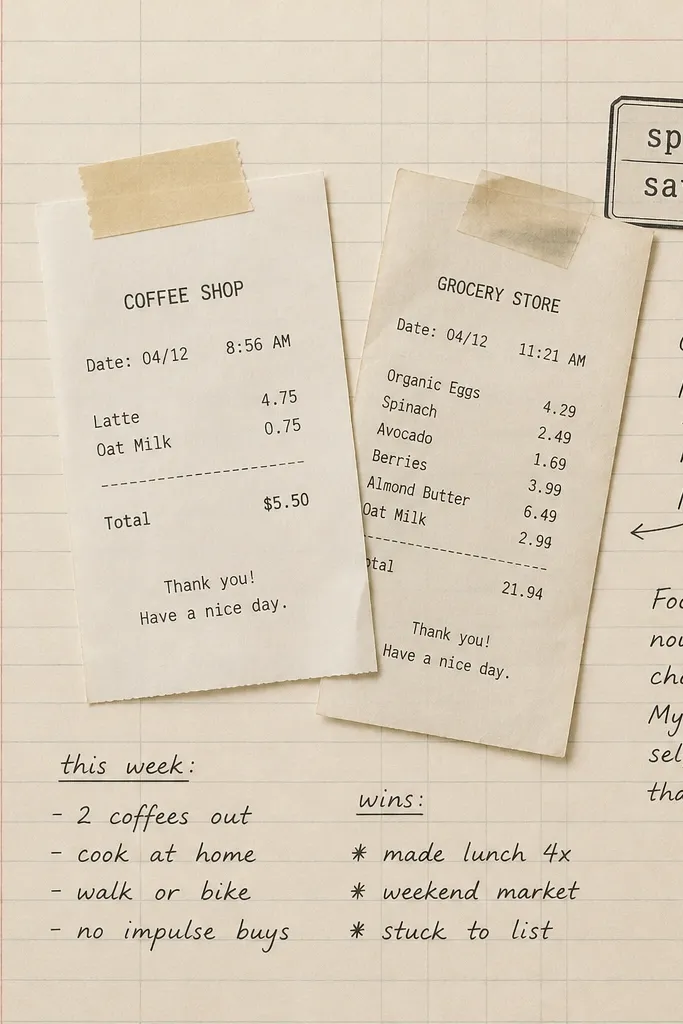
This layout is for the boyfriend who tracks things — budgets, games stats, gym progress, anything with numbers. The ledger grid makes your journaling look organized even if you write messy. Receipts add texture and real-world color — grey, tan, and tiny red logos — without needing extra paper. It also hides small imperfections because the grid does the heavy lifting visually. The principle is turning everyday paper into the decoration.
Editor's noteUse a clear ruler to keep the grid straight; crooked lines scream “I rushed this.”
Use a cream cardstock base around 5x7. Draw a simple ledger grid using a light grey pen, with lines spaced about 3/8 inch apart, and keep a 1/4 inch margin. Tape receipts on the center using two strips of washi tape only at the top corners so they don’t wrinkle. Add a small “spent” label made from a 1x2 inch rectangle of black cardstock with white gel pen text. Fill nearby ledger lines with short notes like date, place, and one sentence about what you did. Finish by sealing receipt edges with a thin layer of matte glue to prevent lifting.
Skip thisCovering the entire receipt with glue makes it bubble and warps the page.
5. Map coordinates page with layered compass charm
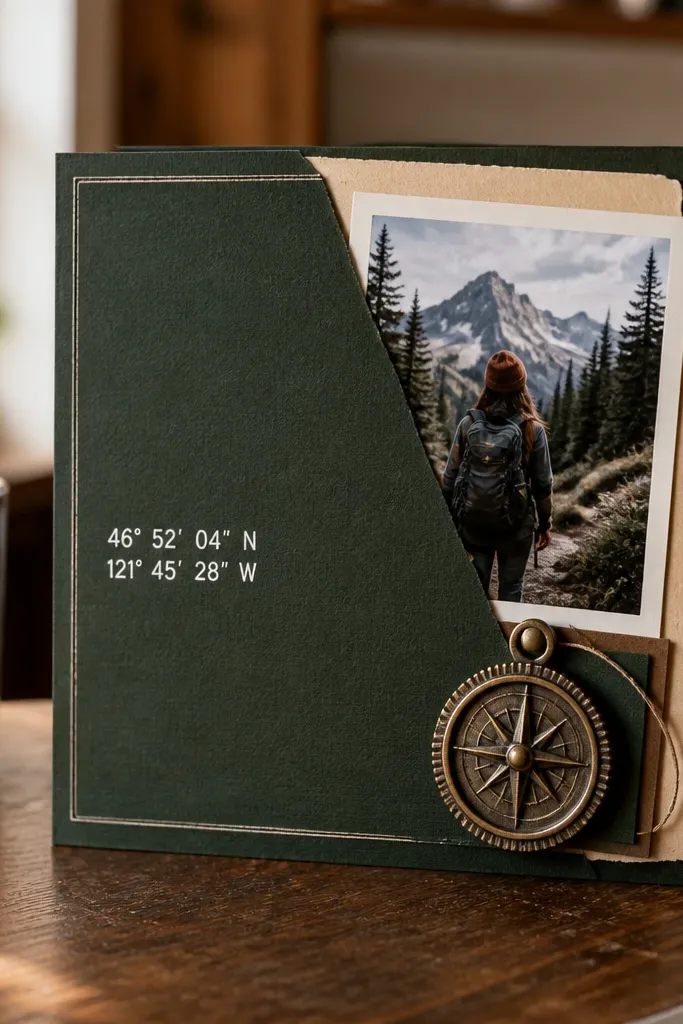
Coordinates look nerdy in the best way, and they feel special even if you only have one photo. A dark green base makes white text pop and keeps the page looking grounded. If your boyfriend likes hiking, gaming, or anything with maps, this page reads like a clue. The metal charm adds weight and a satisfying tactile moment when he flips the page. The principle is one clear focal point — the coordinates — with everything else supporting it.
Editor's noteWrite the coordinates in a slightly different ink shade — like silver on black — if you want it to feel more “designed.”
Cut a dark green patterned paper page to 6x8. Print or hand-write coordinates on a 2x3 inch piece of off-white cardstock, then glue it slightly off-center so it sits above a tucked photo. Draw a simple compass rose in the top right using a white gel pen and a small stencil if you have one. Attach a metal compass charm to a brad through the center of a 1x2 inch twine loop, then glue the twine ends flat so the charm doesn’t stick up too high. Tuck a 2x3 inch photo under the coordinates cardstock and secure it with two photo corners at the top.
Skip thisUsing too many charms or stickers makes it look like a grab bag instead of a single theme.
6. Mini "sneaker care" themed page with microfiber swatch strip
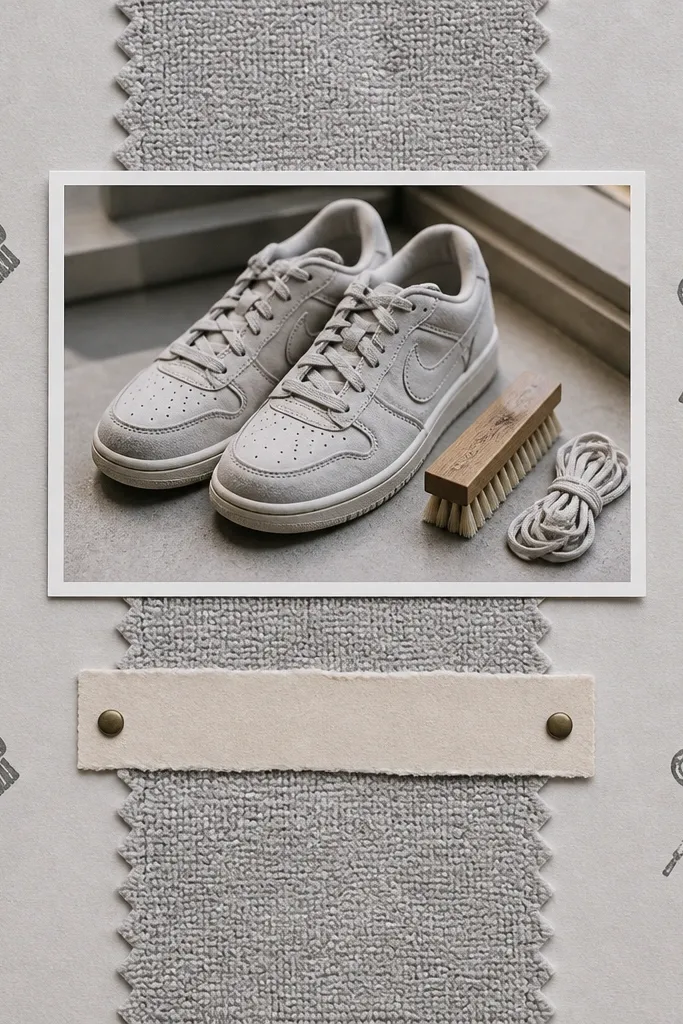
This one is weirdly effective because it uses a real material — a microfiber swatch — which makes the scrapbook feel like something you can touch. Light grey keeps everything readable, and the fabric texture adds depth without adding bulk. It flatters most photo tones because it’s neutral. This is a strong pick if your boyfriend cares about his shoes, watches, or any maintenance routine. The principle is texture over extra paper layers.
Editor's noteTrim the microfiber ends with pinking shears or cut them clean with a sharp blade so the edges don’t fray.
Cut a 6x8 light grey cardstock base. Glue a 1 inch wide strip of microfiber fabric vertically down the center, leaving 1/4 inch space from top and bottom. Stamp or draw tiny shoe-care icons around it using black ink, one icon per inch. Add a 2x3 photo at the top left with a clear photo corner, then place a 1x3 inch label strip beneath the photo with handwritten journaling. Finish by adding a small tab at the bottom made from a 1x2 inch cardstock piece that tucks under the microfiber strip.
Skip thisGluing fabric with too much liquid glue can soak through and leave a dark spot.
7. Black-and-white "game night" controller wrap journaling band
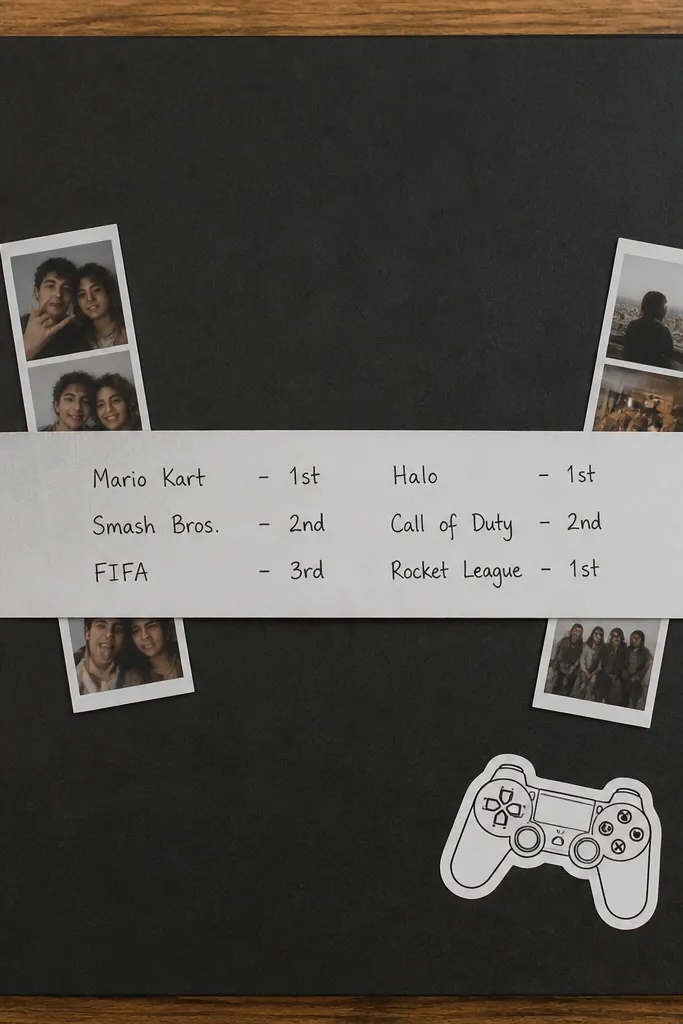
A wrap band layout makes small pages feel bigger because it draws the eye across the spread. Black-and-white fits almost every photo set and hides smudges from quick pens. The controller sticker gives a theme reference without taking over the page. This is great for compact small space scrapbook ideas for boyfriend when your photos are mostly screens, because the high contrast makes them readable. The principle is high contrast plus one horizontal band for your journaling.
Editor's noteUse a ruler for the band edges; uneven bands show up fast on dark paper.
Use black cardstock cut to 5x7. Cut a white cardstock band sized 1.5 inches tall and long enough to cross the page with 1/4 inch overlap on both sides. Glue the band slightly above center, then tuck two 1x3 inch photo strips under the band edges. Add a controller sticker to the bottom right and write game names and scores directly on the band with a white gel pen. Keep the text in two short lines so it doesn’t look like a wall of words when he flips quickly.
Skip thisWriting long paragraphs on black paper makes it look like a note you forgot to type.
8. Clear pocket page with "swipe file" mini notes
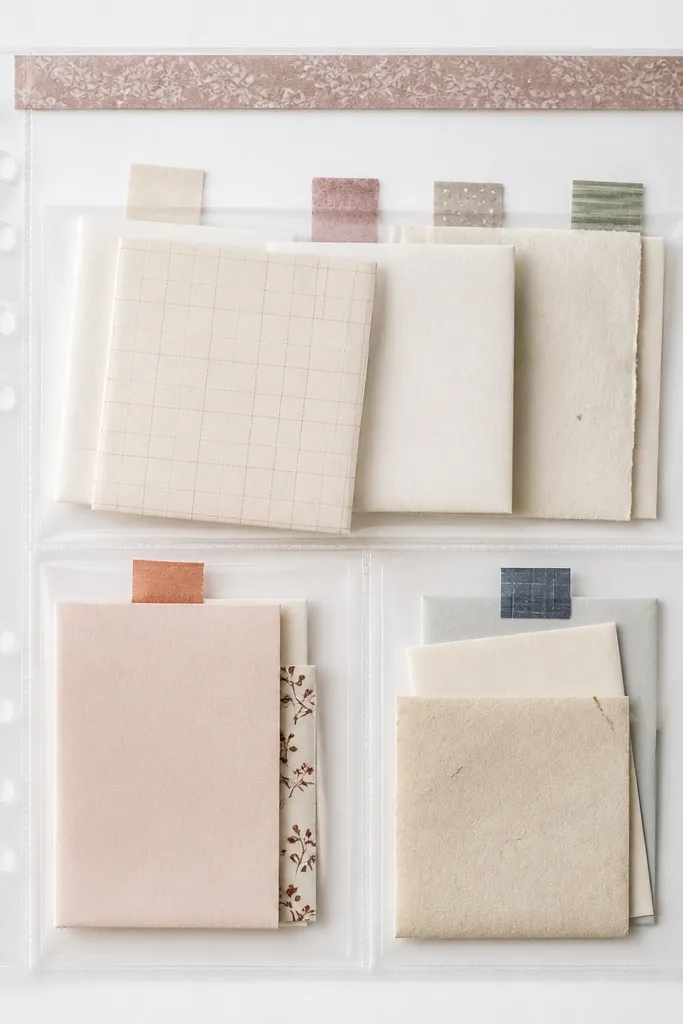
If you don’t have many photos yet, this layout still feels full because the notes become the memories. Clear pockets let you add and swap mini messages like a boyfriend “swipe file,” and it stays tidy in compact spaces because everything lives in one pocket. White cardstock makes the tabs and handwriting look crisp. This is perfect for long-distance relationships or for documenting the “in between” days. The principle is storing the emotional content in small, protected pieces.
Cut a 5x7 white cardstock base and add a header strip of washi tape across the top edge, about 1/2 inch tall. Create a clear pocket using a purchased clear pocket sleeve or a clear acetate envelope glued to the back, sized so it sits centered. Fold 4x6 inch journaling paper into thirds to make small notes, then tie a tiny washi tab to each note so you can pull it out. Add one 2x3 photo in a corner using a photo corner, then slide it behind the pocket edge so it peeks. Write a short date on each note and keep each note under 3 lines.
Use archival ink pens for the notes — they don’t smear when you handle them a lot.
Overstuffing the pocket makes notes wrinkle and makes the page look thick and uneven.
9. Candy wrapper edge trim for a "sweet moments" spread
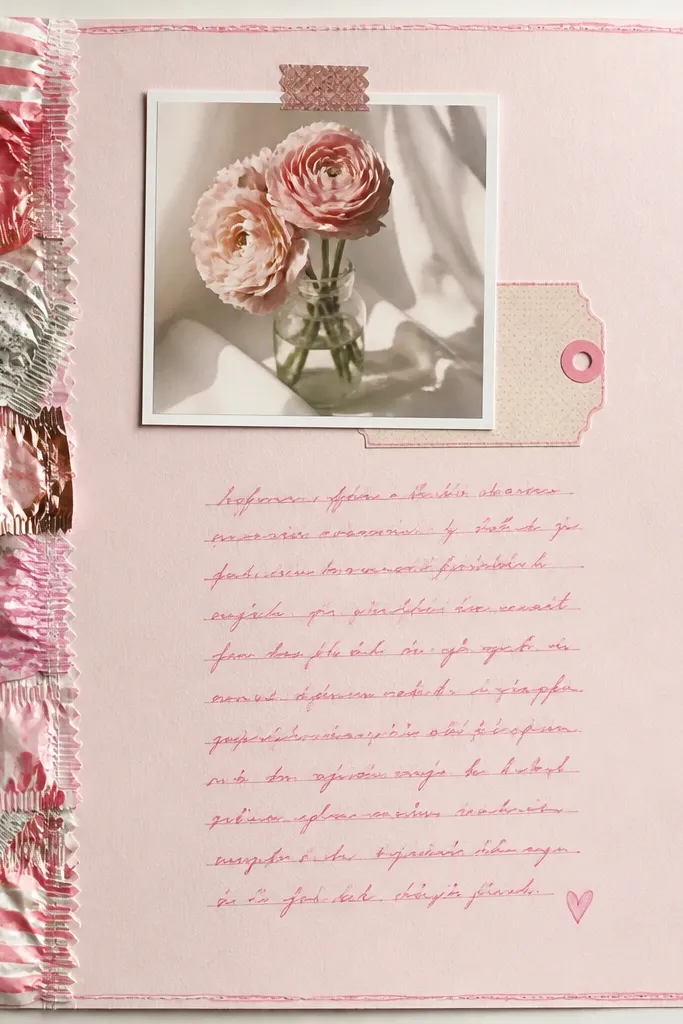
This is one of my favorite compact small space scrapbook ideas for boyfriend because it uses color without adding bulk. Flattened wrappers look glossy and dimensional, and they make the page feel like a treat. Pastel pink also flatters warmer photo tones and keeps skin looking natural. It works best when you use wrappers from the same color family so it doesn’t look chaotic. The principle is a single border accent that frames a clean center for writing.
Pick a pastel pink cardstock base, 6x8. Cut candy wrappers into a 1 inch wide strip, then press them under a heavy book for 30 minutes so they lay flat. Glue wrapper strips along one page edge with a thin line of matte glue, overlapping slightly. Add a 2x3 photo at the top left with a photo corner, then write a short caption tag beneath it using black gel pen. Leave the center mostly blank so the wrapper border is the star. Finish by adding one small sticker — like a star — near the tag, not everywhere.
Trim wrapper edges with scissors right after pressing so they stay crisp.
Using mixed wrapper colors in a big block makes it look like random trash paper instead of intentional trim.
10. Sports schedule mini pocket with vertical photo strip
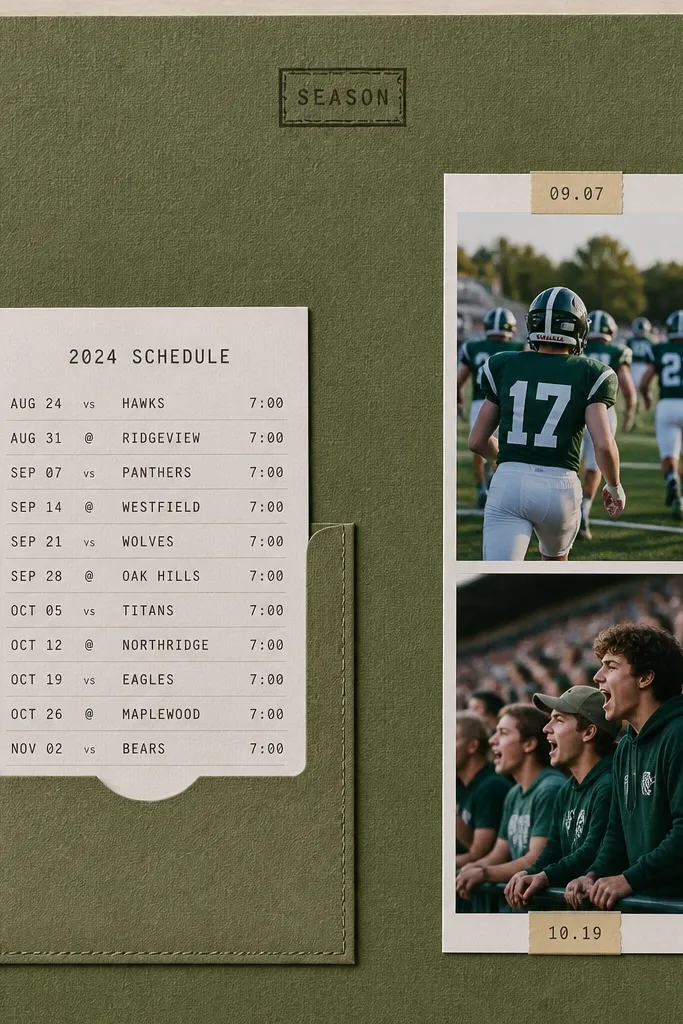
Sports schedule cards are already graphic, so you don’t need extra decoration. The vertical pocket saves space because it uses the page height, not the page width. Green looks great with most photo tones and hides pen marks better than bright white. This layout suits boyfriends who follow teams, play rec leagues, or get excited about stats. The principle is letting printed graphics do the design work while you add only one or two handmade touches.
Editor's noteUse black label tape for dates — it stays readable even on patterned paper.
Cut a 6x8 green cardstock base. Make a left-side vertical pocket from 65 lb cardstock sized about 2.5x6 inches, with a 1/2 inch flap at the top. Glue the pocket to the left edge leaving a 1/4 inch margin. Print or write a schedule card sized to fit the pocket, then slide it in. On the right side, add a vertical photo strip made from two 2x3 inch photos cut down to 1.75x2.5 inches, spaced 1/4 inch apart. Add date labels with a tiny label tape strip, and stamp a small “season” mark at the top corner.
Skip thisPutting the pocket too close to the binding makes it hard to pull the card out.
11. Monochrome floral corner tuck with photo underlay
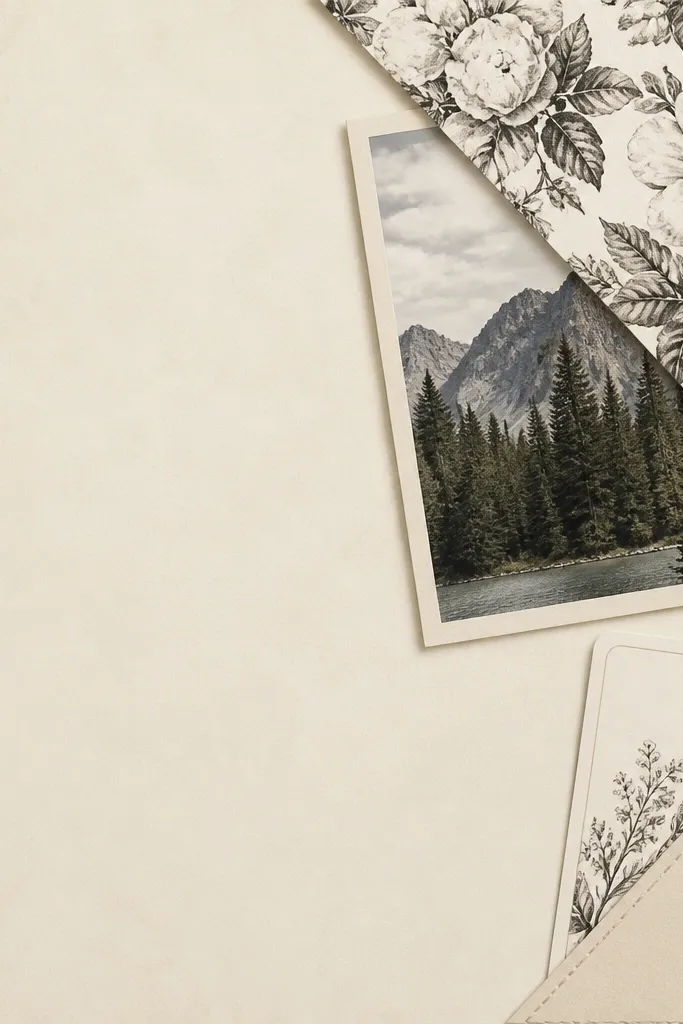
Corner tucks give you dimension without filling the whole page. Monochrome florals are soft, so they don’t fight with bold photos, and they still feel romantic even if your boyfriend is not into flowers. The cream base keeps everything bright, and the corner placement balances the page. This is a good choice for compact small space scrapbook ideas for boyfriend when you want the page to look airy but still detailed. The principle is using one decorative corner instead of scattering embellishments.
Editor's noteUse a bone folder to crease the tuck edge so it opens smoothly on page turns.
Start with a 5x7 cream cardstock base. Cut a floral patterned paper square about 3x3 inches and round the edges slightly with scissors. Glue it only to the top right corner, leaving a small lift edge so you can tuck a photo underneath. Make a 2x3 inch photo and tuck it under the floral corner so it peeks out diagonally. Add a journaling card sized 2x3 inches in the bottom right using a corner pocket cut from thin cardstock. Write a short date and one memory line on the card.
Skip thisGluing the corner down completely removes the tuck effect and makes the page look flat.
12. Sticker map overlay page with clear acetate window
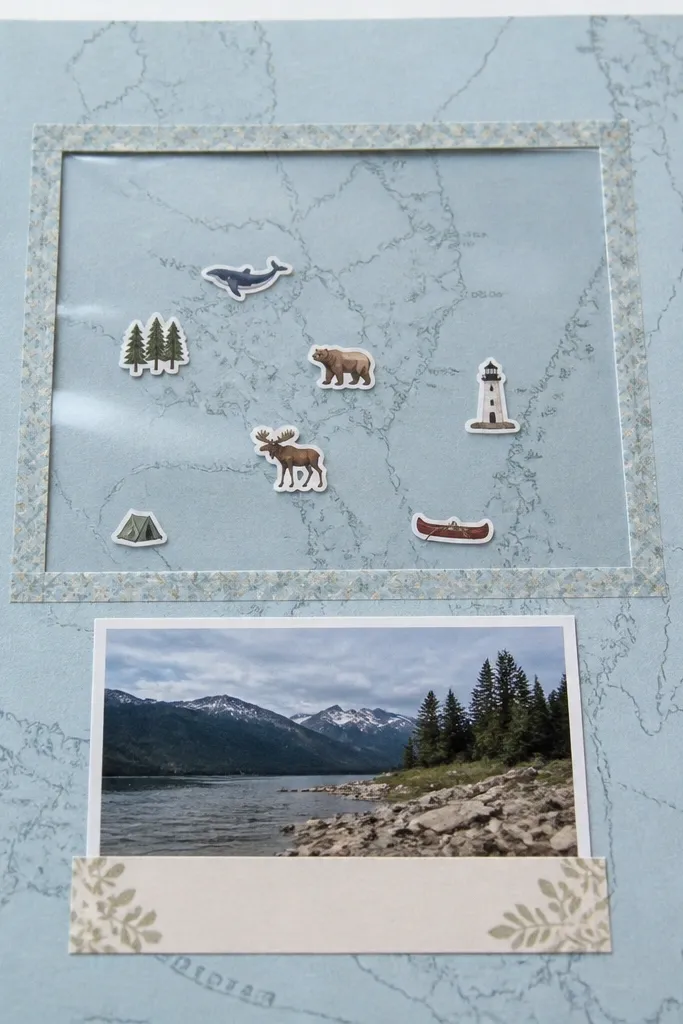
A clear acetate window makes the page feel interactive and keeps the look clean. The map background gives context even if you only have one photo, and stickers add personality without heavy crafting. Light blue works well for photos taken outdoors or at cafes, and it keeps the palette consistent. This layout fits boyfriends who like travel, road trips, or games with levels and quests. The principle is “window framing” — you create a controlled area where everything sits.
Cut light blue cardstock to 6x8. Print or draw a simple map background using a small map sheet pattern, then glue it to the base. Cut acetate to a 3x4 inch rectangle and frame it with washi tape strips along the edges. Place small stickers under the acetate — like a car, a pin, and a tiny star — then seal the acetate with double-sided tape at the frame only. Add a 2x3 photo at the bottom left with a thin washi strip label above it. Write a short journaling line under the photo using a black marker.
Dust acetate with a microfiber cloth before gluing so it doesn’t show fingerprints.
Using permanent glue across acetate edges can fog the plastic and make it look cloudy.
13. Black binder clip "photo lift" corner detail
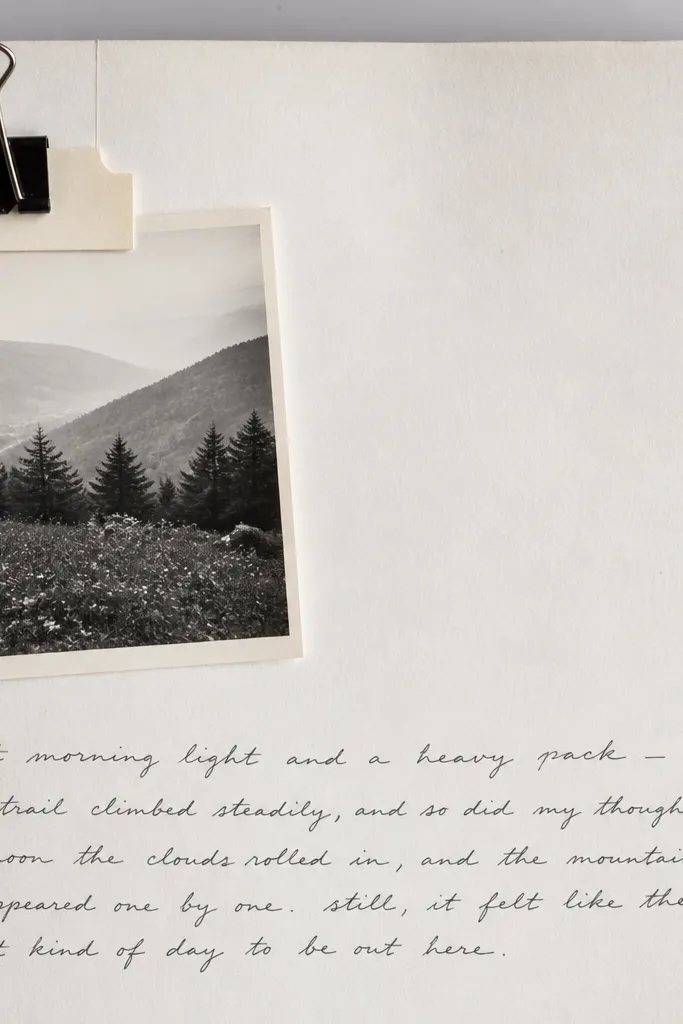
This is a tiny hardware trick that makes a scrapbook page feel physical. A binder clip lets you lift the photo without tearing anything, which matters in a compact book where you flip pages a lot. Black metal against white cardstock looks sharp and works with almost any photo color. This suits boyfriends who like practical tools, office supplies, or anything industrial. The principle is using everyday objects as functional page components.
Editor's notePaint the binder clip with black acrylic if it’s shiny silver — dull metal looks more scrapbooky.
Use a 5x7 white or off-white cardstock base. Cut a small tab from 2x3 inch cardstock and fold it so it sits under the binder clip. Clip a binder clip onto the tab and attach the tab to the page at the top left using only the folded base. Place a 2x3 inch photo under the clip so it peeks out, then secure the photo with a single photo corner so it stays aligned. Add a bottom caption strip using 1/2 inch washi tape, then write two sentences with a fine marker. Keep the binder clip centered so the page closes without catching.
Skip thisClipping too close to the binding makes the clip scrape and can damage the page protector.
14. Mini "gym progress" chart with rounded photo slots
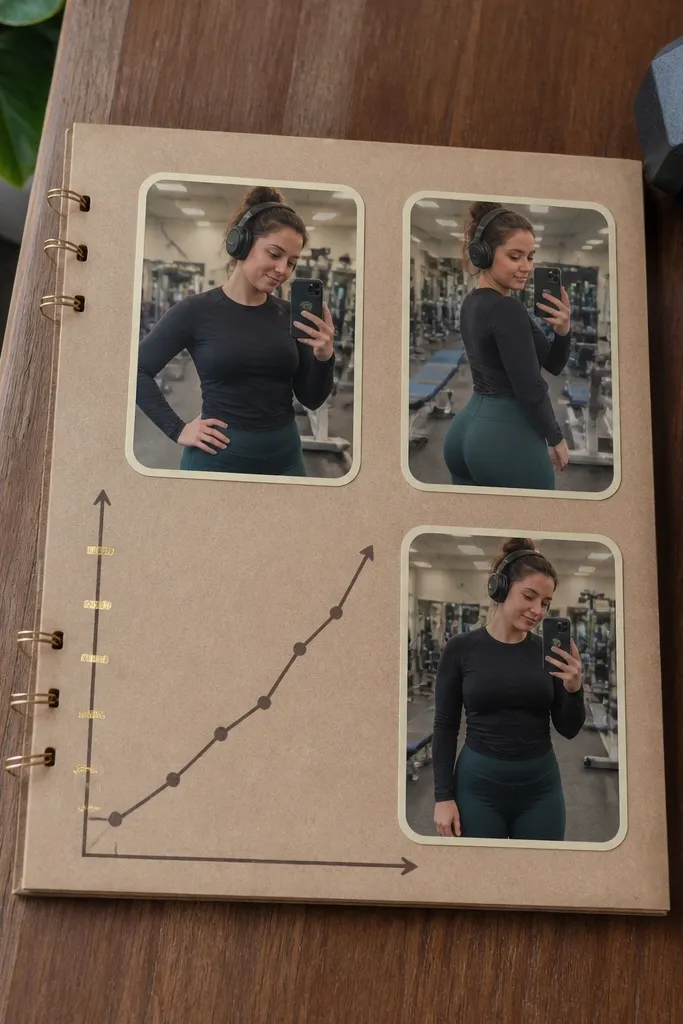
Progress charts feel grounded and honest, and they don’t require fancy art supplies. Rounded photo slots look softer than sharp rectangles, which makes the page feel friendlier even though it’s all data. Tan cardstock is warm and makes skin tones look natural in gym photos. This is perfect for compact small space scrapbook ideas for boyfriend when you want to document time without adding a huge collage. The principle is repeating one shape — rounded rectangles — for a cohesive look.
Editor's noteUse a fine-tip marker for the chart and a thicker pen for the titles so it reads quickly.
Start with tan cardstock cut to 6x8. Draw a small chart grid with black marker: three columns for date, lift, and note, leaving a 1/4 inch margin. Cut two rounded rectangles from cardstock (about 2x3 inches each) using a corner-rounder or template. Glue the rounded slots onto the page and place your photos inside with photo corners only at the top corners. Add a tiny bar graph made from washi tape rectangles along the right side. Write short notes like “felt strong” or “PR day” on the chart lines.
Skip thisUsing too much handwriting makes charts look like homework; keep notes to one phrase.
15. Travel stamp strip with one "ticket" photo
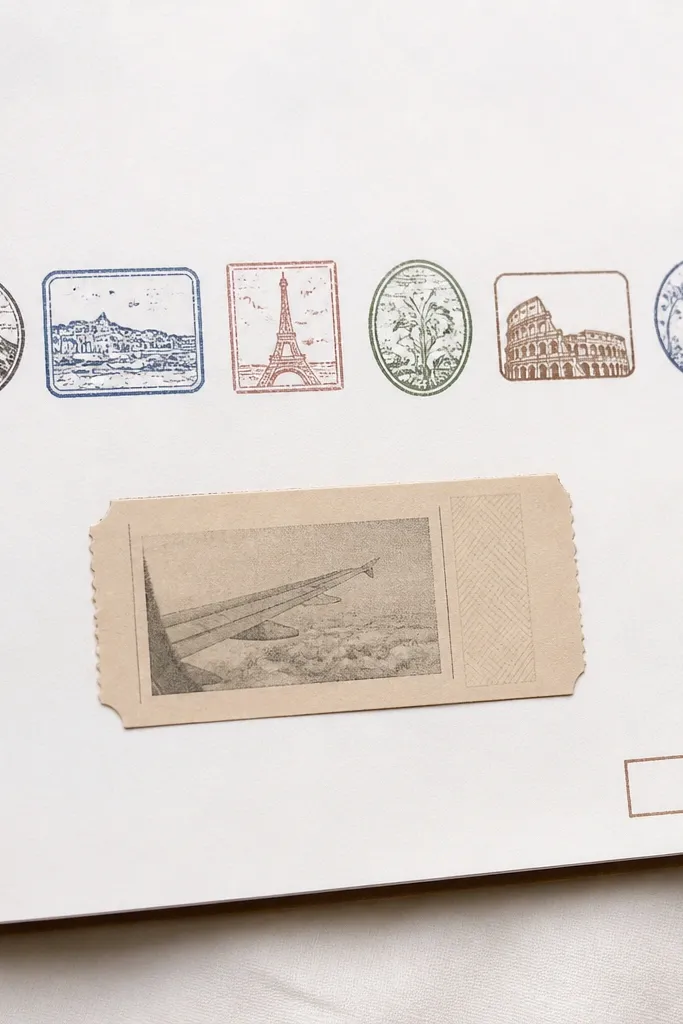
A stamp strip is one of the fastest ways to make a page look designed when you’re working in a cramped space. It’s also easy to repeat across multiple pages, which keeps the scrapbook consistent. White cardstock makes stamps and ink colors crisp, and it gives photos a clean stage. This suits boyfriends who travel, go to concerts, or collect little souvenirs. The principle is one repeating element — stamps — plus one photo to keep it from getting crowded.
Editor's noteUse a foam ink pad and press evenly; uneven stamping looks messy on white paper.
Cut a 5x7 white cardstock page. Stamp a travel-themed line across the top using one ink color, like black or dark brown, placing stamps about 1/2 inch apart. Add a small date label beneath the strip on the left, about 1x2 inches. Print or trim a 2x3 photo so it looks ticket-like by punching a small notch in the bottom corners. Glue the ticket photo under the stamp strip and secure edges with washi tape only at the corners. Write a single sentence journaling line on the bottom right.
Skip thisMixing too many stamp colors on one page makes it look like a craft sale flyer.
16. Coffee stirrer "date night" vertical strip with mini tags
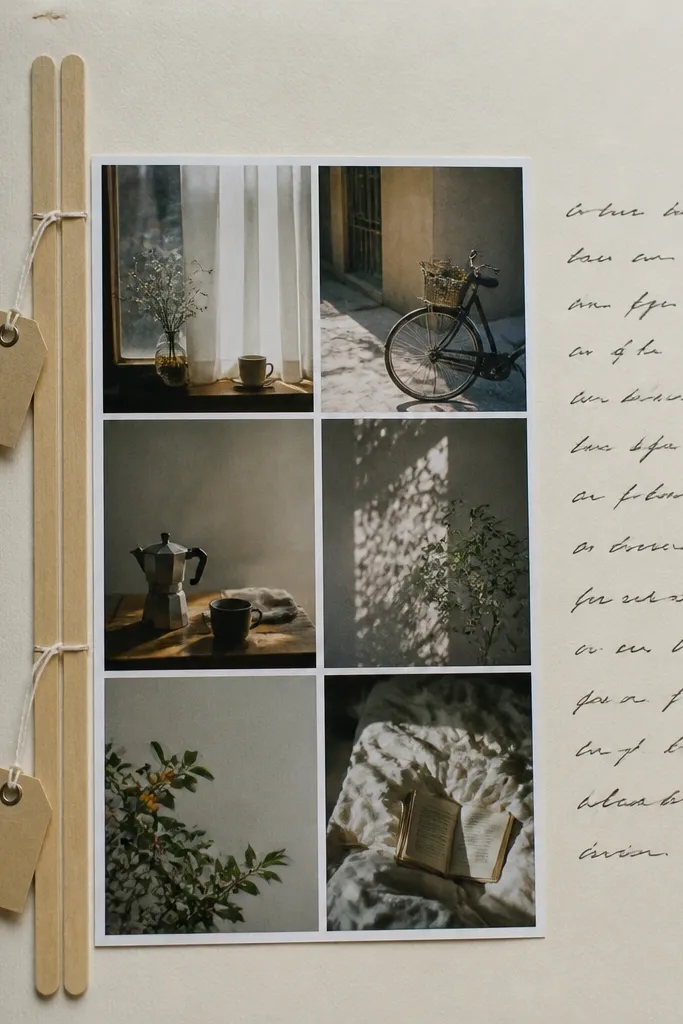
This one feels handmade because the stirrers are a real material with a natural wood tone. The vertical strip uses page height, which is exactly what you want in compact small space scrapbook ideas for boyfriend. It also gives you natural texture that photographs well. The mini hanging tags add movement and make the page feel interactive without making it thick. This layout suits boyfriends who like cafes, morning routines, or road trips for coffee. The principle is vertical material + small tags.
Editor's noteUse a small drop of glue at the very ends of twine knots so they don’t slide.
Flatten two coffee stirrers under a heavy book for 20 minutes. Trim them to about 4 inches tall so they fit on a 6x8 page. Glue them vertically in the center with a thin line of matte glue, leaving 1/4 inch margin on both sides. Punch two small holes at the top of the stirrer strip and tie short twine loops for tags. Make two tags from 2x3 inch cardstock, write a date on each, and hang them under the top twine loops. Tuck a 2x3 photo behind the stirrers and secure with photo corners at the top edges.
Skip thisUsing glossy glue everywhere on wood makes it shiny and looks cheap next to matte cardstock.
17. Monogram letter cutout with photo behind acetate
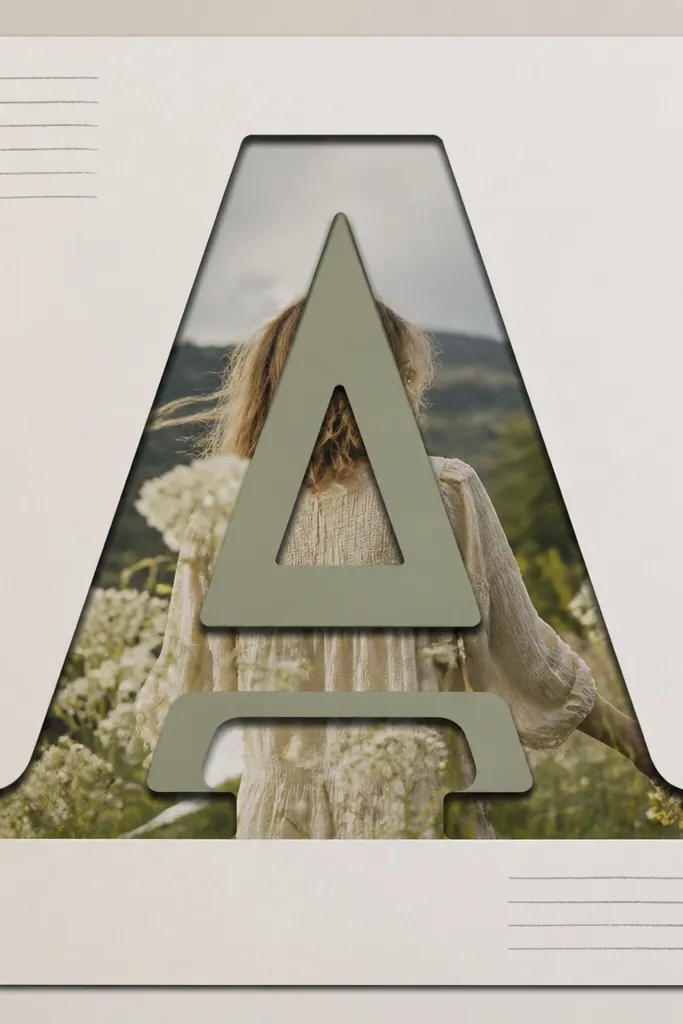
A monogram is a clean way to personalize a boyfriend scrapbook without needing lots of supplies. Cutting one big letter keeps the page from turning into a cluttered collage. Putting the photo behind acetate makes the image look protected and slightly glossy, which gives it a “framed” feel. This looks good for short names because the letter can be sized large on a small page. The principle is one bold typography element plus one photo.
Choose a muted letter color like muted navy or sage on a 5x7 base. Cut a single large letter from cardstock (about 4 inches tall) and outline it lightly with pencil so you can place it centered. Cut an acetate rectangle slightly smaller than the letter shape and tape it behind the cutout so it acts like a window. Place your photo behind the acetate, centered so it shows through the letter opening. Glue the letter around the acetate window using only the letter’s edges. Add two journaling lines in the bottom corners using a fine-tip pen.
Use a craft knife with a cutting mat for clean letter edges — the page looks way more professional.
Freehand cutting letters makes edges jagged and the whole page looks rushed.
18. Receipt + photo corner combo with "where we ate" tag
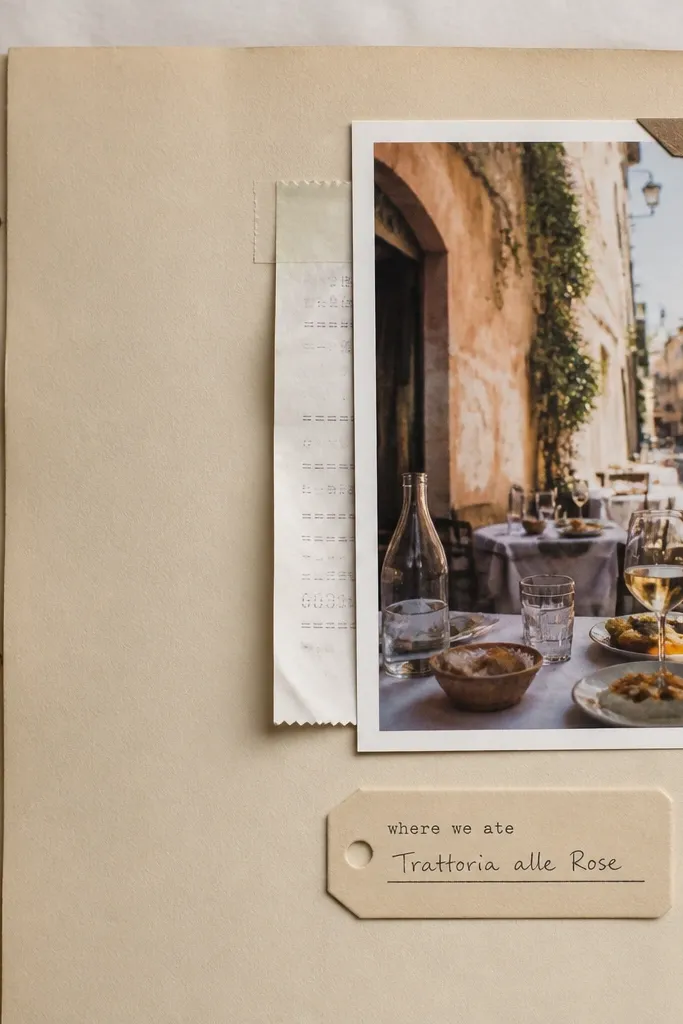
This layout pairs two things that already look like memories: photos and receipts. The photo corner keeps the photo from looking glued down while still being secure. The receipt peeking out adds color and texture without taking over the page. Tan cardstock works well if your boyfriend’s photos are warm and golden. The principle is letting one element peek from behind another — controlled layering.
Editor's noteTrim receipts straight with a paper trimmer so the peek edge looks intentional.
Cut a 6x8 tan cardstock base. Place a clear photo corner in the top right and slide your 2x3 photo into it. Tape a receipt behind the photo corner so it peeks out on the left side, using two small strips of washi tape at the top corners only. Make a 1x3 inch cardstock tag, write “where we ate” and the restaurant name, then glue it at the bottom left. Write a one-sentence note on the empty tan space near the receipt, keeping it short. Press the page under a book for 10 minutes so everything sets flat.
Skip thisTaping receipts fully flat makes printed text warp and curl.
19. Sticker icon checklist page with one big photo
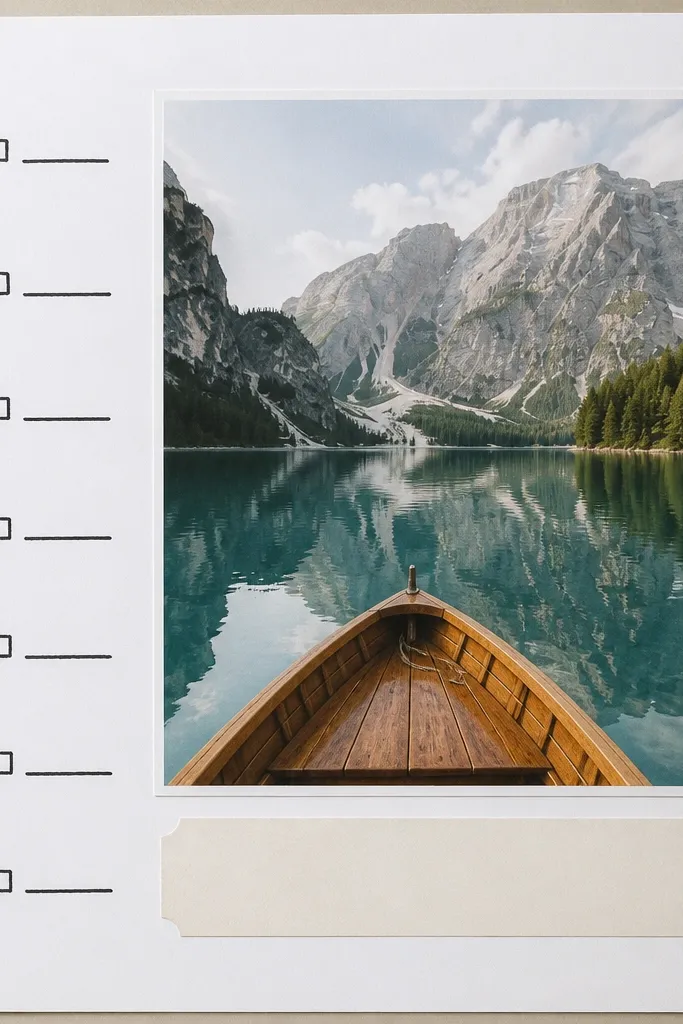
Checklist pages are great for documenting weekends because they turn “we had fun” into specific moments. Icons do the decoration work, and the checklist keeps the text from spreading all over. A single big photo keeps the page from feeling too busy for compact small space scrapbook ideas for boyfriend. White cardstock makes everything readable and gives the icons and handwriting a clean contrast. The principle is one photo focal point plus structured text.
Use a 5x7 white cardstock base. Draw a checklist on the left side with five lines spaced about 3/4 inch apart, leaving a 1/4 inch margin. Place small sticker icons next to each line, like a coffee cup, a movie camera, a car, a dumbbell, and a music note. Center a 3x4 inch photo under the checklist and add a 1/2 inch washi tape strip as a caption header beneath it. Write the date and one line about the day. Keep the checklist items to short phrases so it doesn’t look like a diary dump.
Use a black marker for lines and a gel pen for check marks — gel pens look more “handmade.”
Adding five different fonts for captions makes the page feel inconsistent.
20. Mini "thank you" pocket with handwritten love note slip
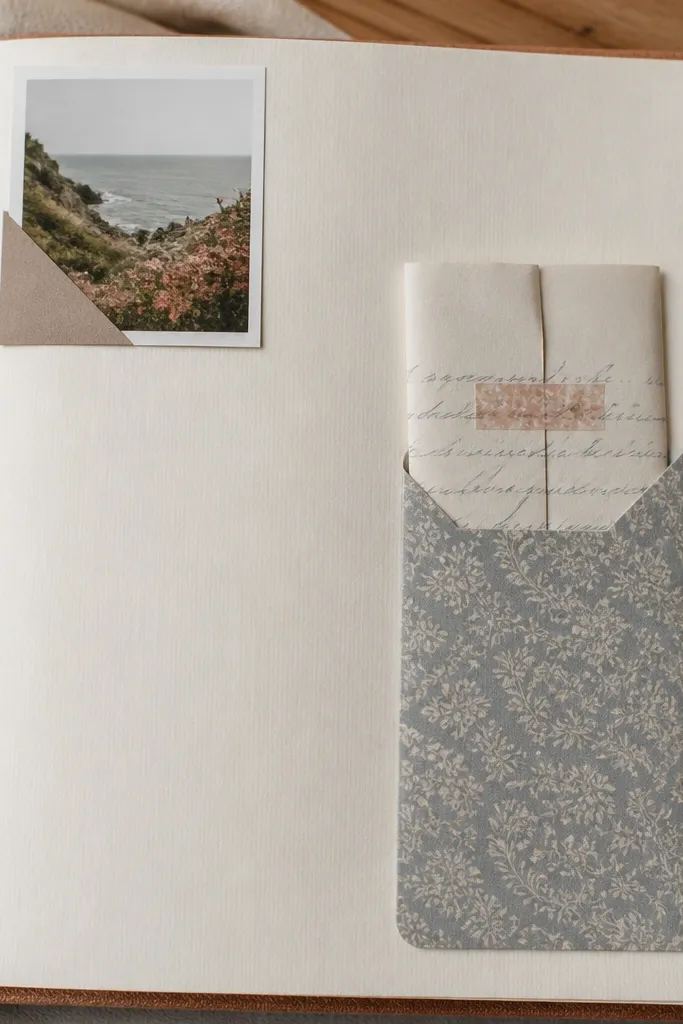
This layout is for pages that feel sweet without turning into a scrapbook of only photos. The pocket holds a note slip so you can write something heartfelt that isn’t exposed to smudges. Patterned paper makes the pocket feel special even if the base is plain. It works for boyfriends who like sincerity and quiet gestures. The principle is hiding the best words in a pocket so he discovers them when he flips slowly.
Editor's noteWrite the note on a card you can remove, then keep it in the pocket with just one washi seal so it opens cleanly.
Start with a plain 6x8 cardstock base in light grey or cream. Make a side pocket from patterned paper sized about 2.5x5.5 inches with a 1/2 inch top flap. Glue the pocket to the right side, aligned with the 1/4 inch margin. Fold a note slip from a 3x5 inch piece of thin cardstock and seal it with a small strip of washi tape. Place a tiny photo (about 1.5x2 inches) in a corner pocket on the top left. Write “thank you” on the pocket front with a fine pen and add the date under it.
Skip thisUsing thick ribbon knots inside the pocket makes the book hard to close.
21. One-page "timeline of us" with 7 tiny photo circles
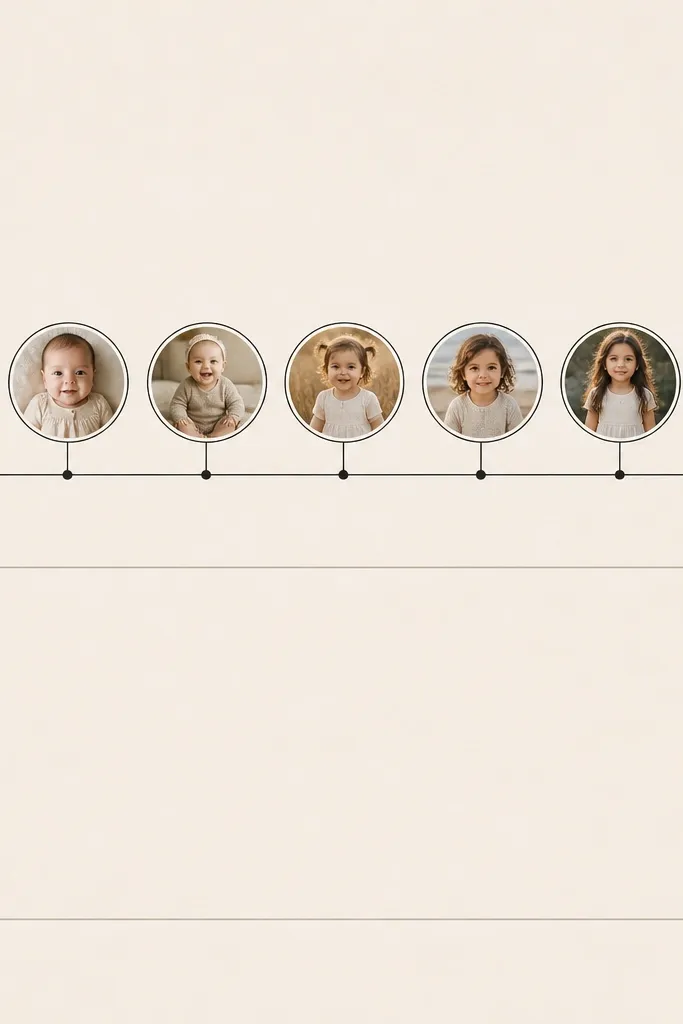
Circles give a timeline page a playful feel without needing a lot of paper cuts. Seven tiny circles fit well on compact pages because each photo is small and consistent. The cream base keeps it bright, and black date labels keep the timeline readable. This is a strong pick for compact small space scrapbook ideas for boyfriend when you want a clear structure but don’t have room for big embellishments. The principle is consistent shape repetition.
Cut a 5x7 cream page. Draw a horizontal line across the middle at about 2.5 inches from the bottom. Punch or cut seven circles sized 1 inch each, using photos you’ve trimmed to the same size. Add black ring borders by gluing 1.25 inch black cardstock circles behind each photo circle. Place the circles evenly along the timeline line and glue them down with a thin adhesive so they don’t bulge. Add tiny date labels under each circle using a label maker or neat handwriting. Finish with a small 2x3 inch journaling box at the bottom for a summary sentence.
Use a paper punch guide so all circles line up — misaligned circles look messy fast.
Placing circles too close together makes dates overlap on small pages.
22. Candy-colored washi tape "photo frame" around one shot
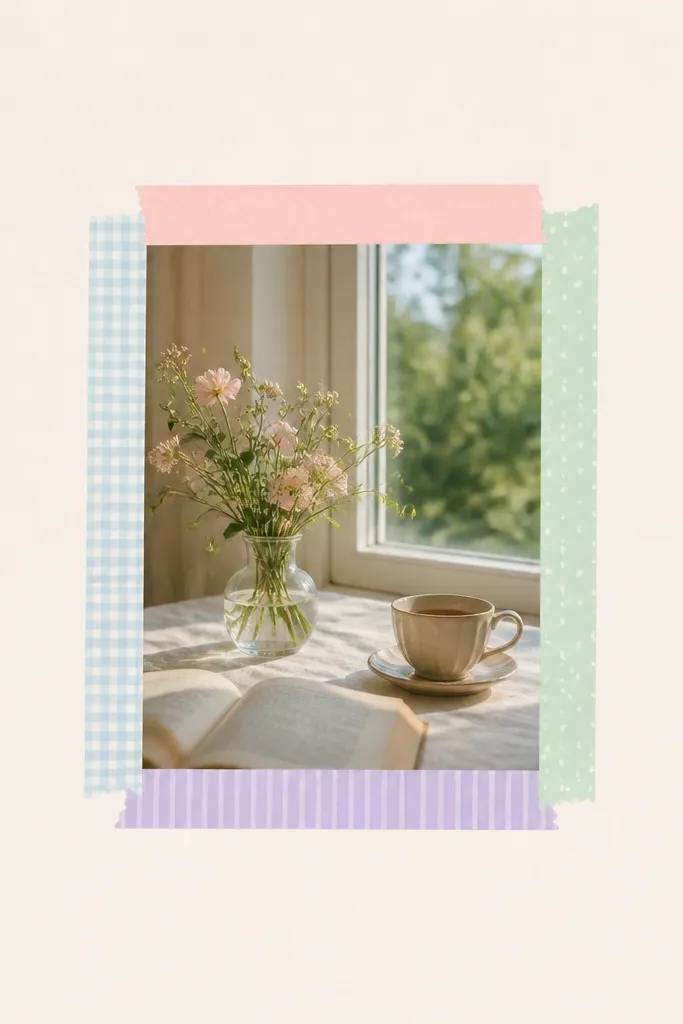
Washi tape frames are the easiest way to make a page look finished when you’re short on time. Candy colors — like mint, peach, and light yellow — look cheerful without needing extra stickers. This works especially well for boyfriend photos because it keeps the focus on him while still adding personality. The blank space helps the page feel airy, which matters in compact small space scrapbook ideas for boyfriend. The principle is framing one photo and letting it breathe.
Editor's noteChoose one washi pattern and two solid tapes so it looks intentional, not random.
Use a 6x8 pastel cardstock base in off-white or light peach. Place your 4x6 inch photo (trim to fit about 4.5x6 inches depending on your binder) in the center area, leaving 1/4 inch margin. Lay four washi tape strips along the photo edges — two on top corners and two on bottom corners — not full strips across the whole photo. Write one short caption in each top corner using a black fine pen. Add a date strip of thin washi tape at the bottom edge of the photo. Press under a book for 10 minutes so tape edges stick flat.
Skip thisWrapping tape all the way around the photo hides the image and makes it look like a DIY frame from a rush.
23. Mini "movie poster" layout using borderless film strip
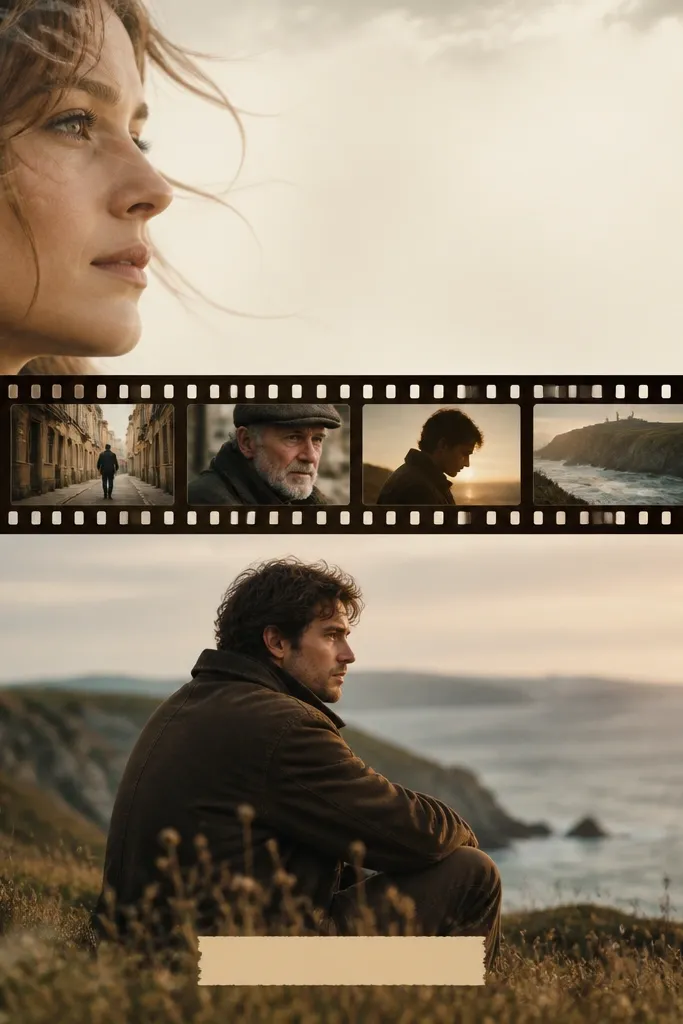
This layout turns casual fun into a theme without needing to draw big graphics. A film strip is narrow, so it fits compact pages while still looking like a movie reference. It also helps if you have lots of small photos from one night — you can cut them into strip segments. The poster-style title makes it feel like a gift, not a scrapbook page. The principle is using a single cinematic motif across the page.
Editor's noteUse matte photo paper for the strip; glossy film strips reflect light and can look harsh.
Cut a 5x7 cardstock base in dark charcoal or deep navy. Create a film strip in the center by arranging 5-6 small photo segments sized about 3/4 x 1.5 inches and gluing them into a strip. Add a thin black border around the strip with a marker so it looks like film. Write a movie-style title at the top using thick marker, like “OUR NIGHT OUT,” and add a small “release date” tag below it using label tape. Place one larger photo (2x3 inches) below the film strip and glue it with photo corners. Add a short journaling line at the bottom in small handwriting.
Skip thisUsing too many colors in the title makes it look like a birthday poster instead of a scrapbook page.
24. Shadow box style page with flat foam squares
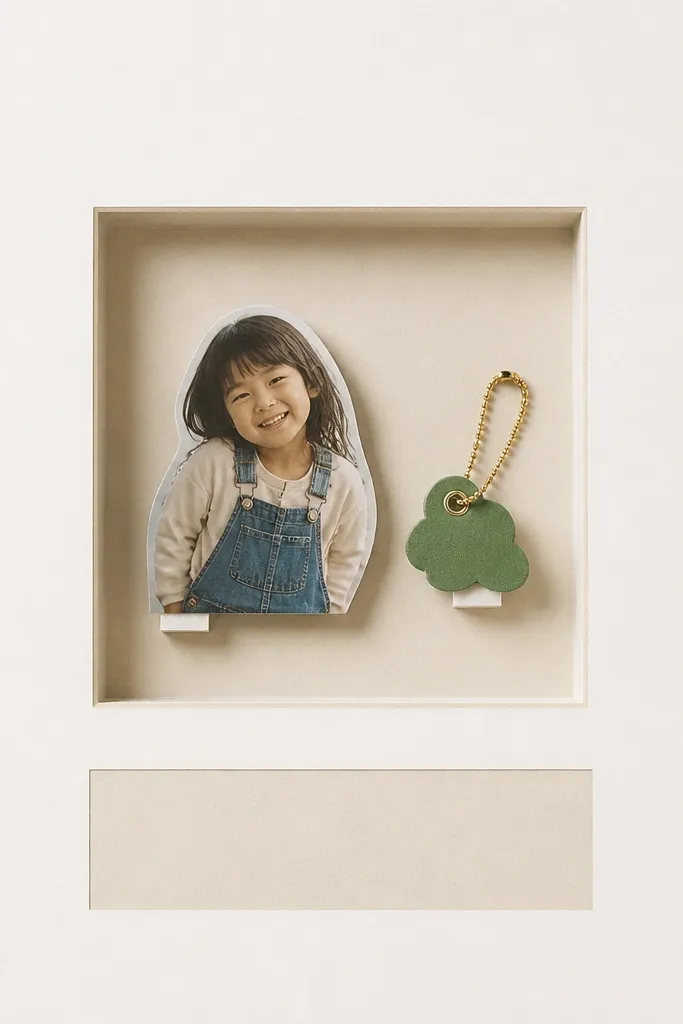
A shadow box effect gives you depth without building a bulky craft box. Flat foam squares lift elements just enough to cast a soft shadow, which makes small objects look intentional. This is great for compact small space scrapbook ideas for boyfriend because the page stays thin but still feels dimensional. It works especially well when you have one meaningful small object — a key tag, a festival wristband piece, a game token. The principle is lifting only one focal cluster, not every scrap of paper.
Editor's noteIf your object is shiny metal, scuff it lightly with fine sandpaper so it photographs without glare.
Use a 6x8 light cardstock base. Choose a focal object and one photo, then cut a 3x4 inch backing card in a contrasting color. Glue the backing card centered on the page. Place flat foam squares only under the photo corners and under one small object — keep the lift under 1/4 inch. Add a caption strip beneath the cluster using 1/2 inch washi tape. Write a short sentence about the object’s meaning and date it. Press the page under a book so foam squares adhere without bubbles.
Skip thisStacking multiple foam layers makes the page too thick for compact bindings.
25. Lego minifig photo scale page with tiny "build" captions
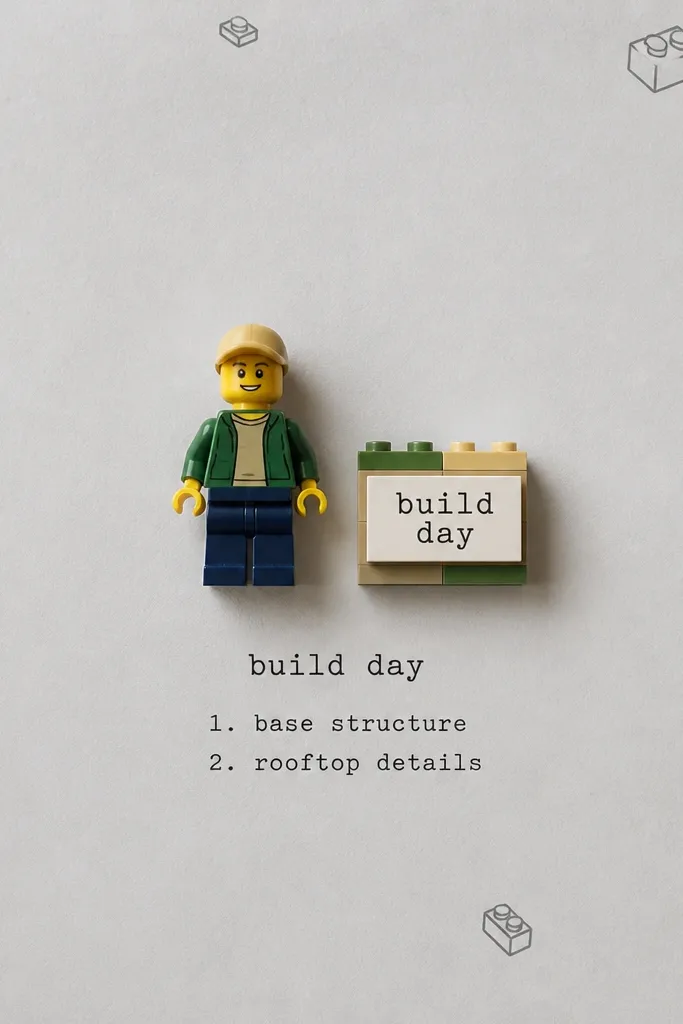
If your boyfriend loves building sets, you can match the scrapbook vibe with mini captions and scale. A Lego minifig theme feels playful and specific, not generic, and it makes the page look like you thought about his interests. Light grey keeps the palette calm while the minifig photo adds color. This layout works with compact pages because the elements are small and controlled. The principle is using his hobby language — build day, bricks, sets — as the design structure.
Cut a 5x7 light grey cardstock base. Place a 2x3 inch minifig photo in the center using photo corners. Create a tiny label from 1x2 inch cardstock and write “build day” on it, then add two short bullet phrases like “new set” and “we laughed” in small handwriting. Stamp brick icons around the edges using one ink color. Add a thin strip of washi tape at the bottom as a caption header, then write the date. Keep all text under 1 inch tall so it stays readable on a small page.
Use a ruler and keep the minifig photo perfectly centered; scale themes look best when the layout is symmetrical.
Overloading the page with too many stickers turns it into a toy box instead of a scrapbook memory.
26. Black card "night mode" page with neon marker handwriting
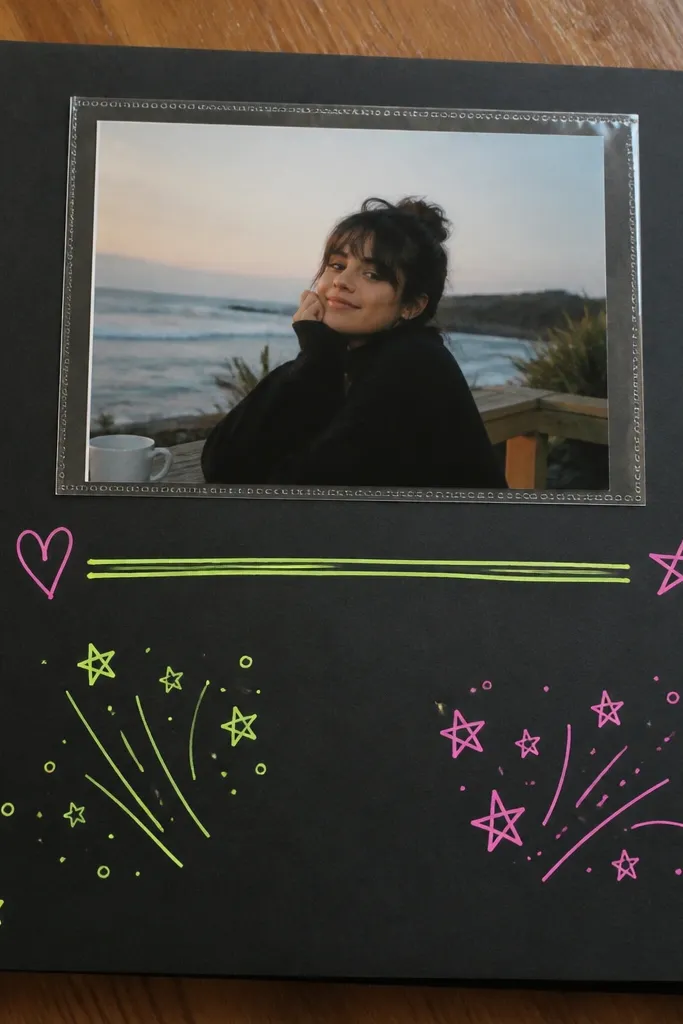
Neon handwriting on black paper looks like a real night-out photo wall. It’s bold, but because you only use one or two neon colors, it still looks clean in a compact book. The black base also hides fingerprints, which is a lifesaver when you’re handling pages with messy hands. This suits boyfriends who like concerts, late-night drives, or anything neon and dramatic. The principle is contrast and restraint — one photo and a strong handwritten line.
Editor's notePractice neon letters on scrap paper first — neon ink is streaky if you write too slowly.
Use black cardstock cut to 6x8. Add a clear pocket at the top center and slide a 2x3 photo inside, leaving the top edge visible. Write one big caption in neon green across the middle, underlining it with neon pink. Add three small star stickers in the top corners only. Keep journaling to one or two sentences at the bottom using a lighter neon shade. Press the page under a book so the pocket lays flat and doesn’t curl.
Skip thisUsing multiple neon colors for every line makes it look like a kid’s craft, not a gift page.
27. Small leaf pressed in vellum sleeve with photo strip
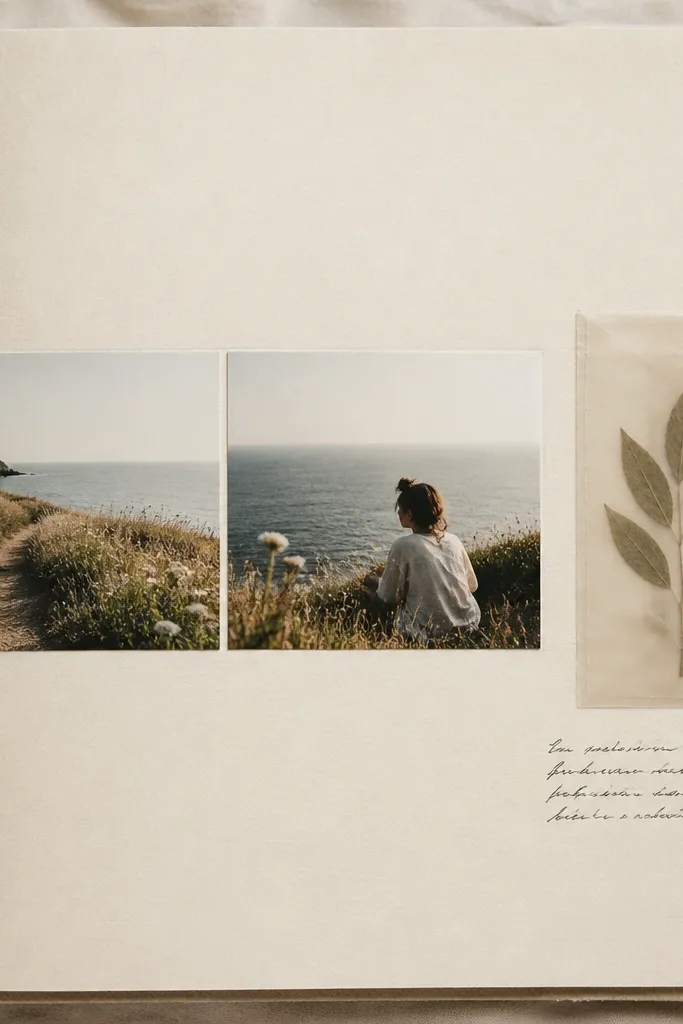
Pressed leaves feel intimate because they’re one-of-a-kind, and the vellum sleeve protects them from dust. Cream paper keeps the leaf’s green from turning muddy, and the translucent sleeve adds a soft glow. This is a great option for compact small space scrapbook ideas for boyfriend when you have one outdoor memory and want it to feel more “real” than a sticker. It also photographs well because the sleeve catches light gently. The principle is using natural texture with protection.
Editor's noteIf the leaf is fragile, seal it with a light layer of matte medium on the back only, then let it dry fully.
Press a small leaf between book pages for at least 48 hours. Cut a vellum sleeve about 2x4 inches and seal the sides with double-sided tape, leaving the top open enough to slide the leaf in. Glue or tape the sleeve to the right side of a 5x7 cream base with 1/4 inch margin. Add a horizontal photo strip of two images across the center, each about 1.5x2 inches, using photo corners. Write a caption under the photo strip that includes the date and where you found the leaf. Seal the sleeve top with a tiny washi tab so it doesn’t slip out.
Skip thisSkipping the sleeve makes the leaf shed bits and makes the page look aged too fast.
28. Map postcard fold pocket with "open me" tab
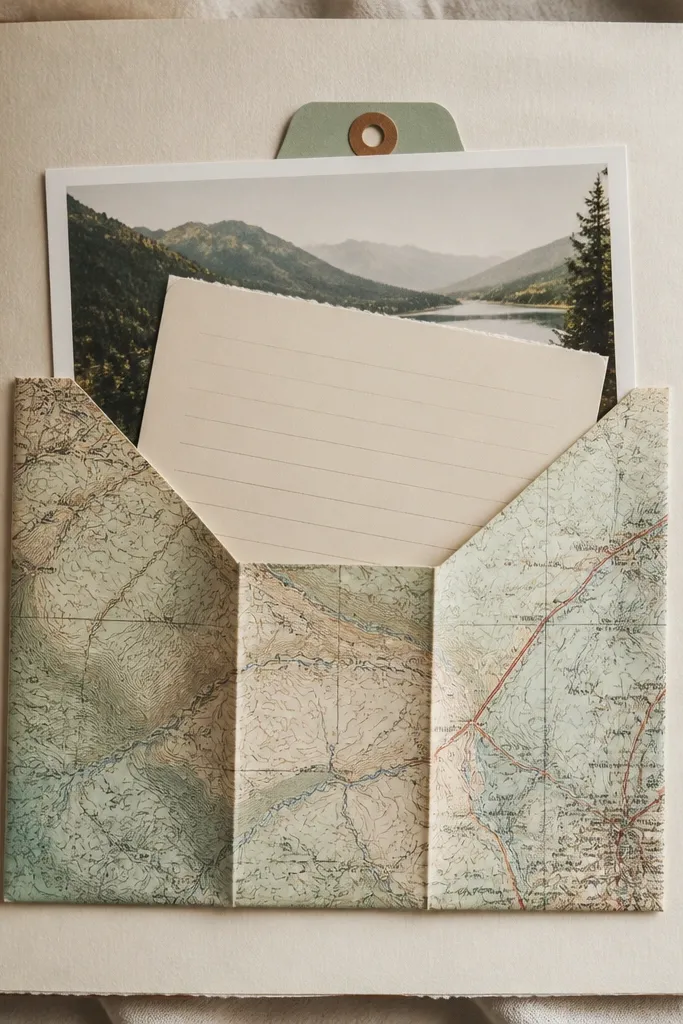
Folded postcards create a built-in pocket that looks intentional, not improvised. The map print already has texture, so your page doesn’t need extra patterns everywhere. A visible “open me” tab guides your boyfriend to the hidden note, which adds a fun moment even in a small space. This suits compact small space scrapbook ideas for boyfriend when you want a travel feel but you don’t want bulky 3D crafts. The principle is using a fold as both storage and design.
Editor's noteUse a matte adhesive roller on the fold line so it doesn’t seep through the map print.
Pick a map postcard or print one on cardstock, then cut it to fit a 6x8 page. Fold the postcard into a pocket by folding the bottom up and leaving a top opening, then reinforce the fold with a bone folder. Attach the pocket to the left side of the page with glue only on the pocket back and bottom edge, not the opening. Add a small “open me” tab by cutting a 1x2 inch cardstock rectangle, writing the phrase, and gluing it to the pocket top flap. Slide a 2x3 journaling card inside and tuck a 2x3 photo behind the pocket edge so it peeks out. Date the card on the back so future-you can remember it.
Skip thisGluing the opening shut turns the pocket into dead paper that can’t be used.
29. Fabric ribbon bookmark page with photo and date tag
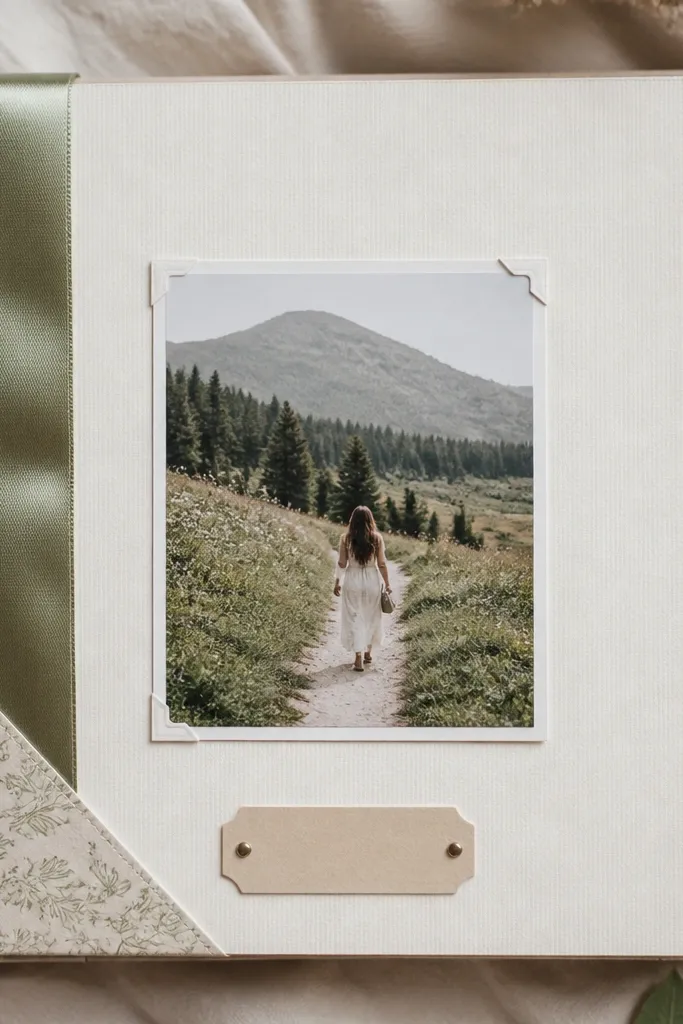
A ribbon bookmark element is practical and pretty, and it makes the scrapbook feel like a keepsake he’ll actually open. Satin or grosgrain ribbon looks clean on camera and adds a soft texture that paper alone can’t. This layout is especially good for compact small space scrapbook ideas for boyfriend because ribbon adds function without thickness. It also works for boyfriends who like reading, books, or long-distance notes. The principle is using a functional strip as the design anchor.
Editor's noteChoose grosgrain if you want it to look crisp; satin frays more easily if you don’t seal the ends.
Cut ribbon about 10 inches long so it sticks out above the page enough to grab. Attach the ribbon to the back of a 5x7 page using a small strip of double-sided tape under a corner pocket flap. Place a 2x3 photo centered and secure with photo corners so it doesn’t hide the ribbon. Make a 1x3 inch date tag and glue it below the photo, leaving room for the ribbon to move. Write a short caption beside the date tag using a fine marker. Slide the page into a protector if your scrapbook uses page sleeves so the ribbon doesn’t snag on paper edges.
Skip thisLetting ribbon ends fray near the binding makes the book look worn after a few flips.
30. Polished "metallic pen" page with clear stamp overlay
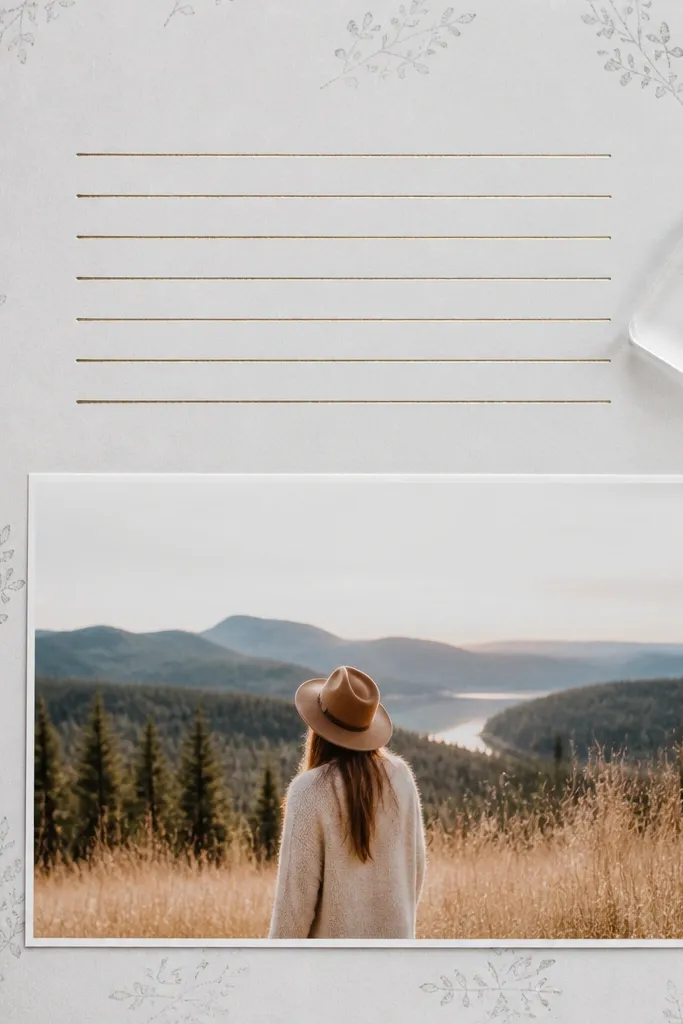
Metallic pen journaling gives you a “finished” look even when your layout is simple. The trick is to keep the metallic to one section, like the top journaling band, so it doesn’t overwhelm the page. A faint stamped pattern in grey adds texture without color chaos. This suits boyfriends who like clean, modern design — it reads like a mini poster. The principle is subtle background texture plus one metallic handwriting moment.
Start with a 6x8 light grey cardstock base. Use a grey ink pad to stamp a subtle pattern across the top third, staying light so the words remain readable. Create a 1.25 inch wide journaling band across the middle using a strip of translucent vellum or thin paper, then write with metallic pen. Place a 2x3 photo in the bottom left using a photo corner. Add a small date label with black ink on the bottom right corner. Keep the rest of the page clean so the metallic writing stands out.
Test metallic ink on scrap first; some pens smear if your paper is too smooth.
Stamping heavy pattern across the whole page makes the journaling hard to read.



