

1. Waxed Thread Keychain Tag in His Favorite Color
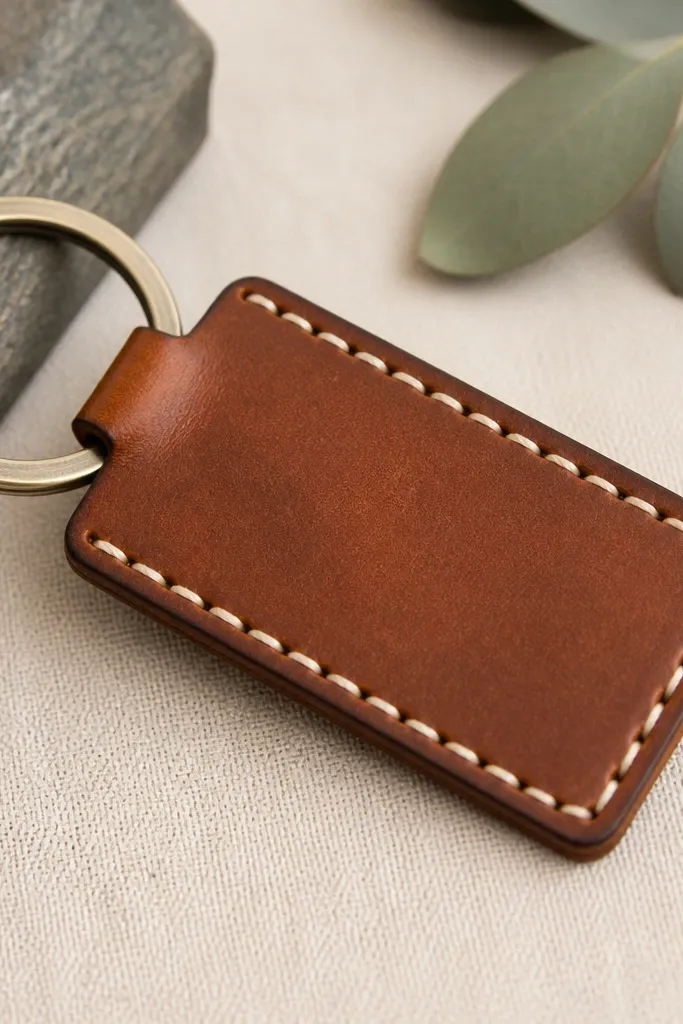
This is one of the fastest cheap handmade gifts for boyfriend that still feels “real leather shop” level. I make it from thin veg-tan leather or faux leather and stitch around the border with waxed thread in a contrasting shade like teal on black or tan on chocolate brown. The look lands clean because the stitching is evenly spaced and the edges are burnished, not left raw. It flatters anyone’s style because it’s small, dark-friendly, and works with metal keyrings — silver, gunmetal, or brass. Pair it with one personal mark like his initials or a tiny coordinate stamp so it reads as him, not generic crafts.
Start by cutting a tag about 2.25 inches by 1.25 inches, then round the corners with scissors or a corner punch. Mark stitch holes 1/8 inch in from the edge, spacing them evenly, and use a leather needle to punch through. Thread a 3-foot piece of waxed thread, stitch around the perimeter, and tie off at the back with a tight knot. Finally, burnish the edges with a little beeswax or edge paint so the border looks finished, then attach it to the keyring with a small split ring.
Use waxed thread in a color that’s one step brighter than the leather — it makes the stitching pop instantly in photos.
Avoid leaving uneven hole spacing; it’s the fastest way to make it look homemade.
2. Heat-Transfer Photo Wallet Insert Strip
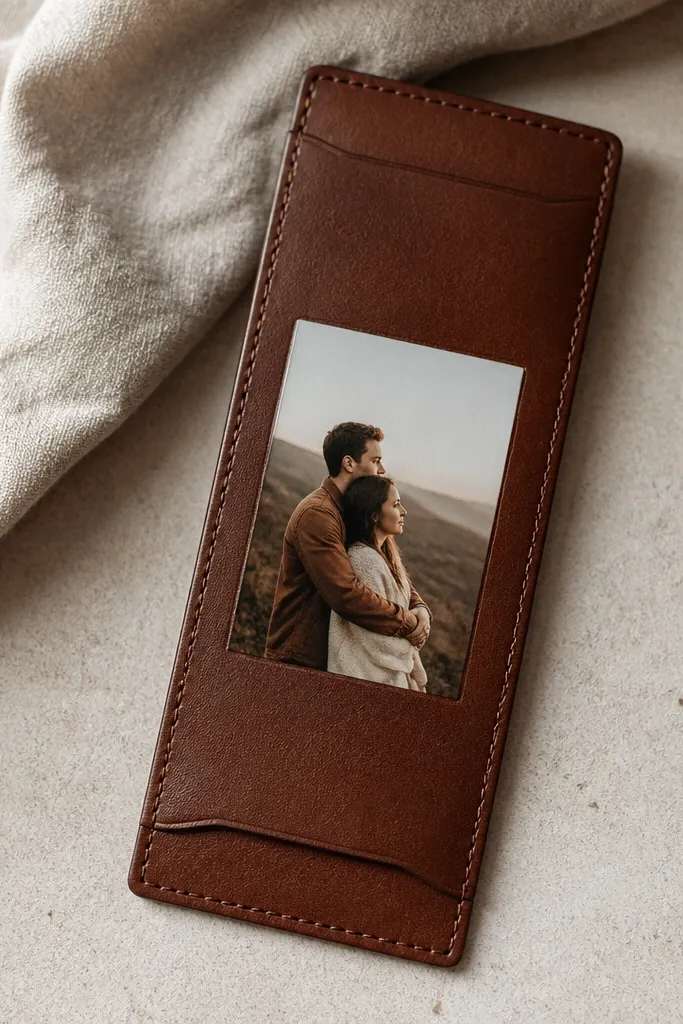
Start by measuring the inside window of his wallet or the card slot — aim for a strip about 3.35 inches long by 2.05 inches wide. Print a small photo (or crop one) and trim it cleanly with a craft knife on a cutting mat. Apply a heat-transfer sheet over the photo area following the package instructions, then press the letters separately if you’re adding initials. Finally, slide it into a clear card sleeve or wrap it with a thin piece of clear adhesive film so it doesn’t get scuffed.
This one feels special because it turns a tiny memory into something he carries daily. I use a wallet photo print on thin cardstock and apply heat-transfer vinyl or a heat-transfer sheet so the image looks sealed and smooth. The best color combo is a neutral photo with one bold accent — like white letters on black, or light tan letters on dark brown. It works for any skin tone and style because it’s a subtle inside detail; nobody sees it until he opens his wallet. Give it a date like “08.17” in small text and it becomes a moment, not just a photo.
Skip thisDon’t use glossy photo paper without sealing — it can peel at the edges.
Editor's notePrint the photo slightly darker than you think; wallet lighting is dim and dulls colors.
3. Braided Rope Zipper Pull With a Tiny Charm
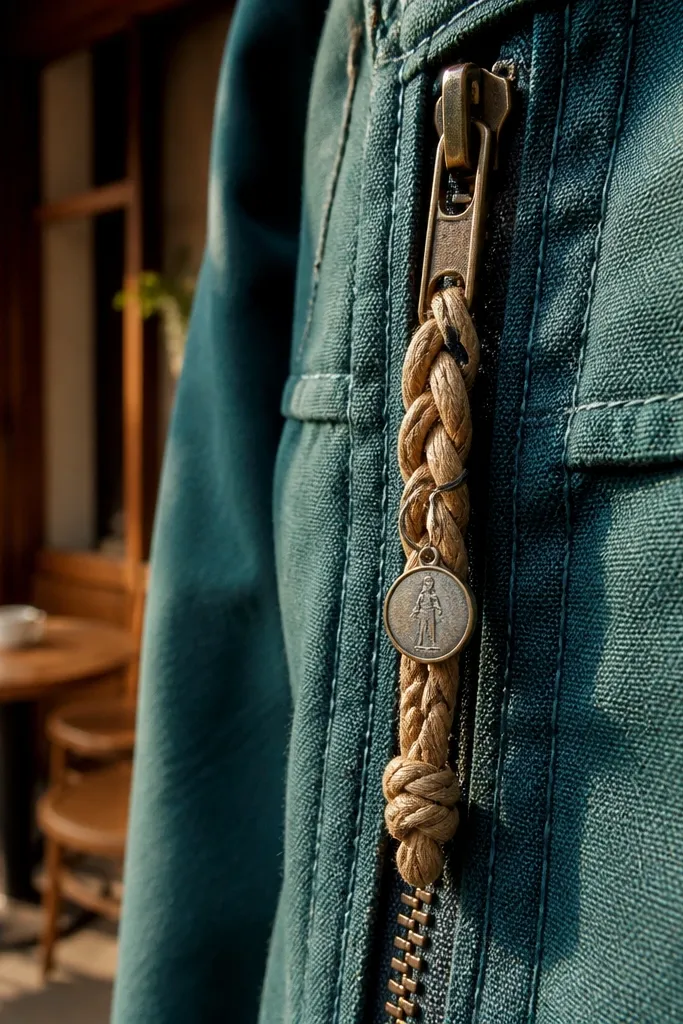
A zipper pull is one of the best cheap handmade gifts for boyfriend because it looks like a real accessory, not a craft project. I braid 3 strands of cotton cord or thick paracord into a tight rope and finish the end with a small knot under a dab of fabric glue. Then I add one charm — a mini star, a coin, or a tiny letter — so it catches light when he moves. The style works with any jacket color since the cord braid can match his existing bag hardware tones. It’s also practical; it makes zippers easier to grab and adds personality.
Start by cutting three equal lengths of cord, around 8 inches each, and braid them tightly. Tie off the braid end with strong thread so it doesn’t loosen, then trim the ends. Thread the braid loop through the zipper tab hole or a small split ring attached to the zipper pull. Add your charm by opening a jump ring and hooking it to the braid end, then close it with needle-nose pliers. Test the movement by opening and closing the zipper 20 times before you call it done.
Use a charm with a hole big enough for your jump ring; small charms fight you and look crooked.
Skip flimsy glue-only ends; if the braid slips once, it looks cheap fast.
4. No-Sew Felt Desk Catch Tray From a Shoe Box
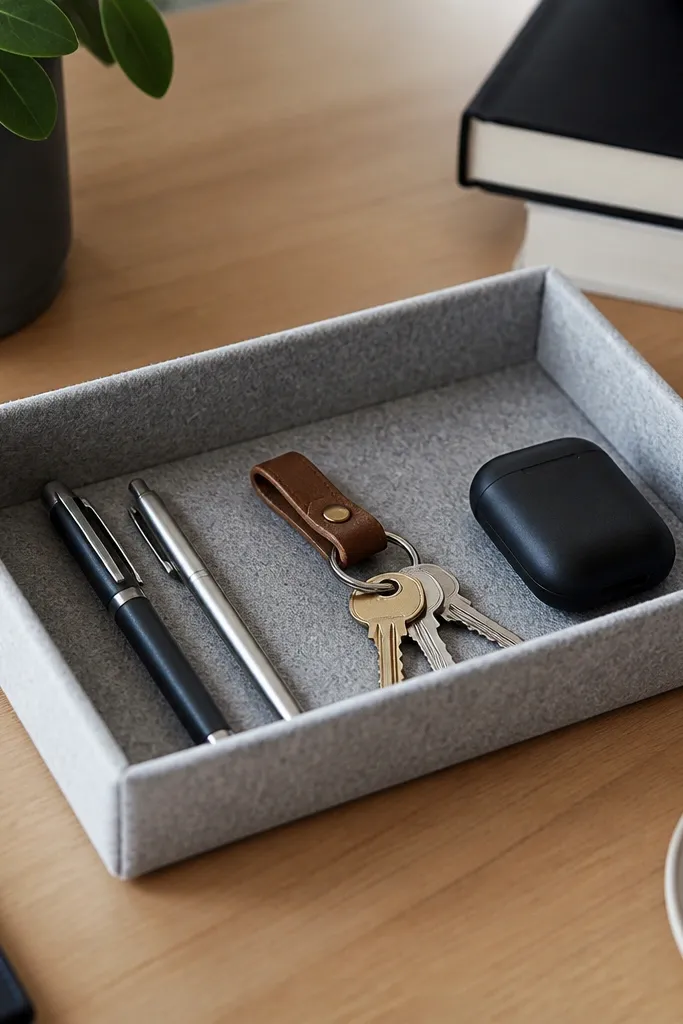
Start by cutting your cardboard to the size you want, usually about 8 inches by 5 inches, and keep the height around 1.25 inches. Cut felt pieces to wrap the sides and bottom; I like 1/4 inch extra on each edge so it folds cleanly. Press the felt on with fabric glue or hot glue, then fold the top edge inward like wrapping a gift. Finally, add a front patch or a small stitched line label, then let it dry under a book for 30 minutes so it stays flat.
This is a desk gift that makes him feel like his space is handled. I build it from a shallow shoebox or small cardboard tray, then wrap it in thick felt so it looks soft and premium. Felt hides small imperfections in the cardboard, and the folded lip makes it look like a store-made catch tray. It suits anyone because it’s neutral and functional — think gray, cream, olive, or black felt. Add a stitched label or iron-on patch on the front for a personal touch without making it busy.
Skip thisDon’t use thin craft felt; it shows wrinkles and makes the tray look flimsy.
Editor's noteChoose felt with a stiff backing so the tray doesn’t collapse when he drops coins in it.
5. Stitched Canvas Coaster Set With Map Coordinates
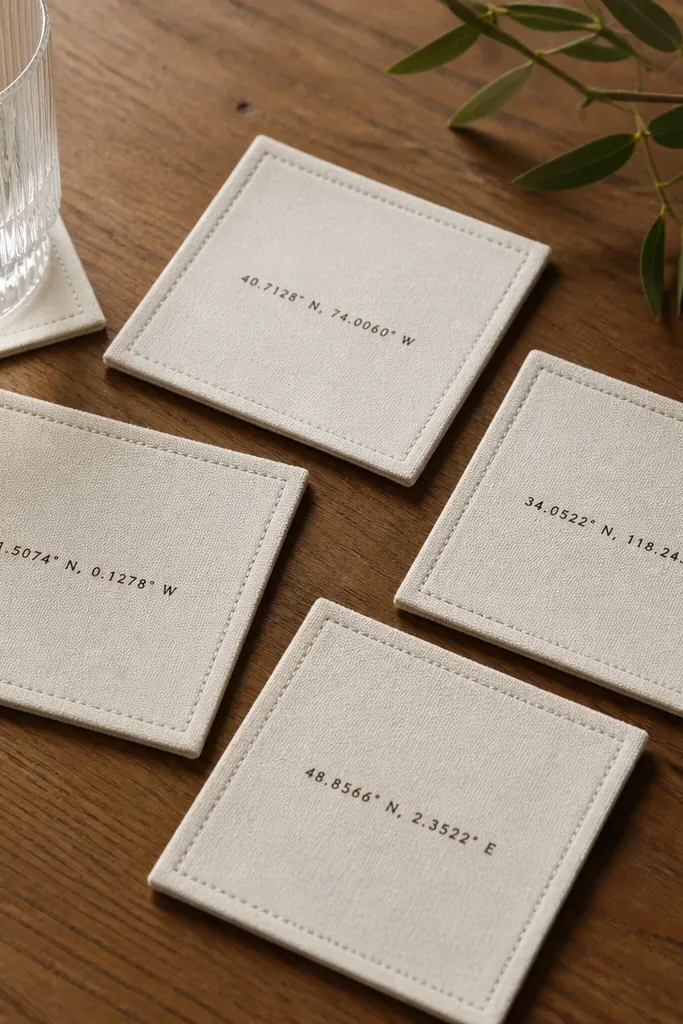
Start by cutting four squares, typically 4 inches by 4 inches, and add a layer of thin heat-resistant batting or felt underneath. Place the coordinates (printed on fabric transfer paper or on a small patch) in the center and secure with heat or stitching. Sew around the outer edge using a simple straight stitch or a blanket stitch — I prefer blanket stitch for a sturdier look. Finish by trimming loose threads and testing with a mug for 10 minutes to check absorbency before gifting.
Coasters are one of the few cheap handmade gifts for boyfriend that feel both practical and personal. I use canvas fabric or sturdy cotton and stitch around the edges to give it a finished, “designed” look. Add map coordinates or a tiny location icon in the center so it feels like a story without clutter. Canvas also tolerates daily use better than paper, and the stitched border keeps the fabric from fraying. This works for any home style because you can match the palette — charcoal thread for black coasters, tan thread for natural fabric.
Skip thisAvoid skipping the backing layer; plain single-layer fabric soaks and warps.
Editor's noteUse a fabric transfer that’s meant for cotton; ink that bleeds ruins the crisp center.
6. Repurposed T-Shirt Fabric Wrist Key Wrap
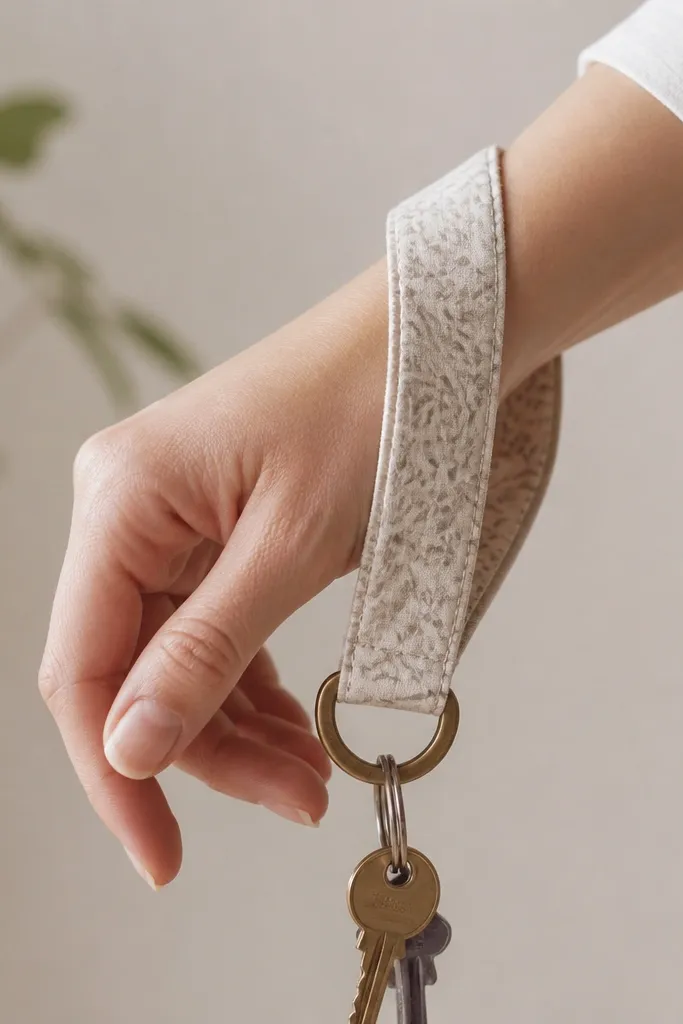
Start by cutting a 1.5 inch wide strip of t-shirt fabric across the grain, about 18 inches long. Fold it in half lengthwise and stitch along the long edge, then turn it right-side out using a safety pin so it looks neat. Attach a small keyring loop by stitching a folded fabric tab to the end, reinforcing it with two rows of stitching. Wrap it around his wrist to check length, then trim and re-stitch so it fits snug but not tight. Finish with a quick topstitch across the ends so it doesn’t fray.
If your boyfriend loses his keys in couches like mine does, this is a lifesaver and still looks cute. I make a wrist strap from a repurposed t-shirt fabric strip, then attach a keyring loop at the end. The stretchy knit makes it comfortable for longer wear, and the fabric pattern adds personality without needing fancy supplies. It also flatters anyone because it sits close to the wrist and doesn’t add bulk. Add a small stitched tag with his initials so it reads personal when he takes it off.
Skip thisDon’t make it too short; a tight wrist strap looks uncomfortable and people stop using it.
Editor's noteUse a stretch needle on your sewing machine or stitch slowly by hand for clean rows.
7. Mini Photo Strip in a Repurposed Matchbox Frame
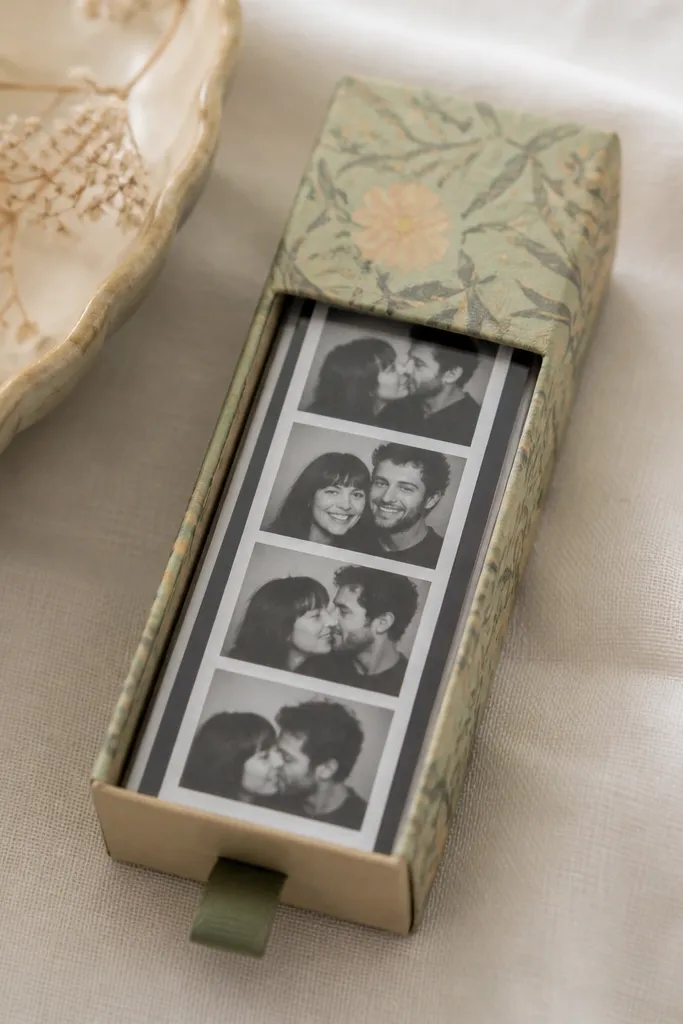
This is one of my favorite cheap handmade gifts for boyfriend because it looks like a tiny desk collectible. I use a repurposed matchbox (or small sliding box), cover it with patterned paper, and place a mini photo strip behind clear plastic. The clear cover protects the photos from fingerprints, and the sliding tray makes it feel interactive. It’s also low-cost because you’re using what you already have: box, paper, tape, and a couple photos. Choose paper that matches his vibe — black-and-white for minimal guys, or muted plaid for warmer tastes.
Start by removing the inner tray and cutting a piece of clear plastic (from a photo sleeve) to fit the front opening. Cover the box exterior with patterned paper, wrap edges tightly, and glue down corners so they don’t lift. Print or cut a 2-inch tall photo strip, then place it behind the plastic window. Add a small ribbon or pull tab on the tray so he can slide it out easily. Seal the paper edges with a thin layer of clear glue or mod podge so it doesn’t peel.
Use matte photo paper for a softer look under the plastic window.
Don’t leave the plastic loose; tape it flat so it doesn’t create bubbles.
8. Puffy Paint Love Note Keychain on Clear Acrylic
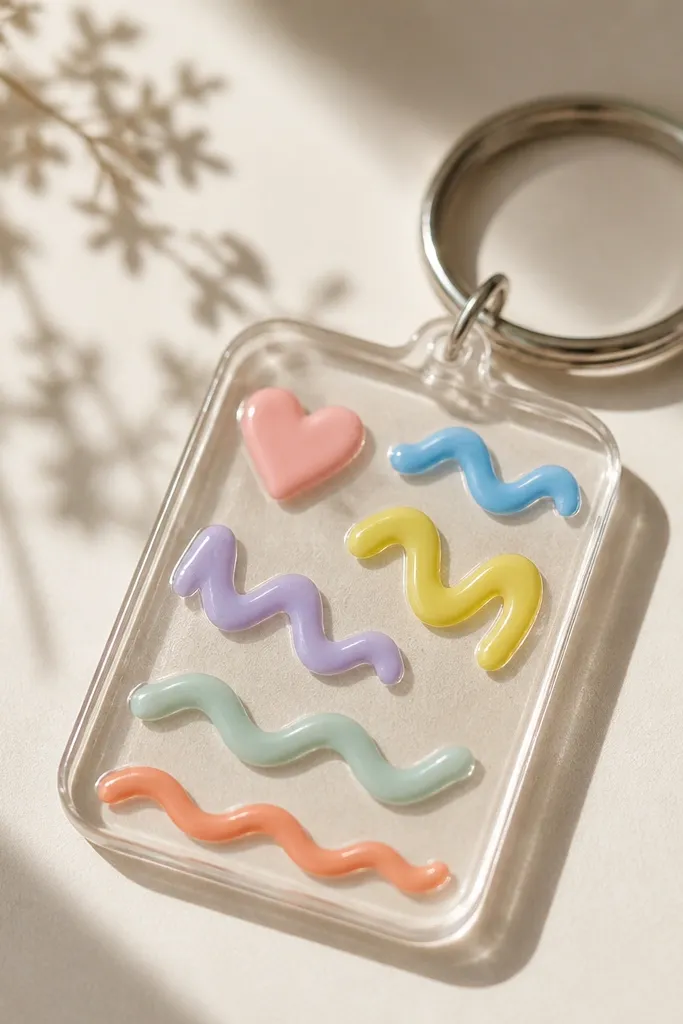
This is the kind of handmade gift that looks playful but still polished because the letters are raised and glossy. I write his short phrase — like “My guy” or “Home” — with puffy paint on clear acrylic or a clear plastic tag, then let it cure fully so it doesn’t smear. The raised surface catches light and reads well from across the room. It flatters because it’s small and light — it doesn’t look bulky on pockets or bags. Keep the message short so it stays crisp and doesn’t look messy.
Start by cutting a clear acrylic or clear tag to keychain size, around 2 inches by 1 inch. Clean it with rubbing alcohol so puffy paint sticks. Outline the letters first, then fill them in; build the puffy paint in 2 thin passes instead of one thick blob. Let it cure at least 24 hours, then punch a hole near the top and attach to a keyring with a small split ring. Wipe the front once more to remove any dust before gifting.
Practice the phrase on scrap first; puffy paint spreads while it’s wet.
Avoid washing or flexing the tag before full cure; it smears and ruins the lettering.
9. Stenciled Tumbler Wrap With Fabric Tape Finish
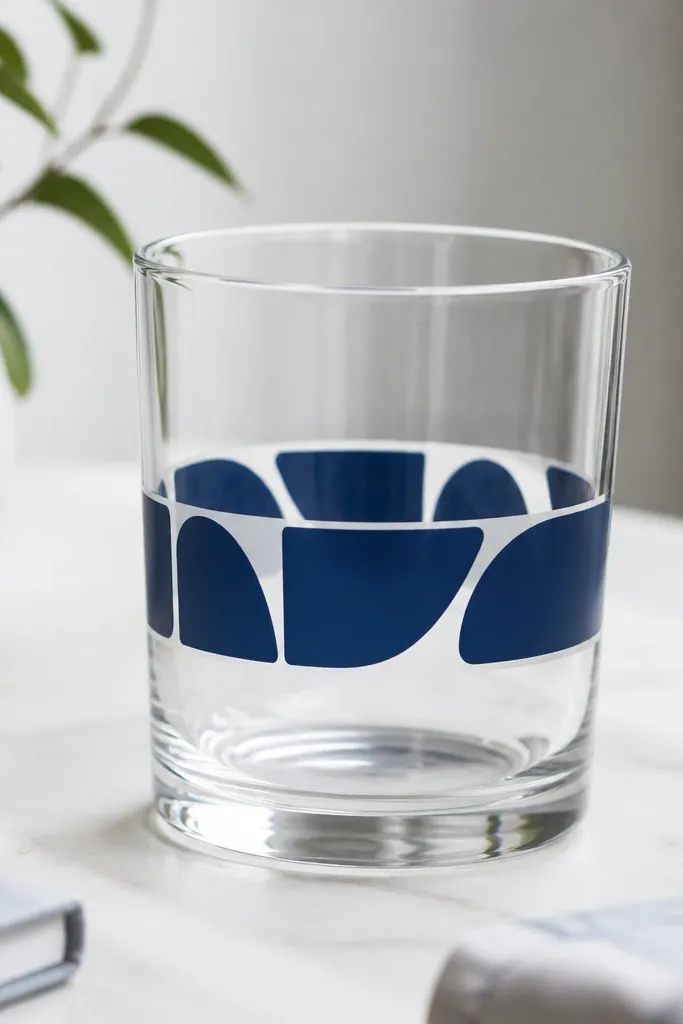
Start by wrapping a thin strip of fabric or transfer material around the tumbler to measure the circumference, then cut it so it overlaps by 1/2 inch. Lay the strip flat and use a stencil taped down with low-tack painter’s tape. Stencil in 2 coats of fabric paint and let it dry between coats. Trim any bleeding with a craft knife once dry, then wrap the strip around the tumbler and secure with clear fabric tape at the seam. Seal with a thin clear spray made for fabric if the brand allows it, and let it dry fully before use.
I’ve made a few versions of this and the one that always looks best uses fabric tape as the edge guide. You stencil a simple design — his initials, a short date, or a tiny icon — onto a strip of thin fabric or transfer sheet, then wrap it around his tumbler. The fabric tape finish makes the edges look straight and store-like instead of crooked craft tape. It works for any style because the tumbler is the canvas and the design is small. Pick colors that match his everyday items — if he wears black and gray, use white and light gray for the stencil.
Skip thisDon’t freehand the spacing; one crooked line makes the whole tumbler feel DIY.
Editor's noteUse a stencil with thick letters; thin fonts get fuzzy on curved surfaces.
10. Handmade Rope Bracelet With Adjustable Button Closure
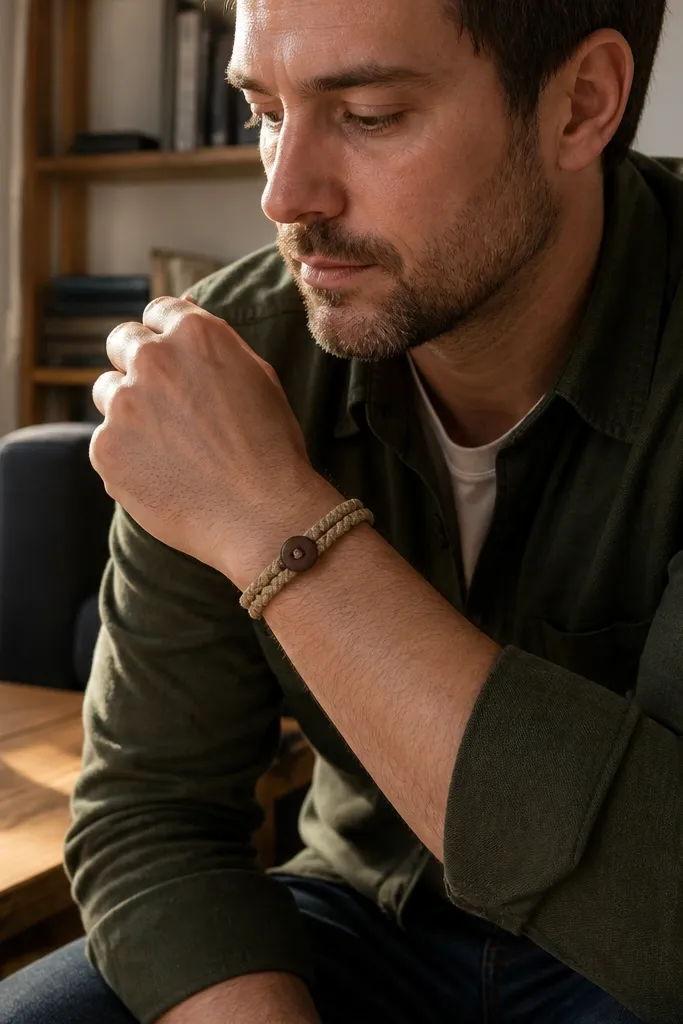
A rope bracelet reads “summer accessory” even when it’s made from cheap materials. I braid three cords and use an adjustable button closure so it fits his wrist without guessing size. The bracelet looks clean because the knot sits on the inside and the closure is centered. It flatters because rope sits flat and doesn’t create bulky layers. Choose cord colors that match his watch strap or shoes — tan and brown for warm guys, black and gray for cooler tones.
Start by cutting three cord lengths, usually 14 inches each, and braid tightly for about 6 inches. Tie off the end with thread and trim. Create a loop closure by leaving a small tail at the end and sewing a button onto the opposite side of the braid. Add a sliding knot: stitch a small fabric tab so the knot can move and adjust. Test fit by wrapping once and checking comfort, then lock the knot with a dab of fabric glue on the underside.
Use a button with a shank if you want a stronger hold on cord fabric.
Avoid loose braids; uneven braid tension makes it look messy fast.
11. Scrap Fabric Patch Wallet Accent With Iron-On Applique
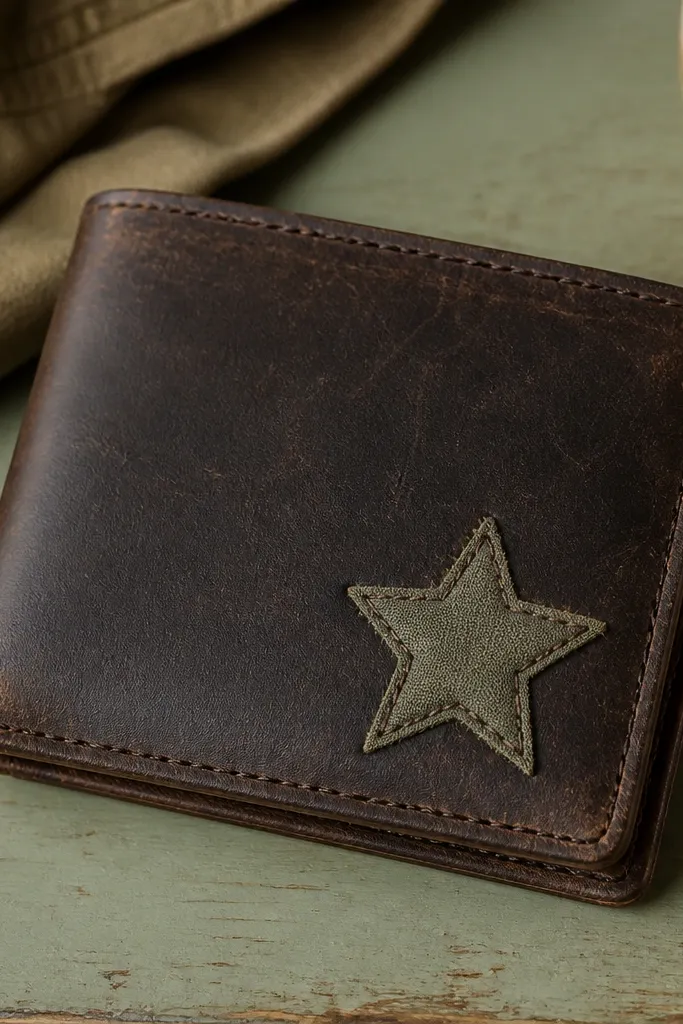
This is a “looks custom” gift that costs pennies when you use scrap fabric. I cut a simple shape like a star, lightning bolt, or tiny mountain and iron it onto a plain canvas wallet or a canvas card sleeve. Then I stitch around the edges with matching thread to lock it down and hide any lifting corners. The effect is a clean, clothing-style detail that looks like it belongs on his stuff. It flatters his everyday carry because it’s small, not bulky, and it can match his hoodie or jacket colors.
Start with a plain canvas wallet or card holder and wash it if it’s new to remove sizing. Cut your patch from scrap fabric, then iron it on using the heat setting for the fabric type. After it cools, stitch around the patch with a tight zigzag or straight stitch about 1/8 inch from the edge. Trim any frayed threads and press again for 10 seconds. Add a tiny second element like a thread “x” or a micro label with his initials on the corner.
Use thread that matches the patch background, not the patch outline; it looks more intentional.
Don’t skip stitching if you want it to survive pockets and keys.
12. Stamped Ceramic Mug Coaster With Alcohol Ink
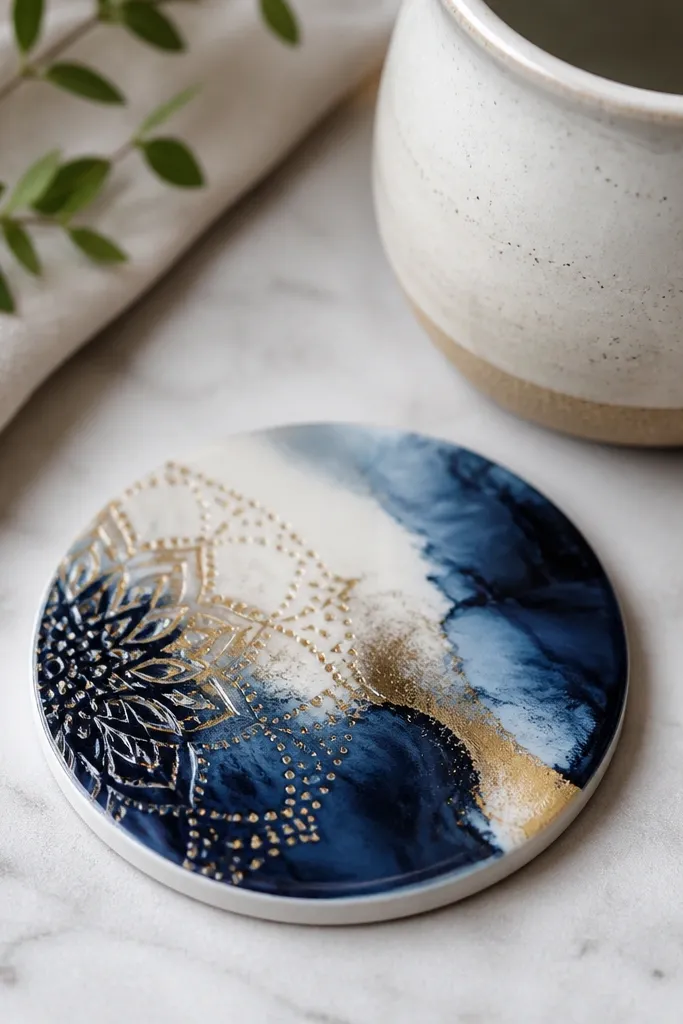
If he drinks coffee at home, this is a gift he’ll use daily, and it looks like you bought it from a craft market. I use ceramic tiles or small ceramic coasters, stamp a subtle pattern, then add alcohol ink in controlled drops for marbled swirls. The stamped texture gives the ink something to cling to, so the design looks layered instead of flat. It flatters a home because the coaster base is neutral and the ink adds color without getting loud. Choose navy, forest green, or deep burgundy ink with a tiny gold accent for a “dark and moody” look.
Start by cleaning the ceramic with rubbing alcohol and letting it dry. Stamp a light pattern using a small craft stamp and a stamping ink made for ceramics. Drop alcohol ink in 2-3 colors — keep one dominant — then tilt the coaster slightly to guide the swirl. Let it dry fully, then seal with a clear ceramic sealer in thin coats. After sealing, test with water on the surface to confirm it beads, then gift it with a small note.
Use a toothpick to drag ink lines — it turns random splatter into intentional details.
Avoid heavy ink layering before it dries; it turns muddy.
13. Personalized Fabric Photo Keychain Lanyard
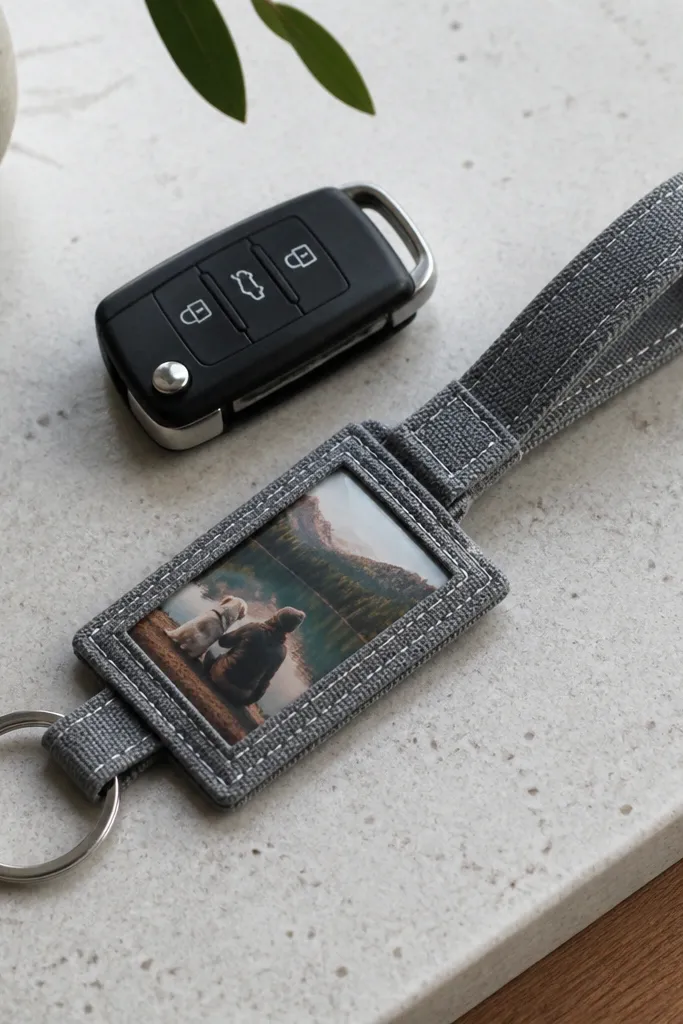
This is a “photo you can touch” gift that looks nicer than a plain print. I make a small fabric sleeve with a clear window so the photo stays protected from oils and rain. The top-stitched edges make it look like a product, not a school project. It flatters because it hangs neatly and doesn’t scratch — the fabric sleeve buffers the photo. Pick a fabric that matches his bag or favorite hoodie — black denim, navy canvas, or a muted plaid.
Start by cutting a fabric rectangle about 4 inches by 2.5 inches and fold it to form a sleeve. Cut a clear plastic window piece and insert it between the front layer and the back layer. Sew along the sides and bottom, then turn it right-side out and press. Slide in a small photo card, then close the top with a zipper or a sewn opening with Velcro. Attach a keyring clip to the top loop using a small swivel hook.
Use clear vinyl from a craft store; it’s thicker and less wavy than cheap plastic wrap.
Avoid thin fabric that puckers; it makes the window look misaligned.
14. Stitched Bottle Opener Keychain From Leather Offcuts
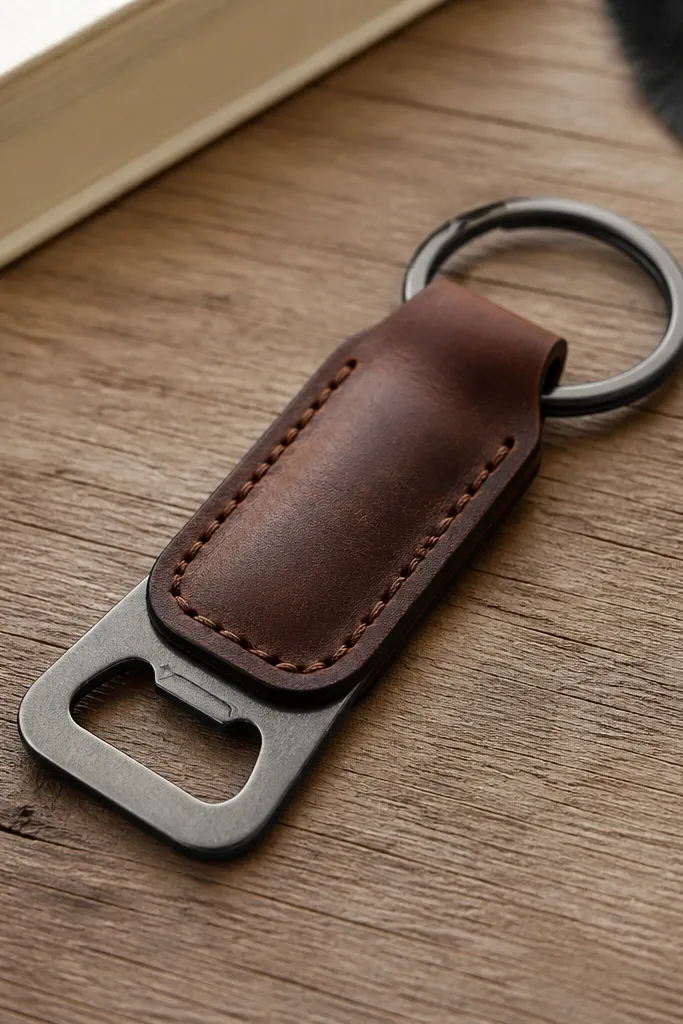
This is a practical, slightly “cool” gift that always gets used at gatherings. I cut a leather shape to hold a small metal bottle opener insert, then stitch around it with waxed thread so the metal never feels loose. The look is clean because the opener tab sits flush against the leather and the edges are burnished. It flatters guys who host or bring drinks because it’s small, sturdy, and doesn’t look fragile. Add a tiny stamped heart or a short word like “Cheers” to make it personal without turning it into clutter.
Start by tracing a bottle opener insert template on leather and cutting the main piece with a sharp blade. Mark and punch stitch holes around the perimeter — keep them even so the opener feels centered. Attach the metal tab with small rivets or a strong adhesive made for leather, then stitch through the holes around it. Burnish the edges and wipe off any dust. Finally, attach to a keyring with a split ring and test the opener action on a bottle cap.
Use a punch for stitch holes; scissors make irregular holes that show on leather.
Don’t rely on glue alone for the opener insert; it will lift after a few uses.
15. Hand-Lettered Candle Label on a Plain Jar
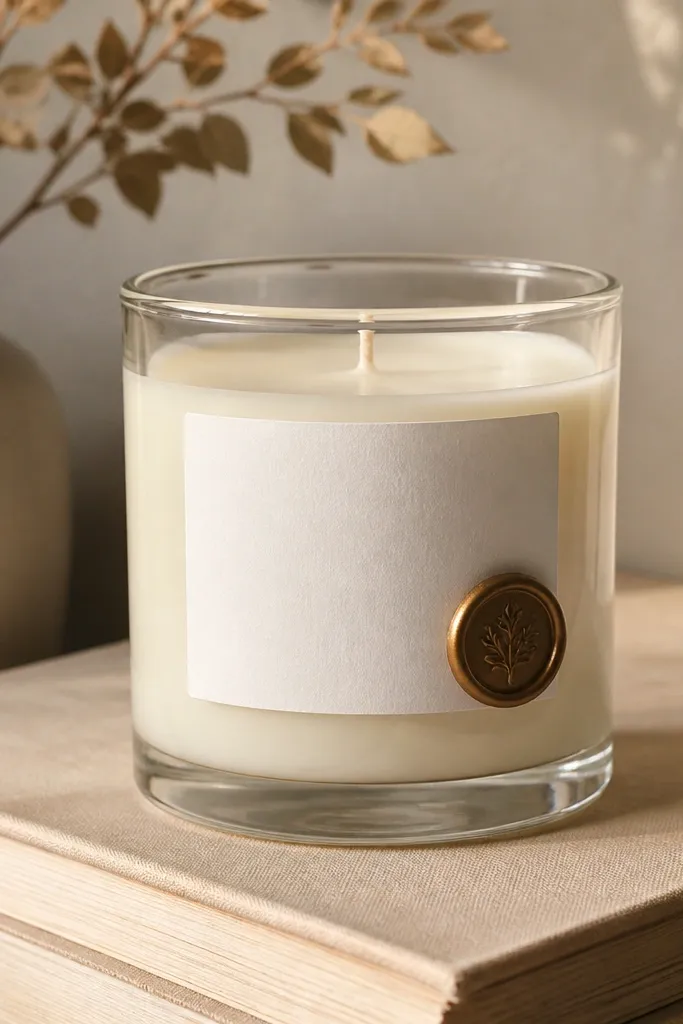
This is one of the best “cheap but thoughtful” gifts because you’re personalizing a thing that already looks finished. I buy plain soy candles in simple jars, then make a custom label with hand-lettering on thick paper or printable sticker paper. The jar looks designer when the label edges are crisp and the typography is consistent. It flatters his taste because the scent choice handles the vibe — choose something like cedar, sandalwood, or vanilla tobacco. Add a date or short message on the bottom so it feels like a note, not just branding.
Start by cleaning the jar and drying it so the label sticks flat. Cut label paper to fit the jar circumference (around 8.5 inches long and 2.25 inches tall for a common jar), then test-fit before applying. Write your message with a fine-tip paint marker or brush pen, then let it dry. Apply a thin layer of clear craft tape to the back if you want extra hold, then wrap it around the jar so the seam is at the back. Add a small wax seal sticker or a tiny ribbon band if he likes that style.
Use a ruler and lightly pencil guide lines; straight labels look expensive instantly.
Avoid messy marker smudges — let ink dry fully before sealing or wrapping.
16. Custom Baseball Cap Patch With Heat + Thread
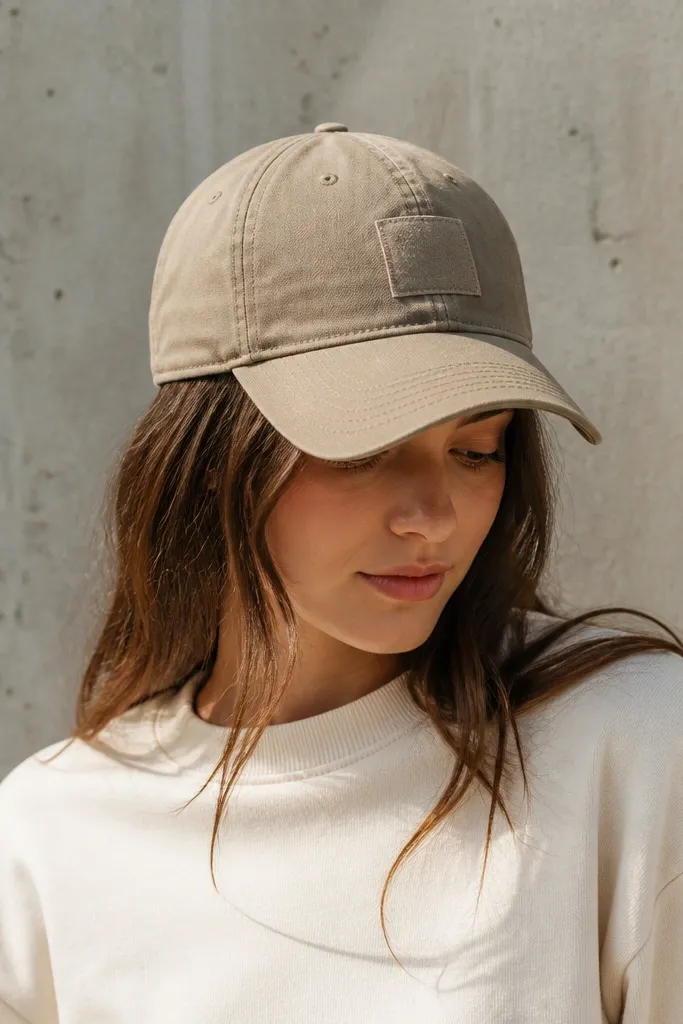
A cap patch is one of my go-to cheap handmade gifts for boyfriend because it turns a basic hat into his hat. I cut an applique from felt or cotton fabric, iron it onto the cap front, then stitch around the edges to stop lifting. The texture contrast — felt patch on cotton cap — looks intentional in daylight. It flatters because the patch sits in the most visible spot and makes his headwear look styled. Use colors that match his typical outfits: black cap with tan patch, or navy cap with white patch and a tiny accent thread.
Start by choosing a cap with a structured front so the patch lies flat. Cut a patch shape about 2.25 inches wide, then iron it in place using an iron with parchment paper over the patch. Stitch around the patch with thick thread and a tight running stitch or blanket stitch. Keep your stitches 1/8 inch apart so the border looks even. Finally, add a micro detail — one tiny star or a stitched line — and press for 10 seconds to set everything.
Choose a patch size under 3 inches; bigger patches look costume-like on most caps.
Don’t place the patch too close to the seam; it warps and looks uneven.
17. Monogrammed Socks Saver Tie With Ribbon Loop
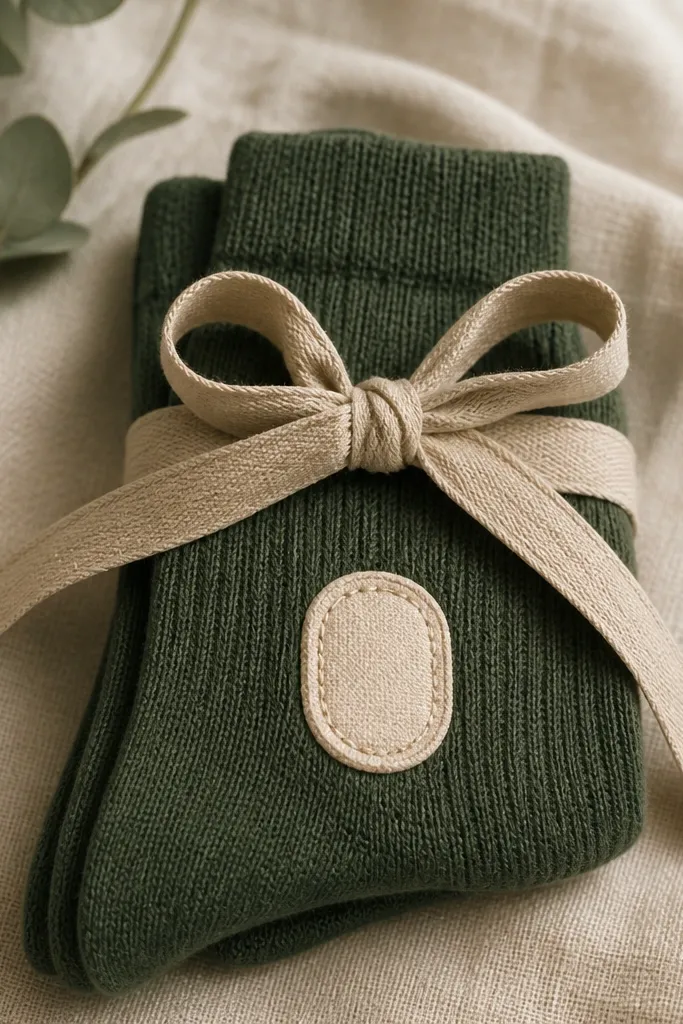
This turns a boring gift into a cute moment, especially for birthdays and holidays when you give clothes. I use a simple fabric tie (or ribbon) and attach a small monogram patch so the socks look gift-ready even before he opens them. The key is making the tie neat and centered so the whole bundle looks intentional. It flatters because it works with any sock pattern and any skin tone since it’s just a wrapping accent. Keep the monogram small — about 1 inch — and let the socks be the color.
Start by folding the socks the same way every time: roll from toe to cuff, then stack and align the toes. Cut a fabric rectangle about 2 inches by 10 inches and sew or glue the ends into a loop, or use a satin ribbon and tie it around the bundle. Attach a monogram patch to the center of the loop using iron-on adhesive plus a quick stitch around the edges. Wrap the tie around the socks and adjust so the monogram sits on top. Finish by tying a small bow with the ribbon tails at equal length.
Use double-sided fabric tape under the patch before stitching to prevent shifting.
Avoid oversized monograms; they make the socks look like a novelty gag.
18. Paper Cutout 3D Love Letter on a Shadow Box Card
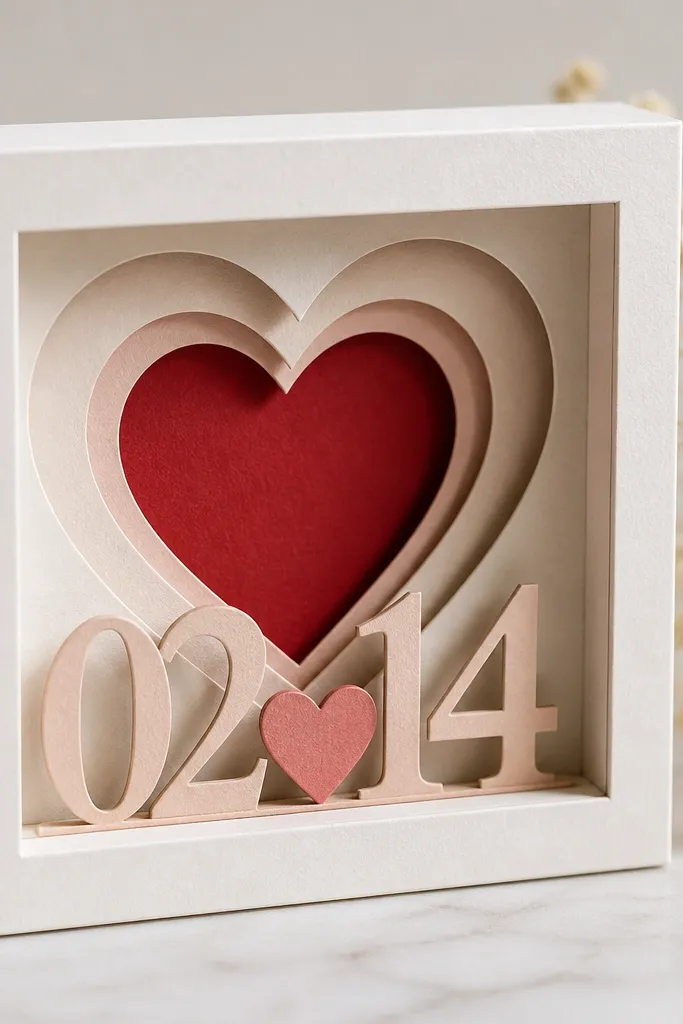
This is a cheap handmade gift for boyfriend that looks like you paid for design work. I build it as a card with a shallow shadow-box depth, then add layered paper cutouts so the message pops. The trick is using foam tape or paper strips to create even spacing between layers, which makes the shadows look consistent. It flatters because it’s personal and visually clean — no clutter, just one clear message. Choose kraft paper with black ink for a moody look, or white cardstock with navy details for crisp contrast.
Start by getting a small shadow-box card base or making one from a folded card and a backing board. Cut your main shapes — heart, initials, or a tiny lightning bolt — from cardstock and keep edges sharp with a craft knife. Layer them using foam tape strips cut to the same width so depth stays even. Add a handwritten message on the top layer so it reads when he opens it. Close it carefully and press under a book for 10 minutes to set the layers.
Use foam tape widths of 1/16 inch for subtle depth; thicker foam looks bulky in cards.
Avoid too many layers; 3 layers max looks intentional and clean.
19. Soda Can Aluminum Keychain With Stamped Pattern
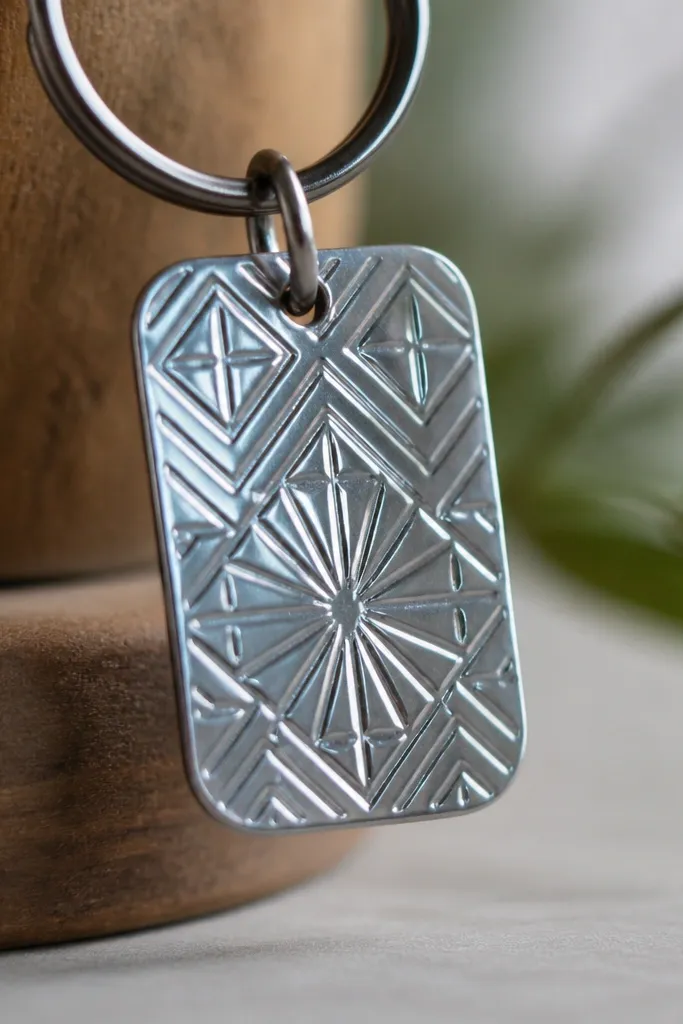
Start by washing the can and letting it dry fully, then cut a rectangle about 2 inches by 1.25 inches. Flatten it by placing it between two heavy books for a few hours. Stamp a pattern — small stars or lines — using a nail and hammer carefully, then smooth sharp edges with fine sandpaper. Drill or punch a hole near the top, clean the surface, and seal with 2 thin coats of clear acrylic spray. Attach to a keyring with a split ring.
This one is for the boyfriend who likes things that look tough. I cut a soda can into a small shape, flatten it, stamp a pattern with a metal punch, then seal it with clear gloss so it doesn’t oxidize. The metallic surface catches light in a way plain crafts never do. It feels special because it’s literally recycled and finished like a metal tag. It also works for any style since the aluminum tone reads industrial — silver, gunmetal, and chrome all match.
Skip thisAvoid skipping sealing; unsealed aluminum dulls quickly.
Editor's noteSand the edges lightly until they feel smooth to the touch; it should not cut skin.
20. Embroidery Hoop Picture Frame With Tiny Fabric Border
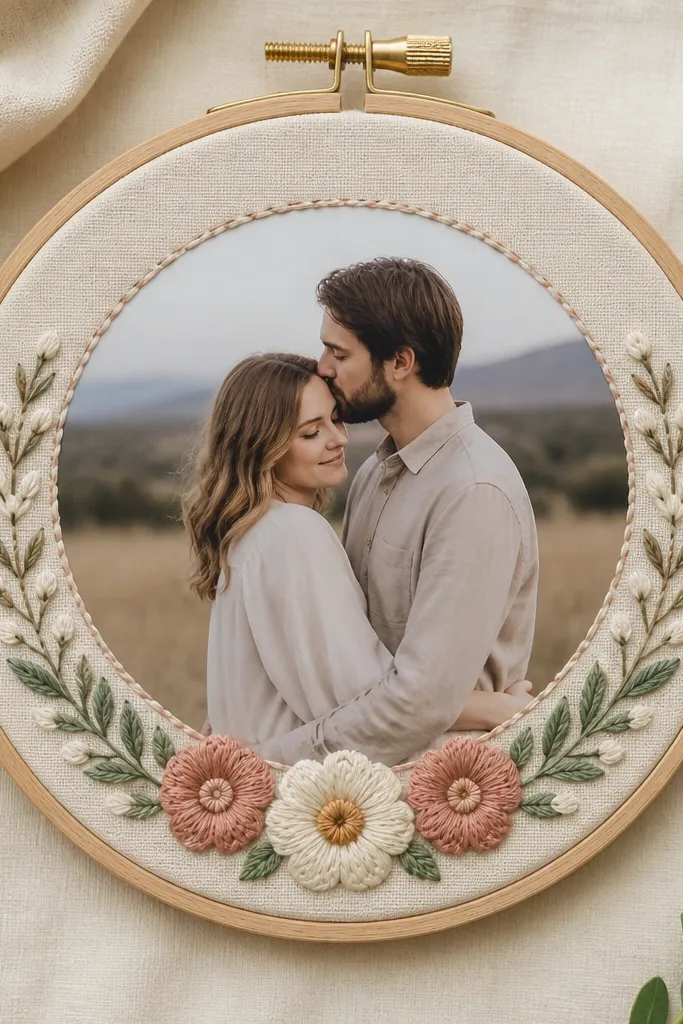
Start by measuring your hoop size and trimming your photo to fit inside, usually 4 inches for a small hoop. Cut fabric to act as a mat, leaving a visible border about 1/4 inch around the photo. Place the photo on the fabric, then stitch around the edge with a simple running stitch or backstitch. Tighten the hoop with the fabric and backer in place, then trim excess fabric. Optionally, add a tiny label in the corner with his initials.
If your boyfriend likes wall decor, this is a cheap handmade gifts for boyfriend option that looks legit on a shelf. I use a small embroidery hoop and add a fabric border around the photo, then stitch the border so it looks finished. The hoop gives it instant structure, and the fabric mat makes the photo look framed like a print. It flatters because the photo sits centered and the border color can match his bedding or desk vibe. Pick one color for the border and one thread color for stitching; keep it tight and simple.
Skip thisAvoid wrinkled fabric under the photo; it looks cheap immediately.
Editor's noteUse a fabric that doesn’t fray much, like cotton canvas or denim, so the back looks neat.
21. Fabric Scrunchie Bracelet With Button Charm
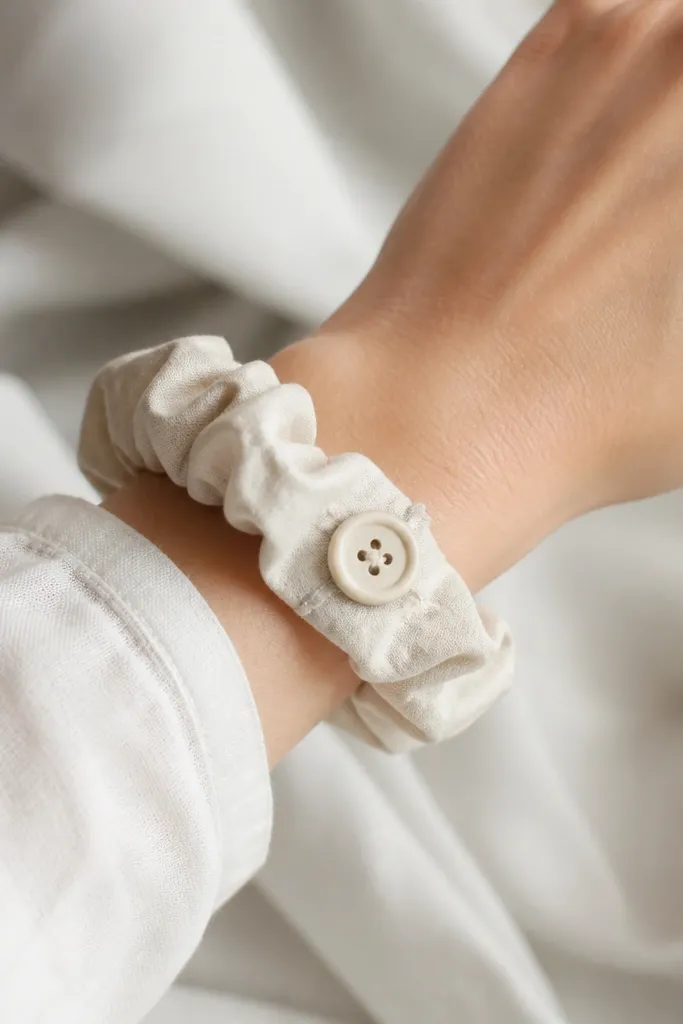
This is a playful handmade gift that still looks intentional. I make a mini scrunchie bracelet using a fabric strip and elastic, then add one button charm so it feels like jewelry. The fabric gathers give it softness, and the button adds visual weight near the closure point. It flirts with an accessory vibe without being complicated. It flatters because it’s comfortable and doesn’t require a perfect wrist measurement — the elastic adjusts.
Start by cutting a fabric rectangle about 7 inches by 3.5 inches and folding it lengthwise with right sides together. Stitch along the long edge, turn it right-side out, and press flat. Insert a short elastic band (about 5.5 inches) and secure the ends with a few stitches. Sew the opening closed, then attach a small button charm with strong thread at one side. Test on his wrist and adjust the elastic length if it’s too loose.
Choose a button with a shank so it stays secure even with daily wear.
Avoid using super-thin elastic; it stretches out and the bracelet sags.
22. Cord Bracelet Bookmark for His Books
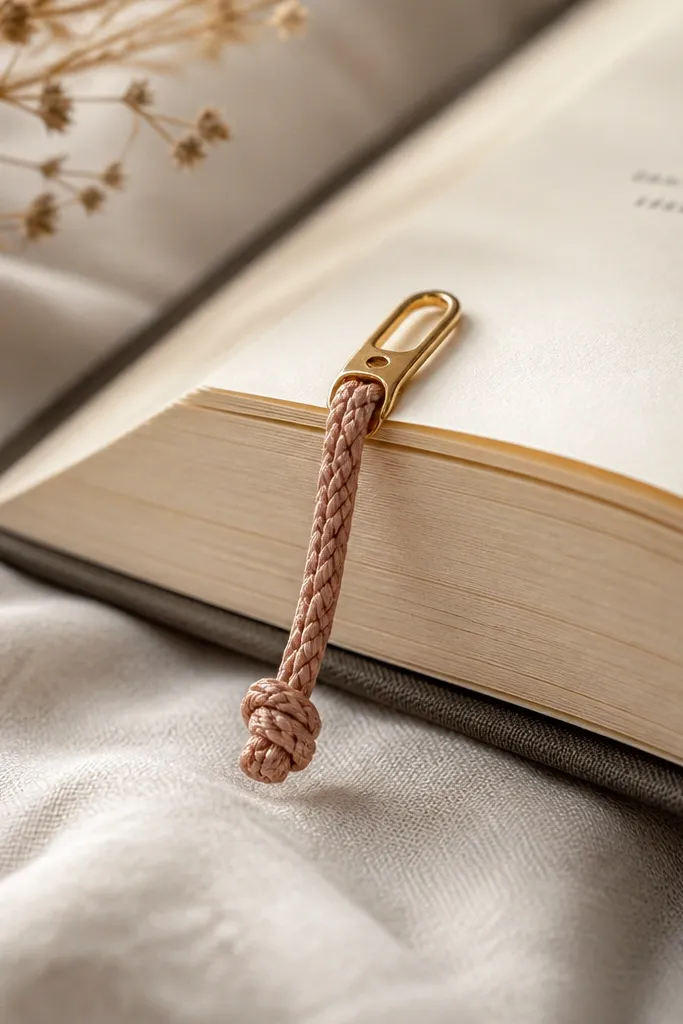
This is a sneaky-useful gift that looks like a small accessory. I braid cord and attach a small metal alligator clip so it bookmarks his current page. Then I add a mini charm near the clip for personality. It flatters readers because it doesn’t bulk up the book like bulky bookmarks. The best part is how it matches his day-to-day — he can clip it on and it looks like a little bracelet detail.
Start by braiding 3 strands of cord into a 6-inch length. Tie off the end and attach a metal clip at one end using strong thread — wrap around the cord and knot tightly. Add a small charm by opening a jump ring and hooking it near the clip, then close it. If you want it to look extra clean, cover the thread wraps with a tiny dab of clear glue once the thread is tight. Test in a thick book so the clip grips firmly.
Clip it into a page and tug gently — if it slides, re-wrap the thread before gluing.
Don’t attach the clip with one weak knot; it will pop off during use.
23. Leatherette Bracelet Keyring Holder for Car Keys
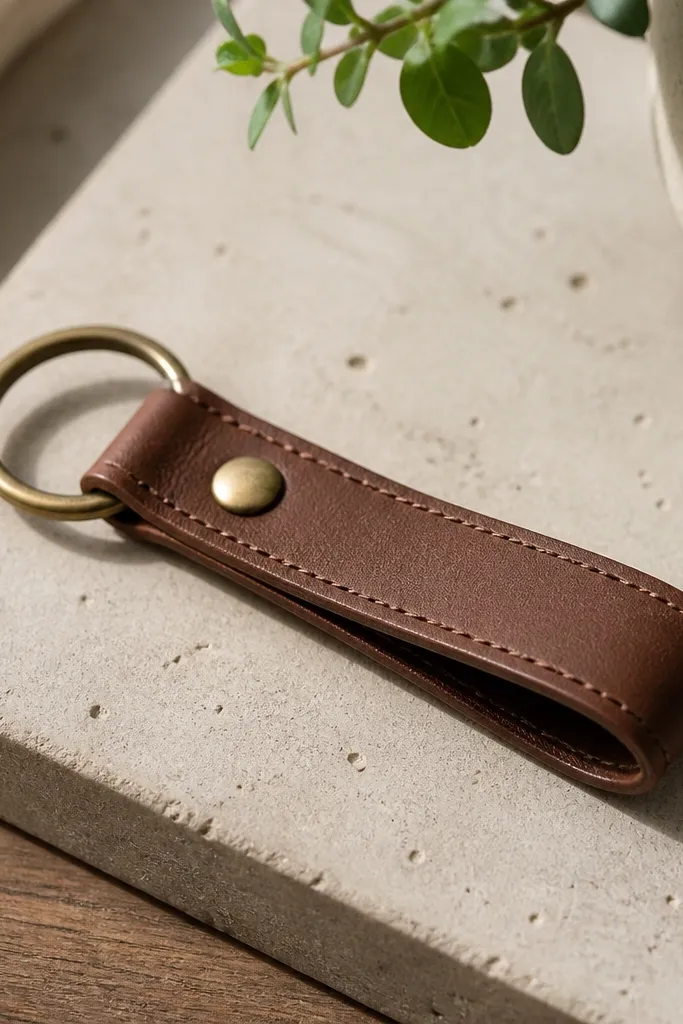
This is for the boyfriend who always has car keys in his hand or on his belt. I make a small leatherette cuff with a snap closure and a keyring loop, so he can carry keys without jangling in pockets. The cuff looks intentional because the snap is centered and the stitching matches the edge color. It flatters because it sits flat and doesn’t press into the wrist if he wears it on a belt loop. Choose dark materials — black or espresso brown — and one bright stitch thread for contrast.
Start by cutting a cuff strip about 10 inches long and 1.25 inches wide, then fold and mark snap positions. Stitch a keyring loop tab at one end so the ring hangs slightly above the cuff. Attach snaps using a snap kit, then stitch around the cuff edges after snapping to hide any rough edges. Burnish or paint the edges so the cuff looks finished. Test with his car keys to make sure the ring doesn’t swing and hit the cuff.
Use a heavier thread like upholstery thread; light thread makes leatherette look flimsy.
Avoid placing the snap too close to the edge; it can tear the material over time.
24. Painted Pegboard Mini Organizer With Washi Edge Tape
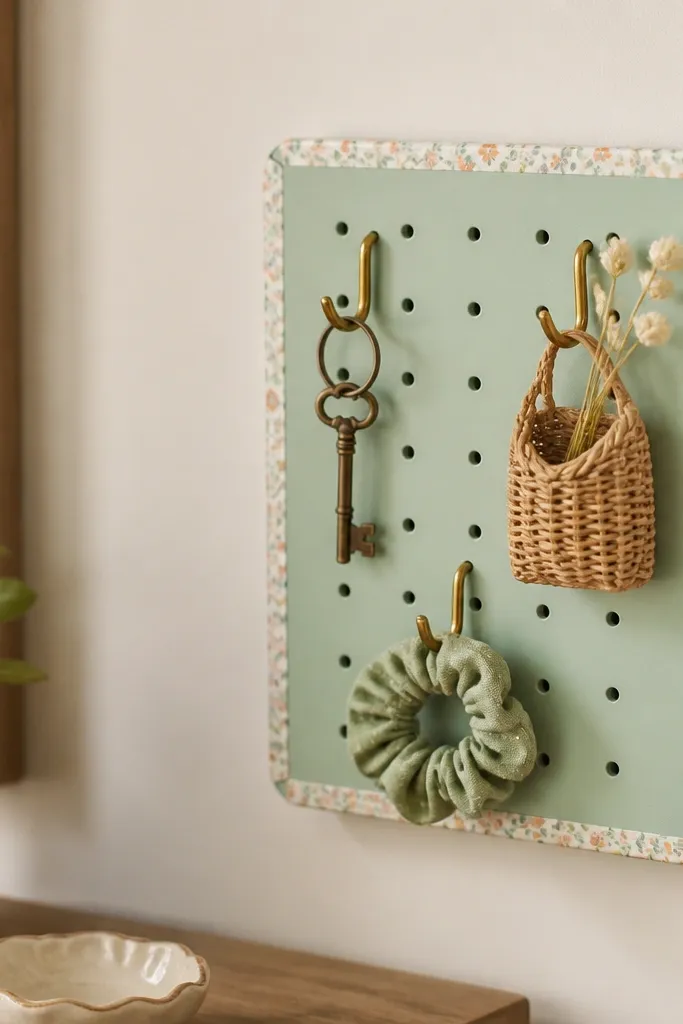
Start by sanding the pegboard lightly and wiping off dust. Paint with matte acrylic spray or paint in 2 thin coats, letting it dry between. Mark hook placements with a ruler so they line up, then drill pilot holes if you’re screwing hooks in. Wrap the sides with washi tape, smoothing it flat and trimming the ends cleanly. Add one small basket or clip and hang his key or earbuds so the organizer gets used right away.
This is a practical decor gift that looks tidy even when his desk is messy. I buy a small pegboard panel, paint it matte, then add hooks with screws or strong adhesive hooks rated for the weight. The washi tape edge wrap hides raw pegboard edges and gives it a finished border. It flatters because it turns “mess” into a visible system — keys go up, not scattered. Choose a border tape that matches his phone case or his favorite notebook color for that personal touch.
Skip thisAvoid heavy items on adhesive hooks; test weight with nothing fragile first.
Editor's noteUse a small level or lay a ruler along the board to keep hook rows straight.
25. Personalized "Gas Tank" Candle Holder From Tin Cup and Vinyl
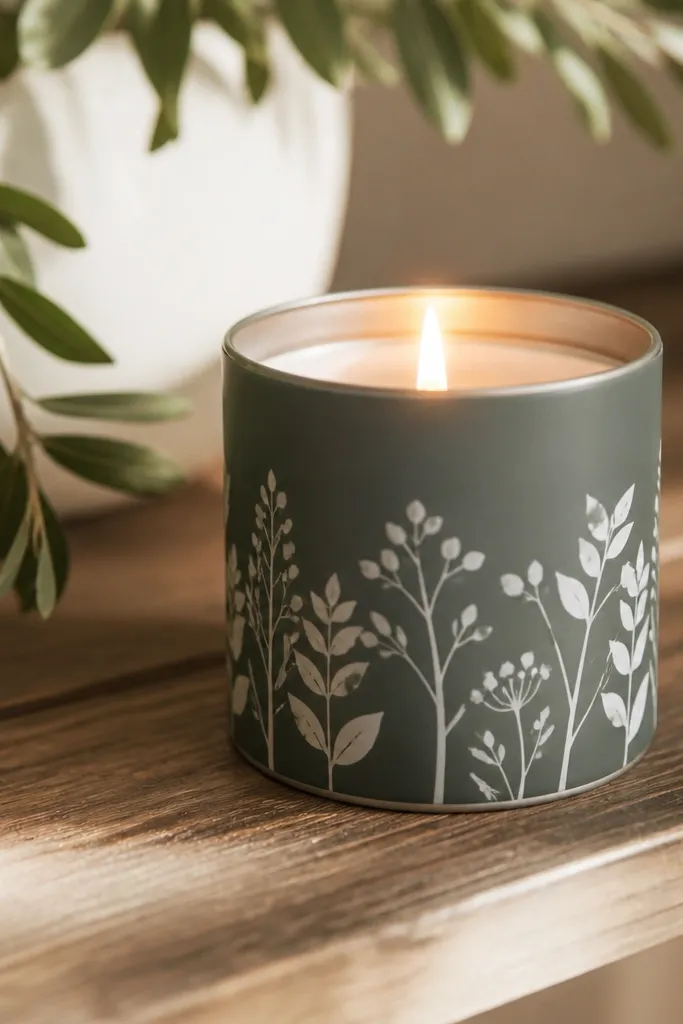
This looks like a themed decor piece but it’s simple to make. I use a small tin cup or metal container and wrap vinyl letters around it like a label, then add a battery candle or small candle inside. The vinyl gives sharp lines, and the metal cup makes it feel sturdy. It flatters because it’s visually masculine without being loud, and it sits on a shelf without needing extra space. Use a word he likes — “Garage,” “Weekend,” or his nickname — in a bold font for the best effect.
Start by cleaning the metal cup with rubbing alcohol, then measure the circumference so vinyl doesn’t overlap crookedly. Cut vinyl letters using a craft cutter or stencil and transfer tape. Apply the vinyl in small sections, smoothing from center outward so no bubbles form. Add a small wax-safe liner if you’re using a real candle, or use a battery candle so it’s easier and safer. Seal the top edge of vinyl with a thin clear tape band if the cup gets handled a lot.
Use matte vinyl for a more expensive look; glossy vinyl can look like sticker residue.
Avoid using vinyl on dirty metal; it lifts at the corners.



