

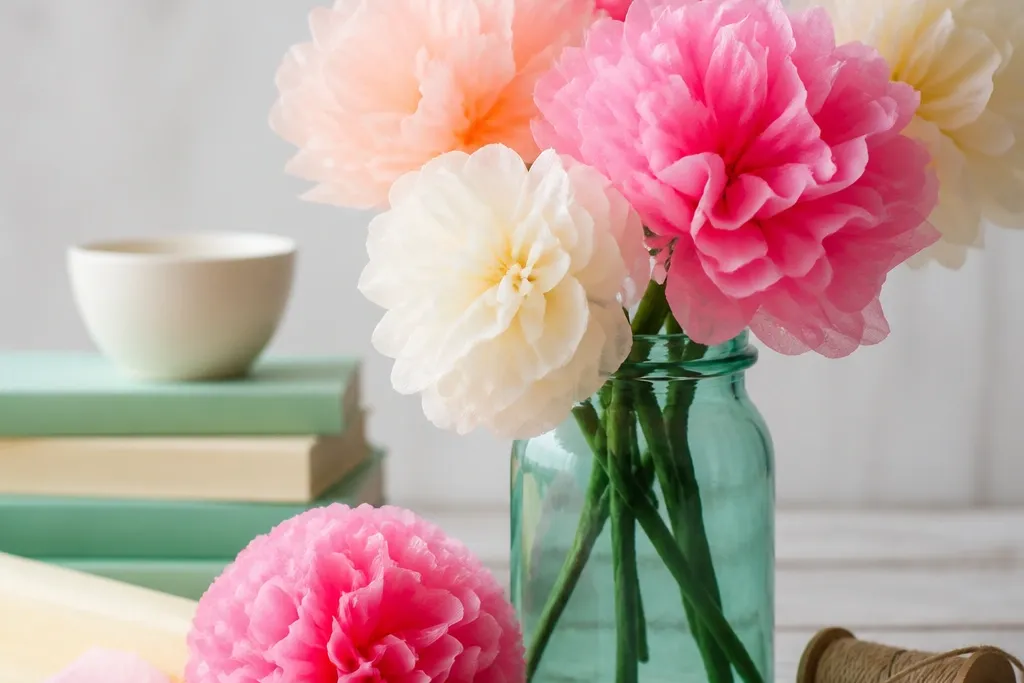

1. Classic Rolled Rose Bud
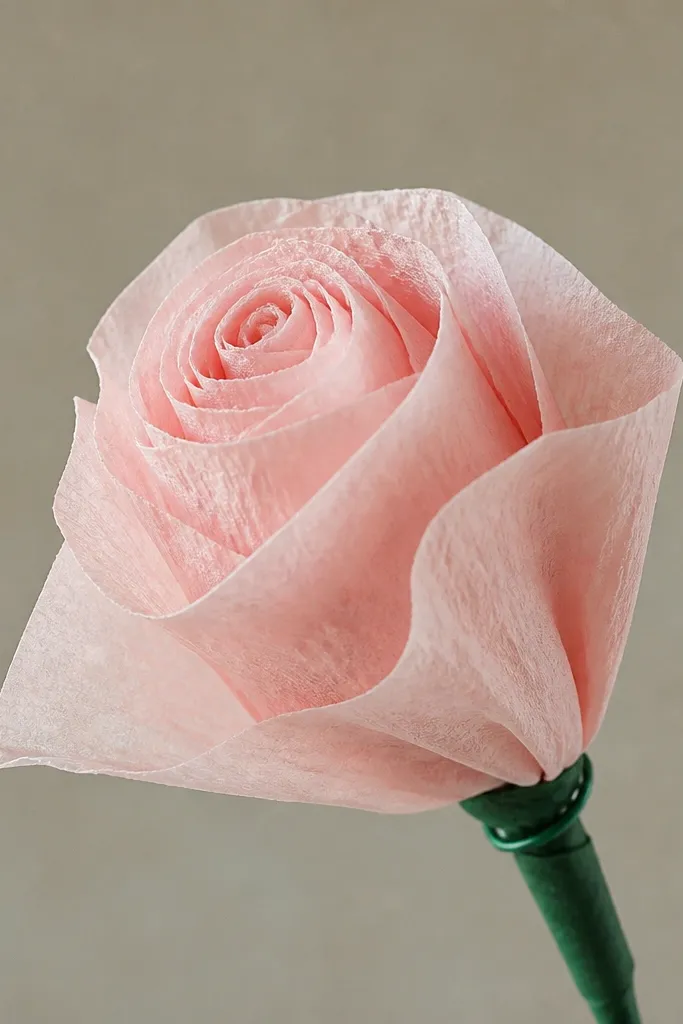
Cut tissue sheets into 10x20 inch rectangles. Stack two rectangles, then cut a gentle V shape along one long edge so you get a tapered petal side. Roll starting from the narrow side like you’re making a paper cone, keeping the center tight and the outer roll looser. Pinch the base, then twist a 6-inch piece of green floral wire or twist tie around the pinch point to lock the bud. If you want more fullness, add a third roll layer by wrapping a thinner strip of tissue around the outside before twisting the stem.
This is the rose you make when you want tissue to look like actual petals instead of flat paper disks. Use two tones of blush — one light and one slightly deeper — so the outer roll looks dimensional. The rolled center gives structure, while the outer layers stay airy, so it reads delicate at arm’s length. I’ve done these in white for bridal-style decor and in coral for summer parties; both look clean because the spiral catches light. This style also works well for people who want flowers that look good even if the edges are a little uneven, because the spiral hides small mistakes.
Skip thisAvoid using one single flat color only — it looks flat and can look like a folded napkin.
Editor's noteSpritz a tiny amount of water on your fingertips and smooth the roll — it makes the spiral look more “petal” than “paper.”
2. Accordion Fan Daisy
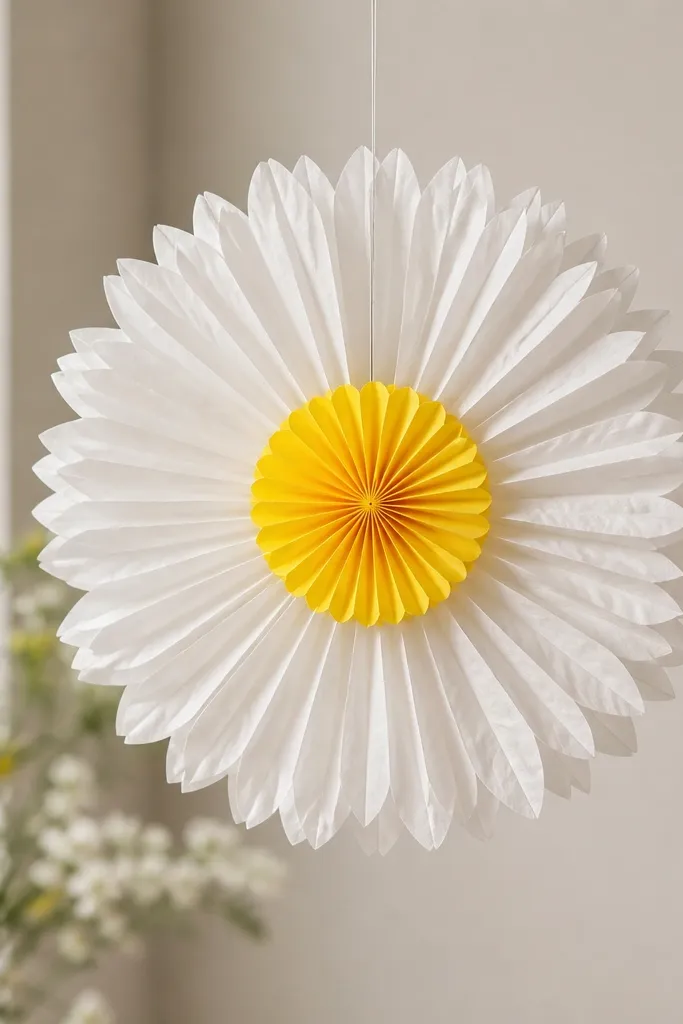
Cut tissue into 6x15 inch strips for small daisies, or 8x18 inch for bigger ones. Fold the strip into an accordion — about 1/2 inch pleats — until you reach the end. Pinch the folded accordion in the middle, then tie it with a 6-inch piece of thread or thin wire. Fan the folds outward to form a half-moon, then repeat with a second accordion layer in the back so it looks full. Glue a yellow tissue circle (cut about 2 inches wide) in the center, then fluff each petal outward one by one.
This daisy is the one I reach for when I need something that looks bright and cheerful from across the room. The accordion fold gives you evenly spaced petals, and the yellow center pops against white. I’ve made these for spring tables in sets of three per plate, and the petals look sharp even in photos because each fold creates a highlight. The daisy shape also flatters people who don’t want perfect symmetry; small differences still read as hand-made charm. Use it for party decor where you want a clean, graphic look.
Skip thisAvoid cutting petals from single sheets without pleats — you’ll end up with floppy, uneven petals.
Editor's noteMake the pleats slightly tighter near the center pinch — it makes the petals look more layered.
3. Layered Tissue Pom-Pom with Fringe Edge
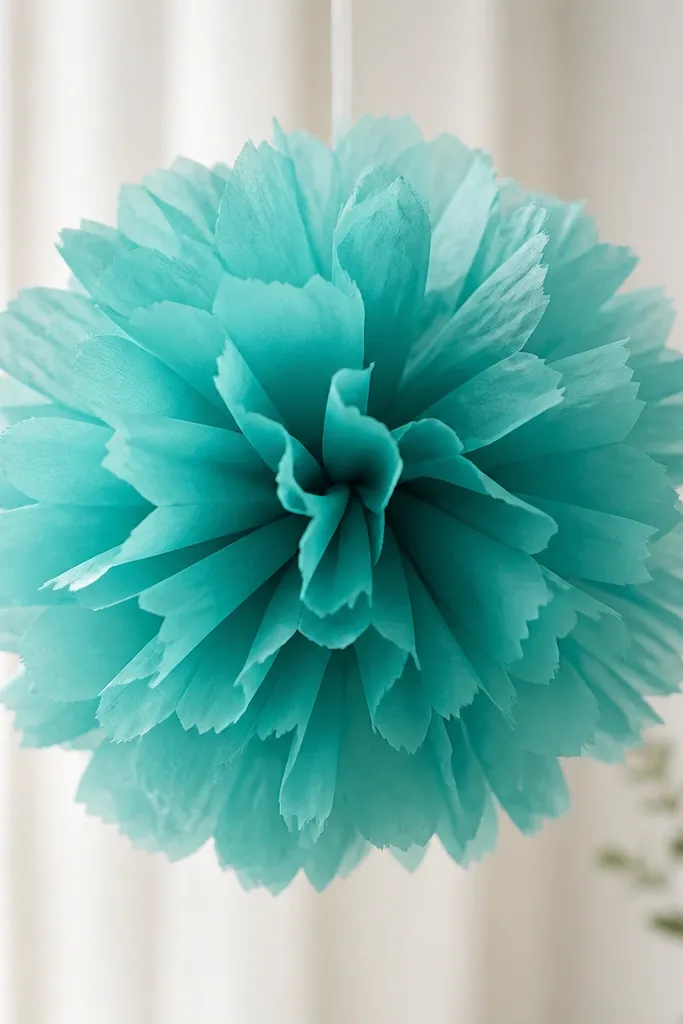
Stack 6 tissue sheets in the same color. Fold the stack in half, then cut into a 10-inch square (trim so corners are neat). Fringe the edges: cut 1/2 inch slits from the outer edge toward the fold, leaving about 1/2 inch uncut at the center. Unfold and accordion the whole sheet stack gently into layers, then pinch the center and tie tightly with string. Fluff each layer outward, pulling from the fringe edge first, so the texture lifts rather than collapses.
This is a pom-pom that looks expensive because the fringe edge catches light and creates texture. I use it when I’m decorating a backdrop and want movement without complicated assembly. Teal with a slightly darker teal fringe layer looks best because the edge shadow shows depth. It also looks great for people with shorter hair at events because the pom-poms read clearly in close-up photos — the texture stays visible. The fringe makes it forgiving if your center knot is a little bulky.
Skip thisAvoid tying too loosely — loose centers cause the fringe to droop.
Editor's noteIf you want it extra full, add two sheets in a darker shade only at the outer fringe layer.
4. Tissue Paper Peony Cluster
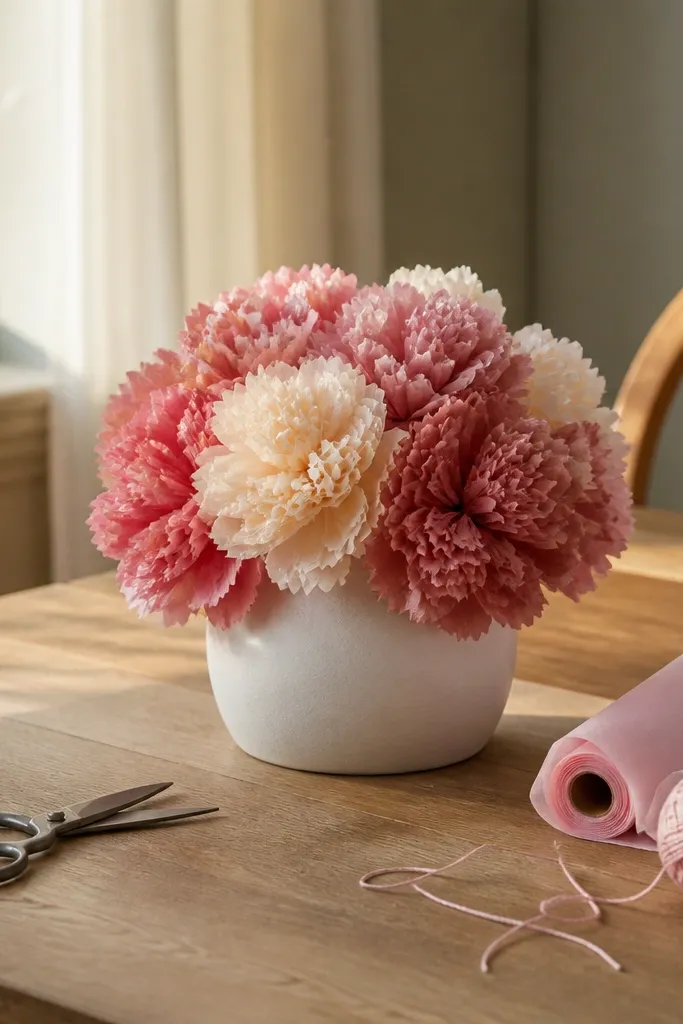
Cut 12 circles from tissue using a 3-inch round template — do 6 in dusty rose and 6 in cream. Stack two circles, then fold each circle into quarters and pinch the folded point, like a tiny flower bud. Arrange the first layer flat on a foam circle (about 4 inches wide), gluing the pinched points outward. Build the second layer slightly inward with the other color, then add a third mini layer using 1.5-inch circles if you want extra fullness. Finish by shaping the outer petals with your fingers so they puff upward, not straight out.
Peonies look hard, but tissue makes them doable because you can hide imperfection in the layering. This cluster uses small “petal puffs” instead of one big bloom, so it looks lush without being stiff. Dusty rose plus cream gives that natural gradient effect — the inner petals look lighter and the outer ones look fuller. It’s flattering for any decor style because it reads soft rather than bold. I’ve used this design as a centerpiece topper and as a wreath focal point; it holds up at eye level better than flat rosettes.
Skip thisAvoid gluing the entire circle flat — that makes it look like a stuck-on doily.
Editor's noteUse a foam base and glue only the pinched point — it stops glue blobs from showing through tissue.
5. Giant Tissue Flower Backdrop Bloom
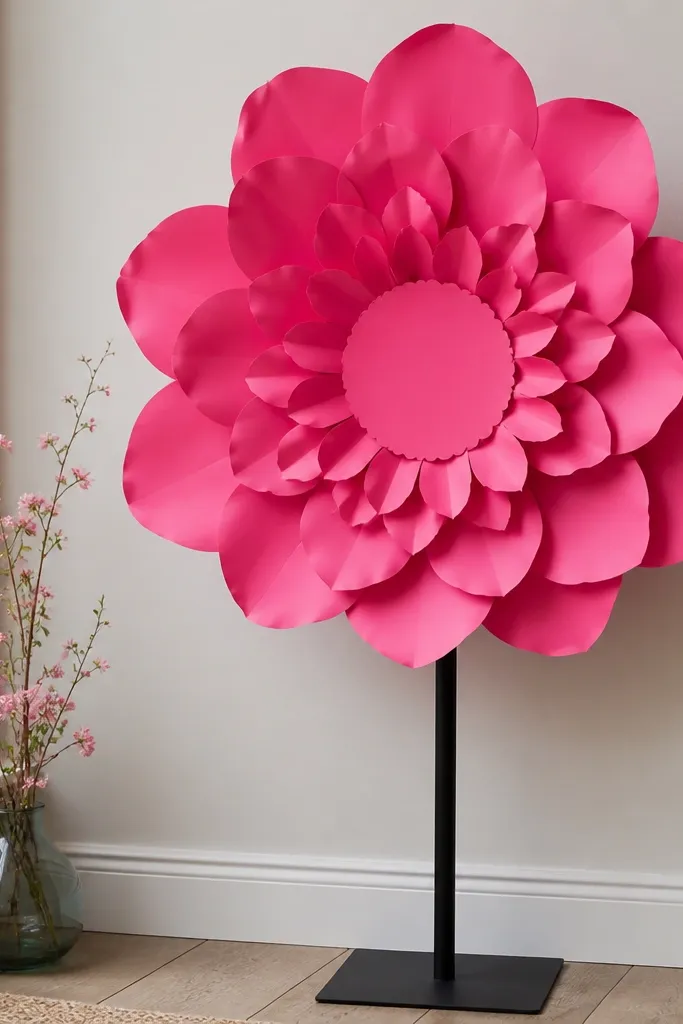
Use 20x30 inch tissue sheets for the base petals. Stack 3 sheets, then fold accordion pleats about 1 inch wide across the short side. Tie the folded stack in the middle with string, then cut the folded edges into a rounded petal shape before you unfold. Repeat for 8-10 petal layers in hot pink. For the center, cut a 6-inch circle and fringe it 1 inch deep, then roll it into a tight coil. Assemble by placing the first petal layer on a cardboard circle, gluing only the center tie line area, then stacking layers outward.
When you need a backdrop flower that people can’t ignore, go giant and keep the petals separated. I’ve made these for graduation photos, and the look comes from using big petal rectangles and fanning them wide, not from extra decoration. Hot pink tissue looks bold in daylight, while the darker center layer adds depth. This bloom is best for open spaces where it can sit tall — it reads “designed” rather than “handmade craft.” If you’re working with limited time, this is one of the fastest high-impact options.
Skip thisAvoid using too few layers — a single ring looks flat from the side.
Editor's noteGlue petals to the cardboard circle in a spiral pattern, not in a straight ring — it hides gaps.
6. Mini Tissue Flower Bouquet Toppers
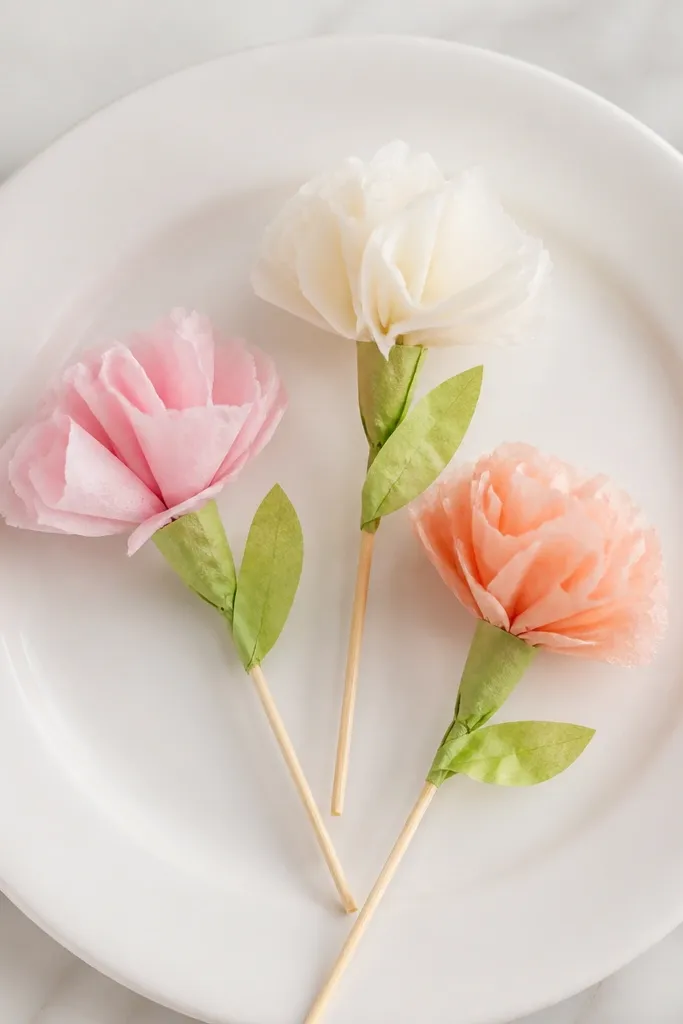
Cut 6x6 inch tissue squares in your chosen colors. Stack two squares, then fold into quarters and snip a rounded petal edge along the open side. Unfold and you’ll have a 4-petal shape; pinch the center and tie with a small piece of thread. Repeat once more for a second bloom layer, then glue the centers together so the petals puff outward. Attach to a cocktail stick with hot glue at the base, then wrap a thin strip of green tissue around the glue point like a leaf stem.
These are the flowers I make when I’m dressing up cupcakes, gift wrapping, or simple table numbers. They’re small but still look full because you stack two tissue layers and fan them. I like using bright colors like turquoise, yellow, and pink because the small size can otherwise look dull. This design flatters anyone who wants quick wins; it’s forgiving and doesn’t need perfect cutting. They also work well for kids because the assembly is simple and the stems are easy to hold.
Skip thisAvoid skipping the second layer — single-layer minis look thin.
Editor's noteCut your rounded edges with kitchen scissors in one smooth pass — it keeps petals looking consistent.
7. Tissue Paper Rose with Twisted Ribbon Stem
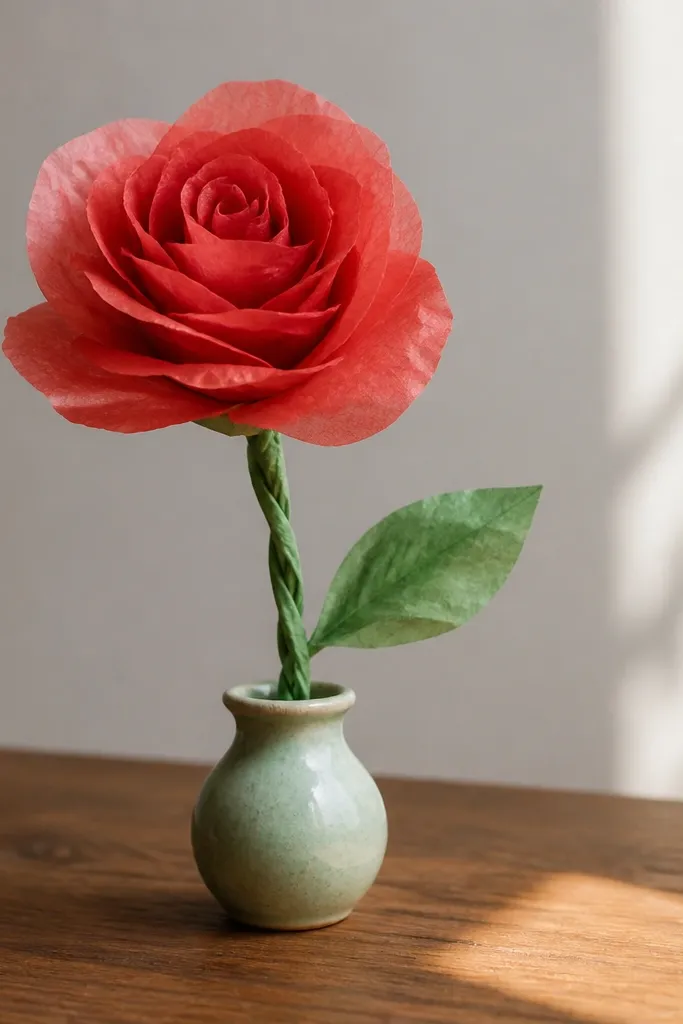
Cut tissue into 2x10 inch strips and stack 3-4 strips of the same color. Fold one strip in half lengthwise, then twist lightly at the fold so it forms a subtle curl. Roll the curled strip into a tight center, then wrap the next strip around it, keeping the center tighter than the outer wraps. When you reach the final wrap, pinch the base and secure with thread. For the stem, twist a 10-inch strip of green tissue around floral wire or a thin skewer, then glue it to the base of the rose.
This rose looks more “finished” than the rolled bud because it has a layered petal structure plus a stem that looks intentional. The twisted ribbon stem hides the messy center tie and makes the whole flower read like a store-bought stem. I’ve made these in red for Valentine’s and in lavender for weddings; the layered strips hold color depth. It also flatters neutral decor because the stem looks clean and the petals have soft movement. If you hate visible wire, this design is the compromise.
Skip thisAvoid hot glue directly on tissue petals — it can create shiny spots.
Editor's noteTwist the strips just a little — too much twist makes the petals look like crumpled tissue.
8. Simple Tissue Heart Blossoms
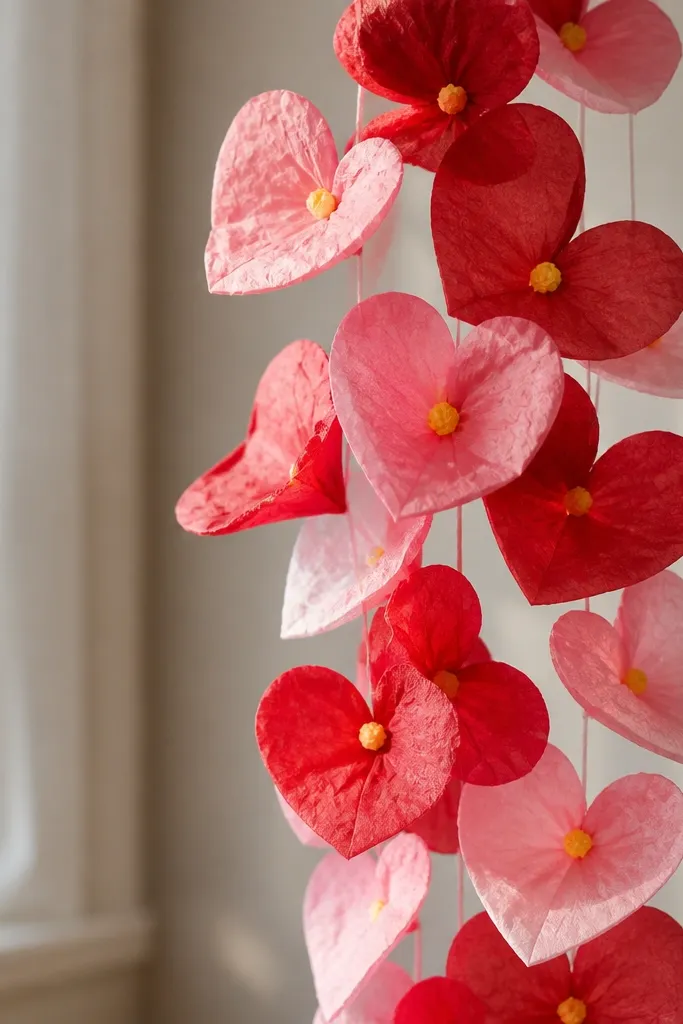
Cut tissue into 8x10 inch rectangles, then fold each rectangle in half. Cut a heart shape along the folded edge, leaving the center uncut so it stays connected. Unfold and pinch the center point, then tie with a small thread loop. Make two heart layers per blossom — one in dark pink and one in light pink — and glue only the pinched center so petals stay lifted. Add a yellow tissue dot center, then attach the blossoms to a string using a tiny knot at the thread loop.
These are for Valentine’s, anniversaries, or any time you want cute without building a full bouquet. You get heart-shaped petals by cutting the folded tissue, and the center makes each blossom feel complete. I use a two-color mix — darker pink outer hearts and lighter pink inner hearts — because it gives a soft shadow. They look adorable on a garland and also work on gift tags when you attach them to string. The heart shape flatters smaller wrists and hands in photos because it frames the subject with a clear outline.
Skip thisAvoid gluing the whole back — hearts will flatten and lose the heart lift.
Editor's noteCut hearts with a paper template once, then reuse the template on multiple sheets for matching shapes.
9. Tissue Paper Sunburst Flower
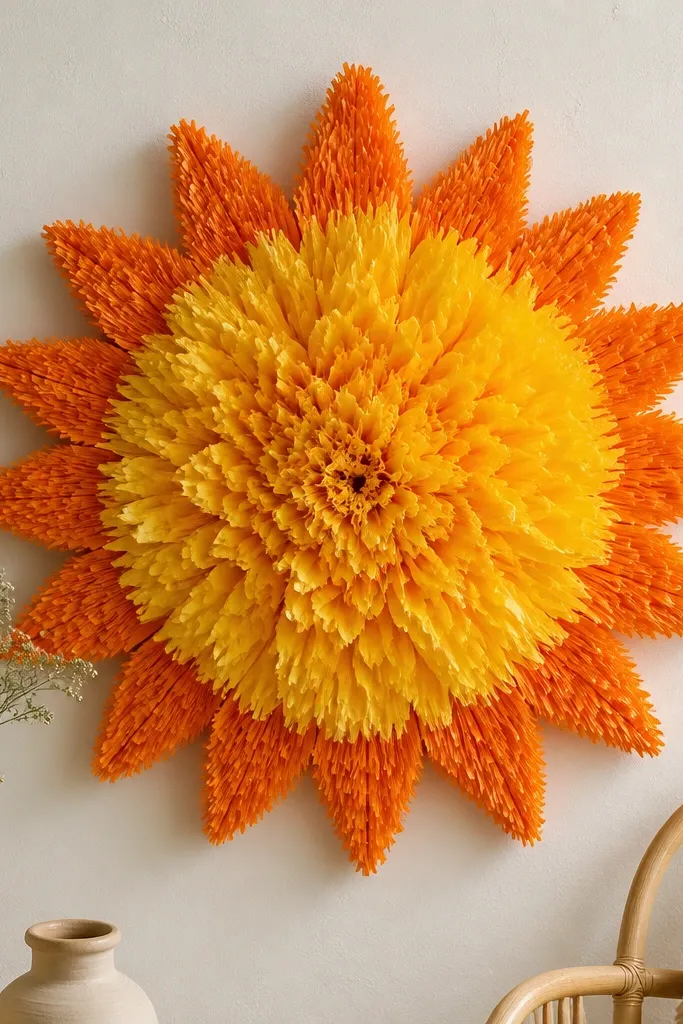
Stack 3 tissue sheets in yellow and 1 sheet in orange. Cut a circle base from cardboard about 5 inches wide. Cut tissue rays by making long strips about 1 inch wide and 10 inches long; gather the strips accordion-style at one end. Glue gathered ray ends around the cardboard circle in a tight ring. Add an inner ring with orange strips, then cut and fringe the outer edges of the orange strips for extra texture. Finish with a small rolled yellow center made from a 1-inch strip rolled tightly.
This flower looks like a party prop because the rays spread in a crisp starburst. It’s one of the fastest designs when you’re making a set for a wall or table runner. Yellow tissue gives the clean base, and an orange fringe layer adds warmth and depth. This one is great if you want something that looks good even if you don’t have a lot of time to fluff — the shape is created by cutting and stacking. It also looks good for people who prefer bold color — the lines are graphic.
Skip thisAvoid using too much glue — it soaks tissue and makes rays stiff in random spots.
Editor's noteKeep ray strips all the same width — uneven widths show up fast on a sunburst.
10. Tissue Paper Orchid Style Bloom
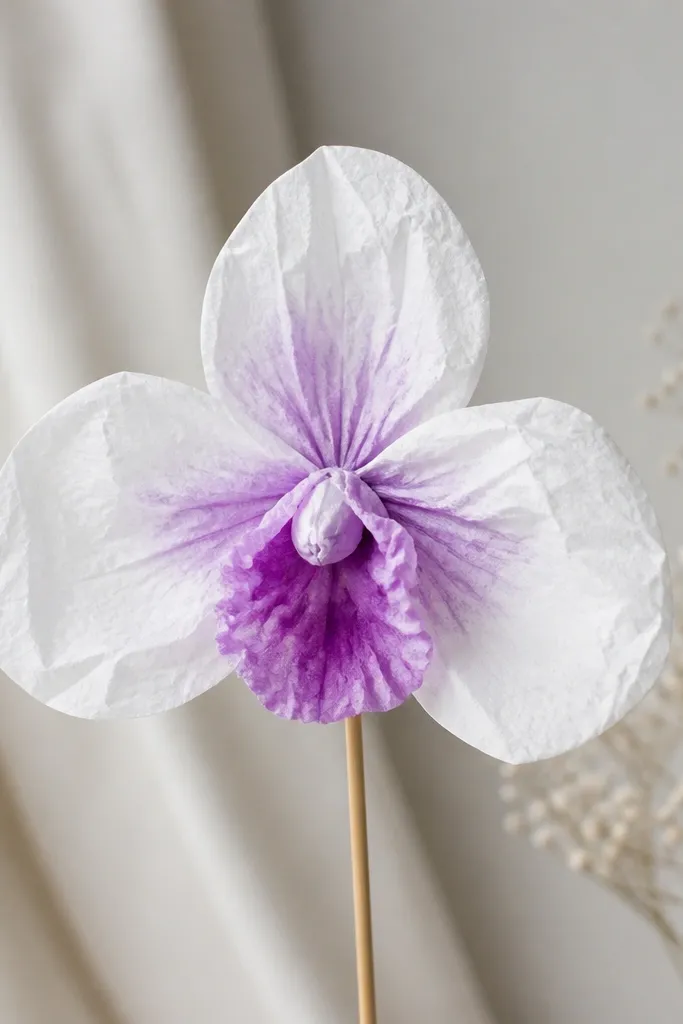
This one looks fancy because tissue lets you shape petals with soft curves. The orchid style has two larger side petals and a center lip that looks like a tiny ruffle. I make these in white tissue with purple tips for a realistic look, but you can swap colors for any room. This style flatters people who want a statement flower that isn’t round and fluffy. It also looks great on a stem because the petals curve upward and show depth.
Cut 3 large petal shapes from tissue: two side petals about 4 inches wide and one center lip about 3 inches wide. Cut a smaller center ruffle piece about 1.5 inches wide and 6 inches long, then fringe one edge lightly. Fold side petals lengthwise to create a shallow curve, then pinch the base. Glue the ruffle piece in the center so the fringed edge faces forward. Secure all petals to a skewer with hot glue at the base, then add a tiny strip of green tissue for a leaf behind the bloom.
Press a petal curve by holding it over warm air from a hairdryer for 2-3 seconds — it sets the shape.
Avoid flat petals stuck flat to the skewer — they look like cut paper flowers.
11. Tissue Paper Hydrangea Cluster
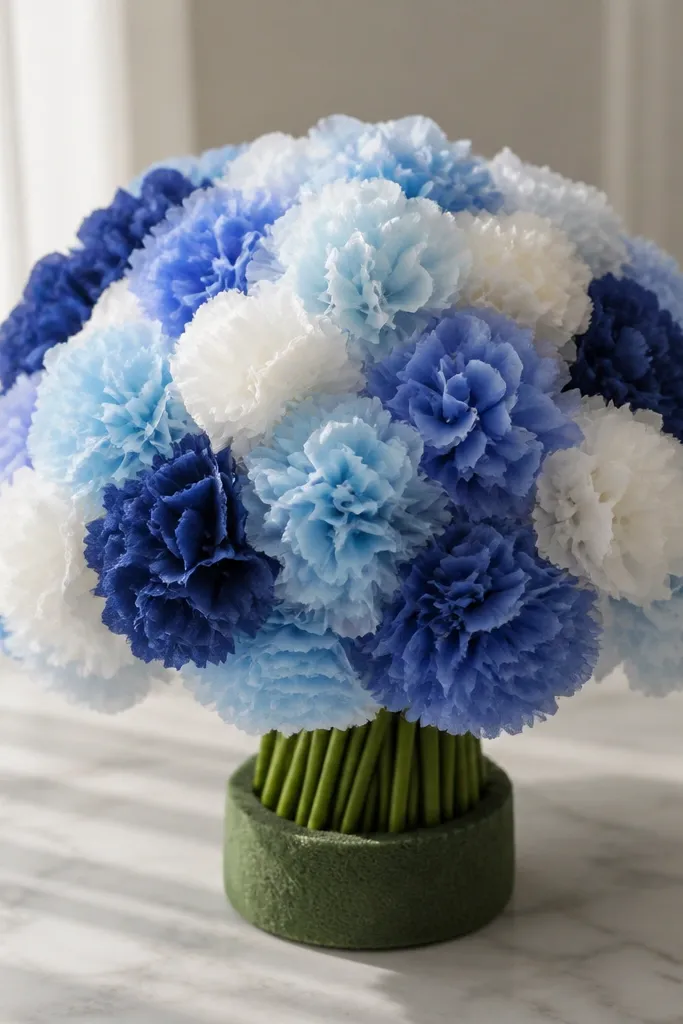
Hydrangea looks like a bunch of tiny blooms, and tissue does that texture better than any single-petal flower. This cluster uses many small puff circles, so it reads full even when you use budget tissue. I like a mix of light blue, medium blue, and white because it makes the flower look layered without extra work. It’s flattering for centerpieces because it fills space naturally. Also, this is one of the best options if you don’t want to glue big pieces — you attach small puffs only at their pinched points.
Cut tissue into 2-inch circles in your color mix. Fold each circle into quarters, then pinch the fold point so it becomes a tiny bud. Glue each bud onto a foam pad in clusters, starting with the center and working outward. Keep spacing tight so you don’t see foam gaps. When the pad is full, trim stray tissue threads and wrap a stem with green floral tape or tissue strip to hide the foam edge.
Make 60-80 mini puffs before you start gluing — it speeds up the build and keeps your colors balanced.
Avoid large gaps between puffs — hydrangea needs density to look real.
12. Tissue Paper Butterfly Blossom
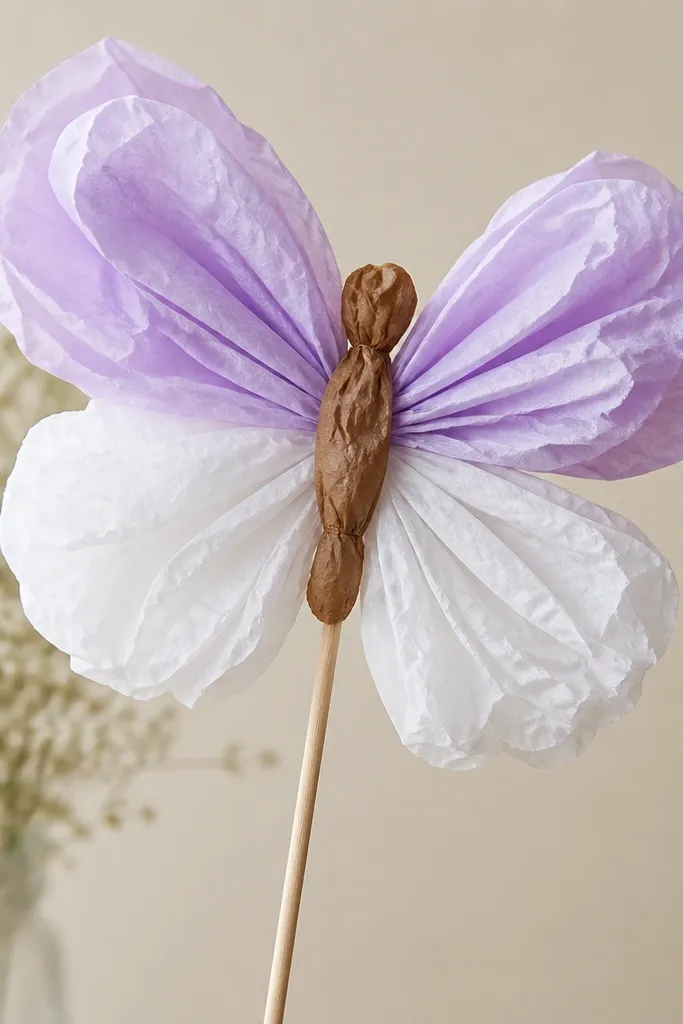
Cut two 6x10 inch tissue rectangles for each wing, one lavender and one white. Stack them, then fold into a fan accordion about 1 inch wide. Pinch the center and tie with thread, then fan outward to make each wing. Glue two wing fans to a small brown tissue body made from a rolled 1-inch strip. Attach to a stick with glue at the base of the body, then shape the wing edges with your fingers so they curve upward.
This is a fun hybrid when you want flowers that feel playful instead of strictly floral. The butterfly blossom makes petals look like wings, which gives a different silhouette than roses and daisies. I use lavender and white for a soft look, and I add a tiny brown body so it doesn’t look empty. This design is great for kids' parties and for decorating a dessert table where you want something that feels cheerful. It also looks good in photos because the wings create shape from the side.
Skip thisAvoid making wing fans too wide — they collapse and lose the butterfly shape.
Editor's noteUse slightly different shades for each wing pair — it makes the butterfly look more dimensional.
13. Tissue Paper Flower Wall Sconce Bloom
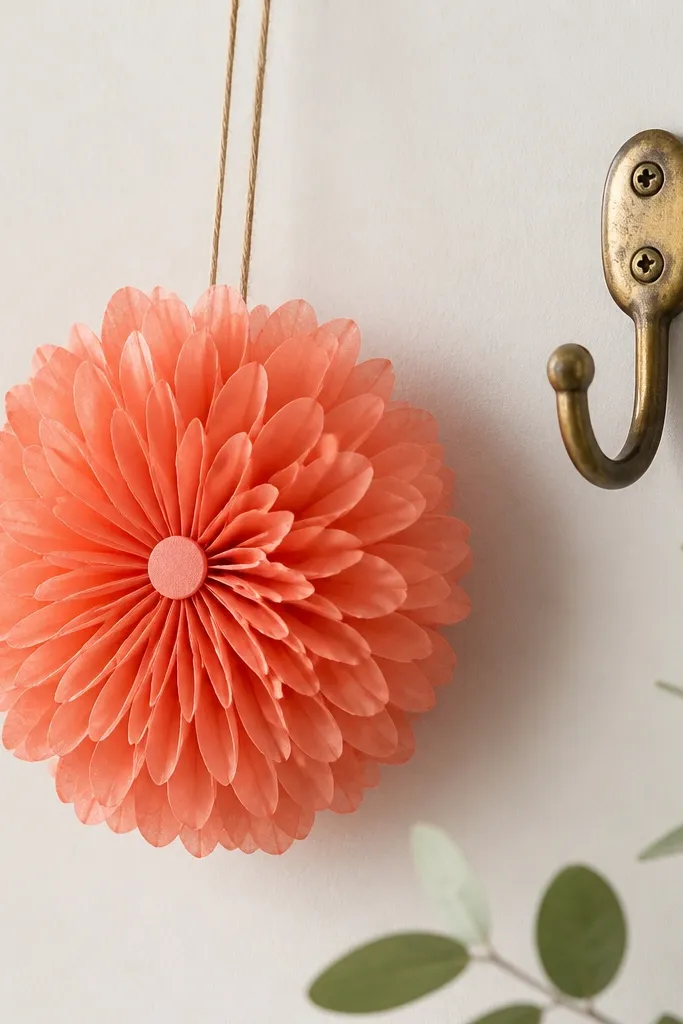
Cut 12 petals from tissue: each petal is about 3 inches tall and 2 inches wide with a rounded top. Fold each petal in half lengthwise and pinch the bottom. Glue petals onto a 4-inch cardboard circle starting with the outer ring, then add a second ring slightly inward. For the inner ring, use cream petals and glue them so they overlap like scales. Add a flat center disk made from a frayed strip rolled into a circle, then attach a string loop to the back of the cardboard.
If you want flowers on a wall without a giant stand, this compact bloom is the answer. It stays flatter than backdrop flowers but still looks layered and full because the petals are stacked in a tight radius. Coral with a cream inner layer looks clean on beige walls and warm wood tones. I’ve used these for small apartment photo corners where full-size blooms would look crowded. This one also flatters people who want decor that doesn’t take up floor space.
Skip thisAvoid using flat, unpinched petals — they won’t hold the layered look.
Editor's noteMake your petals slightly smaller toward the center — it keeps the bloom looking intentional.
14. Tissue Paper Calla Lily Spear Bloom
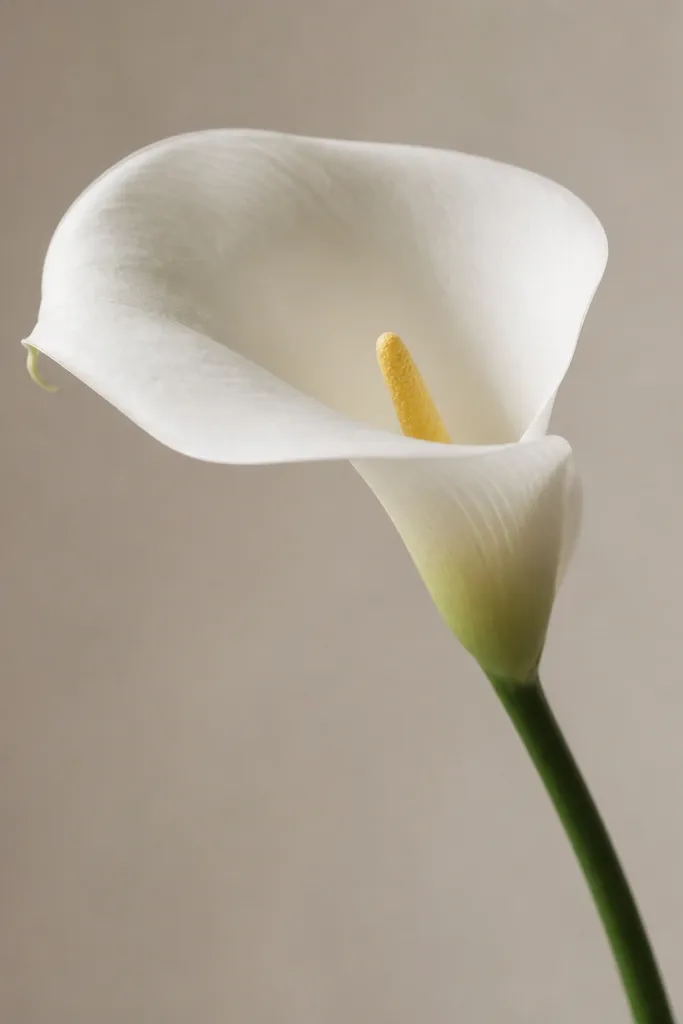
Calla lilies are all about the curve, not the fluff. This tissue version gives you that smooth spear shape with a soft inner fold and a bright center. I make it in white with a yellow center for a clean look that reads well in any room. It’s flattering for minimalist decor because the lines stay sleek. Also, it’s one of the easiest ways to make a “real flower” silhouette without buying expensive materials.
Cut a 6x10 inch rectangle of white tissue. Fold it lengthwise and then roll one edge slightly so it forms a curved sleeve. Glue the side seam with a tiny strip of glue, leaving the top open. For the center, cut a 1x8 inch strip of yellow tissue, roll it tightly, and glue the end. Insert the yellow roll into the open top and secure with a small glue dot. Attach the bloom to a green floral wire stem and wrap with green tape or tissue strip.
Shape the outer sleeve by pinching near the middle so it curves like a real calla.
Avoid making the sleeve too tight — it won’t open at the top and will look like a tube.
15. Rolled Tissue Pom with Twisted Center
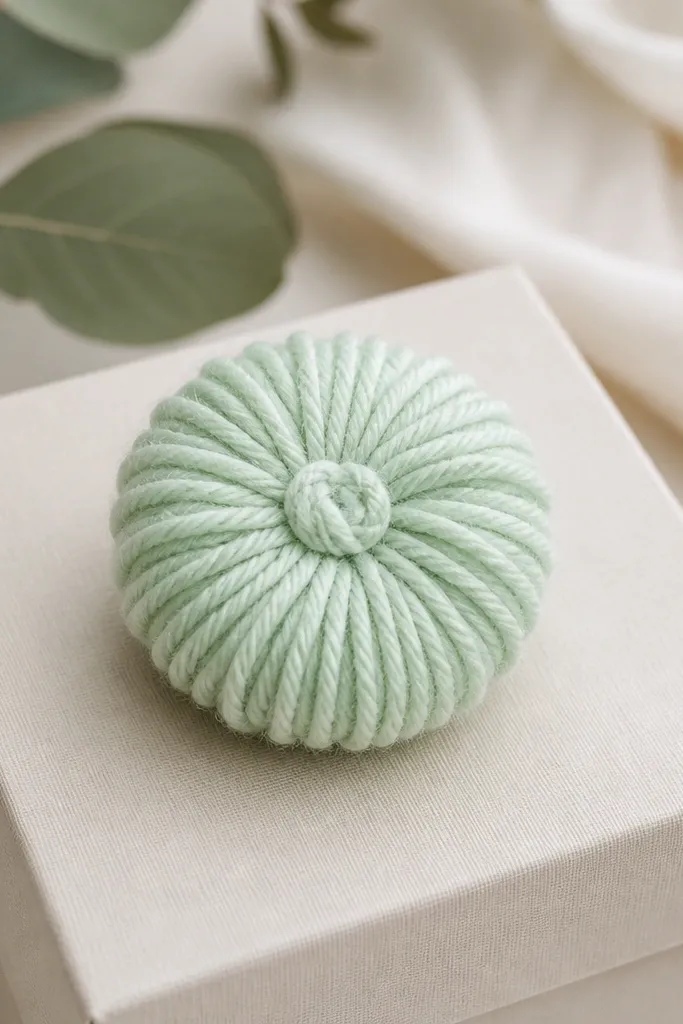
Cut tissue into 2x12 inch strips. Roll each strip loosely, then pinch the base so the roll holds. Twist 4-6 rolled strips around a small center knot made from a short thread bundle. Secure the knot with tape or a tight thread wrap. Fluff each roll outward so petals look like a small flower head rather than a bunch of tubes. If you want a bigger bloom, repeat with more strips and keep the base tight so it doesn’t spread.
This pom style looks softer than fringe poms because the petals roll instead of cutting into rays. It’s a great budget option when you want a clean texture without lots of cutting. Mint tissue looks especially good because the rolls catch light as little arcs. This style also flatters gift wrapping because it sits nicely on flat surfaces and doesn’t droop. I’ve used it for wrapping bottles and small jewelry boxes, and it always looks intentional.
Skip thisAvoid loose rolls that don’t pinch — your pom turns into a tangled ball.
Editor's noteRoll all strips in the same direction — it makes the flower look coordinated.
16. Tissue Paper Peony Rose Combo (Layered Fan)
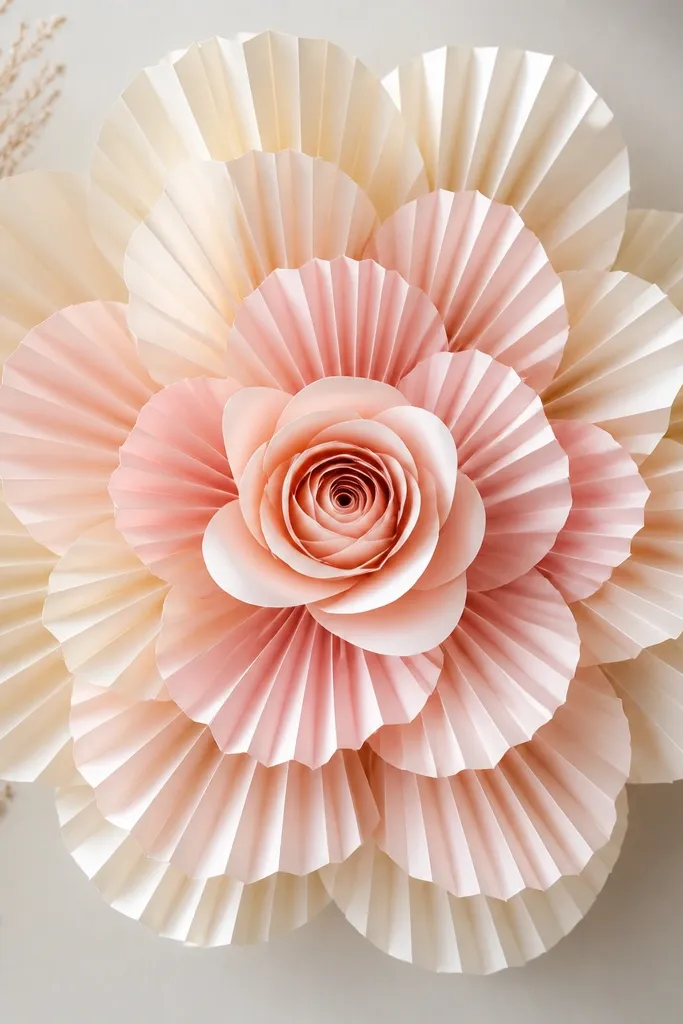
Make a rose center first using 3 tissue strips rolled into a tight spiral, then secure the base with thread. For outer layers, cut 10x20 inch tissue rectangles and accordion-fold them into 1-inch pleats. Tie each folded fan at the center, then cut the folded edges into rounded petal shapes before you unfold. Glue the fan center tie line around the rose base, starting with the smallest fans and moving outward to bigger ones. Finish by fluffing each fan so the petals radiate evenly.
This is my go-to when you want a peony look but with cleaner structure. The center is rose-like, and the outer petals are fan layers, so it looks full without looking messy. Cream and pale pink create a gentle gradient that reads as high-end in photos. This style flatters people who want something romantic but not overly bright. It also works on stems, wreaths, and even as a large centerpiece when you scale up.
Skip thisAvoid gluing the entire fan flat — it kills the lift.
Editor's noteStagger your fan layers so seams don’t line up — it hides gaps fast.
17. Tissue Paper Butterfly Garland Flowerettes
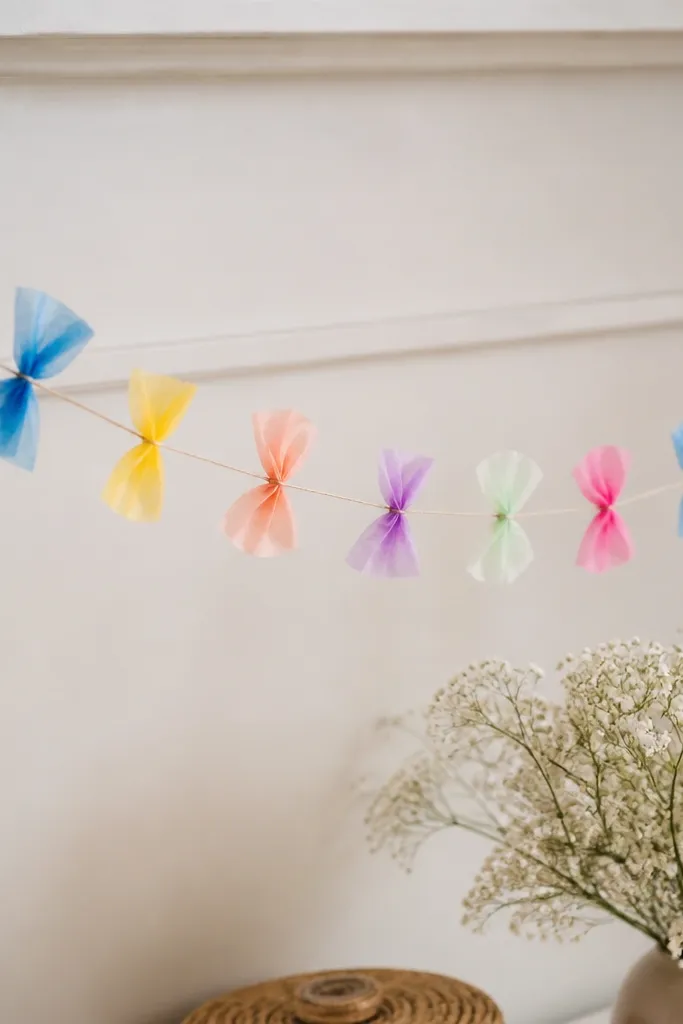
Cut 5x7 inch tissue rectangles in 3 colors. Fold each rectangle into quarters, then accordion-fold the folded rectangle into 1/2 inch pleats. Tie the pleated center with thread, then trim the outer edge into a rounded wing shape. Unfold gently and fluff each wing pair. String them by threading the tie loop onto a long string and spacing every 4 inches for a balanced look. If you want a tighter banner, space every 2.5-3 inches.
Garlands look cute when the pieces are light and repeatable, and tissue butterflies are perfect for that. Each flowerette is small, so you can make a long run without spending much. I’ve used this design for birthday banners where the decor needs to move slightly in a breeze. The wings make a clear silhouette, so you don’t have to worry about perfect petal spacing. It also flatters kids' rooms because the garland feels playful instead of formal.
Skip thisAvoid tying too tight — it crushes the pleats and makes wings look flat.
Editor's noteUse the same pleat width every time; it keeps the wing shapes consistent across the whole garland.
18. Tissue Paper Flower Wreath Rings
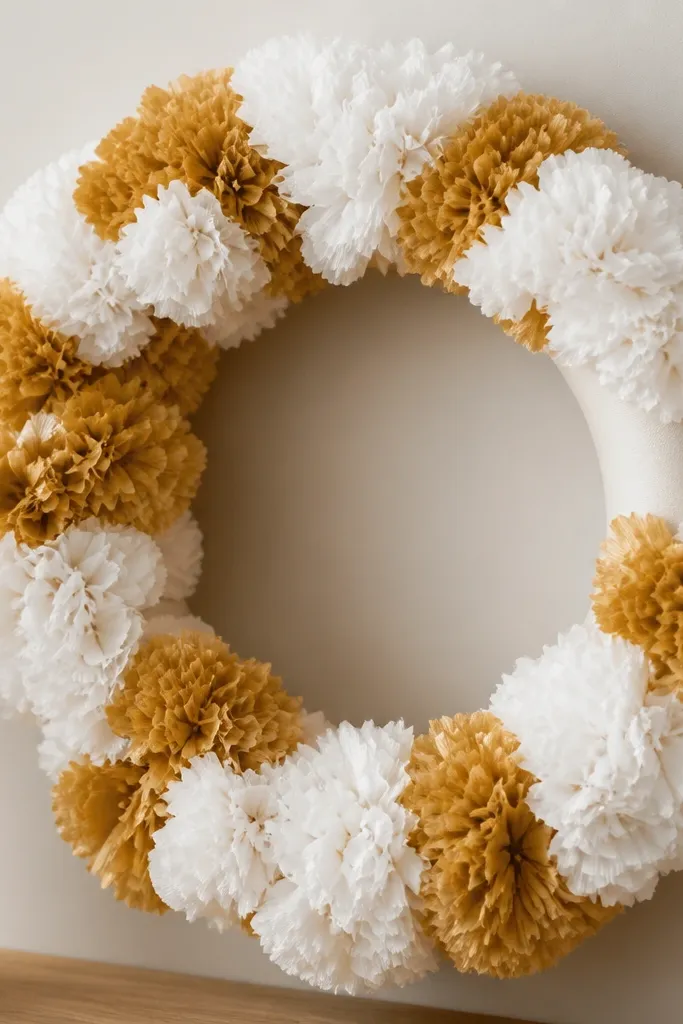
Start with a foam wreath ring about 10 inches wide. Make 20-25 mini flowers using any small design from this list, or use accordion fans about 4 inches across. Glue each flower base into the foam ring, starting at the top and placing them in alternating directions. Fill gaps with smaller buds made from rolled tissue strips if needed. Add a few gold center disks to unify the look, then hang with a ribbon loop at the back of the ring.
This wreath method looks full even when your flowers are small because the ring gives structure. Tissue flowers on a wreath read “decorated” instead of “single craft.” I like using white tissue plus gold center dots because it looks warm on doors and walls. It also flatters people who want an easy seasonal swap: change the color and you’re done. The ring also keeps your glue work contained — you’re building on a shape, not on air.
Skip thisAvoid leaving foam exposed — tissue wreaths look unfinished fast.
Editor's noteGlue in a spiral pattern around the ring so you don’t end up with clusters only in one spot.
19. Tissue Paper Buds on Stems (Wildflower Look)
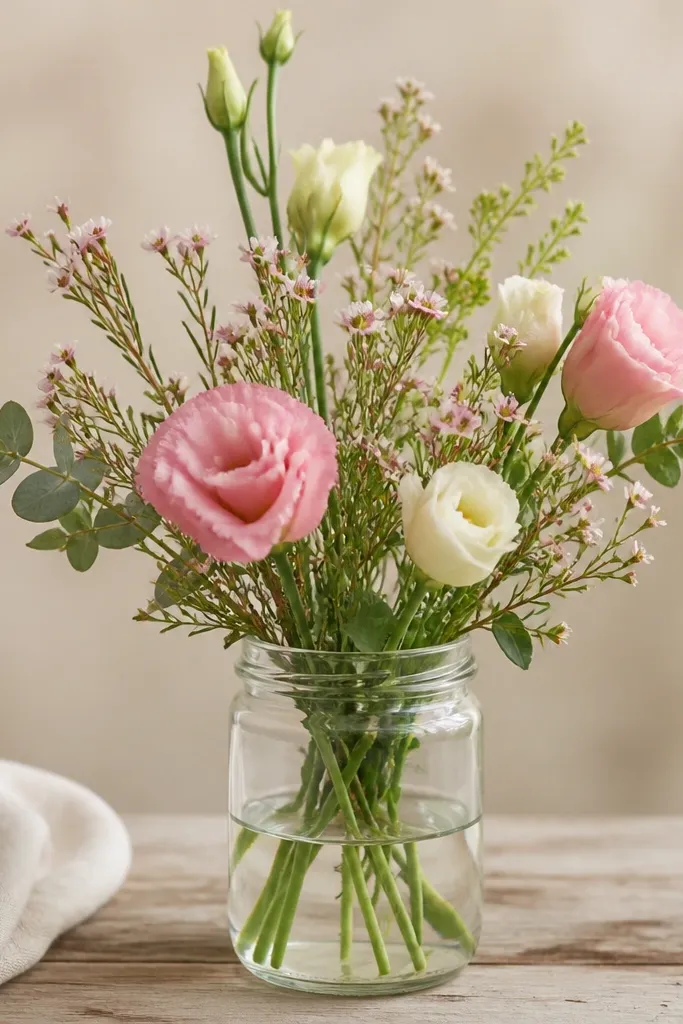
Cut tissue into 4x6 inch rectangles for tiny buds and 6x8 inch rectangles for medium buds. Fold each rectangle in half, then fringe one long edge lightly without cutting through the fold. Roll from the unf fringed side into a tight bud and secure with thread. Attach to floral wire or skewers by hot gluing the base, then wrap with green tape. Arrange stems in a jar, cutting wire lengths so you have one tall accent and two shorter side buds.
Wildflower-style tissue stems look natural because you mix sizes and don’t force everything into perfect symmetry. These buds are smaller than roses, so they look charming in a jar even with a small amount of tissue. I use three bud sizes: tiny (about 2 inches wide), medium (3 inches), and one larger accent bloom. This style flatters narrow vases because the blooms rise at different heights. It’s also beginner-friendly because each bud is quick and you’re building a bouquet, not one perfect flower.
Skip thisAvoid making every stem the same height — the bouquet looks toy-like.
Editor's noteUse different green tissue shades for stems — it looks more natural than one flat green.
20. Giant Tissue Flower with Scalloped Center Disc
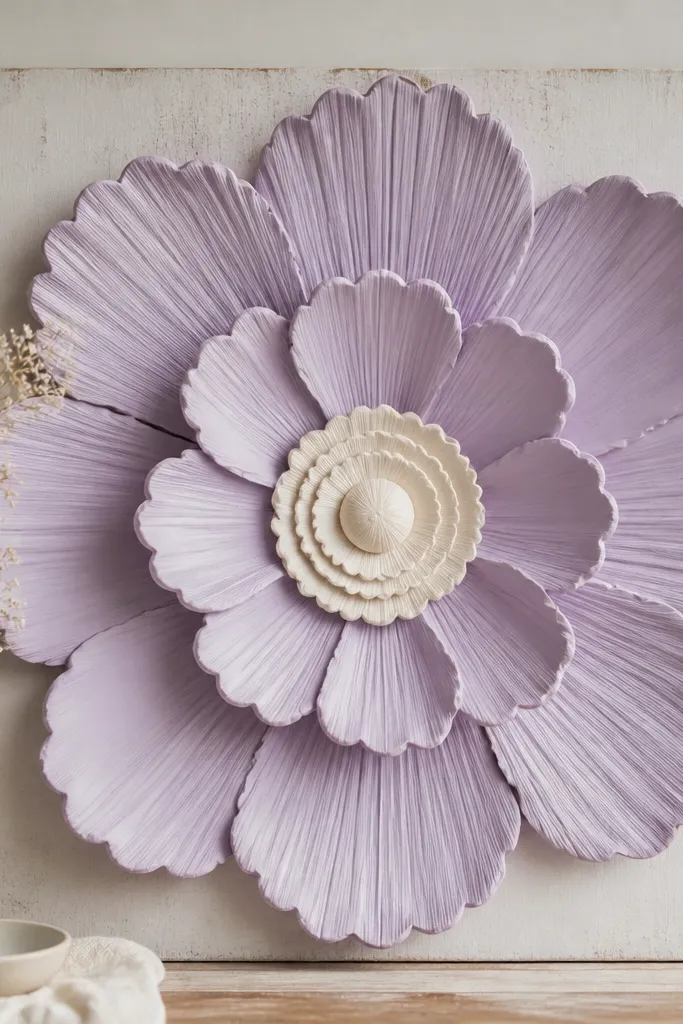
Cut 10 tissue petal strips at 8x20 inches for medium-large, or 12x26 inches for extra big. Stack two strips and accordion-fold into 1-inch pleats. Tie at center with string, then trim the folded edge into scallops before unfolding. Glue petal layers around a 10-inch cardboard circle, starting from the outer ring and working inward. For the center, cut two 7-inch circles from tissue and fringe the edges 1 inch deep, then roll one circle into a tight coil. Glue the rolled coil on top of the other fringing circle for a layered scalloped center.
This giant flower looks crisp because the center disc is scalloped and layered, so the bloom has a strong focal point. The lavender petals look soft but still show up in daylight, and the cream center keeps it from blending into the wall. I like this design for events where you want a big “main photo” flower without the complexity of many tiny puff petals. It also flatters people who want a structured, modern look. The scallops hide uneven petal cutting because the center is busy.
Skip thisAvoid skipping the scalloped center — plain centers make giant blooms look unfinished.
Editor's notePress your cardboard circle flat and let glue dry fully before adding petals — it prevents sag.



