

1. Classic Accordion Tissue Mum (12-inch wall bloom)
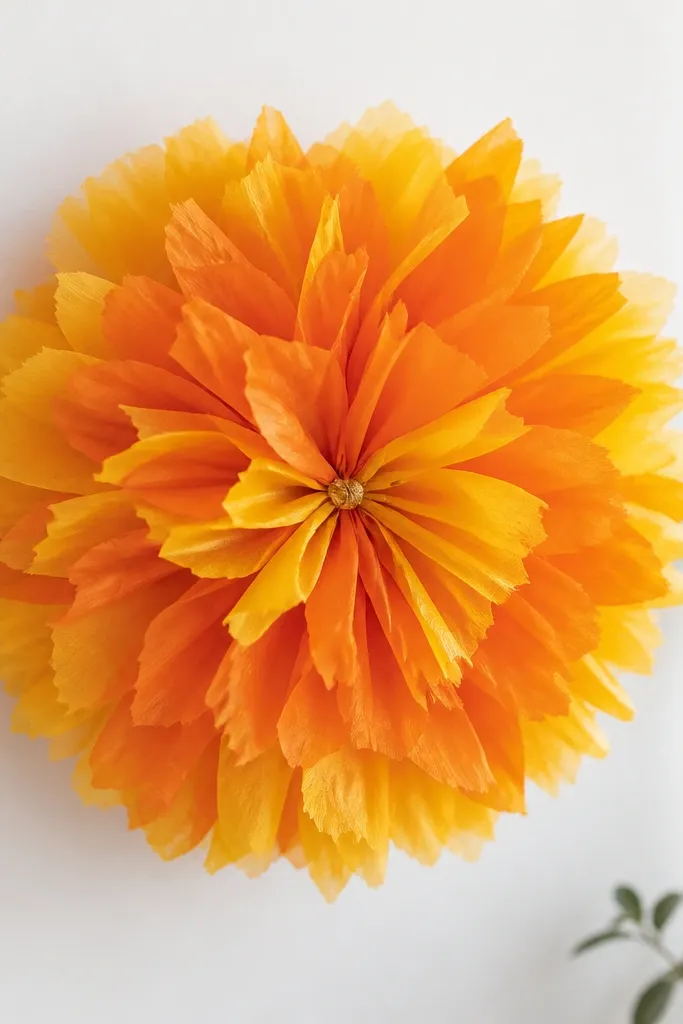
This is the flower I make when someone wants “big and cheerful” without complicated cutting. Use 2 to 4 tissue layers in one color, plus an accent layer in a second color for the outer edge. The petals look rounded because the accordion folds stay tight and the center is pinched hard. It flatters any color scheme — I’ve used it with warm skin tones in photos because yellow-orange tissue reads bright without looking harsh.
Editor's noteIf you want it to look extra crisp, press the accordion folds with your fingernail before tying the center.
Start by stacking 4 tissue sheets of the same color and one sheet of accent color. Cut the stack into a rectangle about 20 x 12 inches, then accordion-fold along the 12-inch width in tight 1-inch pleats. Pinch the exact center and tie it with 8 inches of thin string or floral wire. Trim the ends into a gentle V shape, then fan each fold layer up and toward the center until it fills out evenly.
Skip thisDon’t use loose accordion folds — they make the petals look thin and uneven.
2. Giant Tissue Pom-Pom for Doorways (18-inch)
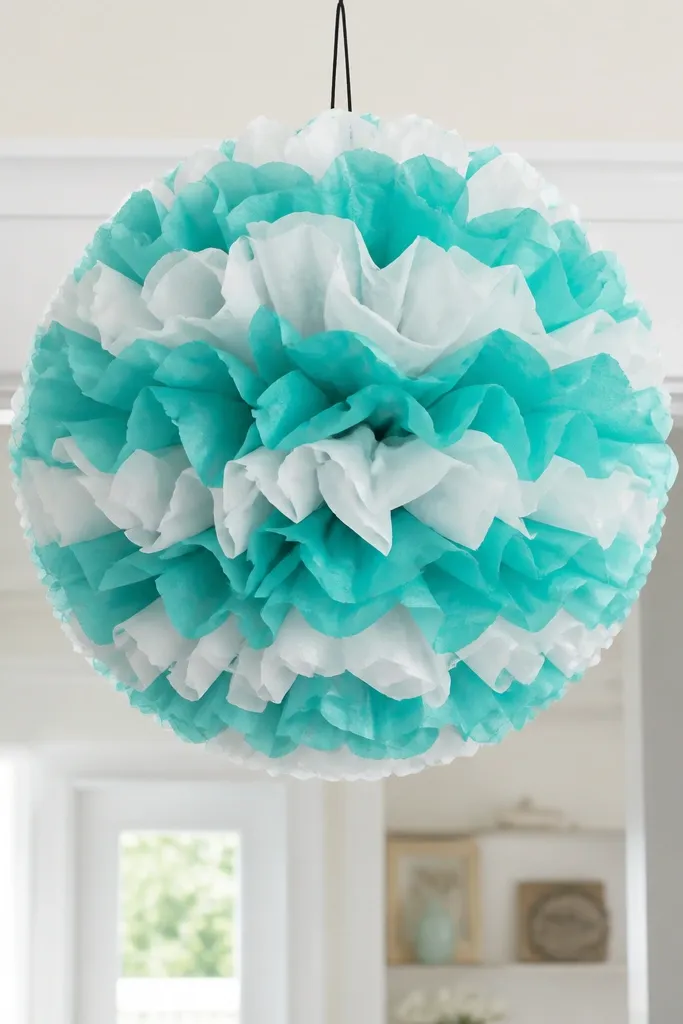
A pom-pom is the fastest “wow” for all year tissue paper flowers for decor because it reads from across the room. I like teal and white for doorways because it looks clean in daylight and still pops at dusk. The shape is round and dramatic, and it doesn’t need perfect petal cuts since it’s built from layers. It also photographs well behind people because the light catches the tissue texture.
Editor's noteHang it by the center loop, not the string knot — add a small piece of ribbon to spread the weight.
Stack 8 to 10 tissue sheets in alternating teal and white. Cut into a long rectangle about 26 x 16 inches, then accordion-fold along the 16-inch width in 1.5-inch pleats. Tie the center with string, then cut the ends into a rounded shape (a semi-circle works). Separate layers slowly — start at the top and pull each tissue sheet outward and up until the pom-pom looks like a full sphere.
Skip thisSkip tiny pleats — they can shred when kids fluff the layers.
3. Layered Tissue Rose with Rolled Centers (8-inch)
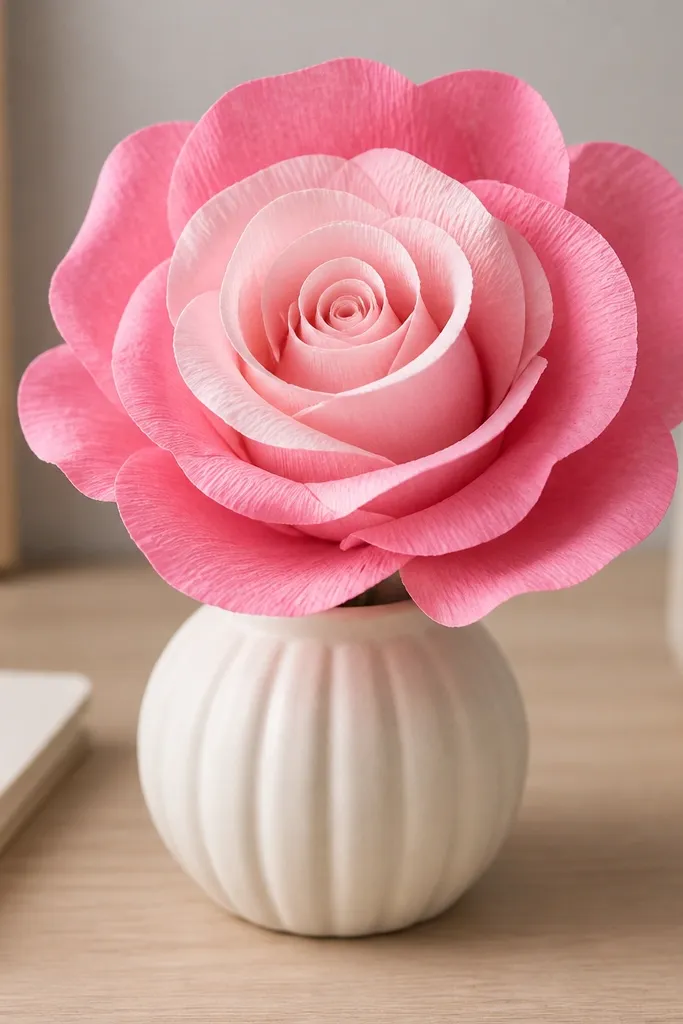
This rose looks the most “real” out of tissue flowers because the center is rolled and the outer petals are slightly curved. Use tissue in two pink tones — one for the inner roll, one for the outer layers — so the bloom has depth. I made these for Mother’s Day tables and they looked great next to candles because the tissue texture diffuses light. It flatters most color palettes, and the darker outer tone keeps the flower from looking flat against busy backgrounds.
Editor's noteUse a thin wooden skewer to roll the center evenly — it creates a tighter spiral than fingers alone.
Cut 6 to 8 petal strips from tissue: inner petals about 2 x 6 inches, outer petals about 3 x 7 inches. Roll one inner strip into a tight cylinder and secure the base with a small dot of glue. Wrap the next inner strips around it, slightly overlapping, then add outer petals by folding the top edge over your finger so it curves. Finally, glue a round base circle under the petals to hide the stem junction and keep the bloom from loosening.
Skip thisDon’t make all petals the same length — the rose needs shorter inner pieces to look dimensional.
4. Crepe-Style Tissue Daisy (White with Yellow Center)
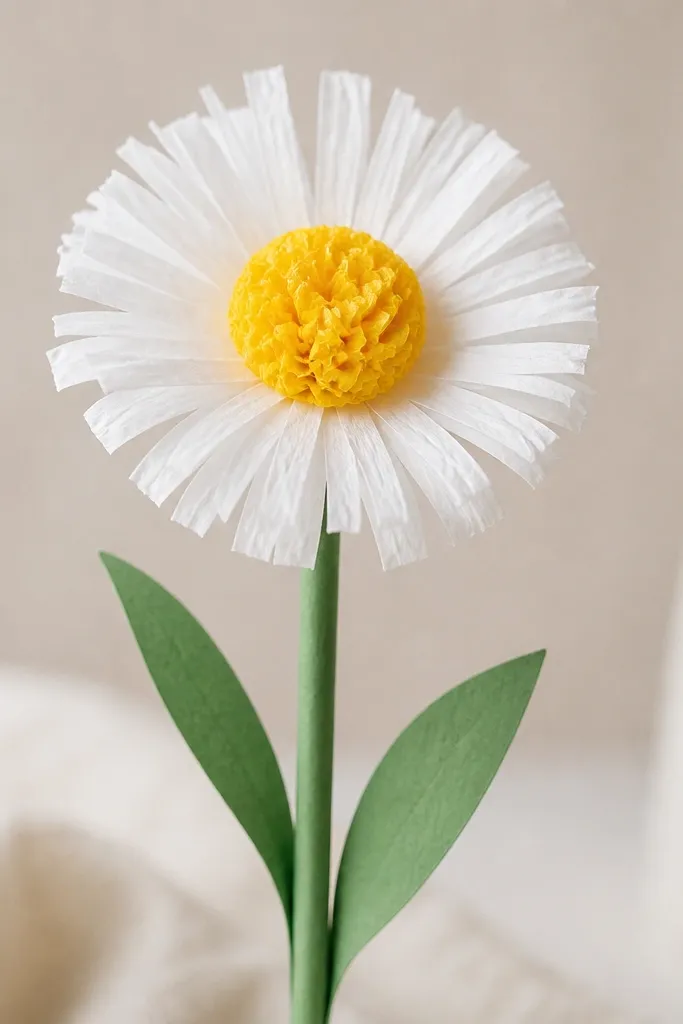
Daisies are my “kid-safe” flower because the shape forgives uneven cuts. Narrow fringed petals look like crinkle even when your child’s scissors aren’t perfect. White petals with a sunny yellow center read cheerful all year, especially in spring-summer color mixes and also in winter when you add a gold center. It’s flattering because white tissue brightens photos and the yellow center gives a clear focal point.
Cut a circle base from yellow cardstock, about 2.5 inches wide. Cut white tissue into a strip 3 inches wide and 12 inches long, then fringe the long edge with 1/4-inch cuts leaving 1 inch uncut at the top. Wrap the fringed strip around the yellow circle, glueing the uncut edge to the back. Crumple a small ball of yellow tissue and glue it in the center for texture.
Use a ruler to mark fringe lines; even 1/4-inch spacing keeps the petals looking intentional.
Don’t skip the center texture ball — flat centers make daisies look like simple puffs.
5. Tissue Snowflake Flower (Cool Blue Winter Bloom)
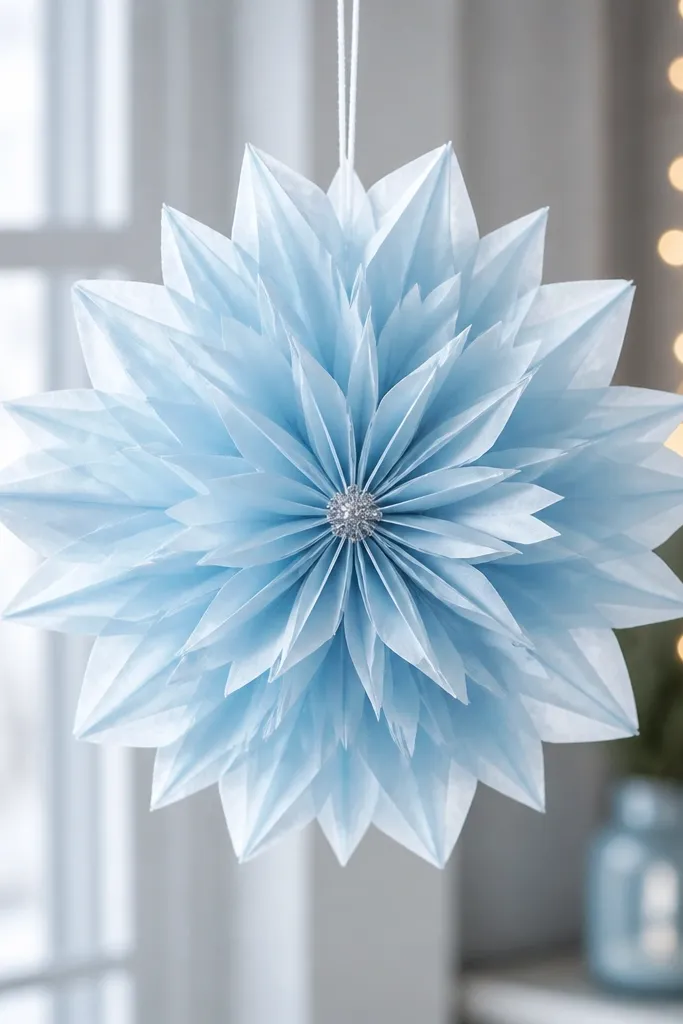
This one reads like a flower and a snowflake at the same time, which is why it works for all year tissue paper flowers for decor when you want “seasonal without storing.” Use icy blue and silver thread. The star-like points make it look crisp, and the small glitter center keeps it from looking empty. It photographs well against dark doors and black bulletin boards, and it doesn’t need a stem since it hangs nicely.
Editor's noteAdd a single strand of silver tinsel through the center tie before you knot it to create a subtle sparkle.
Stack 3 sheets of pale blue tissue and cut into a square about 10 x 10 inches. Accordion-fold the stack into pleats about 1 inch wide. Tie the center with silver thread, then trim the folded edges into a pointy pattern: cut a small notch at the tip of each fold section. Unfold and separate layers, then fluff each point outward gently.
Skip thisAvoid thick tissue in this one — it stays stiff and won’t flare into snowflake points.
6. Paper Lantern Flower Pom (8-inch table centerpiece)
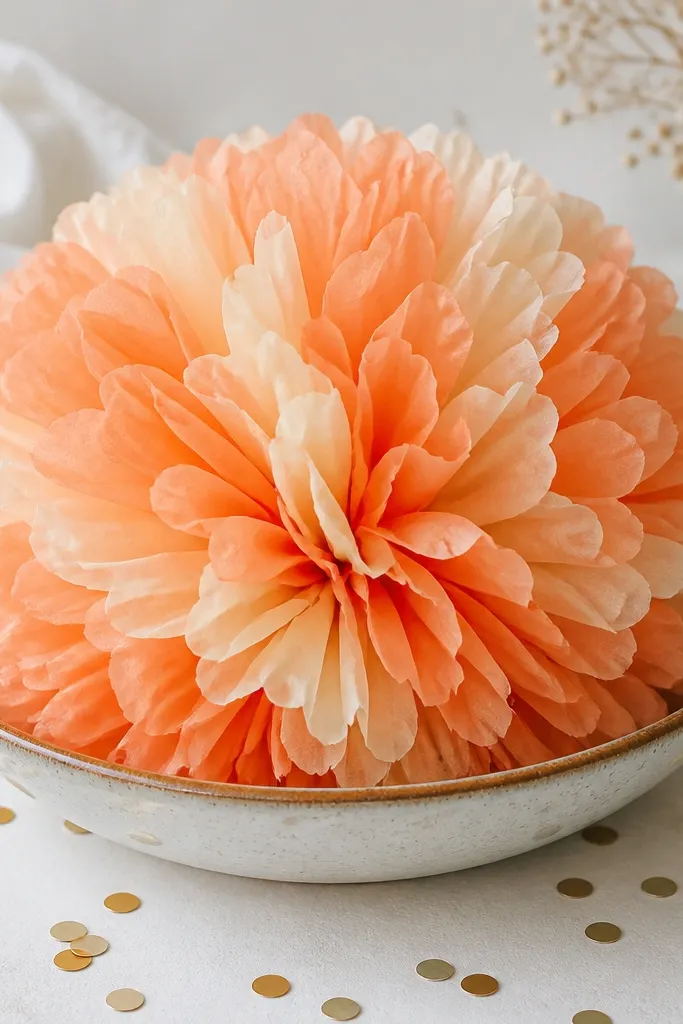
This pom is smaller and rounder than the doorway version, so it looks like a lantern bloom on a table. Peach and cream tissue gives a soft, warm look that flatters skin tones in photos, and it doesn’t clash with most table linens. I like using it for kids' birthdays because it’s easy to make in batches. The rounded shape stays stable because you keep the center tie tight and trim the edges evenly.
Stack 6 tissue sheets alternating peach and cream. Cut into a rectangle about 16 x 10 inches, then accordion-fold in 1-inch pleats along the 10-inch width. Tie the center tightly with string and secure with a small dab of glue over the knot. Trim ends into straight semicircles, then fluff each layer up and toward the center until it looks like a dome.
Stick a small circle of felt under the center tie so it doesn’t snag on tablecloths.
Don’t leave the knot loose — it causes a lopsided top.
7. Tissue Orchid Spray (3 mini blooms on one stem)
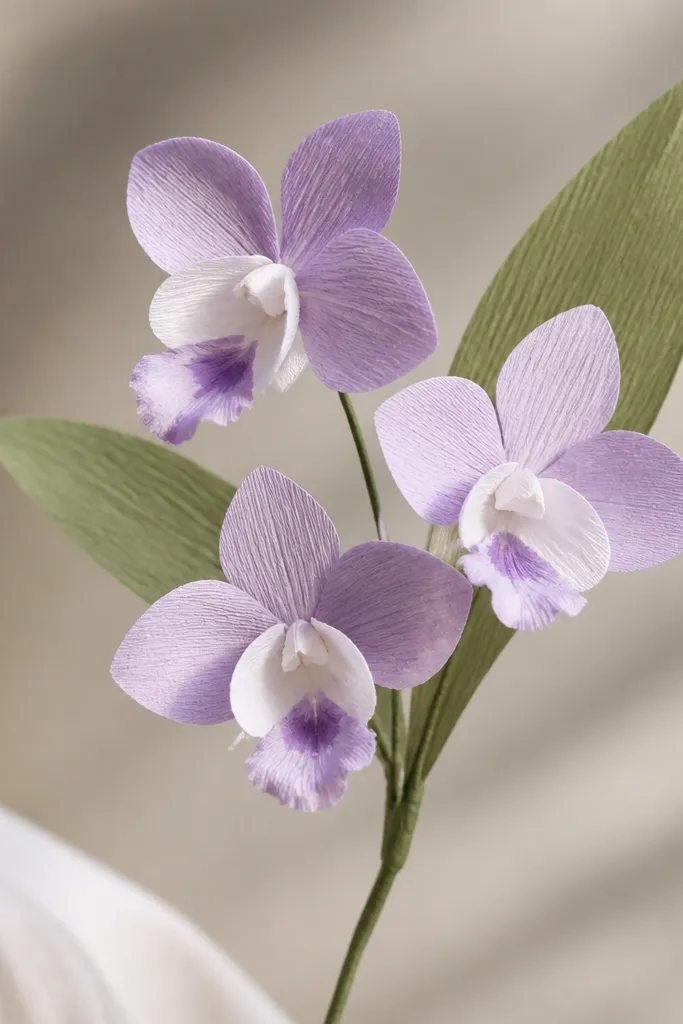
Orchids look fancy, but tissue makes them approachable if you treat them as mini blooms. This spray uses three small flowers so it looks intentional in vases. Lavender plus white tissue creates a gentle contrast that looks good against neutral rooms and doesn’t overwhelm darker walls. I’ve used these on shelves where you need height, and the wire stem keeps the spray angled the way you want.
Editor's noteUse a hole punch for the centers - it makes all three orchids match.
Cut 3 sets of petal shapes from tissue: two side petals about 2.5 x 3 inches and one center petal about 2 x 2.5 inches. For each flower, pinch the base of each petal and twist slightly to give a natural curve, then glue them to a small circle center (use a tiny punched paper circle). Add small dots of darker purple tissue scraps for the throat detail. Glue each flower to the same floral wire stem, then add 2 leaf cutouts from green cardstock behind the blooms.
Skip thisDon’t make petals flat — pinching the base is what makes it look orchid-like.
8. Tissue Cherry Blossoms (Branch cluster with 10 blossoms)
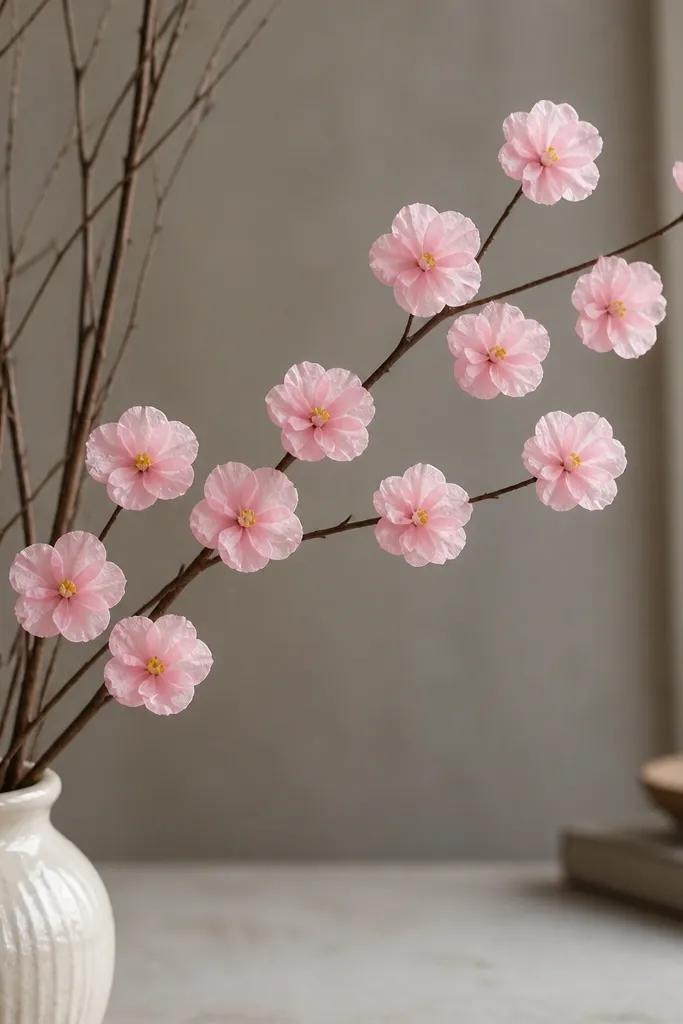
Cherry blossoms are my go-to for all year tissue paper flowers for decor because they work for spring displays and still look nice in winter if you use pale pink and add a few white blooms. The key is making small blossoms fast and grouping them on a branch. The tiny yellow center gives a realistic focal point even at arm’s length. This style also flatters most room colors because the blossoms sit on natural wood tones.
Editor's noteUse a thin glove when fluffing — it stops your fingers from tearing tissue while you pinch and spread petals.
Cut tissue squares about 2.5 x 2.5 inches for each blossom. Stack 5 squares, tie the center with yellow thread, then trim into a rounded petal edge. Fluff each layer outward. Repeat for 10 blossoms total, then attach them to a twig with hot glue at the base of each knot. Add 1-2 white blossoms for variation.
Skip thisAvoid spacing blossoms evenly — clusters look more natural when they bunch in spots.
9. Tissue Paper Hydrangea Ball (Big fullness, 14-inch)
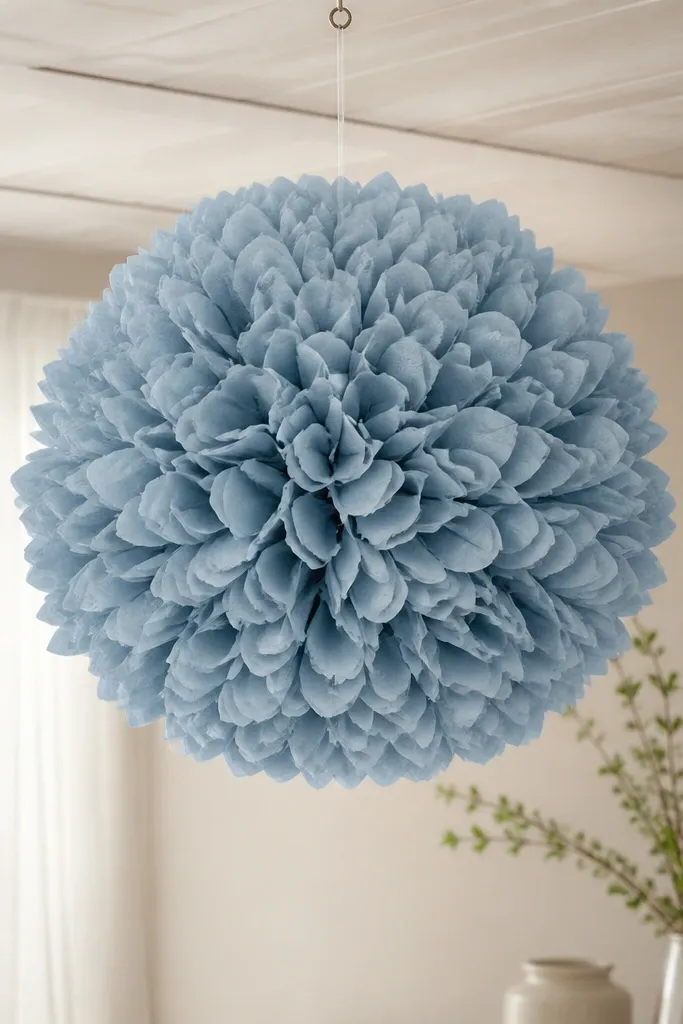
Hydrangea tissue balls look full because you’re building lots of small petals, not a few big ones. Dusty blue tissue reads calm in photos and doesn’t fight with other decor. This style is great for kids because the “small piece” work feels manageable, and the final result hides small cutting mistakes. It also looks good from below, which matters if you hang it over a table.
Editor's noteIf you want a more natural hydrangea look, mix two shades of blue and alternate them randomly.
Cut 40 to 60 small tissue squares, each about 2.5 x 2.5 inches. For each square, pinch the center and fold the corners up to form a tiny petal. Start by tying one tissue circle base (or a foam ball) and glue petals all over it in tight rows. Keep going until no foam shows through, then hang with a loop of string.
Skip thisDon’t use too few petals — you’ll see gaps and it won’t read as hydrangea.
10. Giant Paper Flower with Layered Petals (16-inch studio look)
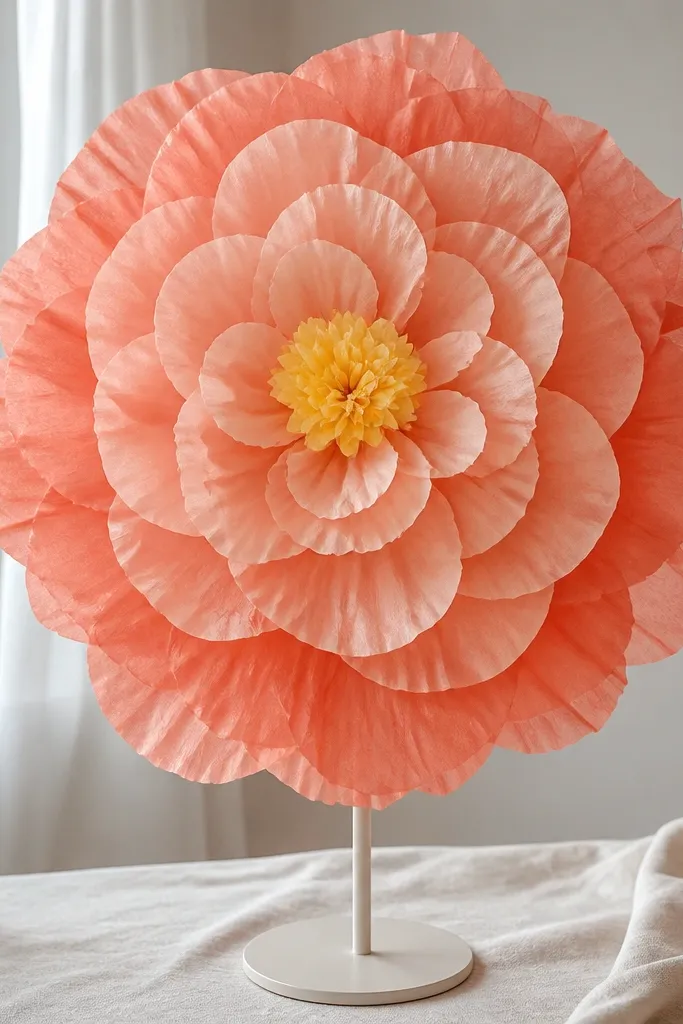
This is the flower I make when I need a single focal bloom for a kid’s party photo spot. Layered petals give a sculpted look without needing real templates every time. Coral and peach tissue stays warm and flattering, and the small yellow center keeps it from looking like a blob. It works for kids of all ages because assembly is basically stacking shapes.
Editor's noteUse a paper plate as a quick petal-size template for consistent circles.
Cut 5 petal circles from tissue: outer petals about 9 inches wide, then 8, 7, 6, and 5 inches for the layers. Fold each petal layer in half, then cut a fringe along the edge so it opens into a ruffled petal when unfolded. Stack layers from largest to smallest and secure with a center knot made from string. Fluff each layer outward, then glue a small yellow tissue circle in the middle.
Skip thisDon’t skip the fringe cut — smooth edges look flat and cheap.
11. Rainbow Tissue Flower Chain (for class hallways)
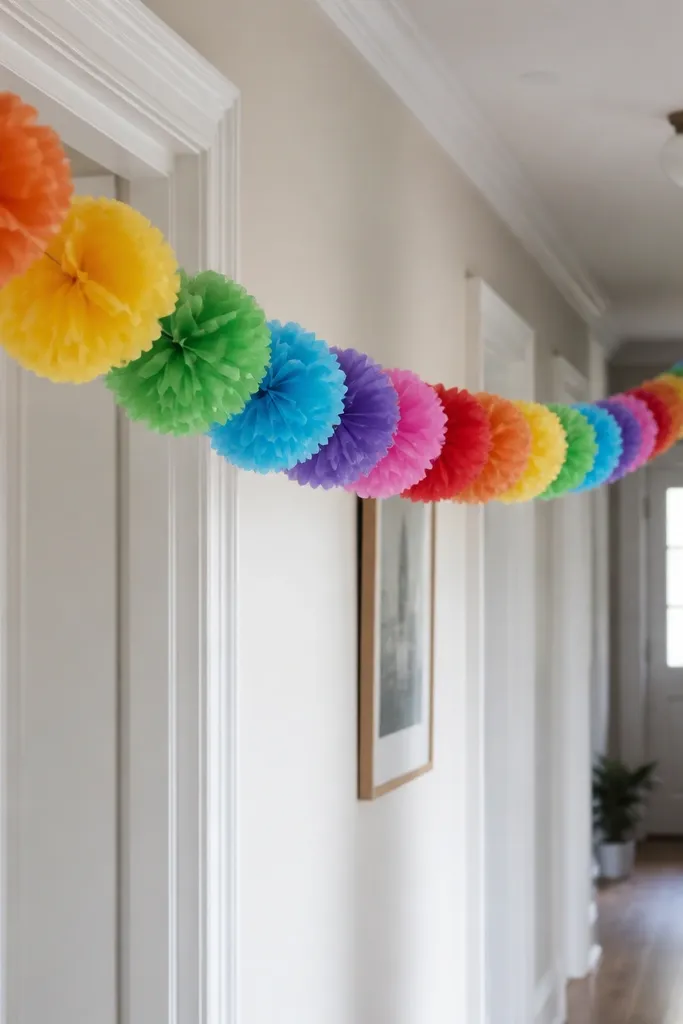
A chain makes decor feel lively without taking up table space. I’ve hung these in classrooms during reading weeks because they move slightly and catch light. Using rainbow colors with a consistent petal shape makes the whole line look cohesive. The curled petals give a little dimension so even at a distance it looks more like flowers than blobs.
Make 10 to 14 small flowers, each using a 6 x 9 inch tissue rectangle stack of 2 layers. Accordion-fold in 3/4-inch pleats, tie the center, and trim ends into rounded shapes. Roll the ends between your fingers to curl the top petal edges. String them onto fishing line by tying each flower center to the line with a small knot, then space them 4 to 6 inches apart.
Use one neutral color for the centers (white or yellow) so the chain looks clean instead of messy.
Don’t tie flowers directly to the ceiling — use fishing line so they swing and show shape.
12. Tissue Sunflower with Fringed Center (10-inch bloom)
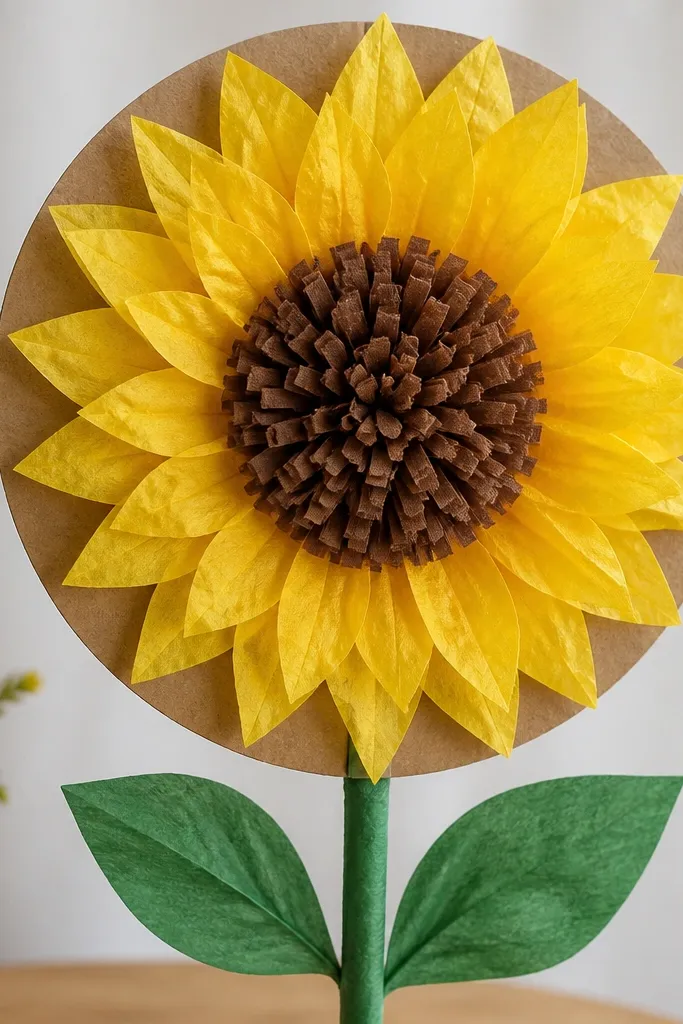
Sunflowers are the easiest way to make tissue flowers look “themed” without fancy painting. The fringed center is what sells it — it looks like seeds even from across the room. I use bright yellow tissue for petals and a mix of dark brown and tan for the center so it doesn’t look muddy. This is a great choice for kids' crafts because the petals can be cut in simple teardrop shapes and still look right.
Editor's noteUse scissors to curl each petal tip — it gives the sunflower a more natural face.
Cut a circle base from yellow cardstock about 4 inches wide. Cut 12 petal strips from yellow tissue, each about 1.5 x 6 inches, then cut a rounded tip and fringe the bottom edge slightly. Glue petals around the circle base, overlapping like scales. For the center, cut a brown tissue strip about 2 inches wide and 10 inches long, fringe it heavily, then roll it into a tight coil and glue into the center. Add a green stem by taping the back to a cardboard strip.
Skip thisAvoid using only one brown tone for the center — it reads flat.
13. Tissue Peony with Wide Petal Rounds (14-inch)
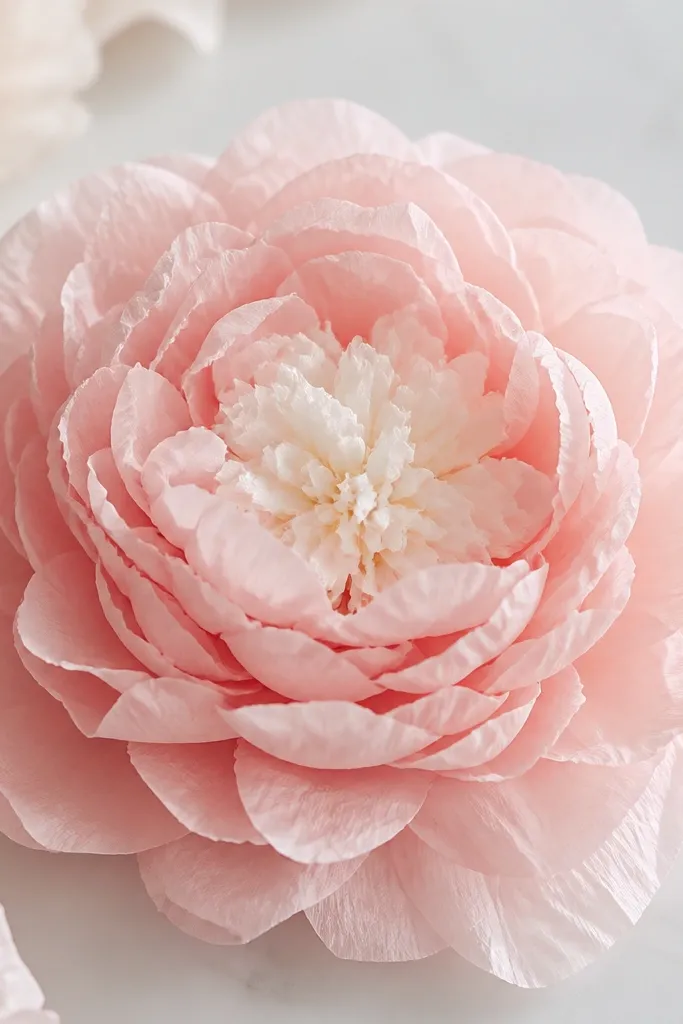
Peonies look lush because the petals are wide and stacked thick. Blush pink tissue makes this feel gentle instead of loud, and it looks great next to dark table runners or navy balloons. I like this for “pretty but not too frilly” decor — it’s full without being messy. It also flatters kids because the flower hides small uneven petal cuts and still reads as a bloom.
Editor's noteIf you don’t have a brad, tie with string and glue the knot underside so it stays flat.
Cut 18 to 24 petal rounds from tissue: start with 9 large rounds (about 5.5 inches wide) and 9 smaller rounds (about 4 inches wide). Layer two tissue rounds for each petal unit and pinch the center slightly so the petal domes. Stack large domes first, then add smaller domes toward the center, securing each layer with a single brad or string tie. Fluff every petal unit upward so the bloom fills out evenly.
Skip thisDon’t glue all petals flat — doming the center is what creates peony fullness.
14. Tissue Paper Lily (Tall stem flower, 9-inch)
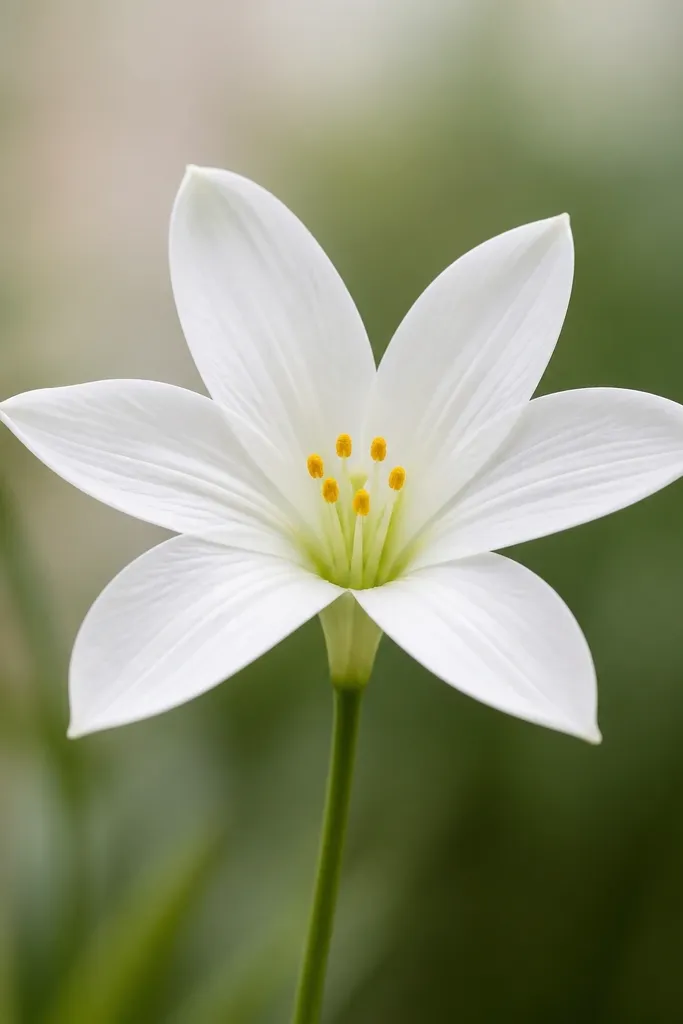
A lily gives you height and structure, which tissue flowers usually lack. The trick is using a long stem and separate petal pieces so they spread like a star. White tissue with a warm orange center looks clean and bright, and it works in both spring and winter decor. This one also looks good for sensory-friendly crafts because cutting petal shapes is straightforward and assembly is glue-and-press.
Editor's noteCurl all petal tips in the same direction — it makes the flower look intentional instead of random.
Cut 6 petals from white tissue, each about 2.5 x 5 inches, rounded at the top. Fold each petal lengthwise and curl the ends slightly by wrapping around a pencil. Make a center with a small circle of yellow tissue and add 3 tiny orange dots (cut from tissue scraps). Glue petals around the center circle on a cardboard ring, then attach the ring to a floral wire stem with tape.
Skip thisDon’t use flimsy stems — thin string makes lilies droop.
15. Tissue Butterfly Flower Accent (for gift tags and walls)
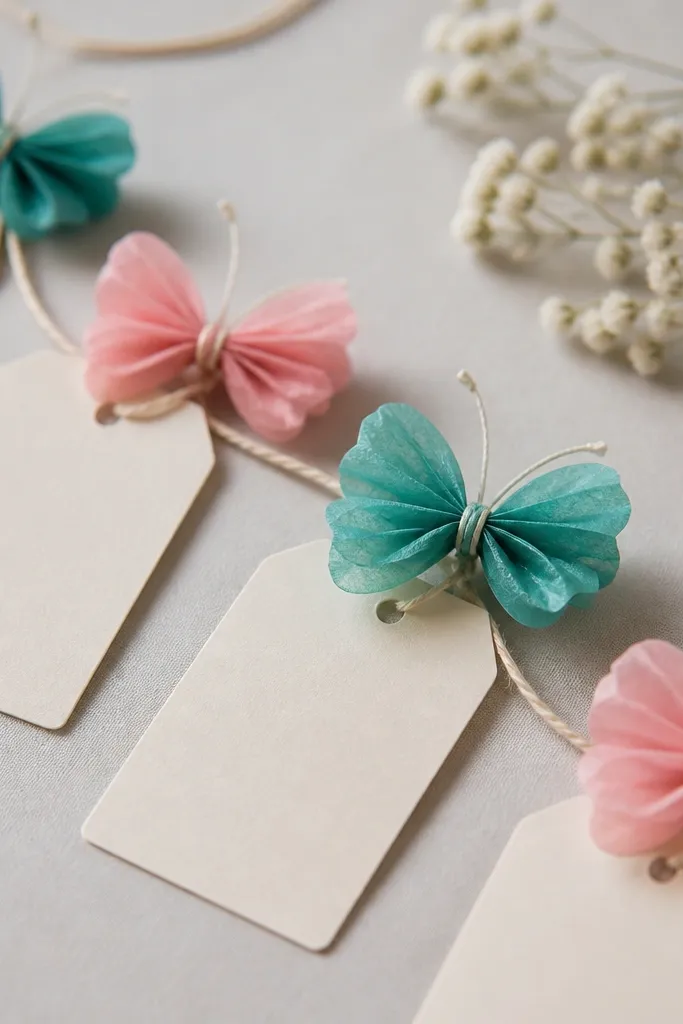
This is a hybrid style — it reads like a butterfly and a mini flower at the same time, which makes it perfect for small decor spots. I use it on gift bags and as wall accents because it’s light and doesn’t need a stem. Teal and pink look playful, and the layered wings make it pop without big size. It flatters kids' projects because it hides rough edges when you layer tissue pieces.
Editor's noteUse double-sided tape on the back when attaching to paper so it doesn’t show glue strings.
Cut two identical butterfly-wing shapes from stacked tissue, each about 3 x 3.5 inches. Accordion-fold a small strip of tissue, then pinch the center and glue it between the wings as a “body.” Add two tiny antenna threads made from thin wire. For the flower look, glue a small rolled tissue center to the body and pinch the wings slightly to create a cupped shape. Attach the finished piece to a tag with a brad or tie it to ribbon.
Skip thisSkip single-layer wings — they look see-through and less dimensional.
16. Tissue Flower Crown Buds (mini blooms on a headband)
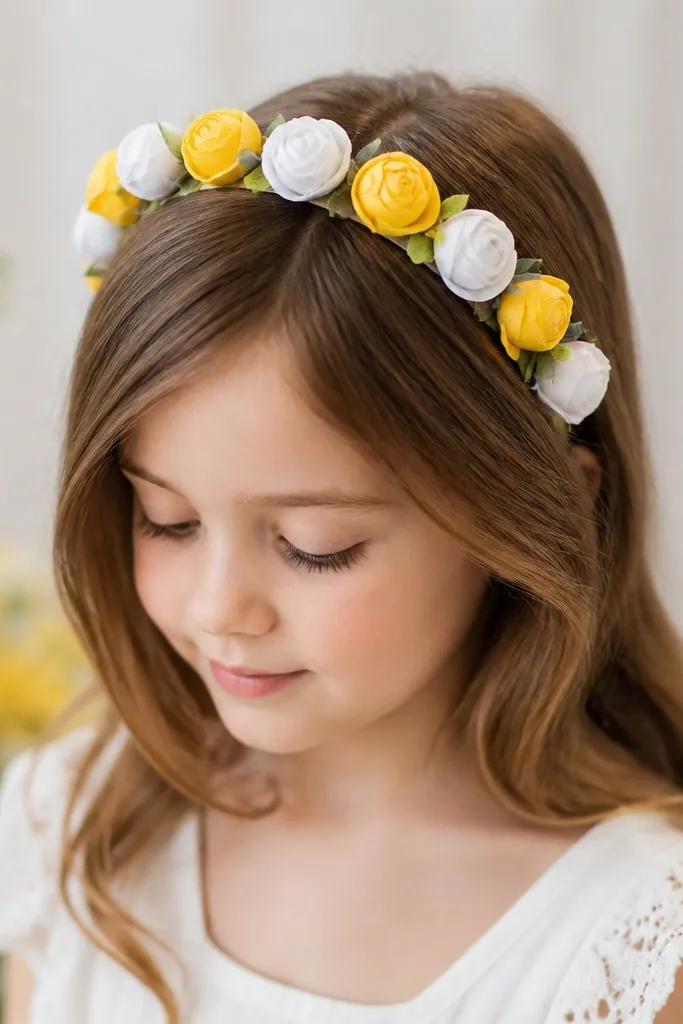
Flower crowns are decor you wear, and kids love them because it turns craft time into play. Mini tissue buds look sweet without getting heavy, and yellow plus white keeps it bright in photos. This style also works for all year tissue paper flowers for decor because you can swap colors for holidays — red for winter parties, pastel for spring, gold for birthdays. The leaf accent makes it look less like you just taped pom-poms on a band.
Start with a fabric or foam headband. Make mini buds by cutting tissue squares about 2 x 2 inches, then pinching the center and twisting the base to form a little rosette. Glue each rosette to the headband with small dots of hot glue (adult). Cut tiny leaf shapes from green cardstock and tuck one leaf behind every other bud. Space buds about 1 inch apart so the crown looks full but not crowded.
Add a second color only at the ends of the crown — it frames the face in pictures.
Don’t glue rosettes too flat — pinched centers make crowns look airy.
17. Tissue Paper Candle Flame Flower (party table accents)
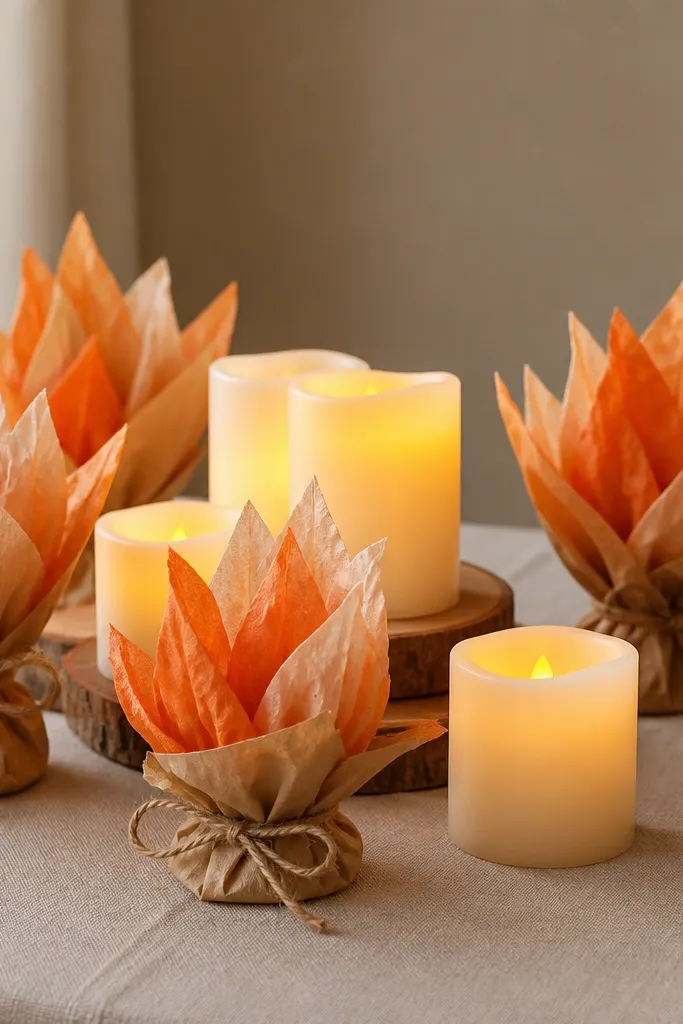
This one is for tables where you want decor that looks alive without being fragile. The flame shape reads like a candle flame, and it looks cute around LED candles because the colors glow softly. Use orange tissue layered over cream so it looks like light. It’s flattering in photos because warm tones complement skin and wood surfaces, and it doesn’t require full flower fluff.
Cut flame shapes from tissue: 2 layers per flower, one cream and one orange. Slightly overlap the orange over the cream, then accordion-fold a tiny strip at the base and glue it as a “stem grip.” Add a small yellow dot in the center for the flame core. Wrap a green pipe cleaner or thin wire with paper tape for the stem, then insert it into the base fold and glue.
Use LED candles and place the flowers 2 to 3 inches away from the light — it looks intentional, not accidental.
Avoid bright red-orange without cream — it turns harsh under warm table lighting.
18. Tissue Flower Wall Frame with 4 Blooms (12x16 inch)
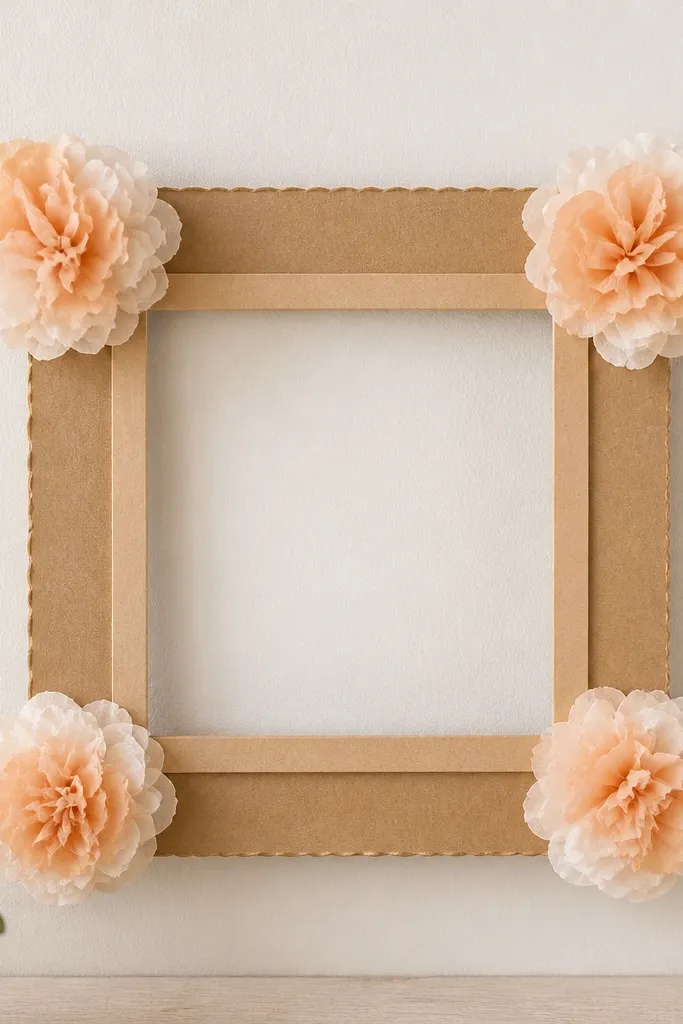
A framed arrangement makes tissue flowers look like real decor instead of loose crafts. I did this for a kid’s room wall and it instantly looked more “designed” because the border controls the chaos. Use one flower style and one color combo across all four blooms so the frame reads cohesive. This also flatters small spaces because it adds color without taking up floor space.
Cut a cardboard backing to 12x16 inches and add a 2-inch border strip in a solid color. Mount four paper flowers at the corners using glue dots or small hot-glue spots at the center backs only. Choose one bloom type (like the 12-inch mum) but scale them down to about 8 inches each. Tie a piece of ribbon across the back for hanging, then add a tiny label card behind the frame edge if it’s for a birthday photo wall.
Use the same tissue color for the center on every bloom — it makes the frame look finished.
Don’t use too many different styles — the frame looks busy instead of curated.
19. Tissue Blossom with Rolled Petal Strips (balloon bouquet style)
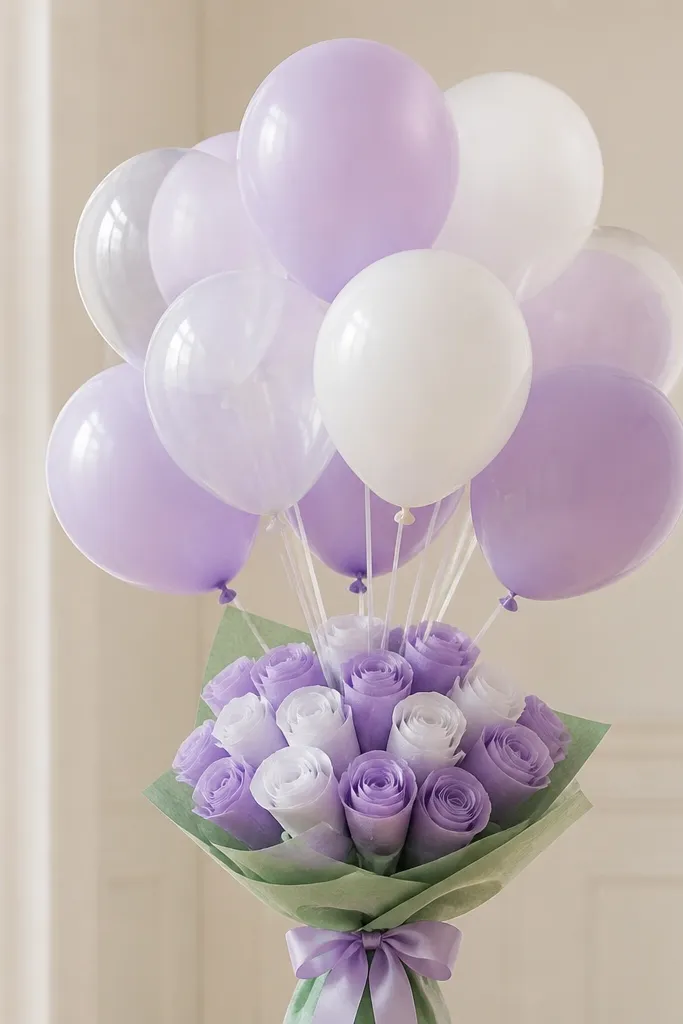
Rolled petal strips create a flower that looks soft and bougie without being hard to make. I’ve used these as balloon bouquet toppers because the rolled petals catch light and look dimensional even when they’re small. Lavender and white gives a calm, party-ready look that doesn’t clash with pastel balloons. It’s also flattering for photos because the petals create gentle texture around faces.
Editor's noteRoll petals tighter for small flowers and looser for bigger ones — it matches the scale.
Cut tissue strips about 1.5 inches wide and 8 inches long. Fold each strip in half lengthwise, then roll the folded strip lightly around a pencil to create a curled petal. Make 10 to 14 petals total. Glue petals around a small circle center (cardstock or folded tissue), then wrap a small green strip around the base to hide the knot. Attach to a balloon string by tying through the center base and securing with tape.
Skip thisDon’t rush the curling — flat strips make the bouquet look like scraps.
20. Tissue Paper Fan Flower Wreath (No Glue Burnt Edges)
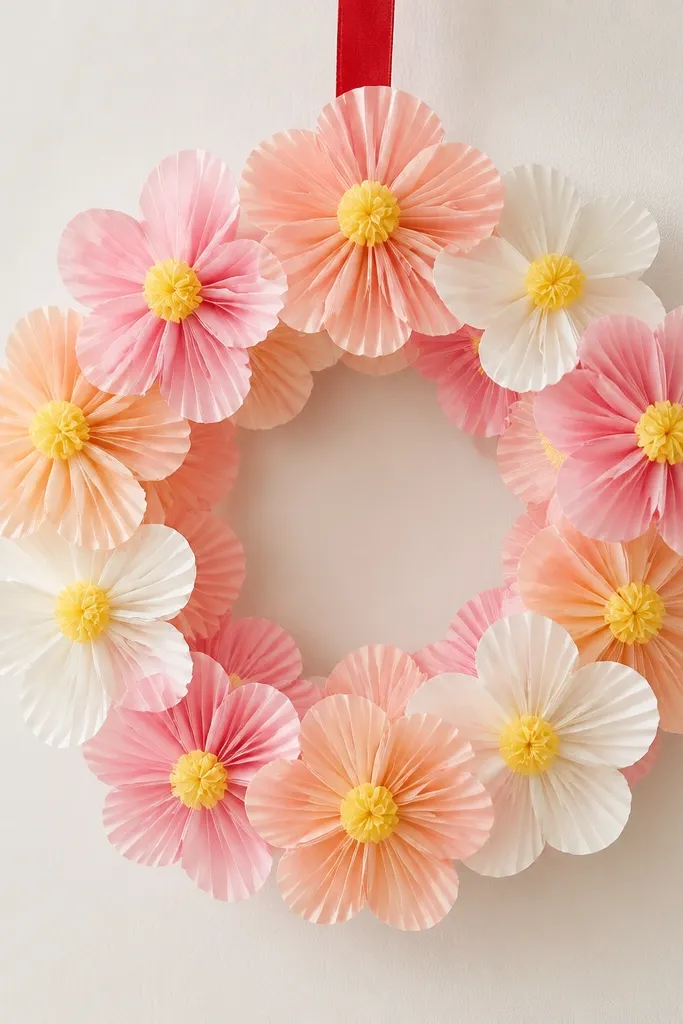
This is a wreath that uses accordion tissue fans, so the flowers look fluffy without needing heavy paper. The foam ring keeps the shape while kids press and fluff petals, and the finished wreath hangs flat for year-round decor. I like it because it hides small uneven cuts — tissue forgivingly folds where paper craft projects usually show mistakes. It also works with any color theme, from spring pastels to birthday party brights, because the fan shape reads clearly from a few feet away.
Editor's noteUse a foam ring 1/2-inch thick. Thin rings dent when kids twist pipe cleaner, and the petals end up leaning.
Step 1: Cut 18 to 24 tissue rectangles, each 12 inches long and 6 inches wide. Fold each rectangle into a tight accordion (about 1/2-inch folds) and pinch the middle so it forms a fan. Step 2: Thread a small twist of pipe cleaner through the fan pinch, then spread the folds so the fan opens like a half-circle. Step 3: Attach the fan to a 9-inch foam wreath ring by wrapping the pipe cleaner ends around the ring and twisting tight. Step 4: Make a center for each flower by scrunching a 3-inch square of yellow tissue, then hot-glue or tack-glue it onto the middle pinch where the fan is tied. Step 5: Arrange fans in clusters of 2 to 3 so the foam ring disappears, then fluff each fan by pulling the outer folds outward with your fingertips.
Skip thisSkip hot glue directly on tissue — it can scorch and leave shiny spots that show through the petals.



