

1. Cream and Gold Initial Keychain with Faux Leather Wrap
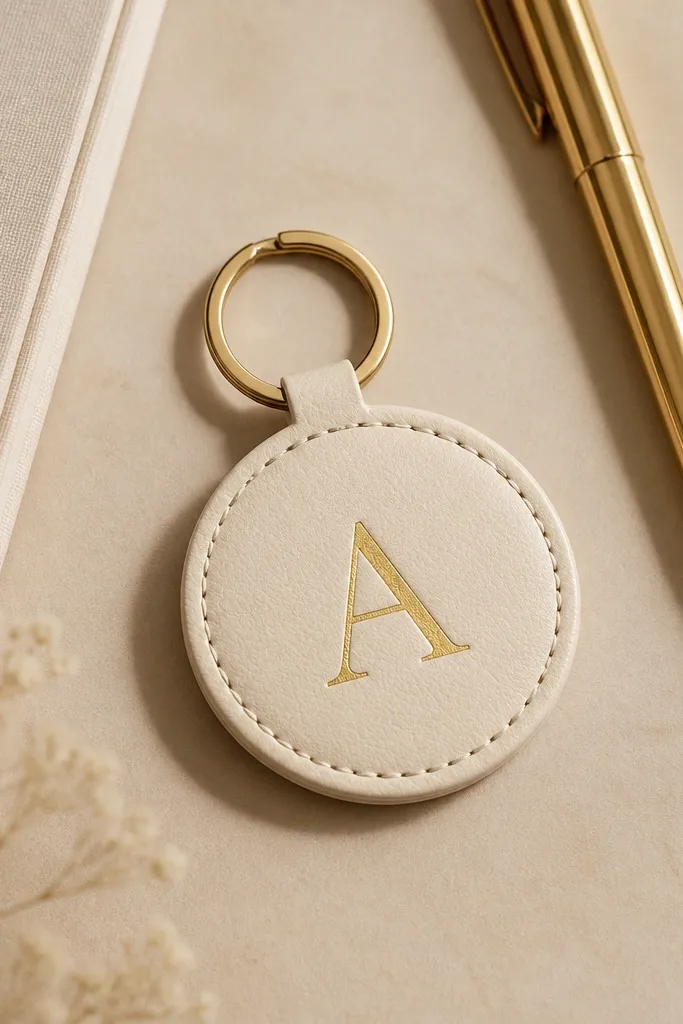
This is the gift I make when I know my friend carries a lot of keys and likes things that look clean. The cream wrap makes it soft-looking, and the gold initial pops without needing extra decorations. Faux leather also hides small cutting mistakes because the surface is forgiving and matte. It looks best for friends who wear neutrals or gold jewelry, and it photographs well against denim, tote bags, and car keys.
Editor's notePress the vinyl down with a flat edge (like a credit card) for 20 seconds so it doesn’t lift at the corners.
Start with a 2.5-inch circle of cream faux leather and trace it onto craft foam or thin cardstock for backing. Cut a matching circle and glue them together with contact cement or strong craft glue, then punch a 1/4-inch hole near the top for the split ring. Apply a gold vinyl initial (or a gold paint marker if you have steady hands) centered on the face, then seal with a thin layer of matte acrylic sealer so it doesn’t scratch. Finish by trimming any edges with an exacto knife for a crisp outline, then attach a gold split ring and a short tassel if you want extra movement.
Skip thisDon’t use glossy vinyl — it looks plasticky on faux leather.
2. Press-Flower Bookmark Set in Clear Laminated Sleeves
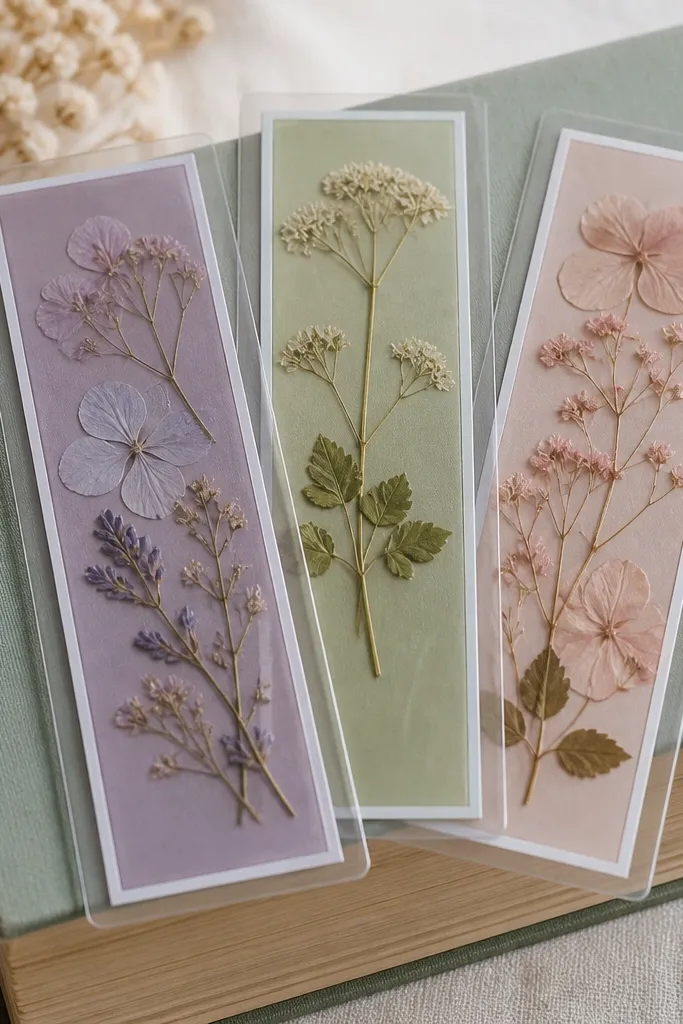
If your BFF reads, this looks like something she’d find in a boutique shop. Pressed flowers create that delicate, airy vibe, and the clear sleeve keeps them flat and protected. The aesthetic comes from spacing — leave a little white margin so the flower doesn’t look crowded. This fits friends who like soft colors, quiet aesthetics, and gifts that feel thoughtful without being loud.
Editor's noteUse tweezers to place flowers — it prevents wrinkles that show through the laminate.
Start by pressing small flowers for at least 24 hours — I use tiny daisies or lavender sprigs, flattened between paper towels and inside a heavy book. Cut strips of cardstock to bookmark size (about 2 inches by 7 inches) and leave a 1/8-inch margin. Place the pressed flower on the cardstock, then slide it into a laminating pouch and trim the edges with a straight cut. Seal the top edge and punch a small hole if you want a ribbon tie, then attach a thin satin ribbon in the same color family (blush, sage, or lilac).
Skip thisSkip thick flowers like marigolds; they warp and create bumps under the laminate.
3. Mini Photo Transfer Coasters with Mod Podge Gloss Finish
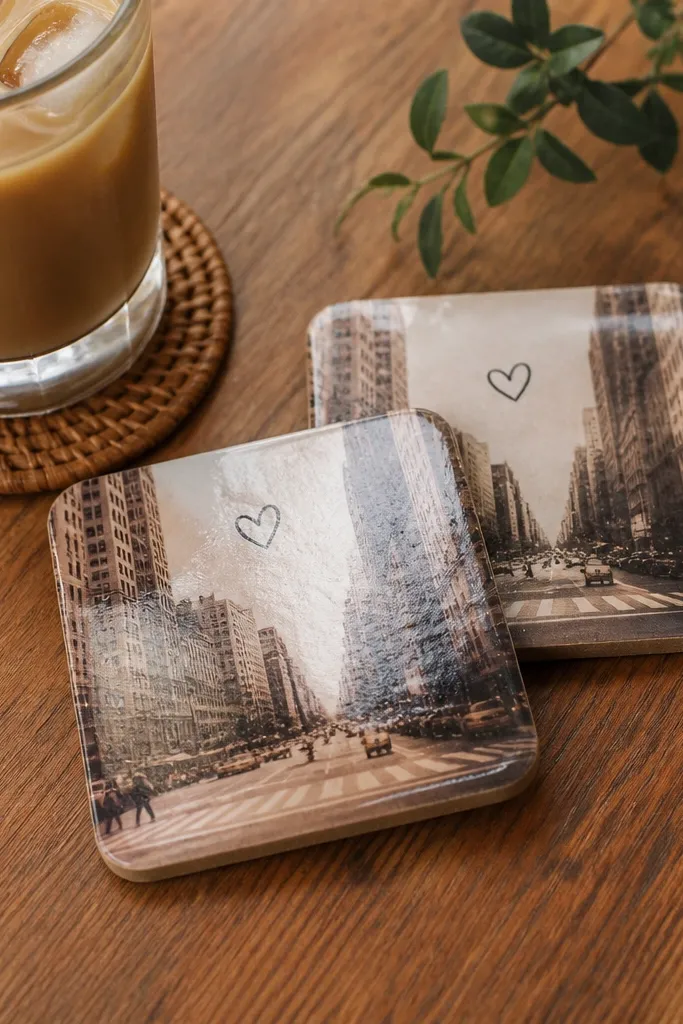
This gift feels personal fast because it uses a real memory — a photo from a trip, a concert, or even a handwritten note. The trick to making it look expensive is the finish: glossy clear coat makes the image look like it’s printed, not pasted. I’ve given these to friends who host and it instantly upgrades their coffee table without looking like DIY decor. They also work for people who like sentimental but clean-looking items.
Editor's noteUse a photo with high contrast so the transfer reads clearly after sealing.
Start with two ceramic tile blanks or round cork coasters, sized about 4 inches wide. Print your photo image in black and white or slightly warm tones, then cut it to fit and apply a thin layer of Mod Podge to the coaster. Press the photo down and rub gently until it sticks, then add a topcoat of Mod Podge gloss. Let it cure for 24 hours, then add one more clear coat to smooth the edges. If you’re using cork, seal the sides with two coats so the cork doesn’t drink the liquid.
Skip thisDon’t rush drying — smudging happens when you touch the image too soon.
4. Navy Denim and White Thread Friendship Bracelet with Sliding Knot
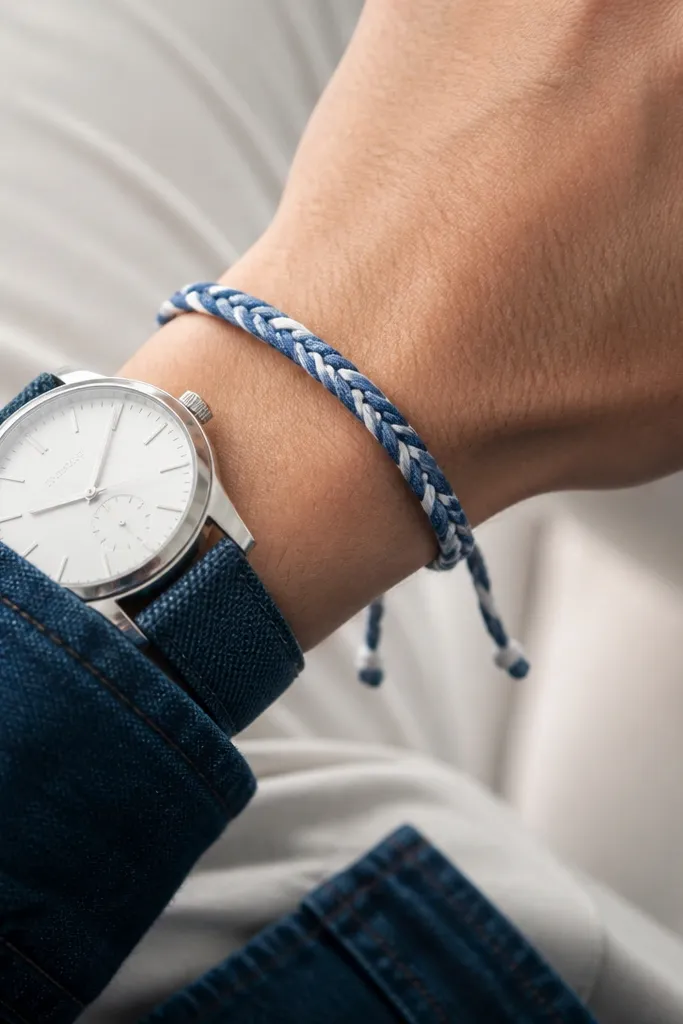
This looks casual-cute and it’s perfect for a best friend who wears denim, black jeans, or simple tees. The denim strip gives texture and a slightly worn-in look, while white thread keeps it crisp. I like the sliding knot closure because it adjusts without bulky hardware. It’s also a great gift for friends who don’t wear lots of jewelry but still like small accessories.
Editor's noteMake the braid slightly uneven on purpose — it reads handmade instead of machine-made.
Cut denim strips about 1/4-inch wide and 6 inches long, then fray the ends slightly with scissors for texture. Braid three strips together loosely and tie the ends with a temporary knot. Wrap white embroidery thread around the braid at two points — about 1 inch apart — and stitch in tight loops to lock the braid. Create a sliding knot closure using a length of satin cord or waxed cotton, then thread it through a small loop at the end. Finish by trimming loose threads and adding a tiny dab of fabric glue to stop unraveling.
Skip thisSkip stiff craft glue on the bracelet body; it creates hard spots that snag.
5. Soft Sage Candle Jar Label with Hand-Lettered Quote
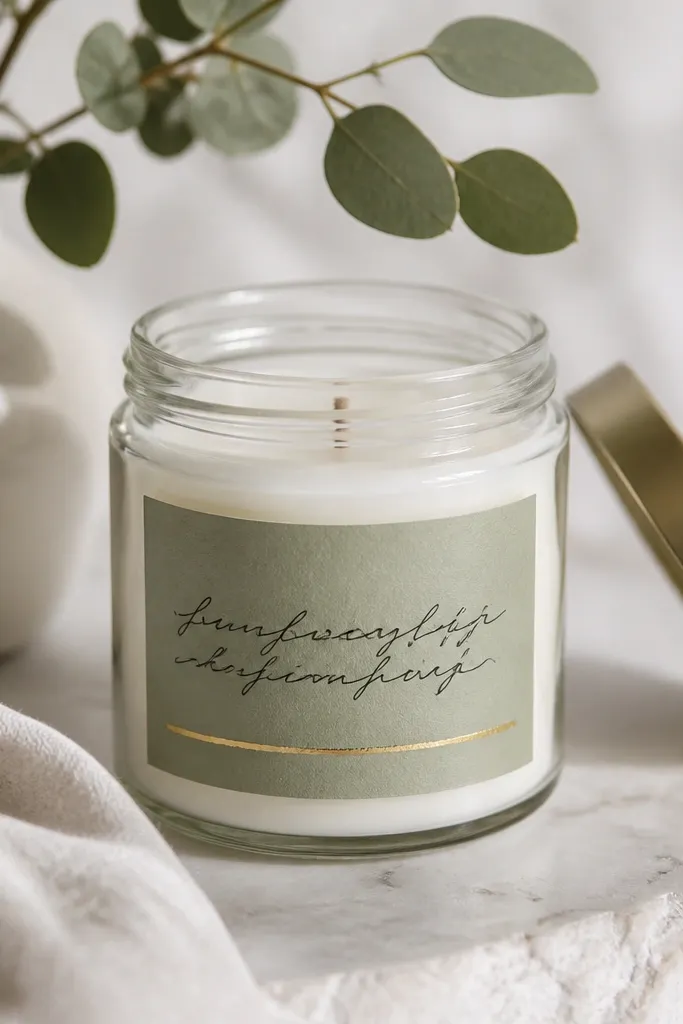
This is the “looks like you bought it” move when you want budget-friendly but polished. If you use a plain candle jar (or an inexpensive refill), the label does all the aesthetic work. Sage paper feels calm and modern, and hand-lettering adds the personal touch. It suits friends who like minimalist decor, neutral color palettes, and gifts that fit their shelf instead of fighting for attention.
Start by cutting a label from sage cardstock to fit the jar — measure the circumference and add 1/2 inch overlap. Use a fine-tip brush pen or paint marker for lettering, and keep the quote short so it looks intentional. Add a gold foil line underneath with a gold leaf pen or metallic marker for a subtle highlight. Adhere with removable glue dots or double-sided tape so the jar still looks clean. If the jar is curved, score the overlap line lightly so it wraps flat.
Write your quote on scratch paper first and pick one letter style — don’t mix scripts and print.
Don’t cover the whole jar with full-bleed color; the edges look messy when the glass curves.
6. Iced Latte Shrink Plastic Key Charm with Outlined Drawing
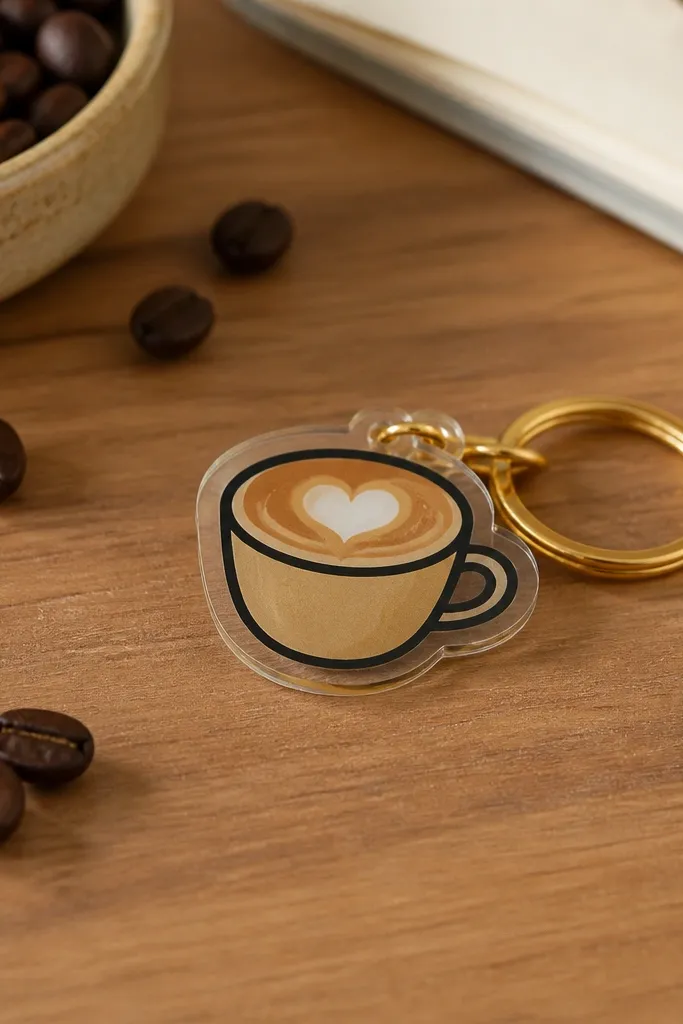
If your BFF likes cute things on her keys or backpack, shrink plastic charms hit the sweet spot: fast, cheap, and surprisingly durable. The aesthetic comes from thick outlines and limited colors. I’ve made these for friends who love coffee vibes and they look adorable even when they get scratched — the design stays readable. It also works for friends who like playful accessories but don’t want bulky jewelry.
Draw your design on shrink plastic with a permanent marker, using bold lines — I do a latte cup with a simple straw and foam top. Color with colored pencils or alcohol markers, keeping shading light so it doesn’t bleed when heated. Cut the shape with a small border, then punch a hole for the key ring. Heat in an oven at the exact package instructions (usually around 325°F) until it curls flat and shrinks. Let it cool fully, then attach a jump ring and key ring; seal with a clear acrylic spray if you want extra scuff resistance.
Use a ruler for the cup outline so it stays crisp after shrinking.
Avoid thin lines — they disappear when the plastic shrinks.
7. Marble-Effect Polymer Clay Phone Stand
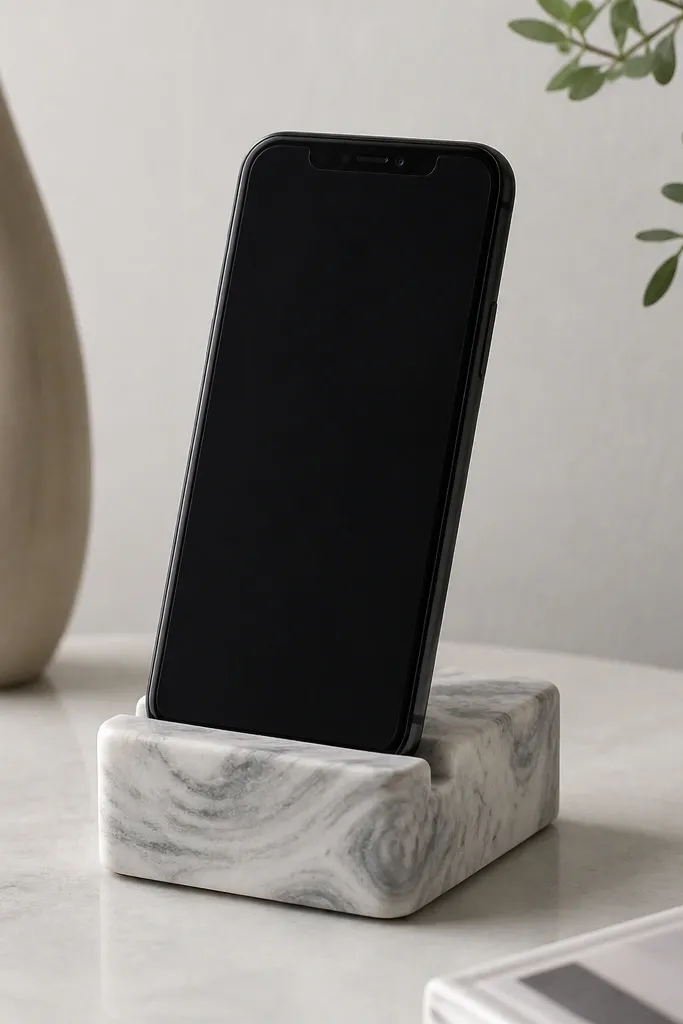
This is a gift for the friend who works from bed or always has her phone propped up. Marble-effect clay looks expensive because it reads like a stone finish. The stand also has a practical use, so she reaches for it daily. I’ve seen this work best with cool color palettes — gray, white, and a touch of black — and it looks clean in photos.
Editor's noteSand the top edge only — leave the base slightly textured for grip.
Start by conditioning gray and white polymer clay until soft, then roll each into thin sheets. Stack the sheets and twist gently, then slice and stack again two times to create a subtle marble pattern. Form a base rectangle about 3 inches wide and 2 inches tall, then add a back support wedge so the stand holds a phone at a slight angle. Smooth edges with a clay tool, poke a shallow channel on the top edge for grip, then bake according to your clay brand instructions. After cooling, sand with 800 grit lightly and seal with matte or satin varnish so it doesn’t look sticky-glossy.
Skip thisDon’t use shiny varnish — it makes the clay look like plastic.
8. Bookish Wall Hanging with Twine, Mini Clothespins, and Notes
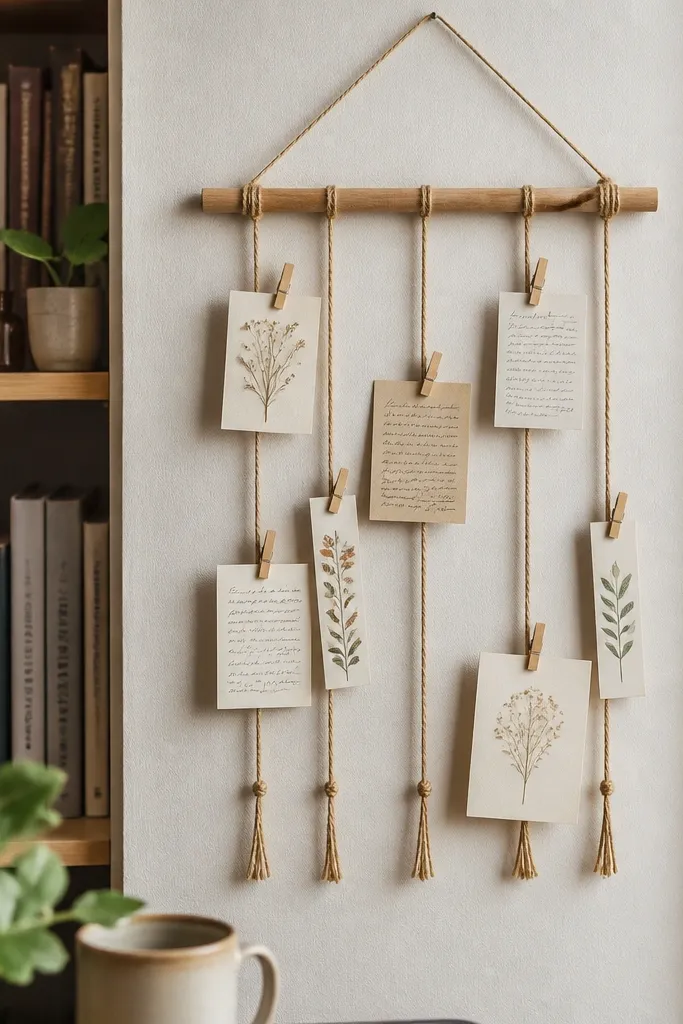
This gift is for the friend who likes to see reminders and little messages every day. The aesthetic comes from the repeating shapes: clothespins, small cards, and a consistent twine color. It also works for different personalities — you can keep it minimal with neutral paper or make it playful with colored tabs. If her room already has warm wood tones, this fits right in.
Editor's noteUse the same font size for all notes so it reads cohesive instead of random.
Start with a thin wooden dowel or even a branch, about 10 inches long, and tie jute twine across it in two horizontal lines spaced 3 inches apart. Clip 8 to 10 mini cards using mini clothespins; cut cards to about 2 inches by 3 inches. Write short notes on cream paper with a black gel pen, then add one small accent per card like a tiny star doodle or a date. Mount the dowel with a loop of twine so it hangs straight. Finish by tying a small bow or leaving it bare if she likes clean decor.
Skip thisDon’t use too many different paper colors; it makes the wall look cluttered.
9. Beaded Name Bracelet with Flat-Letter Pony Beads
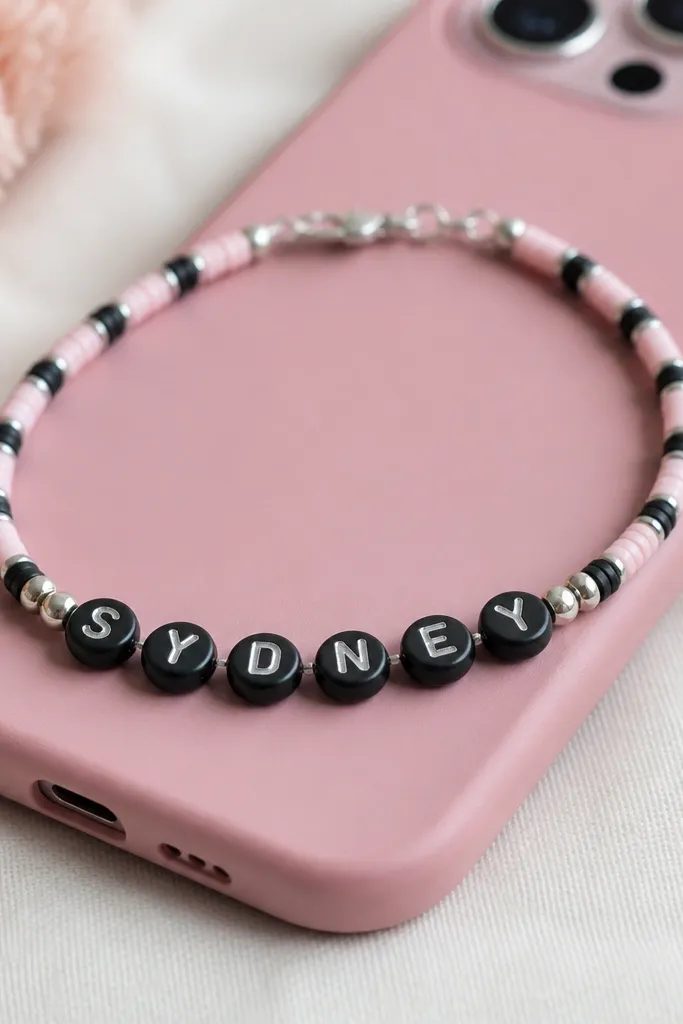
This is the kind of gift that gets worn immediately because it looks like a “real” accessory. Flat letter pony beads let you spell a name clearly without complicated jewelry tools. I like matte black + pale pink because it looks modern and doesn’t scream “kids craft.” It suits friends who like personalized items, and it works for different skin tones because bead colors sit on top of the wrist.
Editor's noteLay the beads out in order before threading — it saves you from one flipped letter.
Start by measuring your wrist with string, then add 2 inches for a comfortable fit. Thread a base line with seed beads in your main color (black works great) and leave a tail for tying. Add spacer beads, then slide on flat letter beads spelled in the right order, keeping gaps consistent between letters. Fill leftover space with a pattern like pink, silver, pink so the bracelet ends look balanced. Finish by tying a double knot with nylon cord and trimming tails, then seal knots with a tiny dab of clear nail polish.
Skip thisSkip stretchy elastic if you want it to stay looking sharp; it stretches unevenly.
10. Pastel Tie-Dye Tea Towel with Sharpie Resist Pattern
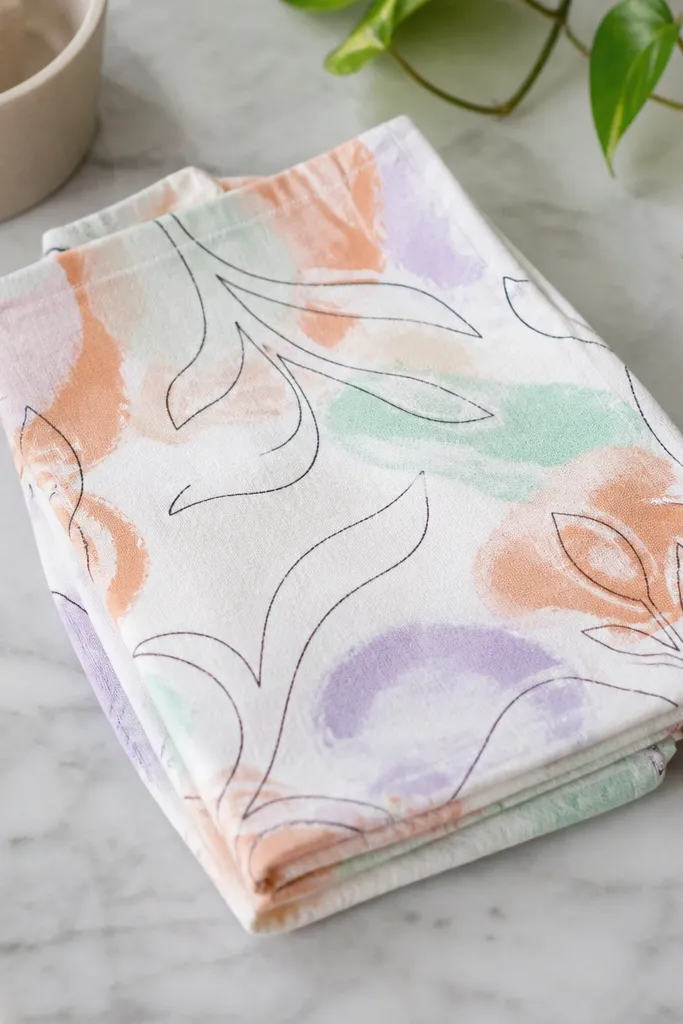
This gift is for a friend who hosts or cooks and likes her kitchen to look cute. The sharp part is the black outline pattern — it stays crisp and makes the dye look intentional. Pastels make it aesthetic instead of messy, and the tea towel is useful, not just decorative. It looks best in kitchens with white cabinets, light wood, or neutral countertops.
Start with a plain white cotton tea towel and sketch a simple design in Sharpie — I do small hearts or a minimal face outline. Soak the towel with water, then twist and tie it with rubber bands into 4 to 6 sections. Mix dye (or use ready-to-use powder dyes) for peach, mint, and lavender, and apply each color to separate sections. Let it sit as the package says, then rinse until water runs lighter. Dry fully, then pull off rubber bands and wash once more to remove extra dye.
Draw the resist lines thick — thin marker lines can bleed under dye.
Don’t use polyester towels; the dye spreads unpredictably.
11. Gold Foil and Black Cardboard Shelf Sign with Vinyl Letters
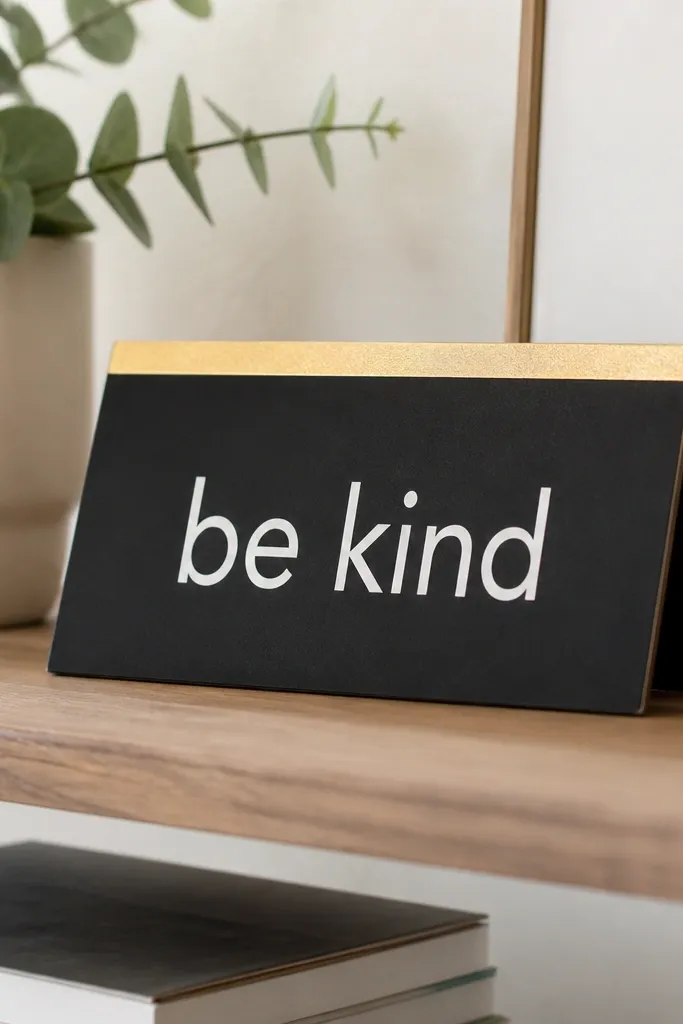
This is a fast decor upgrade for friends who like graphic items. Black and gold reads classy without needing paint skills, and vinyl letters look razor-clean. The shelf sign also makes a good gift because it’s not precious — she can place it on a desk, shelf, or entryway. It works especially well for people who decorate with black frames, candles, and minimal objects.
Editor's noteUse painter’s tape as a guide under the vinyl so you don’t fight alignment.
Start with a piece of thick cardboard or foam board, cut to about 6 inches by 3 inches. Cover the top edge with gold foil tape or gold leaf sheets and press firmly with a burnishing tool. Apply white vinyl letters with transfer tape, spacing them evenly and using a straightedge to keep the baseline straight. Seal everything with clear matte craft sealer so the foil doesn’t rub off on hands. Attach a small backing stand using foam pads so it leans slightly off the wall.
Skip thisSkip glitter paint — it sheds and makes a mess on shelves.
12. Chocolate Brown Felt Hair Clip with Pearl Dot Center
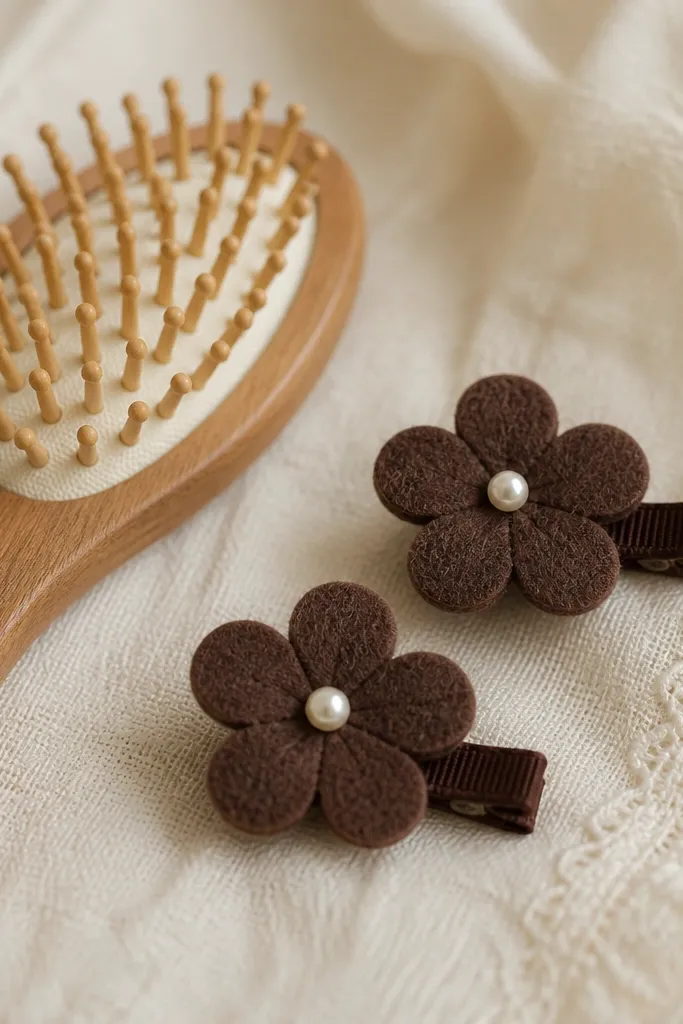
Felt clips look sweet and grown-up when you keep the shapes simple. Chocolate brown is flattering on most hair colors because it sits like a neutral accessory, not a loud decoration. The pearl dot makes it feel dressed-up without adding bulk. I’ve gifted these to friends with straight and wavy hair; the clips hold better when the felt has thickness and the pearl is centered.
Editor's notePress the glued parts under a book for 10 minutes so the clip stays flat.
Start by cutting two felt pieces per clip into petal shapes, about 1.5 inches wide, then stack them slightly offset for a layered look. Glue the layers together and attach a metal alligator clip to the back with strong fabric glue. Add a single pearl dot in the center using hot glue or jewelry glue, then seal the edges with a thin glue line to keep the felt from fraying. Make a second clip to match, using the same felt batch so the color stays consistent. Let everything set 30 minutes before wearing.
Skip thisDon’t use thin craft felt; it bends and the clip looks flimsy.
13. Galaxy Bookmark with Black Gel Pen Stars and Glossy Resin Coating
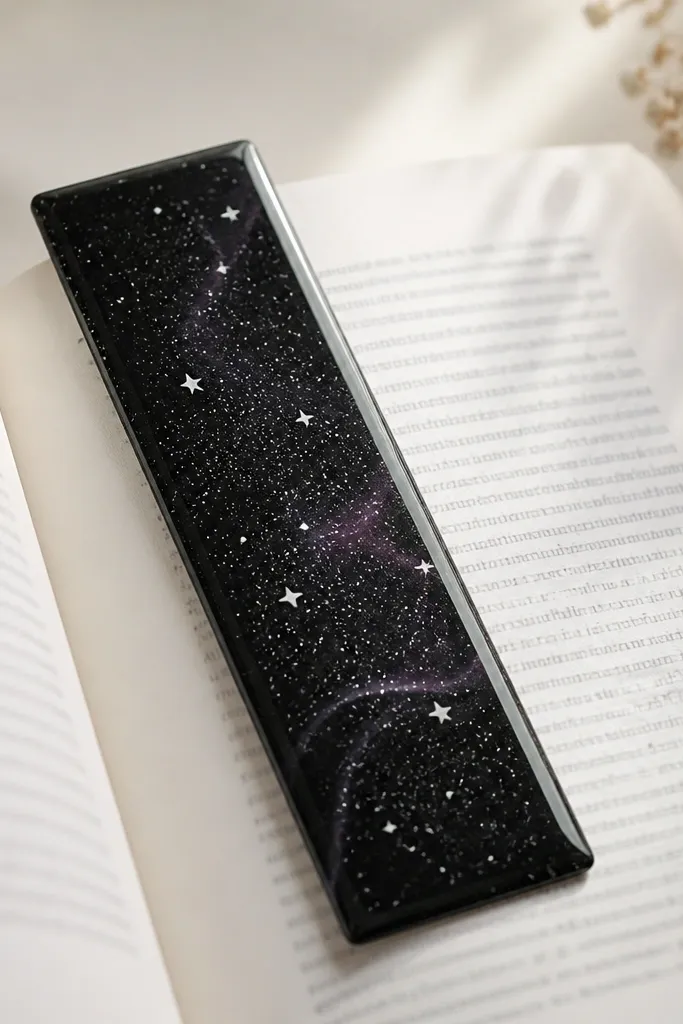
This is the gift for your friend who loves dark aesthetics but still wants something pretty. A black base makes the stars pop, and a glossy resin coat gives that “depth” look like a mini sky. I’ve made these for people who don’t usually read but love visual art — the bookmark is small enough to carry and still feels special. It also pairs well with silver jewelry and dark clothing.
Start with a 2-inch by 7-inch strip of cardstock or thin acrylic sheet. Paint a faint swirl with diluted purple or navy acrylic on one side, then add white gel pen stars — vary dot sizes for realism. Mix and pour a thin layer of clear resin on top, keeping the layer under 1/16 inch to avoid bubbles. Use a toothpick to pop bubbles and let it cure fully, then trim edges with a craft knife if needed. Seal the back with matte spray so it doesn’t glare under light.
Add one tiny crescent moon shape in the corner — it makes the whole design read as intentional.
Skip thick resin — it can feel heavy and peel at the edges.
14. Citrus Slice Keychain with Polymer Clay and Gloss Top
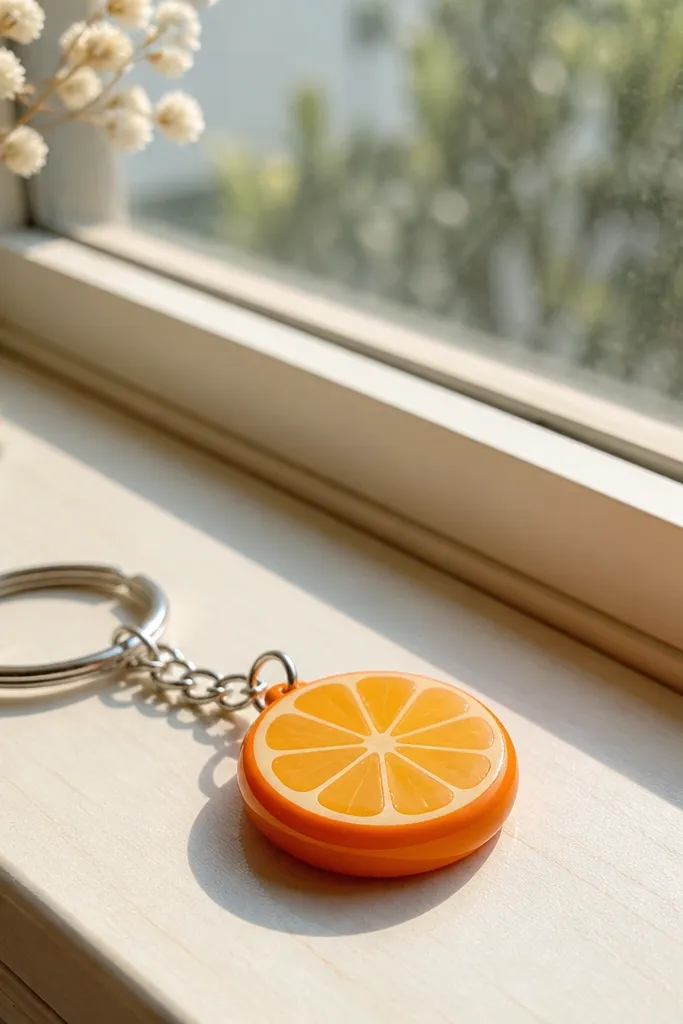
If your best friend loves bright scents and happy colors, citrus slice keychains are the quickest way to get that mood. Polymer clay lets you carve segments so it looks like real fruit, not a flat sticker. The glossy top creates a “wet” look that reads premium in photos. It suits friends who carry bright bags, wear warm tones, or like fun accessories that still look clean.
Start by conditioning pale yellow and orange clay. Roll a thin orange rind sheet, then wrap it around a pale yellow center to form a slice. Use a sculpting tool to press shallow segment lines into the center. Bake as directed, then add a thin layer of glossy glaze or clear acrylic to mimic fruit shine. Attach a jump ring through a pre-made hole near the top edge, and add a small charm loop if you want it to sway. Let the gloss cure fully before handing it over.
Carve segment lines lightly — deep grooves look messy after baking.
Don’t overdo the color — too many bright stripes makes it look like candy packaging.
15. Apricot Candle Wick Trimmer Tag with Faux Leather Strap
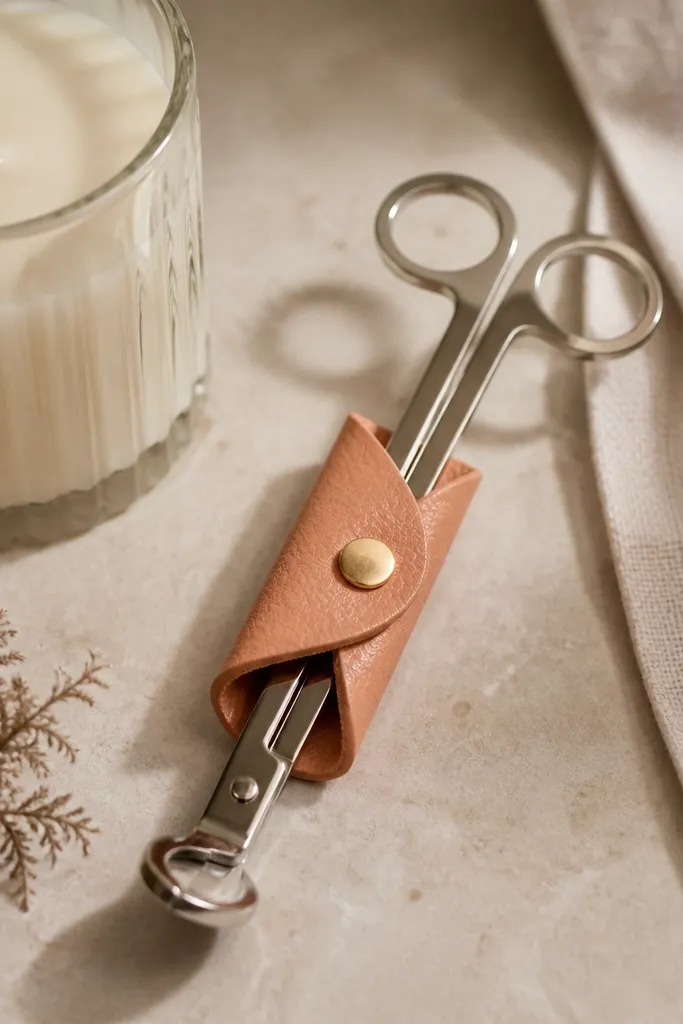
This one is for the friend who lights candles and always forgets to trim the wick until the smoke starts. The gift is practical, but the strap makes it look intentional instead of random tool-in-a-bag. Apricot and gold reads warm and modern, and the faux leather hides minor scuffs. It’s a great pick for friends who like warm neutrals and small “useful decor” items.
Editor's noteUse a hole punch — it makes the strap look store-bought.
Start with a metal wick trimmer (cheap ones are fine) and cut a strip of apricot faux leather about 1 inch wide and 5 inches long. Punch two holes near one end to stitch or rivet a loop that holds the tool handle. Stamp or write a short word like “Soot” or “Light” with a gold paint marker, then apply a matte sealer. Slide the tool into the strap loop, fold the strap tail back, and attach with a rivet or strong glue and a clothespin while it sets. Wrap the strap around once so the tool sits flat against the candle jar.
Skip thisDon’t glue the tool directly to faux leather; it peels with repeated handling.
16. Monogram Canvas Tote Patch with Heat-Set Transfer
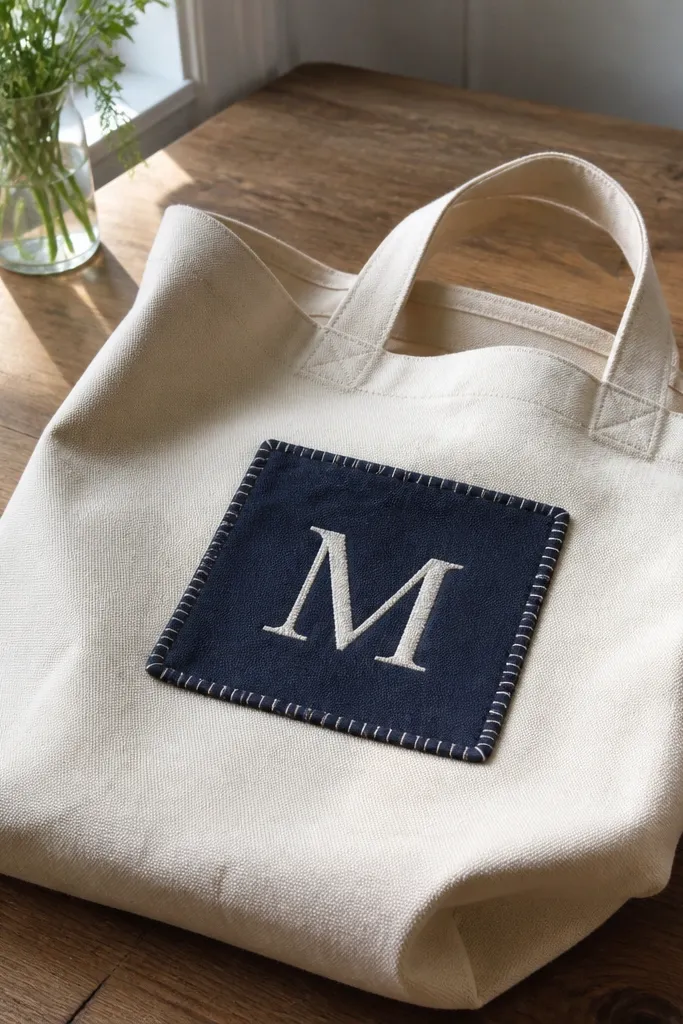
This is the best option when your friend uses bags daily and you want something that looks like it came with the tote. A monogram patch in navy on cream feels classic, and it works with almost every wardrobe. The aesthetic comes from the “stitched” look — even if you use a heat-set transfer, you add the border detail so it reads handmade. Great for friends who carry tote bags, books, or gym clothes.
Editor's noteStitch over the edges where the transfer meets fabric — it hides tiny misalignment.
Start with a plain canvas tote and cut a rectangle patch from iron-on transfer paper or fabric patch material about 4 inches wide. Choose a monogram design in navy — keep it simple and centered. Heat-set it on the tote following the transfer instructions with a pressing cloth so you don’t scorch the fabric. Then stitch around the patch border with navy embroidery thread using a basic straight stitch or a tight blanket stitch. Wash and dry once to test the adhesion, and reinforce any loose corners with two extra stitches.
Skip thisSkip stretchy knit patch material — it puckers on canvas.
17. Rainbow-Free Desk Organizer with Painted Pegboard and Paper Clips
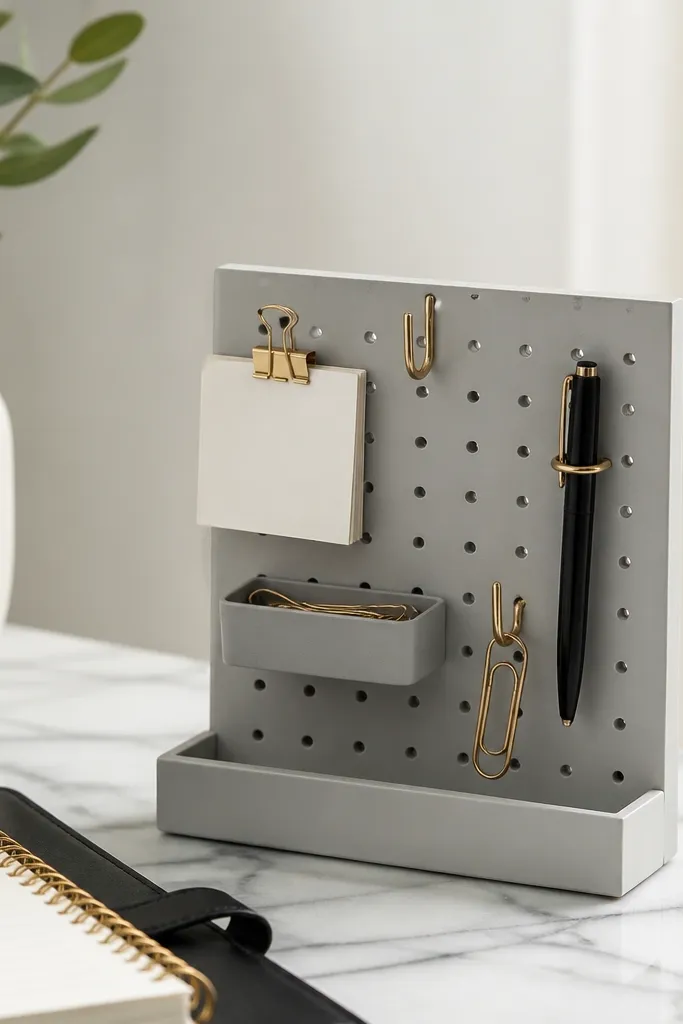
This is for the friend who always has her phone charger, notes, and pens everywhere. Pegboard looks clean and organized, and you can keep it budget by using a small piece instead of a big wall system. The aesthetic is all about a tight color palette — white or pale gray with gold hardware. It flatters people who like minimal desks and it turns random stationery into a visual display.
Editor's noteKeep hook spacing consistent — it’s what makes it look designed, not thrown together.
Start with a pre-cut small pegboard sheet (about 8 inches by 10 inches). Sand lightly, then paint with matte white or pale gray acrylic, letting it dry between coats. Screw in or glue gold hooks and a small row of paper clip holders using small craft clips. Add a mini tray cut from cardstock or thin plastic for sticky notes, then attach with double-sided tape. Hang it with a simple picture hook and make sure the hooks face forward so the clips look intentional.
Skip thisDon’t mix silver and gold hardware; it reads messy.
18. Terracotta and Moss Mini Planter with Hand-Painted Rim
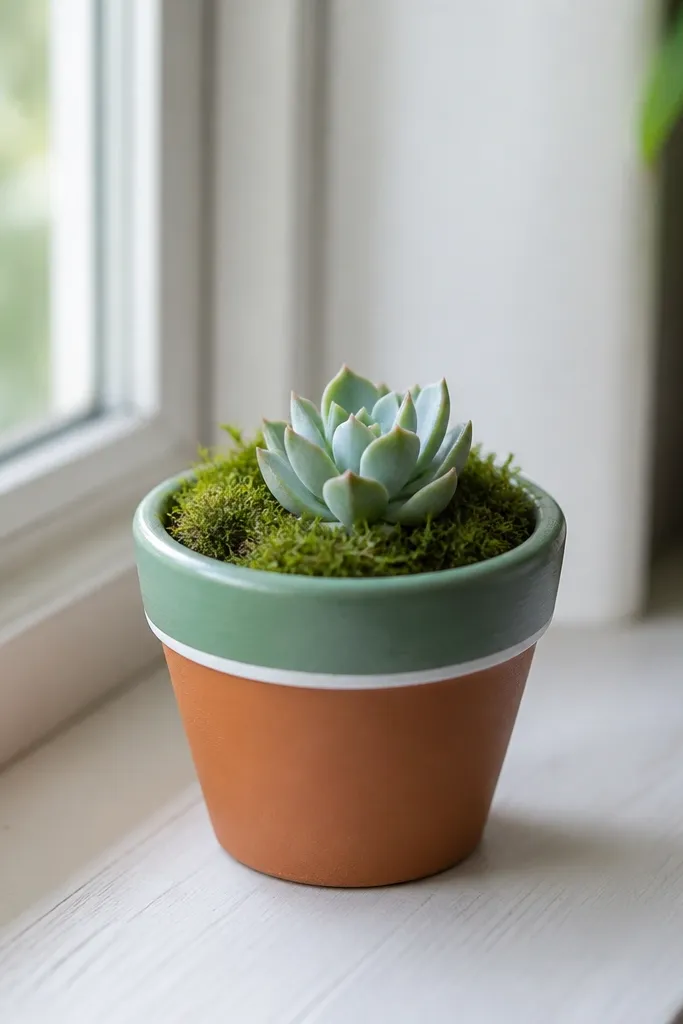
For the friend who kills plants less than she admits, a tiny planter is a sweet, aesthetic gift that still has a real purpose. Terracotta looks warm and natural, and moss gives that lush, textured base that makes the pot look fuller. The hand-painted rim is where it turns from “cheap plant” into something you’d gift with a card. It suits friends with earthy decor — wood shelves, beige walls, and natural light.
Editor's noteUse a cotton swab to clean paint edges — it makes the rim look crisp.
Start with a small terracotta pot, 3 to 4 inches wide, and gently clean off dust. Paint only the rim with muted green acrylic, then add a thin white line just inside the green for definition. Let it dry fully, then add a layer of moss and place a small succulent or air plant on top. Fill gaps with more moss so the plant looks anchored. Finish by sealing the painted rim with a clear matte sealer so it doesn’t rub off when you handle the pot.
Skip thisDon’t paint the inside rim where water sits; it chips and stains.
19. Hand-Sewn Lavender Sachet in Muslin with Tiny Embroidered Lines
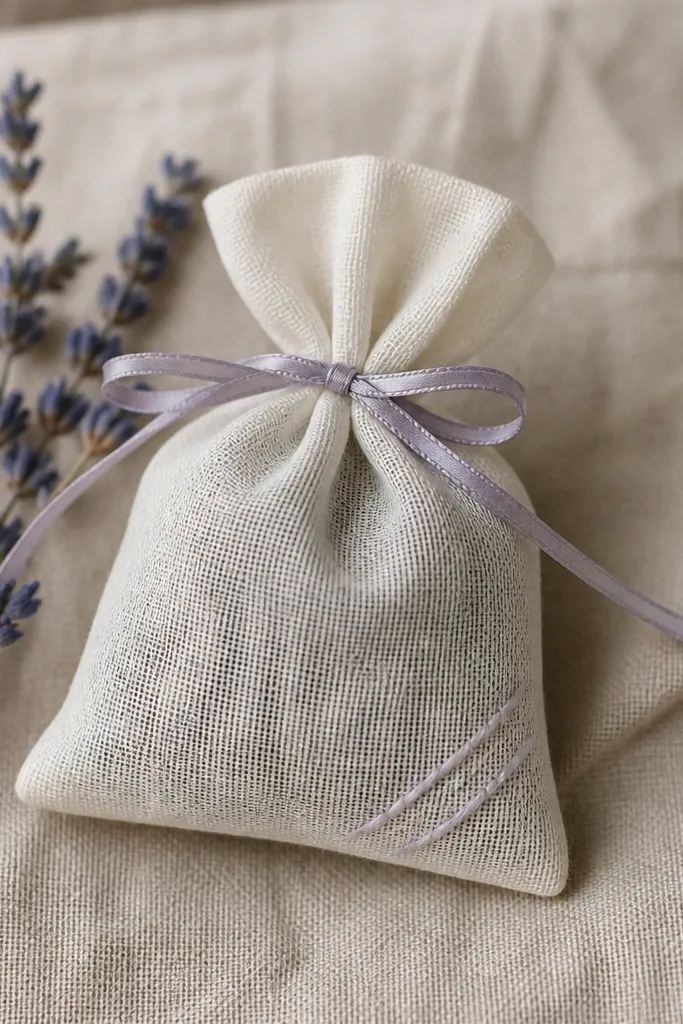
This is the gift I reach for when I want something that feels soft and calm. Muslin looks natural and expensive when it’s sewn neatly, and lavender gives a scent that makes the gift feel alive. The tiny embroidery lines keep it aesthetic without turning it into a complicated craft. It fits friends who like drawers, closets, and bedding that smells good, and it also works for sensitive noses because you control the amount.
Editor's notePre-wash muslin if it’s wrinkled; it makes your stitch lines look cleaner.
Start with a piece of lightweight muslin and cut two rectangles about 4 inches by 6 inches. Sew three sides with a simple straight stitch, then turn it right-side out. Fill with dried lavender — I use about 1 tablespoon — and add a pinch of dried chamomile if she likes a softer scent. Sew the final edge closed, then tie a thin ribbon around the middle. Embroider tiny lines on the front with a single thread color like muted navy or sage, and keep the stitches small so they look tidy.
Skip thisDon’t overfill — a packed sachet looks lumpy and collapses the shape.
20. Hand-Painted Ceramic Spoon Rest with Minimal Blue Dot Pattern
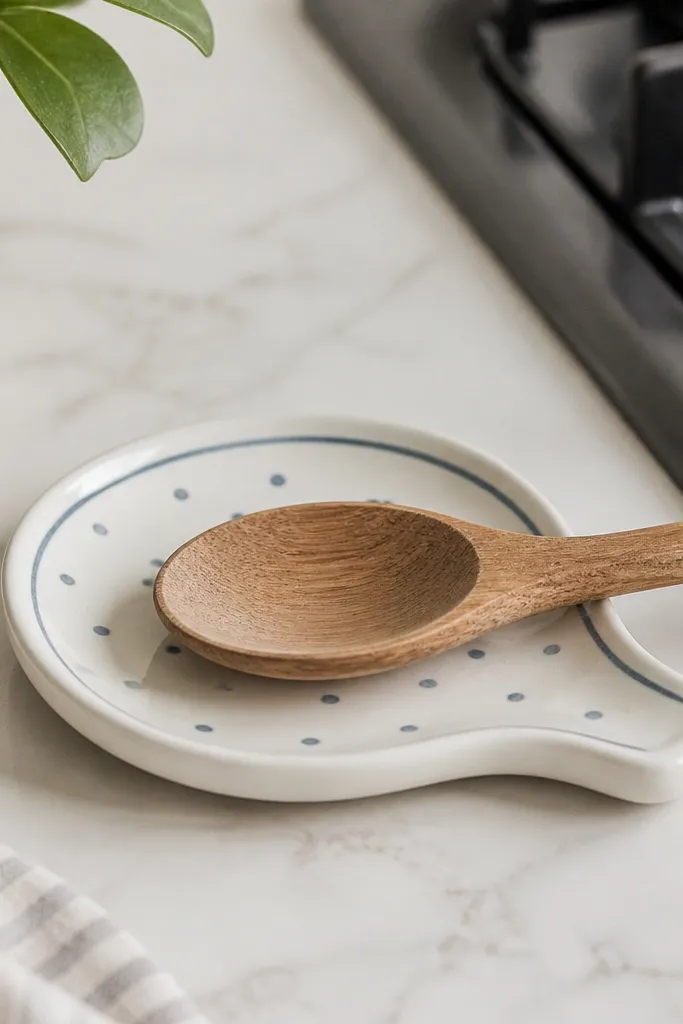
A spoon rest is one of those gifts that gets used the second it arrives. The aesthetic is minimal: white ceramic, a thin blue ring, and a few dot accents that match kitchen tile or dish sets. I like blue for friends who own denim, blue dishes, or navy accents because it ties into their everyday look. This is also great for friends who cook but hate clutter.
Start with a plain ceramic spoon rest (or a small plate you won’t mind dedicating). Clean it with rubbing alcohol, then paint a thin ring around the edge using cobalt or medium blue acrylic made for ceramics. Add 6 to 10 dots in a slightly uneven pattern so it looks hand-done, not printed. Let it dry fully, then bake or heat-set according to your paint instructions. After it cures, wash once gently and seal if the paint requires it. Place it in the kitchen on a neutral counter so the blue pops.
Use a toothpick for perfect dots — dip and tap lightly instead of dragging a brush.
Don’t use regular craft paint without a ceramic seal; it chips with heat and water.



