

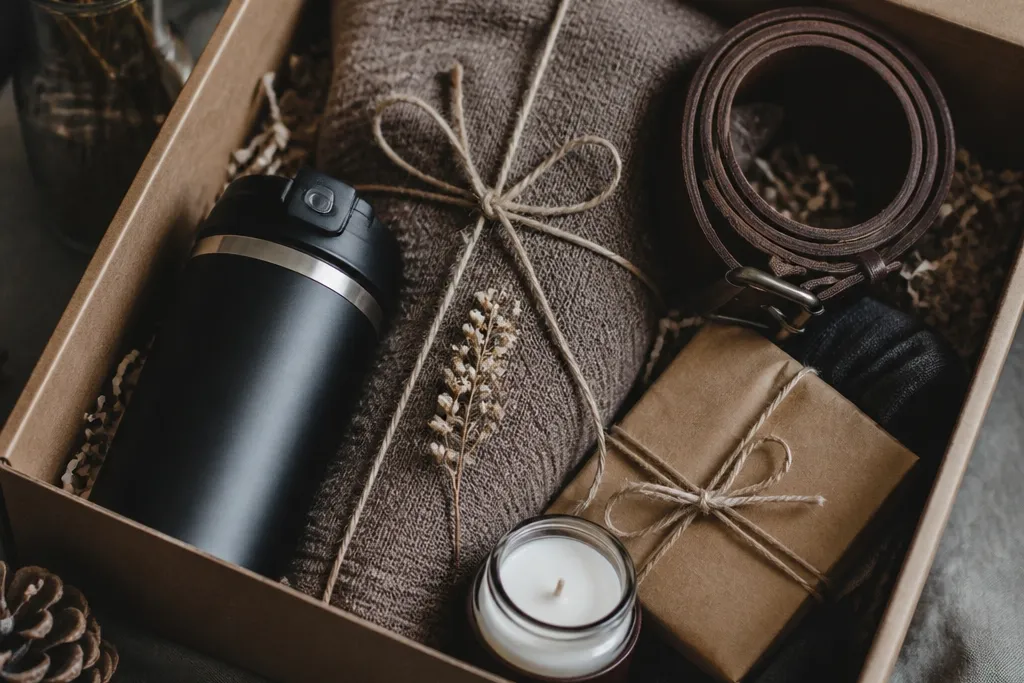
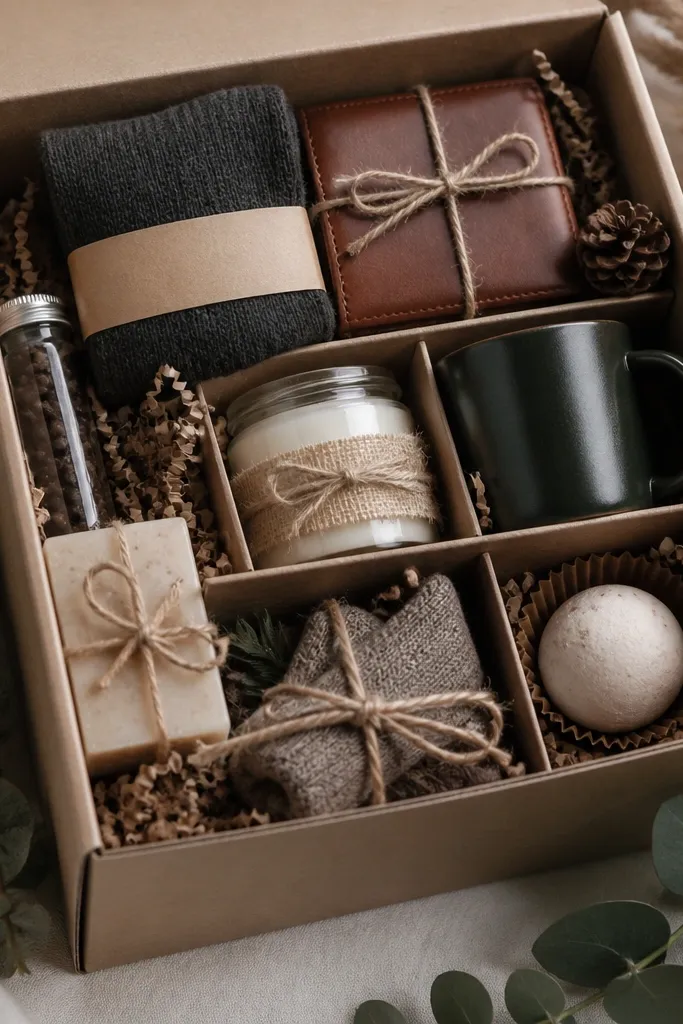
1. Cream Kraft Box with Fabric Belly Band and Tiny Gold Star Tag
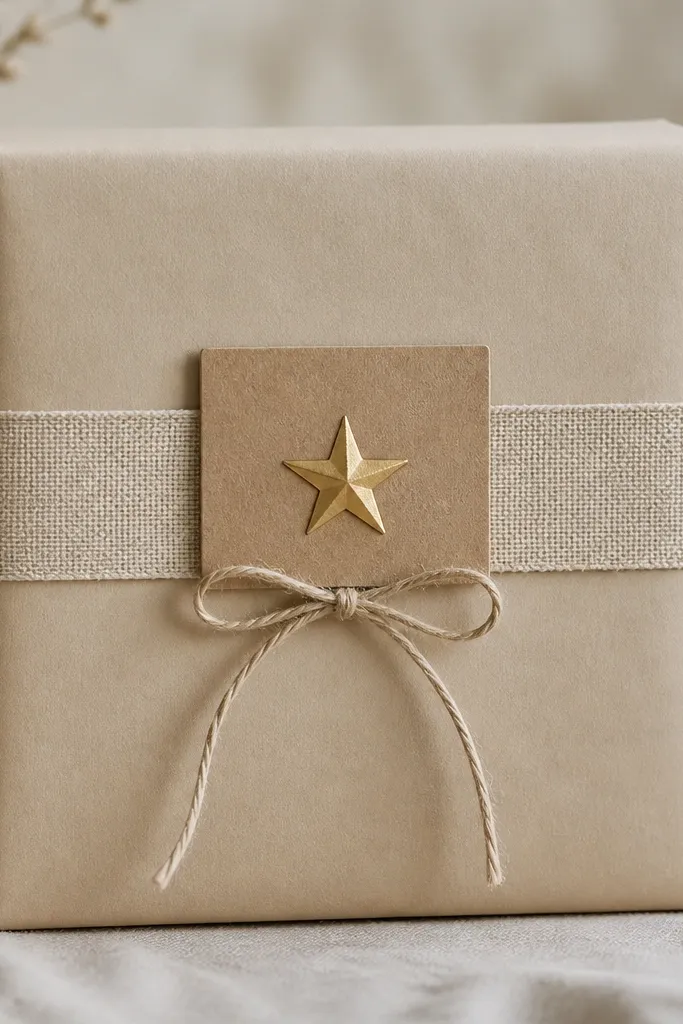
This is the box I reach for when you want “clean and thoughtful” without going full craft-store. The cream kraft paper has a matte, warm texture, and the fabric belly band adds depth you can feel with your fingertips. I use a light beige cotton or linen blend so it drapes flat instead of puckering. The gold star tag gives a little boyfriend-friendly sparkle without turning it into a kid’s gift. It looks great for birthdays, anniversaries, and even a Valentine’s box where you want romance to stay subtle.
Start with a 10x10x3 gift box and cover it in cream kraft paper using a thin glue stick or double-sided tape along the edges. Cut a belly band strip of fabric 3.5 inches wide and about 28 inches long, then wrap it around the center and overlap the ends at the back. Tie a 6-inch piece of twine into a small bow and glue it to the front overlap. Make a tag from kraft cardstock (about 2.5x3.5 inches), add one gold star sticker, and glue it slightly off-center so it looks placed, not centered by accident.
Use matte gold star stickers, not glitter — glitter sheds onto fabric and looks messy after opening.
Don’t use shiny wrapping paper under the fabric band or the whole box starts looking like it was rushed.
2. Black Denim Ribbon Wrap with White Thread Stitch Detail
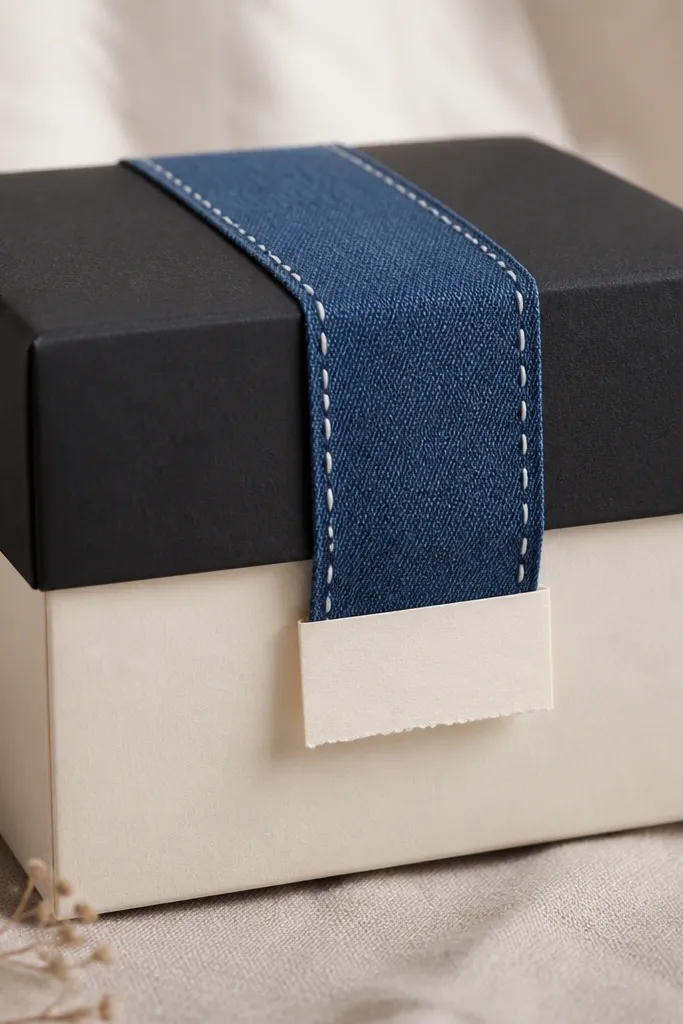
Denim ribbon instantly makes a handmade box feel more “boyfriend” than “girly craft.” The black denim gives a grounded, masculine look, and the white thread detail adds that clean, tailored vibe. I like using a ribbon strip that’s slightly wider than typical satin (about 1.75-2 inches) so it looks intentional. The cream label keeps it from feeling too dark. This style looks best for tech, music, or “practical gifts” because it matches the vibe of wallets, gadgets, and gear.
Cover the box in cream cardstock or matte kraft paper so the denim stands out. Cut a denim ribbon band 2 inches wide and wrap it around the middle, gluing the ends at the back. Add stitch detail by using a white fabric marker to draw two parallel lines and then go over the lines with a glue-and-thread method: dab tiny dots of tacky glue along the line and lay thin white thread in place. Finish with a cream cardstock label (2x3 inches) tied on with a 4-inch piece of twine so it hangs straight.
Editor's notePractice the stitch lines on scrap cardboard first — even spacing matters more than perfect circles.
Skip thisDon’t stack denim with glossy ribbon — the shine makes the stitching detail look cheap.
3. Shadow Window Lid with Clear Acetate and Dried Citrus Slices
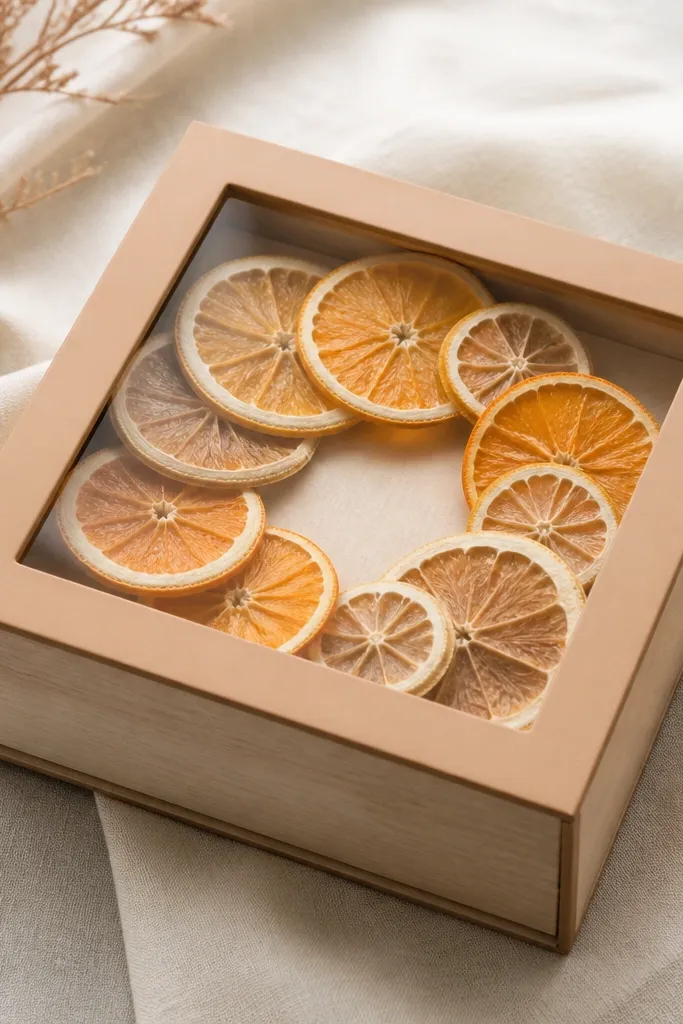
This one looks like a mini apothecary display, and it photographs beautifully because the window creates depth. The clear acetate makes the dried citrus feel suspended, and the matte wood tone keeps it from looking overly decorative. Citrus slices bring warm color — orange and pale yellow — without needing bright prints. I use this for boyfriends who like scents, cooking, or anything “cozy.” It also works well for winter birthdays because the colors read warm, not neon.
Start with a box lid you can cut into a window. Mark a 6.5x6.5 inch square in the center of the lid and carefully cut it out. Glue acetate behind the opening using a thin layer of clear glue or double-sided tape and press flat. Arrange dried citrus slices on a piece of cardstock inside the window area, then secure the cardstock with small glue dots at the corners. Seal the window edges with matte tape strips so nothing lifts when the lid opens.
Editor's noteUse dried citrus that’s fully dry — if any moisture remains, it warps and the slices look uneven.
Skip thisDon’t cram the slices too tightly; leaving small gaps makes the window look airy.
4. Matte White Box with Black Ribbon Bow and Mini Photo Strip
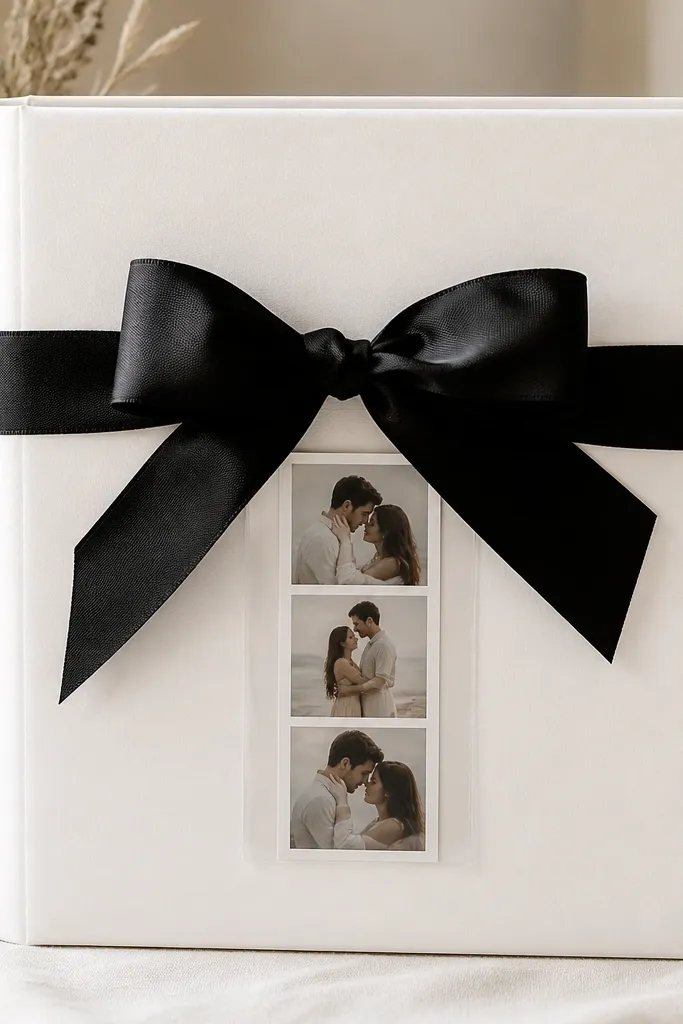
A matte white base makes everything else look sharper, especially black ribbon. The contrast is the whole point: white reads clean, black reads intentional. The photo strip adds a personal touch without cluttering the box interior. I like using three photos max because it stays tidy and doesn’t feel like a scrapbook shoved into a box. This is a good choice if your boyfriend likes memories but you don’t want to write a long card.
Cover the box in matte white paper or paint it with chalk paint and let it dry fully. Add a black grosgrain ribbon around the front only, then glue the ends behind the box and tie a bow using 10-12 inches of ribbon. Create a mini photo strip by printing three photos on a single sheet and cutting them into 1x1.5 inch squares. Put the squares into a small clear pocket (or a clear baggie folded behind a cardstock tab) and glue the tab to the front under the bow.
Use grosgrain, not satin — grosgrain holds a bow shape better and looks crisp.
Don’t use glossy photo paper on matte bases; the shine makes the whole box look less cohesive.
5. Green Envelope-Style Box with Folded Corner Panels
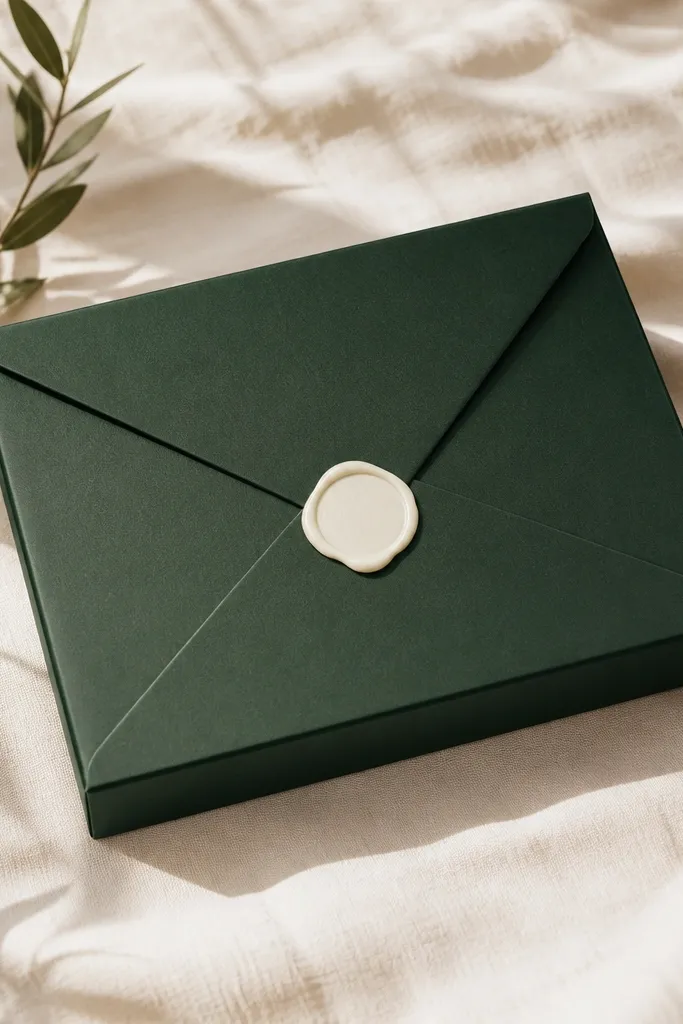
This envelope style looks like stationery, not packaging. The deep green is boyfriend-friendly and hides fingerprints better than pale colors. Folded corner panels create strong geometry, which reads “designed” even if you’re using simple materials. A wax-seal sticker at the center gives a classic focal point. I make this when I want the gift to feel like a letter, especially for first birthdays together or “anniversary but low-key” moments.
Use a 10x10x3 box and cover it in deep green cardstock. Cut two corner panels for the lid: each panel should be 6 inches long with a triangular fold point so it can tuck inward. Glue the corners so they overlap slightly at the center. Add a cream cardstock strip (about 1 inch wide) behind the center overlap, then stick a wax-seal sticker on top. Finish by adding a closure string loop: tie thin twine around the box and knot it on the side so it opens like an envelope.
Editor's noteScore folds with a butter knife on scrap paper first — it makes the corners snap cleanly.
Skip thisDon’t use thick glitter cardstock; it cracks at folds and looks messy.
6. Walnut Stain Paper Box with Rolled Map Ribbon Insert
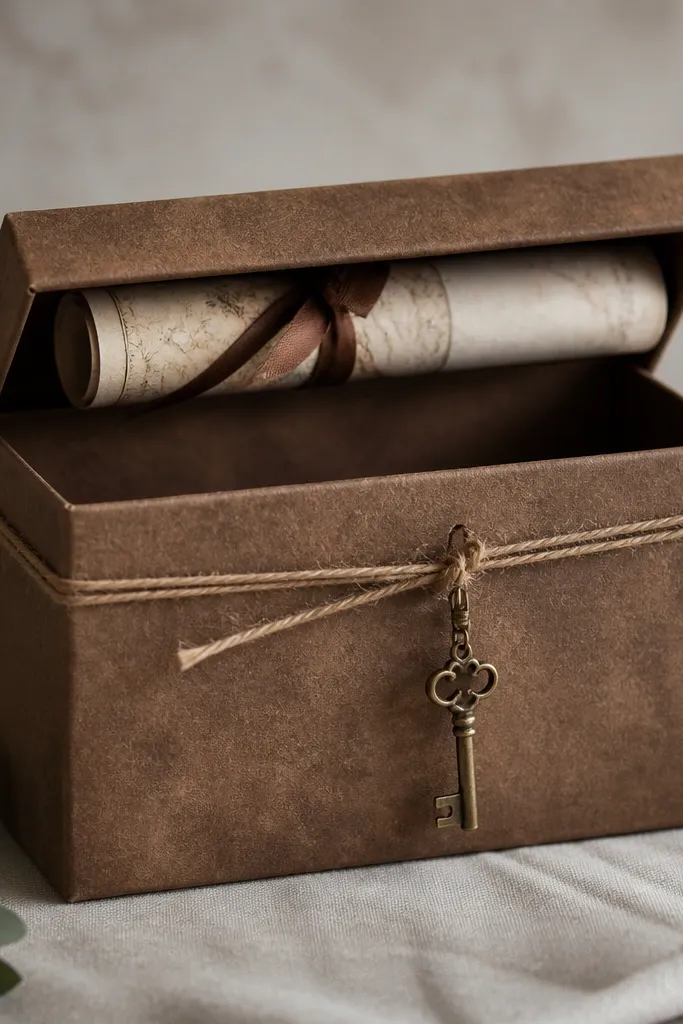
If your boyfriend likes travel, tools, or “let’s go do something,” this box hits that vibe without being cheesy. Walnut-stain brown paper looks warm and grounded, and the rolled map ribbon adds movement. A tiny metal key charm makes it feel like an object, not just decoration. I keep the accents minimal so the map ribbon is the star. This style works for birthdays where you’re also giving an experience card.
Wrap the box in brown kraft paper, then lightly stain it with a diluted walnut-toned ink or wood stain using a foam brush. Let it dry completely so it doesn’t smear. Cut a long strip of vintage map paper and roll it around a pencil to create a tight curl, then glue it under the lid so it peeks out. Clip a small key charm to a piece of twine tied around the front — keep the charm at the center so it reads intentional. Put tissue paper in a tan color family so the interior stays cohesive.
Editor's noteSeal the stained paper with a matte spray from 12 inches away to prevent smudges.
Skip thisDon’t over-stain; uneven blotches make it look like spilled coffee.
7. Pastel-Lined Box with Layered Tissue Curtains
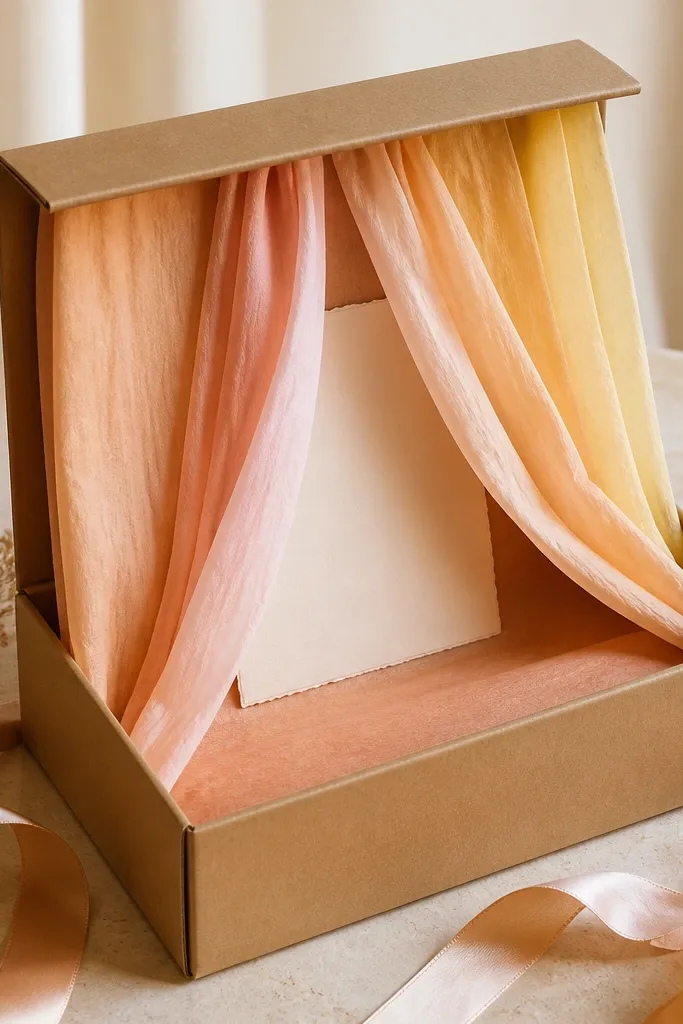
Layered tissue curtains look soft and pretty, but they still read “gift box,” not “party decorations.” The trick is to keep the tissue in one warm color family and use thin layers so it drapes. I use peach, blush, and pale yellow because they look good on all skin tones and don’t clash with dark boyfriend gifts like black socks or a leather wallet. This is perfect when the gift is small and you want the box to create the wow moment.
Cover the box in kraft paper or matte white paper. Cut tissue sheets into 8x12 inch rectangles and fold each into thirds so they hang in layered strips. Glue the top edges inside the box lid area so the tissue falls forward when you open it. Wrap the outside with a satin ribbon band in a muted peach or dusty rose. Add a small card behind the tissue at the center so it’s visible through the layers.
Use tissue that’s slightly thicker than cheap party tissue; it hangs cleaner and doesn’t tear at the edges.
Don’t use too many colors; five+ tissue shades makes it look chaotic.
8. Corkboard Backdrop Box with Pushpin Heart Detail
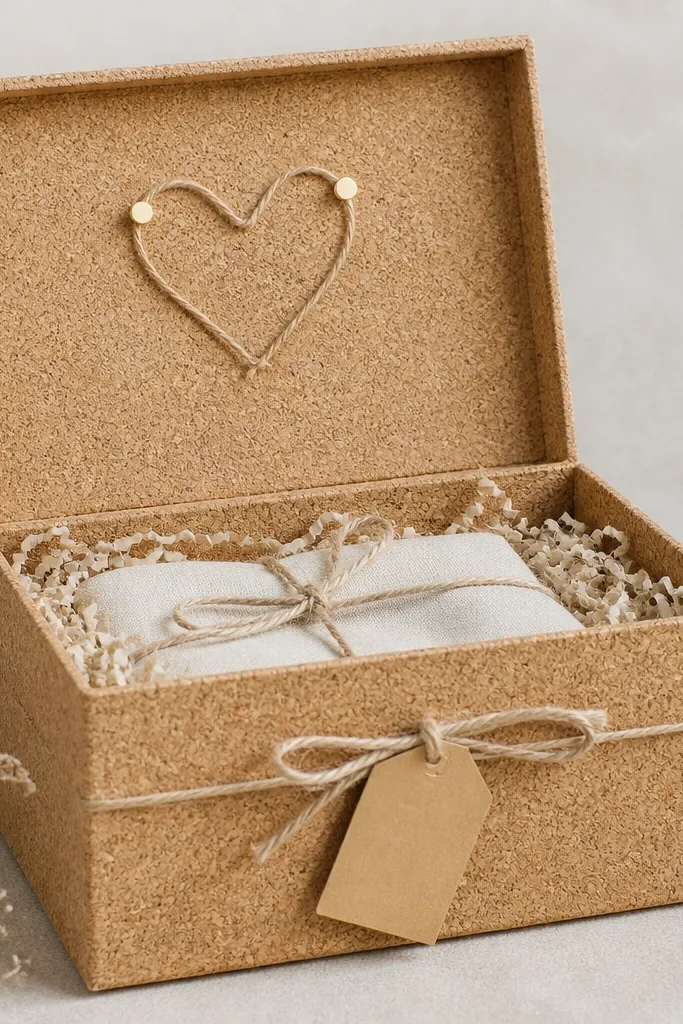
Corkboard textures make a handmade gift feel like a real desk item. The pushpin heart is playful but controlled, and it looks great for boyfriends who like office supplies or DIY projects. Cork also hides small imperfections in your cardboard edges. The twine heart adds a handmade touch without needing fancy tools. I use this style when the gift is something small like a keychain, candy, or a note set.
Buy a cork sheet or use cork craft paper and cut pieces to cover the box front and lid. Glue cork onto the box with contact adhesive or strong craft glue, then press evenly. On the lid, trace a small heart (about 2 inches wide) and wrap twine around the outline with a dab of glue at corners. Place two pushpins at the top points of the heart to “hold” it (use real pushpins or decorative pushpins if you want it safe). Tie a kraft label to the front with 10 inches of twine.
Sand the cork edges lightly with a nail file so they don’t look fuzzy at the seams.
Don’t use hot glue blobs on cork; they soak in and look raised and messy.
9. Matte Black Box with Brushed Silver Foil Stripe
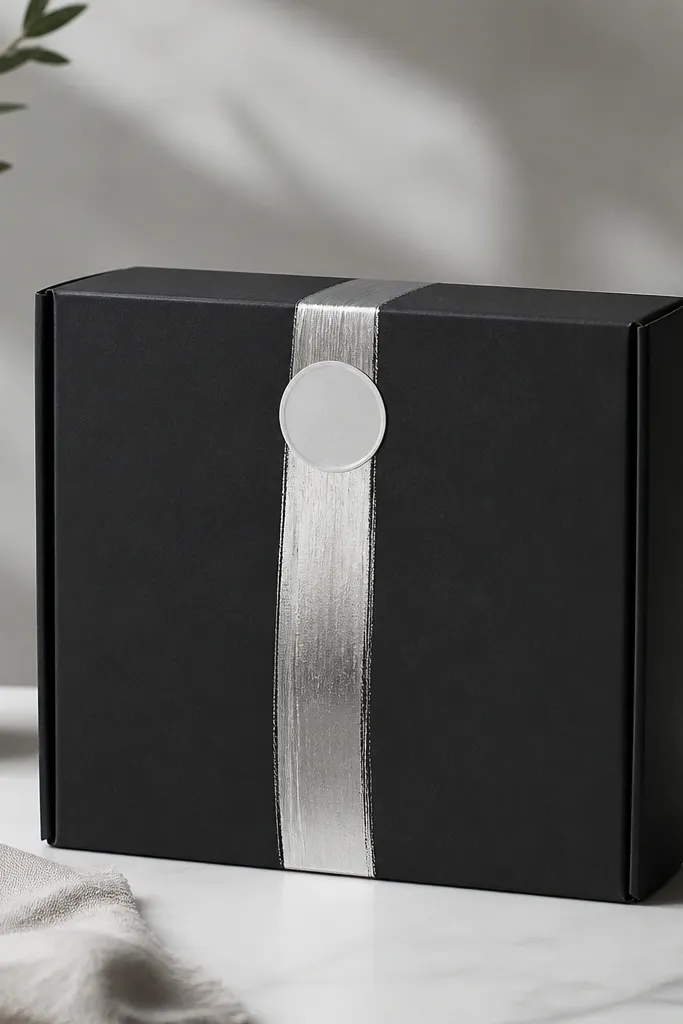
This is the box I make when the gift is sleek — like a watch band, cologne sample, or minimalist wallet. Matte black makes everything feel modern, and a silver foil stripe adds just enough shine. The brushed texture looks handmade even if you’re using foil tape. I keep the rest plain so the stripe reads clean and classy. This style fits birthdays, graduations, and “just because” gifts.
Cover the box in matte black cardstock or matte black paint. Cut a strip of brushed silver foil tape or foil sheet into a 1.25-inch wide vertical stripe and center it on the front. Add a small circle seal near the top (1 inch diameter) using a custom sticker or a pre-made wax-seal style sticker. Wrap the lid edge with a thin silver twine loop for closure. Inside, place black tissue and a small folded insert card so the gift sits centered.
Editor's noteUse a craft knife and metal ruler on the foil stripe so it stays straight.
Skip thisDon’t add extra glitter or multiple foil shapes; one stripe is the whole look.
10. Sunset Paper Weave Box with Orange and Peach Bands
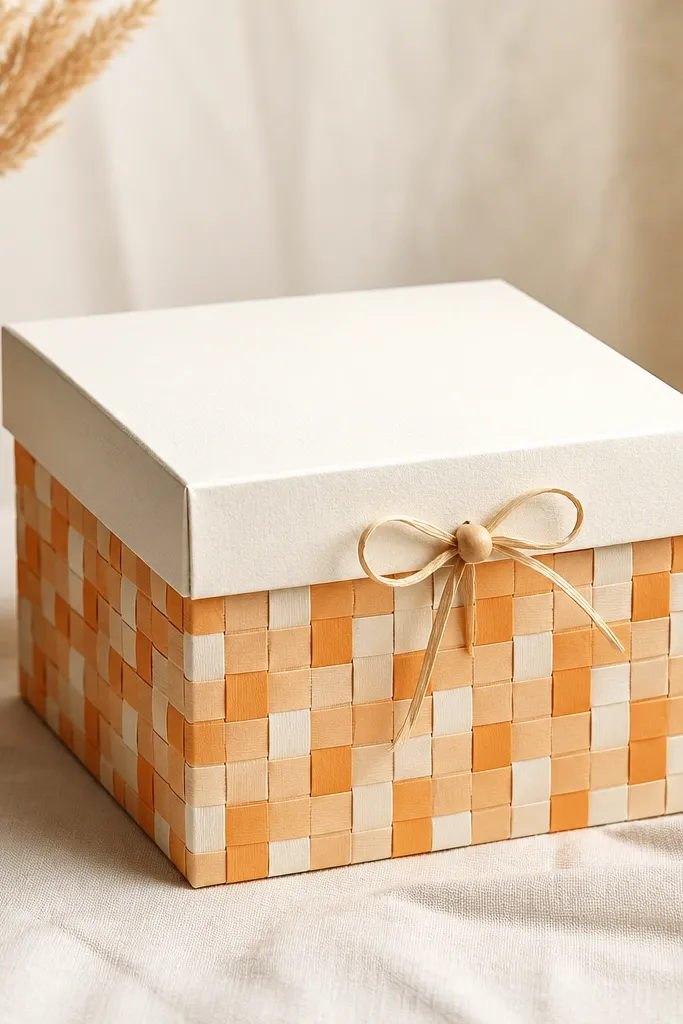
Paper weaving makes the box look like a craft project with real labor behind it, and buyers notice that. Orange and peach bands give warm sunset energy without looking childish. I like using cream as the base strip because it makes the weave readable and keeps it from turning into a busy pattern. A wooden bead on the bow gives a tactile finish. This is best for boyfriends who like handmade goods, art, or anything with texture.
Cut thin strips of paper about 0.5 inches wide from orange, peach, and cream cardstock. Build a side panel by gluing vertical strips on a base cardboard rectangle, then weave horizontal strips through them. Make the woven panel tall enough for two box sides and wrap it around the box with a slight overlap at the back. Cover the top with plain cream cardstock and add a ribbon closure. Tie a bow using orange ribbon and attach a single wooden bead to the center with a small glue dot.
Editor's noteKeep strip thickness consistent; thin variations make the weave look crooked.
Skip thisDon’t use flimsy printer paper; it warps when you glue it.
11. Leather-Look Sleeve Box with Snapped Stud Closure
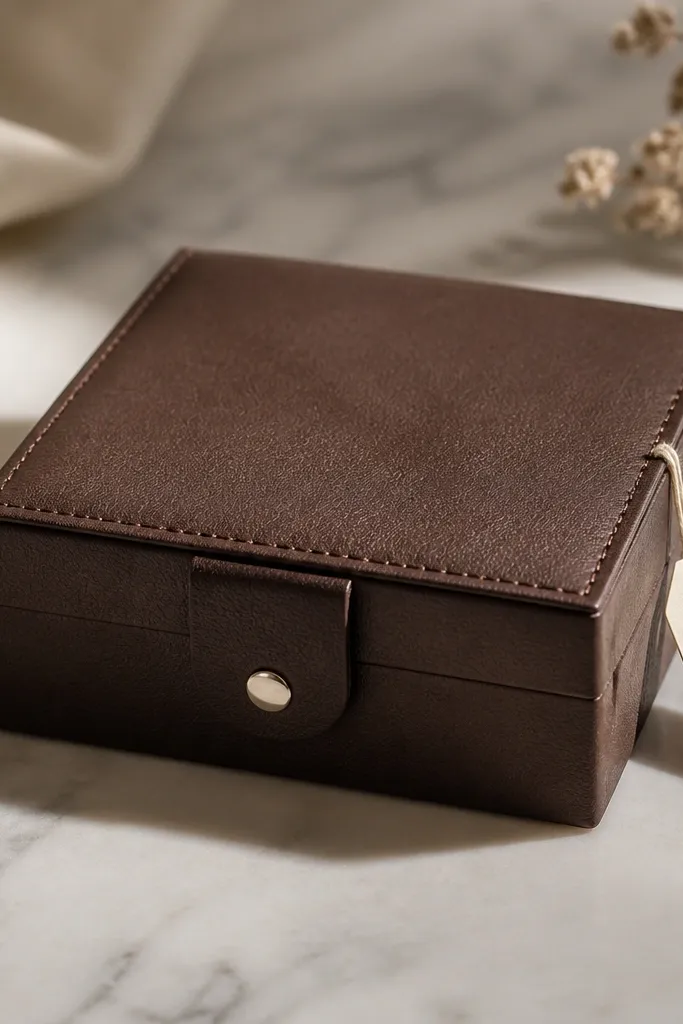
A leather-look sleeve makes the gift feel like it belongs in a closet, not a craft bin. The deep brown color reads mature, and the snapped stud closure is satisfying to open. Stitch lines around the edge make it feel “made,” especially if you use a fabric pen to draw them before adding a tiny strip of faux stitching thread. This one is perfect for wallets, grooming kits, and anything that needs a protective sleeve. It also looks good for boyfriends who like simple, dark aesthetics.
Cover the box with brown faux leather craft sheet cut to wrap around the sides and lid. Leave the lid cover slightly oversized so you can tuck it under the sleeve. Add drawn stitch lines: use a fabric pen to mark a line 0.25 inches from the edge, then glue thin faux leather string or embroidery thread along the line. Install a snap stud closure: mark where the stud hits, punch a small hole, and attach the snap pieces according to the kit. Tie a cream tag to the corner with a 6-inch twine loop.
Editor's noteTest the snap placement by closing the box twice before you glue anything permanently.
Skip thisDon’t use a shiny faux leather; it reflects light and makes the stitching look sloppy.
12. Wood Slice Accent Box with Twine Bow and Matte Vellum Label
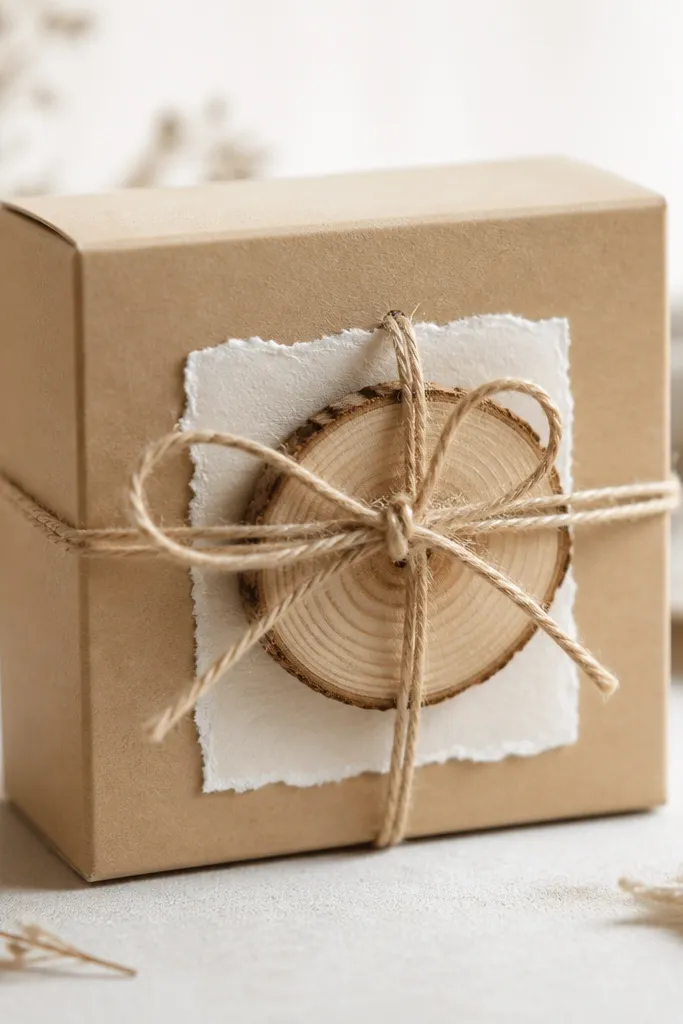
Wood slice accents make a handmade box look like a gift from someone who actually has tools. The twine bow adds that rustic softness, while matte vellum keeps it from looking like a lumber yard project. I use a small wood slice, about 1.5 inches wide, so it feels like a detail not a chunk. This style looks best with neutral gifts — candles, handmade soap, small keepsakes. If your boyfriend likes outdoorsy stuff, it also fits his taste without needing camouflage prints.
Cover the box in light kraft paper, then seal it with a matte clear spray once dry. Glue a 1.5-2 inch wood slice to the front using strong craft glue. Wrap a piece of twine around the box front and tie a bow on top of the slice, then glue the bow tails so they don’t flop. Cut a vellum label (2x3 inches), write a short message with black ink, and slide it under the wood slice edge. Add tissue paper in warm cream or tan so the wood tones stay consistent.
Editor's noteSand the wood slice lightly before gluing so the glue grabs and the surface stays smooth.
Skip thisDon’t use glossy varnish on the wood slice; it creates glare and makes photos look washed out.
13. Indigo Wash Box with White Paper Cut Stars
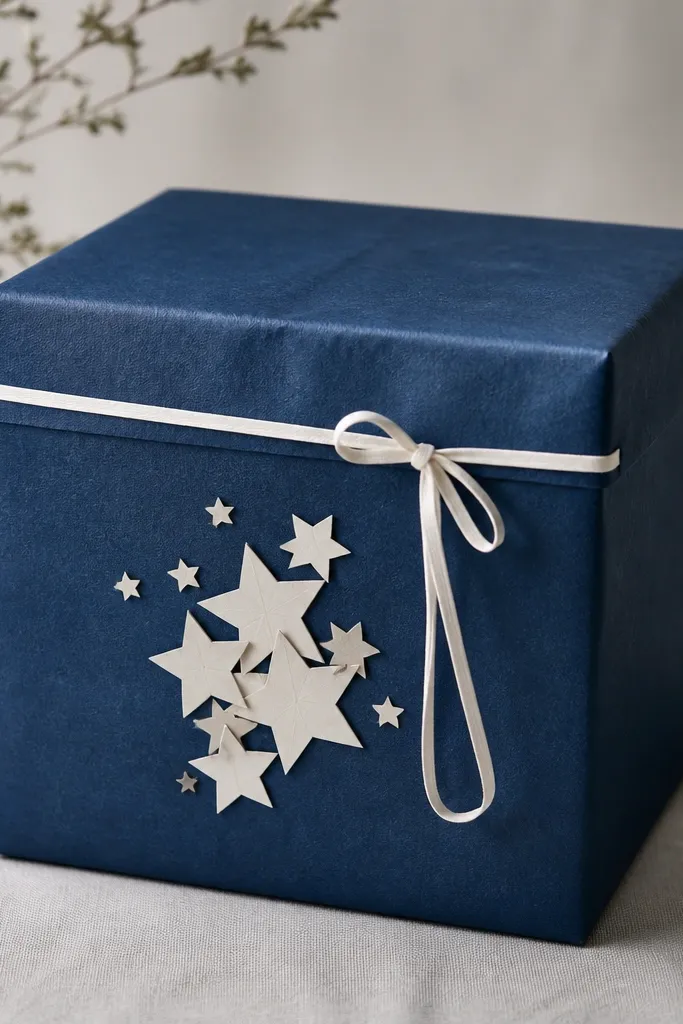
Indigo wash paper looks like denim in paper form — deep blue, slightly mottled, and full of texture. White paper cut stars give a sky effect without using glitter. This is one of my favorite “boyfriend but still cute” styles because it looks artsy and calm. It works especially well for gifts like art supplies, books, or cozy socks. If your boyfriend likes dark colors and clean lines, this won’t feel too sweet.
Wrap the box in indigo-dyed paper or a dyed cardstock. To mimic wash, dab watered indigo ink with a sponge in a few passes and let it dry flat. Cut star shapes from white cardstock and layer them on the front starting with the biggest star at the back. Glue the layers with slight offsets so you see depth. Tie a thin white ribbon around the lid and finish with a tiny knot at the center front. Place white tissue inside so the stars match the interior color palette.
Editor's noteUse a craft knife for star cuts and press firmly so edges stay crisp.
Skip thisDon’t glue stars directly onto shiny tape; the tape glare makes the cutouts look uneven.
14. Monochrome Grid Box with Black-and-White Tissue Fill
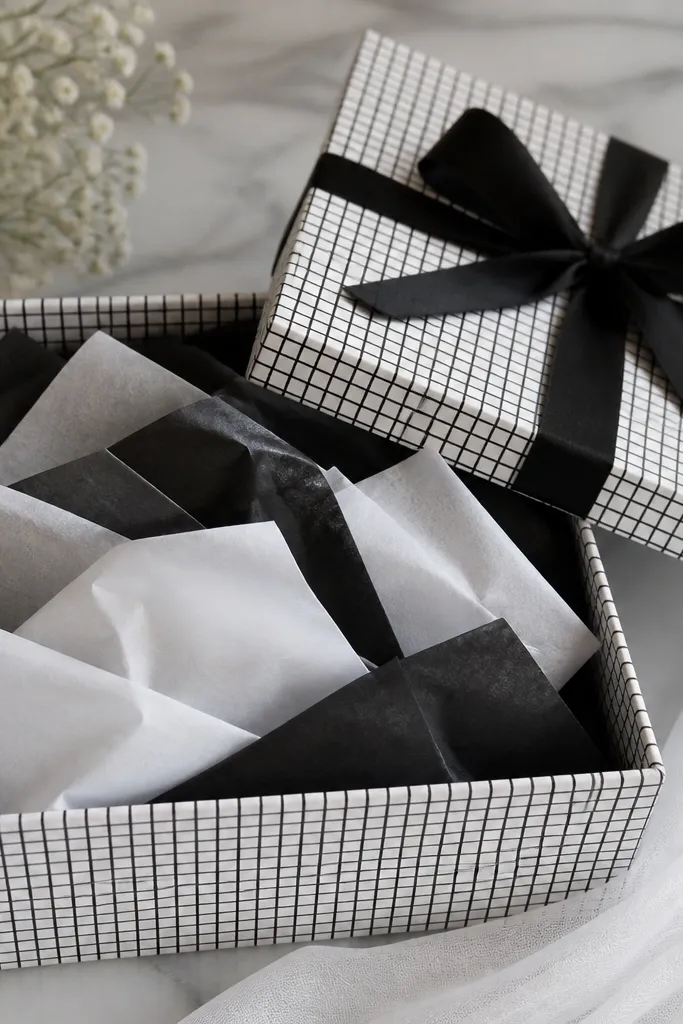
A monochrome grid makes everything look organized, which is why it works for gifts that already have a shape — like a bottle, mug, or folded hoodie. The black-and-white tissue fill creates a “designed” opening even if the gift itself is plain. I keep the lid ribbon plain so the grid pattern stays the focus. This is great for birthdays when you want modern style without any theme characters. It also photographs cleanly because there’s no color chaos.
Cover the box sides with a black-and-white grid paper or create a grid by drawing with a fine marker and ruler. Aim for 0.25 inch squares so it looks crisp, not chunky. On the lid, use a plain black cardstock panel and tie a black grosgrain ribbon bow on top. Fold tissue into 4x4 inch squares, then alternate black and white squares in layers inside the box. Add a small insert card on the top layer so it looks like a planned presentation, not random stuffing.
Fold tissue squares with the same direction each time so the layered texture stays consistent.
Don’t use too-big tissue sheets; they collapse and make the interior look sloppy.
15. Rose Gold Foil Frame Box with White Felt Center Panel
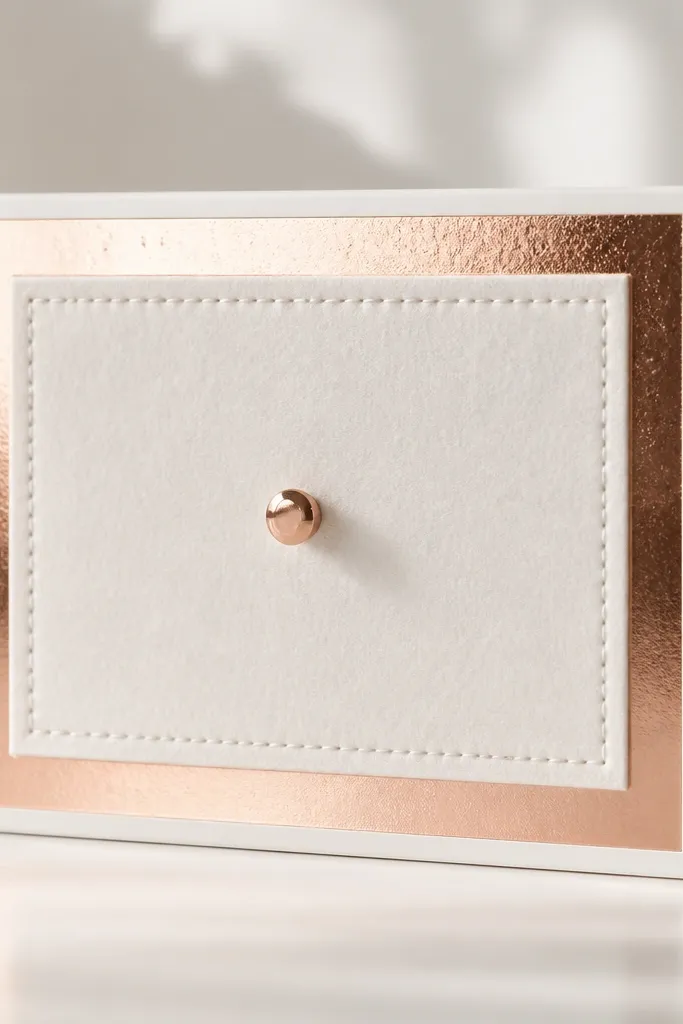
This box looks like a boutique product because the rose gold frame gives clean structure. The white felt center adds softness you can feel, and a stitched border makes the panel look like it belongs on a jacket. The rose gold button in the center gives a small focal point that feels intentional. I like this for boyfriends who wear watches, jewelry, or have a “clean style” wardrobe. It also works for sweet gifts like a handwritten coupon set or a small sentimental item.
Cover the box in matte white cardstock. Cut a felt panel 4x6 inches and stitch a simple border around it using thick white thread (running stitch is fine). Add rose gold foil tape to form a rectangle frame around the felt area, leaving a 0.5 inch gap. Glue the felt panel in the middle and attach a small rose gold button at the center. Inside, place white tissue and a fitted cardboard tray so the gift sits flat and doesn’t sink into tissue.
Editor's noteUse thick thread so the stitched border reads from a distance in photos.
Skip thisDon’t use thin felt; it flops and makes the frame look cheap.
16. Tactile Loop Ribbon Box with Macrame-Style Front Knot
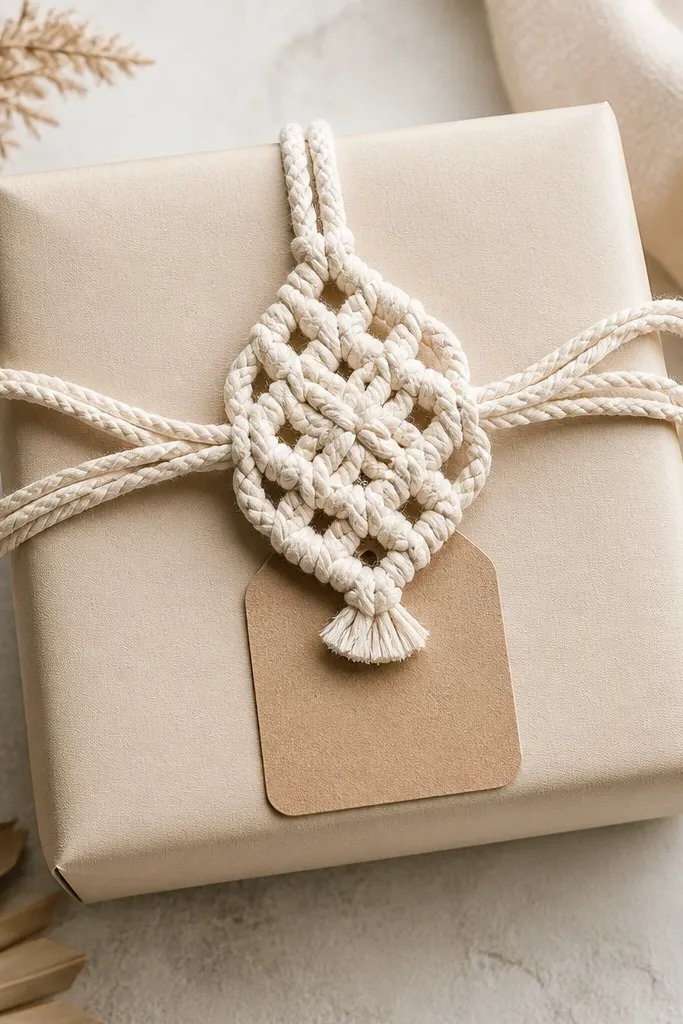
Loop ribbon and cord knots add movement even when the box is closed. The macrame-style knot looks complex, but you can make it with simple cord and patience. I like beige paper because it balances the texture of the knot and keeps it from looking too dark. This style is great for handmade gifts like candles, homemade snacks, or a small “date night” kit. It also flatters most skin tones when your boyfriend holds the box in photos because it’s warm and neutral.
Wrap the box in beige kraft paper and seal with matte spray. Cut 3 strands of jute or cotton cord, each about 14 inches long, and tie them into a simple braided loop knot on the front. Anchor the knot by gluing the cord ends onto the back of the front panel. Create a small kraft label (2x3 inches) and tie it with a 6-inch piece of twine under the knot. Add a ribbon closure on the lid using a thin beige ribbon so it stays neat, not bulky.
Use a hot glue dot to anchor cord ends — it holds fast and prevents fraying.
Don’t use fuzzy craft rope; the fibers shed and make the knot look messy over time.
17. Vintage Book Page Box with Leather-Color Bookmark Spine
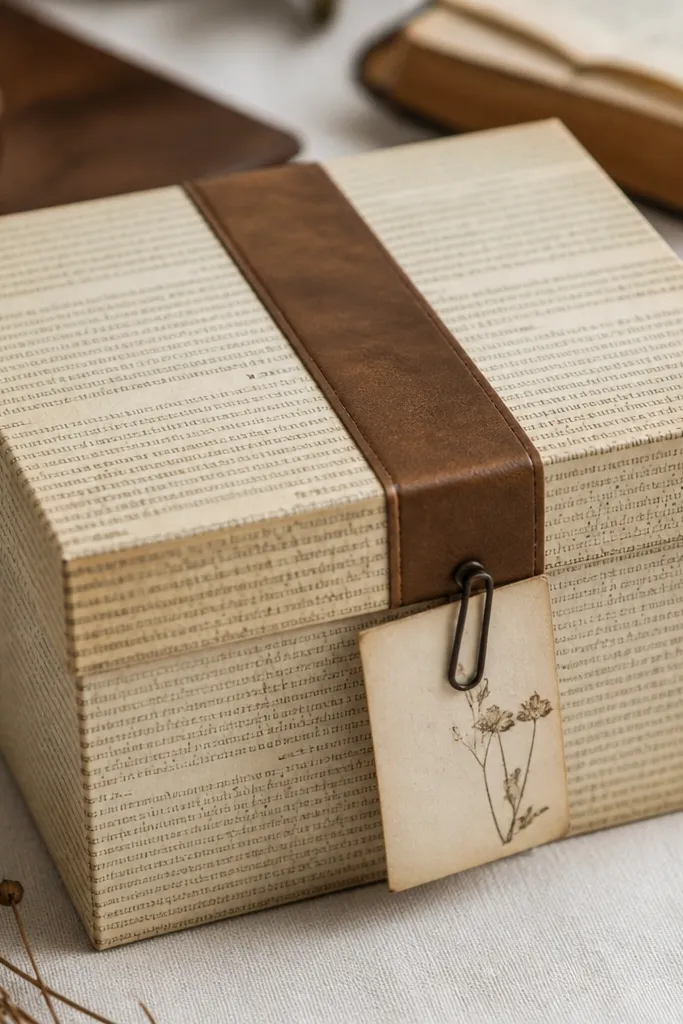
Book page wrapping makes the box feel like a story, not just packaging. The leather-color bookmark spine gives a focused vertical element that makes the box feel designed, not chaotic. I use actual printed book pages or tea-dyed pages because the texture matters — plain printed paper doesn’t have the same grain. A metal paperclip charm is a neat trick for a boyfriend vibe because it looks like something from an office drawer. This is perfect for book lovers and anyone who likes vintage aesthetics.
Cover the box in vintage book pages using a light layer of glue diluted with water so the paper doesn’t warp too much. Let it dry under a heavy book for 30 minutes. Cut a bookmark spine strip from faux leather sheet about 1.25 inches wide and 9 inches long, then glue it down the center of the lid. Add a small metal paperclip to the front by attaching it to a cardstock tab, then slide the tab under a thin ribbon loop. Inside, line with cream tissue so the text wrapping stays readable and doesn’t fight the gift.
Editor's noteUse a foam brush to apply glue to book pages — it prevents bubbles and wrinkles.
Skip thisDon’t over-glue the paper; soaked pages wrinkle and look uneven.
18. Chocolate Brown Box with White "Marble" Contact Paper Top
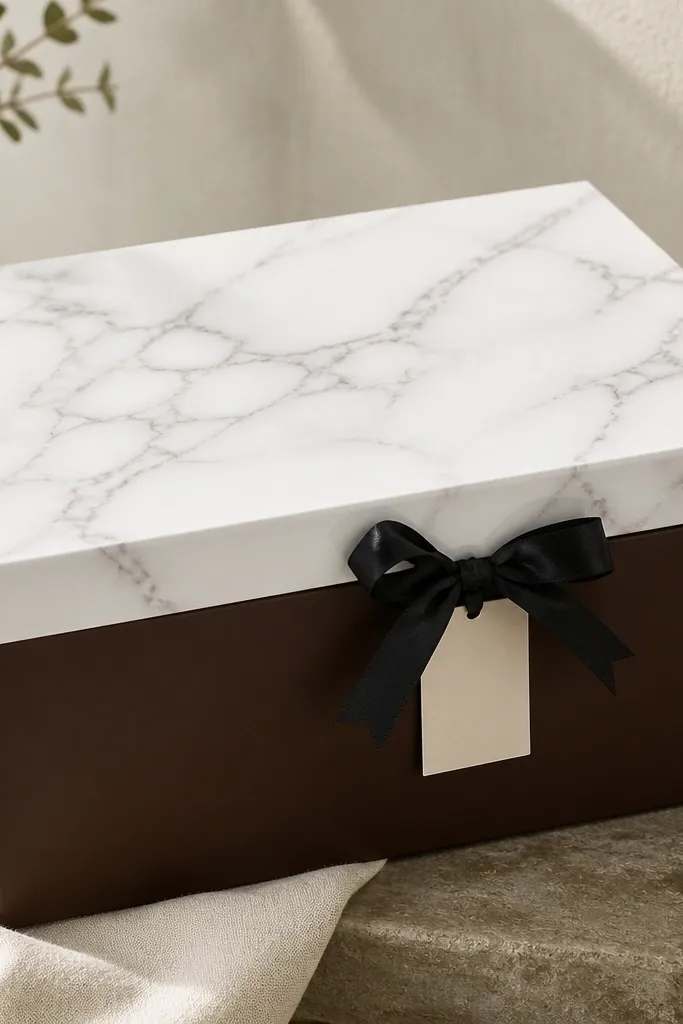
Marble contact paper turns a plain box into something that looks like it belongs in a home decor store. The chocolate brown base keeps it masculine, and the white top gives contrast so the gift reads clean. I like this for gifts that are sleek and minimal — cologne, watch, or a leather key holder. The marble pattern makes the box look “expensive” without adding extra pieces. It’s also easy to clean because contact paper wipes down with a dry cloth.
Wrap the box sides and front in chocolate brown cardstock or matte paper. Cut the marble contact paper to size for the lid panel, leaving a 0.25 inch overhang on each side. Press it down smoothly and trim the edges with a craft knife. Attach a black ribbon bow to the center front of the lid using a small glue dot. Add a tag: white cardstock label tied with thin black twine. Line the inside with dark tissue so the gift pops.
Trim contact paper edges after fully pressing so they don’t lift at the corners.
Don’t place marble on the sides; it gets visually loud fast.
19. Soft Sage Box with Layered Origami Stars on the Lid
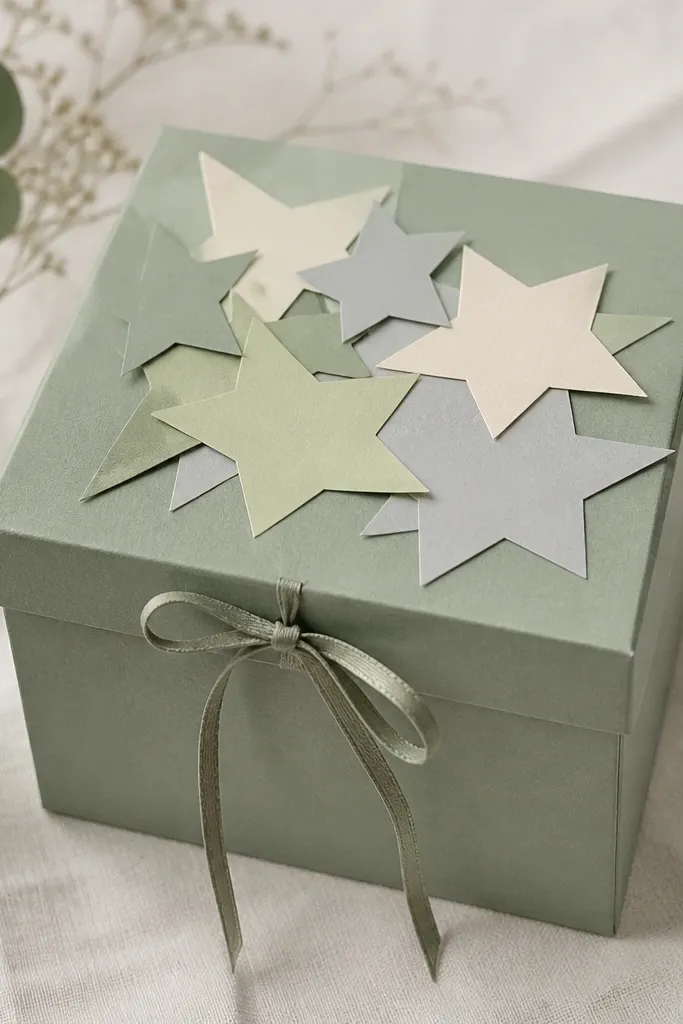
Origami stars add a handmade feel that still looks tidy and modern. Soft sage is calm and boyfriend-friendly, and the layered stars create a top texture that looks good up close. I use three star shades so you get depth without a rainbow effect. This style works when your gift is small but you want it to look like a “moment.” It also suits spring birthdays and lighter outfits because the colors stay gentle.
Cover the box with soft sage cardstock and let it dry flat. Cut or fold origami stars in three sizes: 1.75 inches, 1.25 inches, and 1 inch. Start placing the largest stars first in a loose cluster on the lid, then layer smaller stars on top. Glue only the center points of each star so the edges lift slightly. Finish with a thin ribbon tie across the lid and place cream tissue inside with a small insert card.
Fold stars using crease bone pressure on scrap paper first — crisp folds make the lid look professional.
Don’t glue the full star surface; it flattens texture and looks like stickers.
20. Clear Pocket Lid with Ticket Stubs and Museum Map Print
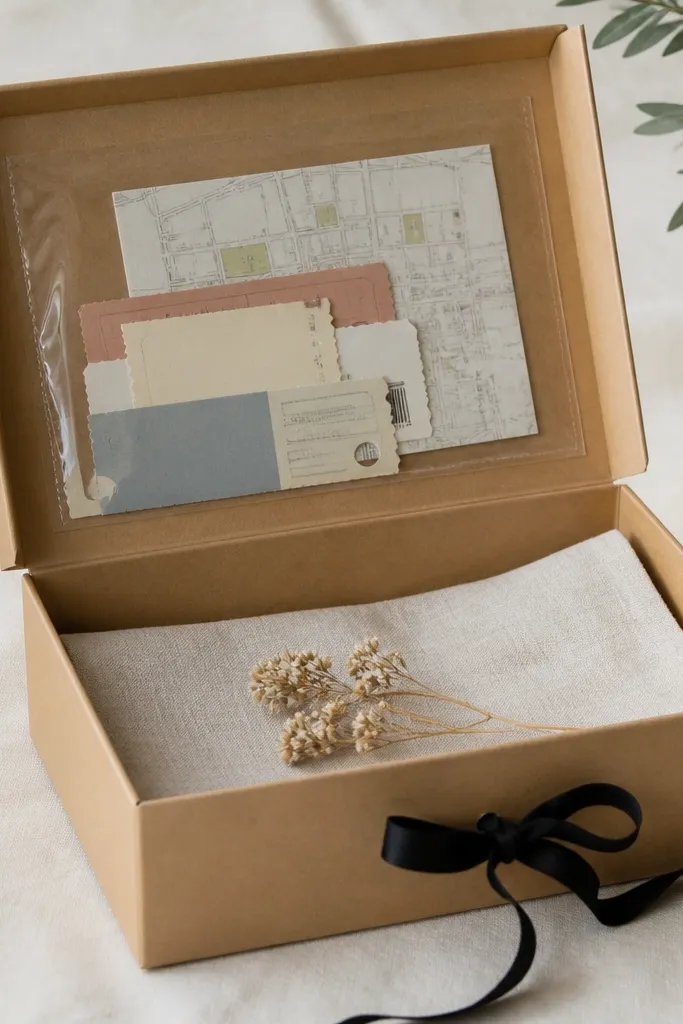
This box feels like an experience you can open. A clear pocket holds ticket stubs or mini notes and keeps everything neat, so you don’t end up with loose scraps inside. Museum map prints add a graphic, boyfriend-friendly vibe because they look like travel documents. The kraft base keeps it grounded and warm. I use this for date-night gifts, especially when you’re giving a plan card plus a small item like snacks or a mini cologne sample.
Cover the box in kraft paper and seal lightly with matte spray. On the inside of the lid, glue a clear plastic pocket (like a document sleeve cut to size) so it sits centered. Print or cut a small museum map graphic and slide it behind the pocket. Add ticket stubs or mini event cards inside the pocket, stacking them neatly. On the outside, tie a black ribbon around the lid and front edges so the box closes securely.
Editor's noteCut ticket stubs to the same width before stacking so the pocket doesn’t look lumpy.
Skip thisDon’t use a pocket that’s too wrinkly; cheap plastic wrinkles show through and cheapen the look.
21. Maroon Felt Panel Box with Brass Button Closure
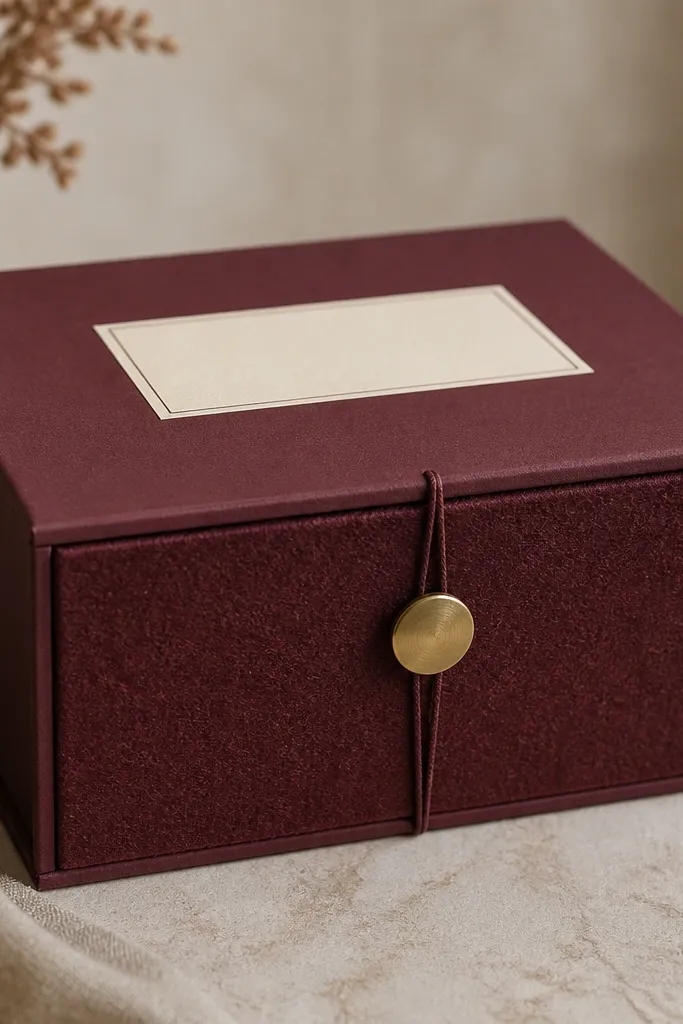
Felt panels look cozy and expensive when you keep the palette tight. Maroon is flattering and reads sophisticated, and brass hardware adds a warm metallic accent. The button closure is practical too — it holds the lid shut without bulky ribbon. This style is great for winter birthdays and for gifts like gloves, warm socks, or a handmade skincare set. It also holds up well because felt hides minor edge imperfections.
Cover the box sides in maroon cardstock. Cut a felt panel for the front about 4.5x6 inches and glue it flat. Add a brass button centered on the felt and punch a small hole for a string loop. Wrap a thin string or twine around the lid edge and tie it so it loops to the button when closed. Add a cream cardstock label (2x3 inches) on the lid front under the button area. Inside, use cream tissue so the maroon doesn’t swallow the gift color.
Use a thicker felt for the front panel so it doesn’t sag when the box sits on a table.
Don’t pick a felt color that’s too close to the box color; you want a visible texture change.
22. Navy Box with White Embossed Star Corner and Rope Handle
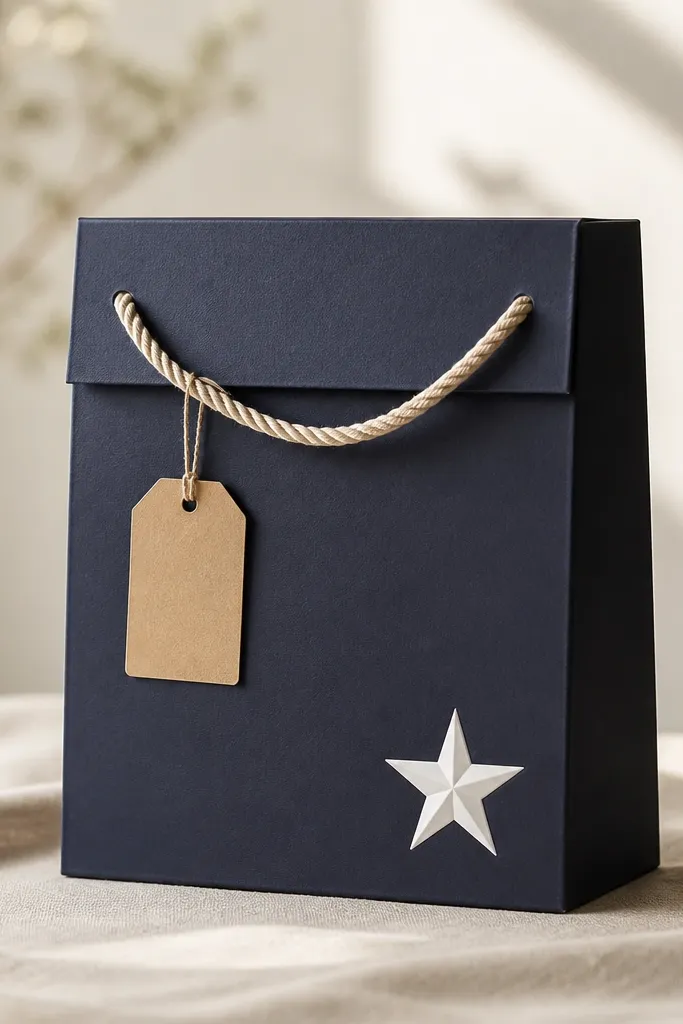
A navy base plus white embossing looks crisp and sturdy, like something you’d carry to a picnic or a sports game. The embossed star in the corner gives a subtle detail, not a loud pattern. A rope handle makes the box feel functional, and that makes the gift feel more “real” when your boyfriend picks it up. This style fits sports fans, outdoorsy people, and anyone who likes simple masculine design. It also makes photos look sharp because navy and white are high contrast.
Cover the box in navy cardstock and press flat. Create the embossed star by using embossing stencil and embossing paste on a small corner area, or use a star embossing seal tool on a thicker cardstock layer. Glue the embossed star piece to the corner so it’s slightly raised. Add a rope handle: glue two small loops of rope at the lid sides and secure them with extra glue under the knots. Tie a kraft tag to the front loop with twine and keep the tag centered for balance. Fill inside with white tissue and a fitted insert so the gift sits stable.
Use cotton rope, not synthetic — it looks better and doesn’t reflect light harshly.
Don’t attach the handle only with tape; it will peel and make the box feel flimsy.
23. Candy-Stripe Tissue Insert Box with Single Statement Ribbon
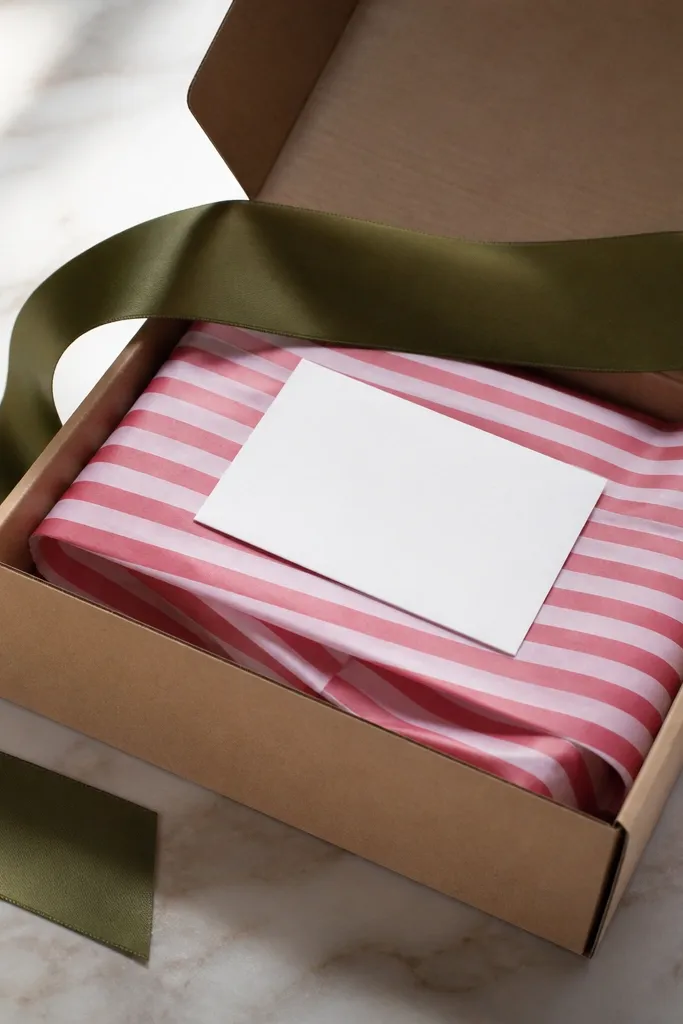
Candy-stripe tissue gives a playful pop, and keeping it as the inside layer keeps the outside classy. The single statement ribbon on top keeps the look from turning into a party favor. I use red and cream stripe tissue because it reads classic, not childish. This works when the gift is colorful or when you want the box to bring the fun while the gift stays simple. It’s also easy to match for birthdays because red and cream pair with almost any card color.
Cover the box with kraft paper and seal with matte spray. Tie one statement ribbon across the top — use a 1.5-2 inch wide ribbon and make a bow that sits slightly off-center. Cut candy-stripe tissue into 8x12 inch rectangles and fold into thick accordion layers. Glue the top edge of the folded tissue to the inside lid so the layers fan outward. Place a small white card on top of the tissue and then set the gift so it rests against the tissue sides rather than sinking into the center.
Make the tissue layers thicker than you think — thin layers collapse and look cheap.
Don’t add extra decorations on top of the ribbon; one focal point is the rule.
24. Monogram Corner Box with Painted Initial and Clear Tape Frame
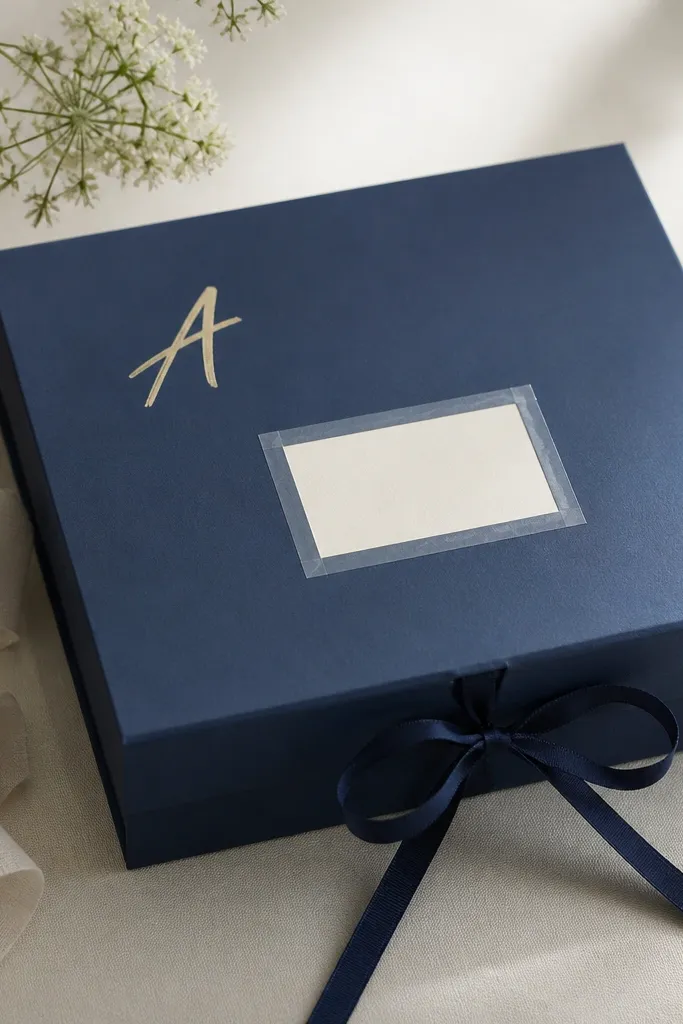
A monogram corner is a subtle flex. It looks custom even when you’re using simple supplies, and it’s boyfriend-friendly because it feels like personalization rather than cartoon decor. The clear tape frame adds a modern “window” feel, and the painted initial gives a hand-finished look. I use one bold letter color — like deep teal, black, or rust — so it stands out against the matte base. This style works for any gift size, especially when you don’t want to build a complicated interior.
Cover the box in matte paper in a neutral color like cream, grey, or light tan. Paint one initial in the bottom corner using acrylic paint and a small craft brush; let it dry fully. Create a label area by outlining a rectangle with clear packing tape or clear tape strips, then glue a small cardstock label inside. Add a ribbon closure around the lid edge so the box closes neatly. Inside, place tissue in the same color family as the initial and keep the gift centered with a folded cardboard insert.
Editor's noteUse painter’s tape to mask the rectangle so your clear tape frame edges look straight.
Skip thisDon’t paint the initial too close to the edge; it chips and looks worn fast.
25. Scented Pine Box with Rolled Ribbon and Tiny Dried Sprigs
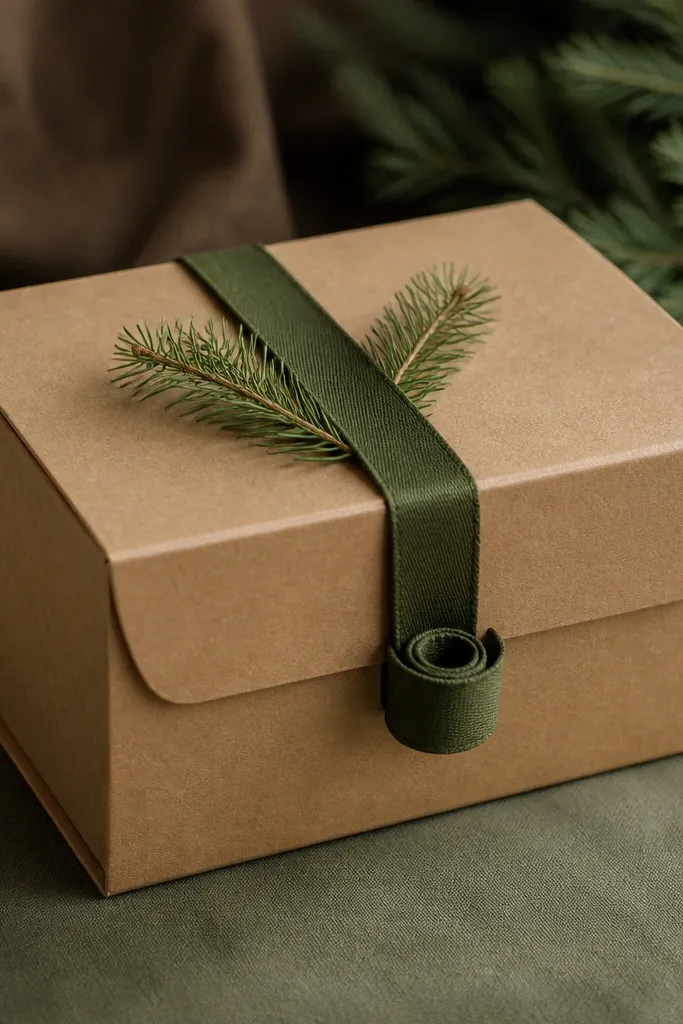
Scented boxes feel personal because your boyfriend smells it before he even opens it fully. Pine sprigs add a natural texture and a green accent that looks great against kraft paper. Rolled ribbon closure keeps the front neat and gives a little “package” vibe. I use this for birthdays close to winter or for outdoorsy boyfriends who love cold-air scents. The best part is it doesn’t require fancy tools — just patience and dry sprigs.
Cover the box in kraft paper and seal lightly so the scent doesn’t stain hands. Tuck dried pine sprigs under a thin ribbon strip on the lid and secure with a tiny dot of hot glue at the ribbon ends only. Roll a ribbon strip into a tight coil and glue it slightly off-center on the front like a rosette. Add a small kraft label under the rosette with a short message. Inside, line with tan tissue and place the gift on top of a folded cardboard platform so sprigs don’t crush.
Sprigs should be fully dry and not shedding — tap them gently before gluing.
Don’t overuse sprigs; too many makes the box look messy and the scent can get overpowering.



