1. Calico Patchwork Cat Mug with 3-Color Fade
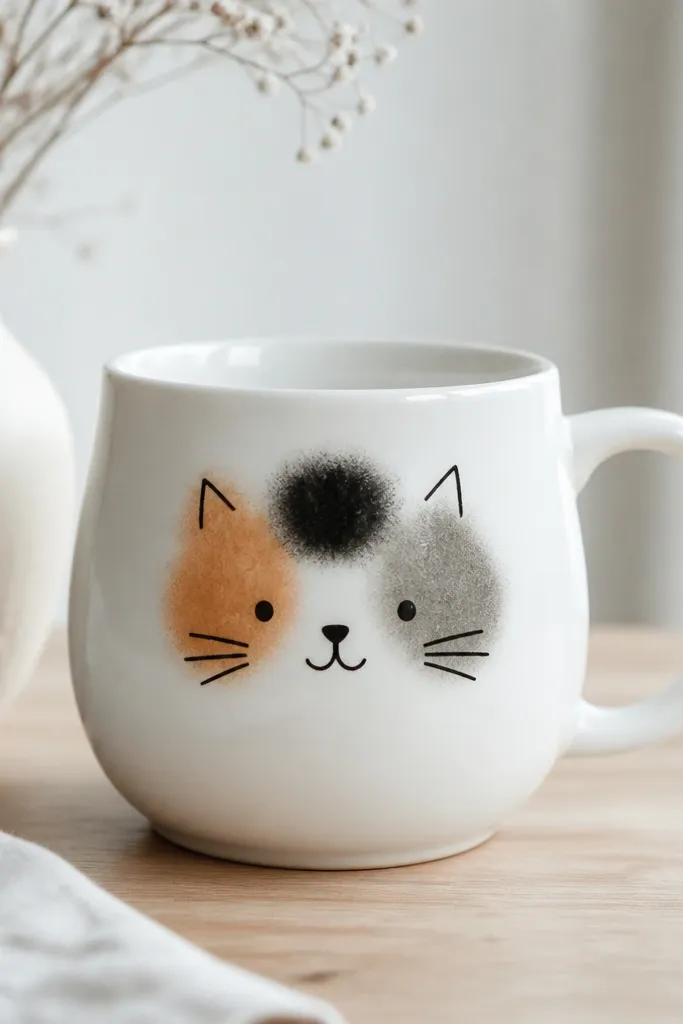
This one looks handmade without looking messy because the cat face is built from patch shapes, not freehand fur. I use orange for the main patches, warm gray to break up the white space, and black just for the ears, nose, and whisker lines. The fade edges make it feel like calico fur instead of sticker shapes. When the mug is empty, the face still reads clearly from across a room.
Start with a lightly sketched cat head that fits about 70% of the mug's front width. Paint 5-7 irregular patch blobs, keeping them away from the rim by at least 1 cm. After the base dries, add ears and a small triangular nose in black, then finish whiskers with a fine paint pen. This mug sits best in a kitchen with warm neutrals or wood tones.
Pro tipUse a paper towel to dab the patch edges while paint is slightly wet - it creates a fur-soft blur without muddying the whole design.
AvoidDon't flood the patches - thick paint ridges catch light and make the face look like it was slapped on.
2. Thrifted Fabric Bowtie Cat Mug (No-Fuss Collar)
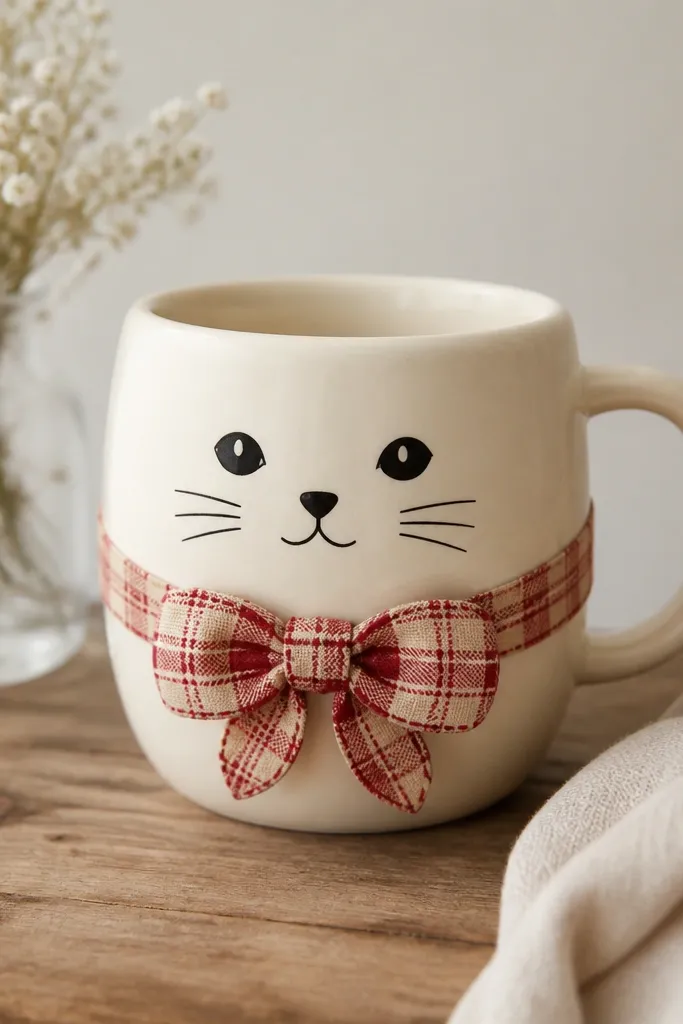
Fabric bowties make a cat mug look styled fast. The plaid gives you calico energy without painting tiny spots, and the bow sits low enough that it never fights with the rim. I pair a flat cat face (black paint or marker) with a textured fabric bow so the mug has one crisp graphic element and one tactile detail. It reads cute year round because the bow isn't seasonal.
Cut a bowtie from a scrap of cotton or cotton-blend fabric, about 2.5 cm wide for the front and 1.5 cm tall. Glue it to the mug under the cat's chin using a craft glue that dries clear, then seal with a thin, dish-safe clear coat if the mug will be washed. Paint or draw the cat face first, let it dry completely, then position the bow so it's centered on the mug front.
Pro tipTo keep the bow from lifting, press it flat under a book for 30 minutes after gluing.
AvoidSkip stretchy knit scraps - they sag and make the bow look crooked.
3. Polymer Clay Kitty Ears on a Matte Glaze Mug
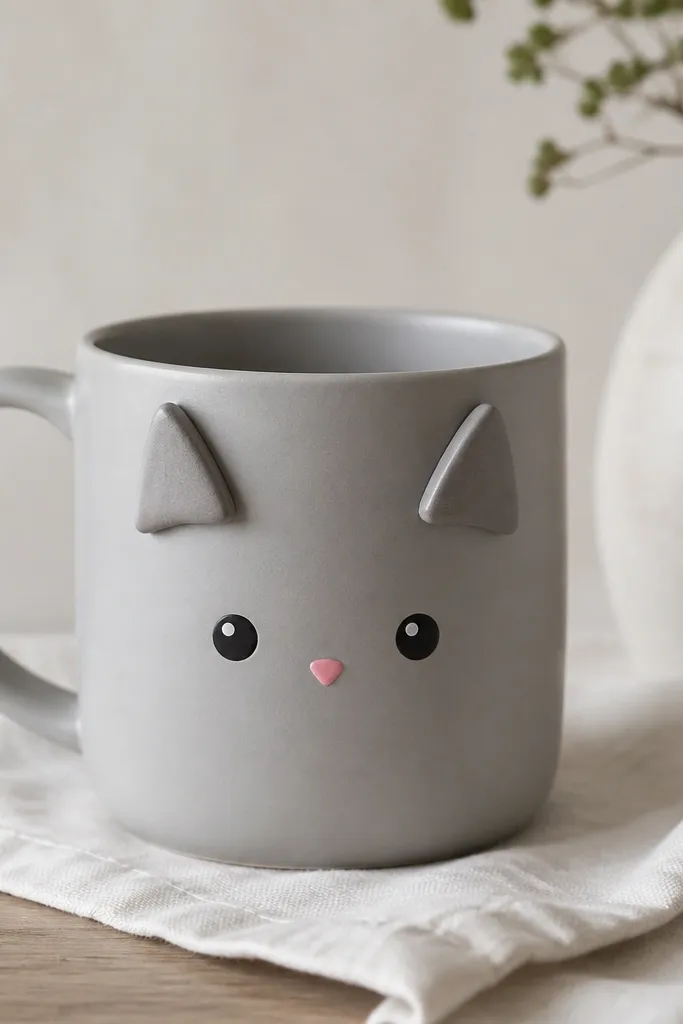
Raised ears change the whole vibe because you get shadow and depth even in flat lighting. Matte mugs are perfect for this because the clay texture shows up without glare. I keep the face minimal - two dot eyes, a tiny nose, and short whisker strokes - so the ears are the star. This is one of my favorite year round handmade mug ideas because it looks adorable all year, not just during holidays.
Shape polymer clay ears about 1.2 cm tall and 1 cm wide each, with a slight curve at the base. Bake according to your clay instructions, then scuff the clay base and the mug spot with fine sandpaper. Glue ears in place, then paint the face after the glue sets. If you want a cleaner finish, cover the clay base edge with a thin layer of matching matte paint.
Pro tipUse a soft pastel chalk to tint the ears - a light gray-brown makes them look like fur instead of plastic.
AvoidDon't glue ears directly on glossy paint - the clay will pop off after washing.
4. Black Cat Silhouette Mug with Gold Moon Cutout
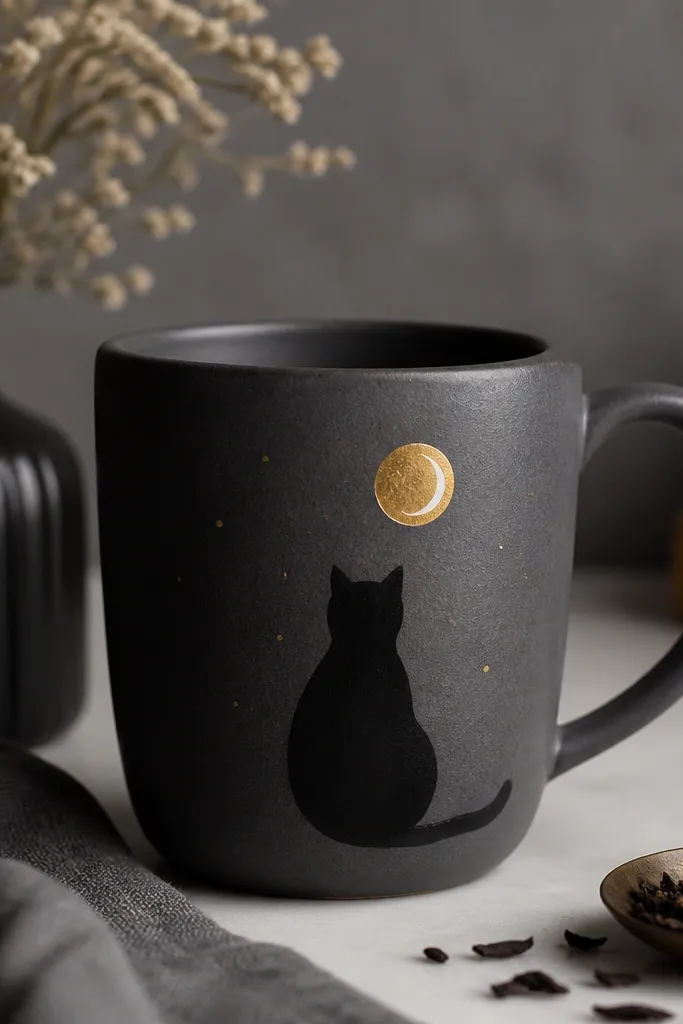
This is the cleanest "witchy but not seasonal" look I've made. The silhouette is bold and readable, and the gold moon adds warmth without turning it into a Halloween-only mug. I like using a gold paper moon because it catches light when you tilt the mug - it looks like it's glowing even when you're just stirring coffee.
Paint the cat silhouette first in matte black, leaving a small gap for the moon. Cut a gold circle, then carve a crescent out of it with craft scissors to make a moon shape. Glue the moon above the cat, then seal over the entire design with a clear coat. Keep the gold specks small - about pinhead size - so they don't look like glitter clumps.
Pro tipIf your clear coat yellows, do a test on a scrap mug first so your gold stays gold.
AvoidDon't place the moon too close to the handle - it distorts when you grip the mug.
5. Gingham Calico Cat Mug with Hand-Drawn Dot Whiskers
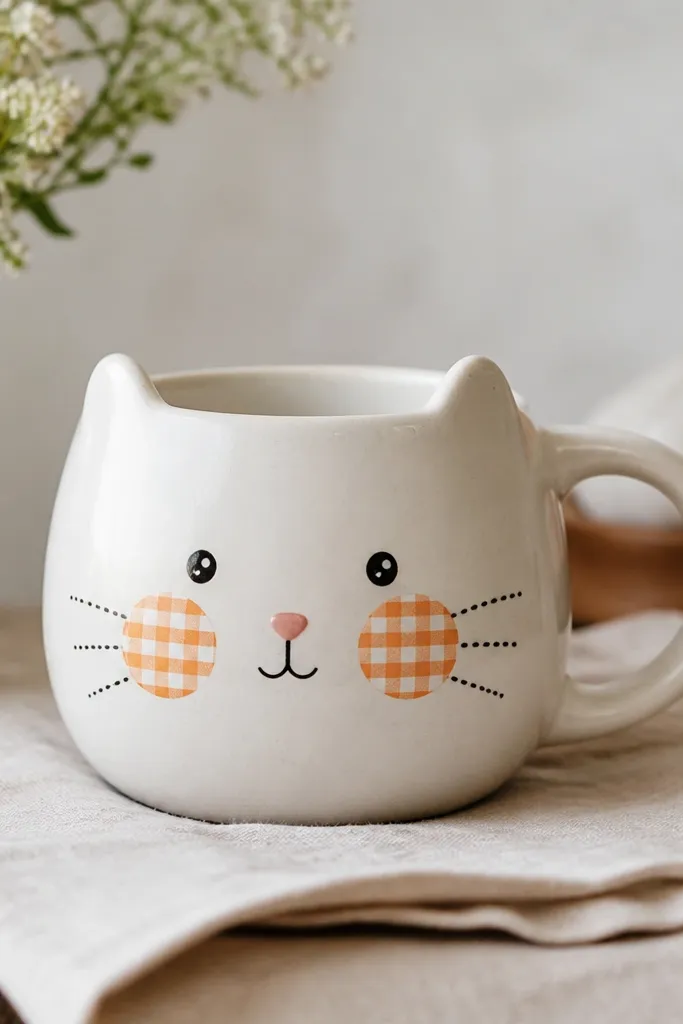
Gingham gives you an instant handmade texture that doesn't require perfect brushwork. I only use gingham for the cheeks and forehead patches, then keep the rest of the face clean. Dot whiskers look playful and forgiving because you don't have to draw long lines. The overall effect feels cozy and stable year round.
Paint the base cheeks with orange and cream squares. Use a thin liner brush to add 3-4 rows of squares per cheek, keeping the grid loose so it looks human. Draw dot whiskers using a dotting tool or the tip of a wooden toothpick dipped in paint. Finish with a small black nose and a simple ear outline.
Pro tipSketch whisker positions lightly with pencil first - then dot over them so the spacing stays even.
AvoidSkip super fine glitter paint on whiskers - it looks gritty when the mug gets wet.
6. Watercolor Tabby Mug with Wet-in-Wet Stripes
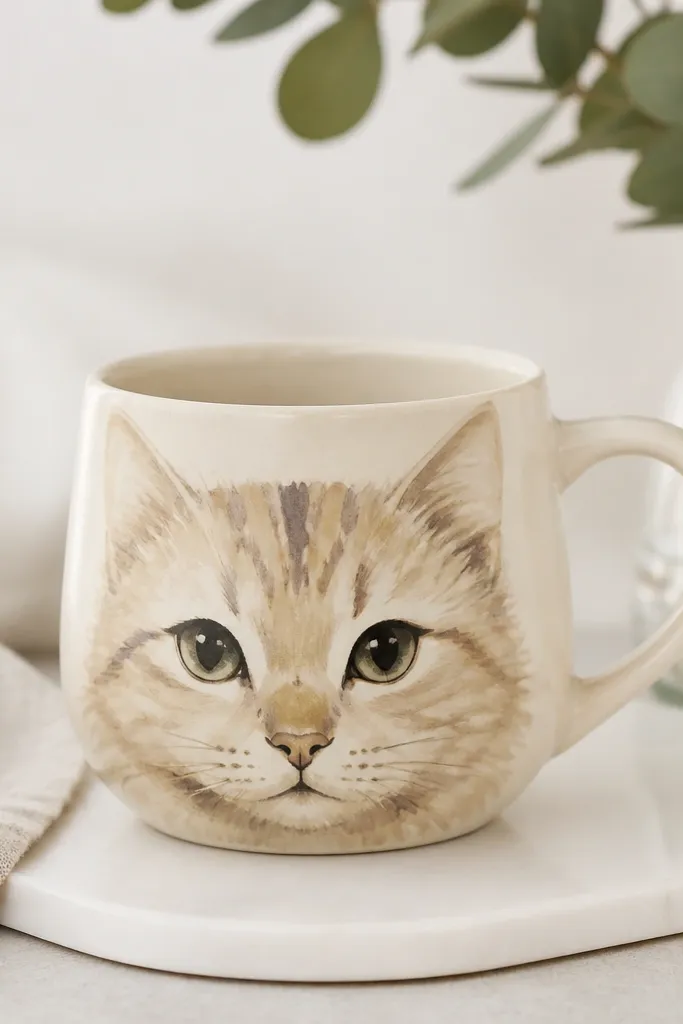
Watercolor-style stripes hide small imperfections and make the cat look alive. The wet-in-wet approach creates fuzzy fur edges that look good even if you're not a steady painter. I keep the eyes crisp - black outlines with a tiny white dot - so the face doesn't blur into the mug. This is one of the easiest year round handmade mug ideas to make look "artist" without advanced skills.
Use ceramic watercolor or watercolor paints designed for ceramics, then set with the right sealer per the product instructions. Wet the stripe area lightly, then drop in diluted brown and taupe paint for soft blooms. Add a thin black outline around the eyes and ears after the stripes dry. Work with a small round brush so the nose and mouth stay tight.
Pro tipTilt the mug slightly while paint dries - gravity helps create natural stripe variation.
AvoidDon't overwork the stripes once they start drying - it turns them muddy.
7. Decoupage Cat Face Mug with Vintage Scrap Paper
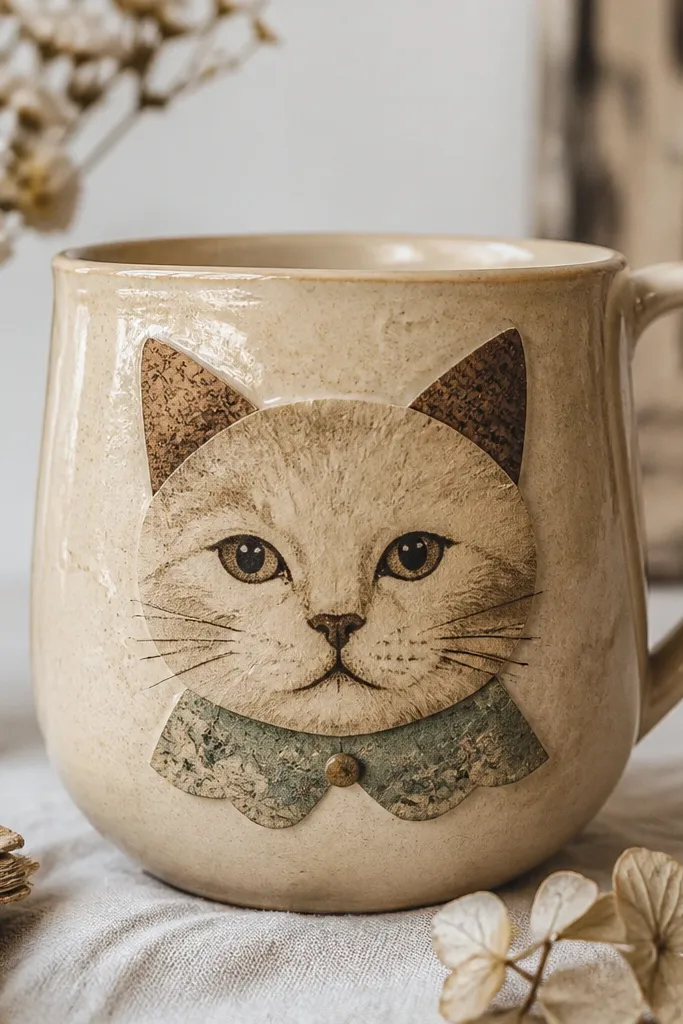
Decoupage gives you a "found object" look that feels handmade even when the cat face is complex. Vintage paper adds texture - the fibers catch light - and you get natural variation in color. I like building the face in layers: lighter base, darker ears, then a collar. The glossy finish makes the paper look like it's under glass.
Choose thin scrap paper or tissue paper with a cat print or small illustration. Cut the cat face pieces, then brush decoupage medium on the mug and press the paper down. Seal in thin coats, letting each coat dry. After sealing, sand any raised edges lightly with very fine sandpaper, then apply one more coat.
Pro tipUse a foam brush for decoupage medium - it avoids streaks and keeps the paper edges smooth.
AvoidDon't use thick cardstock - it creates ridges that feel rough when you drink.
8. Emoji-Style Cat Mug with Clay Nose and Painted Eyes
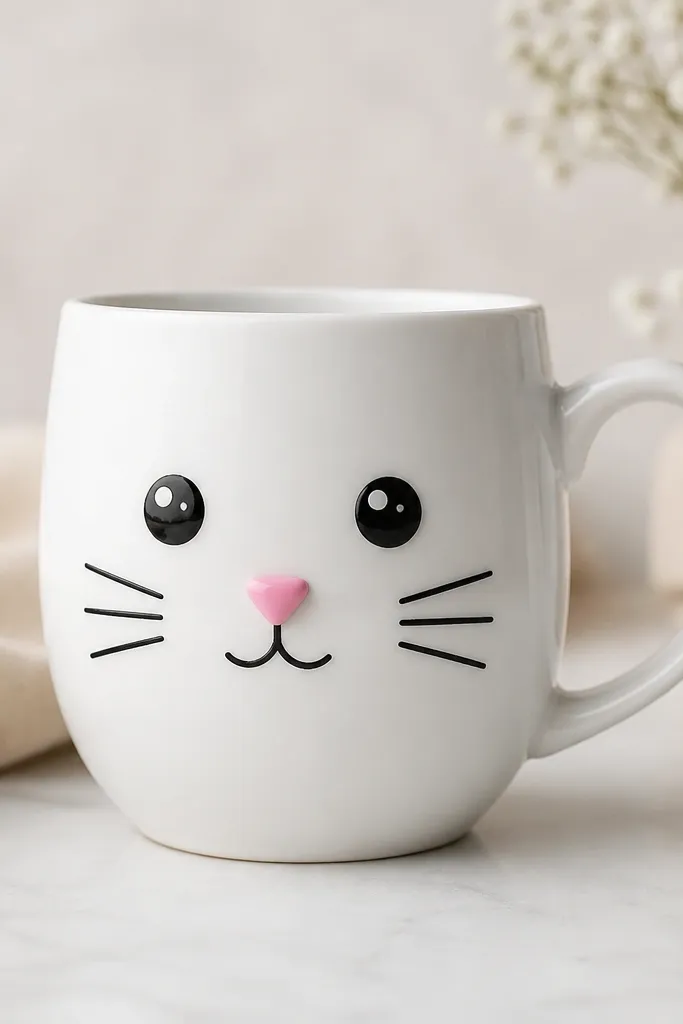
This is the fastest way to get an adorable cat face that still looks clean. The raised clay nose adds a tiny bit of 3D without covering the whole mug. Big painted eyes give you that "sticker" look, and the simple mouth keeps it from getting busy. I use a limited palette: black, white, and pink - it stays readable year round.
Roll polymer clay into a tiny triangle, about 6 mm across, bake it, then glue it onto the mug where the nose goes. Paint the eyes as circles with a white dot highlight, then add a small curved mouth line. Keep the face centered and sized so it fills the front about the width of your palm.
Pro tipUse a toothpick to place the white highlights - they look sharper than brush dots.
AvoidDon't make the eyes too high near the rim - it looks like the cat is peeking out awkwardly.
9. Sponge-Printed Tabby Mug with Micro-Fur Texture
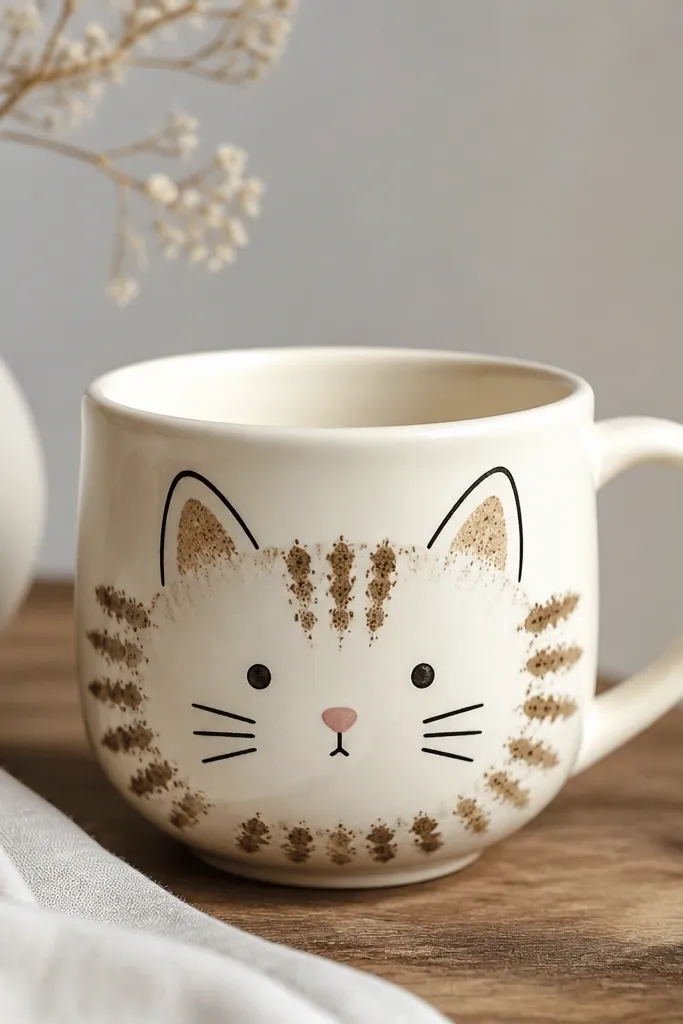
Sponge printing makes "fur texture" without painting every hair. The tabby pattern comes from repeated dabbing, so you get natural variation and a softer look than brush strokes. I outline the ears and eyes so the face stays crisp, then let the sponge do the rest. It's one of those year round handmade mug ideas that forgives mistakes and still looks intentional.
Use a small piece of craft sponge - not a big one - and cut a slightly rounded edge. Dip lightly in diluted brown paint and dab to build stripes across the cheeks and forehead. Outline ears and eyes with black paint, then add whiskers with a liner brush. Let it dry fully before sealing.
Pro tipPractice on a paper plate first so your paint load is light enough to avoid blotches.
AvoidSkip heavy paint - thick sponge marks look like smudges after sealing.
10. Painted Cat Paw Handle-Accent Mug
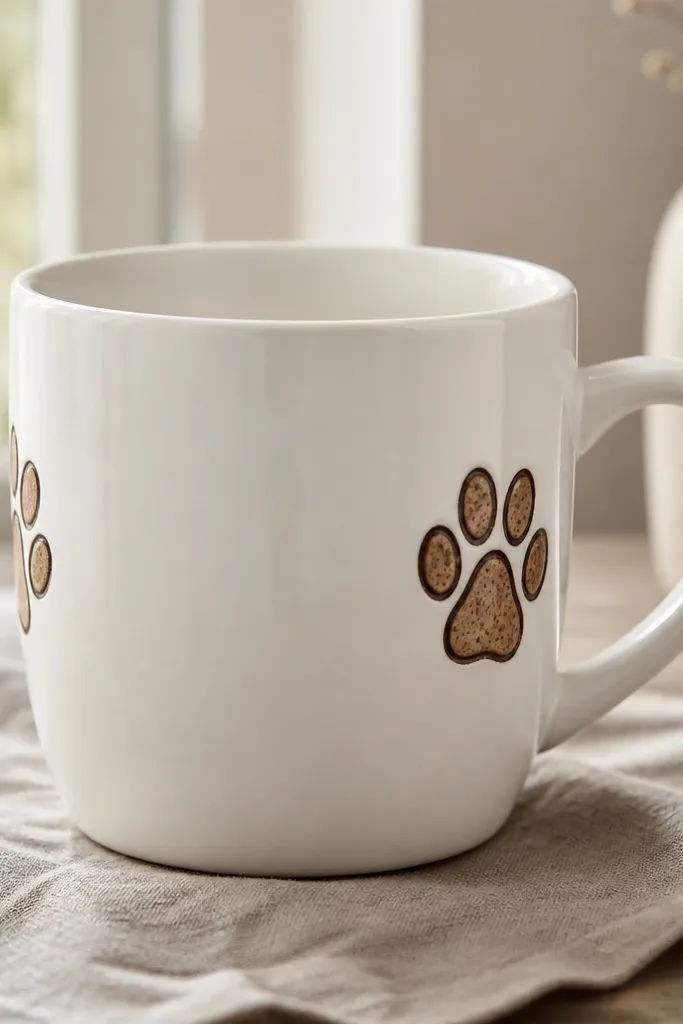
Instead of a full cat face, you get a subtle cat identity that still feels cute. The paw print is easy to place where your hand naturally touches, so it feels personal. I use one main color for the paw beans and a darker shade for the outline so it reads from across the counter. This one works year round because it's minimal and doesn't depend on seasonal motifs.
Stencil or freehand a paw print about 4 cm wide. Paint beans first, then trace the outline with a thin brush. If you want balance, add a small paw print on the back - same size but fainter color or fewer beans. Seal with a clear coat rated for dishwashing if you use it daily.
Pro tipUse a damp paper towel to clean edges right after painting - paw art looks sharper when lines stay crisp.
AvoidDon't put paw prints on the bottom rim - they get scuffed fast and look worn.
11. Rainbow Yarn Cat Tail Mug (Raised Thread Detail)
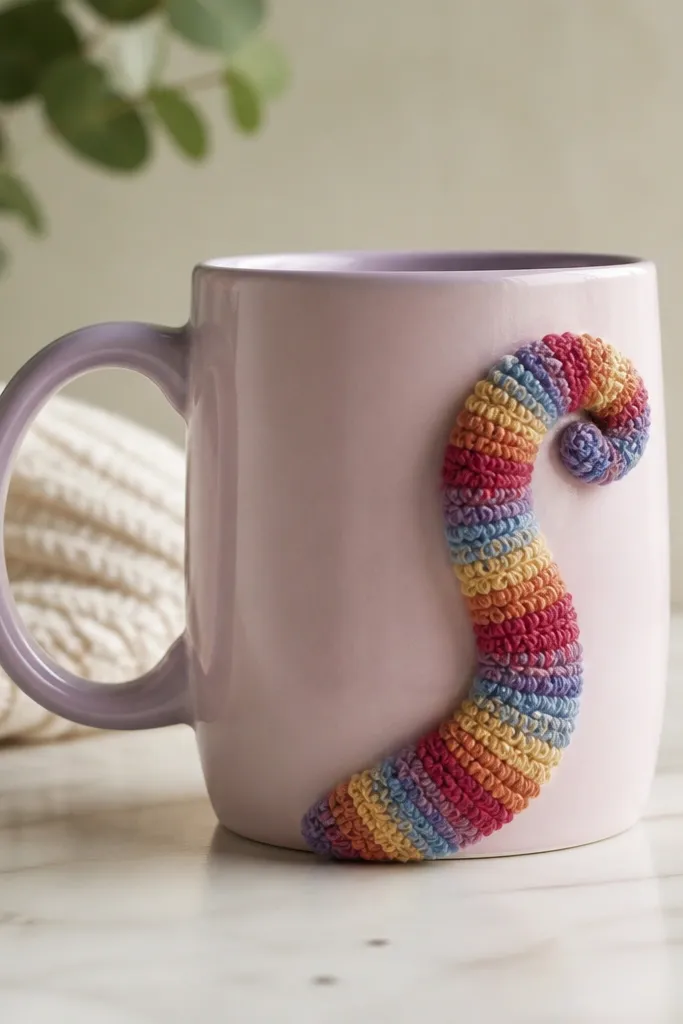
Threaded yarn detail gives you a playful, cozy texture you can feel when you pass by the mug. The trick is keeping the yarn detail away from the drinking area while still making the tail visible. I pair a plain cat face with a colorful tail so the yarn reads as the fun element. This stays cute year round because it's just a cat accessory, not a holiday theme.
Choose yarn that's thin and tightly spun so it lays flat. Glue the yarn tail in a curve along the mug's side, about 2-3 cm from the rim, using a strong craft glue. Let it dry fully, then paint a tiny cat face on the front. Seal the yarn with a thin clear coat so it doesn't snag on towels.
Pro tipTrim yarn ends and tuck them under a loop before the glue sets - it hides seams.
AvoidSkip fuzzy yarn - it sheds and looks messy after a few washes.
12. Kitty Face in Stained-Glass Style Panels
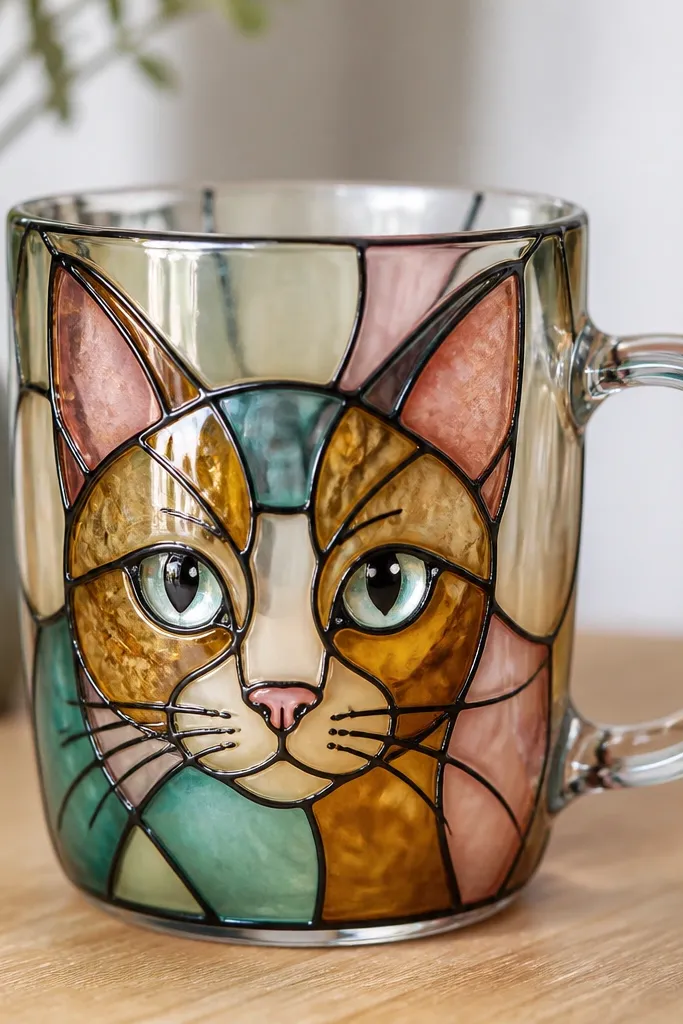
Stained-glass style paint turns a flat mug into something that looks lit from within. You get that "window" effect because the colored areas are semi-transparent and separated by dark outlines. I keep the cat face simple - big eyes, small nose - so the colored panels read clearly. This is a great option if you want year round handmade mug ideas that look fancy without being complicated.
Use a stained-glass look outline paint or fabric paint in dark brown/black, then fill each panel with translucent ceramic paint. Let the outline dry before filling so colors don't bleed. After everything cures, apply a clear sealer layer per the paint instructions. Place the cat face centered and make sure the panels don't cross the rim line.
Pro tipUse a hairdryer on low for outline paint - it speeds up curing and prevents color bleed.
AvoidDon't overload the translucent paint - thick layers look opaque and lose the stained effect.
13. Mismatched Socks Cat Mug with Two-Tone Ears
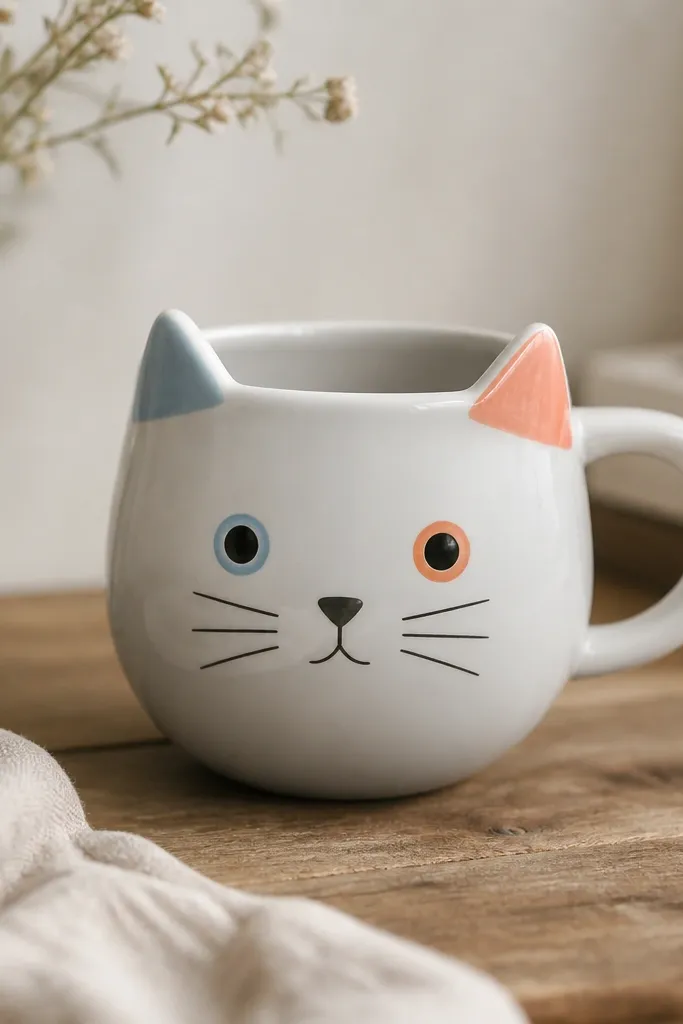
Two-tone ears make the cat look quirky, like it's wearing mismatched socks. It's a fun look that's not seasonal, because it's based on color personality rather than holidays. I keep the rest of the face neutral so the ear colors do the talking. That balance is what makes it look cute instead of chaotic.
Paint the cat head neutral gray, then block in ear colors: one ear in a cool blue, the other in coral. Add eye rings in the same colors as the ears so the design ties together. Whiskers stay black and short, and the nose stays small and pink. Seal once the paint cures fully.
Pro tipMake the ear shapes slightly different sizes - tiny asymmetry looks more handmade.
AvoidDon't add too many extra colors to the cheeks - it turns into a camouflage face.
14. Book Page Tabby Mug with Tiny Text Collar
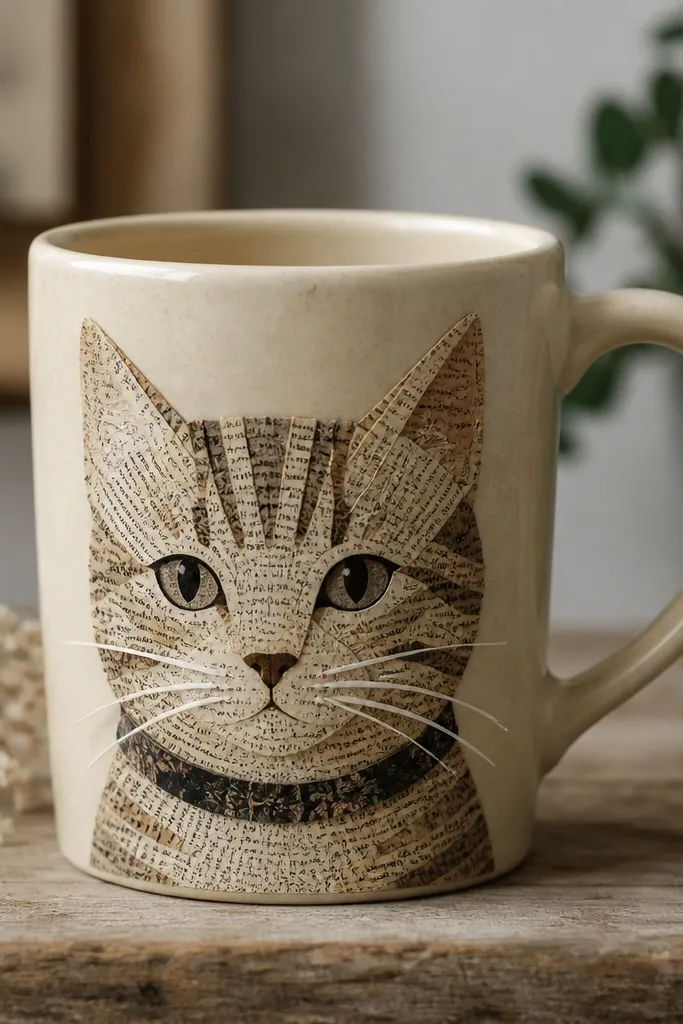
Using book pages for the cat face gives you instant striping without painting. The text lines create natural stripes and variation, which looks like tabby fur when the mug is viewed from a normal distance. I add painted whiskers and a clean nose to give the face structure. This one works year round because the collar is simple and the cat face is the main event.
Cut a cat face shape from book page paper, then layer a second piece for ears. Glue and decoupage medium down in thin coats, smoothing edges as you go. Paint whiskers with a fine brush directly on top once the decoupage is dry. Finish with a clear coat to protect the paper from daily splashes.
Pro tipChoose pages with dense text - sparse pages look patchy and less like fur.
AvoidSkip thick glue - it wrinkles the paper and creates a bumpy surface.
15. Ceramic Marker Cat Face with Raised Outline Border

A raised border frames the cat and makes it look like a sticker sealed under glass. I use ceramic marker for the face because it gives crisp lines, then add dimensional paint as a thin outline so the design pops. The teal border adds color without turning the mug into a busy collage. It's one of my go-to year round handmade mug ideas for gifts because it's fast and clean.
Draw the cat face with ceramic marker: ears, eyes, nose, mouth, whiskers. Let the marker dry, then apply dimensional paint around the outer edge of the head in one continuous line. Keep the border line width about 2-3 mm so it doesn't feel chunky. After curing, apply a clear sealer layer.
Pro tipUse painter's tape to mark the head outline first - it keeps the border evenly spaced.
AvoidDon't rush the cure time on dimensional paint - smearing ruins the raised edge.


