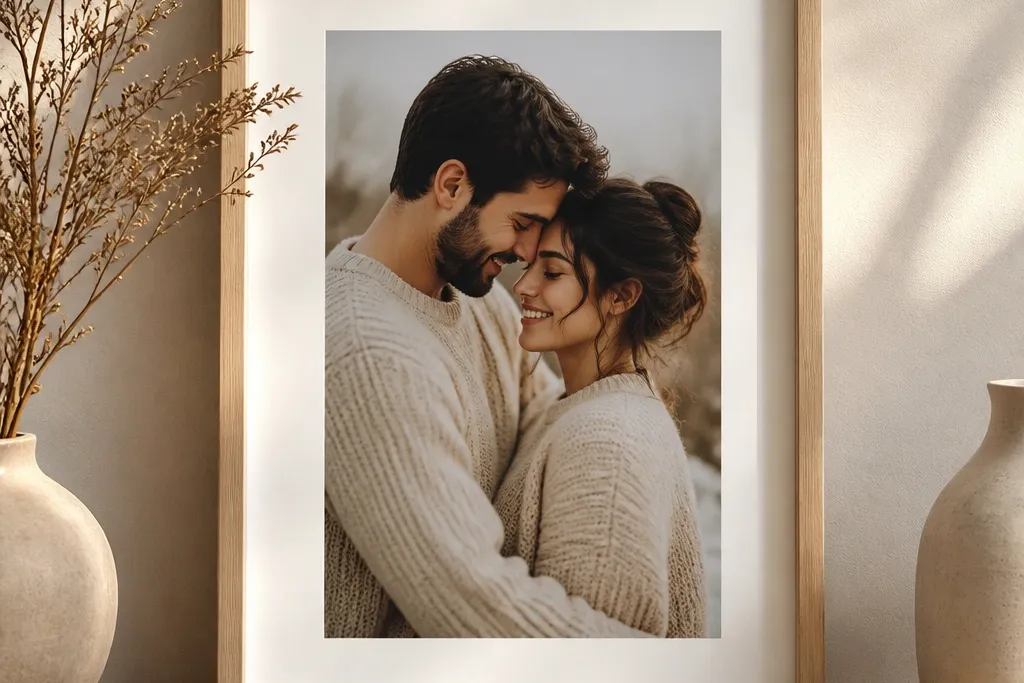
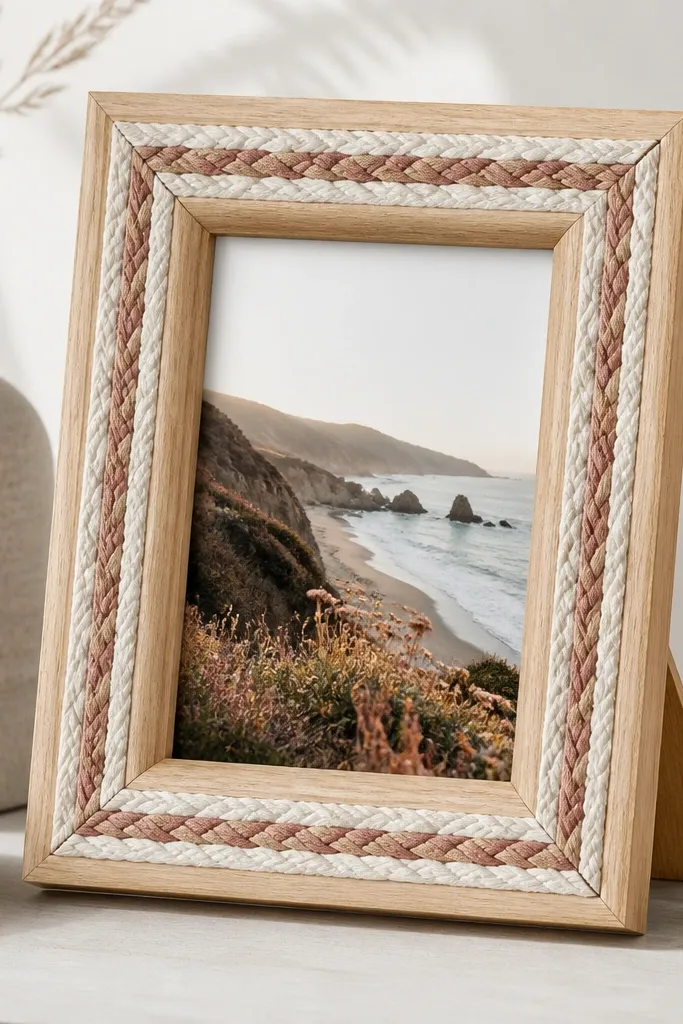
1. Oatmeal Burlap + Twine Edge Frame
This one makes any couple photo feel like it belongs on a couch table. Burlap gives you a real woven texture that reads warm in daylight, and the twine braid keeps it from looking messy. I like oatmeal burlap because it doesn't go yellow as fast as jute and it matches cream walls without fighting them.
Use a 4x6 or 5x7 frame and wrap burlap only on the outer frame edges, not the mat area. Cut burlap strips to the frame's depth, then glue with a thin line of craft glue or hot glue, pressing for 30 seconds. Wrap a 1/4 inch twine braid around the outside edge and tack it every 2 inches.
Pro tipFinish with a single coat of matte Mod Podge or matte acrylic medium over the burlap so it stops shedding fibers.
AvoidSkipping a mat and letting burlap touch the photo edges makes the photo look dirty and uneven.
2. Cream Knit Scarf Frame Wrap
Knit fabric makes a frame look cozy because it has soft ridges that catch light. It also hides minor dents in thrifted wood, which is why this works when your base isn't perfect. Use a solid cream or warm beige knit so the photo stays the focus.
Pick a knit scarf with a tight weave so it doesn't fray. Cut a strip wide enough to cover the frame front and sides, then wrap like a gift - front first, sides second. Glue the backside edges only, so the front stays smooth.
Pro tipAdd two small fabric ties at the top corners using matching yarn so the frame looks intentional, not just wrapped.
AvoidUsing a stretchy, loose-knit fabric without stabilizing it - it will sag and look wrinkled.
3. Wood Slice + Dried Lavender Minimal Frame
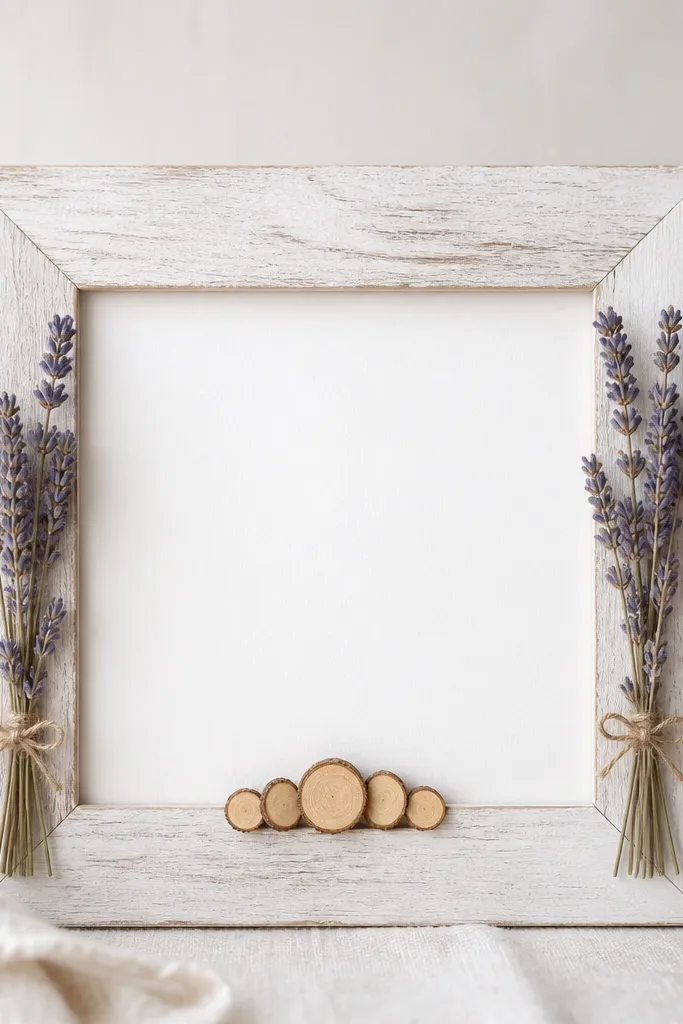
This is cozy without being bulky. The wood slices add warmth and grain, while dried lavender adds soft color that still looks good in winter because it's muted. It's also great for couples who want calm, not cutesy.
Use a 5x7 or 8x10 frame with a mat. Glue 3-5 thin wood slices (about 1/8 to 1/4 inch thick) along the bottom edge of the frame face. Tie lavender sprigs to the mat corners with thin twine.
Pro tipSpray lavender with a light matte clear coat so petals don't fall onto the photo.
AvoidHot gluing lavender directly onto the photo area - it can stain or warp paper mat edges.
4. Thrifted Frame + Faux Fur Corner Pop
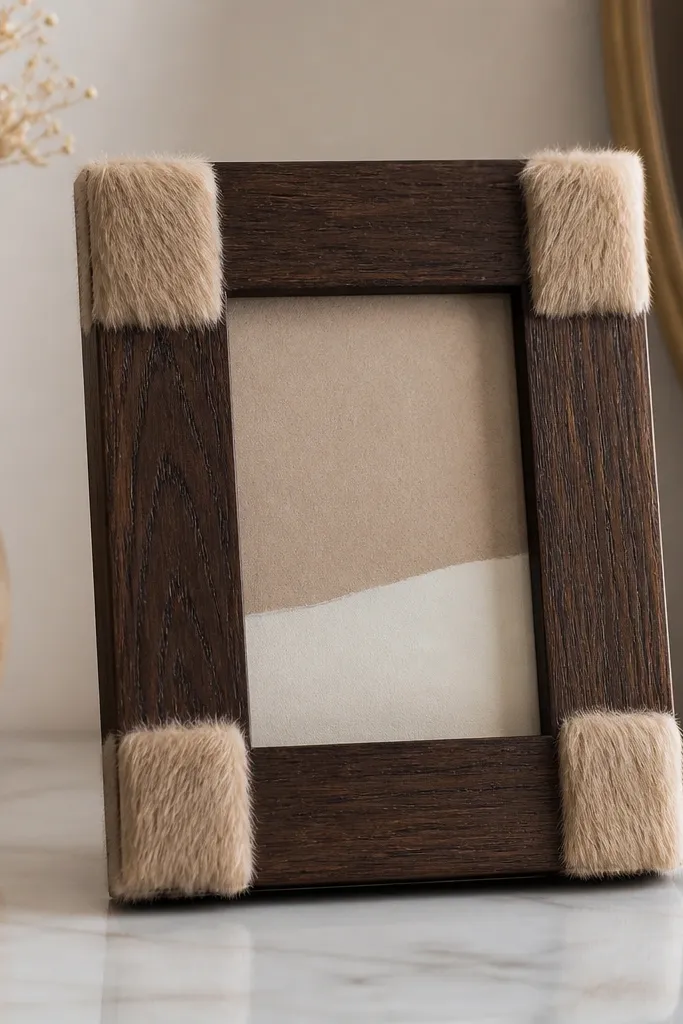
Faux fur reads cozy immediately, and corner placement keeps it from looking like a costume. The fibers create a soft halo around the photo, especially in low evening light. Dark wood + beige fur is my favorite combo because it feels warm without turning pink.
Use a frame that already has a clean border. Cut faux fur into four squares that are about 1.5 inches each for a 5x7 frame. Glue each piece to the inside corners of the frame face, leaving the mat fully visible.
Pro tipBrush the faux fur one direction with a clean mascara wand or soft brush so it looks uniform.
AvoidCovering the entire frame with fur - it makes the photo look smaller and harder to read.
5. Matte Olive Paint + Linen Paper Strip Background
This one makes the frame look expensive because the textures are subtle. Matte olive gives depth, and linen-textured paper adds a gentle fabric vibe without bulk. It's a great year-round choice because olive works in every season.
Paint the frame with matte acrylic in olive (or use chalk paint). Cut linen-textured paper to fit the backboard behind the photo, leaving a 1/2 inch border. Layer with a thin cream strip centered, then glue edges only so the paper lies flat.
Pro tipSeal the paper layer with matte medium to stop curl at the corners.
AvoidUsing glossy paint - it reflects overhead lights and makes the texture look plastic.
6. Ribbon Ladder Frame with Pearl Pins
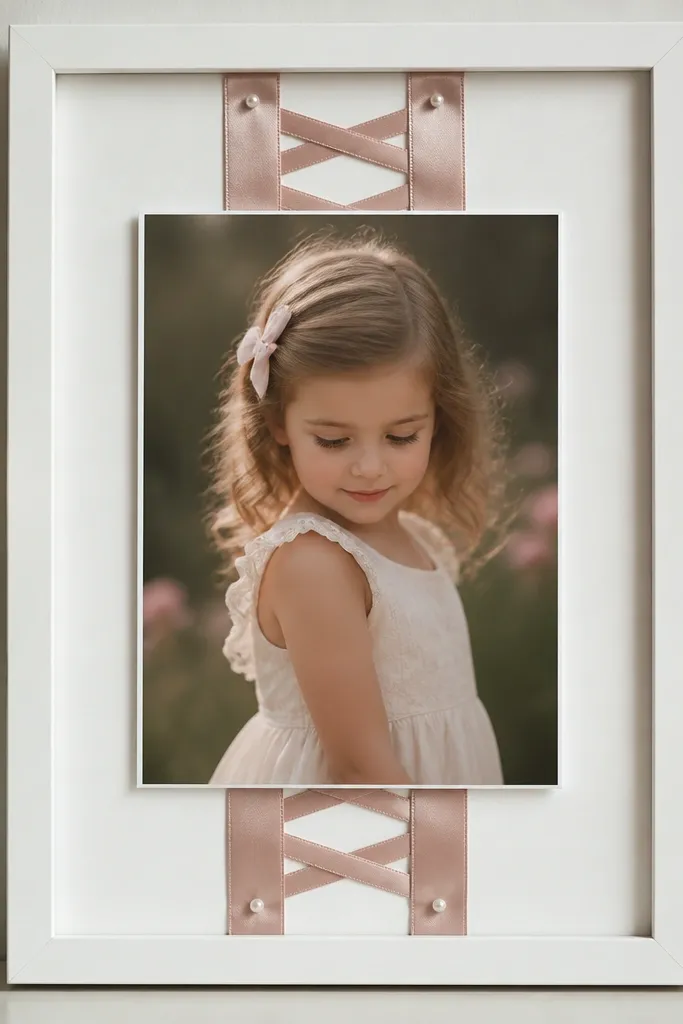
Ribbon looks cozy when it's structured. A vertical ladder layout draws the eye toward the photo and keeps the design tidy. Pearl-headed pins add a soft shine that doesn't look flashy when you keep the ribbon colors warm.
Use a frame with a backboard you can pin to. Cut two satin ribbons in warm cream and blush, each about 8 inches long for a 5x7. Pin the ends on the backboard and add 3 small cross ties using thin twill ribbon.
Pro tipUse satin with a matte finish, not high-gloss - it reads warmer on camera.
AvoidTaping ribbon on the front - you'll see tape lines through the photo opening.
7. Braided Fabric Trim Border
Fabric braid makes the frame look hand-made in a way that still feels clean. The braid adds dimension without covering the photo, so couples photos stay sharp. I like using three-color braids because it softens the look and matches both skin tones and warm interiors.
Make or buy braided trim in about 1/4 inch width. Cut it to fit the frame opening and use miter cuts at corners for a tight fit. Glue with a low-heat glue gun so the trim doesn't warp.
Pro tipPaint the frame edges a shade darker than the trim so the braid looks anchored.
AvoidHot gluing with thick glue blobs - they create lumps that show through the opening.
8. Reclaimed Pallet Wood Frame with Jute Hang Tag
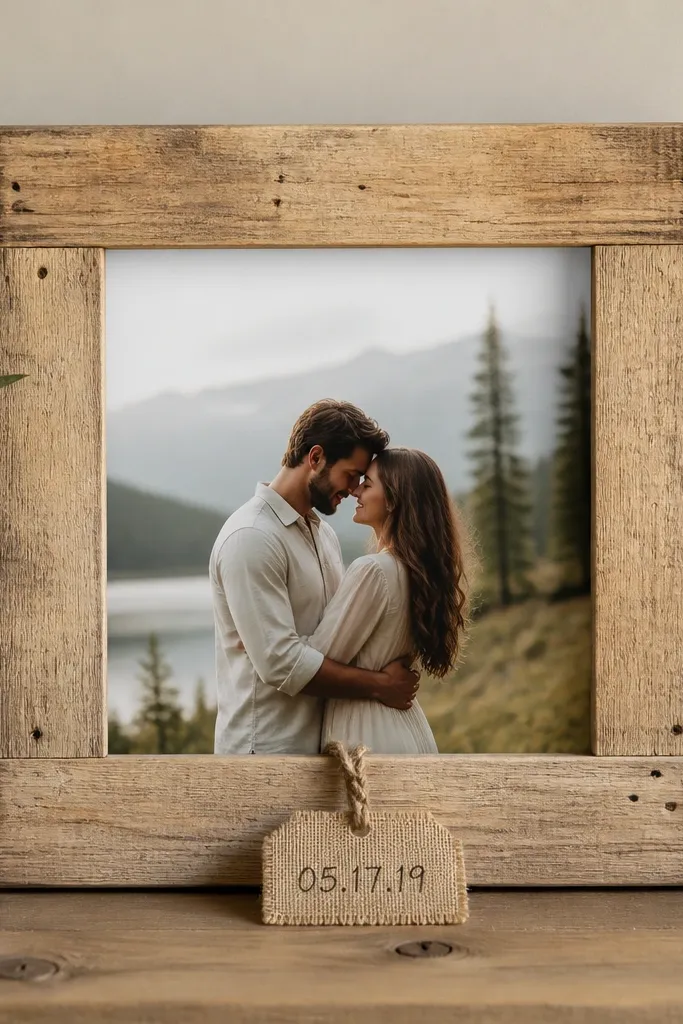
Pallet wood is cozy because it has history in the grain, and it looks great with simple accents. The jute tag adds a warm, casual detail without clutter. Keep the tag small and the rest clean so it doesn't turn into a craft fair sign.
Sand pallet boards until they feel smooth - pay attention to splinters along the inner edge. Use a 1x2 board thickness for a sturdy frame and fill nail holes with wood filler. Finish with a warm stain, then glue the tag to the bottom center of the frame face.
Pro tipInk the tag with a permanent paint pen, then seal with matte clear spray to prevent smudging.
AvoidLeaving rough edges - it makes the finished piece feel cheap even if the photo is perfect.
9. Thrifted Frame + Burlap Bow on Top Corner
A small bow is one of the easiest ways to add cozy energy without covering the photo. Burlap has a casual texture that looks right in daylight, and the top-corner placement keeps the composition balanced. The key is keeping the bow tight and the ribbon loops small.
Use burlap ribbon 1.5 inches wide. Make a bow with two loops and one small center knot, then glue it to the mat corner with a tiny dab. Add 3 pearl dots around the knot for a soft finish.
Pro tipIf the burlap frays, seal the cut ends with a dot of clear glue and let it dry flat.
AvoidOversized bows - they cover too much of the visual space and make the photo look like a backdrop.
10. Warm Gray Frame + Book Page Heart Cutout

This is cozy because paper hearts feel soft and intimate, not loud. The aged book page texture gives a gentle vintage warmth that still works year-round. I like cutting the heart behind the mat so the photo looks like it's framed by a whisper.
Paint the frame warm gray matte. Cut a heart from book page paper, then glue it to the backboard behind the photo opening. Leave the edges slightly imperfect - it reads handmade. Add a clear matte seal to protect the paper.
Pro tipUse an X-Acto blade and a cutting mat so the paper edges stay crisp.
AvoidGluing the heart directly onto the photo - it wrinkles and smears when you seal.
11. Jute Rope Coiled Border with Tiny Brass Nails
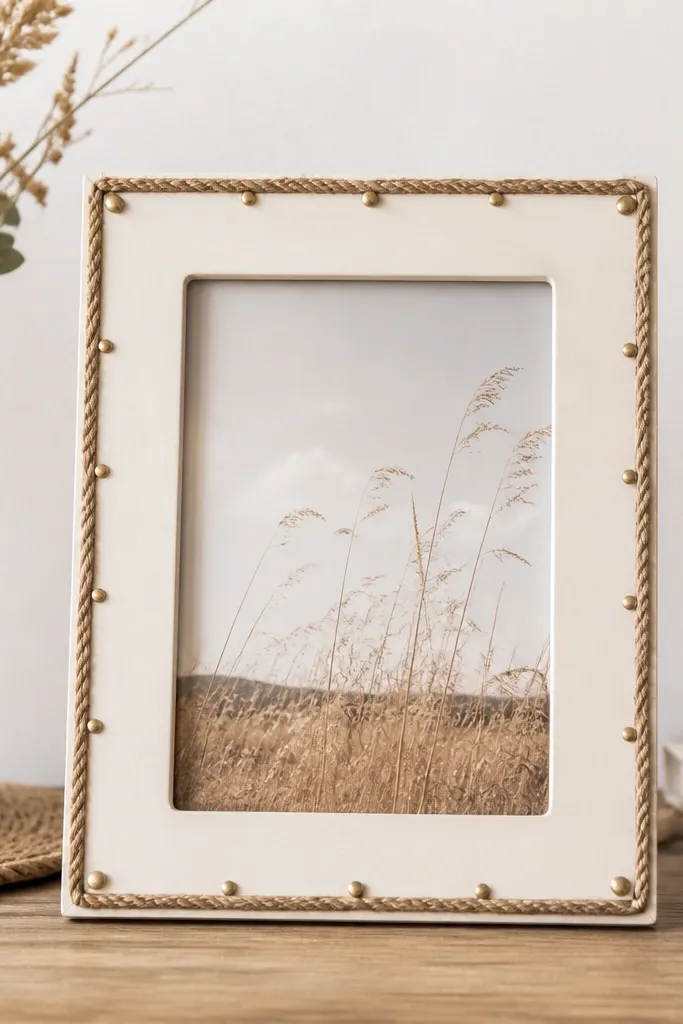
Coiled rope looks cozy because it creates a curved shadow line around the photo. Brass nails add a warm metallic accent that makes the rope look intentional, not accidental. Keep the rope thin so the photo still feels airy.
Use 1/8 to 3/16 inch jute rope. Coil it around the frame opening and tack it with tiny brass nails every 2 inches. If you don't have nails, glue with a thin line and clamp gently while it sets.
Pro tipPaint the frame edge cream first, so the rope color doesn't look patchy against bare wood.
AvoidUsing thick rope - the border becomes bulky and the photo feels cramped.
12. Season-Swap Velvet Ribbon Panels
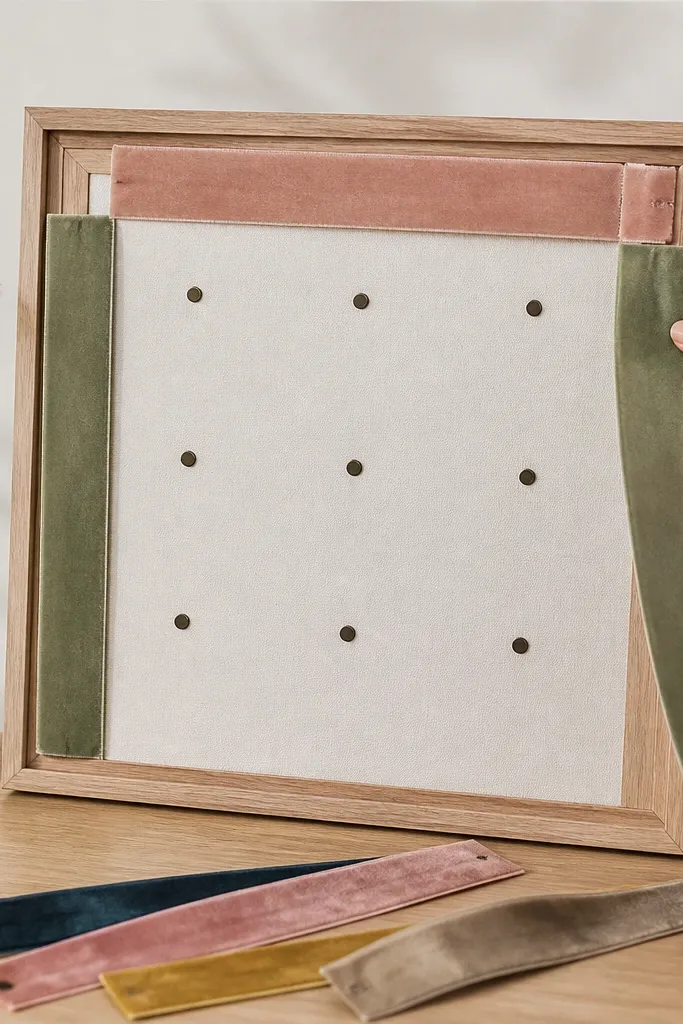
This is the one I reach for when I want year-round cozy without redoing the whole frame. Velvet ribbons give that soft, plush look, and the swap system means you only change the ribbon color - not the base. Use warm neutrals so your winter and summer versions still match your home.
Attach small stick-on magnets to the backboard corners. Cut velvet ribbon pieces to fit the sides and top, and glue a small magnet strip on the back of each ribbon panel. Choose 3 ribbon colors: deep olive, warm cream, and rust.
Pro tipChoose velvet with a short pile so it lays flat and doesn't shed onto the mat.
AvoidSkipping magnet strength - weak magnets make the ribbons slip when the frame is moved.
13. Cork Sheet Backing with Stitched Thread Lines
Cork gives you a naturally cozy, matte texture that also hides small mistakes. Thread lines add a handmade vibe and guide the eye toward the photo without blocking it. This looks great in kitchens and entryways where people pass by quickly.
Cut cork sheet to the backboard size. Seal it with matte medium so it stops shedding. Use embroidery thread and a simple running stitch pattern in two directions, leaving a 1 inch gap around the photo area.
Pro tipStitch with a blunt needle and pull gently so you don't tear the cork.
AvoidLeaving cork unsealed - it flakes and gets on your fingers when you change the photo.
14. Tassel Garland Corner Frame
Tassels feel cozy because they look like soft hanging decor, even when they're tiny. Corner placement keeps the photo centered and makes the design feel clean. Use yarn tassels in one neutral color so it stays year-round.
Make 6 tassels using yarn around a fork or tassel maker, about 3 inches long. Glue the tassel tops to the inside top corner of the frame backboard. Add one small loop of twine to tie the garland so it sits evenly.
Pro tipTrim tassels with small scissors after gluing so all ends match.
AvoidLetting tassels hang too long - they overlap the photo and look messy.
15. Walnut Stain Frame with Leather Strip Lacing
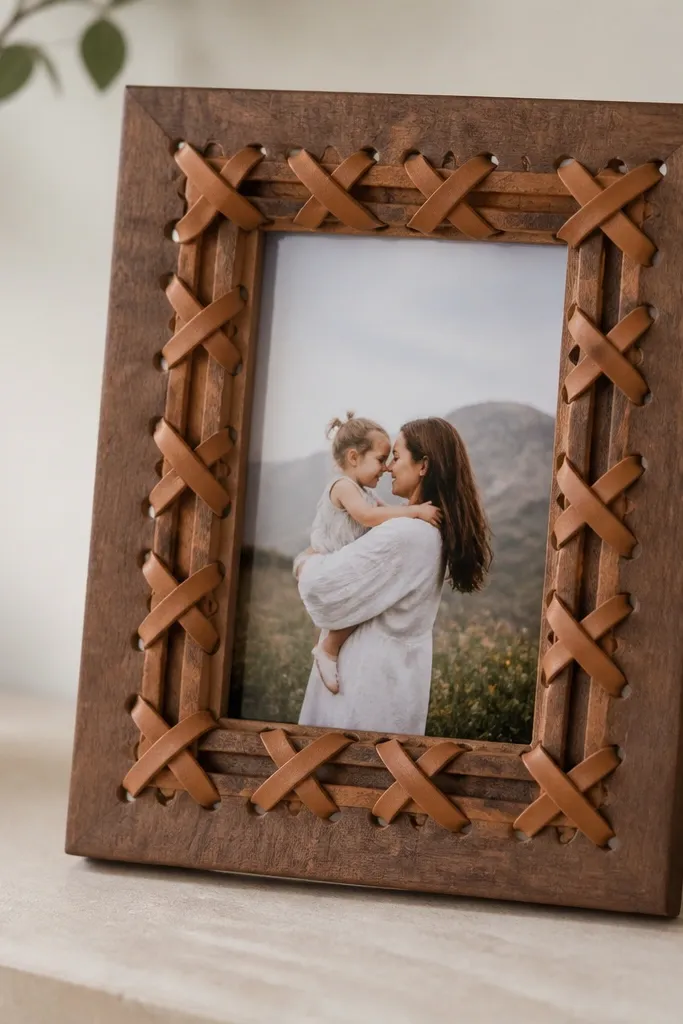
Leather lacing gives you cozy warmth with a clean, grown-up look. The crisscross pattern adds structure and makes the frame feel crafted, not decorated. Walnut stain + caramel leather is a combo that makes skin tones look better in photos too.
Stain the frame walnut and let it cure fully. Punch holes around the inner edge about 3/8 inch apart, then lace with a flat leather strip 1/4 inch wide. Tie off on the back so the front stays smooth.
Pro tipCondition the leather with a tiny amount of leather balm so it doesn't look dry or cracked.
AvoidSkipping hole spacing - uneven lacing makes the photo opening look crooked.
16. Felt Flower Cluster in Dusty Rose
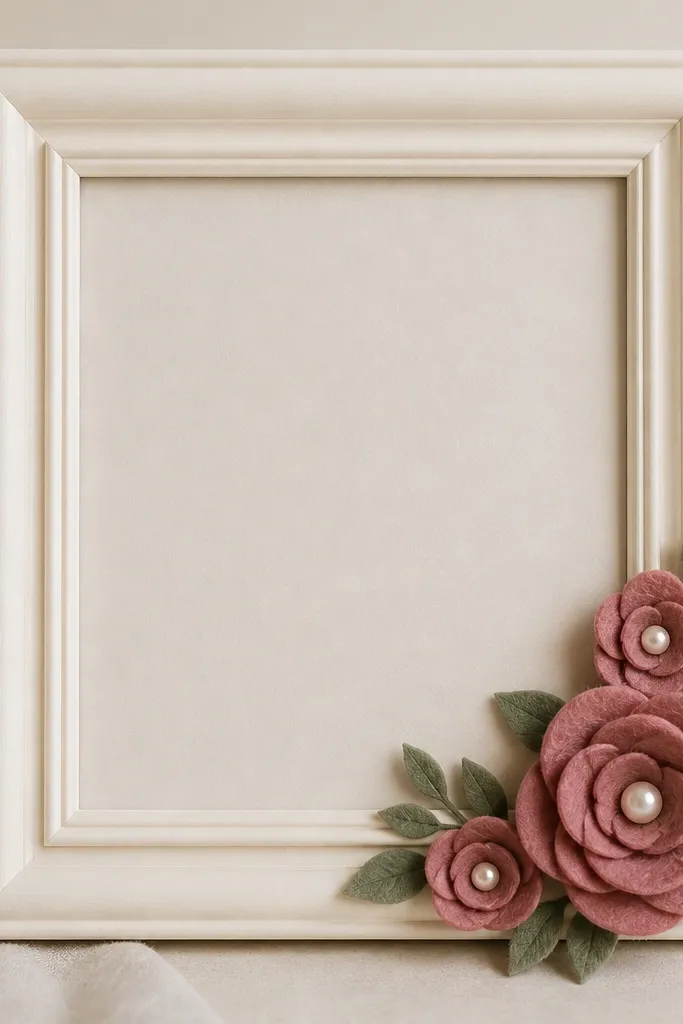
Felt flowers add cozy softness because the edges look fuzzy and warm. Dusty rose is flattering on almost any couple photo, especially black-and-white prints. This design works year-round because it's not tied to a single holiday color.
Cut 5 circles from felt in two sizes (about 1.5 inches and 1 inch) for each flower. Layer with hot glue, then add small leaf shapes from green felt. Glue the cluster to the mat corner, not the photo itself.
Pro tipUse a single pearl button per flower center for a clean focal point.
AvoidUsing too many flower sizes - the cluster turns chaotic and looks uneven.
17. Matte Black Frame + Cable Knit Trim
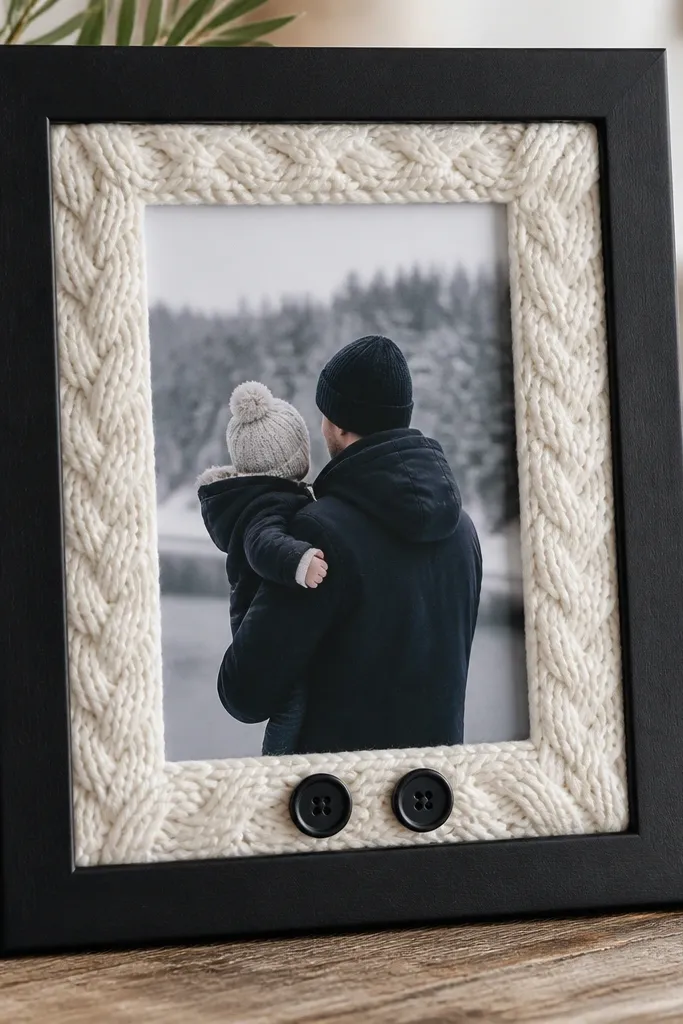
Cable knit trim looks cozy because it has defined ridges. Matte black keeps the knit from blending into the wall and makes the cream pop. I like adding two small black buttons to anchor the trim visually.
Use a matte black spray paint or chalk paint first. Cut cable knit trim to the opening and glue it around the inside edge of the frame face. Add two buttons at the bottom corners of the trim using small dots of glue.
Pro tipPress the knit trim flat with a warm iron on low and a cloth barrier for 10 seconds before cutting.
AvoidUsing glossy black - it reflects light and makes the edges look harsh.
18. Thrifted Photo Frame + Sheet Music Ruffle Strip
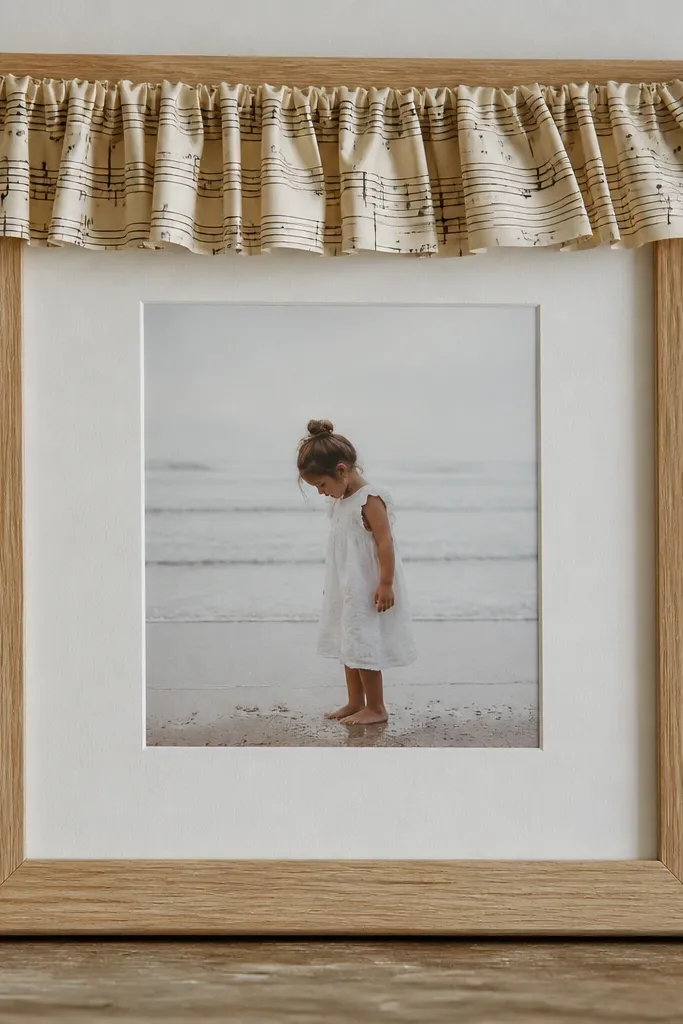
Sheet music paper has a cozy, romantic feel that doesn't scream holiday. A ruffle strip adds movement, and it frames the photo without covering it. Keep the ruffle only on the top edge so the bottom stays calm.
Cut a strip of sheet music paper about 2 inches tall and 10 inches long for a 5x7 frame. Lightly score and pleat by folding back and forth every 1/2 inch, then glue the pleated strip to the top inside edge of the frame. Seal the paper with matte medium in two thin coats.
Pro tipUse a foam brush to apply medium so the pleats don't glue themselves flat.
AvoidSoaking the paper in one thick coat - it warps and curls.
19. Cinnamon Stick Mini Halo Frame
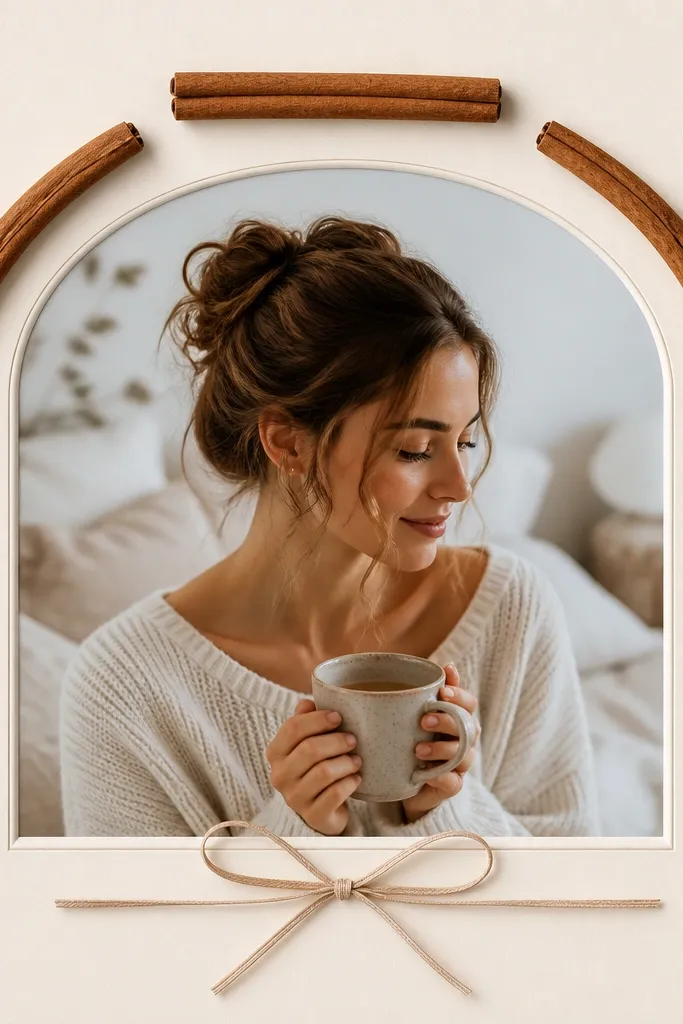
Cinnamon sticks bring cozy in a physical way: they add warm color and a subtle scent when the frame is near you. A mini halo shape keeps it from looking like a craft kit. This is best for winter and fall, but the neutral frame makes it work year-round if you keep the bow simple.
Glue 3 cinnamon sticks behind the mat opening so they don't touch the photo surface. Use a warm cream ribbon 1/4 inch wide and tie a small bow at the bottom center of the frame face. Seal the cinnamon sticks lightly with a clear matte spray so they don't shed powder.
Pro tipReplace cinnamon sticks every 4-6 weeks if you want the scent to stay fresh.
AvoidLetting cinnamon touch the photo - oils can stain paper over time.


