
1. Binder Clip + Mini Photo Strip on a Shelf Edge
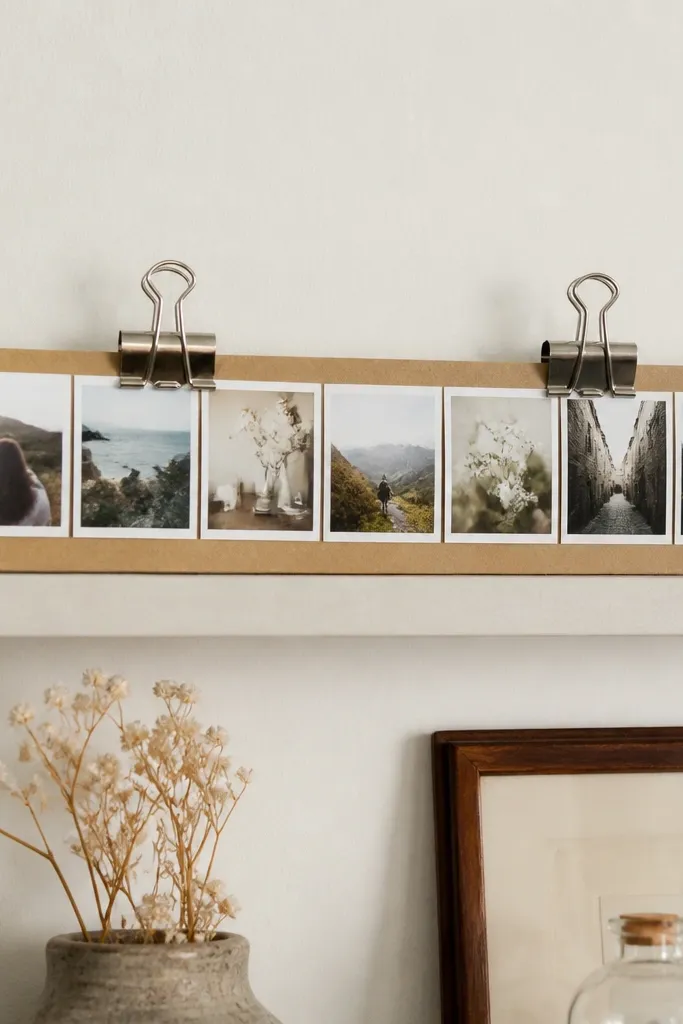
This is my go-to for small space photo frame ideas when you don't want anything to hang on the wall. The binder clips look industrial, but the kraft paper makes them warm. I print photos as 2x3 inch strips, punch a neat hole at the top, and clip them so each image sits flat. It reads as intentional because the spacing is uniform and the background stays matte.
Use 2-3 binder clips, not one huge clip. Cut kraft paper to the shelf depth, then staple or double-stick tape it behind the photos so it hides the shelf scuffs. Choose a consistent photo layout - either all vertical or all horizontal - so the strip doesn't look random.
Pro tipSpray the binder clips with satin clear coat if your shelf gets sunlight, so they don't spot over time.
AvoidDon't mix random photo sizes - uneven heights make the strip look like leftovers.
2. Vintage Window Sash Frame with Two Photos in a Tight Grid
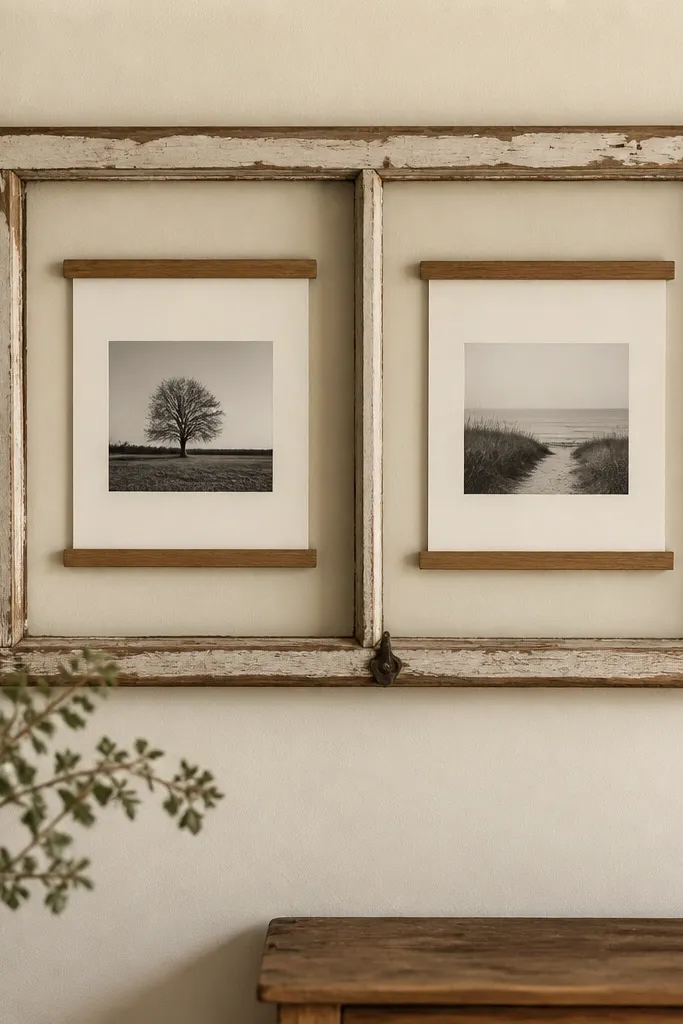
A window sash gives you built-in spacing and a natural grid, which is perfect for small spaces. The wood texture frames the photos without needing a bulky modern frame. I like using two photos instead of four in tight rooms because the wood bars already create structure. The off-white backing keeps both images bright even under warm lamps.
Sand the sash lightly so it doesn't snag fingers, then fill old nail holes with wood filler and paint the sash in a satin eggshell. Cut foam core to the pane size, glue the photo to it, then slide it behind thin trim pieces. Hang with two picture hooks so it stays level.
Pro tipIf the sash is uneven, shim the hanging points with thin cardboard until the panes sit square.
AvoidDon't leave the old glass - it makes the photos look hazy and dims the image.
3. Cardboard Cereal Box Frame with Fabric Edge Binding
This works because it's thin, cheap, and surprisingly sturdy when you reinforce it. The fabric binding hides the raw cardboard edges and makes the frame look finished instead of recycled. I use a single bold fabric pattern - stripes or small florals - and keep the photo matte so it doesn't compete. It's a clean way to do small space photo frame ideas for shelves and desks.
Cut two identical frame outer pieces and one inner window piece from cardboard. Glue them with PVA or hot glue, then reinforce corners with small folded cardboard tabs. Wrap the front edge with fabric using fabric glue, and add a backing board from foam core for stiffness.
Pro tipPaint the inside window edge with white acrylic so the photo looks crisp and not gray.
AvoidDon't use glossy fabric glue blobs on the edge - they show through and look messy.
4. Thrift Frame Turned into a Photo Ledge with Scrap Wood Spacers
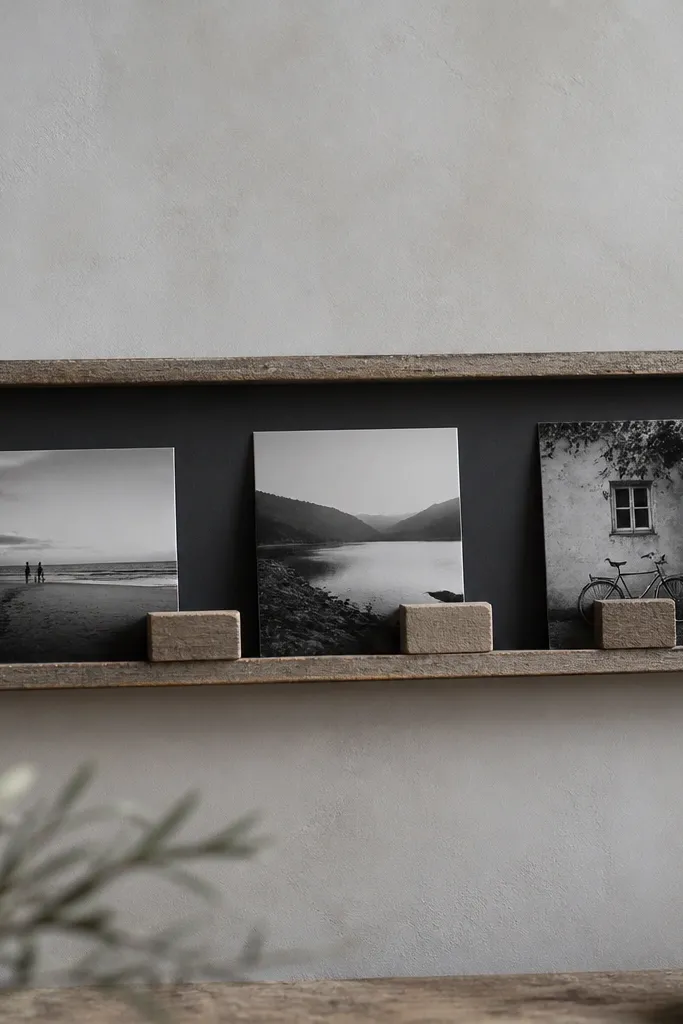
Instead of hanging a bulky frame flat, you create a shallow ledge that holds multiple photos. Scrap wood spacers give you consistent gaps, which makes a small wall look curated. I like charcoal backing because it makes skin tones and bright clothing look warmer. This is ideal for narrow walls where you can't fit a full gallery grid.
Find a frame with a depth under 2 inches or remove the thick backing. Cut a backing panel to fit, paint it charcoal, and attach it to the frame. Use small wood blocks as spacers under each photo, then add a clear acrylic strip or thin mat backing to keep photos from sliding.
Pro tipUse 1/2-inch spacers for the cleanest "designed" look.
AvoidDon't rely on tape to hold photos inside - they curl and creep out over time.
5. Wood Shims Frame with a Single Center Photo
Wood shims bring texture without bulk, and the rough grain makes the photo feel grounded. A single center photo keeps the look calm in a small room. I stain or paint only the shims, not the backing, so the photo stays the brightest element. It looks great with black-and-white photos because the wood grain adds warmth.
Cut shims to frame size, then sand the faces lightly so they don't shed splinters. Stain with a medium oak or dark walnut, then wipe with a rag until the stain looks even. Back the photo with white cardstock and secure it with small corner clips or a thin wood strip.
Pro tipPre-drill tiny pilot holes before screwing the corners so the shims don't split.
AvoidDon't leave shims unsealed - raw wood stains and can yellow under warm bulbs.
6. Picture Frame from Old Book Covers (No Bulky Backing)
This turns a forgotten hardback into a thin photo window, which is perfect for small space photo frame ideas on tight shelves. The book texture gives you character, and the thin clear sleeve keeps the photo protected. I use muted covers - navy, brown, or faded green - so the photo stays readable. The result looks like a collectible rather than a craft project.
Cut the book cover to the size you want, then remove the old pages so it stays flat. Glue the cover to foam core backing, leaving a window opening. Slip the photo into a clear plastic sleeve (like from document protectors) and secure it with thin double-sided tape along the edges.
Pro tipUse a matte photo print so the plastic doesn't cause glare.
AvoidDon't use glossy magazine photos - glare will make the image look washed out.
7. Pegboard Mini Gallery with Clothespin Frames
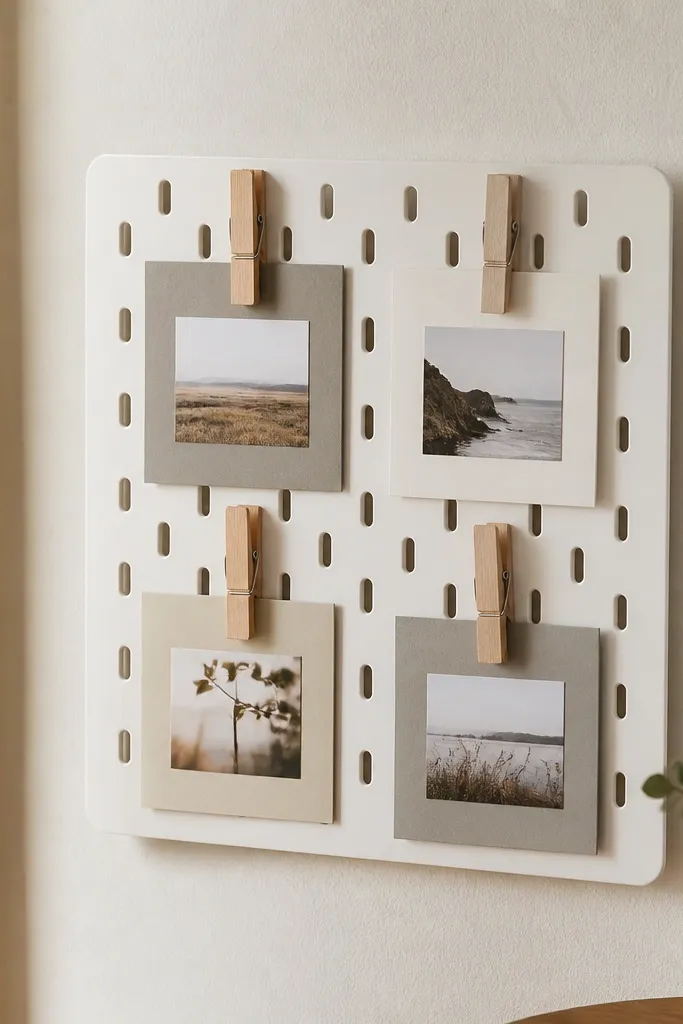
Pegboard makes spacing automatic. Each hole positions the photos evenly, and clothespins let you swap prints without taking tools out. I paint the pegboard white or pale sage so it doesn't overpower the pictures. This is great for renters because it's more forgiving than drilling multiple nail points.
Cut pegboard to fit your space, then paint it and let it dry fully. Cut photo mats from thin cardboard or foam board, add a backing layer, and clip photos in place. Mount the pegboard with two screws at the top corners and use wall anchors if needed.
Pro tipKeep clothespins the same color so the panel looks cohesive, like all black or all natural wood.
AvoidDon't hang heavy photos - the clothespin grip loosens and photos sag.
8. Upcycled Frame from Scrap Trim with Matte Black Backing
Small frames look expensive when you control the back color. Matte black makes the photo feel deeper and keeps glare down, especially near windows. Scrap trim gives you clean corners without hunting for a full frame kit. I like 4x4 or 4x6 sizes for compact walls because they don't crowd the room.
Cut trim pieces to your frame size and miter the corners if you can. Paint them with matte black spray, then add a foam core backing. Glue the photo to matte board, and attach it with photo corners or a thin inner lip.
Pro tipUse a black pen to color the edges of foam core so you don't see white rings.
AvoidDon't leave the backing shiny - it creates a hot spot behind the photo.
9. Thin Mirror Frame with Photo Backing Insert
A mirror frame is already the right shape for small space photo frame ideas, and it adds light. You're basically making a photo display that also reflects the room, which helps tiny rooms feel less closed in. The trick is keeping it shallow and sealing the edges so the photo sits flat. I use one statement photo - close-ups look best.
Remove the mirror glass carefully, then cut foam core to fit the opening. Glue or tape the photo to the foam core and cover it with a thin clear acrylic sheet to protect it. Add a simple stand using a strip of wood so it sits upright on a console.
Pro tipChoose a photo with strong contrast - the frame reflection makes muted images disappear.
AvoidDon't use thick glass replacements - depth will creep over 2 inches.
10. Laundry Peg Frame for Polaroid-Size Photos
Laundry pegs are light, easy to swap, and they look cute in small displays. I use Polaroid-size photos because the white border hides the peg contact points. The board keeps everything aligned, so it doesn't look like a random clothesline. This one is great for bedrooms and kids' rooms where you'll change photos often.
Paint a small board, then attach two pegs on each side using screws or strong glue. Keep the photo centered and clip it so the top edge sits 1/4 inch below the peg line. For stability, mount the board with two small wall hooks.
Pro tipSand the peg ends lightly so they don't dent glossy photo paper.
AvoidDon't clip too tight - you'll leave a crease in the photo border.
11. Scrap Wood Bar Frame for a 3-Photo Row
A single horizontal bar is underrated for small spaces. It draws the eye across, and three photos fit without making the wall busy. I like using reclaimed wood with a warm stain, then painting the photo backer white so colors stay true. This style also works on narrow hallways where vertical gallery walls feel too tall.
Cut three photo windows in a thin wood strip, then add small backing panels behind each window. Secure photos with thin clear vinyl strips or a simple inner frame lip. Mount the bar with a level and wall anchors if the wood is heavier than expected.
Pro tipUse 1/4-inch spacers between photos so you don't get visual "smearing" from close edges.
AvoidDon't leave raw saw cuts in the window edges - they look unfinished up close.
12. Jigsaw Puzzle Frame with Photo Under Clear Resin
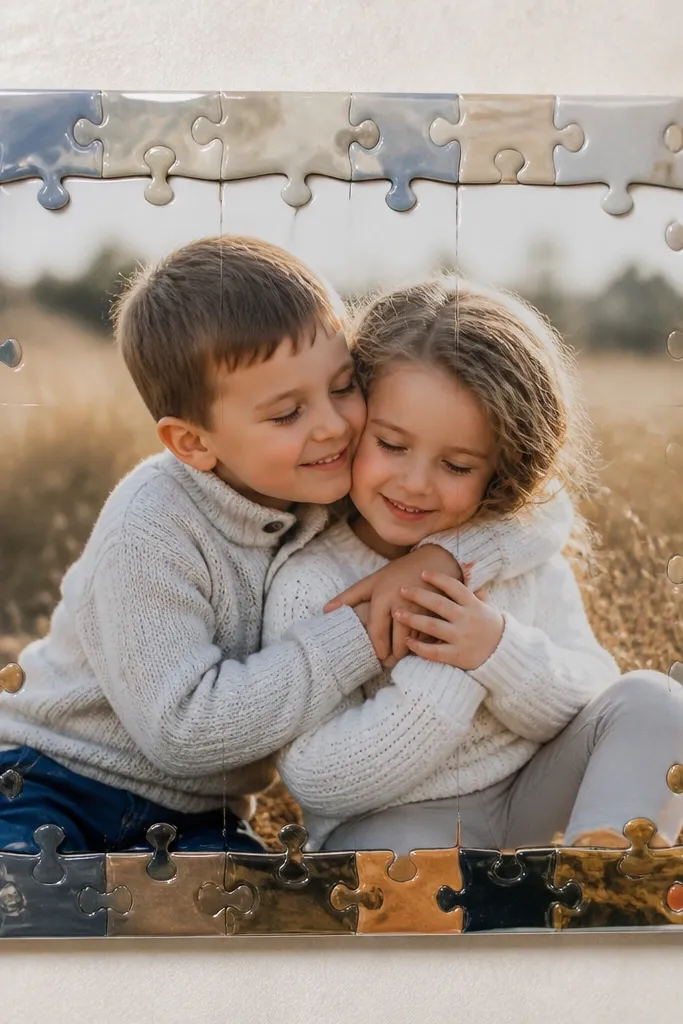
Puzzle pieces give you a playful frame shape without buying a frame. I use this when I want the photo to feel like it's floating under a glossy top layer. The resin makes the surface wipeable, and the uneven edges look charming when the photo is high-contrast. This works best in small spaces because it's a compact centerpiece.
Build a frame shape from puzzle pieces on a flat board. Seal the puzzle edges with a thin layer of clear resin or Mod Podge so resin doesn't soak unevenly. Place the photo, then pour a thin resin layer and let it cure fully.
Pro tipUse a hair dryer on low to pop tiny bubbles before curing.
AvoidDon't pour thick resin - it cures unevenly and can turn cloudy.
13. Canvas Stretch Frame with Photo Corners and No Glass
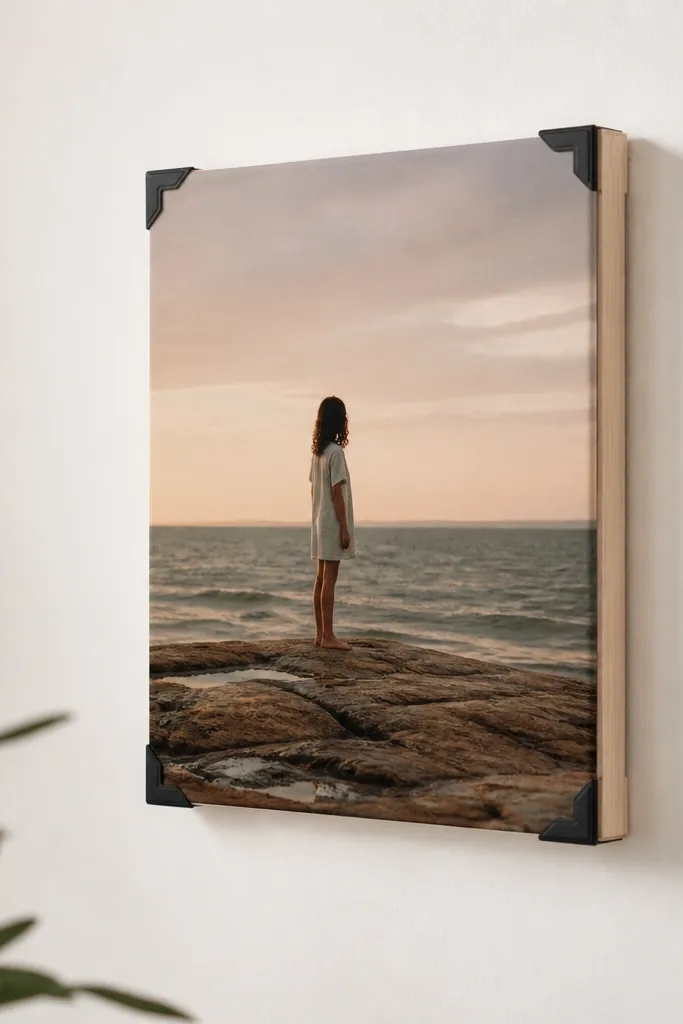
Canvas stretcher frames are shallow and light, so they fit small walls and shelves. No glass means less glare, and the photo looks more like wall art than a traditional frame. I use a matte photo print and attach it with photo corners so you can swap images later. The stretcher bars add clean lines even if the room decor is modern.
Cut a foam core backing to the stretcher size, then attach it to the inside edges. Center the photo and secure it with corner pockets or small binder clips hidden behind the bars. Wrap the back with craft paper so you don't see raw adhesive.
Pro tipStaple a thin felt strip around the edges so the photo doesn't rub the wood.
AvoidDon't skip back covering - the inside mess shows from the side.
14. Tin Can Photo Frame on a Small Repurposed Tray
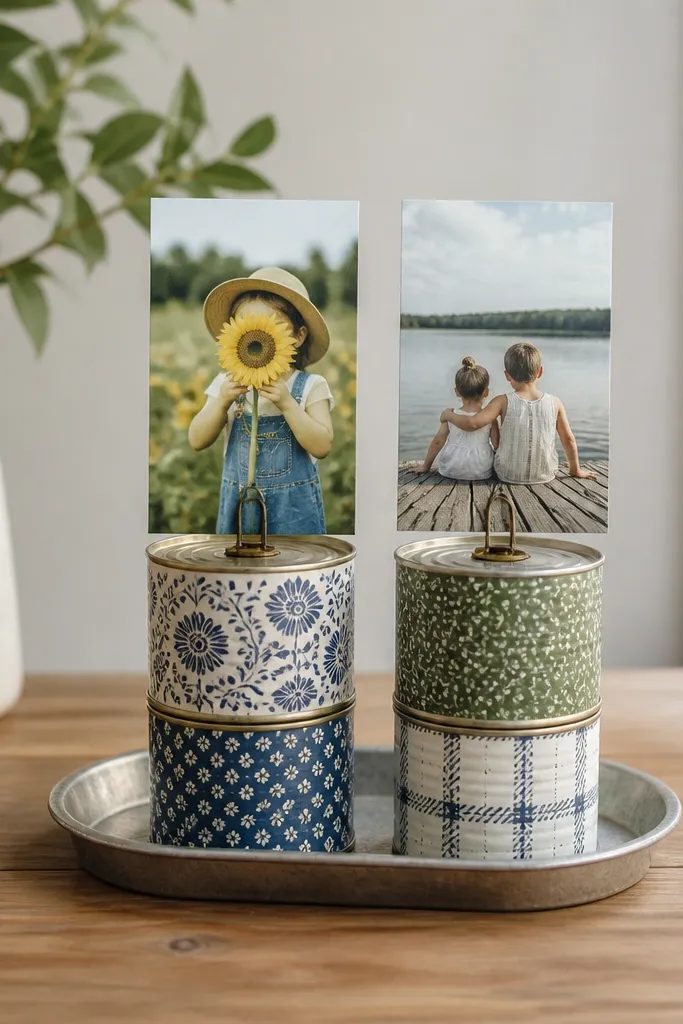
This is a desk-style option that still counts as a frame. The tin cans act like holders, and the tray makes it feel intentional rather than cluttered. I paint the cans in muted colors like sage and terracotta, then add a strip of patterned tape around the middle. It looks cute on nightstands and small entry tables.
Glue a strip of felt to the bottom of each can so it doesn't scratch surfaces. Cut a backing card for the photo to sit upright, then slide it into the can opening. Use the tray to anchor everything and keep it from tipping.
Pro tipAdd a small foam pad under the photo so it sits at the same angle every time.
AvoidDon't use bare metal edges near paper - they can curl corners.
15. Spoon and Fork Photo Frame from Silverware Handles
When you want something sculptural but still compact, silverware handles work. They create an airy border, and the brushed metal catches light without making the frame bulky. I use one centered photo with warm tones so the metal doesn't feel cold. This looks great in kitchens and dining nooks where you want a little personality.
Clean and de-rust the silverware, then sand any sharp points. Arrange handles around the photo window, then hot glue them to a thin backing board. Paint the backing a warm cream so the photo blends with the metal.
Pro tipUse a clear acrylic sheet over the photo if you plan to hang it near cooking steam.
AvoidDon't glue directly to glossy photo paper - it can peel and warp.
16. Reclaimed Pallet Slat Frame with a 2x3 Photo Mat
Pallet wood has character, but it can look messy if you don't tame it. I sand it down to smooth the high points and then seal with a matte clear so the grain stays warm. The 2x3 photo mat keeps it compact and gives the photo room to breathe. Twine adds a little rustic charm and makes it feel handmade.
Cut slats into top and sides, then add a thin backing board. Use a white mat board for the photo so the pallet doesn't darken it. Tie twine around two tiny nails on the back to hold the photo mat in place.
Pro tipSeal edges with a brush-on polyurethane so splinters don't show up later.
AvoidDon't skip sanding - pallet wood can snag fabric and fingers.
17. Old Belt Strap Frame with Center Photo Window
Leather belts give you a flexible border that looks expensive even when it's thrifted. The photo window sits cleanly inside the belt, and the belt edge creates a defined outline. I like dark brown belts with a matte finish because they don't reflect light. This style is great for small space photo frame ideas on shelves where you want something warmer than plastic frames.
Cut the belt into four pieces for the border, then glue them onto foam core with contact cement. Punch a small hole for hanging hardware behind the top strap. Add a backing paper layer so you don't see foam edges.
Pro tipCondition the belt with a tiny bit of leather balm so the photo border doesn't look dry and cracked.
AvoidDon't use stretchy belts - the border warps and the corners won't sit square.
18. Magazine Cutout Border Frame with Solid Color Backer

This one looks artsy without being chaotic because the photo sits on a solid backer. I use magazine cutout strips only on the border, then cover the top with a clear matte sealer so it doesn't shed. The teal or cream backing makes the photo color pop. It's perfect for small walls where you want personality but not clutter.
Cut a thin inner frame from foam board and glue magazine strips around the edge. Place the photo on a solid backing panel, then sandwich it behind the magazine border layer. Seal the magazine with matte Mod Podge in thin coats.
Pro tipPick one magazine page color family so the border looks intentional instead of mixed.
AvoidDon't cover the photo with magazine paper - it dims the image and looks dirty.
19. Cookie Sheet Frame with Tin Back and Photo Magnet Strip
A cookie sheet is thin metal, which means it's light and it holds magnets firmly. You get a modern, industrial look that works in small kitchens and apartments. I use a magnet strip along the sides and a matte backing so the photo doesn't reflect the room. The metal edge frames the photo without adding depth.
Clean and dry the cookie sheet, then paint it matte black or brushed silver. Print your photo to fit, then mount it on a thin foam board backing. Add magnets at the corners or along the side edges and mount the cookie sheet using a strong wall hanger.
Pro tipUse neodymium magnets for small frames so they don't slide.
AvoidDon't use glossy backing - it reflects the light and makes the photo look washed.
20. Clothespin + Dried Flower Mini Frame
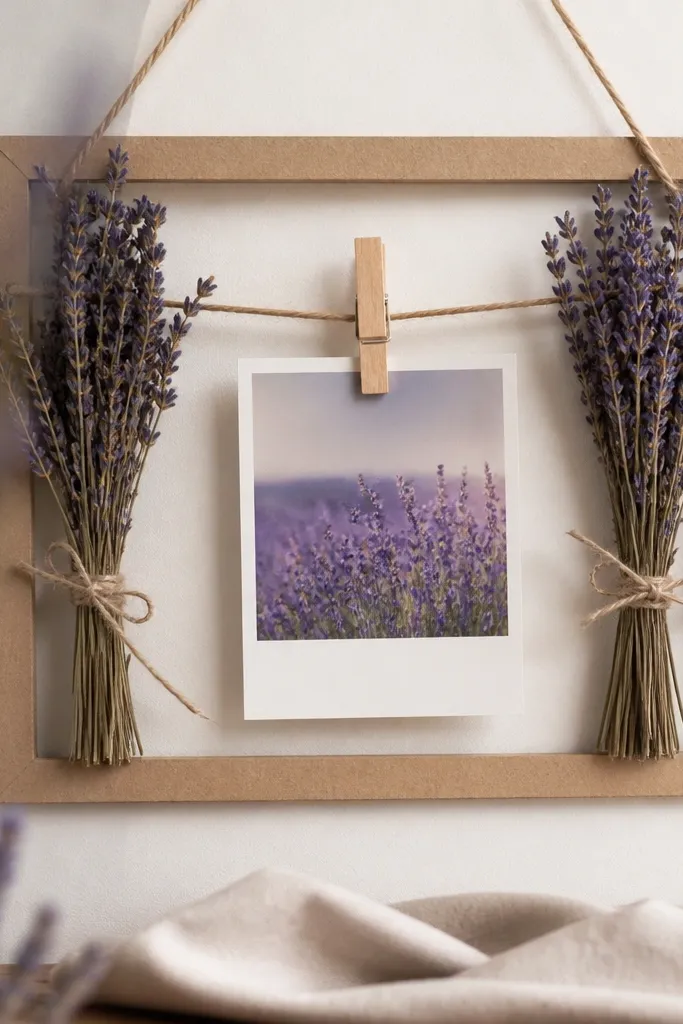
Dried flowers add texture, but you need restraint. I keep the dried flowers in one corner and let the photo be the main subject. Clothespins hold the photo without glue, so you can swap it later when seasons change. The result is small space photo frame ideas that feel personal and not generic.
Use a thin board frame, then glue a tiny strip of fabric or twine where the photo will sit. Place dried lavender in a small cluster and secure it with hot glue on the board, not on the photo. Clip the photo to the front edge with one clothespin per side.
Pro tipSeal dried flowers with a light spray so they don't shed dust onto the photo.
AvoidDon't glue flowers directly to the photo - it warps the paper and looks uneven.
21. Scrap Wood Corner Frames for a 4x4 Photo Cluster
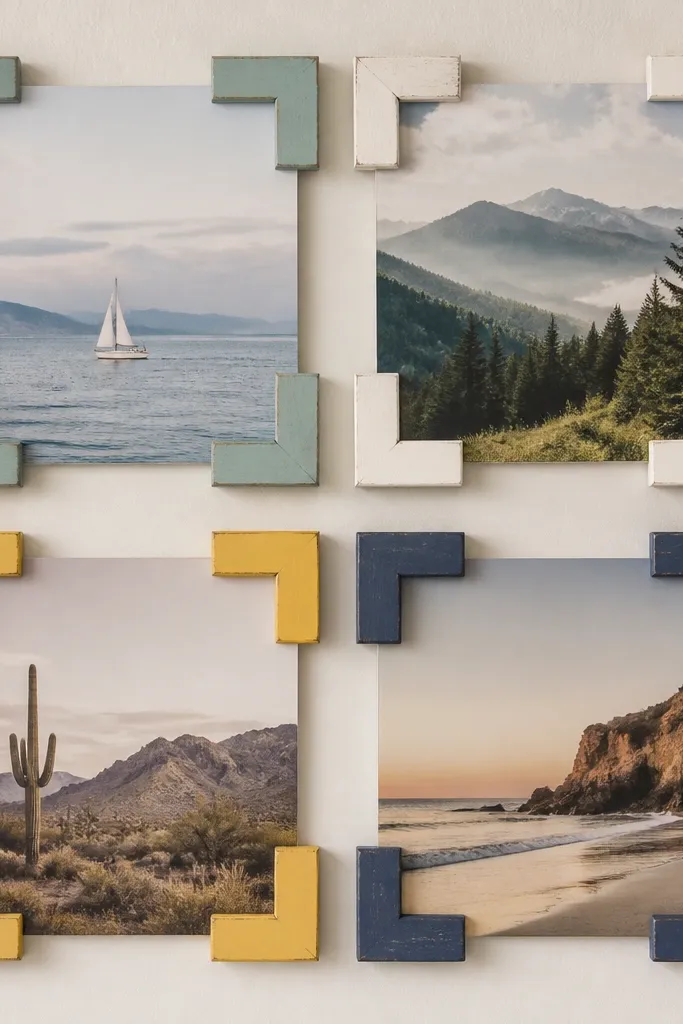
Corner frames are genius for small spaces because they keep the photo large and the border minimal. You get the frame look without the bulk of a full rectangle. I paint the corners white or matte black and keep the photo sizes identical. The cluster looks modern because the spacing is consistent and the negative space is clean.
Cut four corner pieces per photo from scrap wood, then sand and paint them matte. Use foam core behind each photo and attach with small corner brackets. Mount the grid to a backing board or hang each photo with the same hook height.
Pro tipUse a paper template to mark mounting points so all four corners line up.
AvoidDon't use different wood thicknesses - the photos end up at different heights.
22. Upcycled Sheet Music Frame with One Color Photo
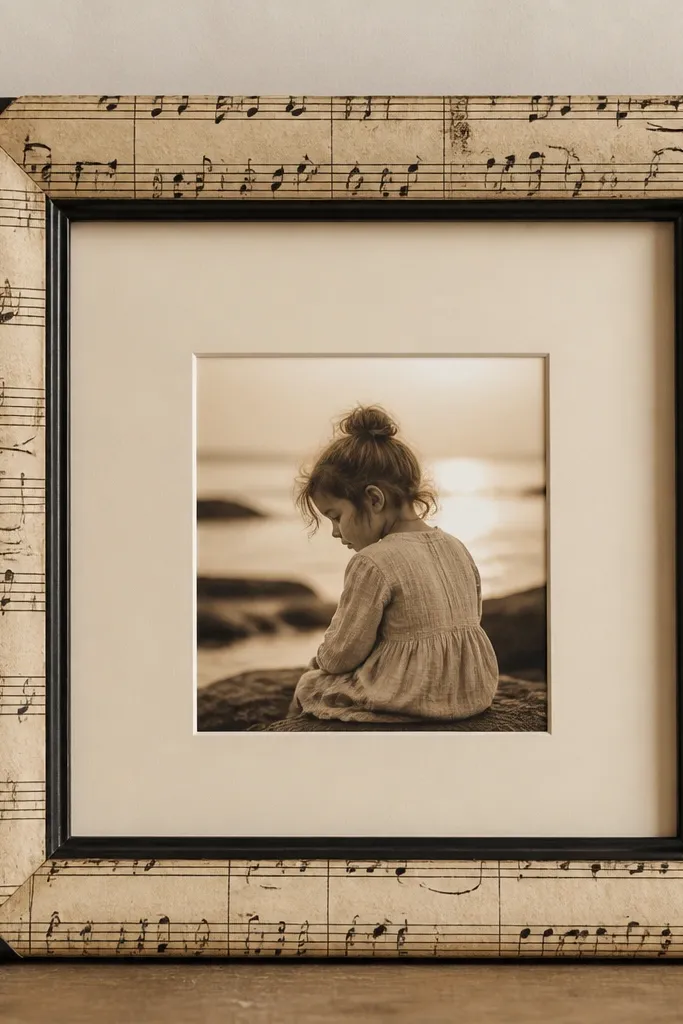
Sheet music paper adds pattern without taking over if you keep it to the border. This works especially well with one-color photos like sepia portraits or monochrome landscapes. The frame border gives you the theme, and the off-white mat keeps the photo readable. In small rooms, this feels more intentional than covering the whole frame.
Cut sheet music strips and wrap them around a thin foam board frame border. Seal with matte Mod Podge in two thin coats. Add an off-white mat board so the photo doesn't sit directly on patterned paper.
Pro tipChoose sheet music pages with fewer stains so the border looks clean up close.
AvoidDon't stack thick layers of paper - the edge will look uneven and shadowy.
23. Painted Matchbox Photo Frame for a Desktop Display
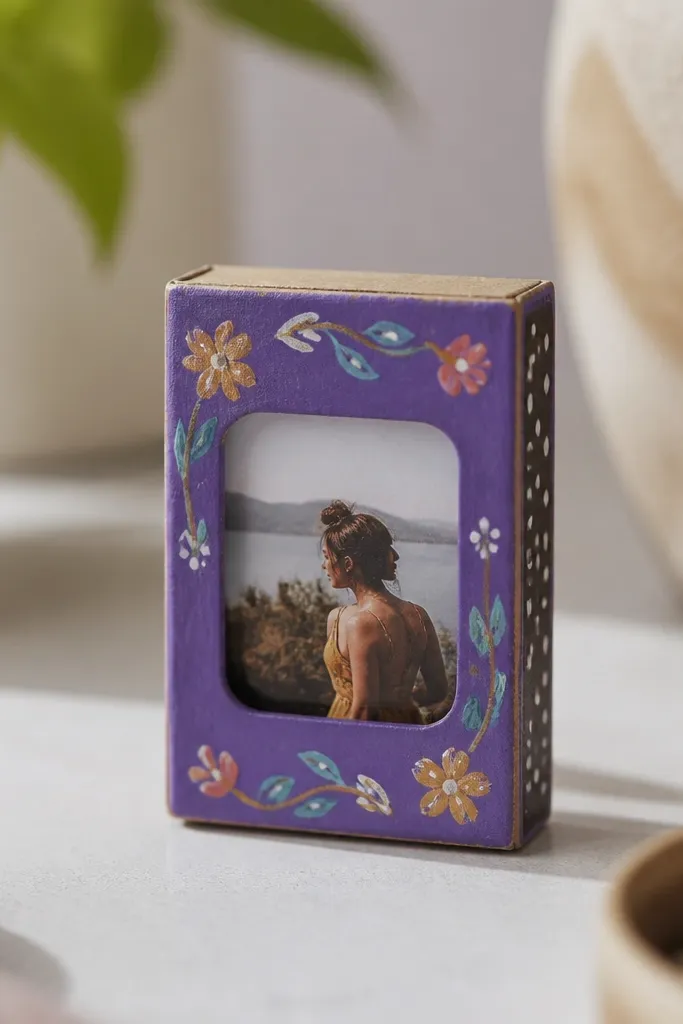
This is tiny, but it looks cute on desks and nightstands. The matchbox shape already has a built-in border, and the painted shell makes it feel like a design object. I use a clear plastic window so the photo stays protected from fingerprints. It's also a fast project when you want several small space photo frame ideas without heavy tools.
Empty a matchbox, then cut a window in the front using a craft knife. Glue the clear plastic behind the window and insert a photo on thin cardstock. Paint the outside with two light coats and let it dry fully before assembling.
Pro tipUse a matte photo finish so the clear plastic doesn't create glare.
AvoidDon't leave the window edge raw - it catches light and looks unfinished.
24. Shoe Box Lid Frame with Fabric Hinge and Flip-Open Photo
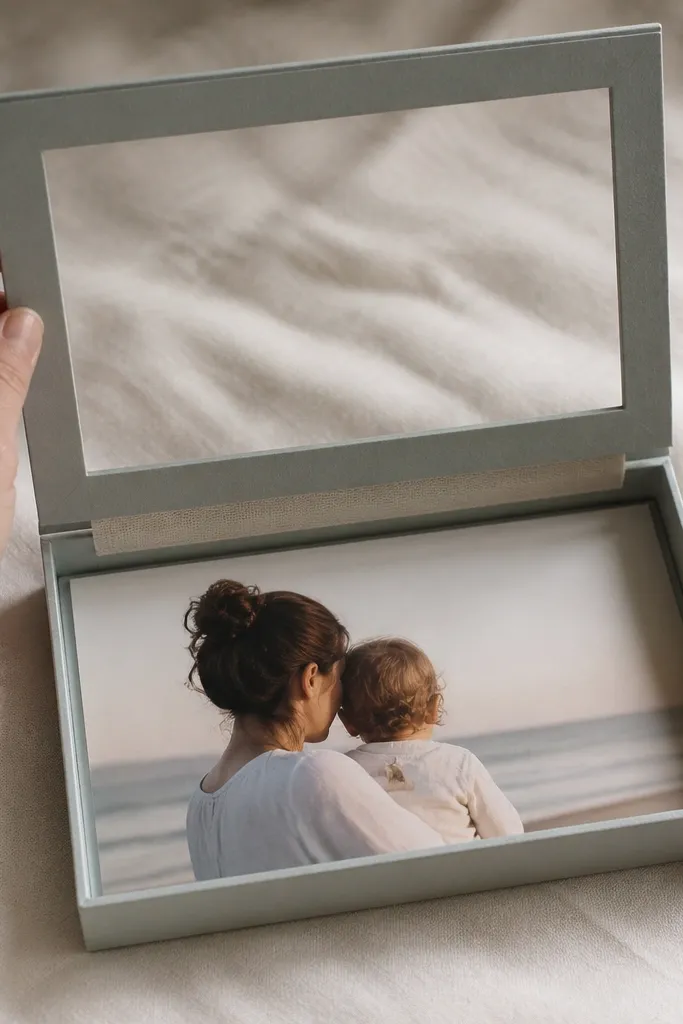
Flip-open frames are fun because they hide the craft bits and protect the photo. The shoe box lid is thin, so it fits small shelves, and the fabric hinge looks neat. I like using a solid fabric cover like cotton canvas in cream or dusty blue. When closed, it looks like a tiny keepsake box.
Cut the lid into a rectangle frame and add a foam core backing. Cover the front with fabric wrapped over the edges, then glue a fabric hinge along one side. Insert the photo on a backing card and secure with a small magnet tab.
Pro tipUse a small rare-earth magnet for a strong close so it doesn't pop open on its own.
AvoidDon't use thick foam - it makes the lid bulge and look uneven.
25. Rug Sample Frame with Photo Center and Padded Back
Fabric borders make photos feel cozy, and rug samples are already thick enough to look intentional. I keep the photo centered on a plain white or cream mat so the fabric pattern doesn't fight the image. This is one of my favorites for small space photo frame ideas in bedrooms because it softens hard walls. It also hides uneven edges from upcycling.
Cut rug sample fabric into a border strip, then wrap it around a foam board frame. Add a padded backing by gluing thin felt behind the photo mat. Use photo corners to attach the photo so it stays removable.
Pro tipTrim the fabric border so the photo edges have a 1/2-inch clean mat all around.
AvoidDon't use a border with a strong busy pattern and a busy photo - it turns into visual noise.
26. Tin Can Planter Turned Photo Holder with Twine Bow
This is a photo holder disguised as decor. The planter shape keeps it upright without needing a bulky frame, and the twine bow adds a handmade touch. I paint the rim in one accent color like mustard or terracotta so it matches other shelf items. The photo looks like part of the styling, not something tacked on.
Use a small tin planter or clean out an old candle tin. Insert a stiff backing card with the photo attached, then secure with a small piece of foam inside the tin. Wrap twine around the rim and tie a bow with short ends.
Pro tipAdd a tiny strip of felt at the bottom so the backing card doesn't slide.
AvoidDon't leave the inside unpainted - shiny metal shows behind the photo edges.
27. Thrift Frame with Faux Mat Made from Wallpaper Scraps
Wallpaper scraps make the mat look custom without buying expensive mats. The frame stays thin, and the photo sits in the center with a clean border. I pick one wallpaper pattern with a small scale so it doesn't overwhelm the photo. This is a fast upgrade that still counts as DIY because you're building the mat layer.
Remove the backing and glass from a thrift frame. Cut wallpaper to mat size, then glue it to foam core. Add a photo on cardstock to the inner window size and reassemble with the frame's original clips.
Pro tipUse a matte clear spray on the wallpaper mat so it resists humidity.
AvoidDon't use a wallpaper with big, dark shapes right next to the photo edge - it frames the photo too harshly.
28. Peg Rail Mini Frames with Threaded Wire and 6x8 Prints
A peg rail lets you adjust height without new holes, and it keeps multiple frames aligned. I like 6x8 prints because they fill the space without looking too tall. Thin wire gives the frames a floating look, which is perfect when your room is tight and you don't want chunky hardware. The rail also makes it easy to expand later.
Install a short peg rail with level marks. Attach small hooks or wire loops to the back of thin frames, then hang them from the rail pegs. Keep the mat color consistent - cream or light gray - for a cohesive set.
Pro tipMeasure from the rail to the photo center so both frames sit at the same eye level.
AvoidDon't twist wire too tight - it can warp the frame backing and make the photo angle weird.
29. Photo Frame Made from a Single Drawer Pull Border
Drawer pulls look like jewelry for your photo. They give you a defined frame border, and they're easy to source from hardware stores or thrift furniture. I paint the pulls matte black or leave them brushed brass for warmth. The photo stays centered and visible because the pull shape creates an airy outline.
Cut a foam board backing to photo size, then attach pulls around the edges with screws through the board. Use a thin mat so the photo doesn't touch the metal directly. Mount the frame to the wall using a single hanger on the back for balance.
Pro tipChoose pulls with similar thickness so the frame looks even from the side.
AvoidDon't mix pull finishes - mismatched metal makes the frame look accidental.
30. Storm Drain Art Frame from Scrap Metal Sheet with Photo Center
If you like industrial decor, scrap metal makes a strong, thin border. It adds weight visually but stays shallow, so it works in small spaces without taking over. I use a distressed metal finish because it hides small imperfections from cutting and sanding. The photo looks crisp behind clear acrylic.
Cut a rectangle from thin scrap metal, sand edges until smooth, and deburr with a file. Paint or seal with metal primer and a satin topcoat. Mount the photo on foam core, place acrylic over it, and secure with small corner brackets.
Pro tipWear gloves and eye protection - metal edges get sharp fast.
AvoidDon't skip edge sanding - it's the part that makes it look cheap and unsafe.


