1. Coffee Sack Linen Wrap with Twine Bow
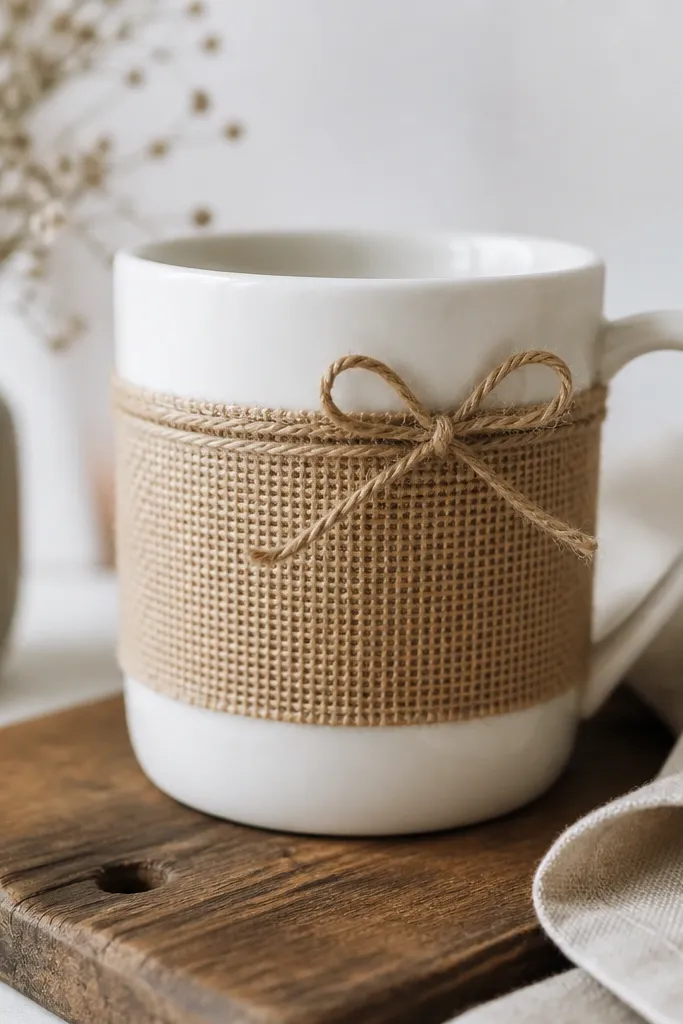
This one looks like rustic shop pottery without the bulk. The coffee sack fabric has natural speckling and vertical weave, so it hides tiny imperfections and makes the mug look textured. I keep the wrap band narrow - about 3 inches tall - so it reads as a deliberate "belt" on a small shelf. The twine bow adds a focal point without covering the handle grip area.
Cut a rectangle of coffee sack fabric about 9 inches wide by 3.5 inches tall. Wrap it around the mug's middle and glue the seam on the back with hot glue, then stitch the seam with thick jute thread for extra hold. Tie the twine bow using 6-8 inches of twine, then trim ends to 1 inch.
Pro tipSeal the fabric with a thin coat of matte Mod Podge or fabric-safe sealer so it wipes clean.
AvoidDon't glue fabric over the handle curve - it makes the handle feel chunky and looks sloppy.
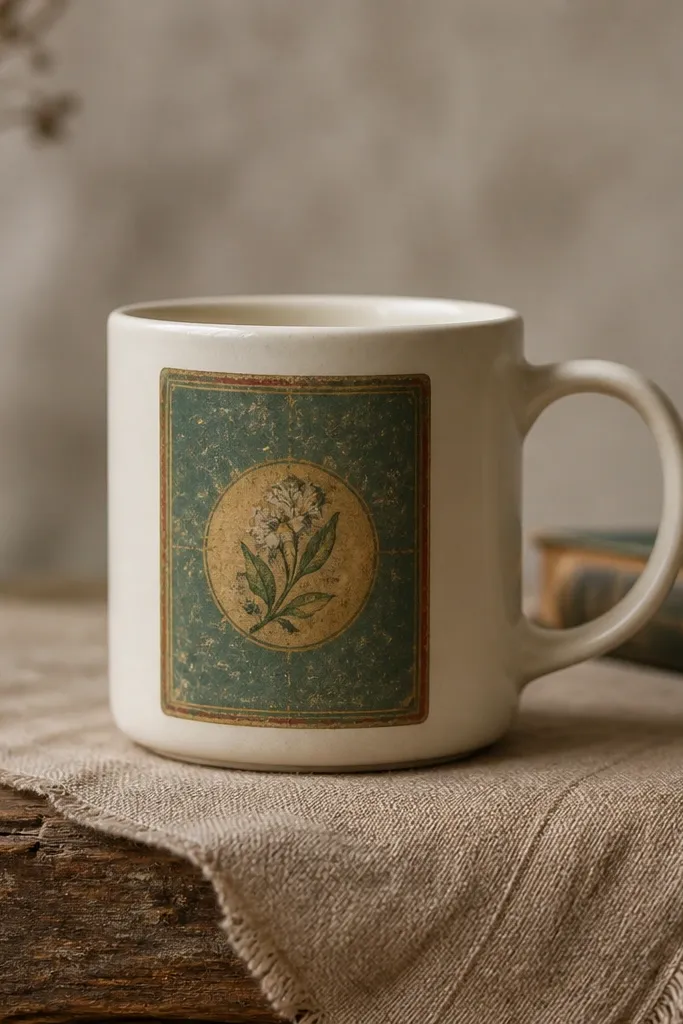
2. Old Book Page Decoupage Constellation
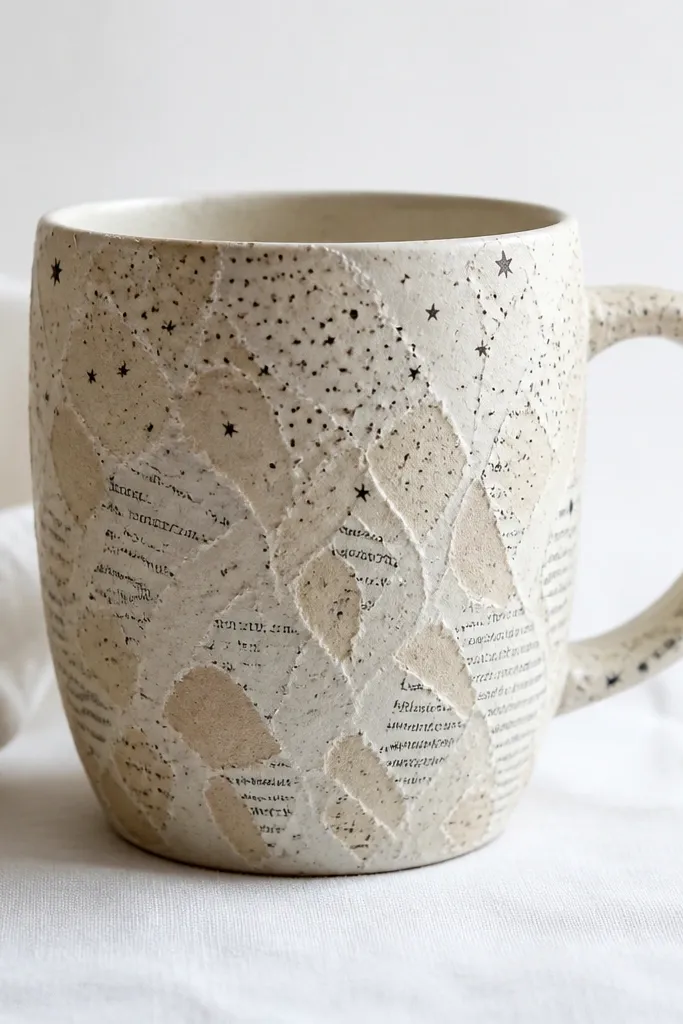
I love this for tight corners because the design stays light and airy. Torn book pages give a paper texture that catches light, and the constellation layout keeps it from looking chaotic. I use a limited palette - cream paper plus a few touches of dark ink - so it doesn't compete with other shelf items. The result looks vintage but stays readable at a distance.
Tear book pages into irregular circles and thin scraps, then dry-arrange them on the mug. Mix a paper decoupage medium with water (about 2:1) and paint it under and over the pieces. Add a dot pattern using a fine-tip archival pen near the "stars," then seal with 2 coats of clear matte acrylic.
Pro tipUse a small foam brush for the top coat so you don't leave thick ridges over the torn edges.
AvoidDon't use glossy varnish - it makes paper look plastic and can peel at the rim.
3. Map Coordinates Wrap Around the Handle Side
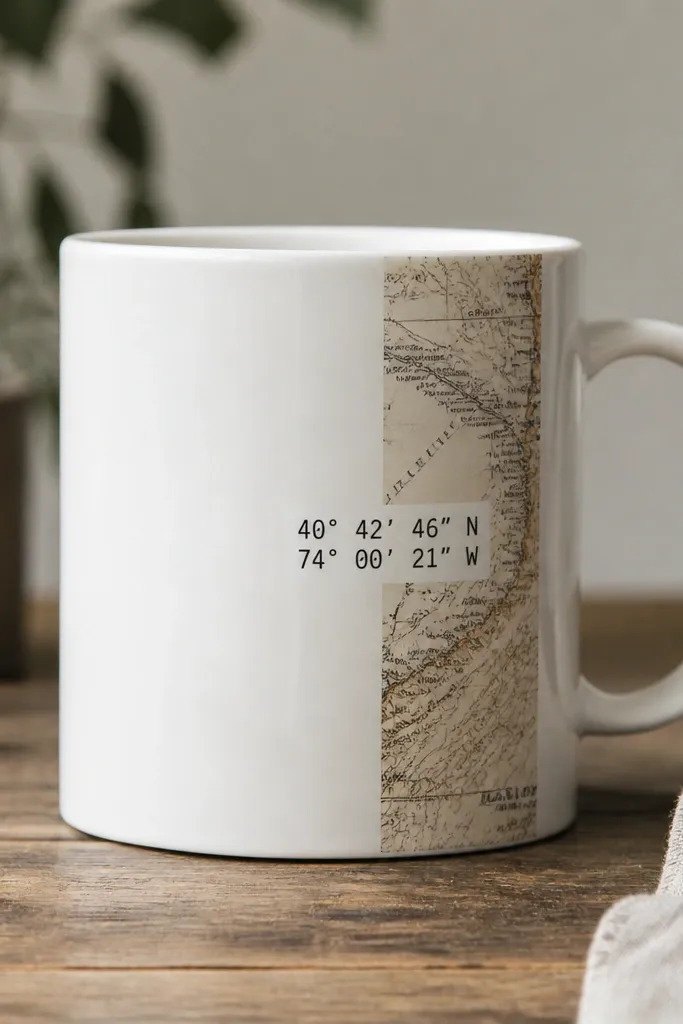
This is my go-to "personal corner" mug. The vintage map strip gives instant character, and the coordinates text makes it feel intentional. Keeping most of the mug plain prevents visual clutter in small storage. The map's lines also make the mug look like it belongs with travel photos and shelf decor.
Print or cut a map strip about 1.5 inches wide by 4 inches tall. Apply a thin layer of decoupage glue, press the strip, and smooth bubbles with a credit card edge. Add coordinates with a stencil and acrylic paint, then seal with a dishwasher-safe dish sealer if you'll use it often.
Pro tipPlace the strip starting 1 inch above the base so it doesn't look like a label.
4. Fabric Scrap Patchwork Band with Heat-Set Vinyl Label
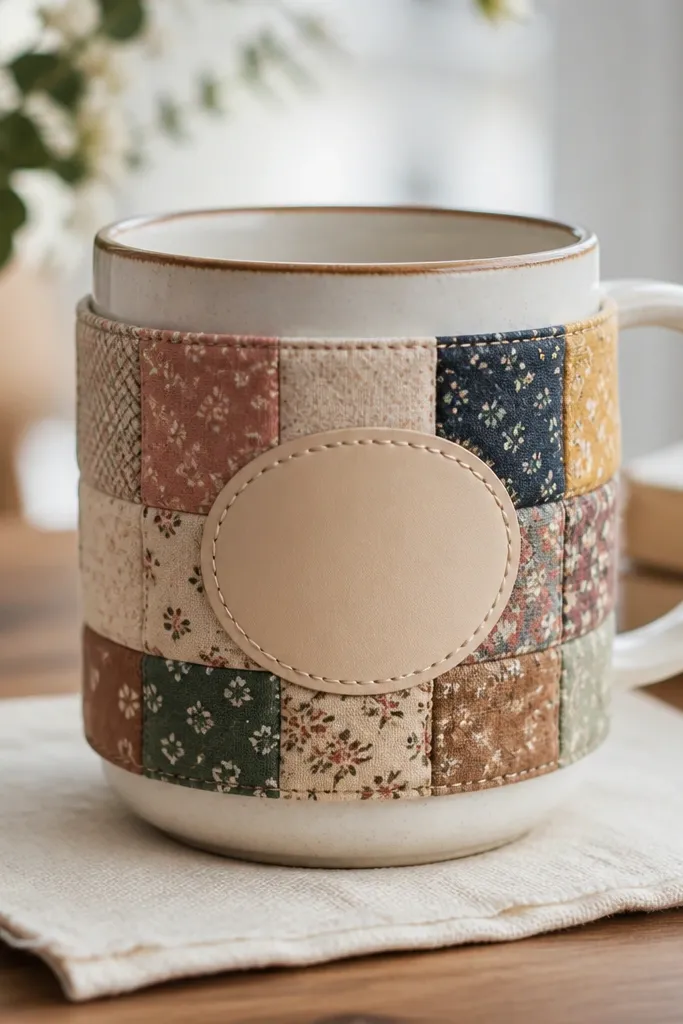
Patchwork looks handmade even when you only do one band. I use fabric scraps with different textures - cotton, linen, and a bit of denim - so the mug looks dimensional. The vinyl label keeps the design sharp and legible, which matters on a small shelf where the mug is seen fast. It also hides any uneven glue lines under the band.
Sew or glue fabric squares into a band 3 inches tall. Wrap around the mug and glue the seam at the back. Cut a vinyl label (about 2 inches wide) and heat-set it following the vinyl brand instructions, then seal fabric edges with a thin fabric glue or Mod Podge.
Pro tipChoose fabrics in one color family - like cream, tan, and muted olive - so the patchwork looks calm.
AvoidDon't stack thick seams at the front; they show as lumps from across the room.
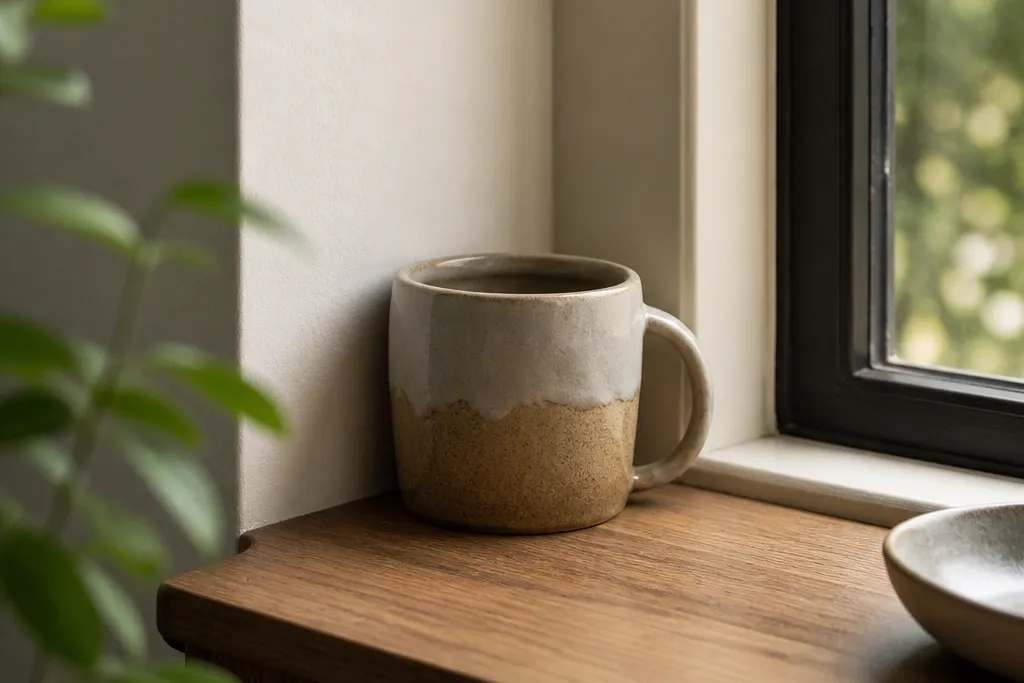
5. Marbled Acrylic Pour Only on the Bottom Third
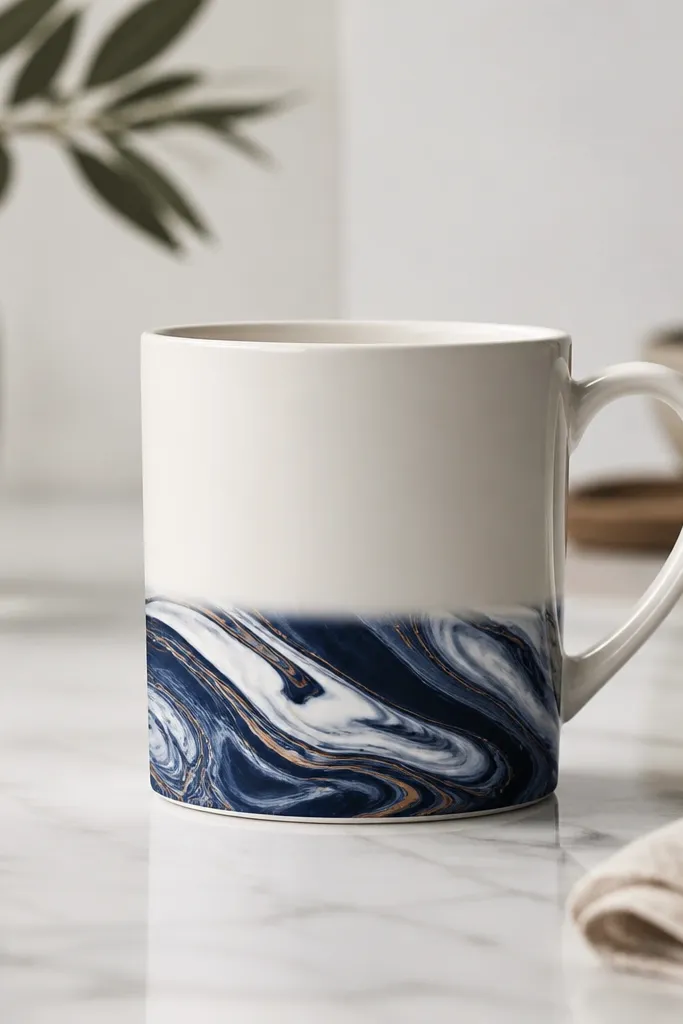
This is the "big wow, small effort" version. Marbling on the bottom third keeps the top clean for drinking and keeps the mug from looking busy. The marbled effect is naturally organic, so each mug turns out different without extra design work. Copper accents make it look like designer ceramic even when the rest is plain.
Tape off the top line so you only paint the bottom 2.5 to 3 inches. Mix acrylic paints with a pouring medium to a thin yogurt consistency, then drag a toothpick through the colors for swirls. Let it cure fully, then seal with a heat-safe clear glaze spray made for acrylic on ceramics.
Pro tipWipe the mug rim edge carefully with a damp cloth before curing so you don't get drips around the lip.
AvoidDon't pour all the way up - full-coverage marbling looks messy in tight corners.
6. Upcycled Denim Pocket Mug Sleeve
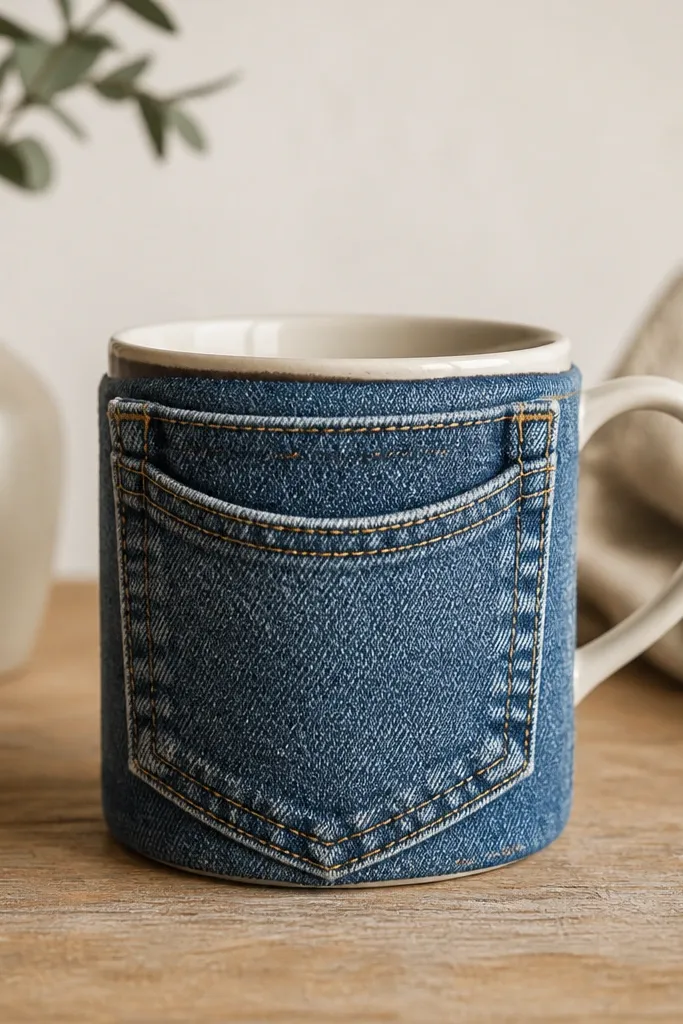
It looks like a tiny jacket for your mug, and it's perfect for a small space because you're adding a built-in "front" feature. The denim seams guide the eye, and the pocket shape gives structure so the mug doesn't feel plain. I like using a real jeans pocket because the proportions are already right. You also get a handy pocket for a tea bag or a mini stirring spoon.
Cut a jeans front pocket panel with about 1 inch of extra fabric around the edges. Glue and stitch it onto a snug sleeve shape that slides over the mug. Reinforce the pocket bottom so it doesn't sag, and use fabric-safe sealant if you'll wash it.
Pro tipChoose a pocket with a strong top seam - it makes the sleeve feel "designed," not patched.
7. Scrap Wood Veneer Nameplate on a Plain Mug
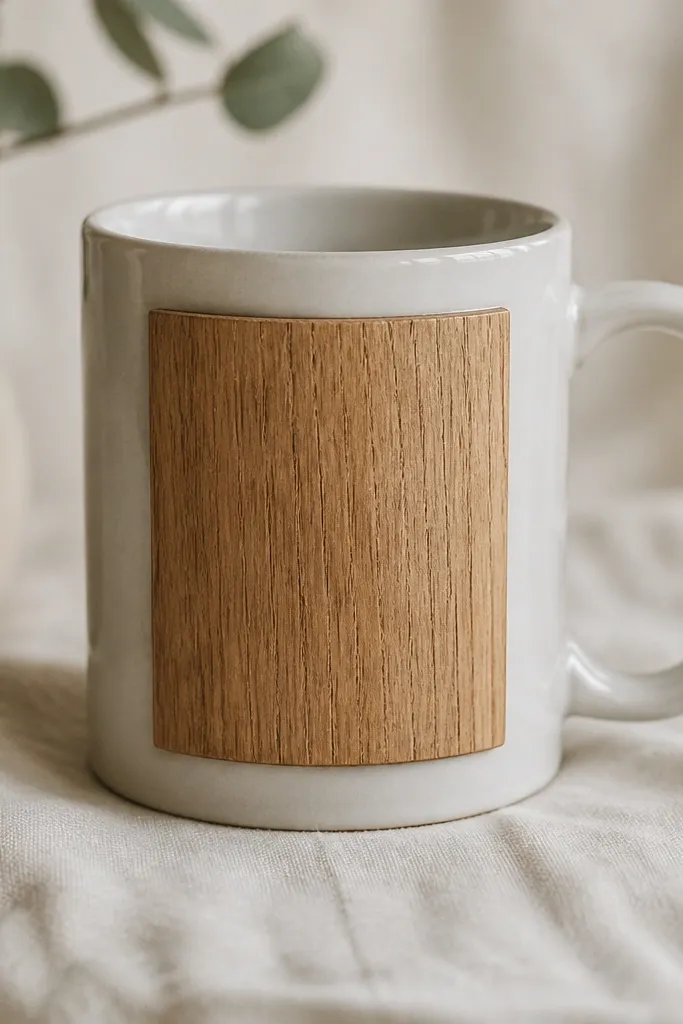
Wood veneer gives you a high-end look with almost no visual clutter. The grain lines act like texture, so you don't need heavy paint or patterns. I keep the wood piece small - about 2x3 inches - because big wood panels make a mug look bulky on a shelf. It also pairs well with minimalist kitchens.
Cut veneer to 2 inches by 3 inches. Sand lightly, wipe dust, then seal with a thin polyurethane meant for crafts. Glue it to the mug with a strong craft adhesive, then seal around the edges with a thin clear coat so water doesn't creep underneath.
Pro tipUse a black fine-tip permanent marker to add a simple date or initial on the wood before sealing.
8. Wire Wrapped Handle-Shadow Frame
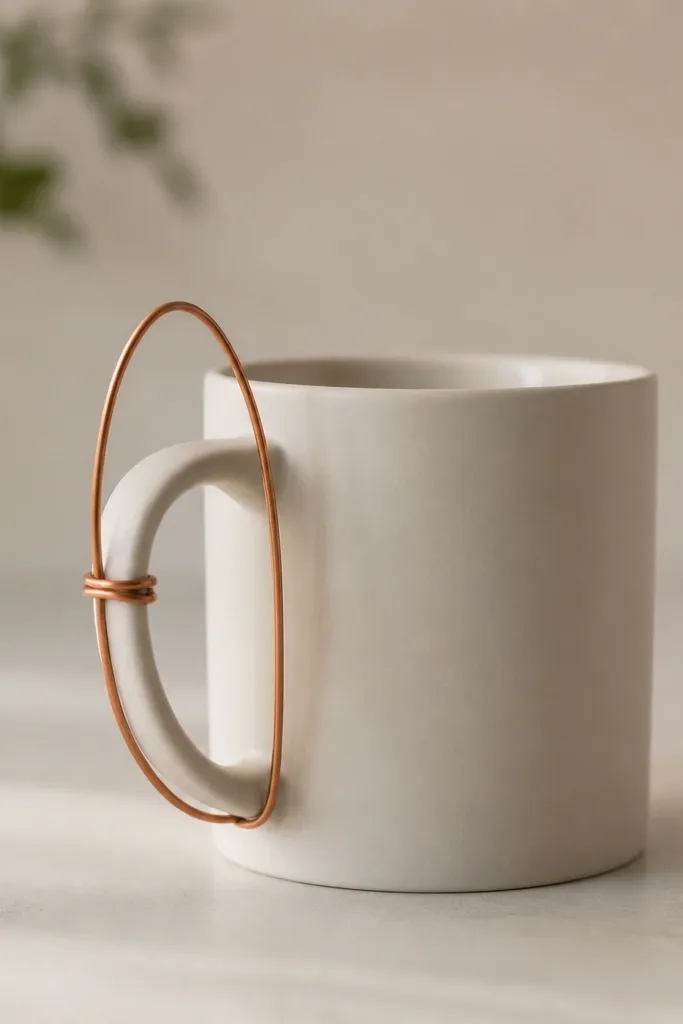
This makes the mug look like a piece of wall decor even when it sits on a counter. The wire frame catches light and creates a soft shadow, which looks good in small spaces where you don't have room for big decor. Copper also warms up cool kitchens. I keep the wire close to the mug so it doesn't feel like a separate object.
Use 1/16 inch copper wire. Wrap the ends around tiny dots of hot glue on the mug sides, then shape an arch that follows the handle curve. Twist the wire ends at the back so they don't scratch. Seal with clear craft varnish to prevent tarnish.
Pro tipMake the arch 1 inch wider than the handle so it frames without blocking your grip.
AvoidDon't use thick wire - it looks clunky and fights the mug shape.
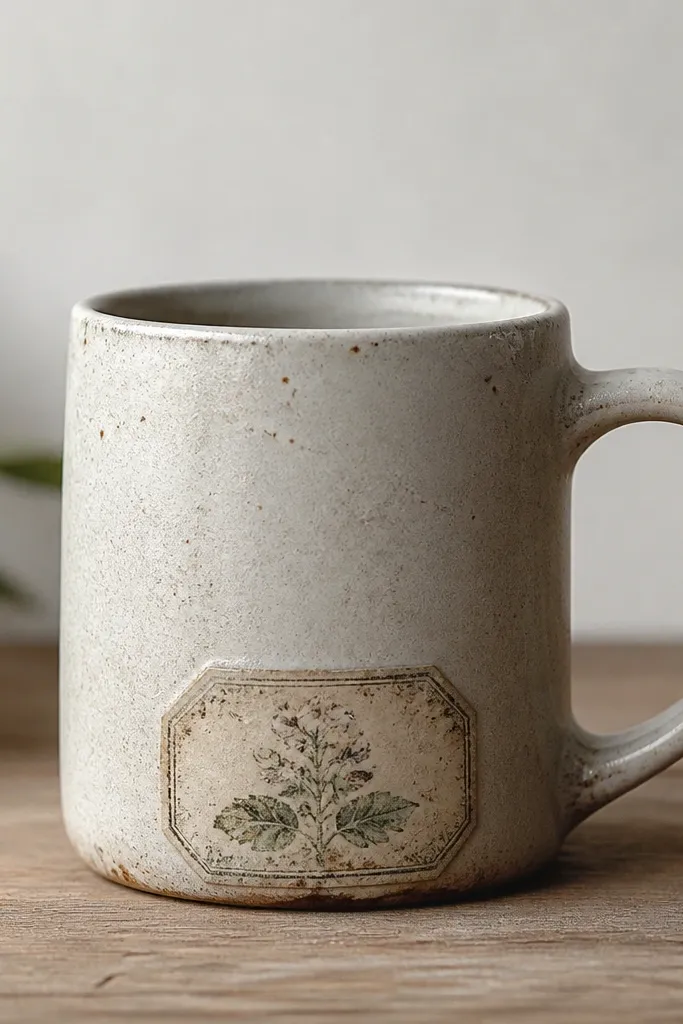
9. Stenciled Mini Botanicals in a Single Corner
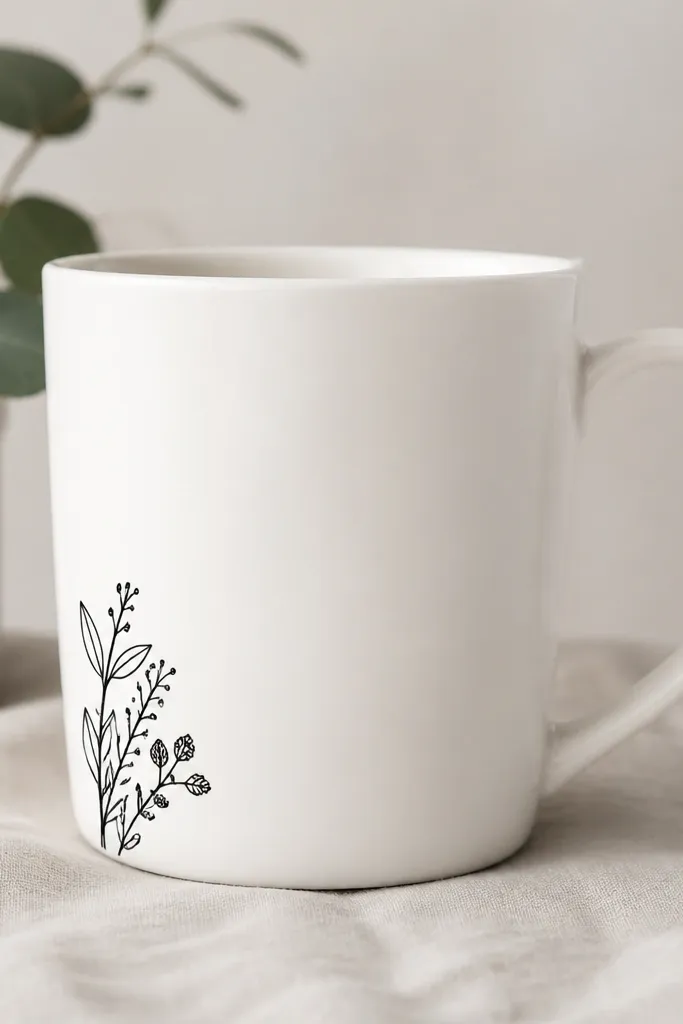
Single-corner designs are perfect for tight shelf arrangements because they don't compete with other items. Stencil line art looks clean and handmade, especially when you stick to one color. I use small botanicals like sprigs and leaves so the mug still feels cozy. The matte finish keeps it from looking like a sticker.
Tape a stencil so it sits about 1 inch above the base on the front. Use ceramic paint and dab with a sponge brush instead of dragging, then let it cure per paint directions. Add a second layer for opacity if needed, then seal with a mug-safe clear coat.
Pro tipPractice on paper first - lining up a tiny stencil is 90% of the work.
10. Glitter Gradient Bottom Edge with Non-Slip Seal
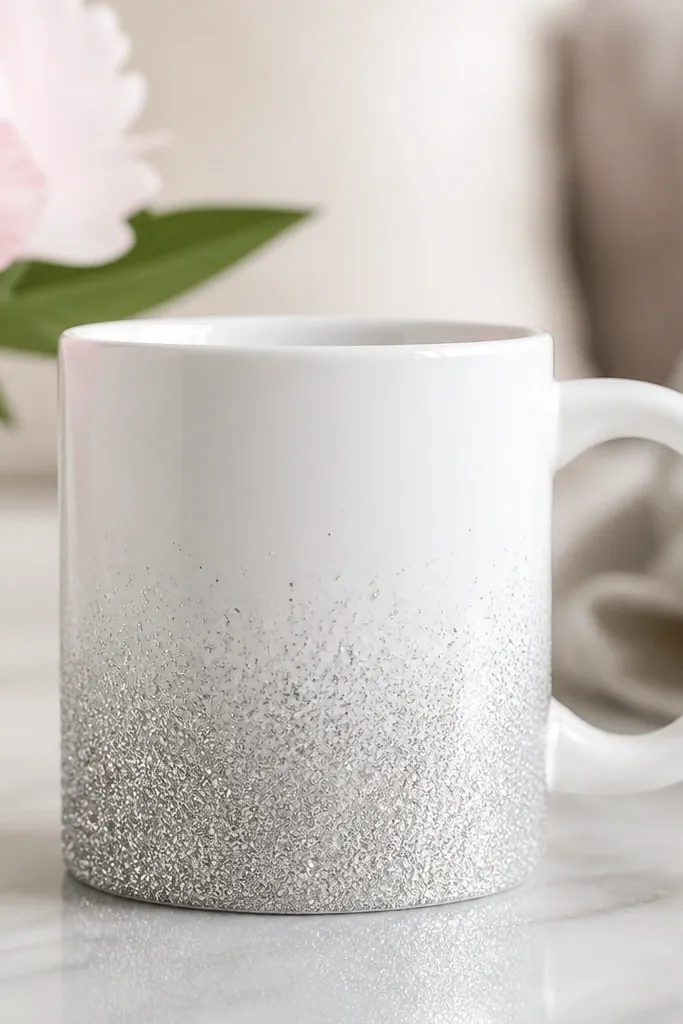
This gives you sparkle without making the whole mug look like it's covered in glitter. A bottom-edge gradient looks like light reflecting off ceramic, which reads upscale in photos and in person. I like silver or pale rose glitter because they don't fight neutral kitchens. The non-slip seal makes the finish feel more "finished," not just loose glitter.
Brush glue or clear craft gel along a 1-inch band at the bottom, then sprinkle glitter and tap off excess. Blend upward by applying less glue as you go. Seal with a flexible clear sealer and let it cure for at least 48 hours before use.
Pro tipUse fine glitter, not chunky craft glitter - chunky stuff catches on your lips.
11. Hand-Painted Checker Band with Matte Top Coat
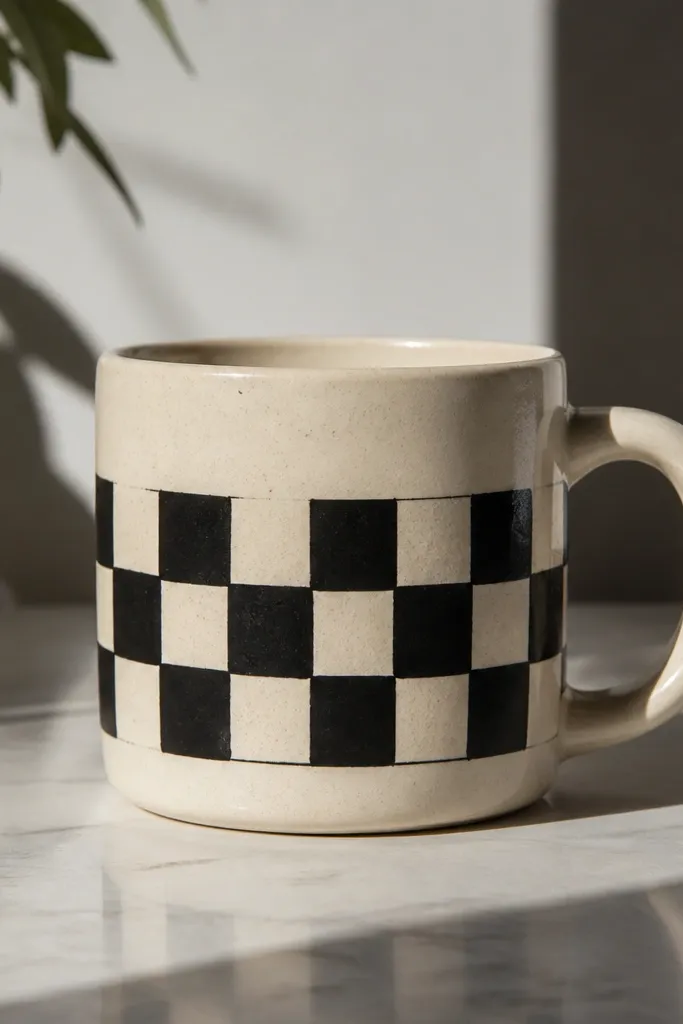
A checker band is my favorite when I want something graphic but small. The black and cream contrast stays strong even from across a room. Hand-painted squares look better than perfectly printed ones because the slight irregularity reads handmade, not factory. Matte paint also hides micro brush marks.
Paint a base cream band first, then mark a grid with light pencil lines. Use a small round brush and paint alternating squares. Let it dry fully, then apply 2 thin coats of matte clear glaze made for ceramics.
Pro tipUse painter's tape to keep the band height consistent on mugs with curved sides.
12. Resin-Set Photo Under Clear Gloss Window
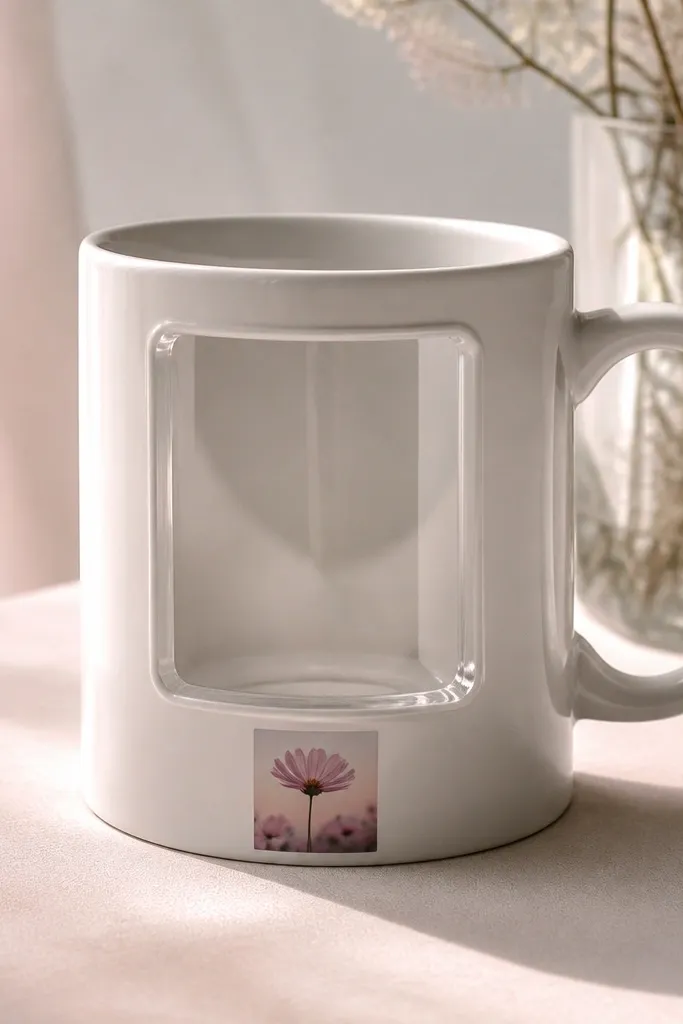
This looks like a museum label on a mug. The photo stays protected under clear resin, so it doesn't soak or smear. I keep the window small, about 1.5x2 inches, so it doesn't bulk up the mug. Gloss resin also makes the photo colors pop in a way paint can't replicate.
Print a photo on thick paper, then trim to 1.5x2 inches. Seal the photo with Mod Podge to prevent ink bleed. Mix resin, pour a thin layer on the mug front, set the photo, then pour a final layer until the surface is level. Cure fully before washing.
Pro tipRoughen the mug surface where resin will go with 220-grit sandpaper.
13. Tin Can Planter Sticker Transfer to Mug
Sticker transfers make a mug look like it came from a thrift store in the best way. The trick is to use labels that already have a distressed look, then seal them so they don't peel. I place the transfer low so it looks like a vintage base mark. It's also fast - you're not painting anything complicated.
Choose a printed label sheet or vinyl decal with plant typography. Clean the mug with rubbing alcohol, apply the decal, then seal with 2 coats of clear acrylic made for ceramics. If you're using paper transfers, apply decoupage medium under and over the paper edges.
Pro tipIf the decal edges lift, press with a warm spoon wrapped in cloth for 20 seconds.
14. Yarn-Wrapped Vertical Stripes on a Plain Mug
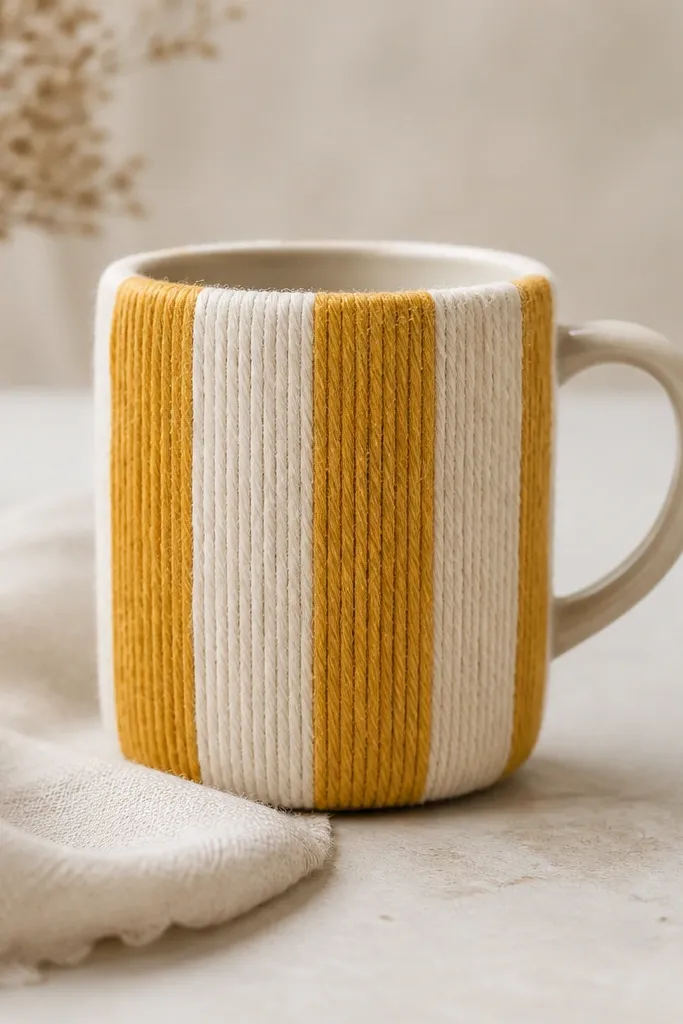
Yarn stripes add cozy texture without covering the whole mug in heavy decoration. Vertical stripes make the mug look taller, which helps in small corners where you want clean lines. I like using medium-weight yarn with a tight twist so it doesn't shed fibers into your drink. The muted colors keep it from looking like craft supplies.
Wrap 4 vertical columns using hot glue dots spaced 1 inch apart. Keep yarn tension even so the stripes look straight. Tuck the ends under the bottom edge and seal with clear glue. Cover the yarn with a thin clear coat once dry if you'll use the mug.
Pro tipUse a lint roller on the yarn before gluing so stray fibers don't stick.
15. Stitch-and-Glue Faux Leather Label
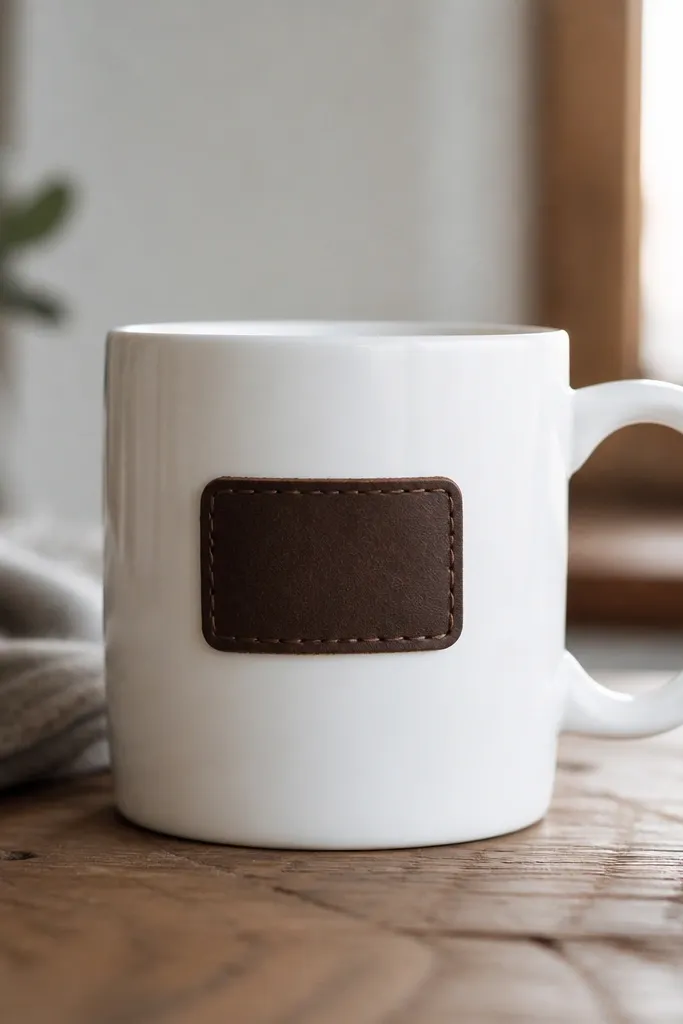
This is a clean way to make a mug look like a product, not a craft. Faux leather hides small surface bumps and gives a smooth finish that reads "designed." The stitched border adds structure even if your handwriting isn't perfect. I keep the label small so it doesn't feel like a giant patch on a compact mug.
Cut faux leather to 2.25x3 inches. Punch 6-8 tiny holes along the border and stitch with waxed thread. Glue it to the mug and seal the edges with a thin clear adhesive so it doesn't lift when damp. Add a short name or date using leather paint or a permanent marker.
Pro tipUse matte faux leather, not glossy - glossy reflects glare on shelf photos.
16. Ceramic Paint Orange Peel Texture Dots
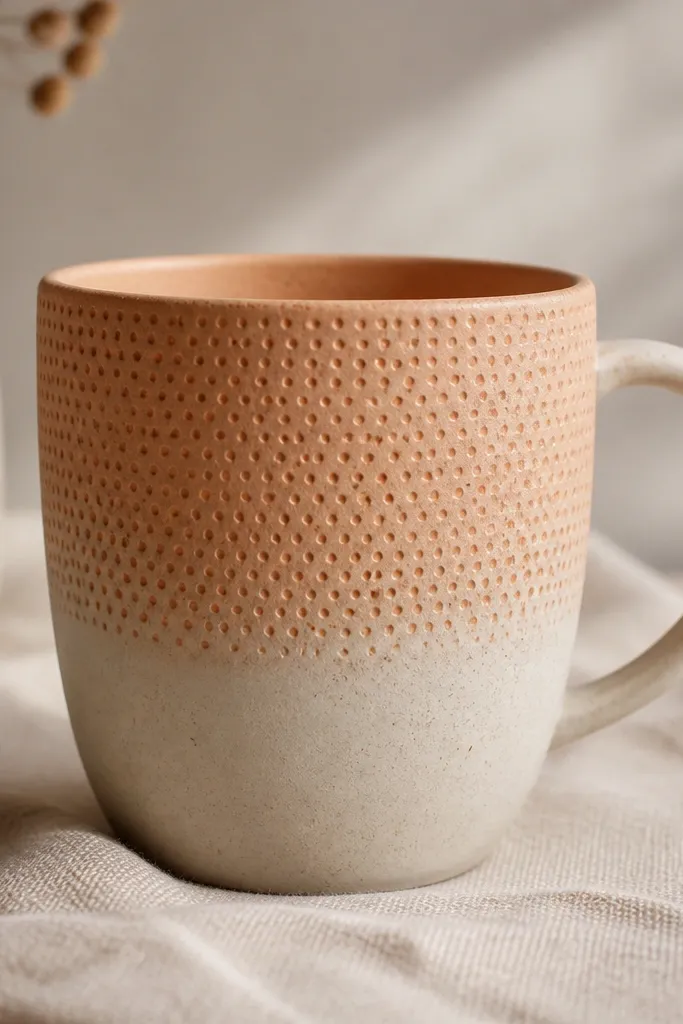
Texture makes a mug look expensive even if the design is simple. The dot pattern creates shadow and depth, which is great for narrow spaces where you see the mug from an angle. I stick to two warm colors so it stays cohesive with wood cutting boards and linen towels. The raised dots also hide small paint mistakes.
Mix ceramic paint with a tiny bit of texture medium, or use fabric puff paint labeled safe for ceramics. Tap with a sponge or small brush handle to create dots. Let it cure fully, then seal with a clear glaze coat meant for the paint system.
Pro tipKeep dot spacing consistent - random dots can look messy fast.
17. Heat-Set Vinyl Tiny Icons Around the Rim
Rim icons make the mug feel playful without covering the whole body. Heat-set vinyl looks crisp, and it's one of the more practical options for daily use if you seal correctly. I like icons in one color, usually black or deep forest green, because it keeps the look calm. On a small shelf, the rim design is visible when you glance down.
Clean and dry the mug, then apply vinyl cutouts using a heat press or household heat tool per the vinyl brand. Place icons on a 1-inch band around the bottom rim area. Press firmly for the recommended seconds, then apply an extra clear seal coat if your vinyl system allows it.
Pro tipDo a single test icon first so you dial in heat and pressure.
18. Acrylic Wash Background with Dry-Brushed Edge

This gives you the "painted pottery" look without complicated techniques. The wash is translucent, so the mug base still shows through, which keeps the design light in tight corners. A dry-brushed edge anchors it and gives the mug a finished bottom. Sage works with everything from black dishware to warm wood tones.
Thin acrylic paint with water until it's like milk. Sponge it onto the mug front and blend edges with a damp brush. Dry-brush a darker green along the bottom 1 inch, then let it cure and seal with clear glaze spray.
Pro tipUse a makeup sponge for the wash - it gives even speckling.
19. Thrifted Lace Trim Band with Fabric Glue Seal
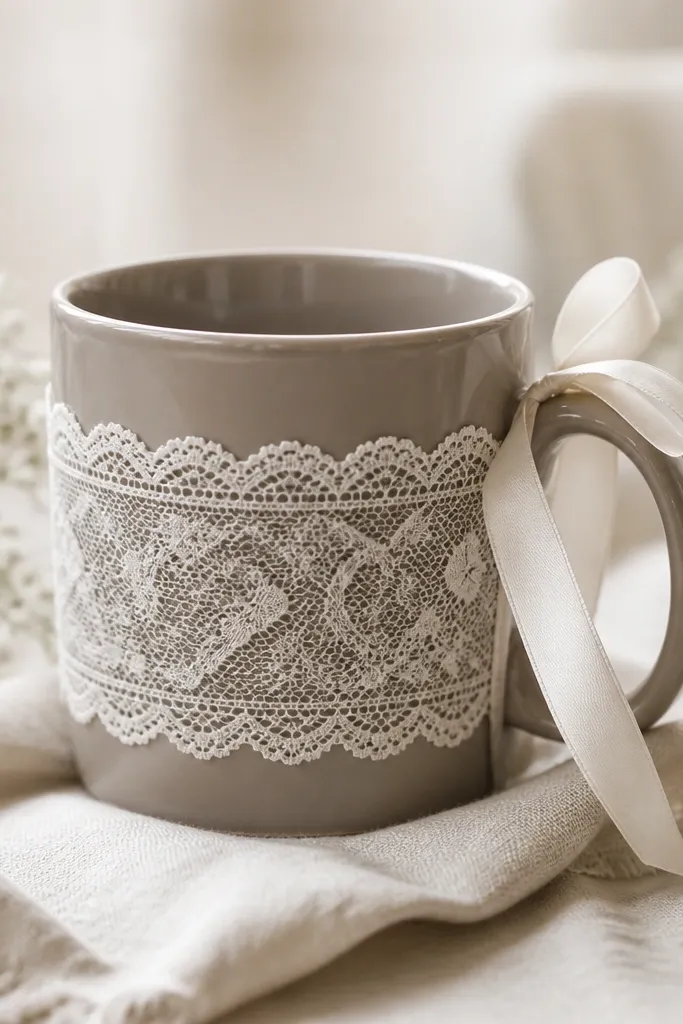
Lace trim looks delicate, but a band design keeps it from looking messy. The lace pattern creates a soft, airy texture that contrasts nicely against a plain mug. I like using lace that's only 1.5 inches wide so the decoration stays tight and readable. A tiny ribbon tie behind the handle gives it a finished look.
Cut lace to wrap the mug circumference plus 1 inch overlap. Glue the overlap at the back with fabric glue, then brush a thin layer of clear sealant over the glue line. Tie a 6-inch satin ribbon into a small knot behind the handle, then trim ends to 0.75 inch.
Pro tipChoose lace with a flat back so it doesn't lift at the edges.
20. Brushed Gold Leaf Corner Accent
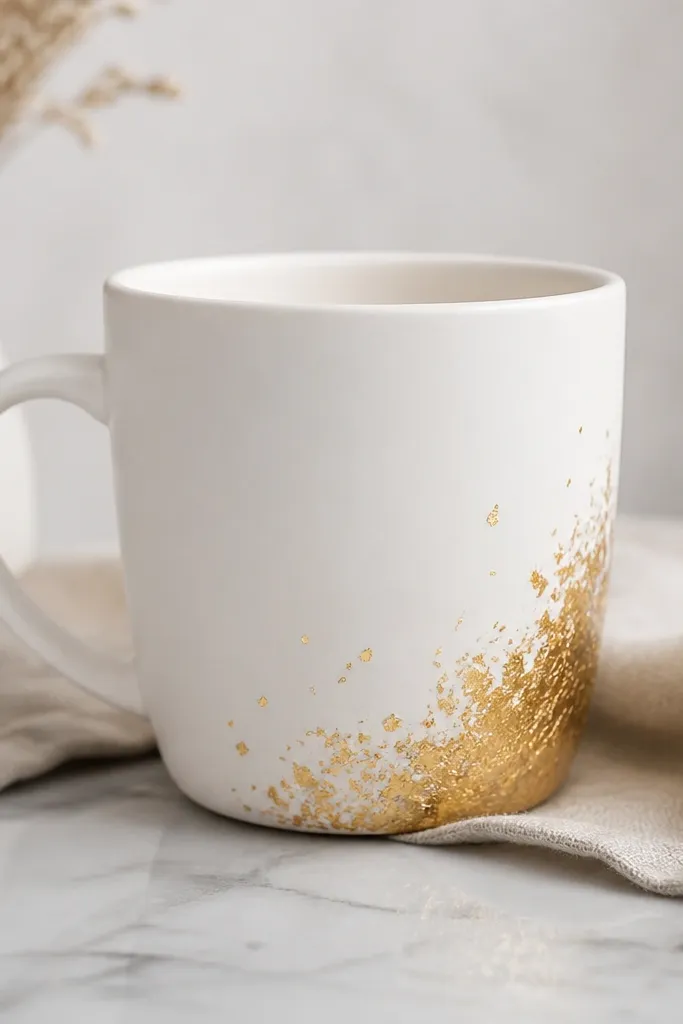
Gold leaf in a corner gives you shine without taking over the whole mug. The irregular flake edges look real and handmade, and the matte mug keeps it from looking tacky. I keep the gold area under 2 square inches so it reads like a design detail on a shelf. This works especially well if your kitchen has black hardware or brass accents.
Apply a gold-leaf adhesive patch to a 1.5x1.5 inch area. Press gold leaf gently onto the tacky surface, then use a soft brush to remove loose flakes. Seal with a clear matte or satin sealer that's safe for ceramic.
Pro tipUse a cotton glove when handling gold leaf so it doesn't transfer oils.
21. Sashiko Thread Lines on a Linen-Primed Mug
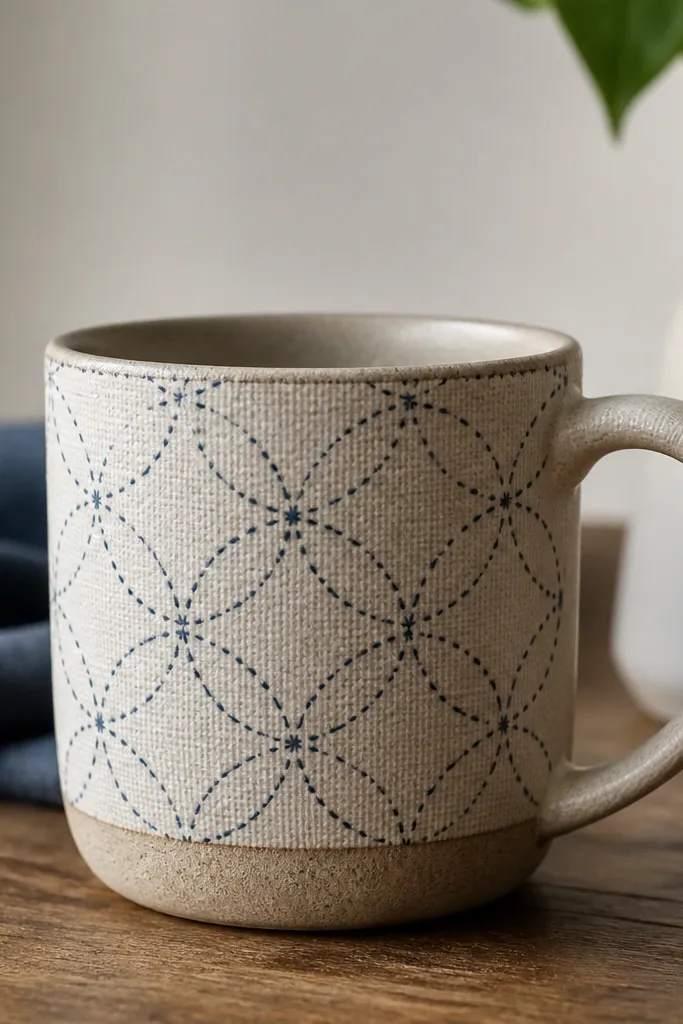
Thread lines make the mug feel cozy and intentional. Sashiko-style straight running stitches look good even with simple shapes, and the blue thread pops against warm off-white. The linen-primed surface helps the thread grab so you don't get slipping. It's also a great way to use embroidery thread you already own.
Prime the mug with a thin layer of fabric-like acrylic primer or gesso tinted warm beige. Mark a grid lightly with pencil. Use embroidery needle and thick thread to stitch through paint areas; tie off at the back, then seal the stitched front with clear acrylic medium. Let it cure 24-48 hours.
Pro tipKeep stitch spacing around 6-8 mm so it looks like real sashiko.
22. Chalkboard Paint Label Strip for Rotating Quotes
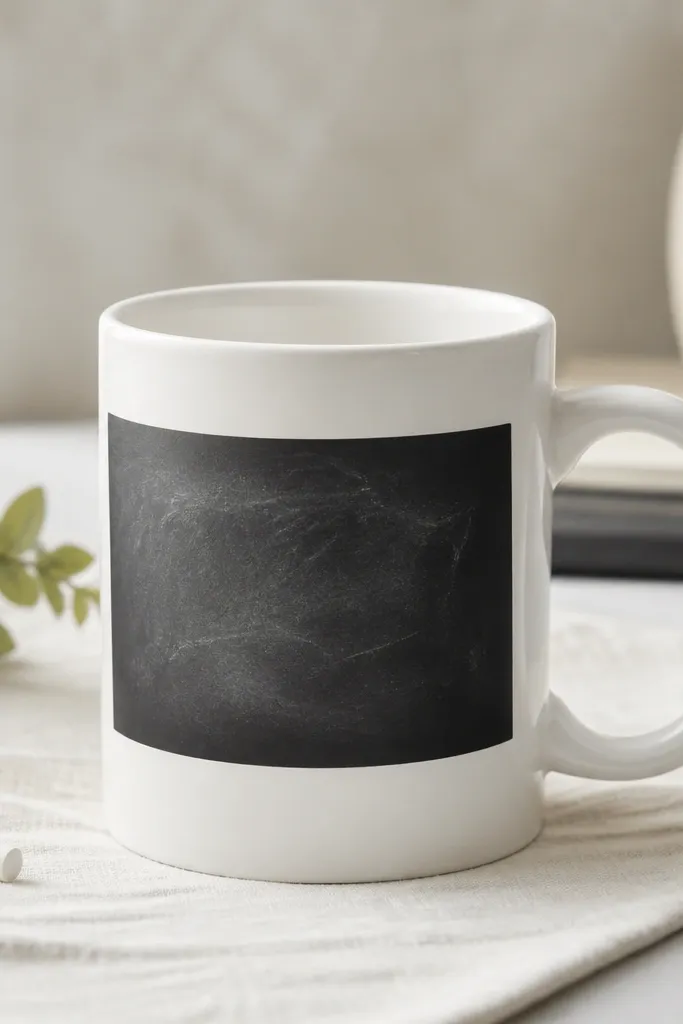
Chalkboard paint is the most practical "small space" choice because you can change the mug's look without repainting. The label strip also keeps the decoration confined, so the mug doesn't clutter your shelf. I use short phrases or a single icon so it reads quickly. It works great for seasonal corners - fall, holidays, or gift notes.
Tape a 2-inch vertical strip area and paint chalkboard coating in two thin coats. Let it cure per instructions, then season with chalk rubbing. Write your text with chalk markers or chalk, and seal only if you want it to be wipeable with a damp cloth.
Pro tipUse a ruler to keep the strip straight - curved mugs tempt you to eyeball.
23. Washi Tape Geometric Panels with Clear Acrylic Seal
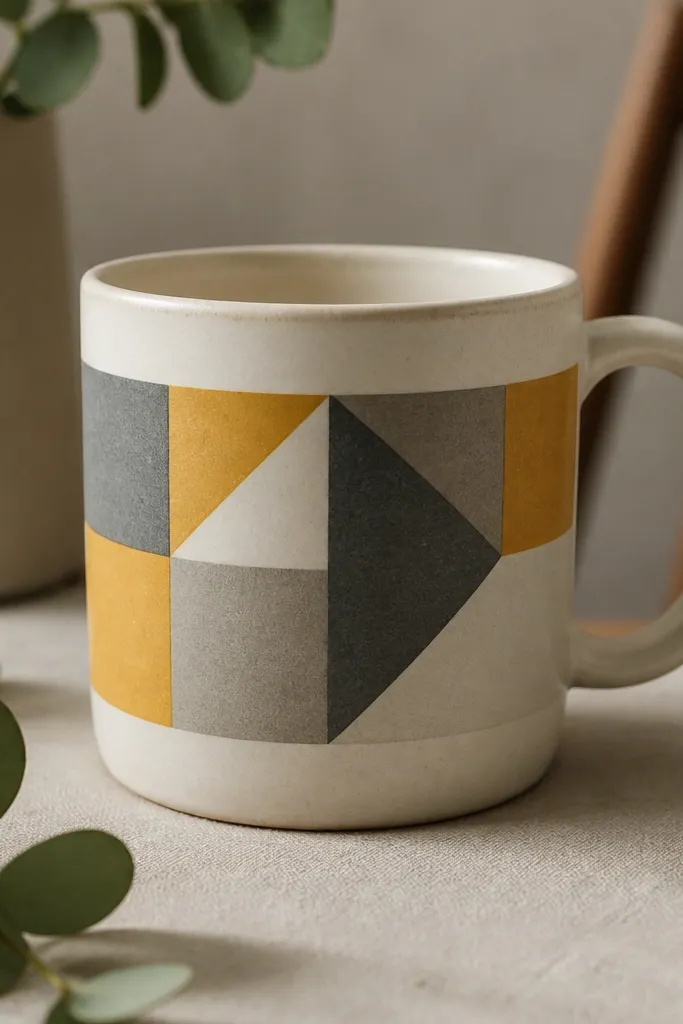
Washi tape looks tidy and graphic, which helps in tiny spaces where visual noise feels louder. I like geometric panels because they look deliberate and hide small alignment issues. The tape also gives you a removable planning stage - you can rearrange before sealing. Sealing matters because tape left unsealed lifts from heat and washing.
Apply tape in two or three stacked layers to form triangles or blocks about 3 inches tall. Press edges firmly with a plastic scraper. Coat over the tape with clear acrylic in 2-3 thin coats, letting each dry completely. Avoid soaking the mug while it cures.
Pro tipChoose washi tape with matte finish so it doesn't glare under lights.
24. Painted Porcelain Transfer Using Contact Paper Mask
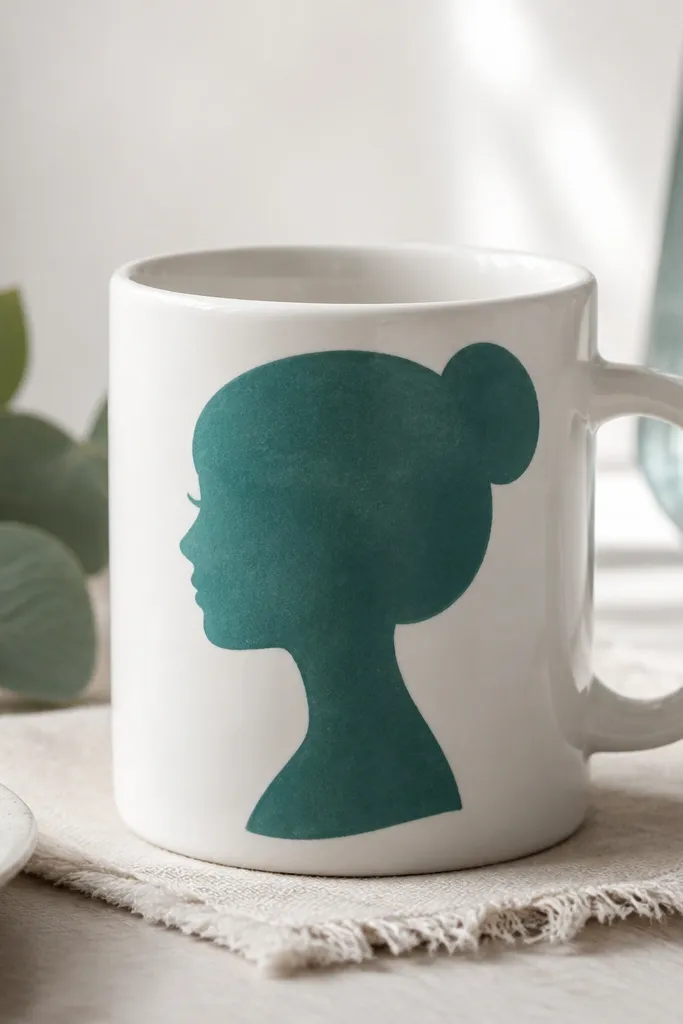
This is stencil-level crispness without needing fancy cutters. Contact paper masks let you paint a shape and peel it away to reveal a clean edge. I use teal or terracotta for a strong contrast that still feels warm. It's perfect for small shelf corners because the silhouette reads fast.
Draw a simple shape (heart, leaf, or mountain) and cut it from contact paper. Stick the mask to the mug front, press edges, then brush ceramic paint over it. Let it dry, remove the mask, then cure and seal with a mug-safe clear coat.
Pro tipCut the contact paper shape with a new craft blade so edges don't fray.
25. Repurposed Tea Tin Label Decal with Weathered Ink
Tea tin labels already look like they belong on jars and mugs. Using the label in one spot makes the mug feel like a vintage find, not a DIY project. The aged ink look gives softness and keeps colors from screaming. It also pairs well with pantry decor like glass jars and kraft paper bags.
Cut a label strip from a tea tin or print one at a similar size. Apply a thin layer of decoupage glue, press the label down, and smooth bubbles. Seal with clear acrylic in thin coats, paying extra attention to the edges.
Pro tipTrim the label close - a thick white border makes it look cheap.
26. Superglue + Baking Soda Faux Ceramic Crater Spots

This texture trick makes a plain mug look aged and collectible. The crater effect creates natural shadow, so it stands out even in low light. I keep the color neutral with beige and white so it matches everything. It's also quick once you get the hang of dot sizes.
Dot a thin line of superglue on the mug in small circles using a toothpick. Sprinkle baking soda immediately over each dot, then tap off excess. After it hardens, paint over lightly with diluted acrylic and seal with clear glaze sealer.
Pro tipMake test dots on a spare plate first so you dial in glue amount.
27. Spoon-Handle Mini Charm Cluster on the Handle Side
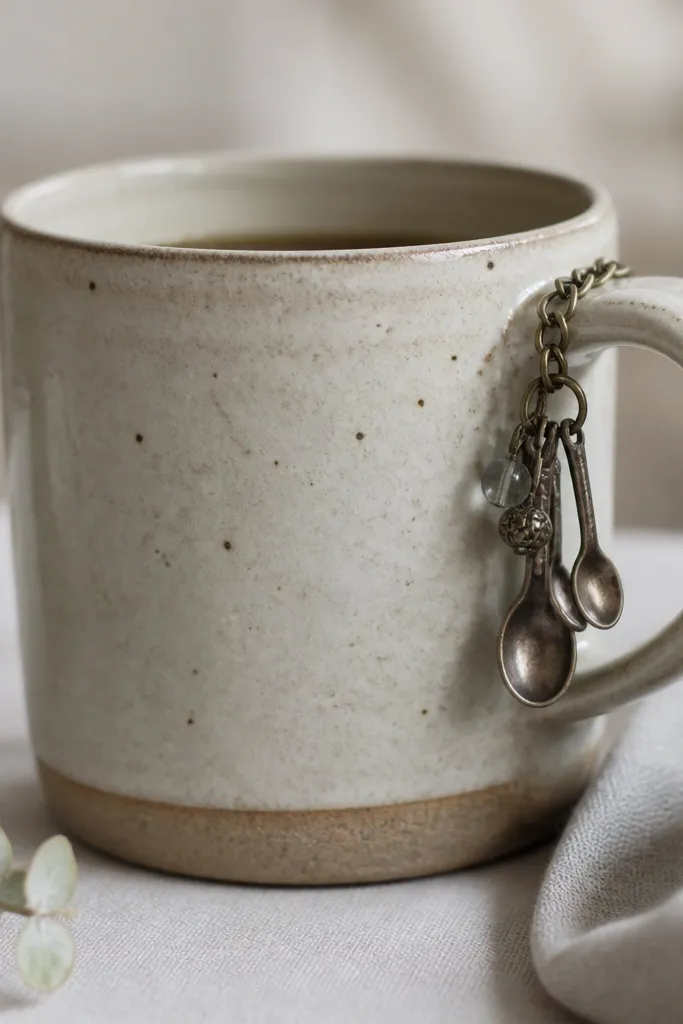
A charm cluster is a fun way to add personality without covering the mug body. The key is placement on the handle side so it reads like a detail, not a mess. Metal charms catch light as you move the mug, which is great for small spaces where you notice motion. I keep charms light so they don't pull at the mug or scratch.
Use a jump ring and short chain attached with strong craft glue or epoxy near the handle base. Add 3-5 small charms, then check clearance with a dry run of your grip. Seal the attachment point with epoxy so it doesn't snag or lift.
Pro tipUse smooth, rounded charms - sharp edges scratch counter surfaces.
28. Crayon Wax Resist Lines with Heat-Set Sealer
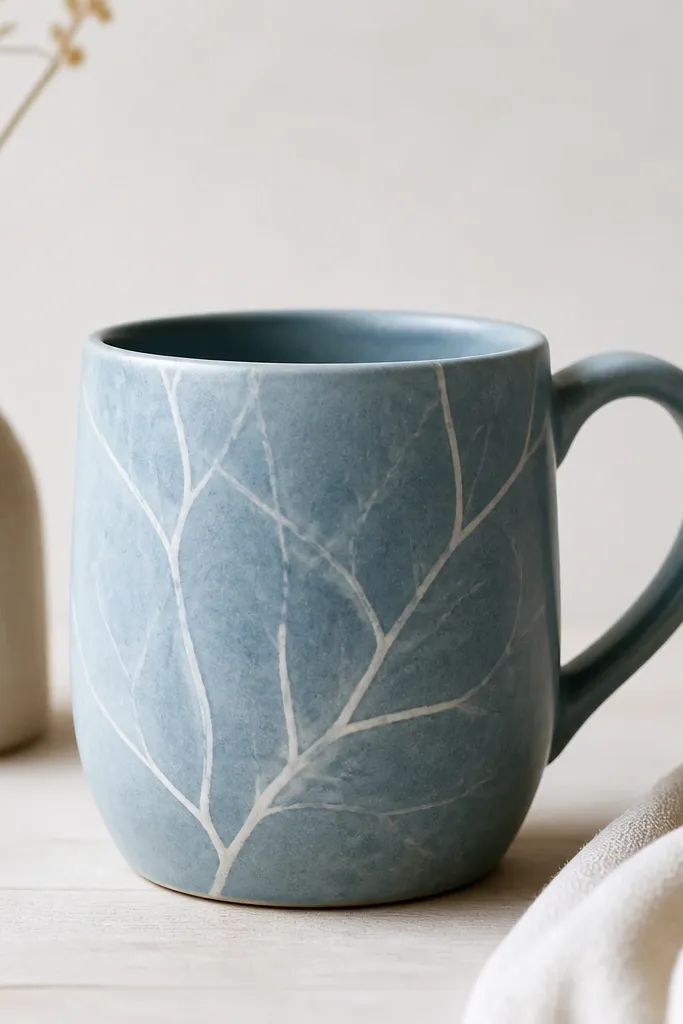
Crayon resist gives you a hand-drawn look that feels organic. You draw lines with white crayon, paint over with a thin wash, and the wax repels paint so the lines stay light. It looks especially good on mugs with a matte or lightly textured surface. The design stays minimal, which is perfect for tight corners.
Draw lines with white crayon on a clean dry mug. Paint over with diluted acrylic or ceramic paint in a single wash color. Let it dry, then seal with a clear glaze sealer compatible with your paint. Cure fully before use.
Pro tipUse a hair dryer to speed drying between layers so wax doesn't smear.
29. Painted Tile Scrap Mosaic Only on One Side
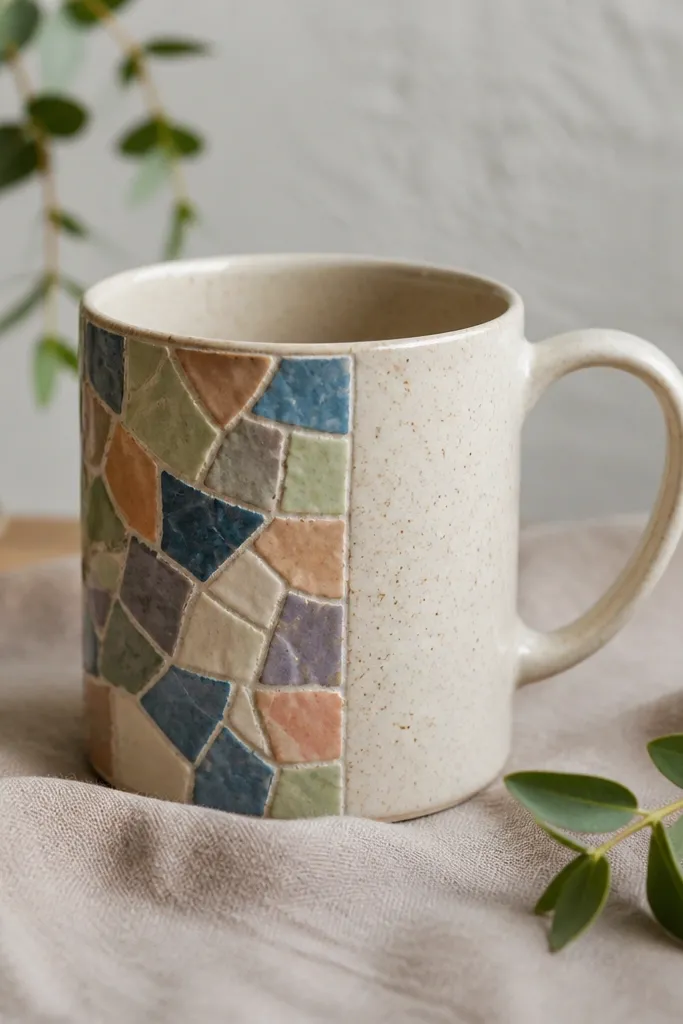
Mosaic looks complex, but you can keep it small and controlled. Covering only one side keeps the mug from feeling heavy and cluttered. Tiny tile pieces create sparkle and texture, and the painted colors stay cohesive. This is one of the best options when you have leftover tile scraps from a backsplash project.
Cut tile scraps into small squares using tile nippers or a tile cutter. Dry lay the pieces on the mug side to keep the patch around 2.5 inches wide. Glue with tile adhesive suitable for ceramic, grout lightly if you want texture, then seal with a waterproof sealer.
Pro tipLeave a 1/8 inch gap between pieces for grout lines that look intentional.
30. Vintage Button Cluster on a Felt Backing Patch

Buttons give instant personality, and felt makes the cluster sit flat. This is great when you want a sculptural look without covering the whole mug. I use a felt backing because it hides glue bumps and keeps buttons from wobbling. The cluster reads like a tiny outfit for the mug's front.
Cut felt to 2.5x3 inches. Arrange buttons and hot-glue or sew them on. Glue the felt patch onto the mug front, then apply a thin clear coat over the felt edges where it meets ceramic. Keep the patch centered so it doesn't interfere with the handle grip.
Pro tipStick to buttons with a flat back so the patch doesn't lift at the edges.


