
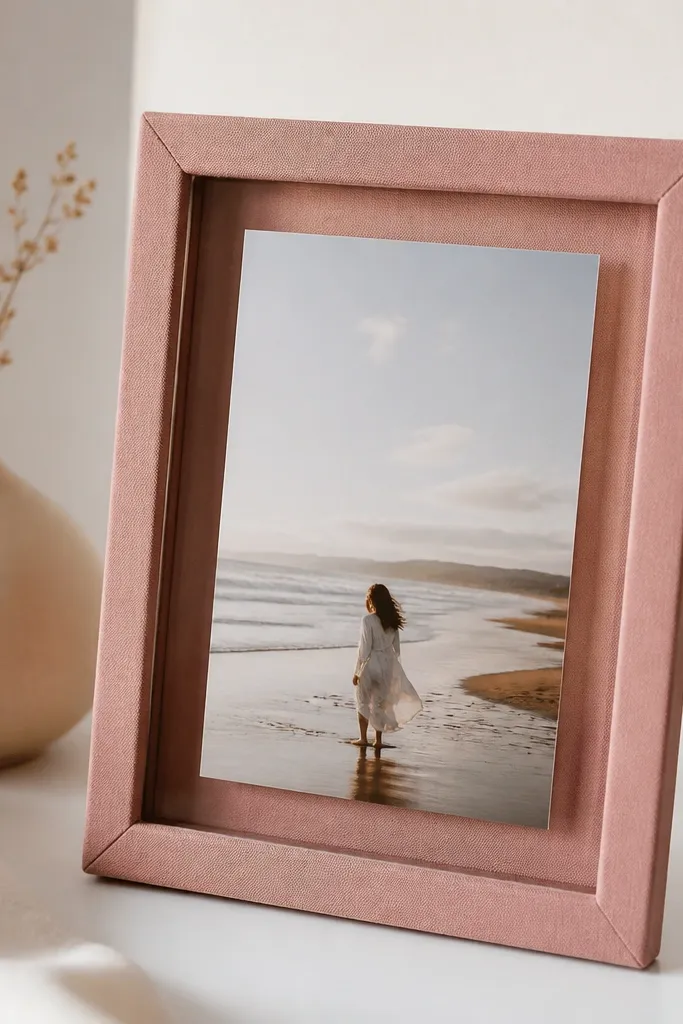
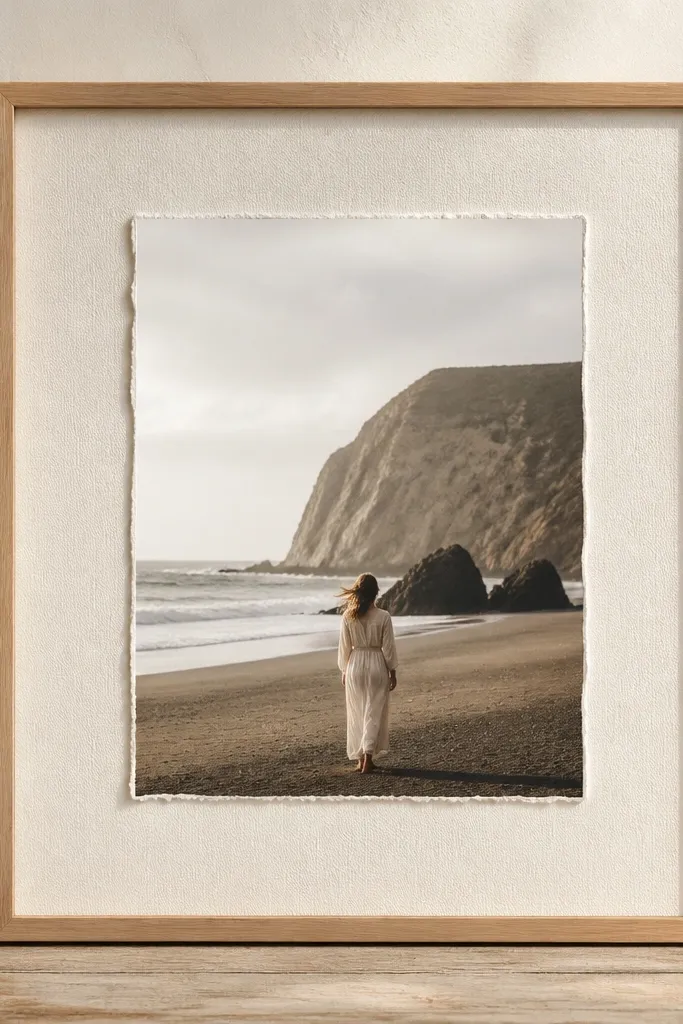
1. Thrift frame makeover with a clean mat window
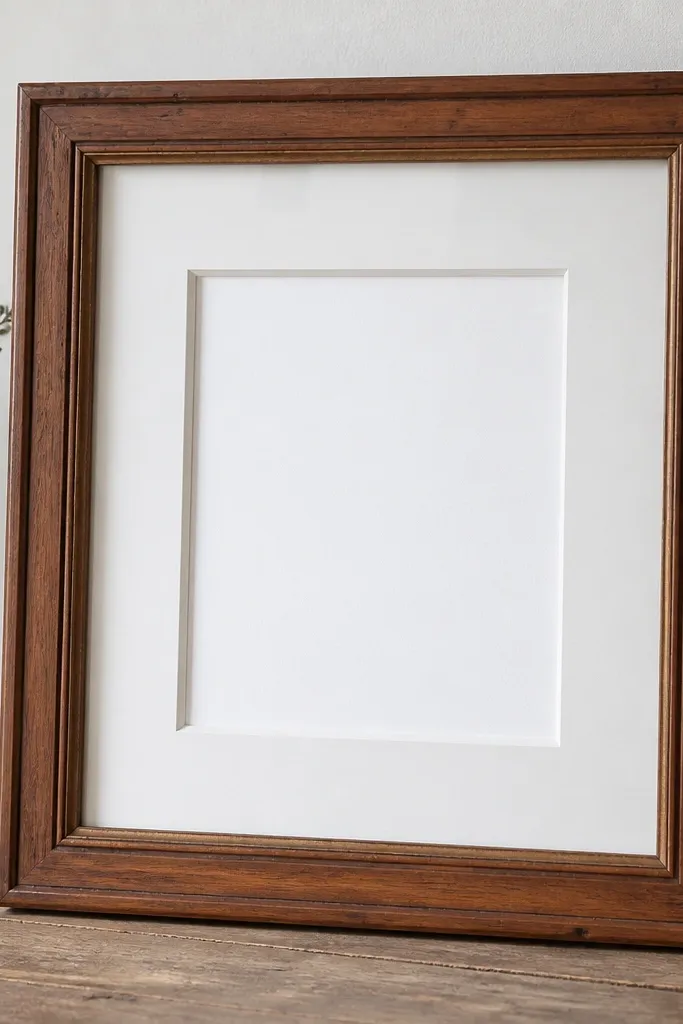
Start with any frame that already has a strong outer shape - I like dark wood with a simple profile because it hides small sanding marks. Add a mat board cut to size so the photo has a defined white border. Clear acrylic on top keeps glare down and gives a smooth, professional surface. The mat also stops the photo from looking "stuck" to the backing.
Remove the old backing and measure the inside lip where the cover sits. Cut mat board so it leaves even margins on all sides, then dry-fit the acrylic to confirm the fit. Reattach the backing with corner tabs or small screws so it closes tight without bowing.
Pro tipWipe acrylic with a microfiber cloth and a drop of glass cleaner before mounting - fingerprints ruin the look.
AvoidDon't reuse a warped backing; it makes the photo lift and the frame look crooked.
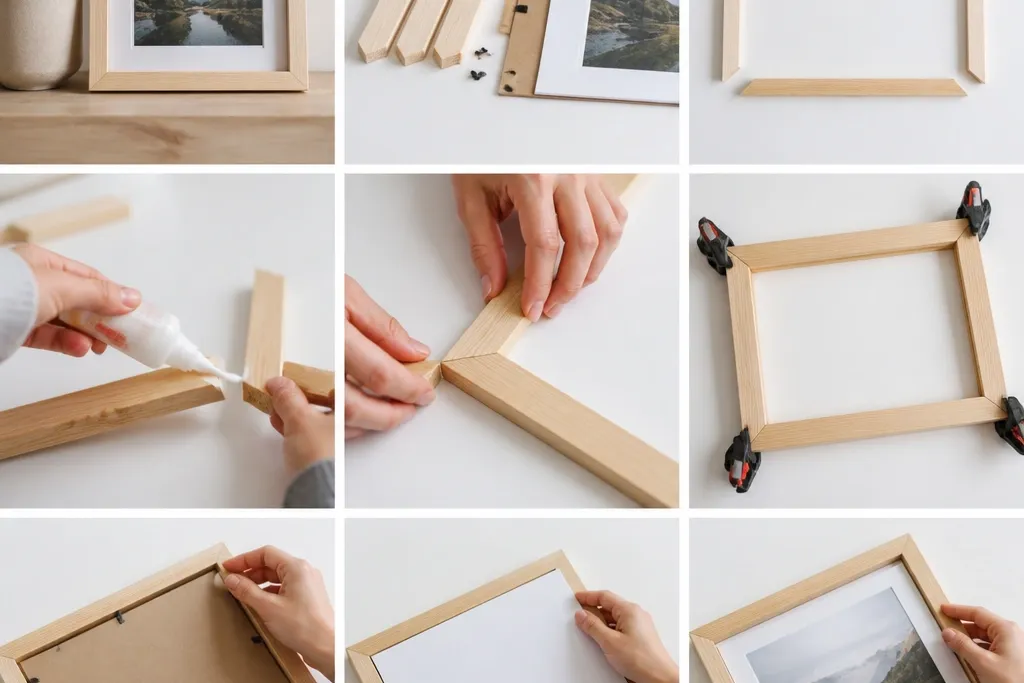
2. No-glass scrap wood frame with a paper photo insert
If you're working with scrap wood, skip glass and build a front "ledge" that holds the photo insert. This works because the photo is protected by the frame walls and doesn't need a cover. I use thick cardstock or foam core for the photo panel so it stays flat. The wood edges create a shadow line that reads intentional even without acrylic.
Cut four strips to the same outer size, then cut a second inner lip using a router bit or by stacking thin cardboard spacers if you don't have tools. Glue a foam core panel that matches the inner opening and use acid-free photo corners to mount the print. Finish the wood edges with shellac or a clear matte varnish so the scrap doesn't look raw.
Pro tipUse a 1/8-inch thick spacer liner around the photo opening so the panel sits evenly and doesn't rattle.
AvoidDon't mount a photo directly to thin cardboard; it curls and makes the insert look cheap.
3. Popsicle stick frame with a dyed "gallery" border
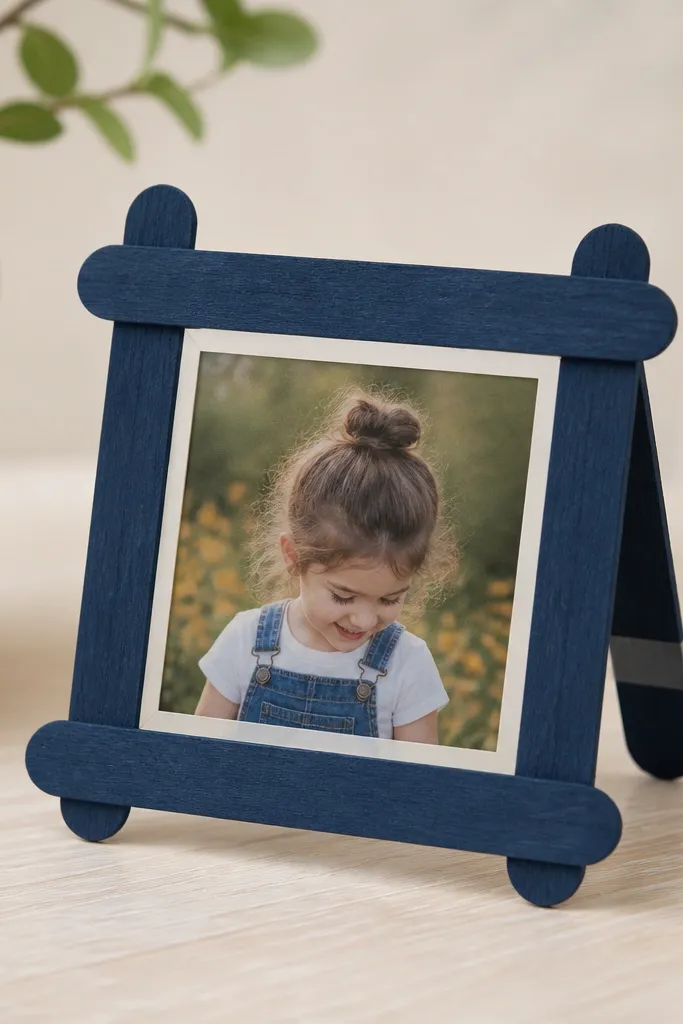
This is the fastest frame style that still looks cute on a desk. Paint popsicle sticks in two tones - I like deep navy outside and a lighter indigo inner border. The photo sits on a white backing so the colors pop. Clear tape hinges keep the photo swap easy without messy glue on the print.
Glue sticks into a rectangle using wood glue and a flat surface so it stays square. Add an inner border with thinner strips or by layering two stick widths. Tape a folded backing flap at the rear corners, then slide the photo panel in and out.
Pro tipSand only one side of each stick - the rough side grips glue better and the front stays smooth.
AvoidAvoid glossy paint; it reflects light and makes the frame look like craft paint.
4. Mason jar lid mini frame for tiny prints
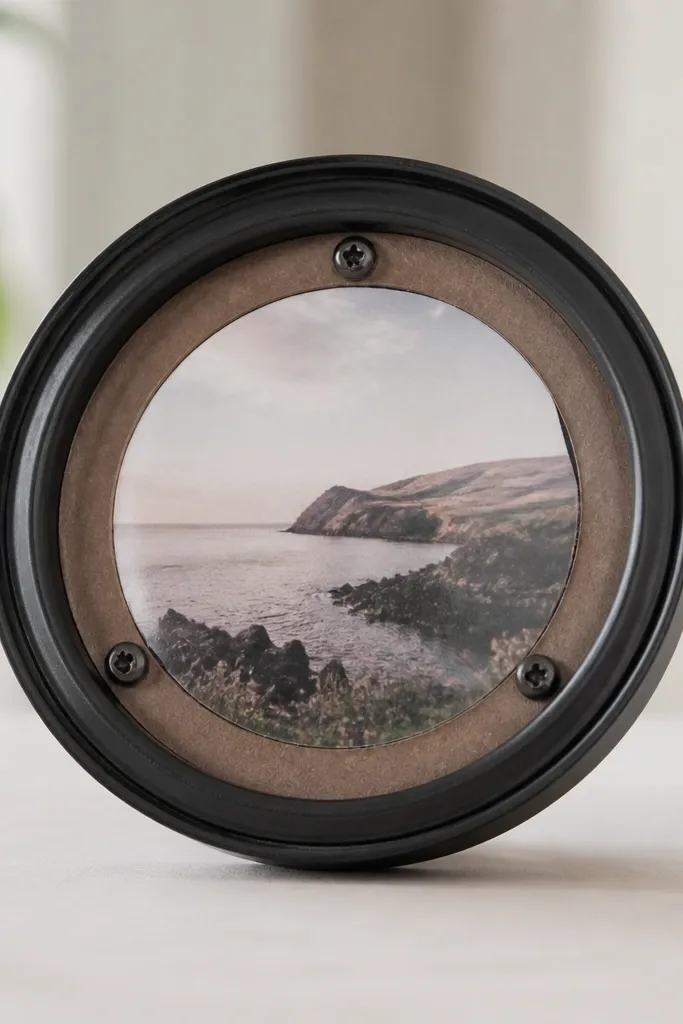
Jar lids are already the perfect round frame - you just need a clean cover layer. I use matte black for the lid and a thin clear plastic circle for the photo surface. The print looks intentional because the round opening frames it tightly. This is great for passport photos, Polaroids, and small stickers you want to display.
Clean the lid, scuff it lightly with fine sandpaper, and spray with matte black. Cut a circle of clear acrylic or packaging plastic slightly larger than the lid and trim after you test fit. Mount the photo to a thin cardboard disc, then screw a cardboard ring over the edges to clamp it in place.
Pro tipDrill two tiny pilot holes for screws so you don't crack the lid.
AvoidDon't use thick clear plastic; it bows and creates a wrinkled cover.
5. Coffee stirrer frame with a warm stain finish
Stirrer frames look surprisingly polished when you stain them evenly and miter the corners. Honey-brown stain makes the wood feel warm, and the clear sheet reads like a lightweight cover. The square shape is perfect for 4x6 mini prints or cropped photos. The best part is that the materials are cheap and the build feels satisfying.
Cut stirrers into equal lengths for the outer rectangle. Use a miter box if you can, or cut at an angle and sand to a tight corner. Stain in thin coats, let dry fully, then glue the corners with wood glue. Mount the photo on thin cardstock and secure the clear cover with small corner clips or a rear tape hinge.
Pro tipWipe off excess stain after 3-5 minutes so the corners don't get darker than the straight edges.
AvoidDon't over-saturate the wood; it stays sticky and smears when you handle the frame.
6. Scrap plywood frame with a routered inner lip
A routered lip makes your frame look custom because it creates a precise seat for the cover. Plywood grain gives texture, and a matte clear finish keeps it from looking like a craft project. Froze acrylic or thin translucent plastic adds a soft look - it hides glare and fingerprints. The photo sits flat because the cover has a consistent resting edge.
Cut your outer frame piece, then route a shallow inner channel that's just deep enough for the acrylic to sit 1-2mm below the lip. Dry-fit the cover, then add a photo backing panel that matches the opening size. Seal the plywood with sanding sealer or a quick coat of matte clear to stop fuzz at the edges.
Pro tipTest the acrylic thickness with a scrap first; a 2mm difference changes the fit.
AvoidDon't skip sealing raw plywood edges; they shed fibers and make the frame look unfinished.
7. Magazine page decoupage frame with a glass-like top
Decoupage works when you keep the surface flat. I use magazine pages for color and pattern, then seal over everything with several thin coats so it becomes smooth like a finish. The photo underneath stays crisp because the cover is clear and flat. This frame is great for travel photos or anything you want to look artsy without buying new materials.
Sand the frame smooth, tear magazine pieces in irregular shapes, and glue with a decoupage medium. Layer thin coats and let each coat dry before the next so you don't get bumps. After sealing, add a backing and set the photo behind clear acrylic or a glossy protective sheet.
Pro tipUse a foam brush for decoupage so you don't leave streak lines.
AvoidDon't glue straight over glossy varnish; the paper lifts later.
8. Fabric-wrapped frame with a floating photo pocket
Fabric frames look soft and expensive because the texture catches light differently than wood. I wrap the outer edges with cotton fabric, then create a shallow inner pocket so the photo floats a few millimeters off the backing. That gap makes the whole piece look intentional. Use a clear acrylic cover to keep the photo flat and protect it from dust.
Wrap with the fabric grain aligned and staple or glue the back edges first. Build the inner pocket using thin foam tape or a 2-3mm spacer strip around the opening. Mount the photo to foam core, then insert it into the pocket and close with a backing panel secured with small screws or clips.
Pro tipPress fabric with a warm iron through a thin cloth before wrapping so it lays smooth.
AvoidDon't stretch the fabric tight across the corners; it puckers when it dries.
9. Washed-out map frame with a thin black photo border
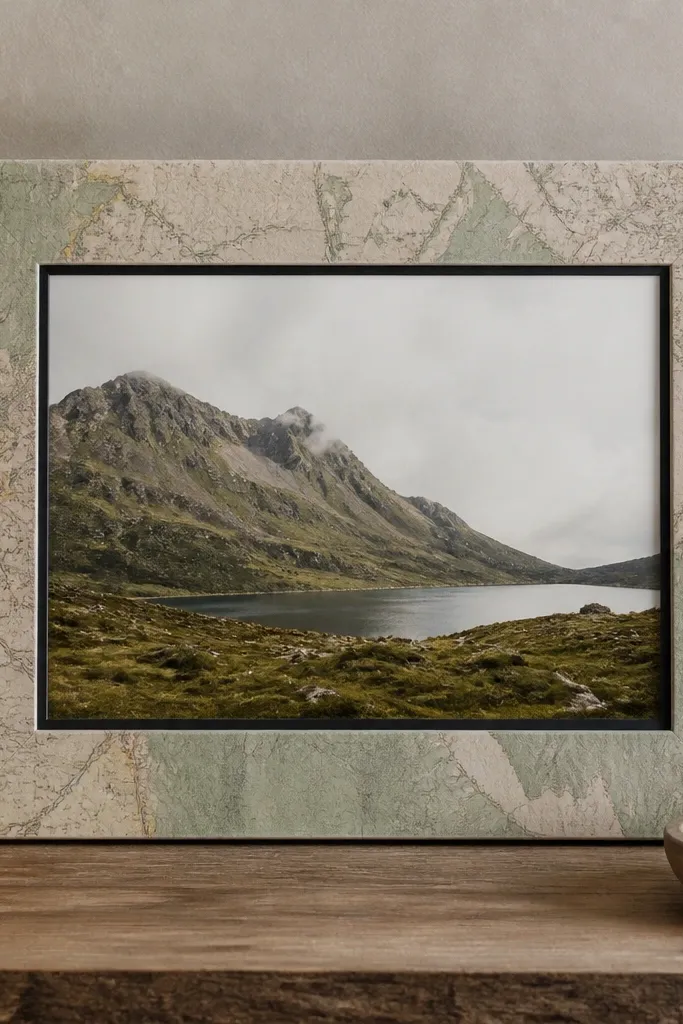
This style looks clean when the map is muted and the photo mat is crisp. I use map paper or old atlas pages, then seal it so it doesn't crack. A thin black mat border (about 1/2 inch) keeps the photo from blending into the background. Clear anti-glare acrylic makes the map background feel calmer and the photo easier to read.
Apply map paper to the front and sides with decoupage medium, then seal with 2-3 thin coats. Cut a black mat border and mount the photo centered. Fit anti-glare acrylic and secure the backing with corner tabs so it closes evenly.
Pro tipSeal the map in a single direction first, then the opposite direction for fewer streaks.
AvoidDon't skip sealing - dry paper edges curl and create rough spots along the photo opening.
10. Chunky 2x2 frame with hidden picture wire
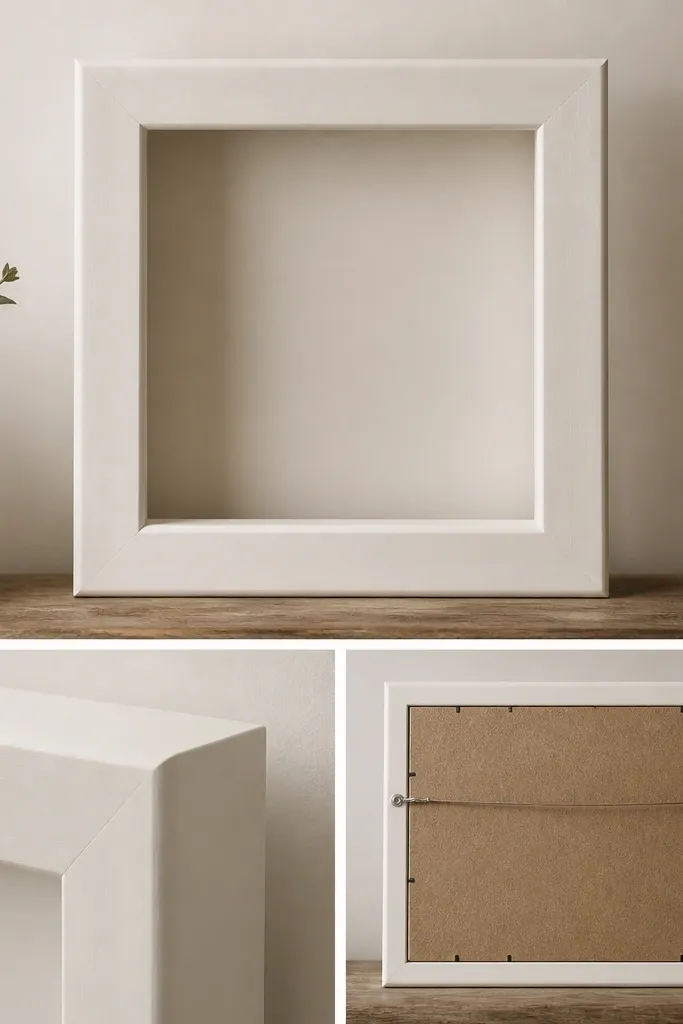
Thicker wood makes your frame feel solid even if it's simple. I paint or stain it in one color, then keep the front opening minimal so the photo looks centered and calm. Hidden wire looks neat because you don't see hardware through the frame. This is the style I use for 8x10 prints when I want it to hang cleanly on a wall.
Cut outer frame pieces and miter or butt them depending on your skill. Sand and apply a primer if painting so the wood doesn't show blotches. For hanging, screw two wire anchors into the back board and attach wire with tight twists. Mount the photo with a backing board and foam tape spacers so it doesn't slide.
Pro tipHang test: measure from the top of the frame to the wire anchor so the photo level stays straight on the first try.
AvoidDon't attach the wire directly to thin backing - it loosens and the frame tilts.
11. Corner-bracket frame with a floating acrylic window
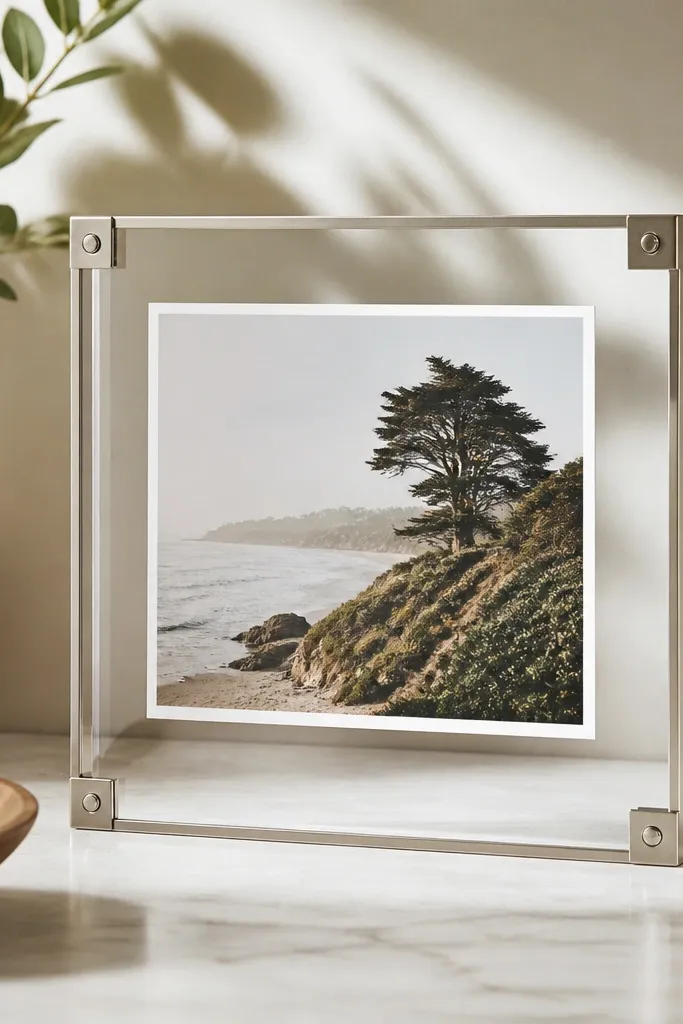
You get a modern look by using corner brackets instead of wood joinery. The acrylic window creates a "floating" effect, and the metal corners add structure without complicated cutting. This works great for minimal photos - black and white prints look especially sharp. Because the acrylic is held by brackets, the layers stay aligned.
Use straight wood strips as the frame rails and attach metal corner brackets on the inside edges. Cut acrylic to size and rest it on a thin spacer strip so it's centered. Mount the photo on foam core, then close the back with a thin board screwed into the rails.
Pro tipUse matte black brackets if your photo has bright colors; shiny metal competes with the image.
AvoidDon't over-tighten screws into wood; it compresses the rails and causes gaps at the corners.
12. Watercolor paper mat frame with handmade deckled edge
A watercolor paper mat makes a basic photo look soft and artful. I like deckled edge styles because they feel handmade but still clean when the frame is simple. The photo sits behind clear acrylic, and the textured mat hides small imperfections in the print edges. This is a great pick for prints you want to feel gentle - portraits, wedding photos, and kids' drawings.
Cut the mat from thick watercolor paper or heavyweight art paper. Instead of using a perfect rectangle, create a slightly uneven deckled edge by tearing the opening margin and trimming only the outer edge. Mount the photo on a thin backing board and secure with photo corners. Seal the frame wood, then assemble with a backing sheet that holds the acrylic tightly.
Pro tipDry-fit the torn opening before you glue anything - tearing too much makes the photo look off-center.
AvoidDon't use thin printer paper for the mat; it warps and makes the opening look wavy.
13. Painted clothespin frame for mini photos
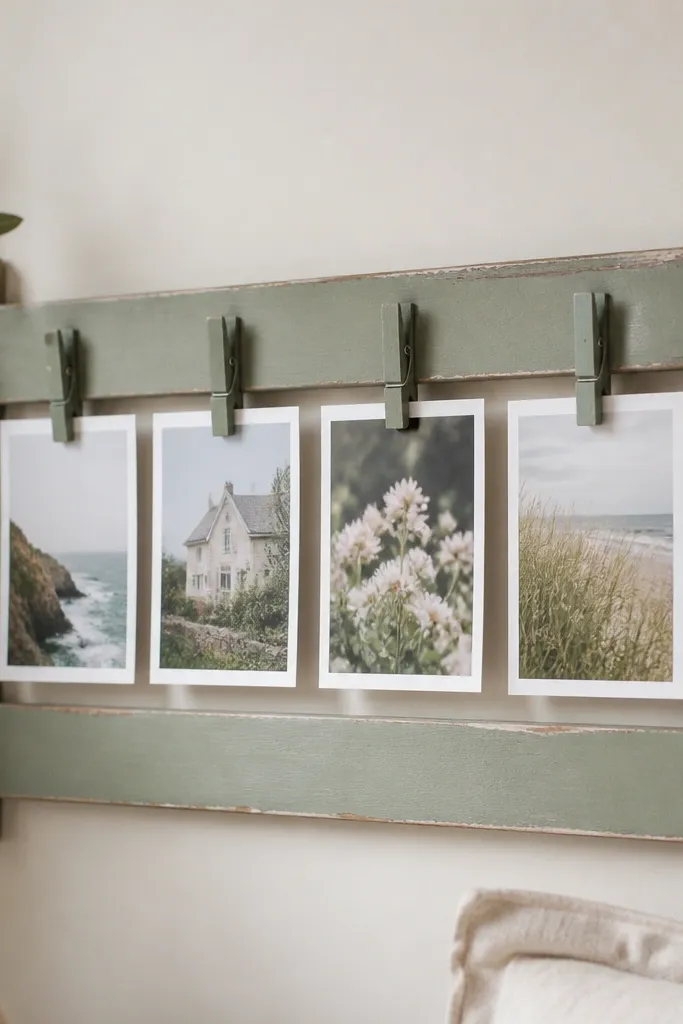
This is a frame you interact with. Clothespins let you swap photos fast, and the board acts like a clean display rail. I paint both boards in the same color and lightly distress edges so it looks lived-in. The photos sit flat because you clip them with enough pressure to hold the corners down.
Cut two boards to the same length and screw them to a backing strip or mount directly to the wall. Paint with satin paint, then distress lightly with sandpaper on the edges. Space clothespins evenly, then clip prints with a tiny piece of acid-free paper between clip and photo if the paper surface is delicate.
Pro tipMeasure clothespin spacing from the center first - even spacing looks better than perfect symmetry.
AvoidDon't leave raw wood edges; they catch photo corners and scuff prints.
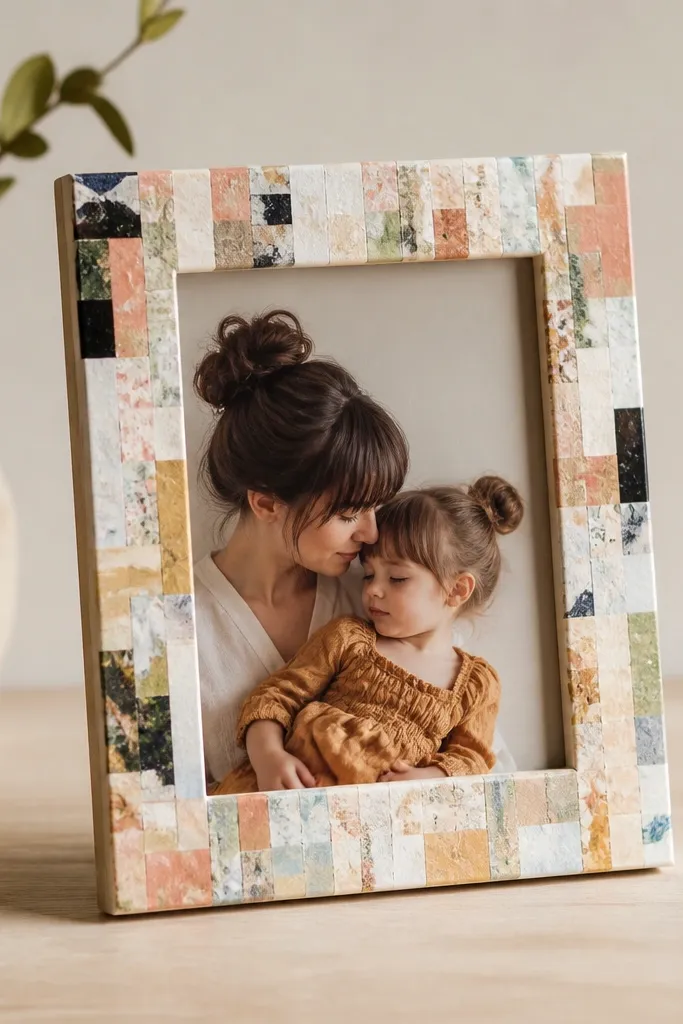
14. Ceramic tile mosaic frame with a single photo center
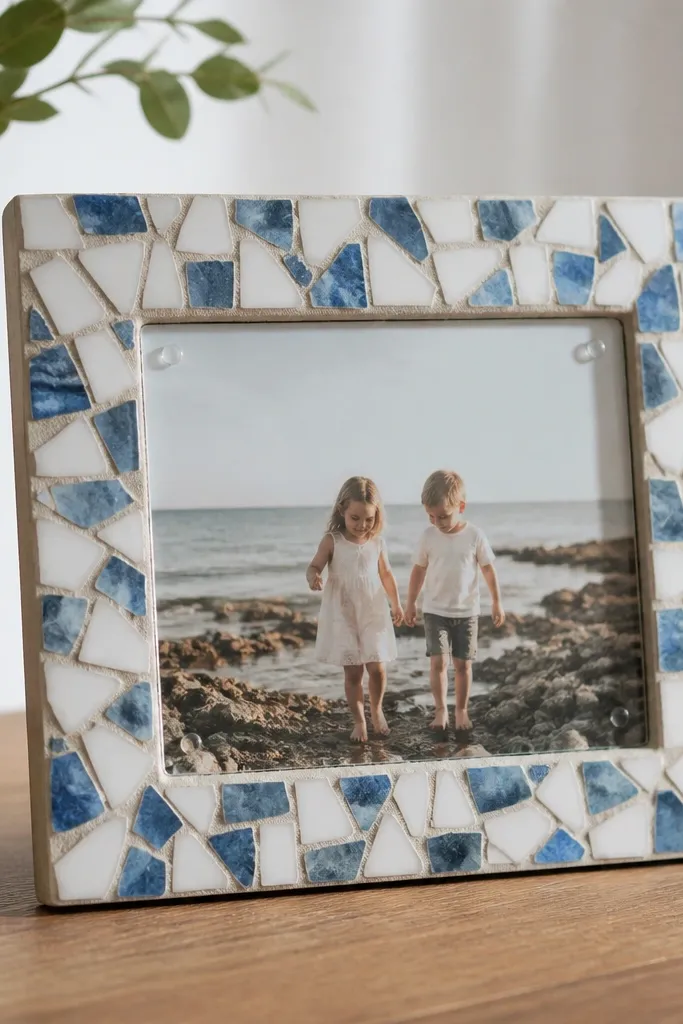
Tile turns a frame into something you don't have to baby. The grout lines create a strong grid around the photo, which makes the center feel crisp. I use small tiles in two tones, like white with pale blue chips, and keep the center opening simple. The clear cover protects the photo from dust and fingerprints from handling.
Build a base frame from wood or foam board, then glue tile pieces around the edges. Use thin-set or strong craft adhesive and let it cure fully. Apply grout and wipe clean, then seal the grout so it doesn't stain. Mount the photo on a backing board, add acrylic, and screw a rear frame plate over the edges.
Pro tipUse painters tape to mask the photo opening edges while grouting so grout doesn't creep inward.
AvoidDon't rush grout sealing; unsealed grout absorbs moisture and can discolor around the photo.
15. Acrylic photo frame with layered vinyl numbers on the front
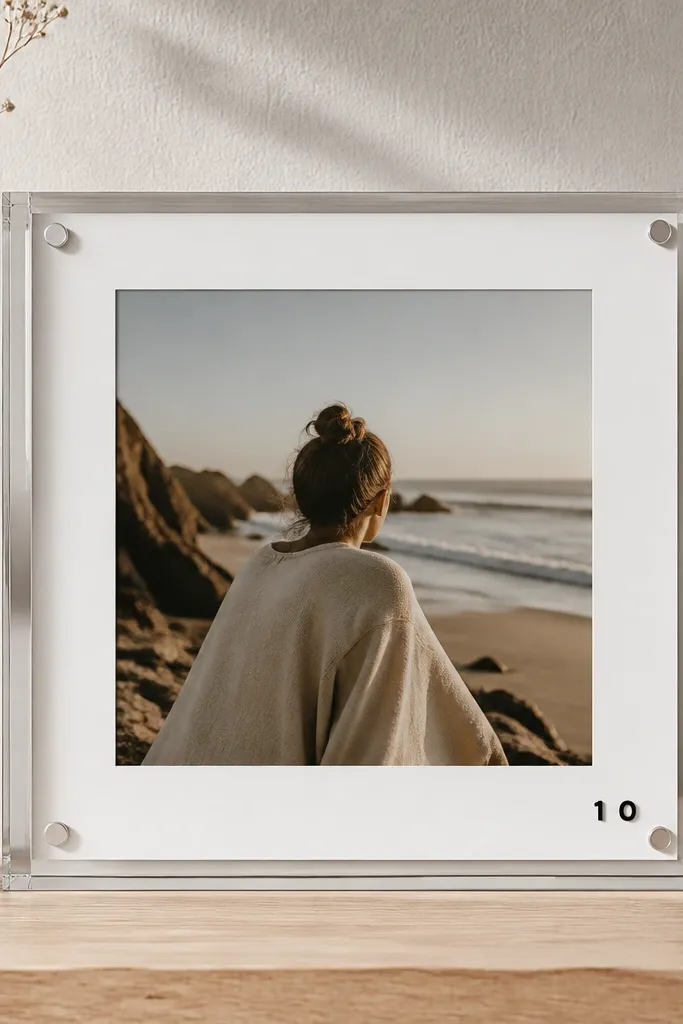
This looks modern because the acrylic is the star and the design is minimal. I add vinyl numbers or letters directly on the acrylic surface so the text floats above the photo. A white backing makes the colors pop and keeps the photo from looking dull. This style is great for date-stamped memories and recipe or event photos.
Cut acrylic to size and build a sandwich with a white backing board. Place the vinyl design on the acrylic before final assembly - it's easier to align when you can lay the acrylic flat. Use clear standoffs or a foam gasket to keep the acrylic from scratching the photo surface.
Pro tipPress vinyl with a plastic squeegee slowly so it doesn't trap air bubbles.
AvoidDon't stick vinyl after assembly; alignment gets messy and the text looks crooked.


