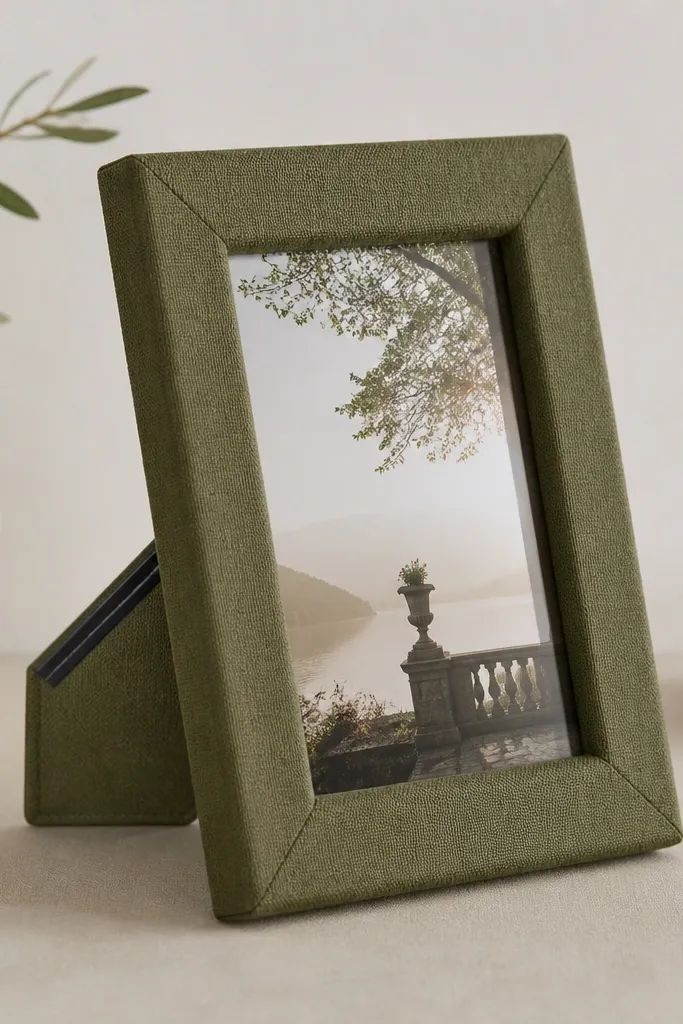
1. Chalky terracotta frame with linen ribbon border
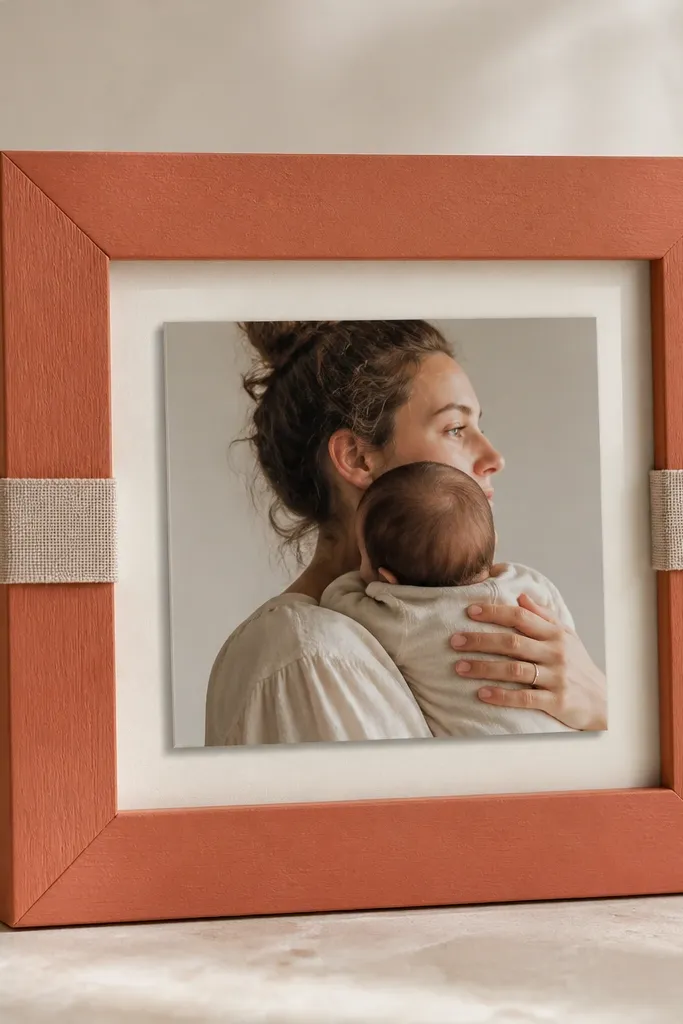
I used chalky terracotta paint because it hides tiny brush marks and looks good in daylight. The linen ribbon adds texture without looking bulky, and the neutral fabric keeps the frame from fighting the photo. A pale mat makes the lifted photo pop - you see a clean shadow line instead of a flat sticker look.
Paint the entire frame with two coats of matte acrylic or chalk paint, letting it dry 2 hours between coats. Cut a mat from 2 mm craft foam or thick cardstock and glue it behind the photo opening. Add 1/16 inch adhesive foam tape to mount the photo so it sits slightly forward.
Pro tipLightly mist the ribbon with fabric spray starch before attaching so it stays crisp and doesn't sag.
AvoidAvoid using glossy Mod Podge on top of fabric - it makes linen look plastic.
2. Navy wood frame stained then dry-brushed with silver
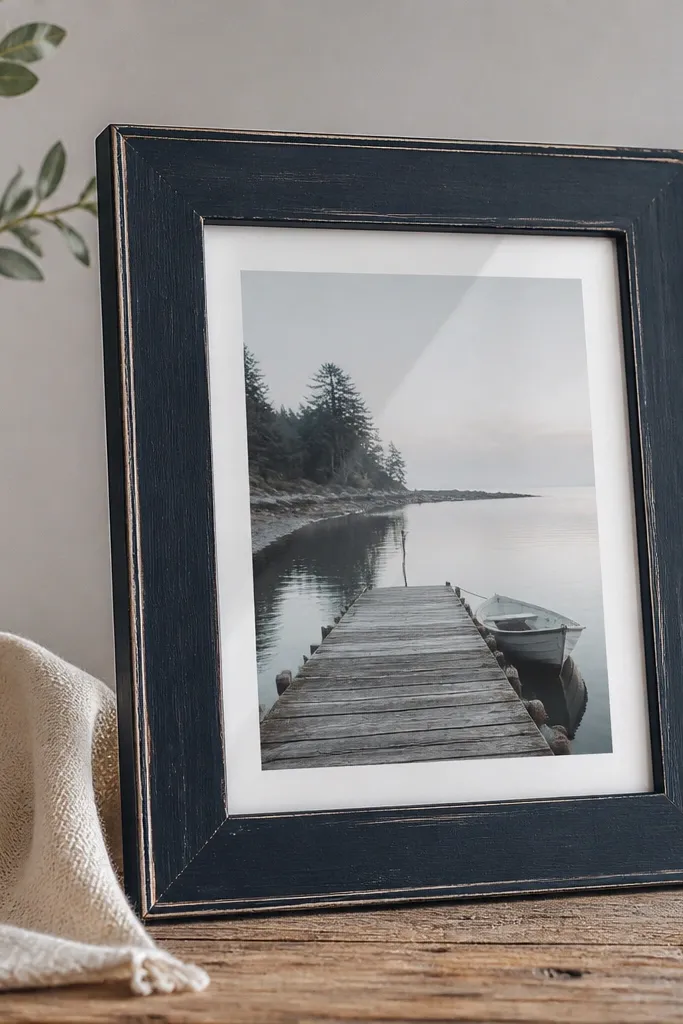
This one is my go-to when a frame is solid wood but the color feels boring. The navy stain gives depth, and the dry-brushed silver hits only the raised edges so it looks intentional, not scratched. The white mat keeps the navy from swallowing the photo.
Sand the frame lightly with 180 grit, wipe dust, and stain with a navy wood stain. Once dry, dry-brush a metallic silver acrylic on the edges only - use a nearly dry brush so you don't flood the grooves. Add a 1-2 mm white mat and mount the photo with foam tape.
Pro tipPractice the dry-brush on a scrap piece of cardboard first - you want faint specks, not stripes.
AvoidDon't sand through the stain to raw wood everywhere; that reads as accidental damage.
3. Map-printed paper decoupage with clear matte coat
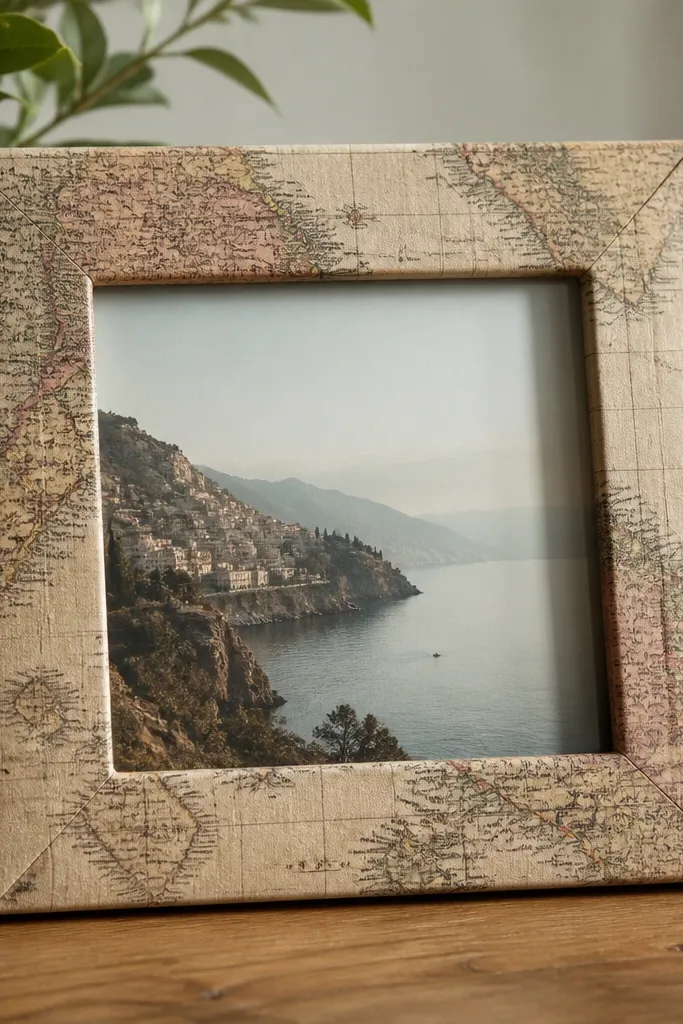
Decoupage works when you keep the paper seams tight and seal it flat. The map print gives instant story and pattern, but the matte clear coat keeps it from looking like wet craft glue. I like using a slightly darker mat so the photo doesn't get swallowed by busy paper.
Cut map paper strips to match each frame side, and decoupage with matte Mod Podge applied in thin layers. Smooth with a plastic card so there are no bubbles at the corners. After it dries overnight, spray a matte clear sealer or brush on a final matte coat.
Pro tipTrim the paper edges with a craft knife after the first coat dries - it gives you crisp borders.
AvoidSkipping the final clear coat makes the paper scuff easily and look dull.
4. Scrapbook paper geometric frame with a single gold line
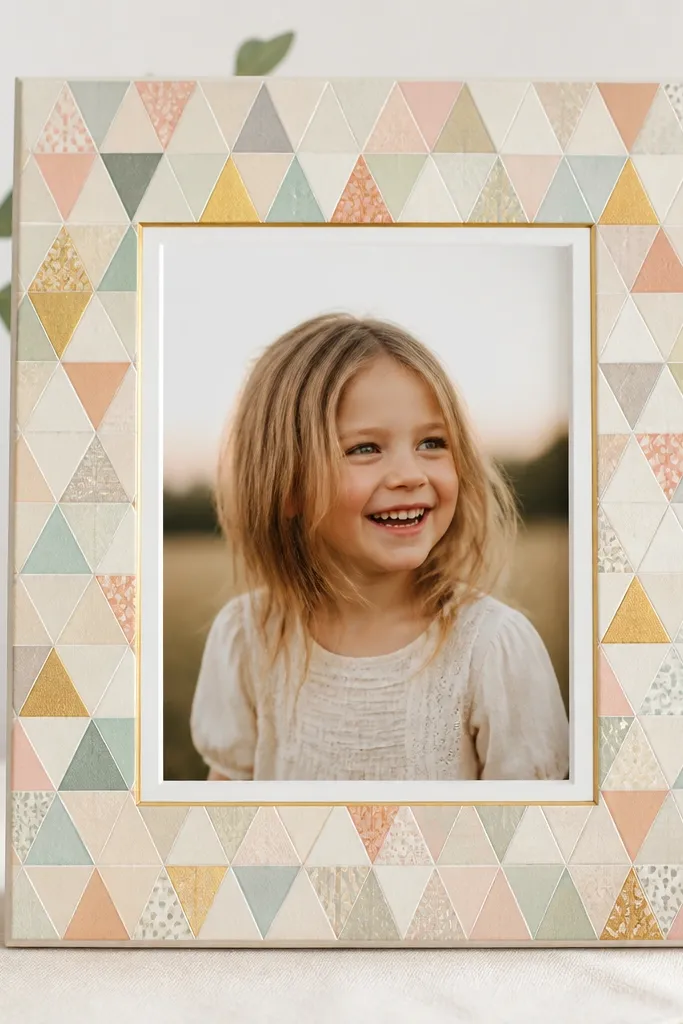
Geometric paper looks sharp when you control the edges with a clean gold line. The pattern stays playful, but the gold border makes it feel finished and framed, not like wrapping paper. I keep the photo mat white so the geometry doesn't compete with faces or text.
Cover the front with geometric paper cut to the exact frame size, leaving a 3-4 mm margin for trim. Seal with matte Mod Podge. Paint one thin gold line around the inner opening using a fine detail brush or gold acrylic pen.
Pro tipUse painter's tape to mask the gold line and burnish the tape edge with your thumbnail.
AvoidDon't blend multiple patterns on the same frame - it turns busy fast.
5. Washed-out denim frame with stitched-looking twine corners
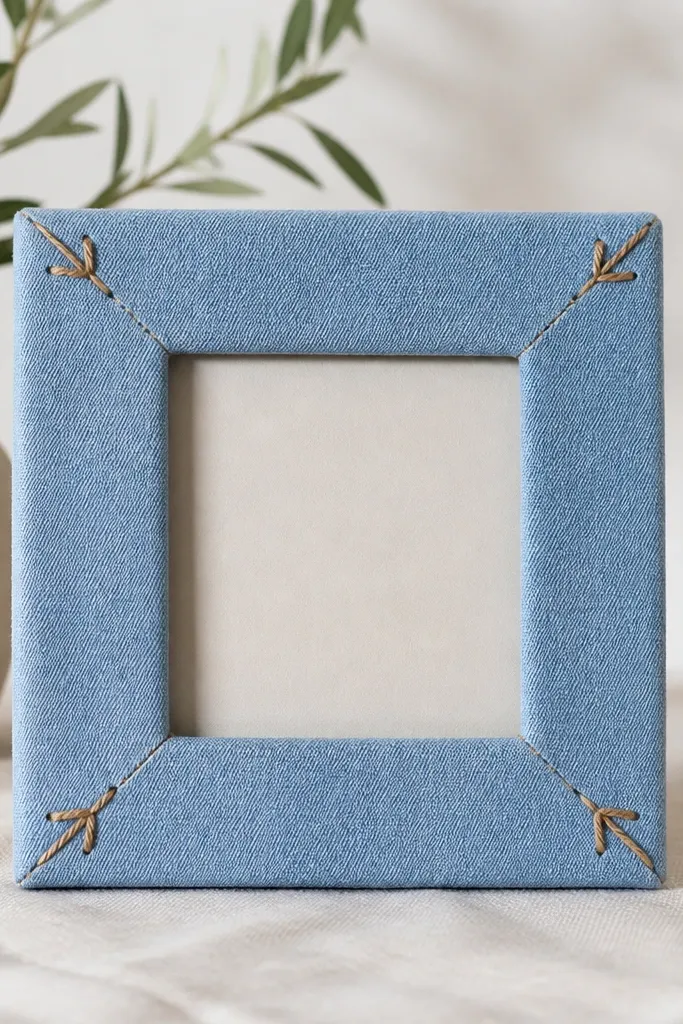
Denim fabric adds instant softness and makes the frame feel like a handmade keepsake. I like this when the photo is casual - family, friends, or a summer trip - because the texture matches the mood. The twine corners give structure so the fabric doesn't look like a loose cover.
Wrap denim around the front and sides, then glue it to the back so the front looks smooth. Trim the inner opening cleanly and glue a thin cardstock backing behind the photo. Tie twine into two loops per corner and anchor with hot glue dots.
Pro tipUse spray adhesive on the denim first, then hot glue only at the corners for a flatter front.
AvoidAvoid thick knots on the front - they cast bulky shadows.
6. Tile mosaic frame using broken white tiles and gray grout-look paint
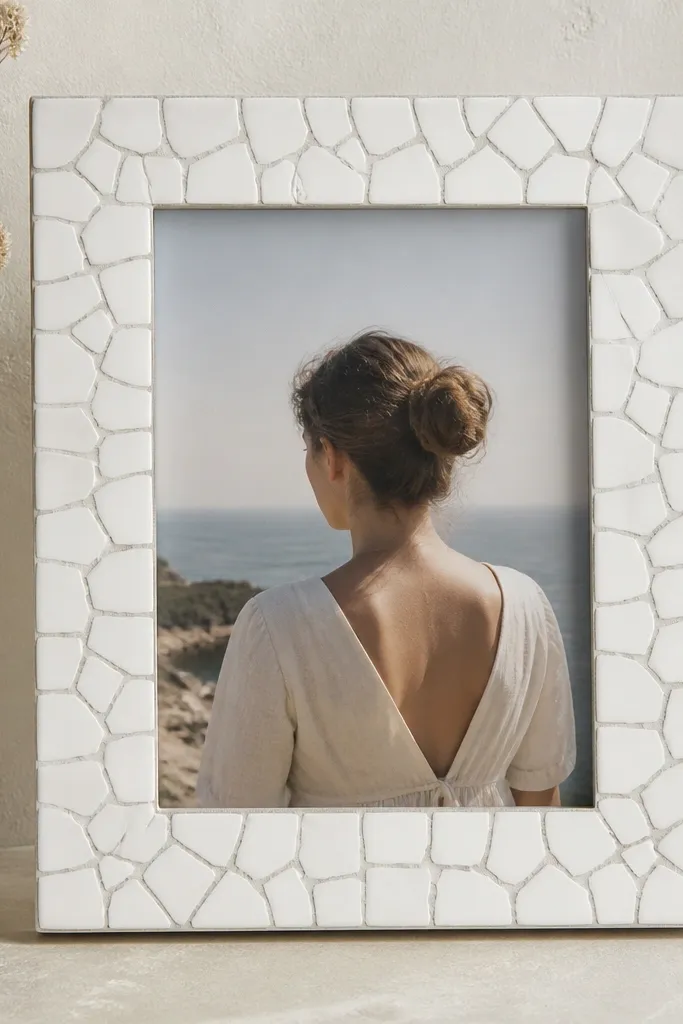
This is the makeover that makes people ask where you bought it. The small tile pieces create a mosaic sparkle, and using a grout-look paint keeps it from getting messy like real grout. White tile makes everything look brighter, and gray grout lines add structure.
Break white tiles into small chunks (about thumbnail size). Arrange them on the frame front with small gaps, then glue with tile adhesive or strong craft glue. Fill gaps with gray grout-look paint after the adhesive cures, and seal with a clear matte sealer.
Pro tipWipe tile dust with a damp cloth before painting grout-look so it doesn't clump.
AvoidDon't spread glue too thick - tile edges will lift and look uneven.
7. Vintage book page frame with pressed-leaf corners
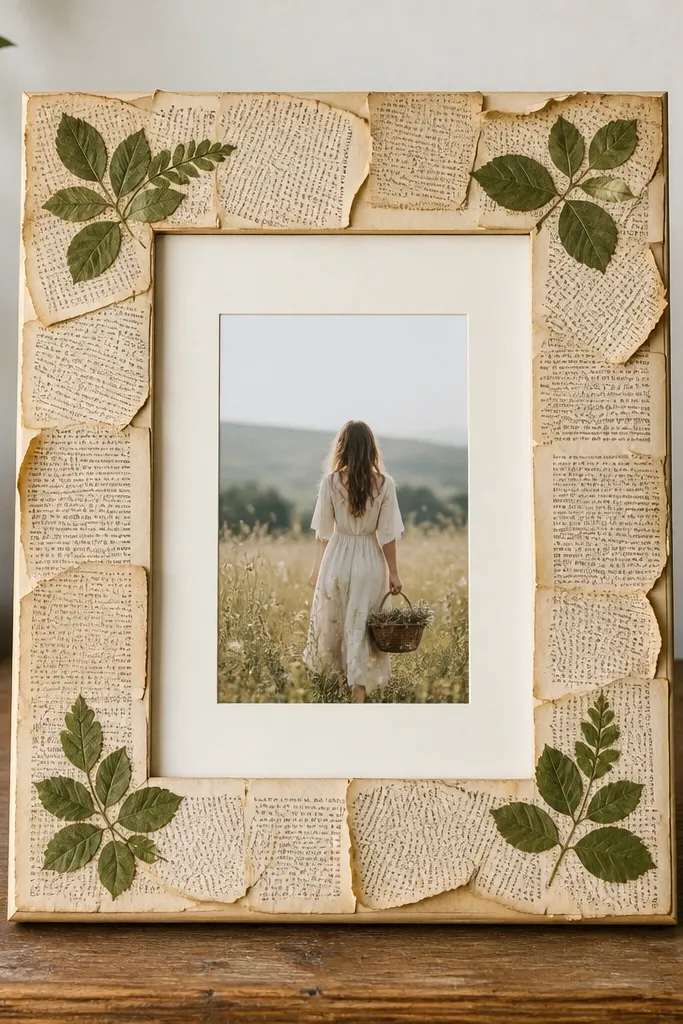
Book pages give that paper texture people love in home decor, and pressed leaves bring a natural detail without adding bulk. The trick is sealing everything so the paper doesn't turn fuzzy and the leaves don't darken unevenly. A cream mat keeps the photo readable.
Decoupage book pages in small overlapping sections so corners stay smooth. Flatten with a plastic card, let it dry fully, then apply two thin matte seal coats. Glue pressed leaves on top with clear-drying glue and press under a book for a few hours.
Pro tipUse a matte seal spray instead of glossy - pressed leaves look more like real specimens.
AvoidAvoid too much glue under leaves; it shows as wet spots.
8. Sprayed metal frame in matte black with cork photo strips
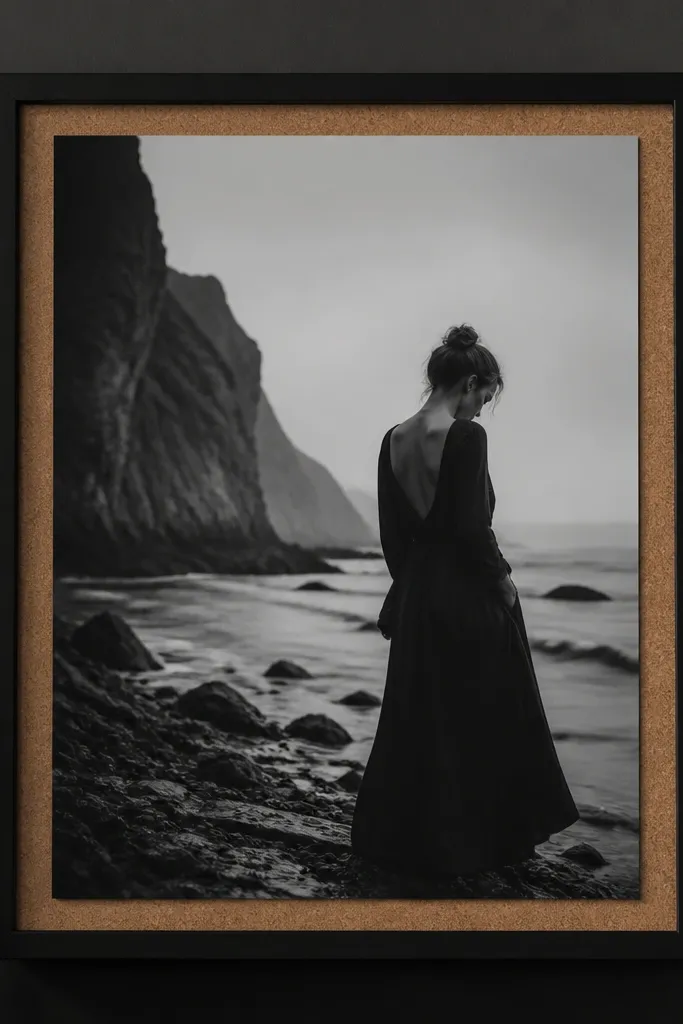
Matte black spray makes cheap metal frames look intentional, and cork adds texture without being loud. The cork strips create a layered border that makes the photo feel like it belongs there. It's a clean look for kitchens, offices, or a gallery wall.
Clean the metal well, then apply a bonding primer and two light coats of matte black spray. Cut cork sheet strips to the photo opening size and glue them behind the photo. Mount the photo with foam tape so the cork border shows evenly.
Pro tipSpray in thin passes from 10-12 inches away so you don't get drips on corners.
AvoidSkipping primer makes the black coat chip at the high-touch edges.
9. Yarn-wrapped frame with a tight spiral border
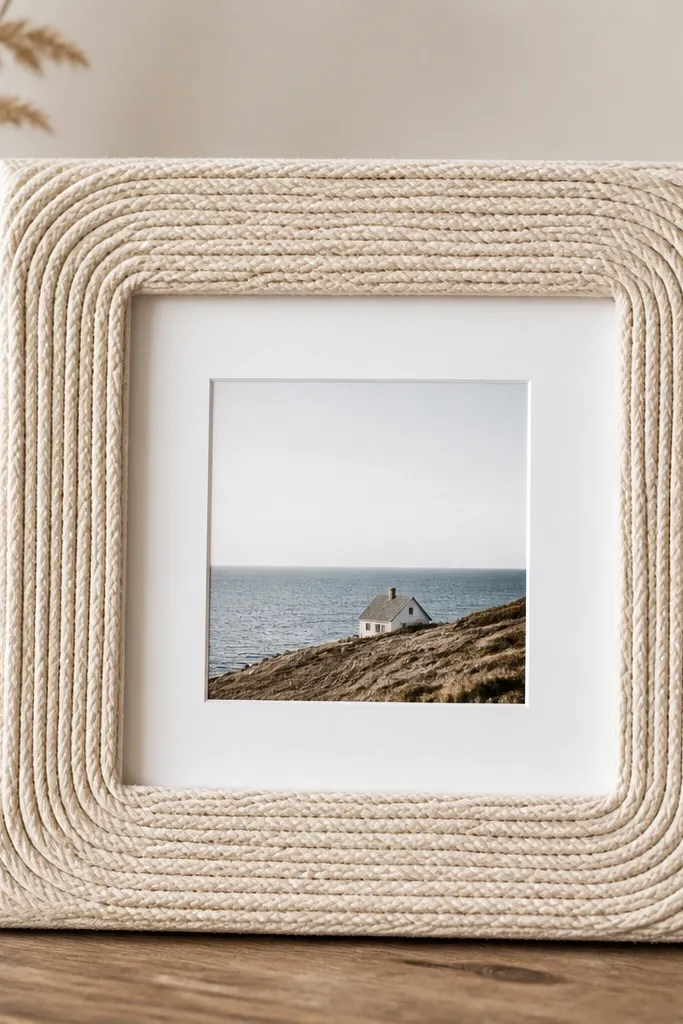
Yarn looks cozy, but it only looks neat when the wrap is tight and consistent. I wrap around the outer border first, then keep the center plain so the yarn becomes the frame's focal detail. A white mat keeps the yarn from turning the whole thing into one beige blob.
Use thick cotton yarn and a hot glue gun. Start at the bottom corner and wrap in a spiral, keeping each loop touching the last. Leave the inside border open or cover it with a single layer of cardstock so the photo window looks crisp.
Pro tipPull the yarn tight as you wrap and glue every 2-3 inches, not continuously, to avoid big glue strings.
AvoidDon't use thin craft yarn - it shows gaps and looks patchy.
10. Painted ombre frame with a single contrasting corner stamp
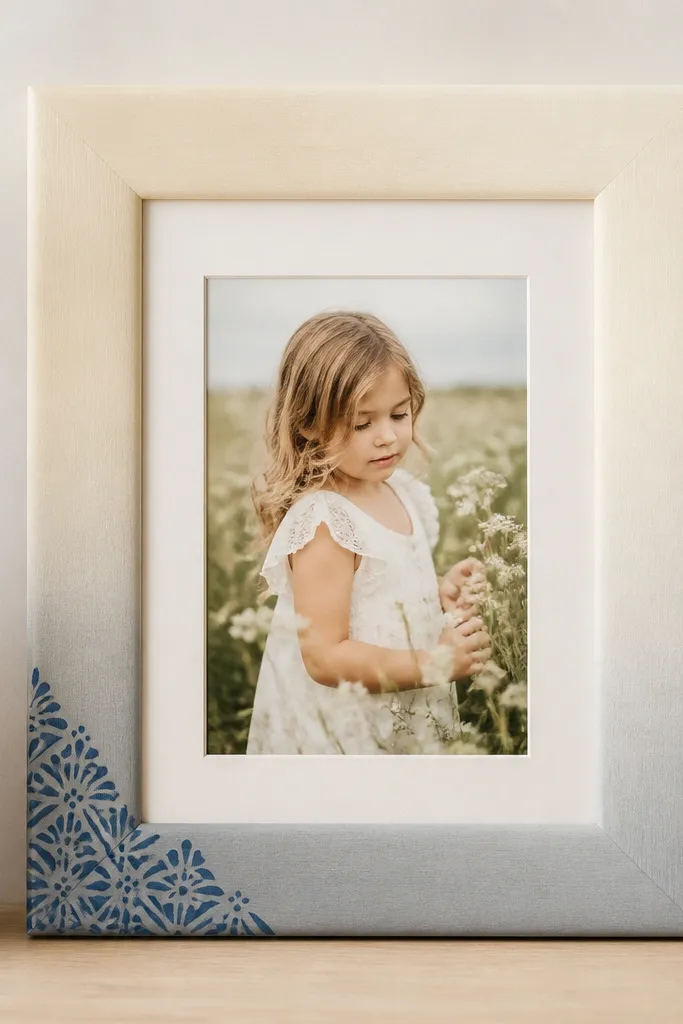
Ombre gives you a smooth, modern gradient, and a single stamp keeps it from looking like a beginner paint job. I like using a foam stencil brush for the stamp so it lands evenly. This works great for beachy photos or anything with lots of negative space.
Base coat the frame in light cream. For ombre, blend gray acrylic at the bottom using a damp sponge, working upward in small passes. Let it dry, then stamp one corner with a small ink pad and seal with matte varnish.
Pro tipDo the ombre on a horizontal surface so gravity doesn't create streaks.
AvoidAvoid wet-on-wet blending for too long; it turns muddy.
11. Button-and-sequin cluster frame front
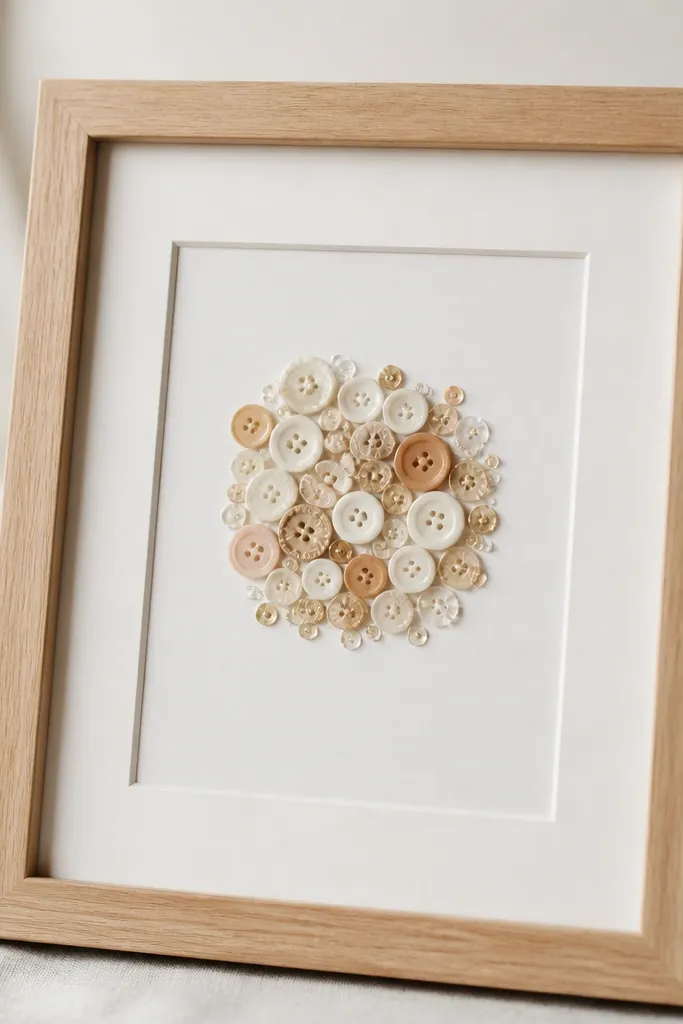
This makeover looks playful and handmade because the texture is concentrated in one spot. Buttons also hide small imperfections in the frame surface. I keep the outer frame natural or lightly painted so the photo stays the main focus.
Lightly sand the frame and wipe dust. Paint a thin layer of clear matte medium or primer if the wood is glossy. Glue a mix of buttons (sizes 10-22 mm) in a tight cluster, then add a few sequins around the edges for sparkle.
Pro tipSort buttons by size before you glue so you don't end up with one huge button dominating the center.
AvoidAvoid gluing sequins flat in a random scatter - it looks messy.
12. Spray-splattered frame with thick black marker border
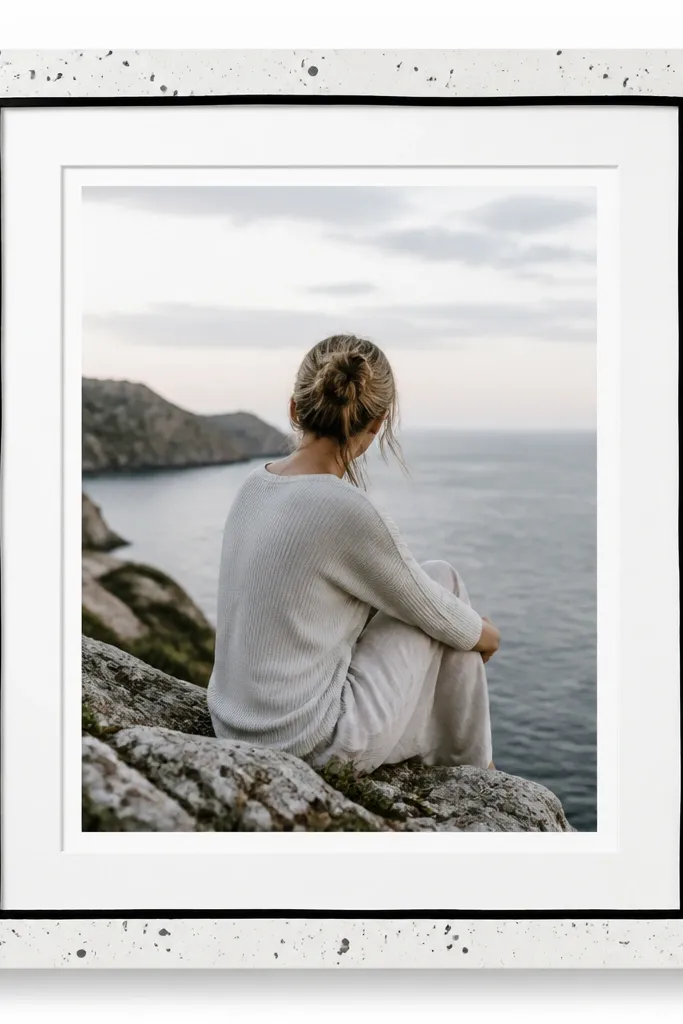
Splatter looks artsy when it's controlled - you want small dots, not big drips. A thick marker border makes the whole piece feel graphic and intentional. This is the quickest "after" look if you want something modern without covering the whole frame.
Base coat the frame white and let it cure 24 hours if possible. Use a toothbrush or splatter brush loaded with watered-down acrylic, then flick over the front from 12 inches away. After drying, draw a thick inner border with a paint marker and seal with matte spray.
Pro tipLay cardboard behind the frame while splattering so you don't get specks on the back or glass.
AvoidDon't seal splatter too early - the dots can smear.
13. Reclaimed wood slat frame with clear epoxy river edges
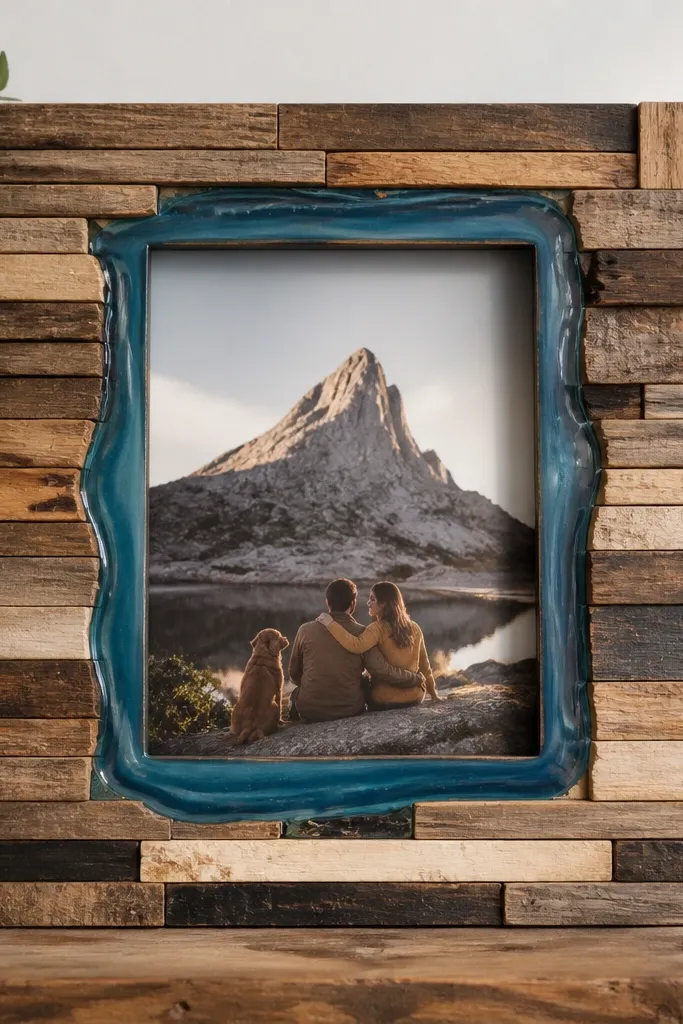
When you use reclaimed slats, the grain does the work - you don't need heavy decoration. The epoxy line gives a glassy contrast against the matte wood, and it makes the frame look custom. It also hides small gaps where pieces meet.
Cut reclaimed slats to fit the frame sides and glue them in place with wood glue. Use painter's tape to mask a thin channel where you want the epoxy river, then mix and pour a thin layer. Let it cure fully, then mount the photo with a backing board.
Pro tipSand the slats after gluing so the epoxy channel sits flush and doesn't show steps.
AvoidDon't pour a thick epoxy layer at once; it can cure cloudy.
14. Pressed flower frame with watercolor wash background
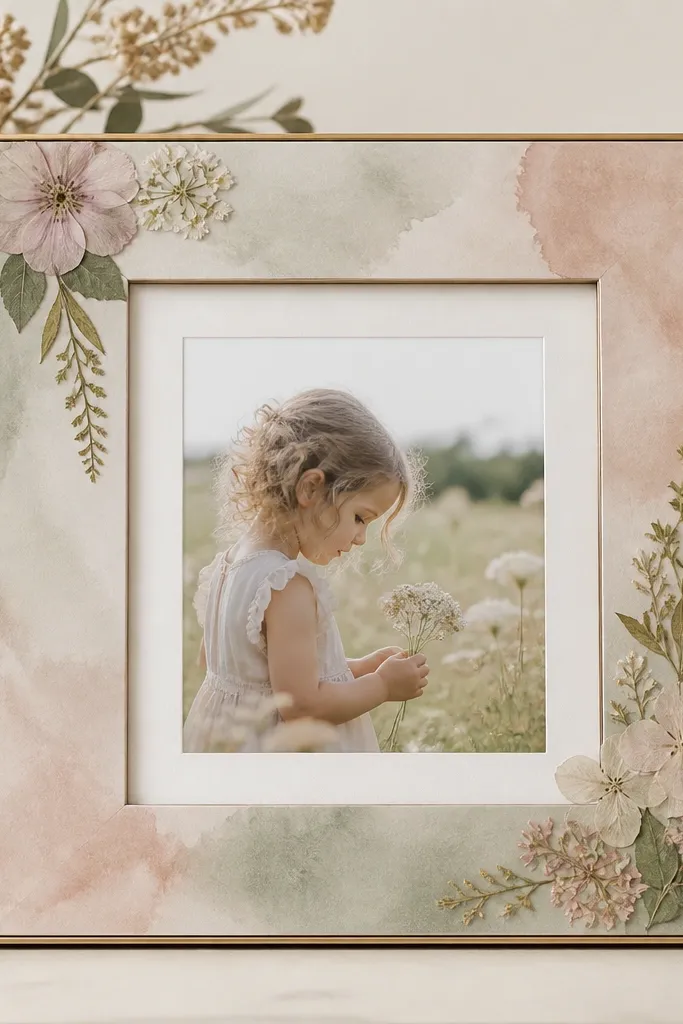
Watercolor wash backgrounds make pressed flowers look airy instead of stuck-on. Dusty pink and sage are forgiving - they don't fight most skin tones in photos. The glass helps protect the flowers, but you still need a seal so the paper doesn't lift.
Paint a background sheet (watercolor paper or cardstock) with a loose wash. Glue pressed flowers on top with archival matte medium, then seal with a thin matte top coat. Replace the original backing inside the frame so the flowers sit directly behind the glass.
Pro tipPress flowers for at least 2 weeks for flatter petals; thick petals warp under sealant.
AvoidAvoid using glossy Mod Podge on pressed flowers - petals look wet and uneven.
15. Fabric-covered frame with a hidden magnetic photo swap
This is a makeover for people who actually change photos. Fabric gives softness, and a magnetic backing lets you swap prints without pulling the whole frame apart. The frame still looks tidy because the magnet stays hidden behind the backing board.
Cover the frame with fabric using spray adhesive on the front, then wrap the edges to the back. Cut a backing board and glue a thin magnetic strip along the edges of the photo area. Print your photo on cardstock and attach a thin magnet layer to the back so it locks in place.
Pro tipUse 1/8 inch neodymium strip magnets only if you can keep them fully inside the backing - they're strong.
AvoidDon't rely on tape magnets; they slide and the photo will drift.


