1. Wrinkled Map Paper Frame with Brass-Tone Corners
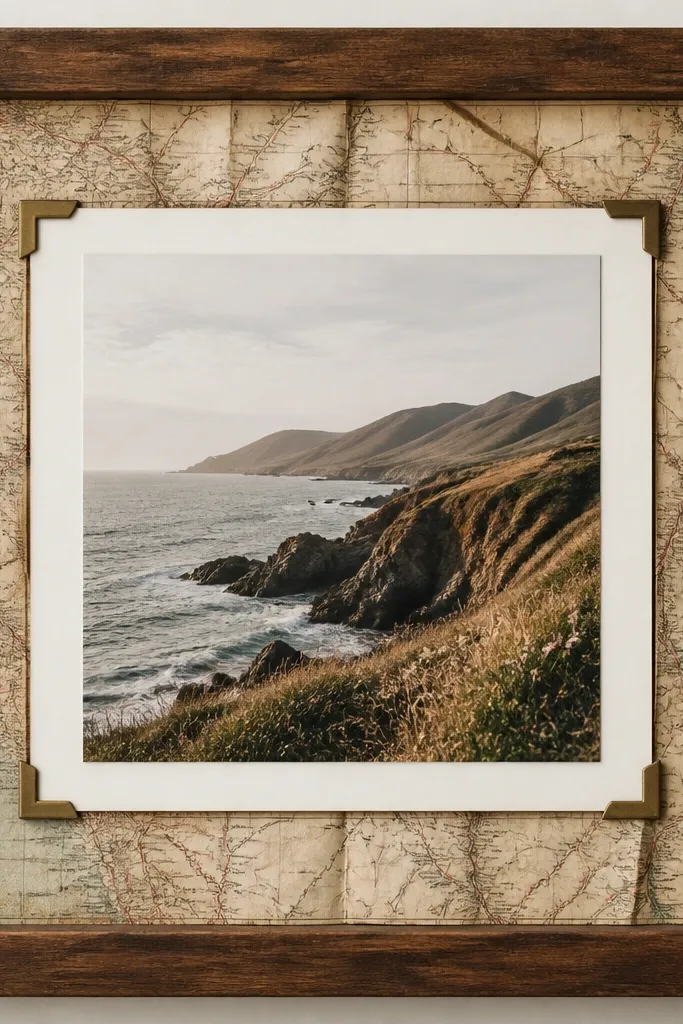
This works because the map paper gives you a busy background without needing extra decorations. The slight wrinkles make it look aged instead of flat, and the brass-tone corners add structure so the frame doesn't feel chaotic. I used muted map colors (cream, faded green, dusty blue) and kept the photo mat clean so faces stay readable.
Rip map paper into strips that cover the mat area, then lightly crumple and smooth it to create natural folds. Glue with matte Mod Podge in thin coats, pressing edges down around the opening. Finish by adding corner accents from small brass-tone metal corner guards or self-adhesive corner protectors.
Pro tipSeal the map paper with one thin layer of Mod Podge on top after it dries so it doesn't pick up handling scuffs.
AvoidDon't fully flatten the paper - totally smooth map backgrounds look like a craft sticker.
2. Denim Pocket Frame with a Mini Ticket Stub Border
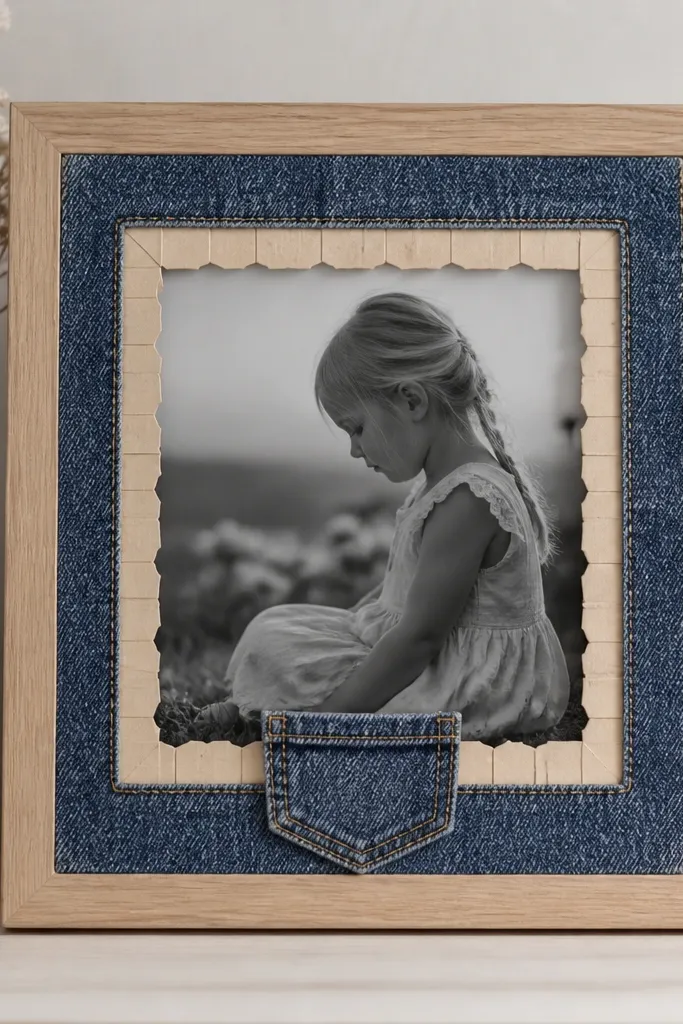
Denim gives texture and a casual, wearable look. The mini ticket stubs add a travel vibe and create a repeating border pattern that makes the photo feel like part of a story. I keep the denim blue fairly medium and avoid dark indigo because it swallows the photo.
Cut a denim rectangle to match the mat opening, leaving a 1/2-inch border to wrap and glue on the back. Add a small stitched pocket (about 3 x 2 inches) from leftover denim. Glue ticket stubs in a ring around the photo using a glue stick for paper contact, then seal the stubs with a thin Mod Podge layer.
Pro tipUse a fabric glue for the denim edges and let it cure overnight before you handle the frame.
AvoidDon't use hot glue directly on denim - it can soak through and leave shiny blobs.
3. Sheet Music Frame with Black Wash Edges

Sheet music brings a classic pattern that reads as intentional when it's paired with a moody edge finish. The black wash on the outer frame gives contrast, so the paper text doesn't overpower the photo. I like cream matting because it keeps the music marks from looking gray.
Tear sheet music into irregular pieces and overlap them behind the photo opening. Brush Mod Podge to tack it down, then add a second coat once dry. For the edges, wipe a small amount of black acrylic paint mixed with water onto a rag and lightly drag it along the frame corners and sides.
Pro tipSpray a matte clear coat over the paper background after it fully dries so the ink doesn't smear.
AvoidDon't paint the sheet music directly - brush strokes turn it patchy fast.
4. Tissue Paper Ombre Frame with Clear Tape Border
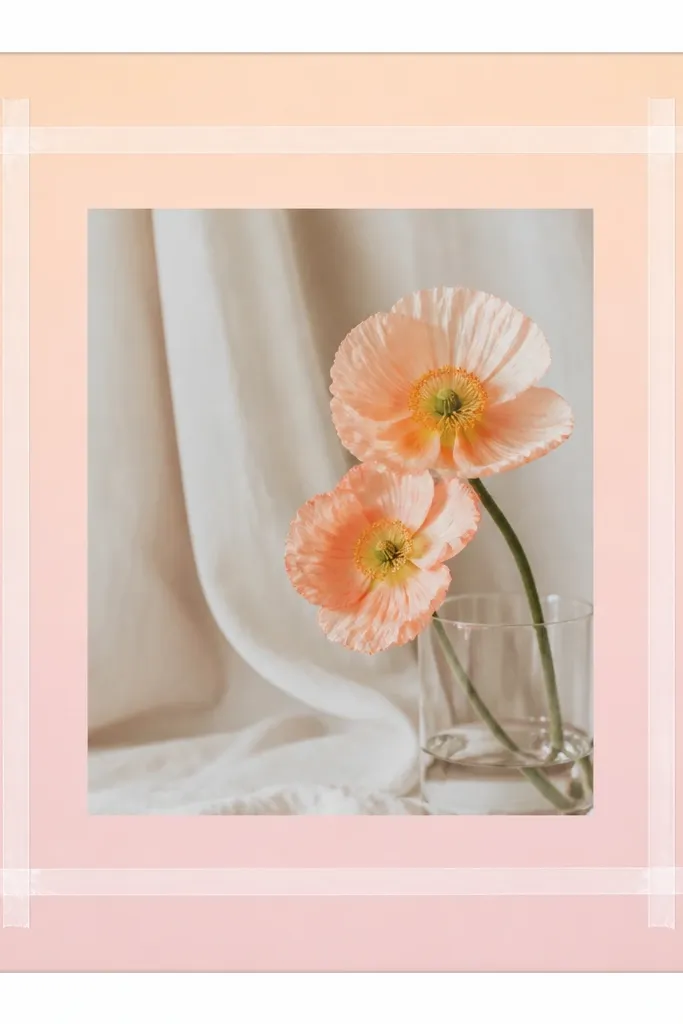
Tissue paper layers create a watercolor-like gradient that looks expensive in daylight. The clear tape border gives crisp geometry, so the soft background stays controlled. I used three tissue shades and blended them by overlapping edges, not by painting.
Cut tissue strips in widths of about 2 inches. Layer from bottom to top with slight overlaps, then tack the tissue to the back using Mod Podge diluted 1:1 with water. Add clear tape strips in a rectangle around the photo opening so you get sharp lines.
Pro tipUse a foam brush to apply Mod Podge - it spreads without tearing tissue.
AvoidDon't press tissue hard while wet - it turns into creases that show through the photo.
5. Pressed Leaf Frame with Linen Mat
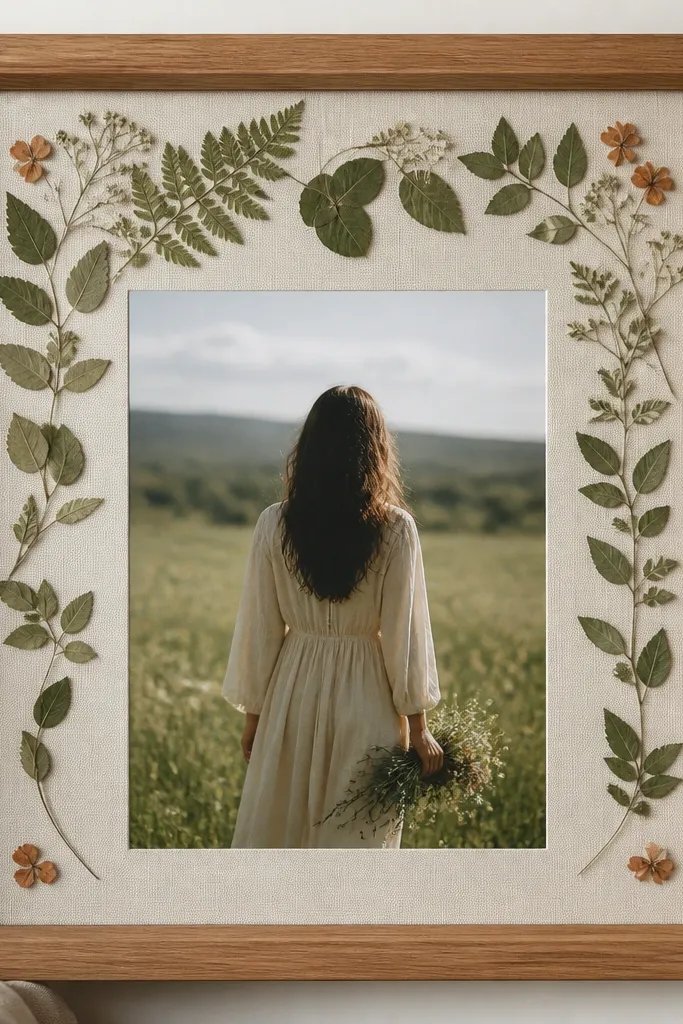
Pressed leaves add real organic detail and look best when the mat is neutral. Linen texture makes the leaves feel like they belong in a gallery instead of a school project. The key is spacing: leave breathing room so the leaves don't crowd the photo.
Press leaves between pages for 1-2 weeks if you want them flat. Cut a linen-look fabric mat to the opening size and glue fabric to a backing board. Arrange leaves on top and use a thin layer of clear-drying craft glue, then seal the whole background with a light Mod Podge coat.
Pro tipPick leaves with thinner veins - they press flatter and look crisp at close range.
AvoidDon't use glossy leaf glue or thick paste - it makes leaf edges look wet.
6. Rope-Wrapped Frame with Nautical Knot Corner Blocks
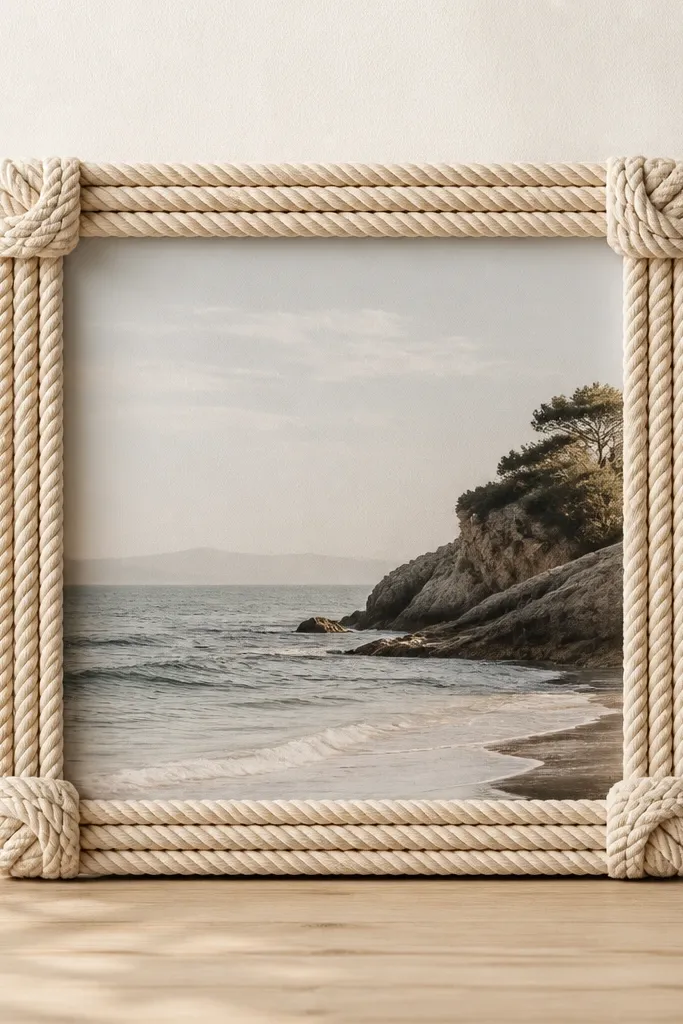
Rope wrapping gives instant texture and makes even a cheap frame look sturdy. The knot corner blocks stop the rope from looking like it just got glued on - they frame the corners and make the whole piece feel intentional. I chose cream rope because it works with almost any photo color.
Remove the backing and wrap rope around the outer frame edge, gluing in short sections so it doesn't shift. Use a hot glue gun sparingly on wood only, not on thin painted surfaces. Make corner blocks from extra rope, tie a tight square knot, then glue the block at each corner.
Pro tipKeep tension even - if one side is loose, the photo opening will look crooked.
AvoidDon't wrap over peeling paint - the rope lifts with the flaking layer.
7. Washitape Grid Frame with Color-Matched Photo Mat
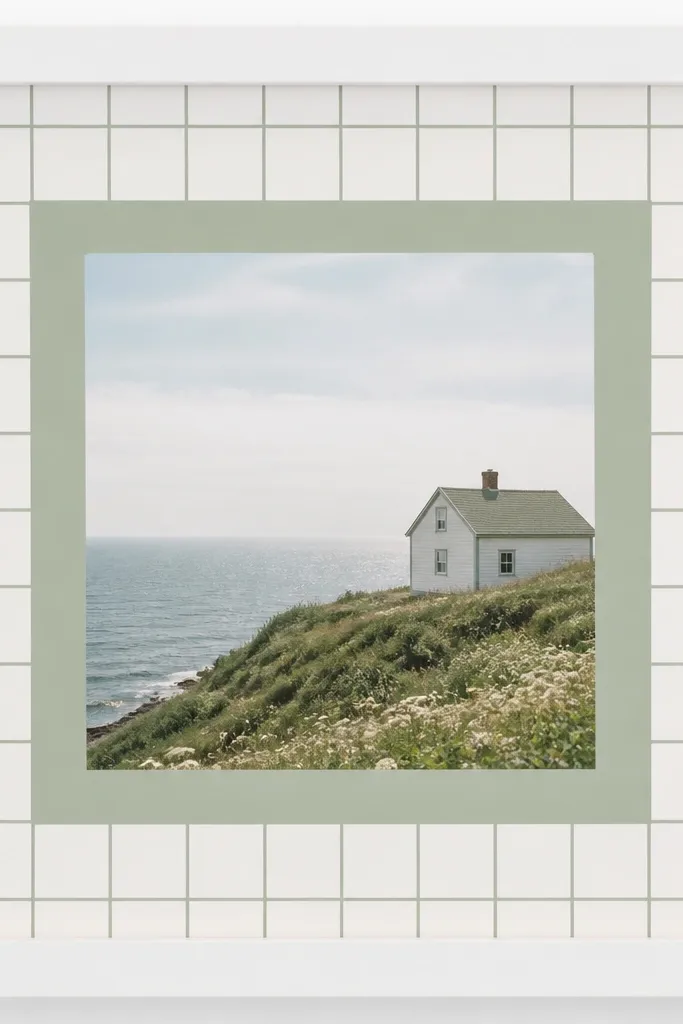
Washi tape is the fastest way to make a clean graphic frame. A grid pattern gives structure, and color-matching the mat makes the whole thing feel designed instead of random. I stick to two tape colors plus the white base so it doesn't get busy.
Measure the interior area and mark spacing lightly with pencil on the backing board. Lay tape strips horizontally and vertically, then trim tape edges with a craft knife. Cut a mat from cardstock in a matching color (like dusty teal or soft coral) and adhere it behind the photo.
Pro tipPress tape down with a ruler edge so corners don't lift later.
AvoidDon't use too many tape colors - it turns into a sticker collage.
8. Scrapbook Paper Burst Frame with Photo Centered on a Circle
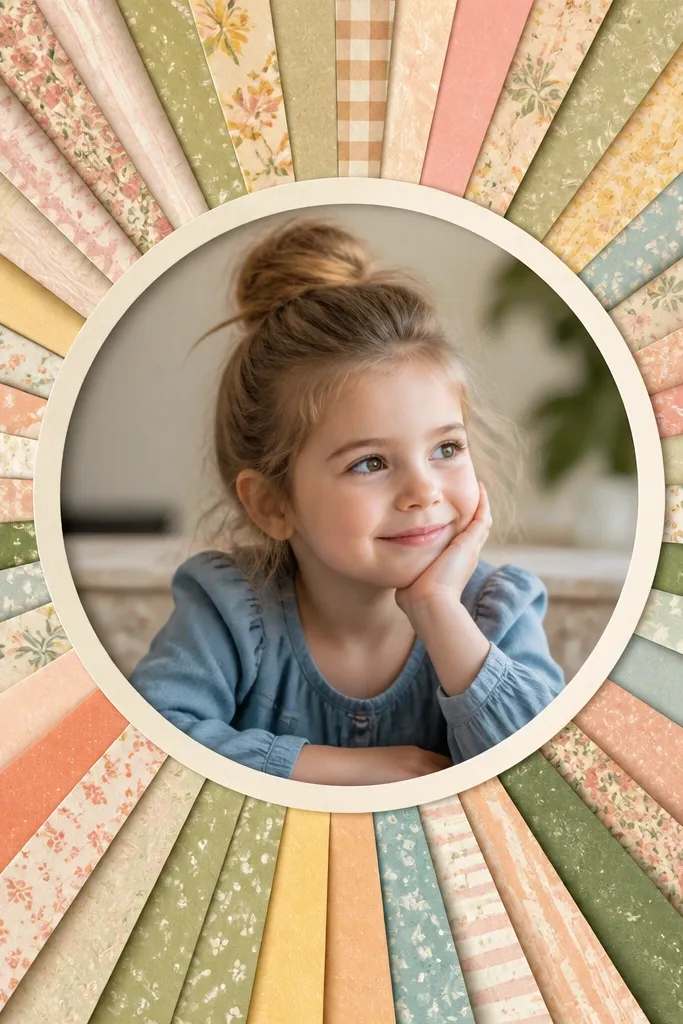
A burst background creates motion, and circles soften the geometry so the photo feels like the focal point. Scrapbook paper prints look best when you pick one dominant pattern and repeat it in strips. I used a single print for the burst and kept the frame itself plain.
Cut 12-16 strips of scrapbook paper about 1 inch wide and 6-8 inches long. Fold each strip accordion-style and glue them around a paper circle center behind the photo. Use a circle mat cutout (about 1/2 inch larger than the photo) so the face sits clean.
Pro tipMake the strips slightly different lengths so the burst looks hand-made, not stamped.
AvoidDon't glue the burst directly over the photo - shadows make it look messy.
9. Corkboard Pushpin Frame with Fabric String Border
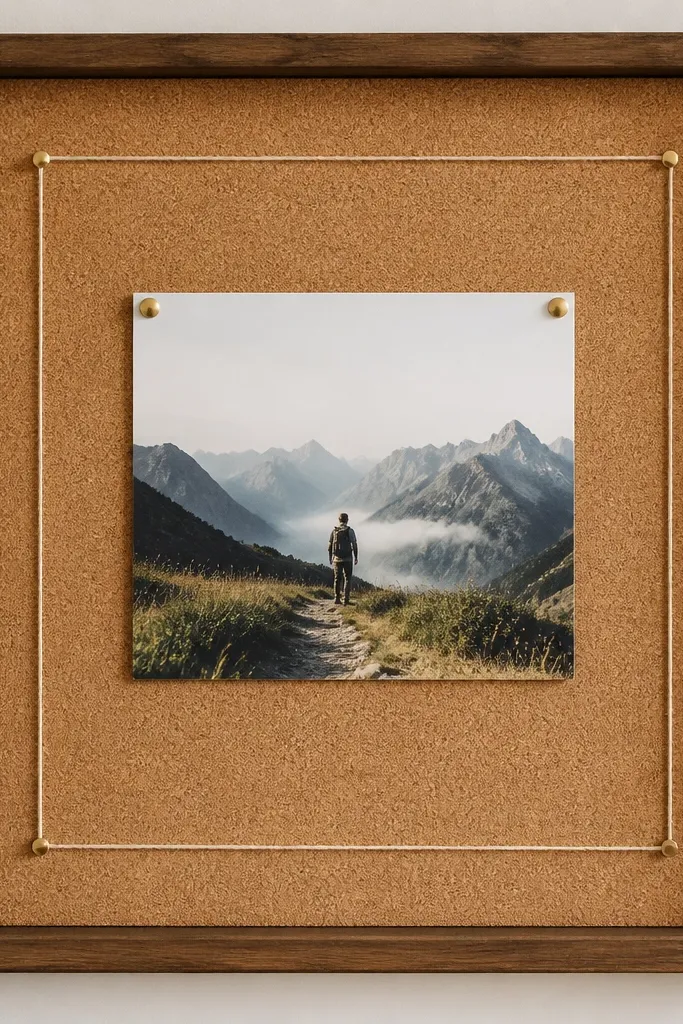
Corkboard lets you pin things without permanent glue. The pushpins add a little hardware charm, and the fabric string border adds a softer line than twine. This is the frame I reach for when I want to swap photos often.
Cut corkboard to fit the frame backing. Pin the photo with two pushpins at top corners and one at bottom center if it's heavy. Tie fabric string (ribbon or thin cotton cord) around the opening and glue string ends on the back so the front stays clean.
Pro tipUse stainless pushpins - they don't rust and they sit flatter.
AvoidDon't use thick yarn - it makes the border look chunky and uneven.
10. Painted Popsicle Stick Frame Border with Matte Photo
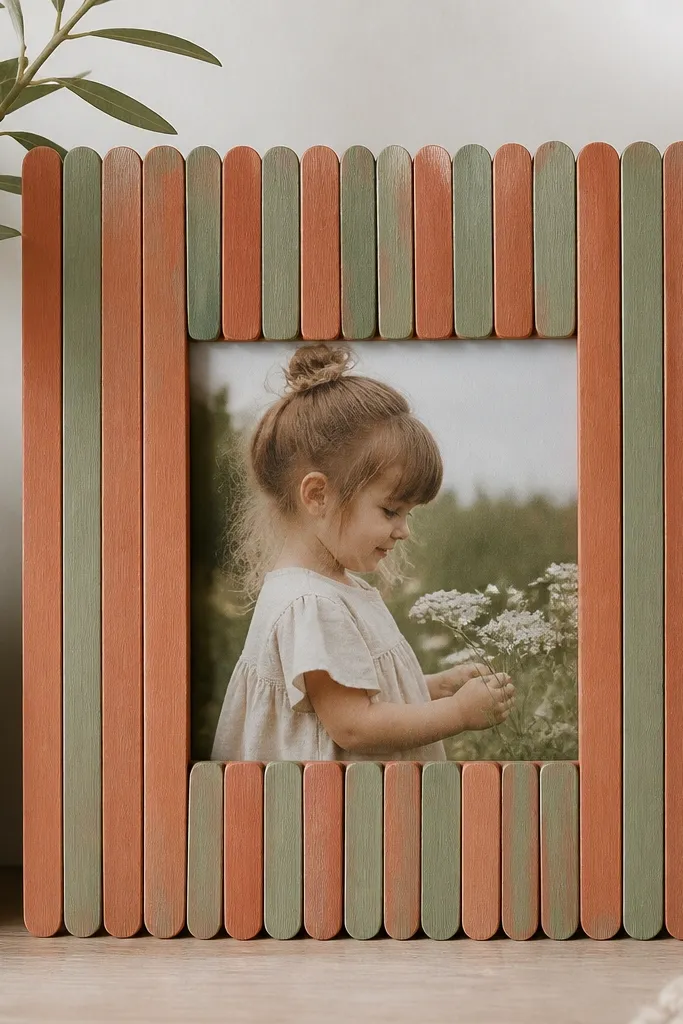
This gives you a homemade border that looks crisp when the sticks are aligned. Matte photo paper (or a matte print) keeps it from fighting with the stick texture. I like this for warm-toned photos because the border reads like a handmade craft without looking cheap.
Paint popsicle sticks with acrylic paint and let them dry fully, then trim them to match each side length. Glue sticks to the backing board around the opening with a thin craft glue layer. Add a matte photo print and mount with photo corners for a clean edge.
Pro tipSand the stick edges lightly so corners don't show splinters through the photo opening.
AvoidDon't stack glossy stickers next to matte sticks - the shine mismatch screams "craft."
11. Old Book Page Frame with Gold Leaf Speckle
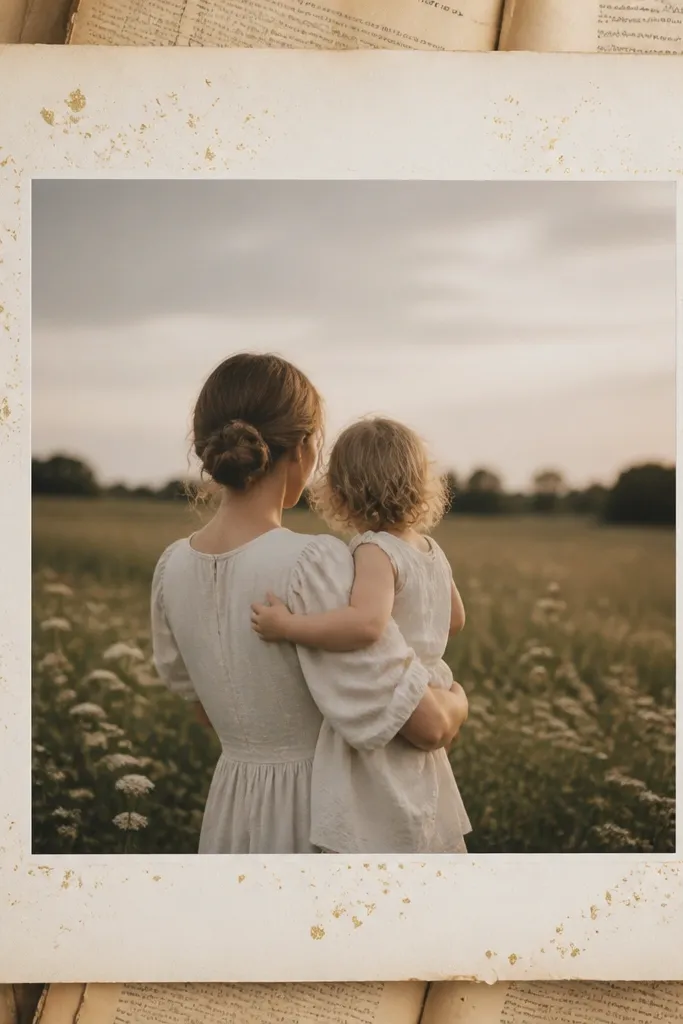
Book pages give you a dense, paper-rich background that reads warm and lived-in. Gold leaf speckles add a celebratory touch without covering the page text. I keep the speckles controlled - you want a light scatter, not a full gold wash.
Tear book pages into uneven shapes and glue them down behind the opening. Once dry, tear tiny pieces of gold leaf and tap them with a dry brush to create speckles. Seal with matte Mod Podge so the gold doesn't peel when you dust the frame.
Pro tipUse a white mat so the gold speckles stand out and the letters stay readable around the edges.
AvoidDon't use too much glue under gold leaf - it soaks and darkens the paper.
12. Clear Acrylic Frame with Layered Photo Strips
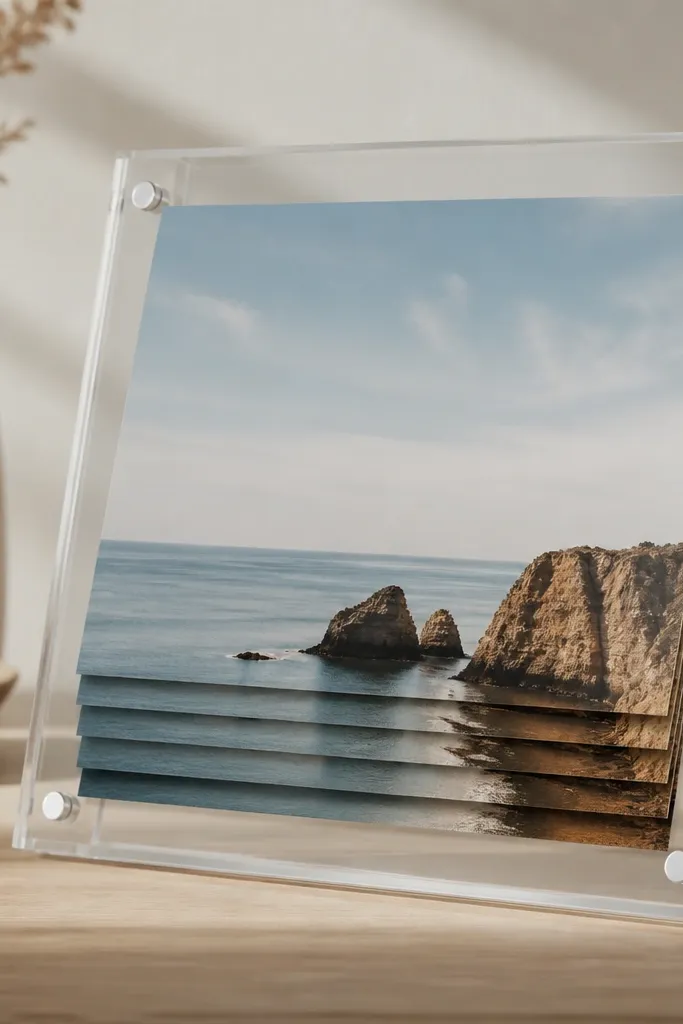
Layering photo strips creates depth without adding bulky embellishments. Clear acrylic keeps everything modern and lets the overlapping photos do the decorating. I use this for action shots because the stacked strips look like motion trails.
Cut 3-5 narrow photo strips from the same image (about 1 inch wide each) and print them slightly smaller than the opening. Layer them with double-sided tape on the backing so they step down. Place clear acrylic cover last so you don't trap bubbles.
Pro tipPrint on matte photo paper for a soft look under clear plastic.
AvoidDon't use thick foam tape - it makes the frame look crooked through the acrylic.
13. Fabric Scrap Roll Frame with Rolled Rose Corner
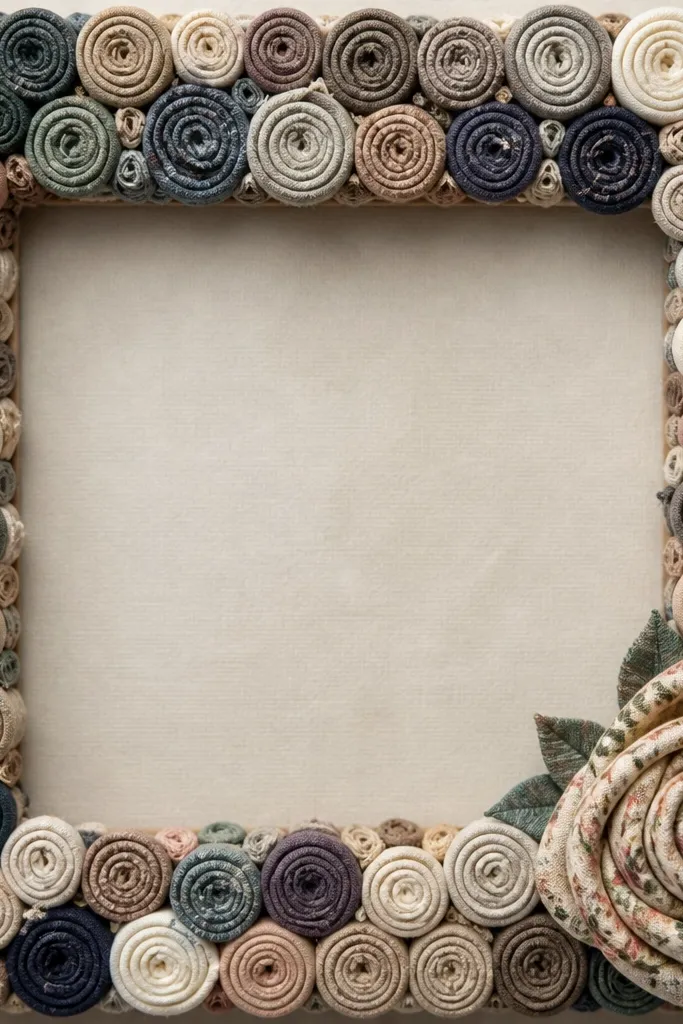
Rolled fabric coils look like little flowers and add dimension you can feel. The background stays textured without being loud because the coils are small and repeated. I keep the main photo mat plain so the fabric texture doesn't compete with faces.
Cut fabric scraps into 1-inch strips and roll tightly, then tack the end with fabric glue. Arrange coils around the edges and corner, leaving a clear center for the photo mat. For the rose, roll a longer strip around itself and glue the base to the corner.
Pro tipUse cotton scraps - they roll tighter and don't fray as badly as polyester.
AvoidDon't overfill the frame center - too much texture makes the photo look stuck on top.
14. Chalkboard Paint Frame with White Sticker Labels
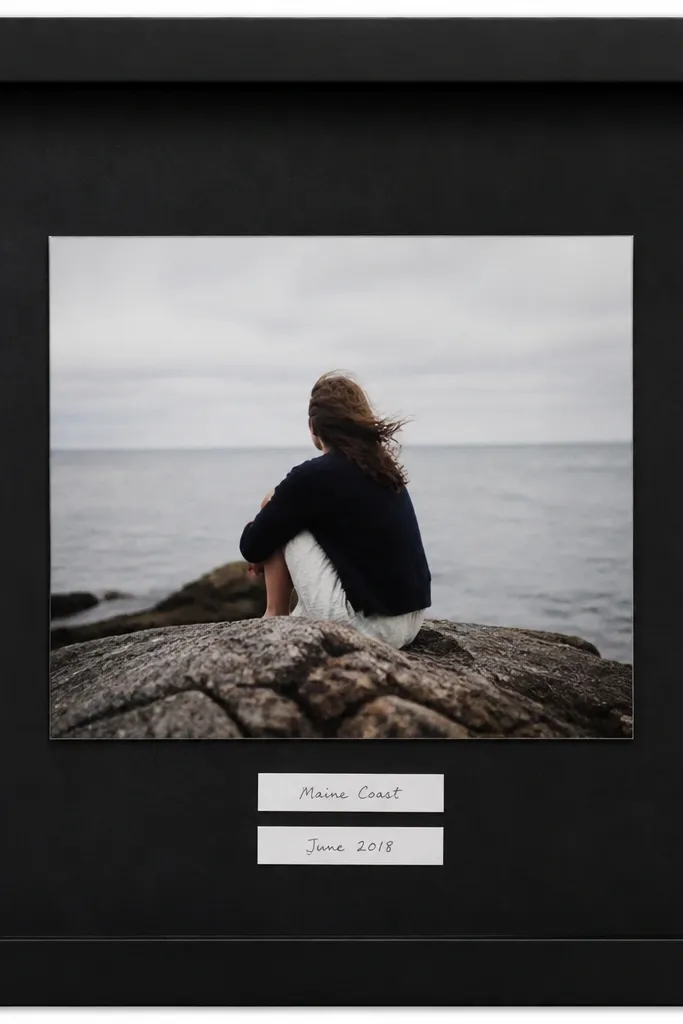
Chalkboard paint gives you a matte surface that looks clean even when you add labels. It also lets you change captions without scraping everything. I used white labels because they stay readable against black and they frame the photo like a gallery caption.
Sand the inside edge of the frame lightly, then paint chalkboard paint in two thin coats. Let it cure per label directions, then wipe with chalk dust. Add photo with adhesive corners, then stick on small white labels and write with a chalk marker.
Pro tipSeal label paper lightly with a matte spray so it doesn't peel if you wipe dust off the surface.
AvoidDon't use glossy acrylic paint - the glare makes the black look cheap.
15. Washed Acrylic Glitter Frame with Tissue Paper Backing
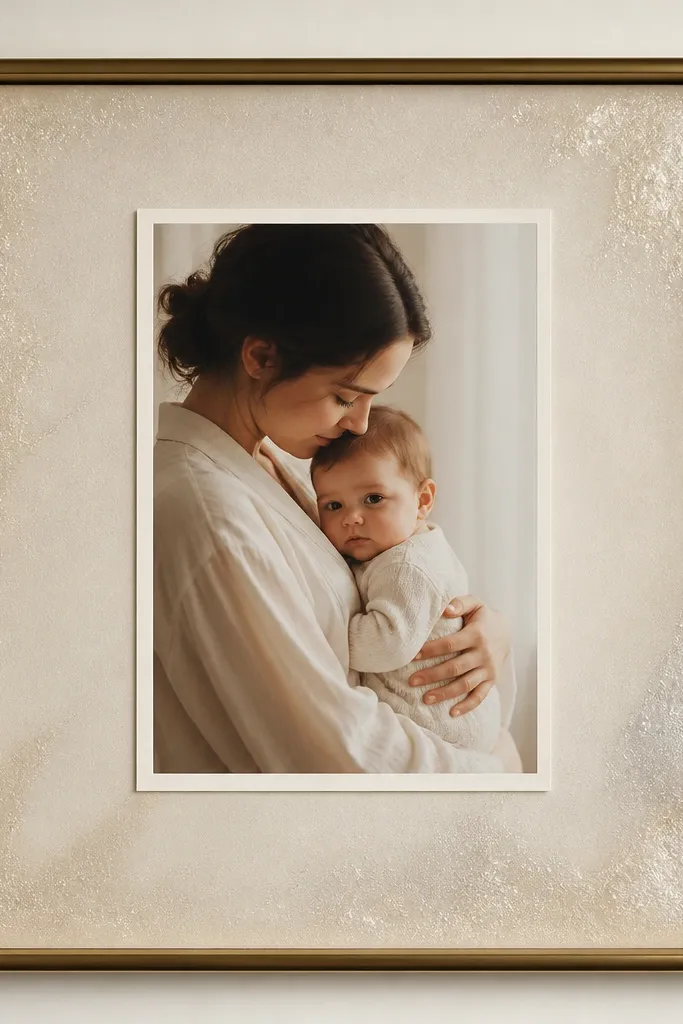
This one looks like frosted glass when it's done lightly. Tissue paper under the glitter softens the sparkle so it doesn't look like craft glitter on a table. I concentrate glitter toward the corners and let it fade toward the center.
Cut tissue paper to cover the backing board. Mix a small amount of clear acrylic medium with fine glitter and paint it only on the edges with a sponge brush. Let it dry flat, then seal with matte Mod Podge to lock the glitter down.
Pro tipUse fine glitter, not chunky - chunky shows texture through the photo area.
AvoidDon't overload the acrylic mix - thick glitter turns grainy and uneven.
16. Ribbon Lattice Frame with Tiny Clothespin Clips
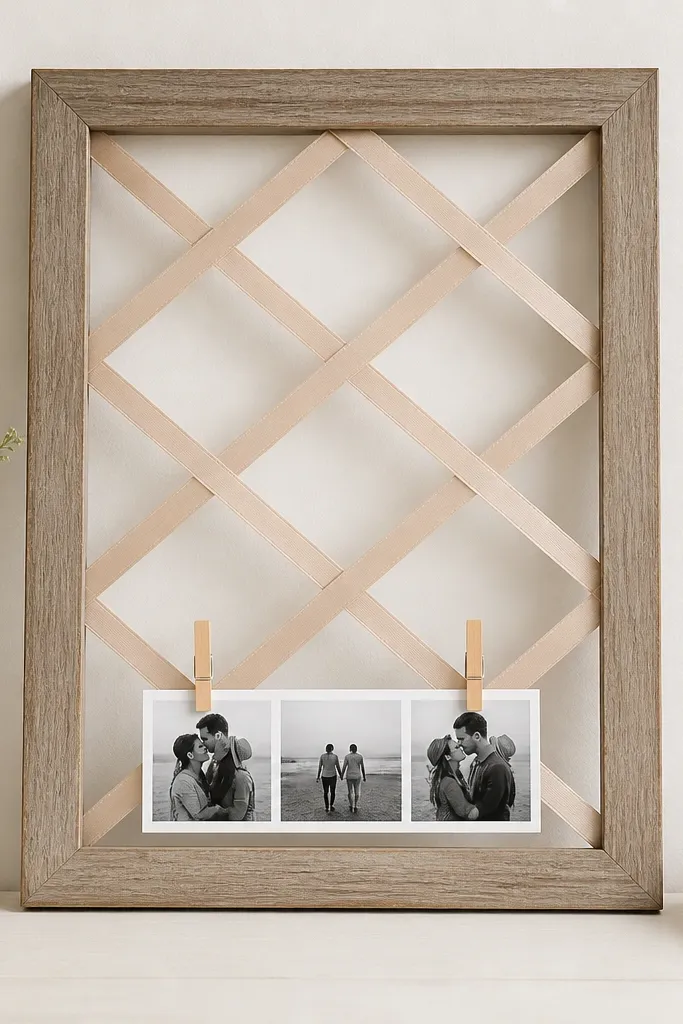
Ribbon lattice adds a decorative grid, and clothespins let you swap the photo strip without re-gluing. The contrast between soft ribbon and small metal clips makes it feel playful. I used narrow ribbon in two colors so the lattice doesn't overpower the image.
Attach ribbon ends to the backing board with hot glue, then weave ribbon strips across to form a lattice. Add tiny clothespins (the mini craft size) to hold a small photo strip under the lattice. Keep the main photo in the center on a mat so it stays the hero.
Pro tipCut ribbon ends at a slight angle before gluing so they hide better at corners.
AvoidDon't tie knots in front - knots look bulky through a frame opening.
17. Spray-Painted Pegboard Frame with Photo Clips
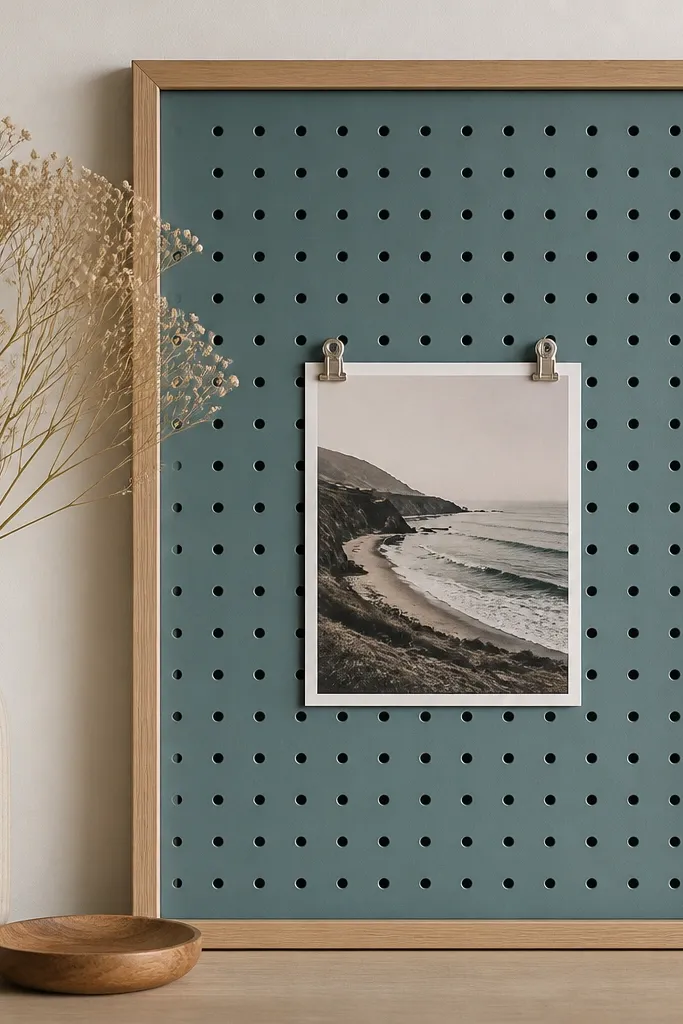
Pegboard makes a frame feel industrial and keeps the photo removable. The painted background gives you one solid color so the peg holes don't distract. I like this for kitchen or office photos because it looks structured.
Cut pegboard to size and paint it with spray paint in light coats. Let it dry fully before inserting it into the frame. Clip the photo with mini binder clips or photo clothespins, and use a matboard spacer behind if the clips need room.
Pro tipUse a thin spray paint, not thick - thick paint clogs holes and makes clipping harder.
AvoidDon't leave raw pegboard edges - they scratch hands and look unfinished.
18. Sandpaper Gradient Frame with Color-Blocked Edges
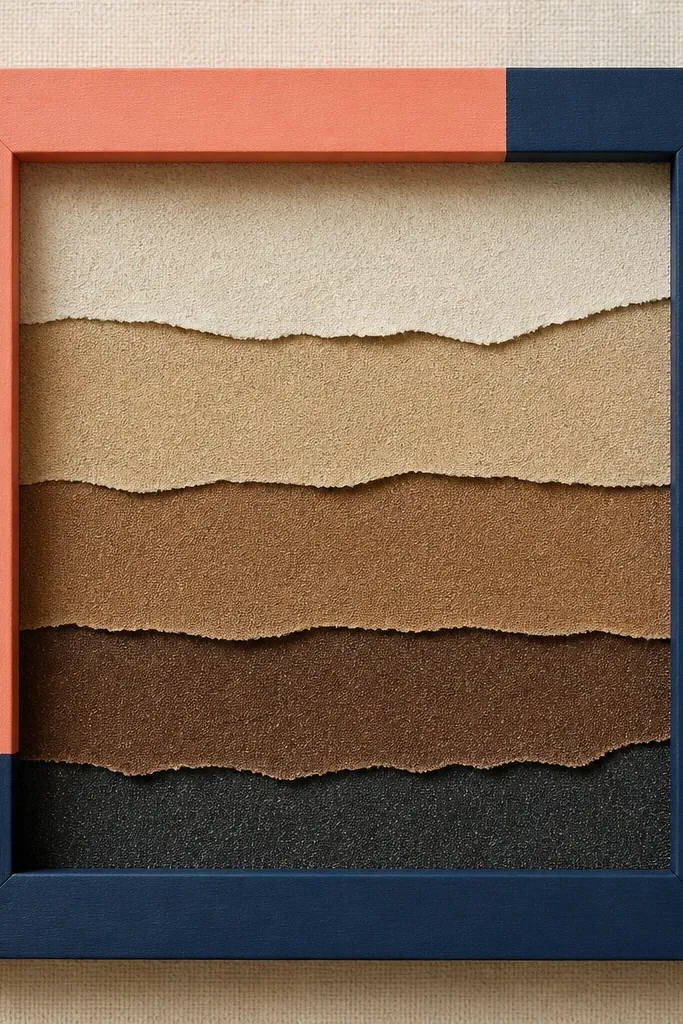
Sandpaper gives a matte, velvety texture that takes paint well. The gradient is built from different grit levels, so it looks like a soft fade. Color-blocking the outer edges adds a modern look without extra embellishment.
Cut sandpaper sheets into rectangles and glue them behind the opening in a gradient from light grit to darker grit. Paint the outer frame edges in two solid colors using painter's tape for clean lines. Seal the sandpaper with matte clear coat so it doesn't flake when touched.
Pro tipWear gloves - sandpaper edges can snag through thin gloves and cut fingers.
AvoidDon't glue sandpaper directly with wet glue - it warps and buckles.
19. Coffee Bean Frame with Burlap Band
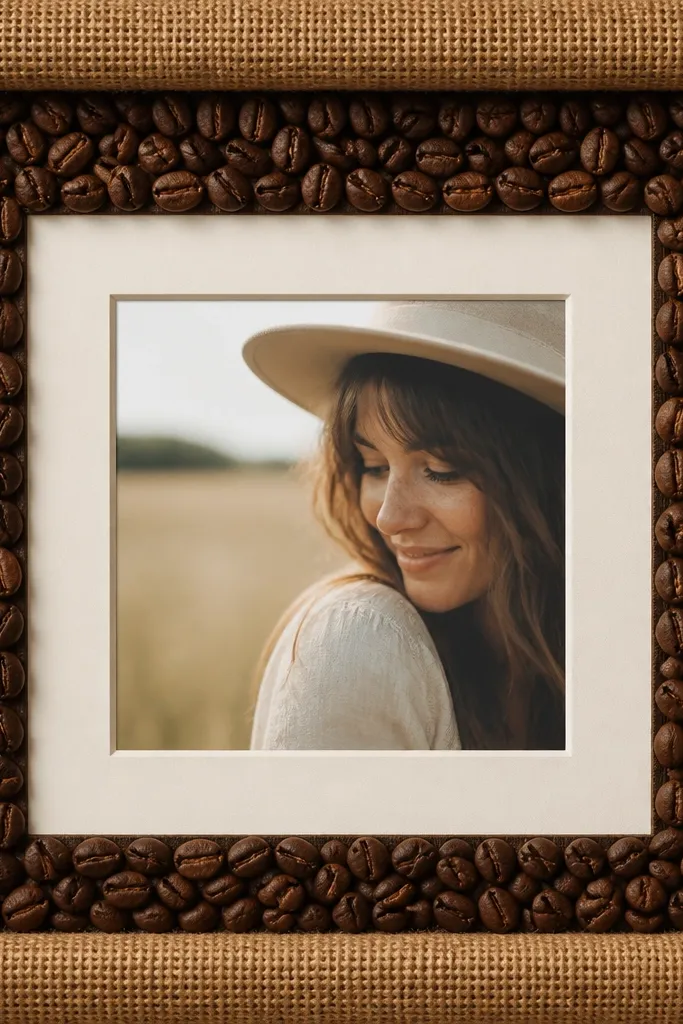
Coffee beans add a strong texture and a smell that makes the frame feel cozy. Burlap keeps it rustic and softens the bean pattern so it doesn't look like a craft bomb. I used a small amount of beans as a border, not a full background, so the photo stays readable.
Glue burlap strips along the inner edge of the frame opening with fabric glue. Arrange coffee beans in a ring around the photo mat, then fill gaps with extra beans. Seal with a thin clear matte spray so beans don't shed oils and leave dark spots.
Pro tipSort beans - use whole, similar sizes around the border for an even look.
AvoidDon't use glossy varnish - it makes beans look wet and messy.
20. Neon Highlighter Backdrop with Black Tape Frame
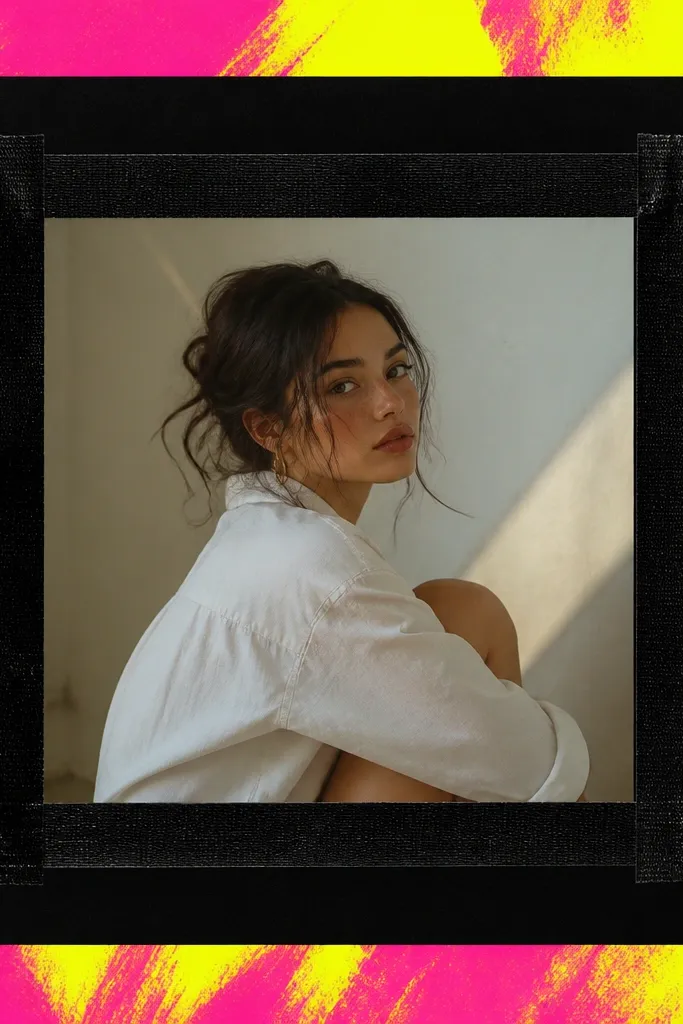
Highlighter color looks graphic when it's diluted into streaks instead of solid coverage. The black tape border and black mat make it pop without turning the whole frame into a color-salad. This one looks best for portraits with simple outfits.
Lightly brush highlighter fluid diluted with water onto backing paper in streaks. Let it dry completely so it doesn't smear. Add a black cardstock mat and place photo centered. Use black washi tape or craft tape to form a thick inner rectangle frame.
Pro tipTest the dilution on scrap paper first - too strong looks blotchy.
AvoidDon't cover the photo with highlighter stains - they bleed and ruin prints.


