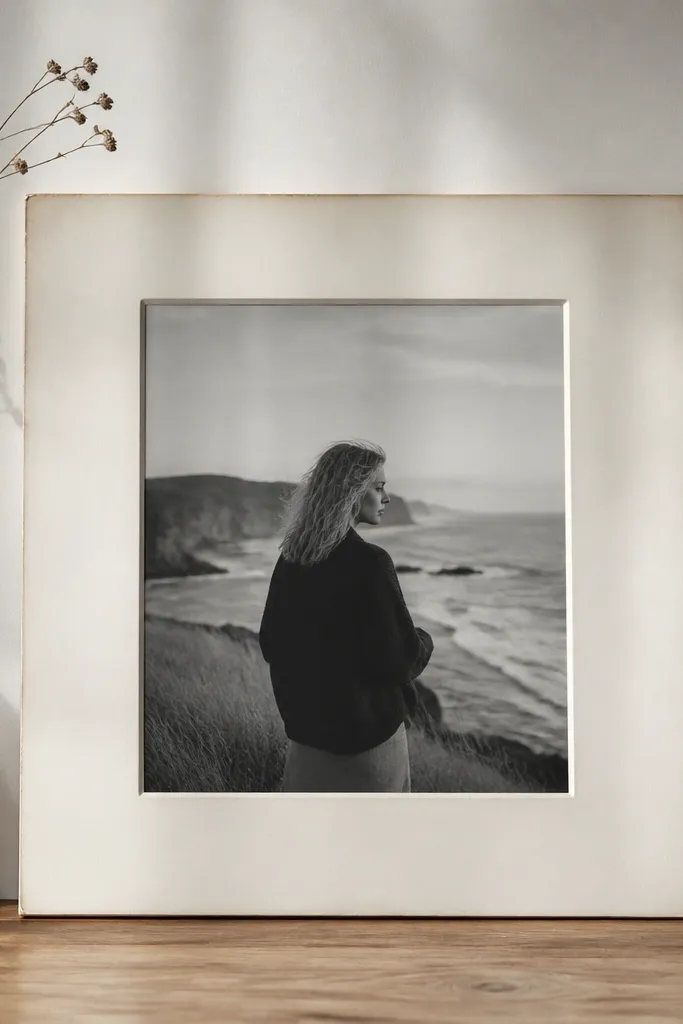
1. Painted popsicle-stick frame with a linen mat
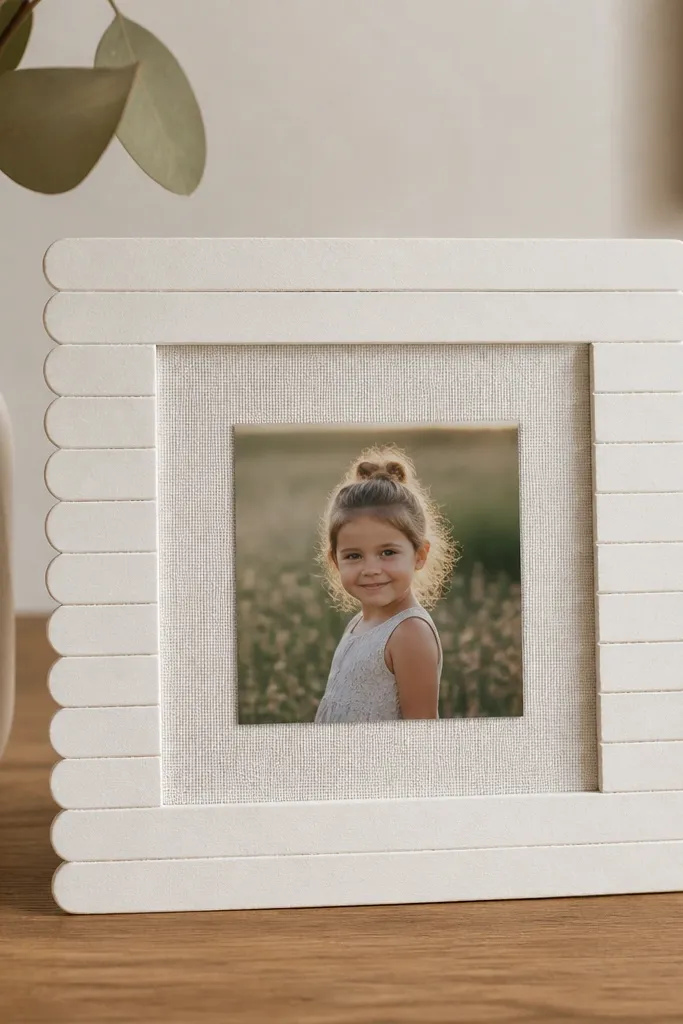
This one looks modern because the sticks form a clean, narrow border while the linen mat adds texture without adding color noise. Use matte off-white paint so it doesn't reflect light like shiny craft paint. The linen gives a soft, warm background that makes black-and-white photos pop. I like it for desk photos and shelf displays because it stays light and unobtrusive.
Cut 4 sticks for a 4x6 opening. Sand the edges lightly, then paint two thin coats and let them cure overnight. For the linen mat, cut a window so the photo sits 1/8 in. Inside the border. Glue the mat to a backing board, then glue the sticks around it with a thin bead of strong craft glue.
Pro tipSpray the finished frame with a matte clear coat to kill any brush streaks.
AvoidAvoid thick glue lines at the corners - they create bumps that catch the light.
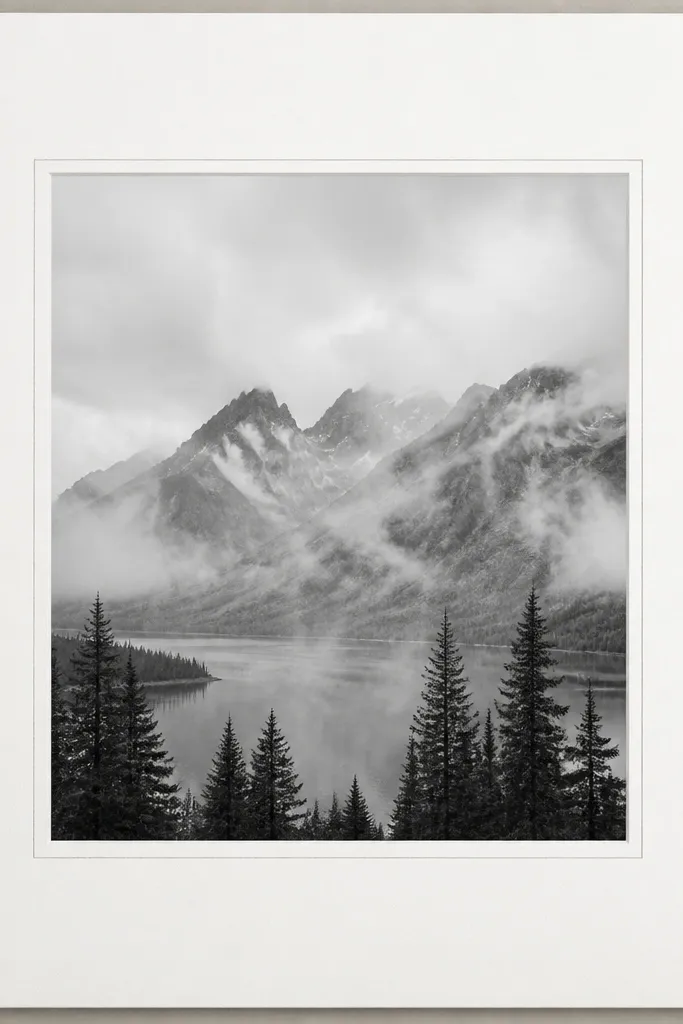
2. Reclaimed wood slat frame with a black acrylic window
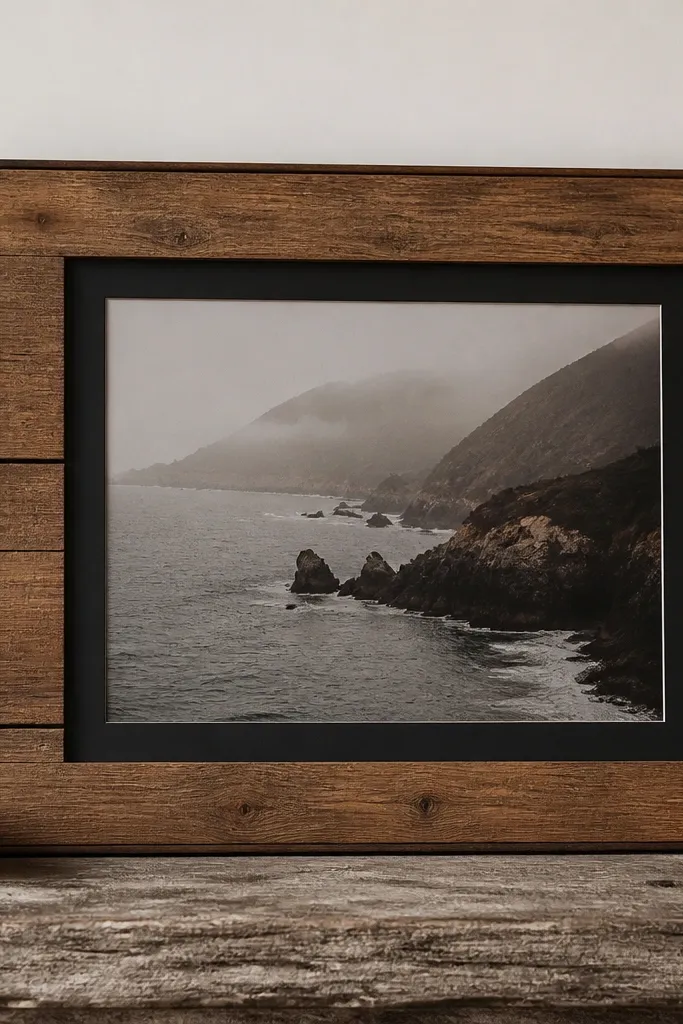
The reclaimed slats add real texture, but the black acrylic keeps the look modern. The contrast makes the photo feel like it's floating. I use this when the wood has visible grain because minimalist rules are about shape and restraint, not hiding character. The acrylic window also protects the print and keeps it looking sharp.
Rip or cut 4 wood strips to the same thickness (about 1/4 in.). Lightly sand, then stain with a warm oak tone and wipe off extra stain to avoid a blotchy finish. Cut acrylic to size and leave a 1/16 in. Gap around the opening. Attach acrylic to the backing with small dots of silicone or acrylic-safe adhesive so it doesn't fog.
Pro tipUse a black acrylic sheet that's matte or lightly frosted instead of glossy - it hides fingerprints.
AvoidDon't skip sealing the reclaimed wood - raw grain drinks stain and looks patchy.
3. Off-white shadowbox frame from a cereal box and foam
This is a trick I use when I want depth without buying wood. The layered cardboard creates crisp, stepped edges that read as intentional design. The shadow effect makes the photo feel more "finished" than a flat frame. Keep the palette limited: off-white frame, clear cover, and one accent color from the photo.
Use a cereal box or thick paperboard, then laminate two to three layers with glue stick so it stays rigid. Build a shallow "box" by cutting a window and stacking a second layer to create depth (about 3/4 in.). Cover the front with clear document plastic or thin acrylic. Paint the entire frame off-white and add a paper hinge to the back for easy access.
Pro tipScore the fold lines with a craft knife before assembly to keep edges straight.
AvoidDon't use flimsy cardboard - it warps and the shadow lines look messy.
4. Brass corner bracket frame with matte black strips
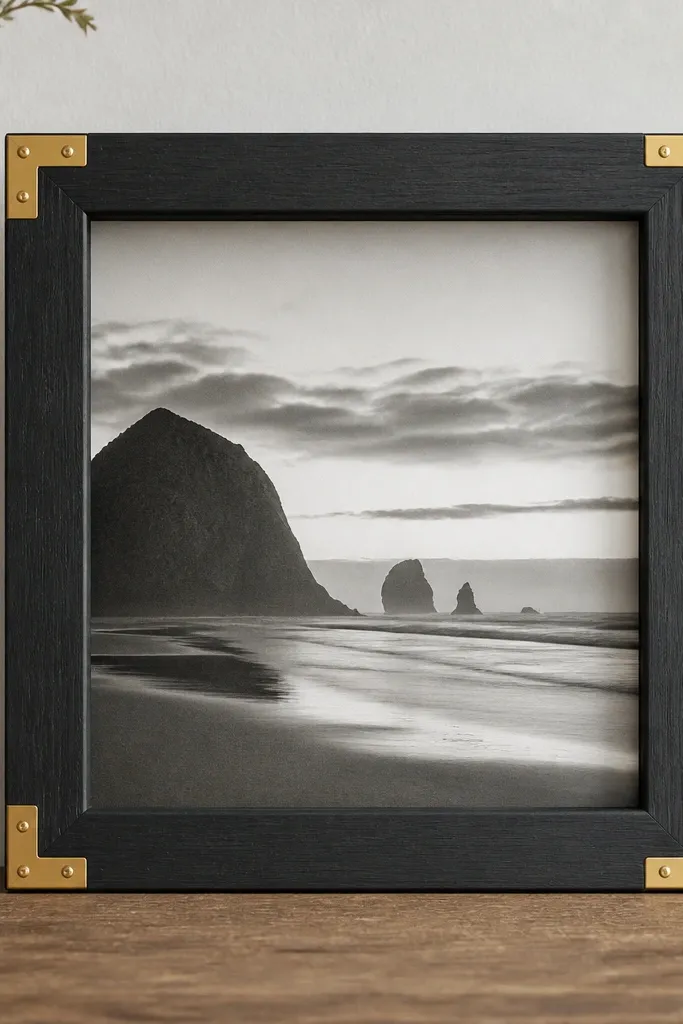
Minimalism loves contrast, and matte black with brass is a clean combo. The corner brackets add structure and a modern industrial vibe without clutter. Because the corners are hardware, you can make the frame fast and still get crisp alignment. The brass catches light in small flashes, which looks intentional next to a simple photo.
Cut 4 strips to equal lengths (for a 5x5 style, use 1 in. Wide strips and adjust opening accordingly). Paint matte black, then attach brass corner brackets on the outside corners. Build a backing board from foam core and sandwich the print with a thin spacer strip so the photo doesn't touch the glass. If you have glass, use clear acrylic for safety.
Pro tipWipe brass brackets with isopropyl alcohol before assembly so the shine matches across corners.
AvoidAvoid mixing matte black with semi-gloss - the sheen mismatch makes it look uneven.
5. Washi tape grid frame on a store-bought print mat
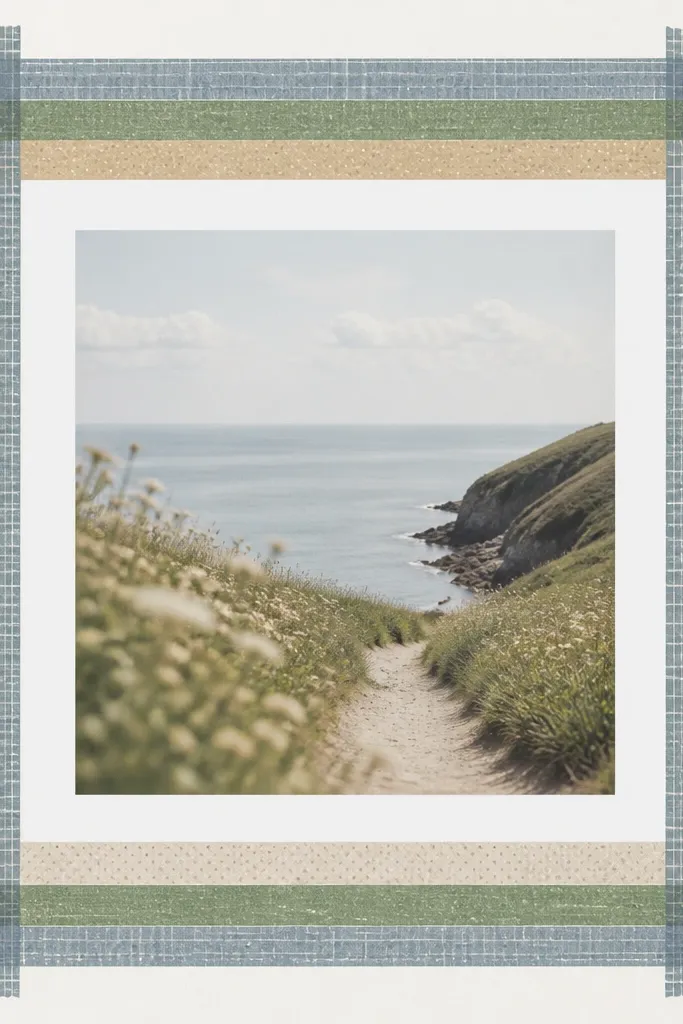
This works because the mat is the "frame," and the tape is just the detail that turns it into modern minimalist photo frame ideas. Choose one washi tape color and stick to a simple pattern: a single thickness grid or a thin double-line border. The white mat keeps everything calm, and the tape adds texture without adding bulk. It's the fastest option when you want a clean look today.
Buy a plain white photo mat (even a cut-down store mat works). Tape a 1/4 in. Border around the photo using two parallel lines of tape for each side. For corners, fold tape neatly so edges meet without gaps. Seal the tape with a thin matte spray so it doesn't peel with handling.
Pro tipPress tape down with a plastic card so the edges look sharp, not wrinkled.
AvoidDon't use three tape colors - it stops reading as minimalist and starts reading as decor.
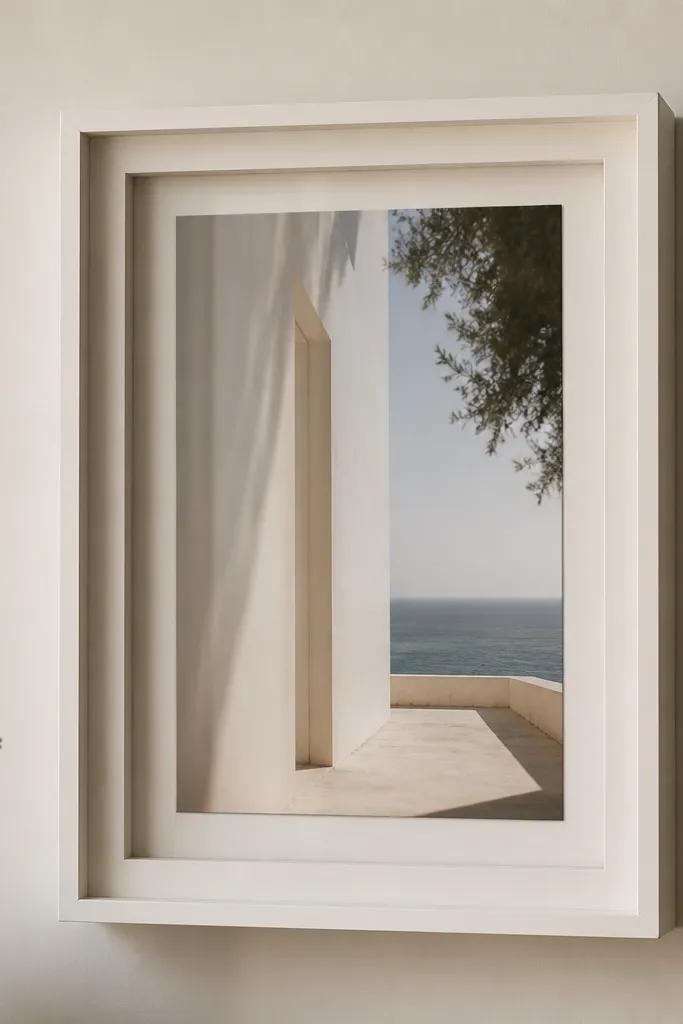
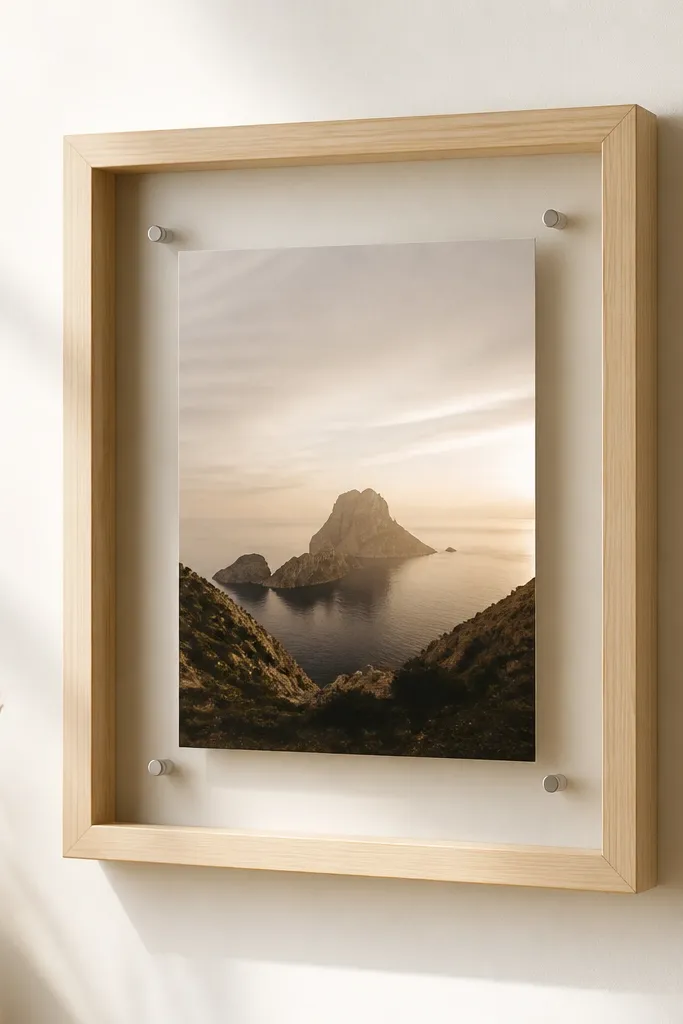
6. Clear acrylic frame with picture wire and two wood spacers
A clear acrylic frame looks modern because it removes the bulky border. The photo feels like it floats against the wall. The wood spacers give you something solid to mount and keep alignment. Use this for small landscapes or close-up portraits when you want the image to be the main event.
Cut acrylic pieces to create a simple sandwich: front acrylic, photo, backing acrylic. Leave the mounting points at the top corners. Add two small wood blocks (about 1 in. Long) behind the acrylic and drill holes for wire. Use clear standoffs or small screws to tighten without cracking acrylic.
Pro tipUse a hole punch or drill guide for acrylic so the holes line up perfectly.
AvoidAvoid tight screws directly into acrylic - it cracks if you over-torque.
7. Contact paper marbled frame using a thrifted wooden outline
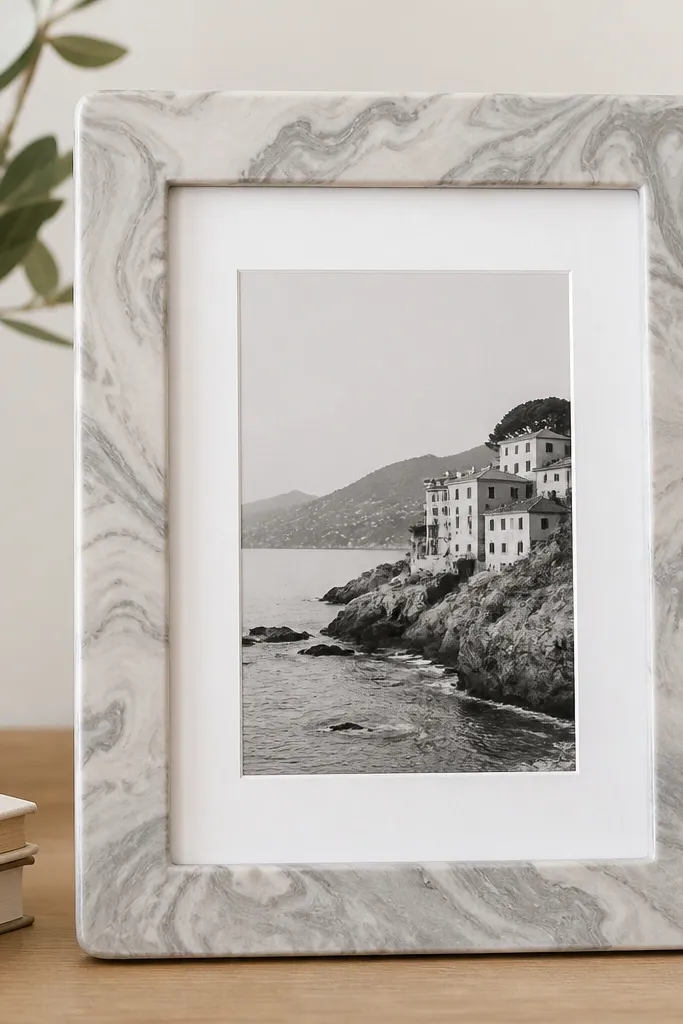
Marble contact paper sounds busy, but when you limit it to a thin frame border and keep the mat white, it reads modern. I've used this on scratched thrifted frames that were otherwise unusable. The key is trimming the contact paper perfectly at the edges so it looks like a single finish. It also hides surface damage fast.
Start with a thrifted frame that has the shape you want and sand any rough spots. Cut contact paper slightly larger than the frame, apply with a smoothing tool, then trim with a sharp blade along the inside edge. Add a new white mat and swap the backing so the photo sits centered. Finish with a clear matte seal over the contact paper if it's glossy.
Pro tipUse a metal ruler and replace the blade often - contact paper edges show every snag.
AvoidDon't stretch the contact paper while applying - it creates ripples at corners.
8. Corkboard frame with a single thin black border strip
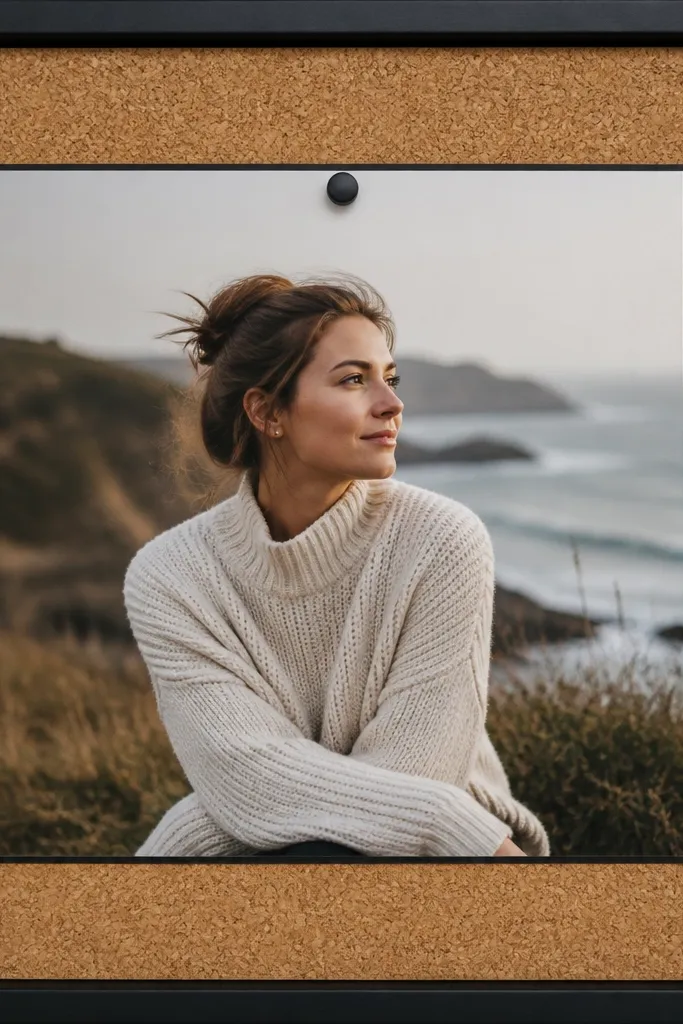
Cork gives you a built-in texture and a practical way to swap photos. The thin black border keeps it minimalist and stops the cork from looking too rustic. Pinning works best with small prints or photos printed on heavier paper. I use this in kitchens and hallways because it's easy to update without tools.
Cut a cork sheet to your frame size and seal edges with a thin line of wood glue or edge paint. Add a thin black strip frame (about 1/2 in. Wide) by gluing it on top of the cork. Place the photo and pin through the corners using two pins per side. Add a backing strip so it sits flat on the wall.
Pro tipPin through a small paper reinforcement so the photo doesn't tear at the corners.
AvoidDon't use lots of pins - it looks messy and kills the clean look.
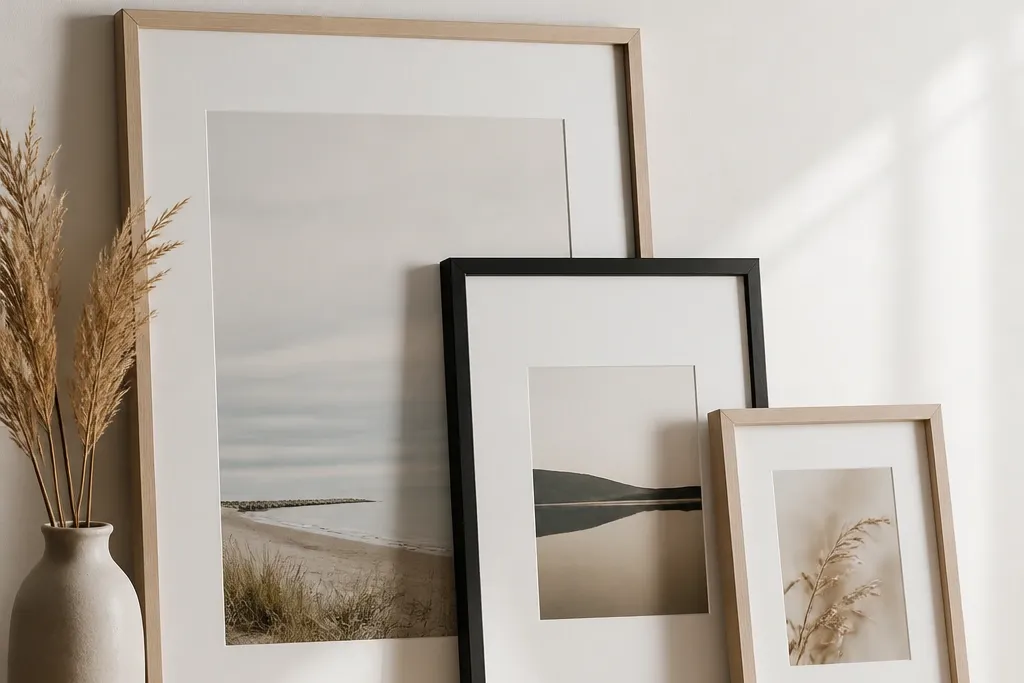
9. 2x2-inch mitered trim frame with a linen backing
This is the "grown-up" version of minimalist frames because miter corners make the border look crisp. Linen backing adds softness and keeps the frame from feeling hollow. I like warm gray trim because it pairs with almost any photo color. It also hides tiny imperfections in the print edges.
Buy simple trim molding and cut 45-degree miter corners. Use 2x2 in. Style pieces but adjust to your photo size. Paint two coats in warm gray and sand between coats lightly. Cut linen fabric to cover the backing board, then staple or glue it to the back. Mount the photo with a thin foam strip so it doesn't sag.
Pro tipDry-fit the miters before gluing and sand one side until the corners close with zero gaps.
AvoidAvoid visible wood glue at joints - it stains and turns the corners into messy blobs.
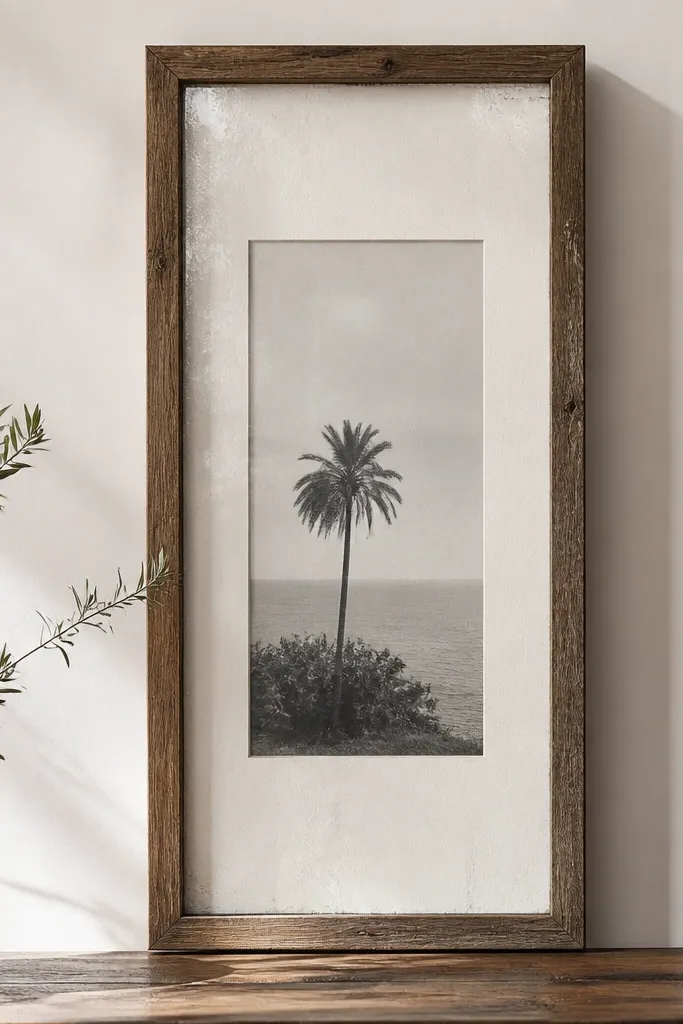
10. Book spine frame from an old hardcover with a glassless insert
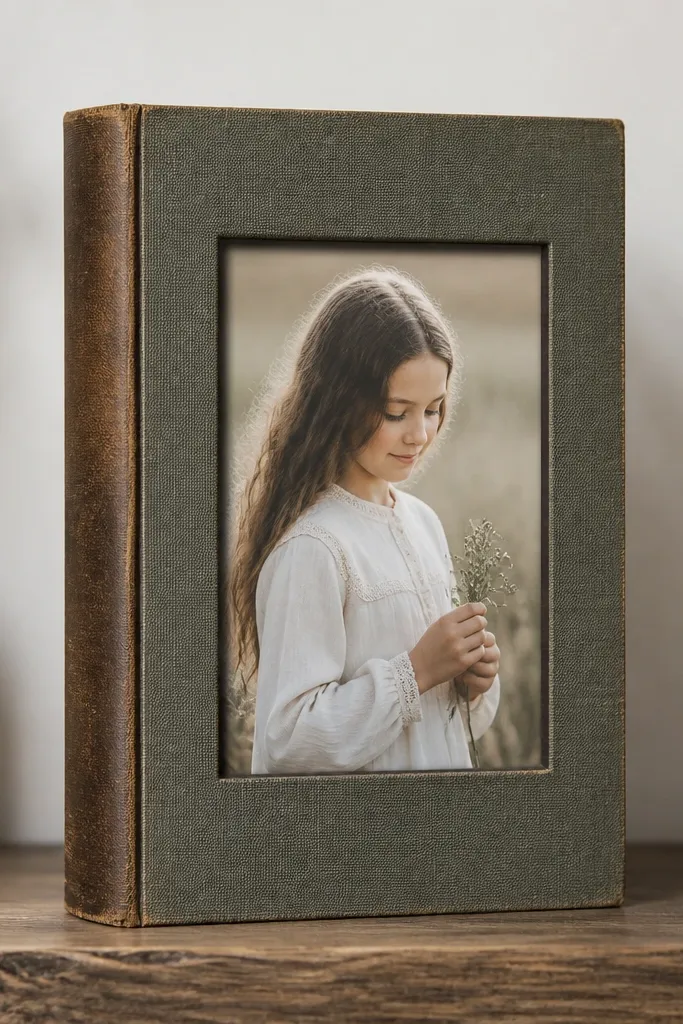
Upcycling a book cover gives you a built-in modern texture and a strong color base. The minimalist look comes from keeping the window simple and centering the photo. No glass means less fuss and less weight. This is great for photos that you don't need behind heavy protection, like art prints for indoor shelves.
Choose a hardcover with a spine you like and a cover that's not too warped. Cut a window on the front cover using a steel ruler and craft knife. Make an insert board from foam core that holds the photo and fits snugly inside the window. Use a thin strip of double-sided tape or small corner tabs to hold it in place.
Pro tipBurnish the cut edges with fine sandpaper so the window looks clean, not torn.
AvoidAvoid covers with loose fabric - it frays and the window edge looks cheap.
11. Chunky craft wood frame with a floating photo and clear standoff
A floating photo makes minimalist frames feel expensive because it adds a 3D detail without decoration. The matte pine keeps it calm, and clear standoffs keep the spacing consistent. I use this for family photos because the depth makes them look more intentional than flat prints. The photo edges stay crisp and don't curl against the backing.
Sand pine and apply a matte wood finish or light stain with a clear matte topcoat. Cut a backing board and attach small clear standoffs in a grid around the photo corners. Place the photo on the standoffs and secure with a thin retaining strip at the back. Use a consistent border width like 1/2 in. All around.
Pro tipTest standoff height with a scrap photo so the floating gap looks right for your print size.
AvoidAvoid shiny varnish - it throws glare across the photo and ruins the minimalist vibe.
12. Pegboard frame with minimalist pins and a thin frame border
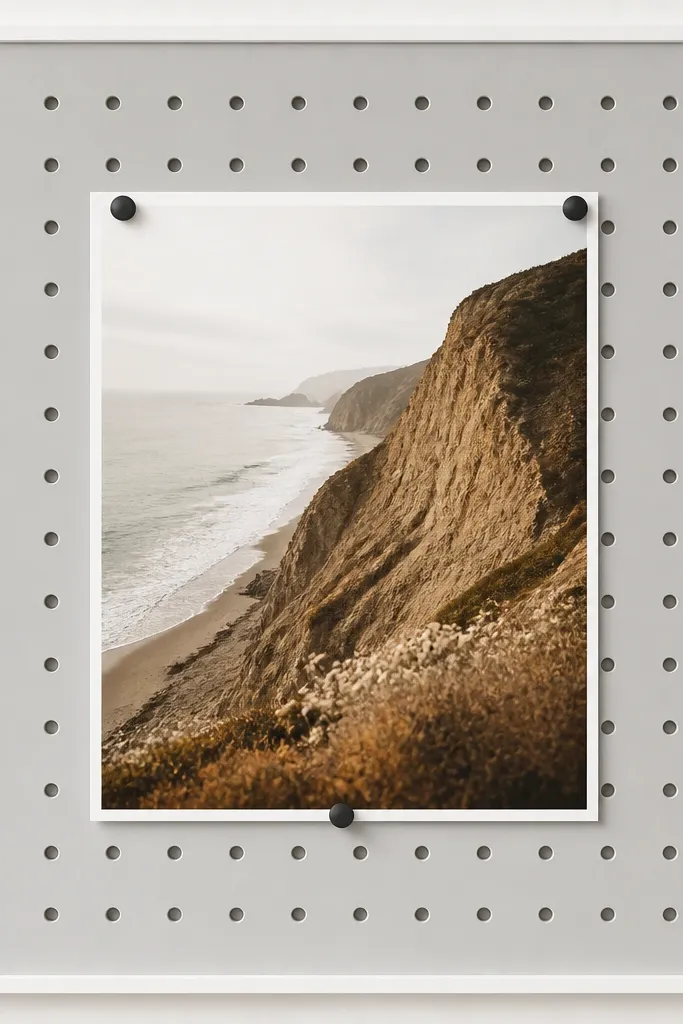
Pegboard is a cheat code for modern minimalist photo frame ideas because it gives structure and grip without complicated hardware. The thin border keeps it from looking like a workshop board. Use black pins and a light gray background so the photo stays the focus. This is perfect for photos you want to swap seasonally.
Paint pegboard light gray and let it cure fully. Cut a thin border frame (wood or foam board) and glue it around the pegboard opening. Pin the photo with only two or three pins - I place pins near the corners, not in the middle. Add a simple hanging hook on the back.
Pro tipUse a straightedge and mark pin points with a pencil before you puncture anything.
AvoidDon't cover the pegboard completely - the texture is part of why it looks modern.
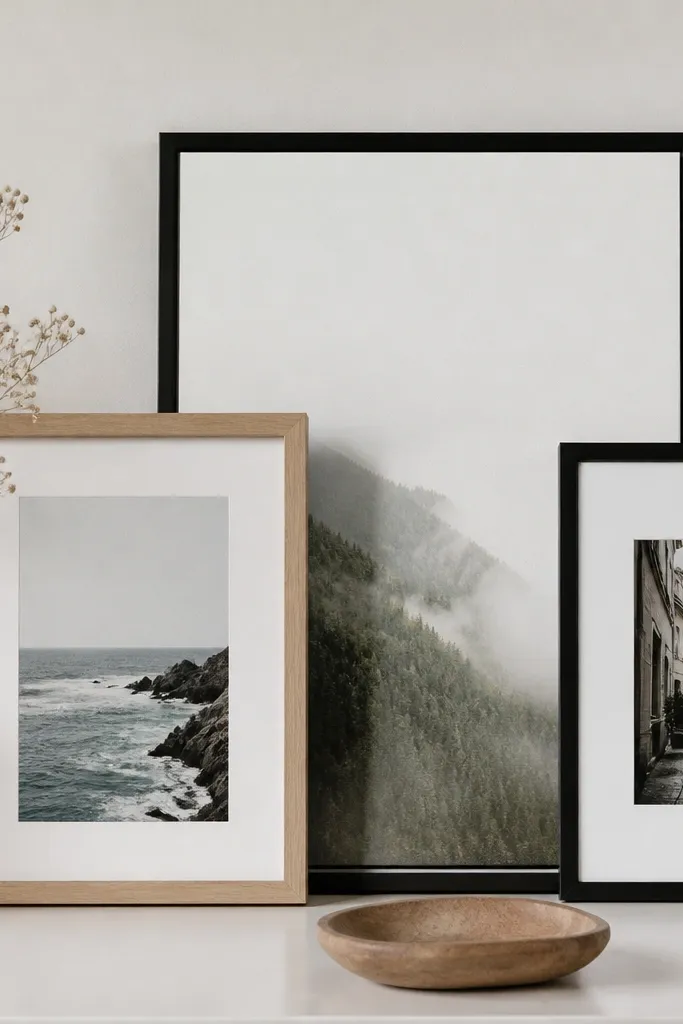
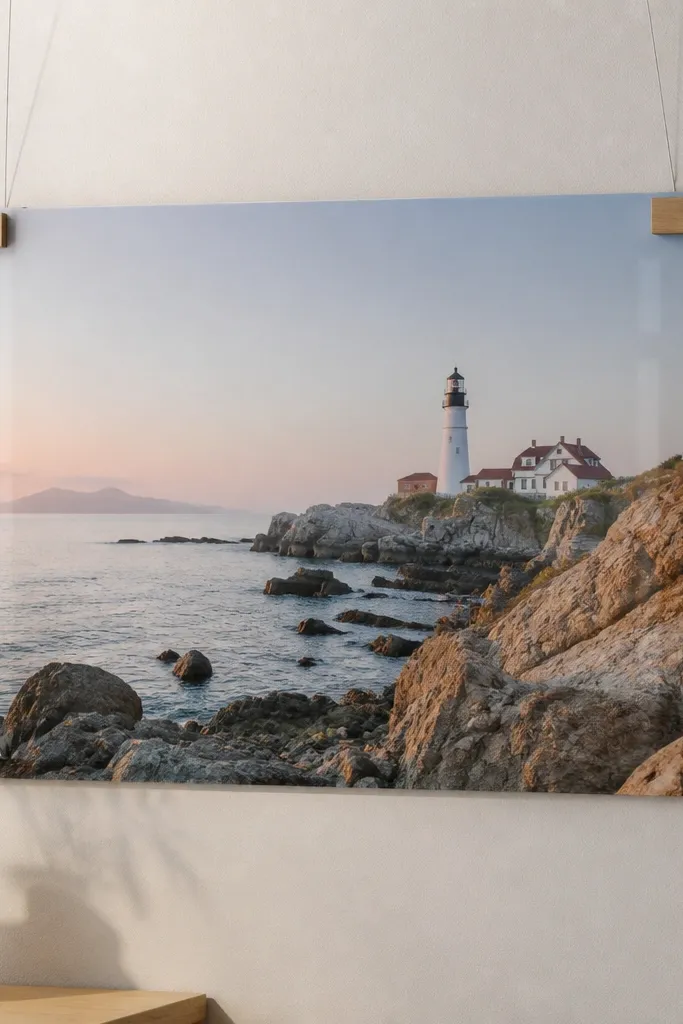
13. Old window glass frame with reclaimed wood rails
Old window glass has a subtle texture that looks modern when paired with straight wood rails. The key is keeping the rails simple and the mat light. I use this for larger photos because the glass gives depth and protection. It also makes the photo look sharper and more "gallery" without any fancy styling.
Cut rails to your photo size and sand edges until they feel smooth. Paint or stain with a matte finish. Use a pale mat board behind the photo and place it against the glass. Add small glass clips or a back retainer strip so the glass stays secure.
Pro tipClean glass with a vinegar-water mix and dry with microfiber - streaks show fast on minimalist frames.
AvoidAvoid thick decorative molding - it clashes with the clean glass look.
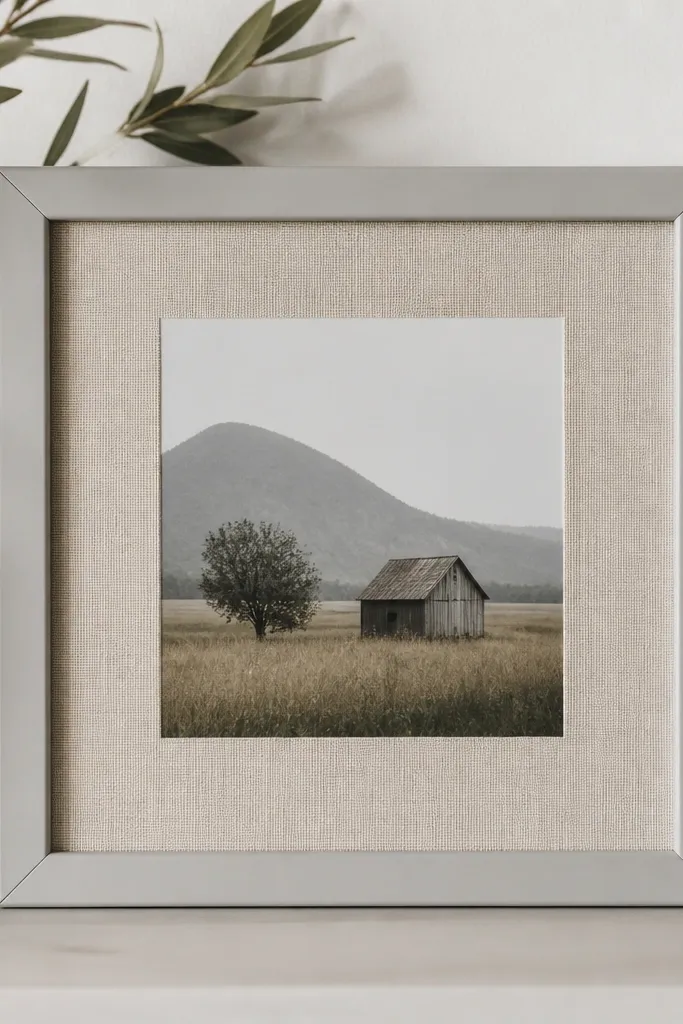
14. Fabric-wrapped frame border with a white mat insert
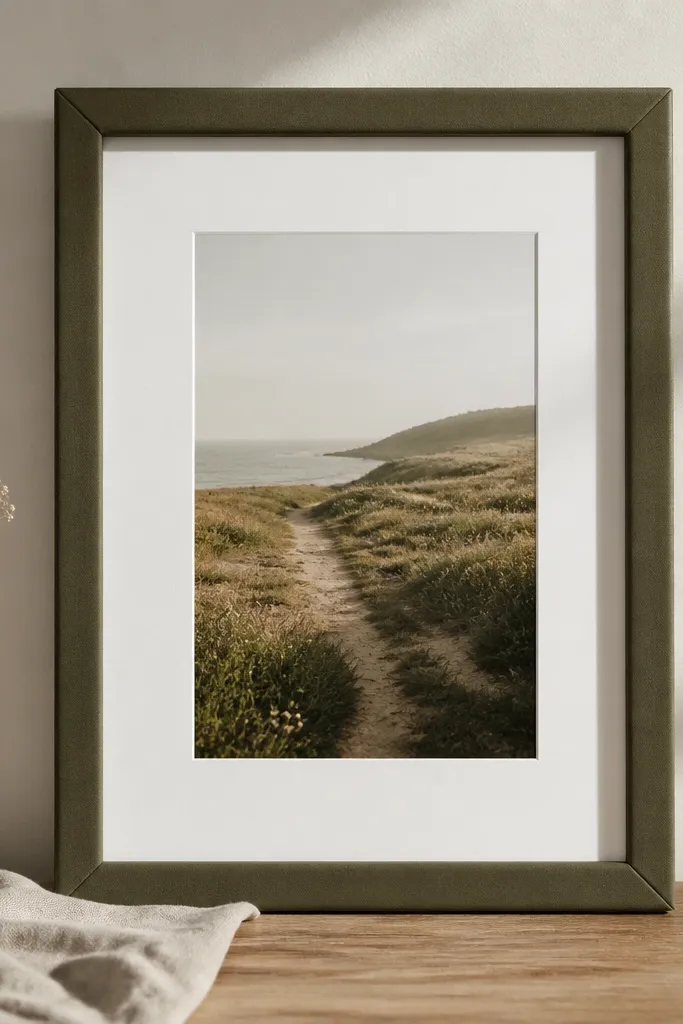
Fabric on only the border reads soft and modern, especially with a white mat. I like muted olive, dusty blue, or oatmeal because they work with skin tones and landscapes. The photo stays crisp because it's backed by clean white. This is great for prints that already have a color theme you want to match.
Wrap thin wood strips or foam board borders with fabric using spray adhesive or careful brush glue. Fold corners like you're wrapping a gift - trim excess so the folds don't bulk. Attach the wrapped border to a backing board with a centered mat opening. Use a clear cover if your space is dusty.
Pro tipUse a small foam brush to press fabric into corners without soaking the glue.
AvoidDon't use stretchy fabric - it warps the border and makes the photo opening uneven.
15. Vinyl record sleeve frame with a black-and-white photo
A record sleeve has a built-in graphic vibe, but you can keep it minimalist by controlling the window and mat. I cut the sleeve so only a small amount of text shows near the edges. The off-white base keeps it calm, and a black-and-white photo ties it together. This looks great on music rooms and hallways.
Choose a sleeve with mostly off-white and minimal color splashes. Cut a window and back it with foam core so the photo sits flat. Add a clear plastic cover for protection. Mount it with a simple sawtooth hanger or two small wall hooks.
Pro tipTrim the window corners with a sharp blade so the edges stay crisp even on thick paper.
AvoidAvoid sleeves with loud full-bleed colors - the frame stops reading as minimalist.
16. Matboard frame with a single continuous pencil-line border
This is minimalist DIY at its purest: the matboard is the frame, and the pencil line adds a subtle "finished" edge. It looks modern because the line is thin and monochrome. I use it when I want the photo to feel like a print in a gallery mat. It's also easy for beginners because you're not cutting wood or dealing with glass.
Cut matboard to size and cut a centered window. Tape the photo to the back so it sits flat. Draw a pencil border around the photo opening with a ruler so it's straight. Seal lightly with matte clear spray if you want extra protection.
Pro tipUse a 2B pencil for a soft line, then lightly erase any smudges before sealing.
AvoidDon't use felt-tip markers - the line bleeds and looks messy on white matboard.
17. Stainless screwhead grid frame using thin plywood
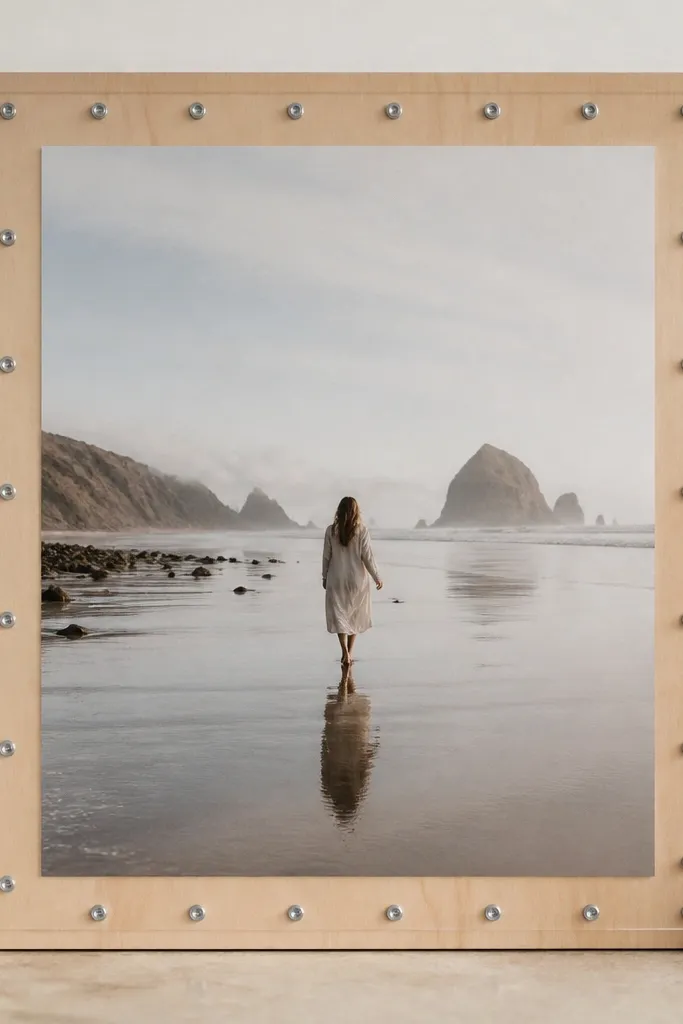
A screwhead grid gives you a modern frame line that's industrial but still clean. The plywood stays light, and the stainless screws add a crisp border with no paint mess. It's a great option when you want a frame that looks architectural. Use this with photos that have strong contrast.
Cut thin plywood (about 1/4 in.) and sand smooth. Drill shallow pilot holes and drive stainless screws so heads sit flush - don't over-sink. Place clear acrylic over the photo and use the screw grid to anchor a backer strip. Keep the photo opening centered and consistent.
Pro tipPaint the plywood with a clear matte sealer so the grain stays light and uniform.
AvoidAvoid uneven screw depth - the border becomes wavy and looks sloppy fast.
18. Chalkboard paint frame on scrap wood with a simple white label strip
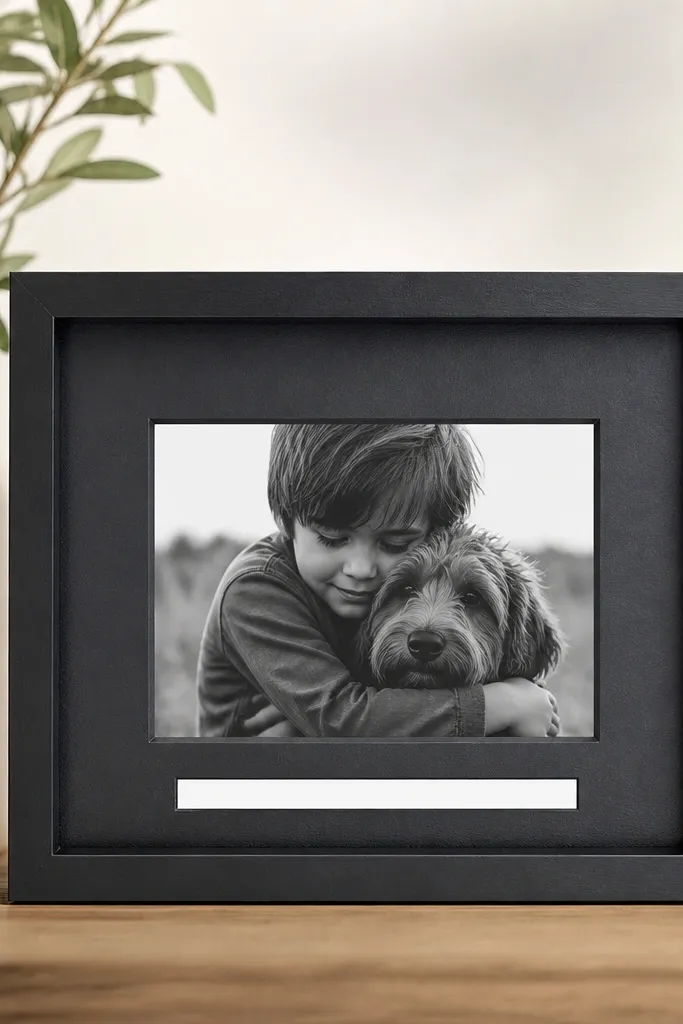
Chalkboard paint is matte, and matte is the secret for modern minimalist photo frame ideas. The black background makes the photo read crisp, and the white label strip adds a small, controlled accent. I've used this for travel photos because you can write the location in chalk and swap it later. It still feels minimal because the label is thin and simple.
Sand scrap wood, then use two coats of chalkboard paint. After it cures, add a thin white strip (tape or painted cardstock) near the bottom of the opening. Mount the photo behind a clear acrylic cover or directly against the backing with spacers. Seal the chalkboard paint with a chalkboard-safe top coat if you're using frequent erasing.
Pro tipUse a white paint marker on the label strip for ultra-clean edges.
AvoidDon't use glossy craft black - it reflects light and makes the frame look cheap.
19. Stacked magazine paper frame with a flat front and thin black shadow line
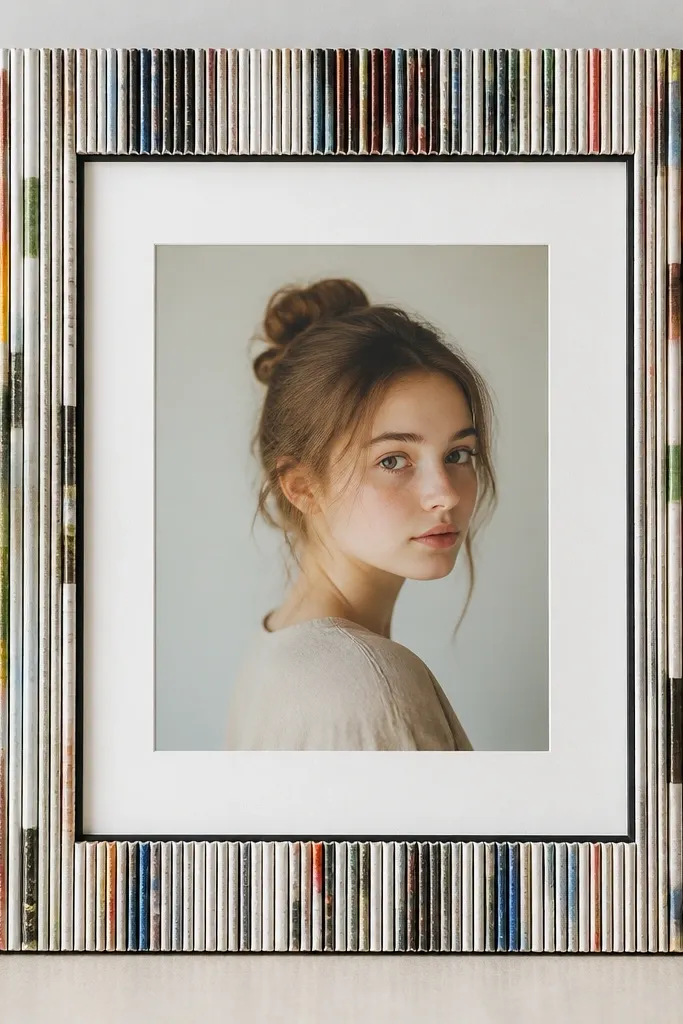
This is minimalist because the border is still a clean rectangle - the detail is hidden in the material thickness. Stacked magazine paper can look messy, but it gets modern when you compress it tightly and seal it. The thin black shadow line makes it feel designed, not handmade. Use this with photos that have one dominant color so the magazine tones don't compete.
Stack 20-30 layers of magazine pages cut to border strips and glue the stack to a backing board. Press under a heavy book while it dries. Sand the edges lightly so the border looks even, then seal with matte Mod Podge or clear matte sealer. Paint only the thin edge line black so it separates from the mat.
Pro tipCut the magazine pieces with a rotary cutter so the border edges stay straight.
AvoidAvoid loose stacks - any gaps show as uneven thickness.
20. Mirror-finish acrylic frame with frosted tape border
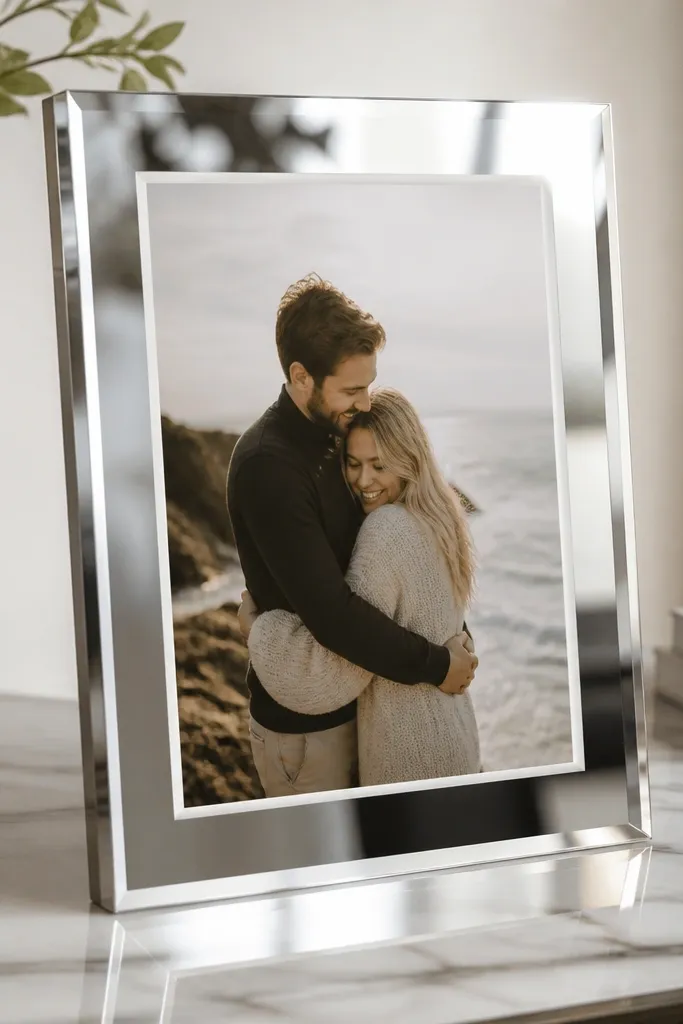
Mirror-finish acrylic gives a clean, modern edge, and frosted tape keeps the center from looking too shiny. I like this for photos with lots of light - it keeps the frame classy instead of flashy. The frosted tape acts like a matte mat border. It reads minimalist because the effect is controlled and the photo stays centered.
Cut acrylic to frame size and polish edges if needed. Apply frosted tape around the inside opening to create a uniform border width (about 1/8 in.). Mount the photo on a backing board and sandwich it between acrylic layers. Use corner fasteners or clear standoffs so the acrylic doesn't shift.
Pro tipWipe acrylic with microfiber before assembly - dust shows instantly on reflective surfaces.
AvoidDon't leave protective film on during display - it makes the edges look hazy.


