1. Epoxy-Sealed Map Print Mug with Cork Sleeve
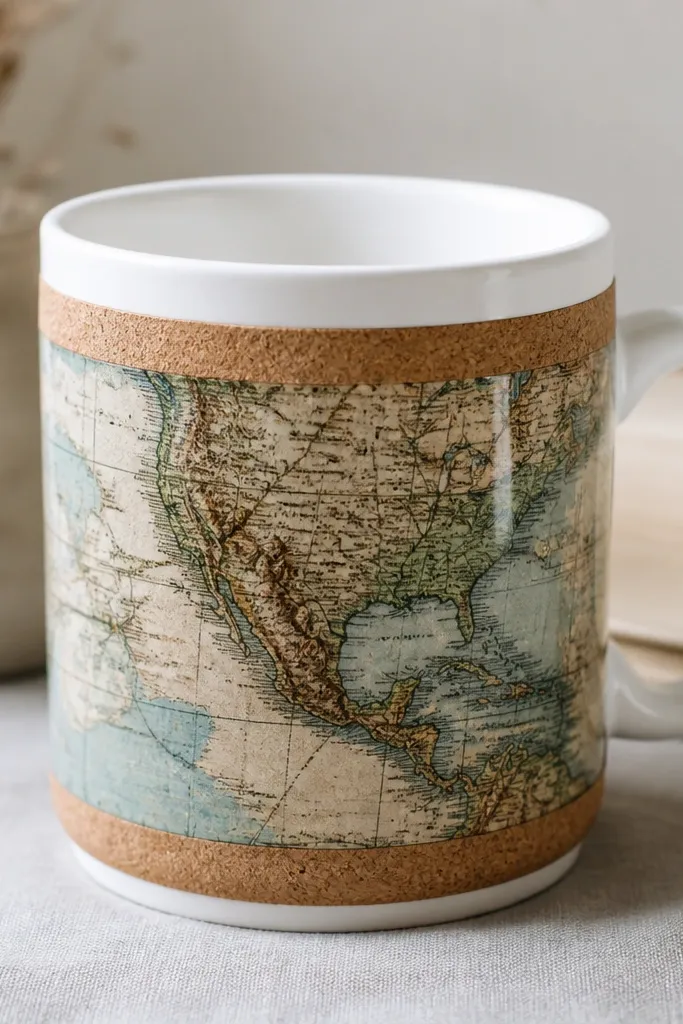
This look hides the chaos and keeps the mug easy to clean because the print sits under a hard epoxy layer. The cork sleeve is soft to the touch and protects your hand from heat without adding fragile decoration near the rim. Choose map print in muted blue-gray and warm off-white so it reads "designed" instead of busy. The glossy epoxy makes the print look like it's part of the mug, not pasted on.
Use a mug with intact glaze and a straight outer wall. Cut cork to wrap around the mug like a band about 2.5-3 cm tall, then glue it with a strong contact adhesive. Apply mod podge or craft glue to the map strip first, let it dry fully, then pour or brush a clear epoxy topcoat in thin layers so the surface stays smooth.
Pro tipSeal the map edges with epoxy so water can't creep under the paper seams.
AvoidSkip putting paper right up to the rim - that's where steam and scrubbing wear it down fast.
2. Fabric Patchwork Mug with Heat-Proof Clear Vinyl Topcoat
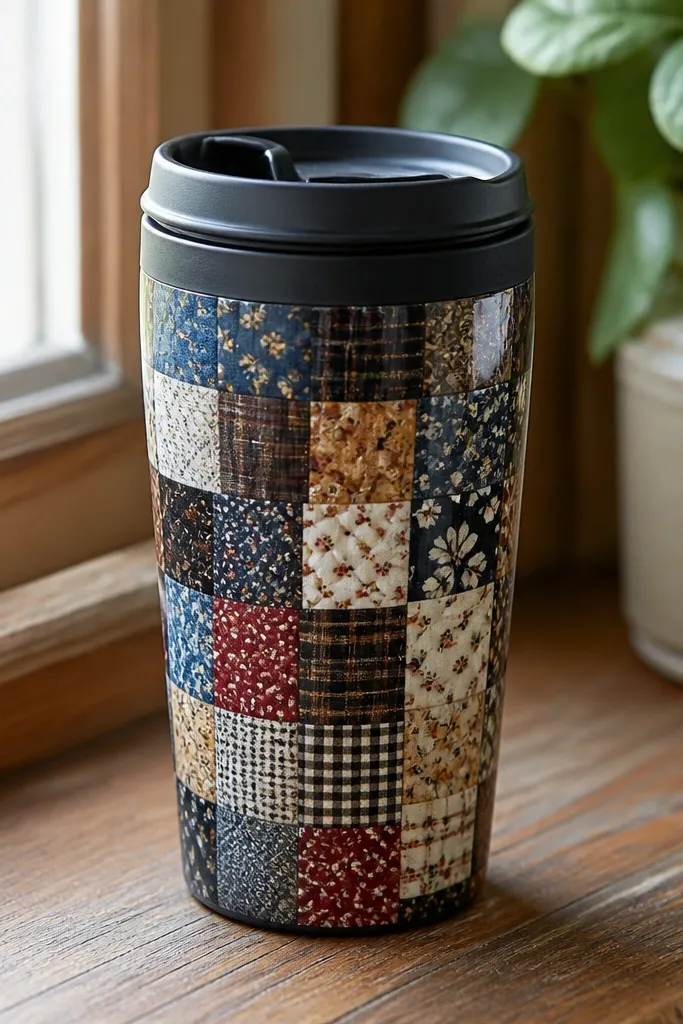
Fabric patchwork looks cozy, but it gets messy unless you trap it under a tough clear barrier. The vinyl-like topcoat gives you a wipeable surface so crumbs, fingerprints, and coffee splashes don't soak into the cloth. Pick cotton scraps with tight weaves (denim, canvas, or quilting cotton) so the surface doesn't feel fuzzy after sealing. The matte base plus glossy seal contrast makes it feel intentional.
Cut fabric squares about 2-3 cm each and overlap them slightly so gaps don't show. Use a thin layer of fabric glue or matte medium, then brush a clear heat-resistant sealant over the full patch area. Keep the coating off the lid seam and off the rim so it doesn't peel from constant contact.
Pro tipPress the fabric down with a flat tool for 30 seconds before sealing so you don't get bubbles under the topcoat.
AvoidDon't use stretchy knit fabric - it warps as the mug heats up and the seal cracks.
3. Tin-Leaf Accent Travel Mug with Weatherproof Clear Coat
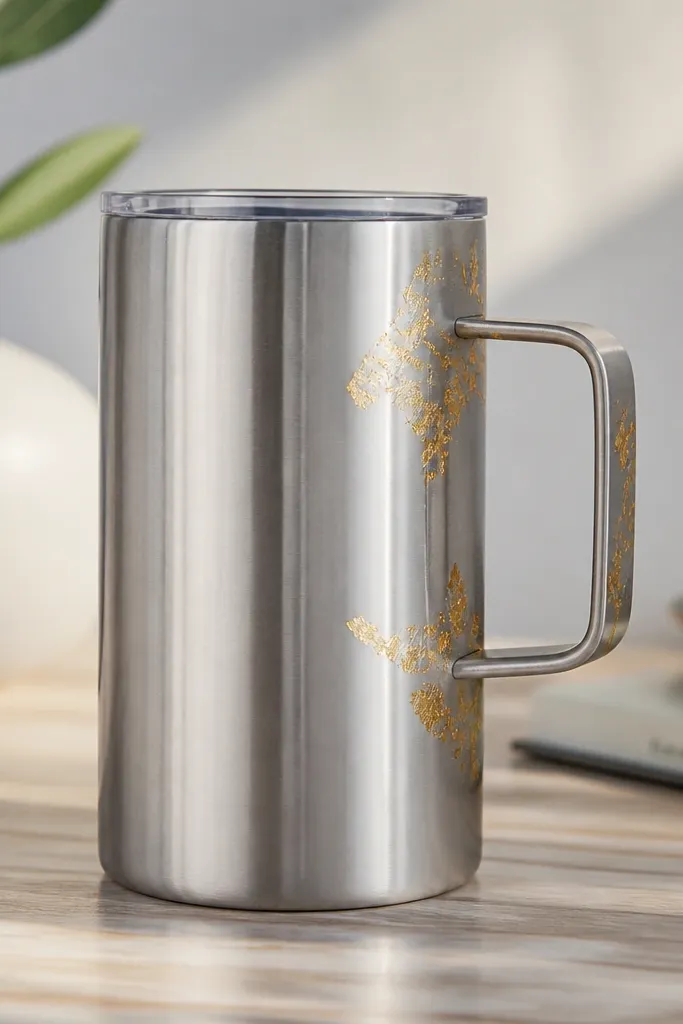
Tin-leaf adds that "fancy" look without complicated painting, and it's easy to maintain when you lock it under a weatherproof clear coat. Because the foil stays in small accents, you don't risk peeling across a big flat area. Choose tin-leaf in soft gold rather than bright yellow so it looks warm, not flashy. The stainless base keeps it wipe-clean.
Scuff the mug surface lightly with a fine sanding pad so the adhesive grabs. Apply tin-leaf adhesive to small zones (like 5-7 cm clusters), press the leaf in place, then seal with a clear two-part coating made for outdoor metals. Let it cure fully - I give it 48 hours - before you fill with hot liquid.
Pro tipSeal in two thin coats instead of one thick coat to prevent streaks and ripples.
AvoidDon't seal immediately after applying leaf - if the adhesive isn't cured, you'll get cloudy patches.
4. Chunky Yarn Braid Handle Cover on a Plain Mug
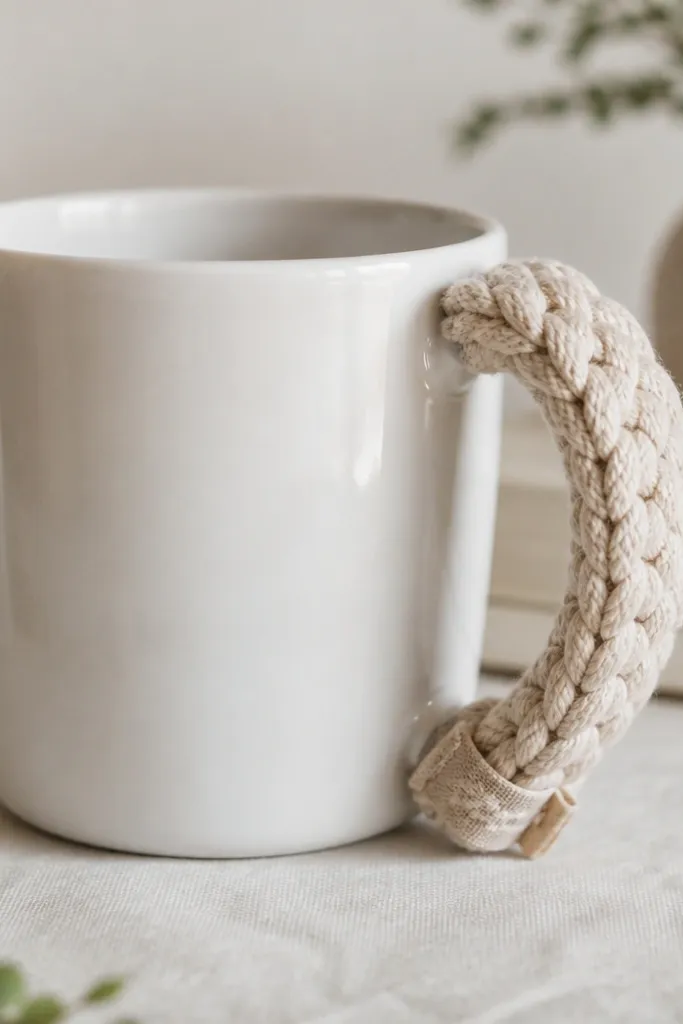
This is the low maintenance version of "cute handle." The yarn is only on the outside handle, so it never touches liquid, and it's easy to replace if it gets messy. A tight braid keeps the cover from snagging on bag zippers. Use wool-blend yarn or acrylic yarn that holds its shape; avoid super fluffy yarn that sheds. The mug stays clean because the drinking surface is untouched.
Braids look best when the yarn is thick: think 6-8 mm strand equivalent. Wrap the braid around the handle and stitch the ends to a small strip of felt that you glue to the handle base. Keep the cover 1-2 cm away from where your fingers grab so it doesn't compress and loosen.
Pro tipUse a removable cover design - stitch it so you can unthread and rewrap in 10 minutes.
AvoidSkip yarn directly on the rim or near the lid - it stains from heat and drips.
5. Acrylic Pour Gradient Outside, Matte Interior Kept Plain
I like acrylic pour on the outside because it gives you a smooth, modern look without lots of brush strokes. The trick for low maintenance is to keep the interior matte and uncoated with paint, then seal only the outside finish. Matte interiors hide water spots and make the mug feel less sticky to wipe. Outdoorside glossy seal makes it wipe-clean.
Tape off the rim and interior area. Pour acrylic paint in two or three colors (terracotta, clay orange, cream) onto the outer mug surface, then spread gently with a palette knife. Once cured, seal the outside with a clear acrylic sealer made for ceramics or a two-part epoxy clear.
Pro tipSand the first coat lightly with 800-grit so the second sealer goes on glass-smooth.
AvoidDon't pour over the rim - paint builds up there and chips first.
6. Stenciled Constellation Mug with Ceramic-Safe Paint Seal
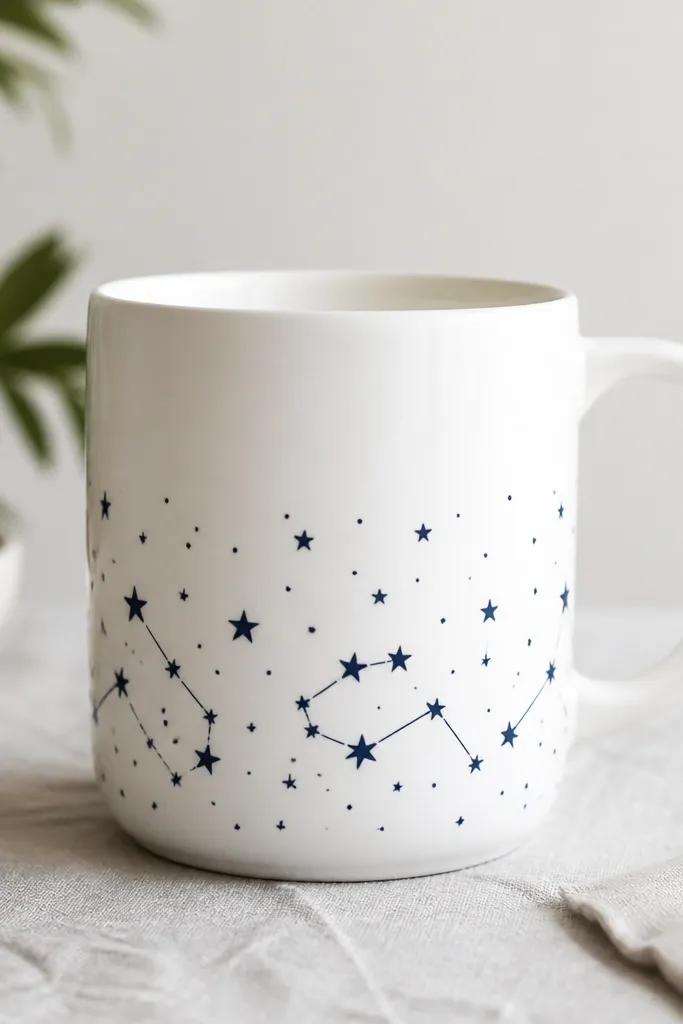
Stenciling is my go-to when I want handmade without the "wobbly hand" look. Small star dots and thin lines are forgiving, and they look good even when the mug sits on a desk for months. Use ceramic-safe paint so the finish doesn't stay tacky under heat. Seal over the stenciled area so you can wipe coffee splashes without losing the design.
Use a reusable stencil or cut your own from stencil plastic, then tape it down so it doesn't shift. Paint with a foam brush for dots and a fine brush for lines, letting each layer dry. After curing, bake if your paint brand requires it, then apply a clear ceramic glaze sealer.
Pro tipDo two light coats for the lines - one heavy coat runs and makes stars look like blobs.
AvoidAvoid glitter paint - it sheds and gets into the seam around the handle.
7. Alcohol Ink on Tile Base Mug with Epoxy Rim Guard
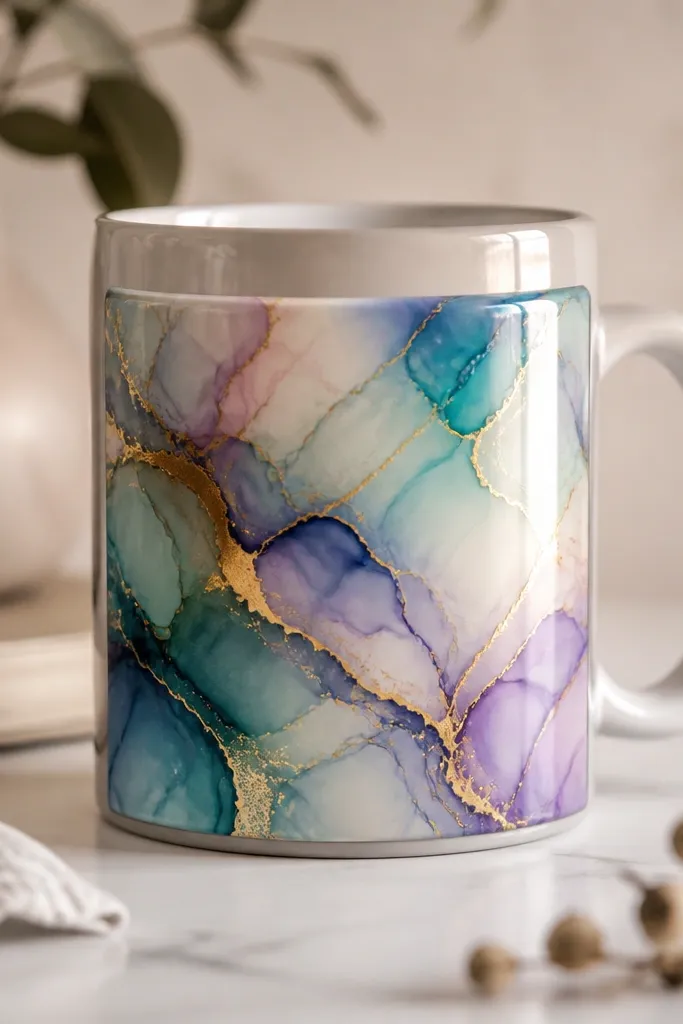
Alcohol ink gives those smoky swirls that look expensive but are quick to make. The reason this stays low maintenance is the epoxy rim guard - it's a physical barrier against wear from wiping and steam. You get color depth without textured fabric catching grime. Keep the swirls on the outer panel, not on the drinking edge.
Make a panel from a small tile or ceramic sheet, then seal the ink with multiple thin clear layers. Attach the panel to the mug with a strong adhesive rated for ceramic-to-ceramic. Build a 3-5 mm epoxy rim guard along the top edge of the panel so it takes the abuse instead of the ink.
Pro tipUse rubbing alcohol in a spray bottle to control the ink bloom - mist lightly, then stop.
AvoidDon't rely on ink alone - it needs sealing or it smears when wet.
8. Bead-Studded Nameplate on a Plain Travel Mug
Bead work looks delicate, but it's low maintenance when it's confined to a domed nameplate spot. The dome finish is smooth, so you don't snag fabric or scratch other items in your bag. Use seed beads with consistent size so the surface looks even. Keep the rest of the mug plain to stay wipe-clean.
Create a flat base plate from polymer clay or a thin wood slice, then glue seed beads in rows. Seal the beaded area with clear epoxy to form a smooth dome, and sand the edges once cured so it doesn't catch. Attach the finished plate to the mug with a strong adhesive and seal the perimeter.
Pro tipPick beads in two colors max - one accent color plus a neutrals base reads cleaner on travel mugs.
AvoidSkip beads over the lid seam - vibration and heat make them pop off.
9. Cork Stamps on a Kraft-Brown Mug with Sealed Ink
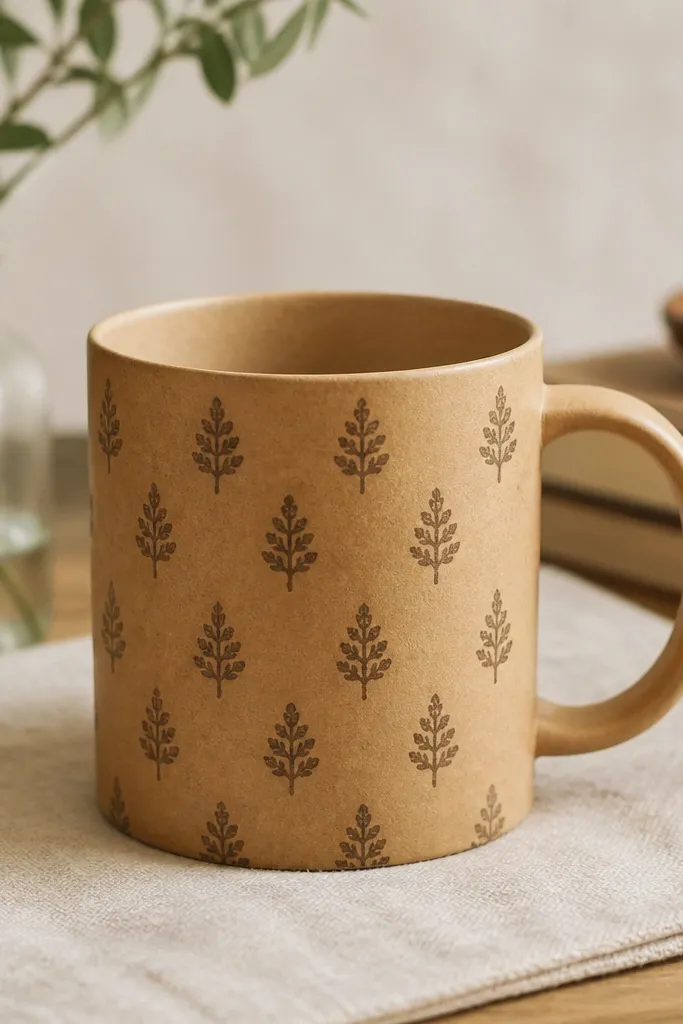
Stamping with cork gives you a handmade pattern that looks intentional and doesn't require brush control. The low maintenance part is choosing a stamp ink that you can seal over, then applying a clear coat to lock everything down. Kraft-brown + deep cocoa stamps hide coffee stains and wipe clean. If you keep it away from the rim, it looks good even after daily use.
Cut cork into small blocks and carve a simple pattern like dots or tiny leaf shapes. Stamp with fabric ink or craft ink designed for porous surfaces, then let it dry overnight. Seal the stamped outside with a clear coat that's compatible with your ink and safe for hot beverages.
Pro tipStamp on the lower half only so the pattern doesn't take direct rim contact.
AvoidDon't use water-based paint without sealing - it smears when the mug gets wet.
10. Resin-Encased Flower Petals in a Clear Window
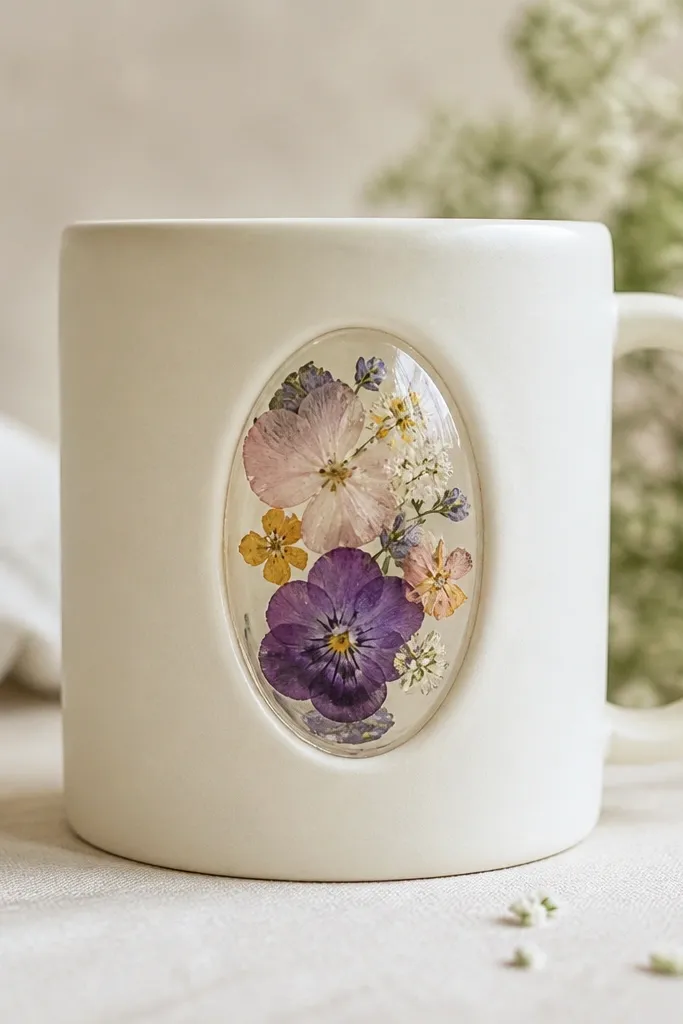
Pressed petals look fragile, but the resin window makes them sturdy and easy to wipe. I like this design because you get a single focal point instead of covering the whole mug. Choose flat, dry petals like pansies or small daisies, then press them between paper for a full week. The resin makes the color pop while keeping the petals sealed away from water and oils.
Create an oval mold area using silicone or a resin casting frame on the outside of the mug. Place petals dry, then pour a thin resin layer, wait for bubbles to rise, and pour a final layer to fully cover. Sand the edges of the cured resin window lightly so it feels smooth, then seal around the perimeter.
Pro tipDry petals longer than you think - 7-10 days prevents darkening under resin.
AvoidSkip fresh petals - moisture turns resin cloudy and can loosen the window.
11. Color-Blocked Heatproof Vinyl Wrap with Hand-Painted Dots
Vinyl wrap is my fastest low maintenance option because it's smooth and wipes clean. You can still add handmade charm with a simple row of dots between the blocks. The color-block layout hides scuffs because the wrap takes the hit. Keep the dots small and consistent so it reads like a pattern, not a mess.
Use heatproof vinyl designed for mugs or crafts, cut two bands, and smooth them around the mug with a plastic scraper. Add dots with ceramic paint markers or a fine brush, then seal over the painted dots with a clear heat-safe coat. Keep the vinyl away from lid contact points and edges.
Pro tipWarm the vinyl slightly with a hair dryer before applying so it conforms without wrinkles.
AvoidDon't stretch vinyl tight - it shrinks later and creates gaps at the seam.
12. Marbled Sharpie + Rubbing Alcohol on Ceramic Cup Sealed with Epoxy
This is the "I want it to look like stone" method without buying expensive stoneware. Sharpie-like markers spread beautifully when you mist rubbing alcohol, creating natural-looking marbling. The low maintenance part is sealing - the epoxy makes the surface wipeable and prevents ink from bleeding when it gets wet. You also get a unique pattern every time.
Draw small marker dabs on the mug's outside, then mist rubbing alcohol lightly to spread. Work in small sections so the pattern doesn't overmix. After the ink dries, coat the outside with epoxy in thin layers, staying clear of the rim and inside wall.
Pro tipPractice on an old saucer first - you'll learn how much alcohol spreads your specific marker.
AvoidSkip sealing too thin - pinholes let liquid seep and you'll see dull spots later.
13. Pearl-Button and Leather Strap Mug Handle Wrap
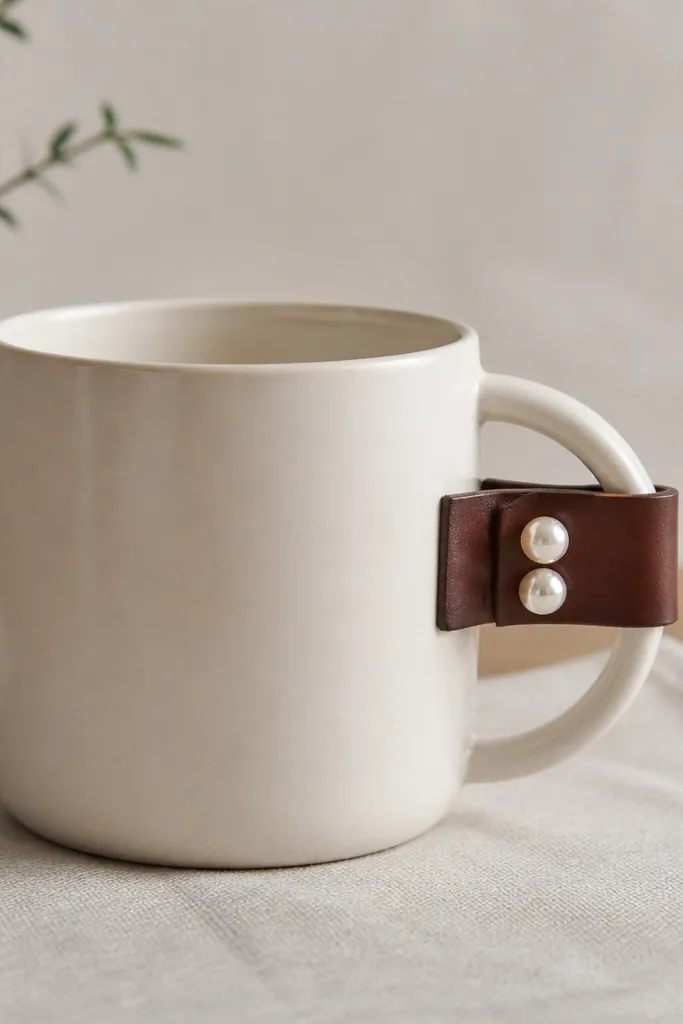
Leather handle wraps feel expensive and they're low maintenance because leather just needs a wipe and occasional conditioner. The pearl-like buttons add a gentle shine without touching the drinking surface. This works best on mugs with sturdy handles where you can anchor the strap ends securely. The mug stays simple and clean because the decoration lives on the handle only.
Cut a leather strip about 2 cm wide and long enough to wrap the handle with 1 cm overlap. Punch two small holes for stitching or use rivets to attach the ends. Stitch on two buttons using waxed thread, then wipe the leather with a damp cloth after use and let it air dry.
Pro tipCondition leather after the first week of use - it prevents cracking and keeps the color even.
AvoidDon't glue buttons onto leather - heat and flex pop them off over time.
14. Tissue Paper Decoupage with Gloss Seal on a Travel Mug
Tissue decoupage looks artsy, but it's low maintenance when you seal it until it feels like plastic. Tissue is thin and conforms, so you get smooth color without bulk. The glossy coat makes splashes wipe off instead of catching into fibers. Use small, overlapping pieces so seams disappear under clear finish.
Tear tissue into irregular shapes about 1-2 cm wide and layer them in a pattern. Apply a thin layer of decoupage medium, press tissue down, and paint over the top to saturate it. After it dries, seal with multiple clear coats - I do 3-4 for a travel mug - and sand lightly between coats if texture shows.
Pro tipUse matte tissue on matte mug parts and glossy tissue on glossy mug parts so the finish looks intentional.
AvoidSkip big tissue sheets - they wrinkle and create raised ridges that feel cheap.
15. Raised Dot Texture Mug Using Fabric Mold Paste + Clear Coat
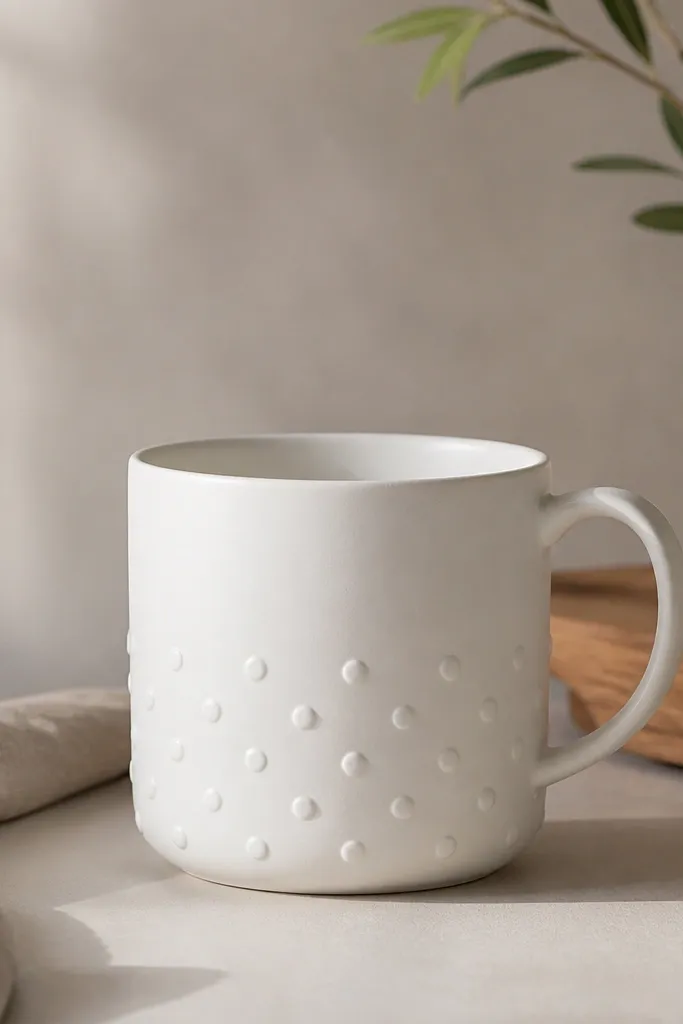
Raised texture looks tactile but stays low maintenance if you seal it so it doesn't hold grime. Fabric mold paste creates consistent dots with a silicone stamp or stencil, and once cured you can coat it with clear glaze sealer. The dots hide minor scuffs and fingerprints better than flat paint. Keep the dots small so they don't feel rough when you wipe the mug.
Use a silicone dot stencil or make a stencil with craft foam and holes. Mix or use ready mold paste, then spread it over the stencil to form dots. Let it cure fully, then brush clear sealer over the entire textured area, keeping the rim and interior untouched.
Pro tipTest dot size on a scrap first - 3-5 mm dots look neat and wipe clean.
AvoidDon't skip curing time - soft paste smears under clear coat.


