
1. Tea-bag drip shelf mug with watercolor stripes
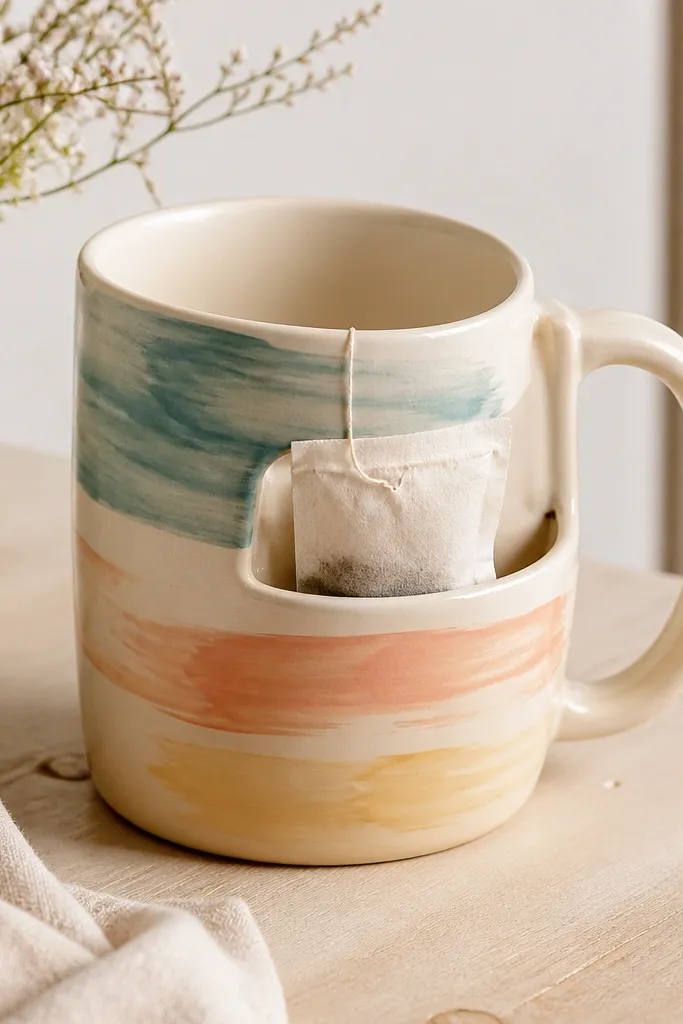
I paint the outside in soft watercolor stripes, then build a tiny front "shelf" using a thin plastic or silicone insert glued under the rim line. Tea bags rest on that shelf while the mug stays easy to lift. The colors look airy and calm because the storage area stays visually quiet - you only see the painted stripe pattern on the outer wall.
Use a standard 11-oz mug. Glue a small U-shaped silicone strip under the rim lip on the front side only, leaving the rest of the rim clear. Mask the storage opening with painter's tape before painting so the inside doesn't get sealed too thick.
Pro tipCut masking tape into a narrow strip and press it along the exact edge of the shelf so the stripe ends look intentional, not accidental.
AvoidDon't paint over the shelf surface - thick paint makes tea bags snag.
2. Pen cup mug with geometric dots and a magnetic side latch
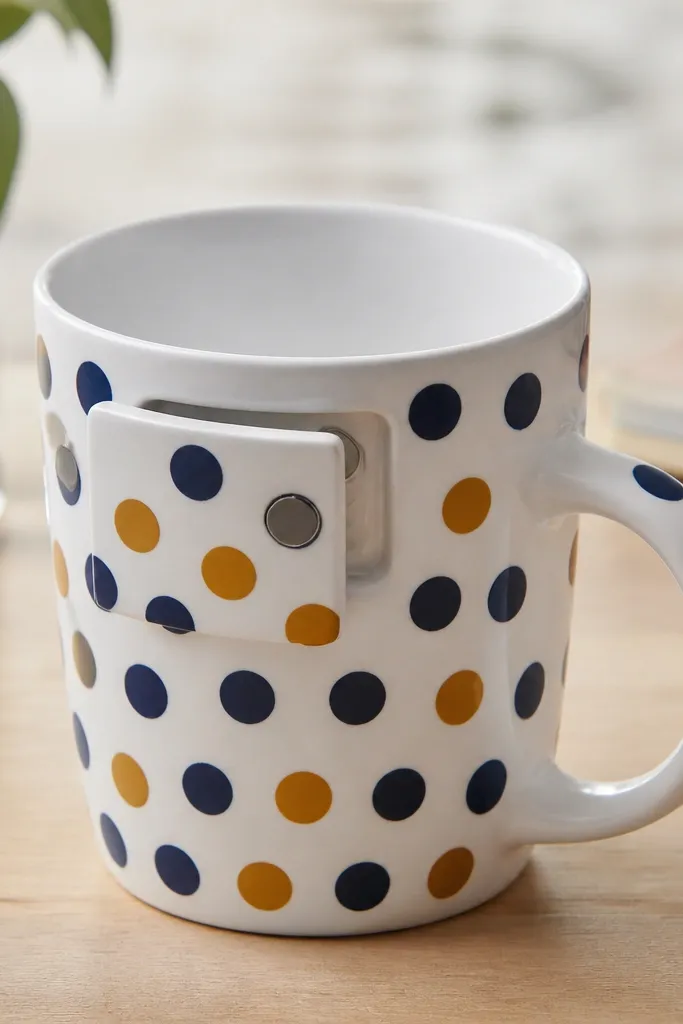
This is the one I grab when my desk gets messy. I paint bold dots on the outside, then add a flap that closes with a small magnet so pens don't fall out. The dots create a clean pattern that still reads playful, even with a functional lid.
Cut a flap from thin acrylic sheet or craft foam and glue it so it covers the opening by 1/4 inch. Add a small rare-earth magnet pair: one on the flap edge, one on the mug rim beneath the painted area. Seal the paint on the outside only; keep the magnet area dry and unpainted.
Pro tipPaint the mug first, then attach the flap after curing so glue doesn't mess with the finish.
AvoidSkip foam that's too thick - it makes the flap lift and look homemade in a bad way.
3. Spice mug with drawer front and hand-painted chili flags

A drawer-front mug turns a mug into a pantry mini. I paint chili flags along the top curve so the artwork wraps naturally, then the drawer panel gives you a place for spice packets or a pinch jar. The drawer keeps the contents hidden while the painted theme stays bright.
Use a mug that has a wider base. Cut a shallow drawer panel from thin plywood or plastic, and glue it to the front with a small hinge strip at one side. Add a tiny bead as the handle. Paint the drawer panel edges carefully and seal after drying.
Pro tipDry-fit the drawer panel before painting so it slides without catching on the mug curve.
AvoidDon't glue the drawer panel directly over paint lines - it causes chips where it flexes.
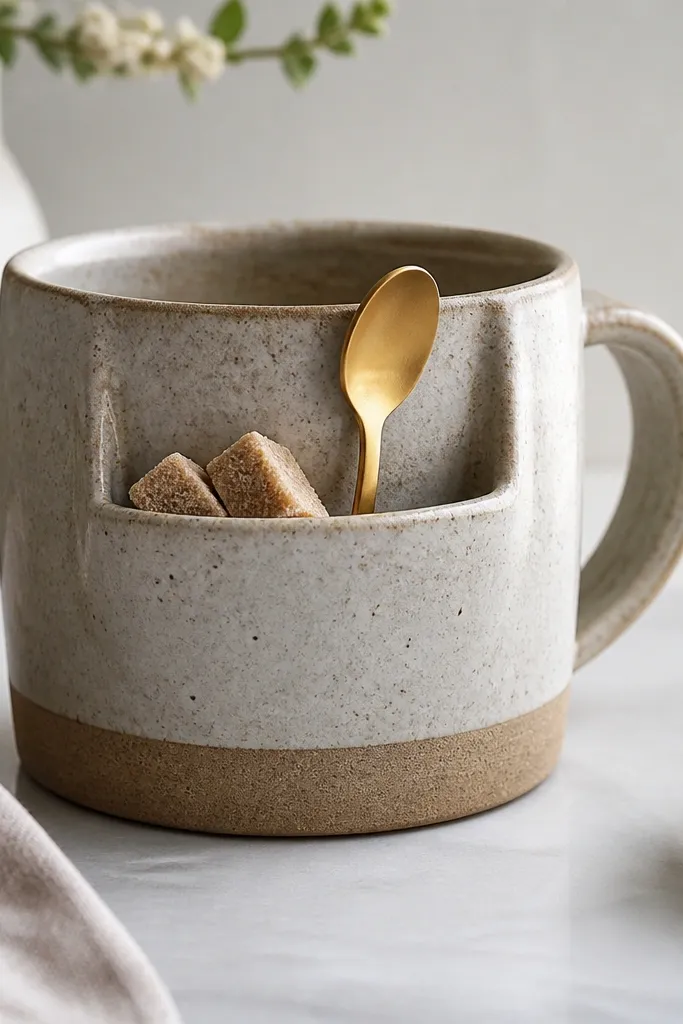
4. Spoon-and-sugar mug with faux enamel border and hinged top
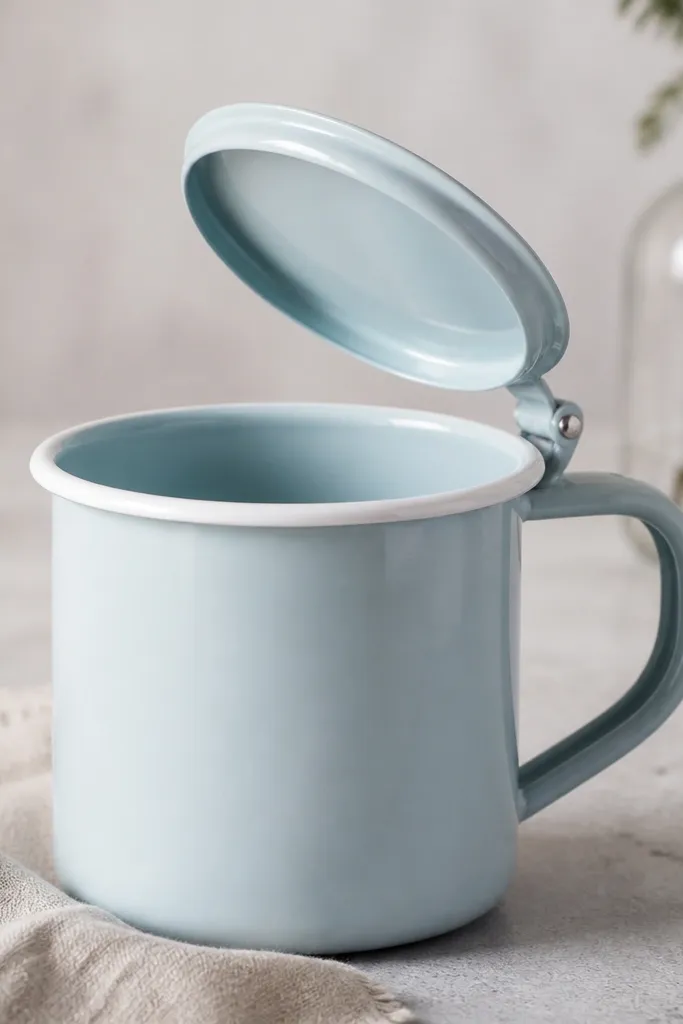
This one looks like a tiny kitchen canister. The faux enamel border makes the mug feel store-bought, and the hinged top keeps sugar scoops and spoons from getting dusty. I like painting enamel borders because they hide small brush marks - the border line does the heavy lifting visually.
Use ceramic paint for the blue and white border. Create a lid with a small hinge from a craft hardware set, then test fit so it opens fully without hitting the handle. Keep paint off the hinge pin and the inside rim so it stays smooth.
Pro tipUse a round sponge to dab the blue for an enamel-like texture instead of streaky brushwork.
AvoidDon't paint the hinge area - dried paint makes the lid stiff.
5. Crayon storage mug with rainbow block stripes and a scratch-resistant clear coat
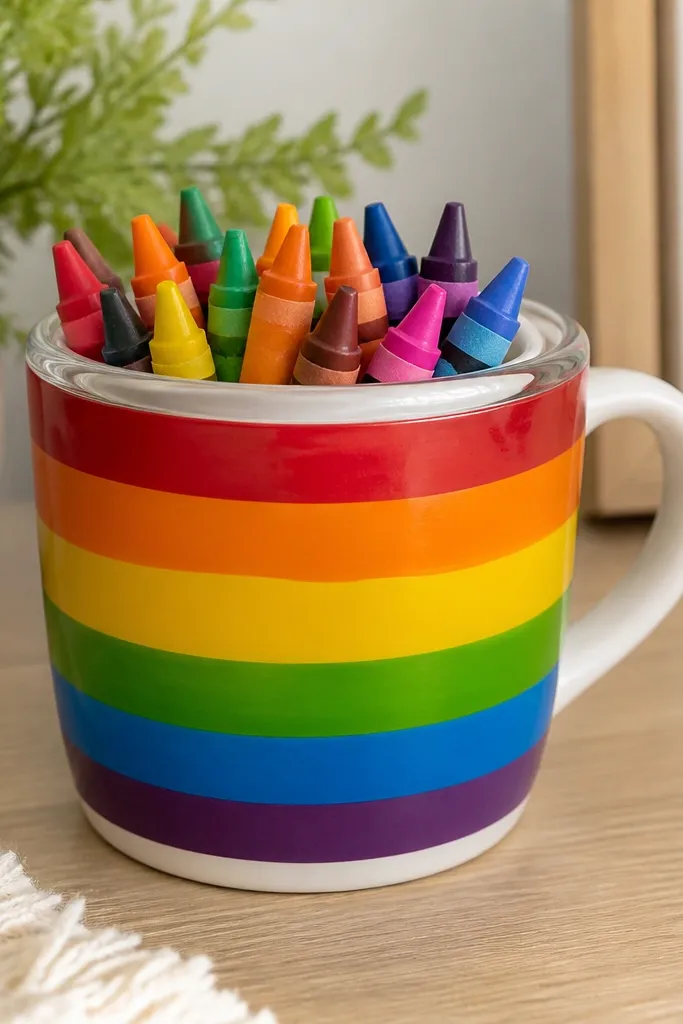
For kids, function beats detail every time. I paint thick blocks so crayon storage mug looks bright even from across the room. The storage works because the inside stays unpainted, so crayons slide in cleanly and don't scrape through thick paint.
Mask each stripe width with tape, then paint using a small foam brush. Leave a 1/2 inch clear strip around the opening. After curing, apply a durable clear coat made for painted ceramics.
Pro tipPaint stripes slightly wider than you think - the mug curve hides thin lines at the sides.
AvoidSkip glitter inside the opening - it flakes off when kids grab crayons.
6. Cotton pad mug with lace stencil and snap-top slot
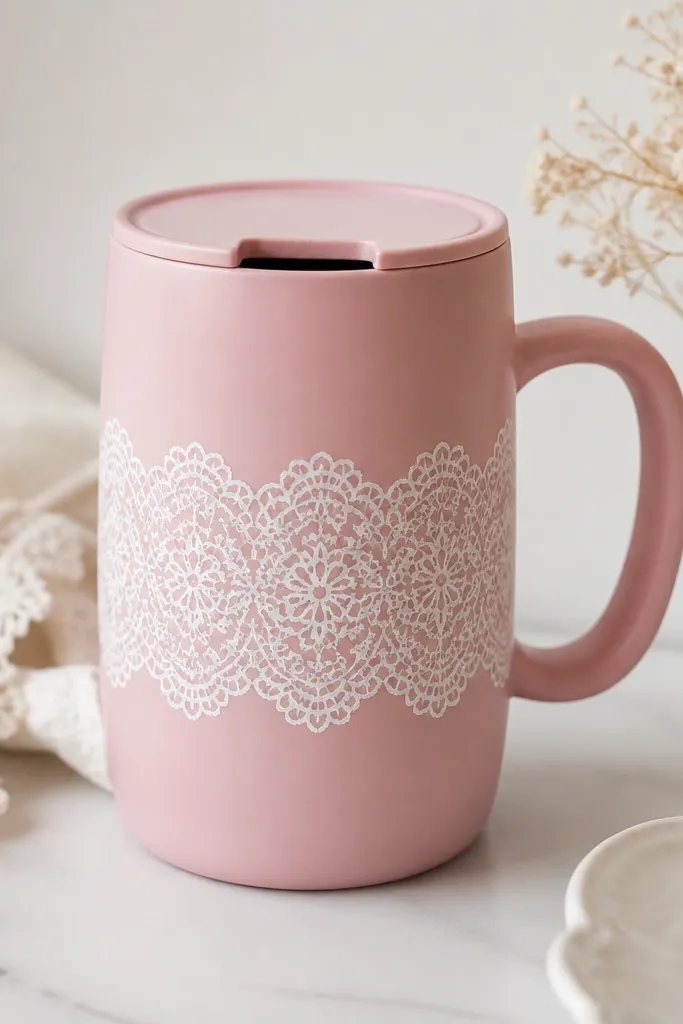
This is my bathroom counter fix for messy cotton pads. The lace stencil looks delicate, but the storage slot keeps pads contained. The snap top makes it easy to pull one pad without digging fingers into the whole stack.
Stencil with a foam stencil brush and let the paint dry fully before adding clear coat. For the slot, use a slim acrylic strip lid that snaps onto the rim with two small hook tabs. Mask the slot opening before painting so it stays smooth.
Pro tipUse painter's tape to create a crisp 'window' where the slot opening sits.
AvoidDon't overfill the stencil with paint - thick stencil edges feel raised and catch dust.
7. Garden seed mug with painted seed packets and a pull-out tray
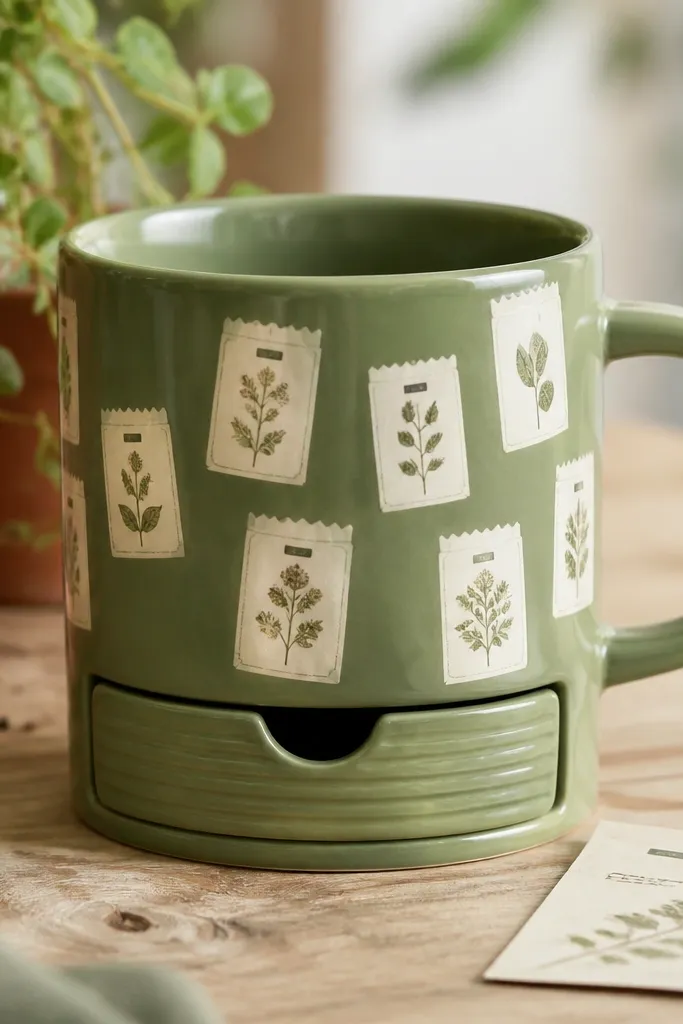
Seed packets are paper-thin, so they need a tray, not a deep cavity. I paint seed packet labels straight onto the mug front, then add a pull-out tray so the packets slide out like a drawer. The artwork sits above the tray edge so it doesn't get scuffed when you pull it open.
Glue a small pull-out tray to the lower front using a drawer slide strip or simple friction fit with a thin felt bumper. Paint the tray separately so you can seal it without getting paint on the slide edges. Keep the top of the mug opening unpainted where packets slide.
Pro tipAdd a felt bumper on the tray lip so it closes quietly and doesn't scratch the mug glaze.
AvoidDon't put the tray flush to the mug bottom - you need a tiny gap for movement.
8. Coffee stirrer mug with chalkboard patch and side pocket
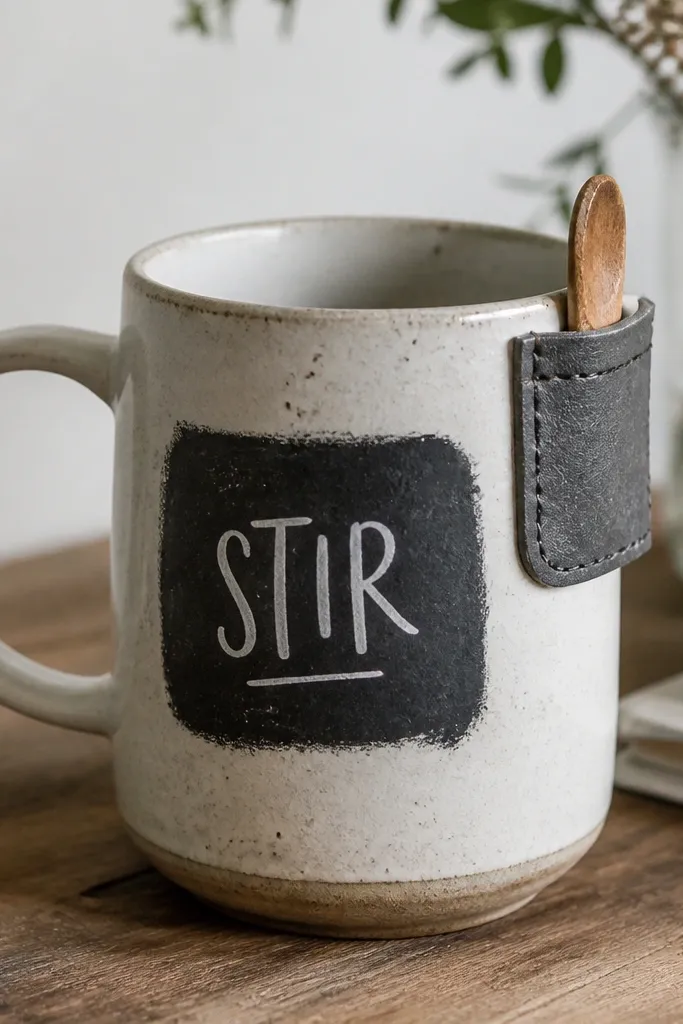
This one keeps your stir sticks and notes in the same place. The chalkboard patch lets you rewrite flavors or reminders, and the side pocket holds extra sticks or a small sugar packet. I like mixing matte chalkboard with glossy ceramic paint so the pocket looks grounded and the patch reads bold.
Use chalkboard paint made for non-porous surfaces and cure it per instructions. Add a side pocket from faux leather or heavy canvas, stitched and glued, then paint around it but not inside the pocket. Seal the chalkboard patch carefully on the edges only so it stays writable.
Pro tipUse a fine paint marker for the white lettering so it stays crisp on the chalk texture.
AvoidSkip sealing the entire chalkboard patch - it turns glossy and stops writing.
9. Bath salts mug with ombre paint and clear jar-liner storage
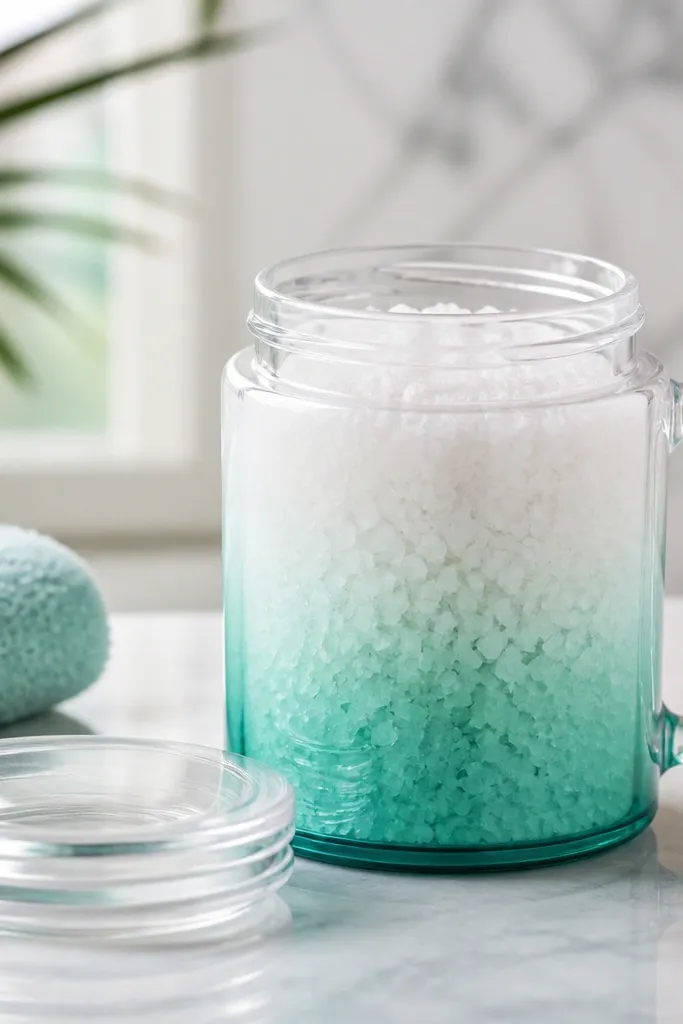
If you hate residue, this is the approach I keep using. I paint the outer mug with ombre, then drop in a clear liner jar for storage. The jar prevents salts from touching the painted ceramic and makes refilling easy. The ombre looks smooth because you blend with a sponge, not a brush.
Choose a liner jar that fits inside the mug with a 1/4 inch gap. Paint only the outer mug surface, mask the top rim, then cure. Add a lid with a simple screw cap or silicone press lid.
Pro tipFor ombre, dab from the bottom up with a makeup sponge and stop before it gets streaky.
AvoidDon't skip masking the rim - salts and water creep onto paint edges.
10. Desk cable mug with painted cord labels and a top slot
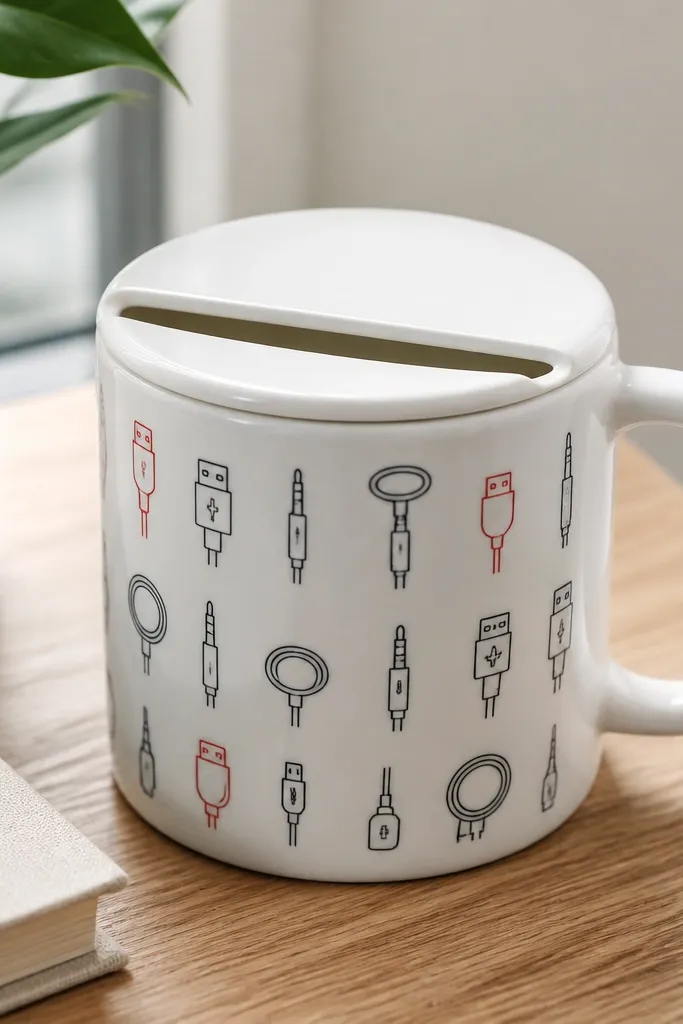
This is for the person who always tucks cables under the monitor and forgets them. I paint cord labels so you grab the right one fast, then I add a top slot so cords feed through without yanking. The mug stays neat because the cords disappear below the opening.
Cut a slot in a lid or in a removable top ring piece. Use acrylic paint for small icons, then seal. Keep the slot edges unpainted except a thin clear coat so cords slide without snagging.
Pro tipWrite the labels with a thin paint pen after the mug paint cures, then seal over the lettering lightly.
AvoidSkip thick paint near the slot - it creates a ridge that wears the cord jacket.
11. Paintbrush rinse mug with splatter art and a removable strainer
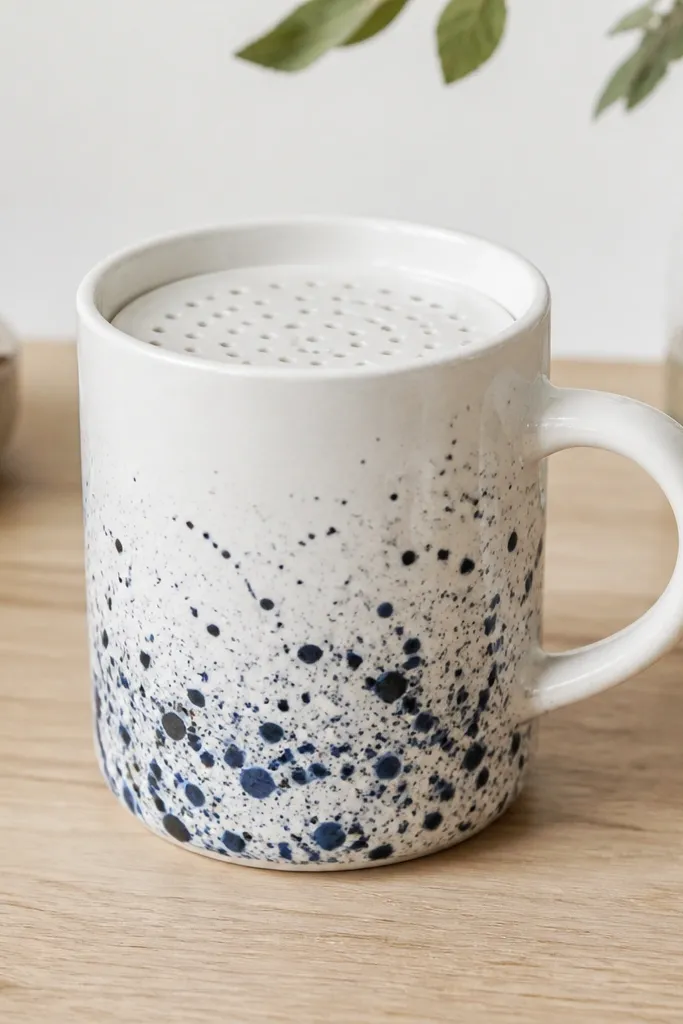
I use this during watercolor and acrylic projects when brushes need a quick rinse. The splatter art hides small paint stains, and the removable strainer keeps chunks out so you don't ruin your next wash. The storage part is the strainer - it holds brushes upright for drying.
Make a strainer from a metal mesh circle or a plastic mesh cup lid. Fit it so it rests 1/2 inch below the rim and can be pulled out. Paint the outside first, then seal. Leave the inner wall around the strainer unpainted so it doesn't get gummy.
Pro tipUse a clear silicone ring under the strainer so it doesn't rattle against the mug.
AvoidDon't use permanent glue inside the mug - dried glue traps gunk.
12. Office snack mug with cookie illustration and snap-in divider
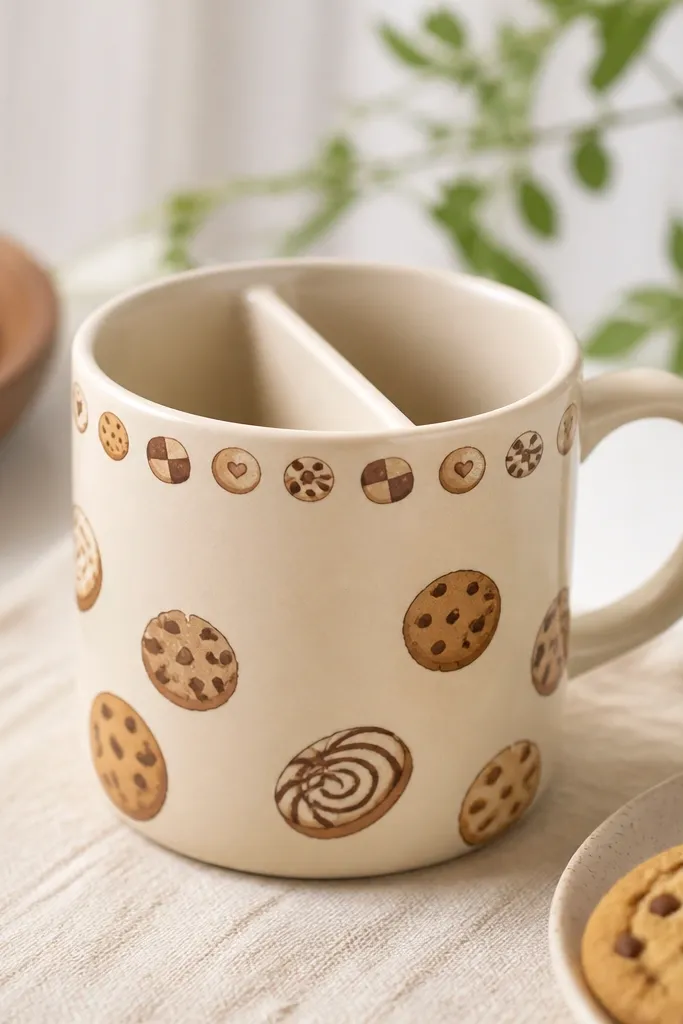
I made this for mixed snacks because one pile turns into crumbs and chaos. The divider creates two compartments for nuts and chocolate chips, and the cookie art makes it feel fun instead of utilitarian. The key is keeping the divider removable so you can dump and wash without wrestling the compartments.
Create a divider from food-safe plastic, sized to fit snugly inside the mug. Add snap tabs near the top so it locks without permanent glue. Paint the mug outside, mask the inner rim where the snap tabs touch, and seal the outer artwork.
Pro tipUse a divider that sits 1/2 inch below the rim so you can still scoop easily.
AvoidDon't paint the inner walls - crumbs stick to painted texture.
13. Bathroom hair tie mug with painted terracotta arches and elastic loop band
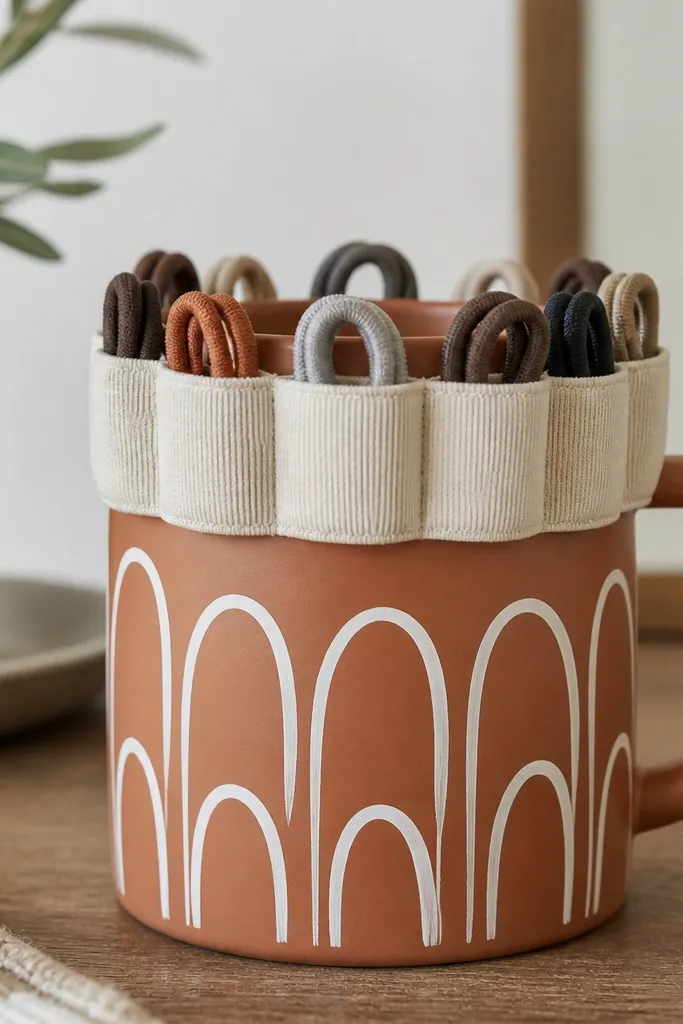
This is the hair tie mug I wish I had years ago. The elastic loop band holds ties upright, so you don't dig through a pile. The terracotta arches look warm and cottagey, and the storage is visible, so you see what you need.
Wrap a wide elastic band around the mug top and stitch or glue at the back. Add 6-10 small fabric loops made from narrow strips. Paint the mug first, then attach the fabric band after curing so paint doesn't interfere with adhesion.
Pro tipUse fabric loops in one solid color and let the mug artwork do the design work.
AvoidSkip slippery satin loops - hair ties slide off.
14. Chalk marker mug with color-block stripes and a flip lid
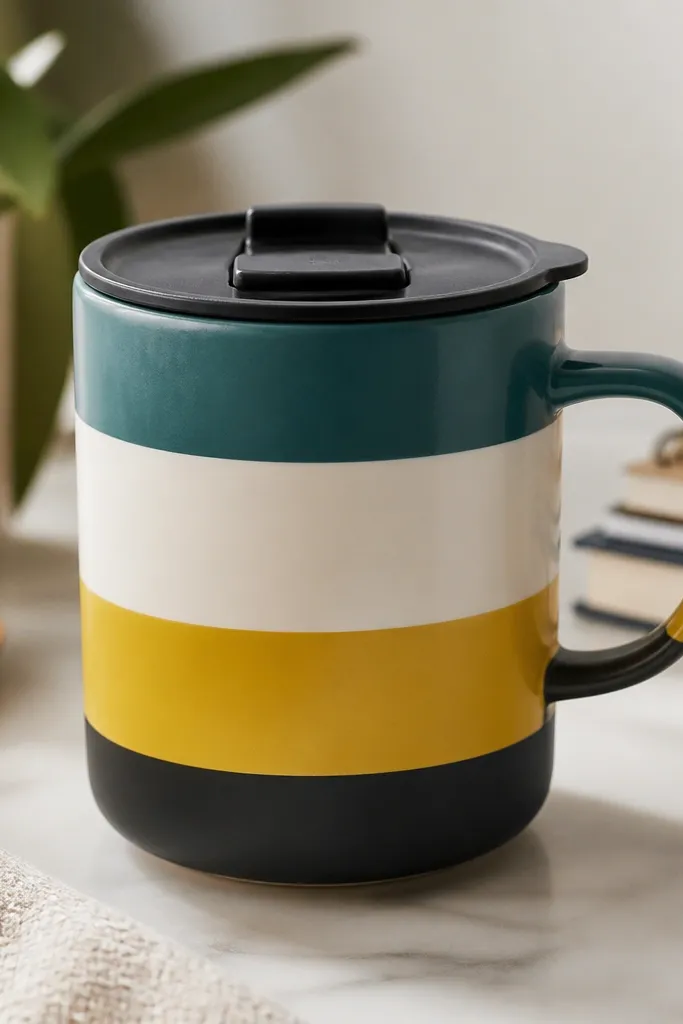
This is for craft rooms and classrooms. You toss in chalk markers, then flip the lid shut so they don't dry out. The color blocks are high-contrast, and I keep a label patch unpainted or lightly coated so you can write directly.
Paint outside stripes with painter's tape lines for clean edges. Add a flip lid from a thin plastic sheet and a small hinge strip, then test the opening angle. Seal everything except the label patch, which stays chalk-friendly.
Pro tipUse two layers of stripe paint and let each cure fully so the colors stay opaque.
AvoidDon't cover the label patch with heavy clear coat.
15. Wall-mount mug with painted skyline and hanging key slot
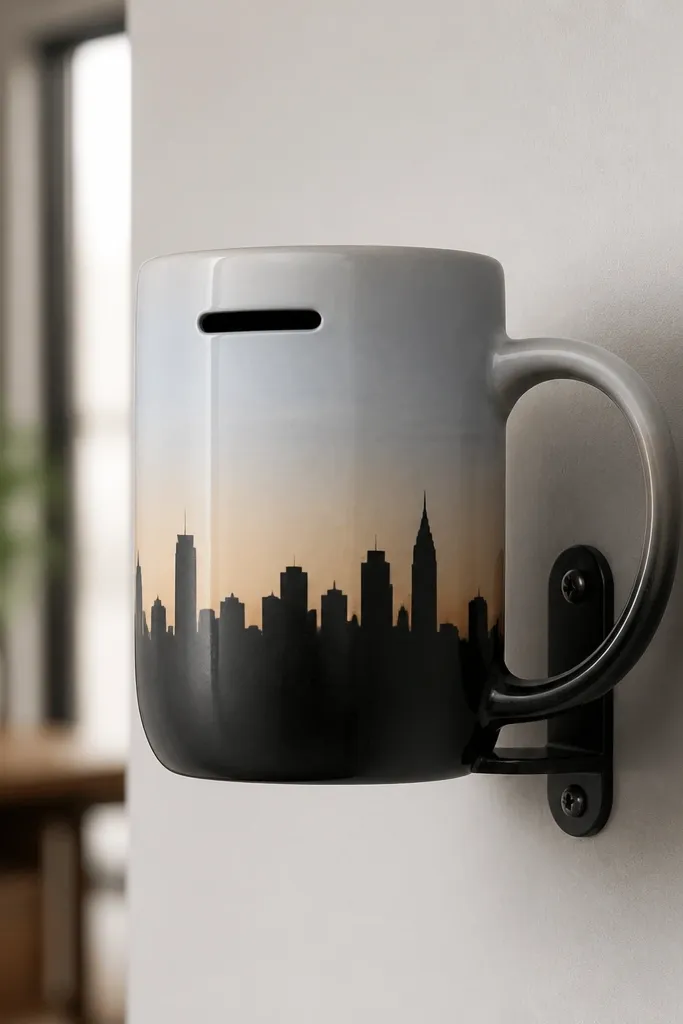
This one turns a mug into a key drop without buying a separate organizer. The skyline silhouette looks like a night postcard, and the narrow slot keeps keys from clanging around inside. I mount it at chest height so keys land gently and you don't have to reach up.
Paint the mug flat on a backing board so you can get clean skyline edges with a stencil. Mount with a sturdy wall bracket screwed into studs. Cut a key slot opening about 1 inch wide and leave it unpainted for smooth key entry.
Pro tipRound the slot corners with sandpaper so keys don't scratch the paint edge.
AvoidSkip mounting with drywall anchors only - the mug gets heavy fast with keys.
16. Picnic cutlery mug with checkered band and fold-out pocket
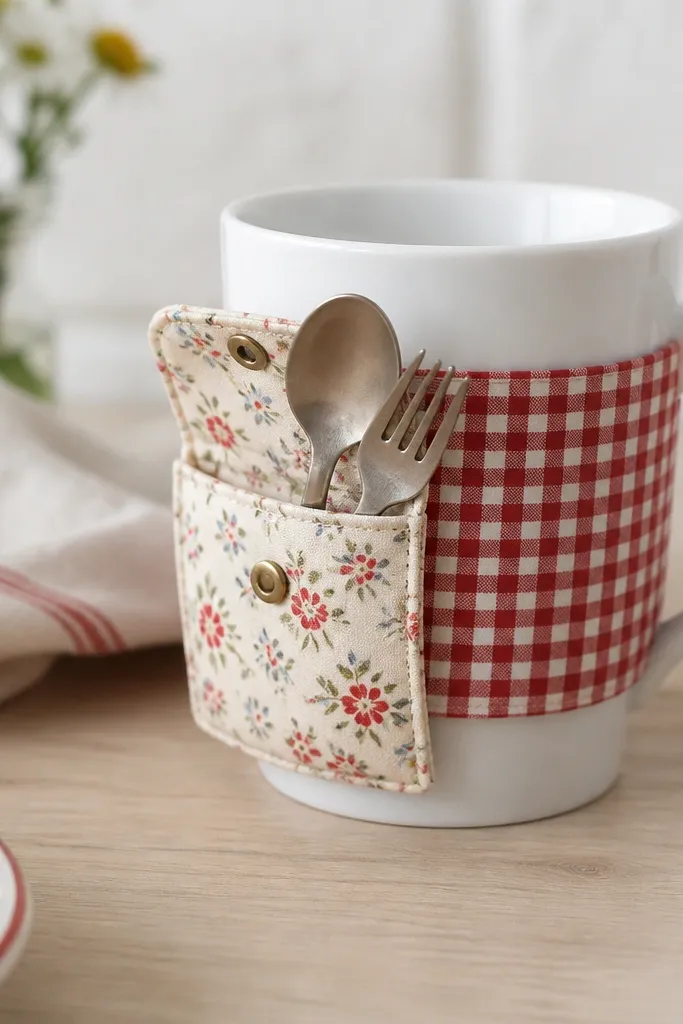
For road trips, this is the mug that makes you stop forgetting utensils. The checkered band looks classic, and the fold-out pocket holds cutlery upright so it's easy to grab. The pocket fabric also hides small scuffs, which is nice when this mug travels in a bag.
Paint the checkered band using tape cut into small squares. Make a side pocket from cotton canvas with a plastic-coated lining, then sew a fold hinge at the top edge. Glue the pocket base to the mug after paint cures.
Pro tipUse snaps on the pocket flap so utensils don't fall out when the bag tips.
AvoidDon't glue fabric directly over wet ceramic paint.
17. Desk plant mug with painted leaf veins and water reservoir ring
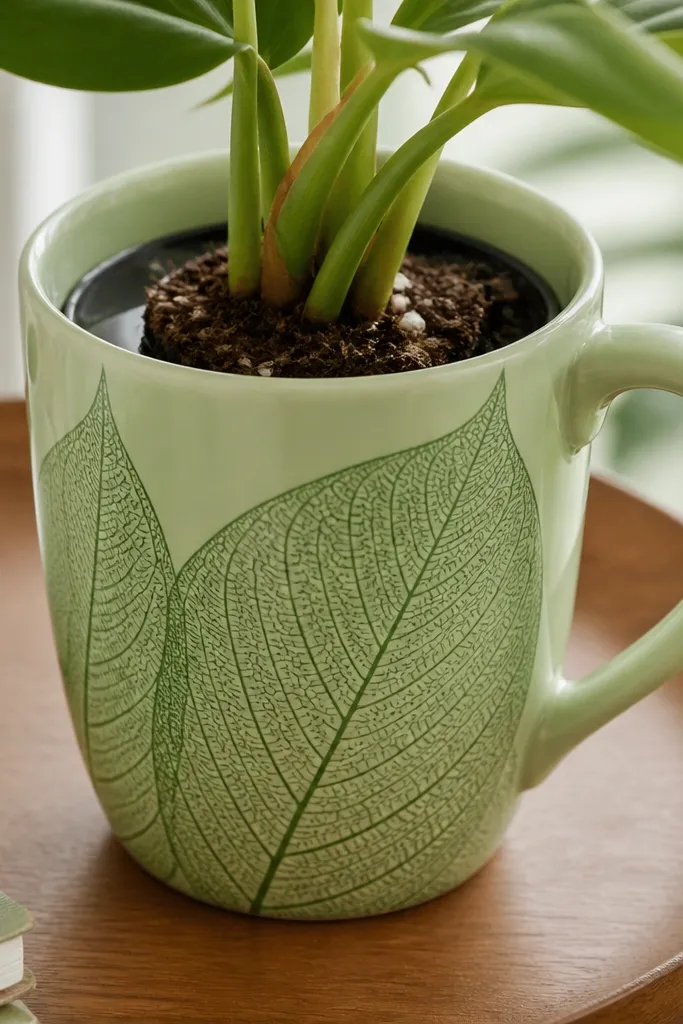
This is a storage mug for plant care items and a mini reservoir for small succulents. I paint leaf veins for a natural look, then add a reservoir ring so water collects below the soil level. It works because the storage area stays clean and doesn't get muddy.
Use a small plastic reservoir ring insert that sits inside the mug opening. Paint the outer mug only. If you're putting soil in, keep the insert height so water pocket stays exposed to roots but not to the soil surface.
Pro tipPaint veins with a liner brush and a steady hand - one thin line from center to edge makes the whole leaf read real.
AvoidDon't create a reservoir that touches the painted inside wall - it stains.
18. Holiday ornament mug with gold star paint and ribbon storage loop
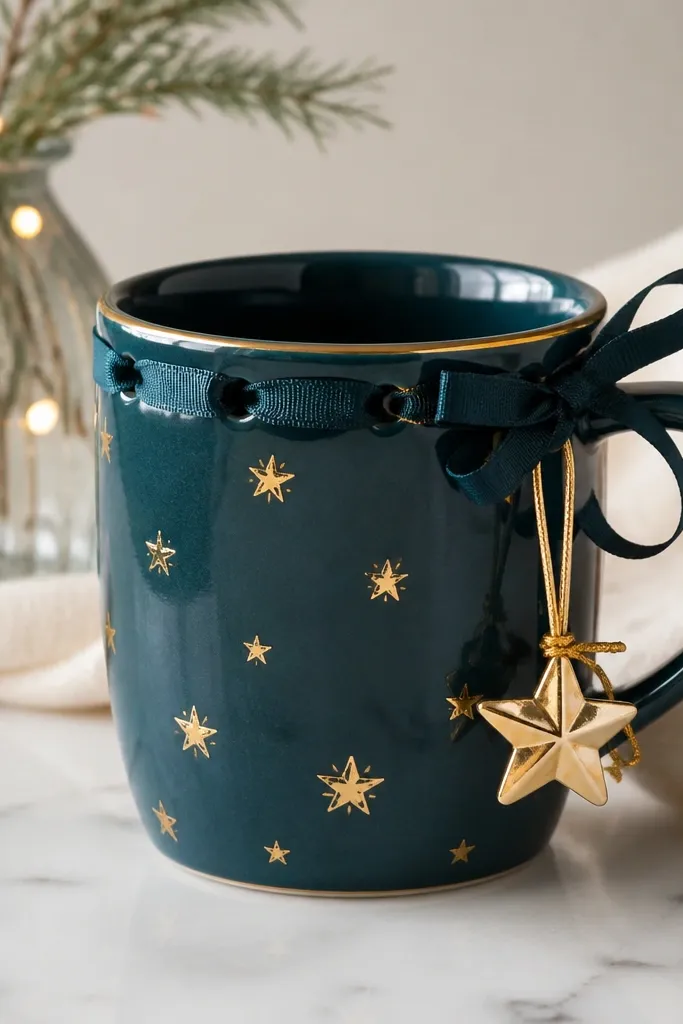
This mug stores holiday tags, ribbon, or tiny ornament hooks without clutter. The gold stars look warm against teal, and the ribbon loop gives you instant organization you can see. I like this idea because you can reuse the same mug year after year by swapping what hangs on the loops.
Paint stars with metallic gold ceramic paint. Add a ribbon loop ring by wrapping ribbon around the rim and securing with small knots under the handle area. Keep the ribbon ends sealed with fabric glue and let it cure fully.
Pro tipUse painter's tape to define star clusters so they look intentional, not random dots.
AvoidSkip cheap metallic paint that rubs off - test on a spoon first.
19. Craft beads mug with wave pattern and snap-on lid organizer
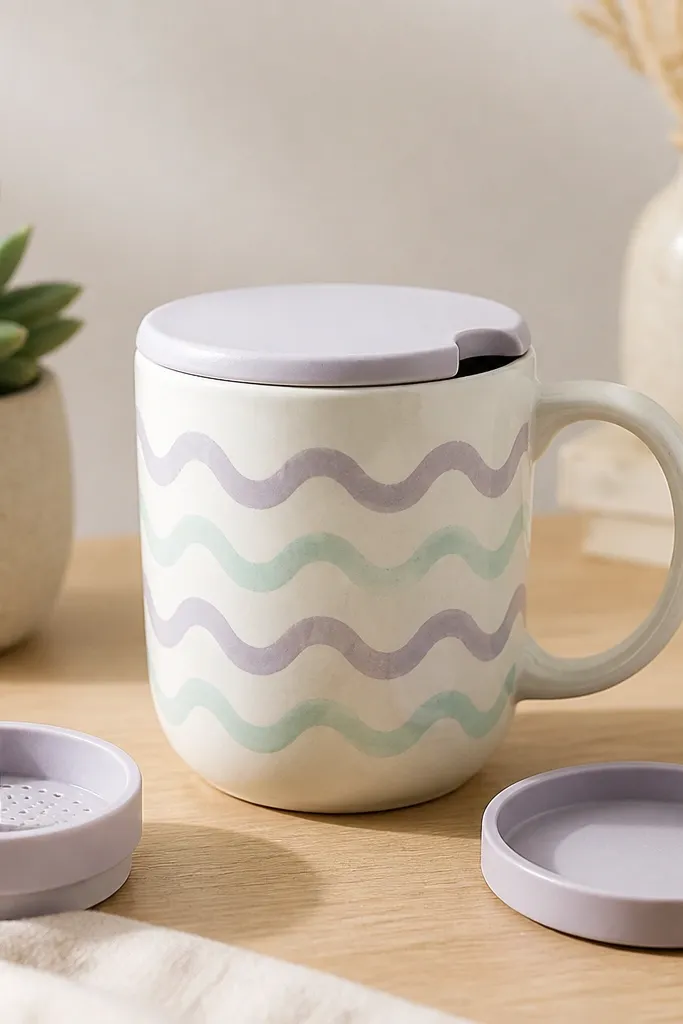
Beads scatter. This mug keeps them contained with a snap lid and a removable insert so you can dump and sort. The wave pattern is soothing and makes it easier to find the mug in a messy craft bag. It also hides tiny chips because the lines break up the surface texture.
Paint waves with a small round stencil or a flexible tape guide. Add a snap-on lid from a plastic food container lid cut to fit the mug rim. Insert height should leave a 1/2 inch gap so you can shake beads out without splashing.
Pro tipSeal the waves with two thin clear coat layers, letting each dry completely.
AvoidDon't paint the lid top - it becomes slippery and scratches off fast.
20. Desk sticky notes mug with lined paper design and side clip tray
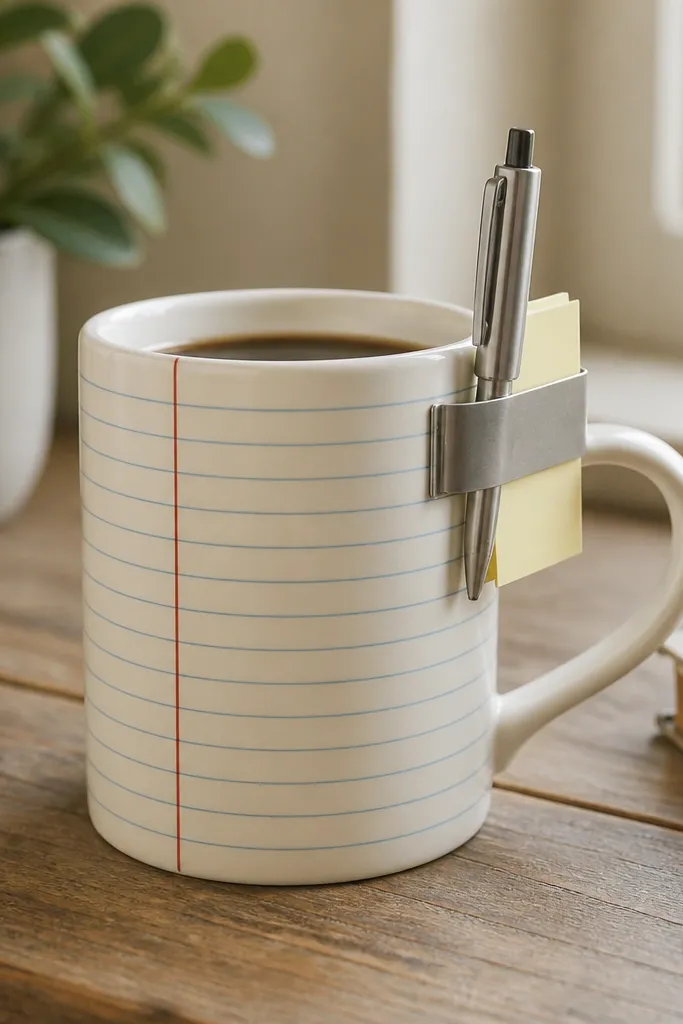
I like this because it turns sticky notes into a grab-and-go system. The notepad lines look like a real desk pad, and the side clip tray holds a pen so you don't hunt. The storage is visible and functional, so it feels organized without being stiff.
Paint the lined-paper look with a ruler and painter's tape for spacing. Attach a small metal clip tray using screws or strong adhesive, but keep it away from the painted area if possible. Seal the mug outside and leave the clip mounting points uncoated.
Pro tipUse a fine brush for the blue lines so they look like print, not drawn.
AvoidSkip freehand spacing - uneven lines make the whole mug look rushed.
21. Bathroom razor mug with navy stripe wrap and vented storage ring

Razor storage is always gross if it traps water. This mug keeps razors upright using a vented ring insert so water drips away. The navy stripes look clean and classic, and the vented ring keeps the storage part practical, not decorative.
Use a vented plastic ring insert sized to the mug opening. Paint vertical navy stripes with tape guides, leaving the inner ring area unpainted. Seal the outer paint, but don't seal the inside where water stays - keep it simple and easy to rinse.
Pro tipAfter curing, run hot water through the mug and dry it fully so any uncured paint residue is gone.
AvoidDon't add thick decorative texture on the inside - it traps grime.
22. Baking measuring spoon mug with flour-dusted ombre and hanging loop
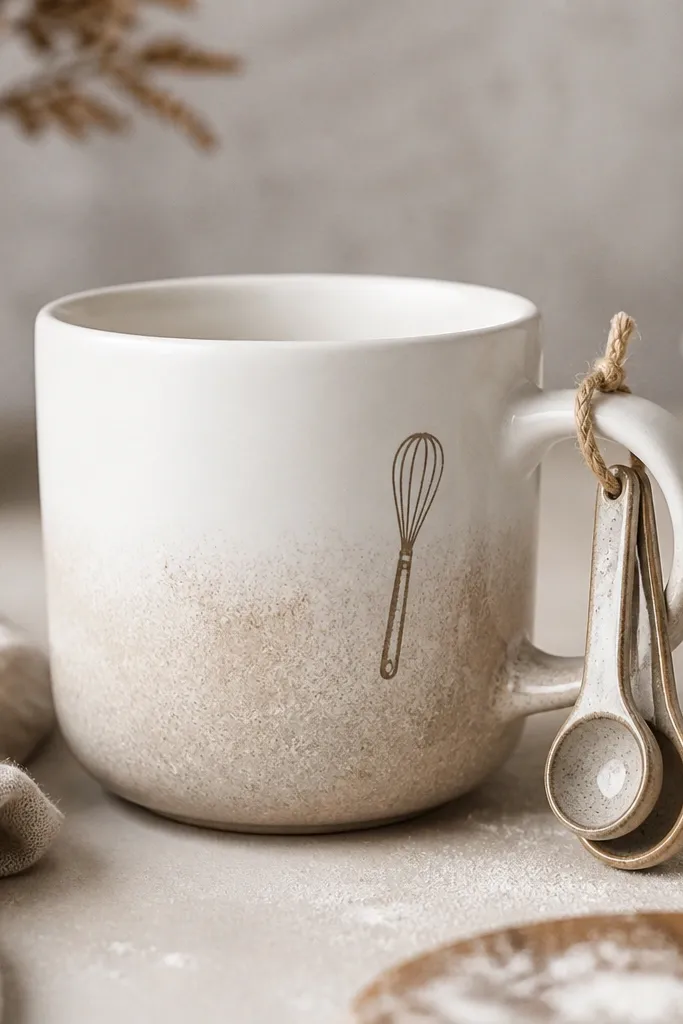
This is the spoon mug that stays useful while you bake. The ombre looks like a flour haze, and the side loop gives you a place to hang spoons so they don't clatter into your counter mess. I keep the storage area simple and sturdy so it can take daily bumps.
Paint ombre with a sponge starting at the bottom third. Glue a metal loop or sturdy ribbon loop on the side opposite the handle. Seal the outside paint; let the loop hardware touch only sealed ceramic areas to prevent rust.
Pro tipHang spoons by the handle - it keeps the bowl end clean for scooping again.
AvoidSkip thin wire loops - they bend after a few uses.
23. Workshop hardware mug with rust-orange stencil and compartment divider
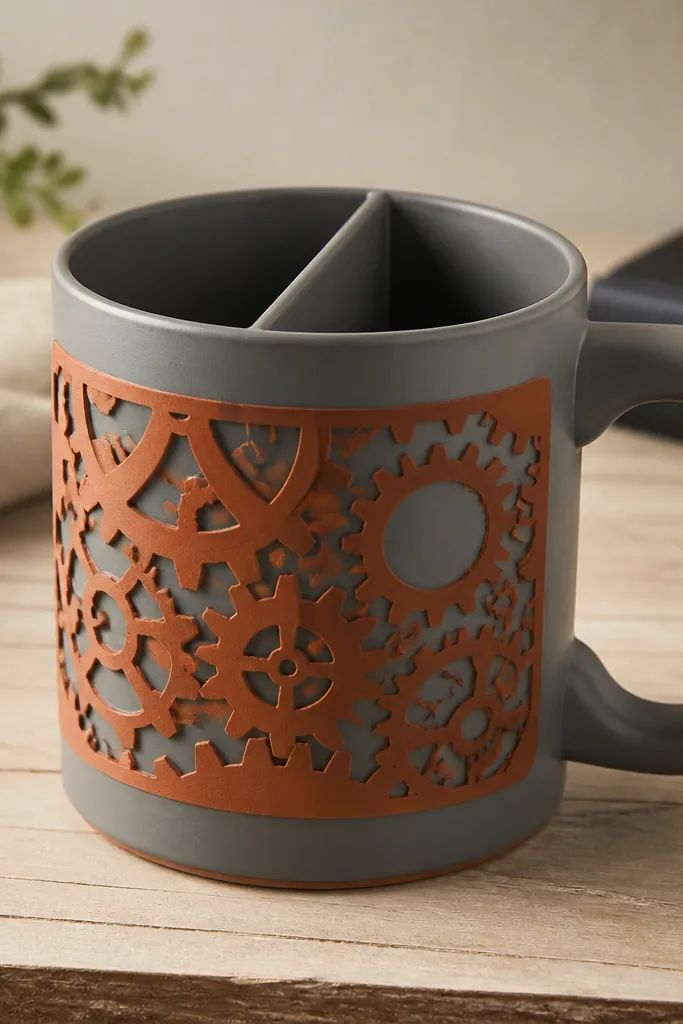
Hardware needs separation. I paint a gear stencil on the outside so it looks intentional, then add a divider to keep screws and washers from turning into one mixed pile. The gray base hides scuffs from workshop use, and the rust-orange stencil pops without needing lots of layers.
Use a thick stencil brush and one color, no blending. Insert a divider made from thin plastic or metal sheet with a smooth edge, resting 1/2 inch below the rim. Mask the divider contact area so paint doesn't build up and interfere with fit.
Pro tipHit the stencil with a dry brush technique so the edges stay crisp and not muddy.
AvoidDon't paint the inside divider surfaces - it makes parts stick.
24. Library reading mug with watercolor bookmark art and elastic bookmark pocket
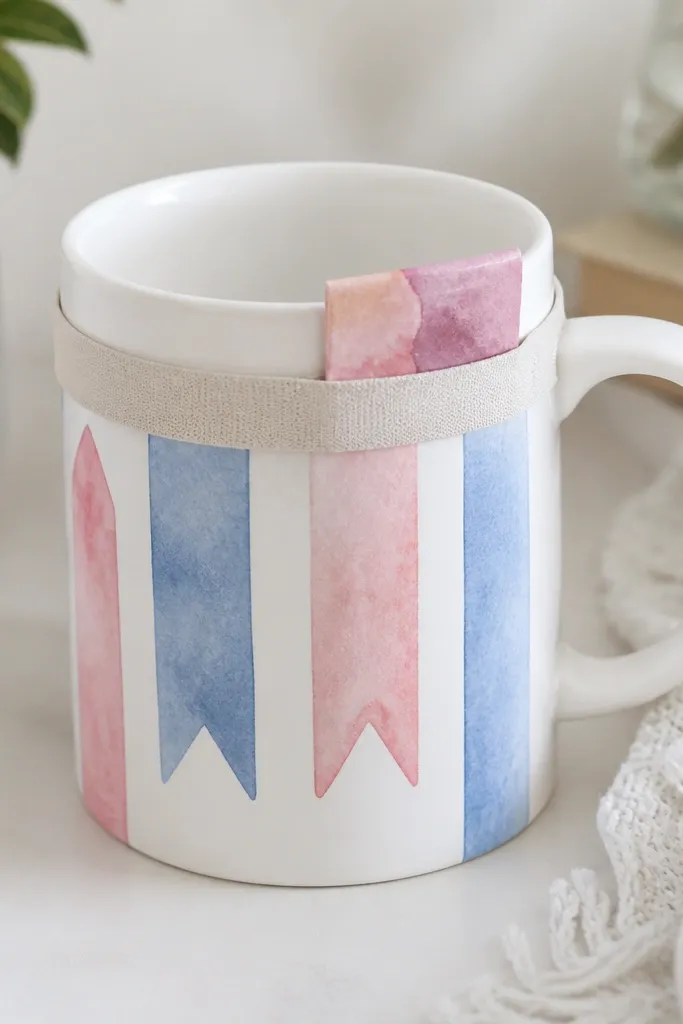
This mug keeps your place while you sip. The bookmark pocket holds a folded page marker or a thin notecard, and the watercolor bookmark art makes the design match the function. I like the soft colors because they look good under warm lamp light.
Paint bookmark shapes around the front with a small flat brush and let edges feather slightly. Add an elastic pocket by sewing a strip of stretchy fabric and gluing it under the rim lip, centered between the handle and the opposite side. Leave the pocket fabric unpainted so it stays grippy.
Pro tipUse a ruler to place the bookmark art so the top point aligns with the mug handle height.
AvoidSkip stiff fabric pockets - they don't slide bookmarks in smoothly.


