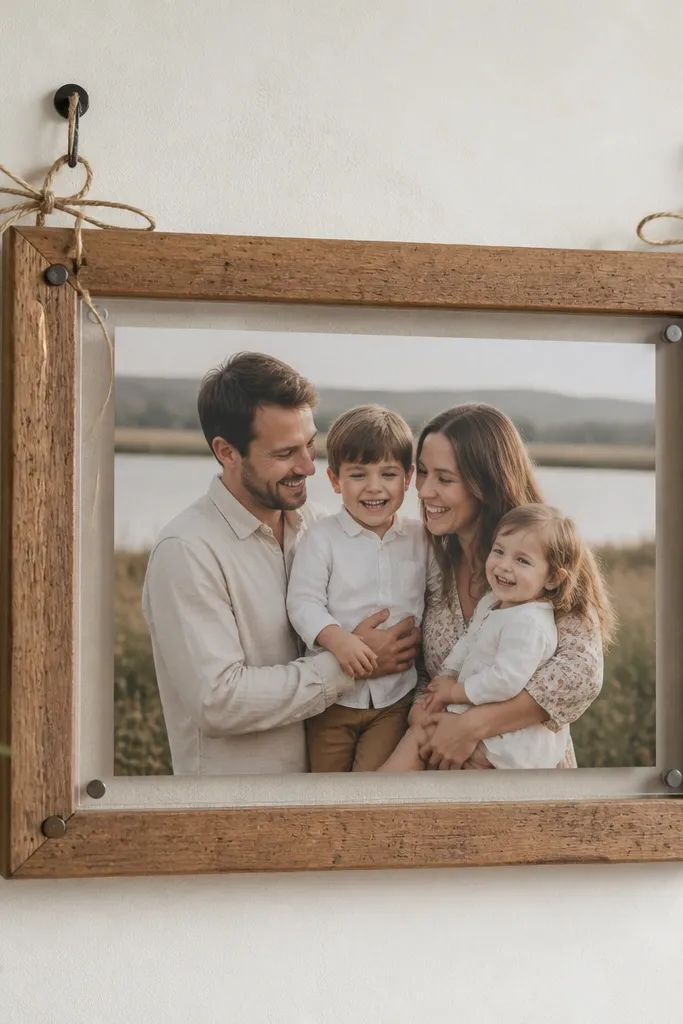
1. Thrifted window frame with 8x10 photo panes
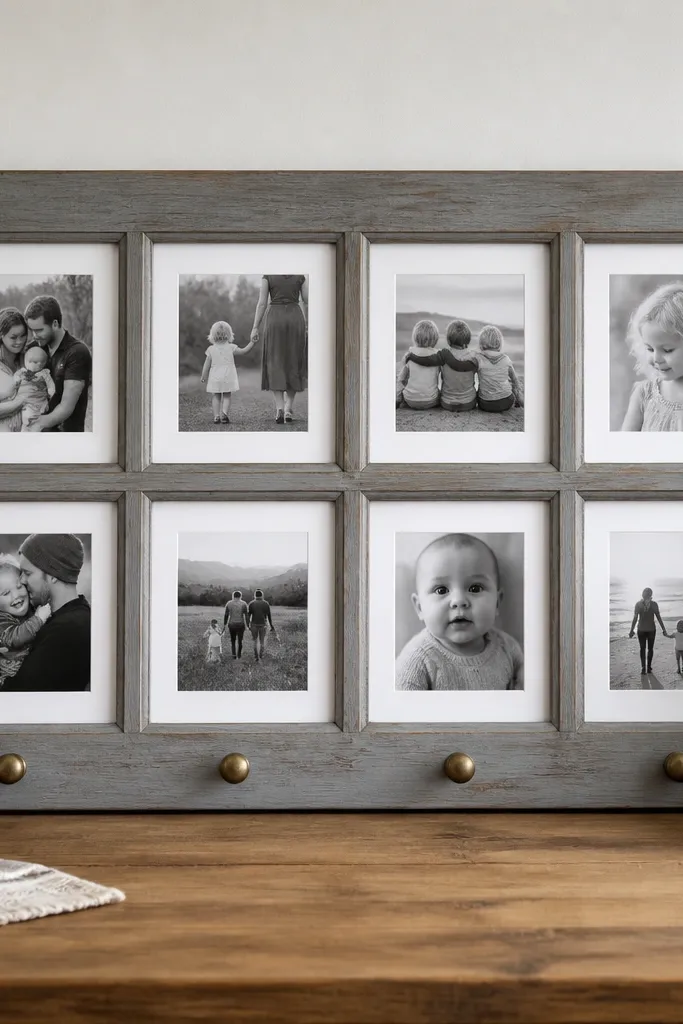
This look works because it gives you built-in spacing like a gallery display, so your photos don't compete. The white mats keep faces crisp against the darker wood, and the warm gray paint makes skin tones look natural. I like using 8x10 photos because they fill the pane without stretching. Add a few black-and-white prints mixed in - it turns the set into a "collection" instead of a pile of pictures.
Use a real window frame with at least eight openings. Cut acrylic to the exact opening size, then glue a paper mat backer to hold the photo flat. Keep the mat border consistent at 1 inch (2.5 cm) so all openings look aligned. Finish with two light coats of primer, then two coats of warm gray, then a matte clear coat.
Pro tipSand the paint edges on the inside rails with 220 grit so the photos sit on a smooth, non-scratching surface.
AvoidDon't use glossy clear coat - it throws glare on the hallway light and makes faces look washed out.
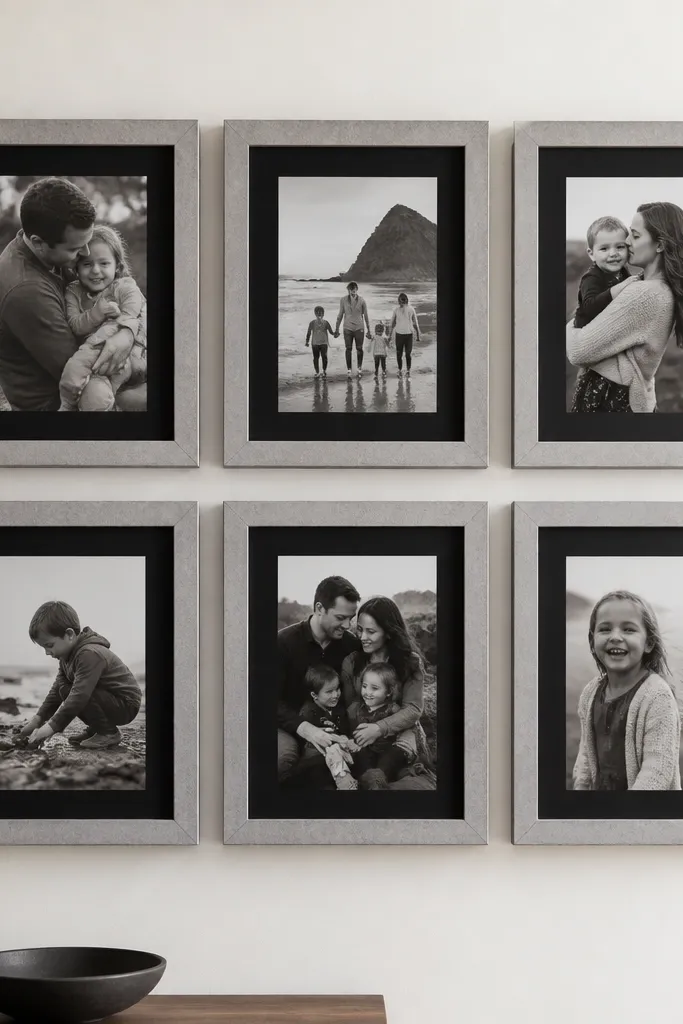
2. Gallery wall clip frames on a single wood rail
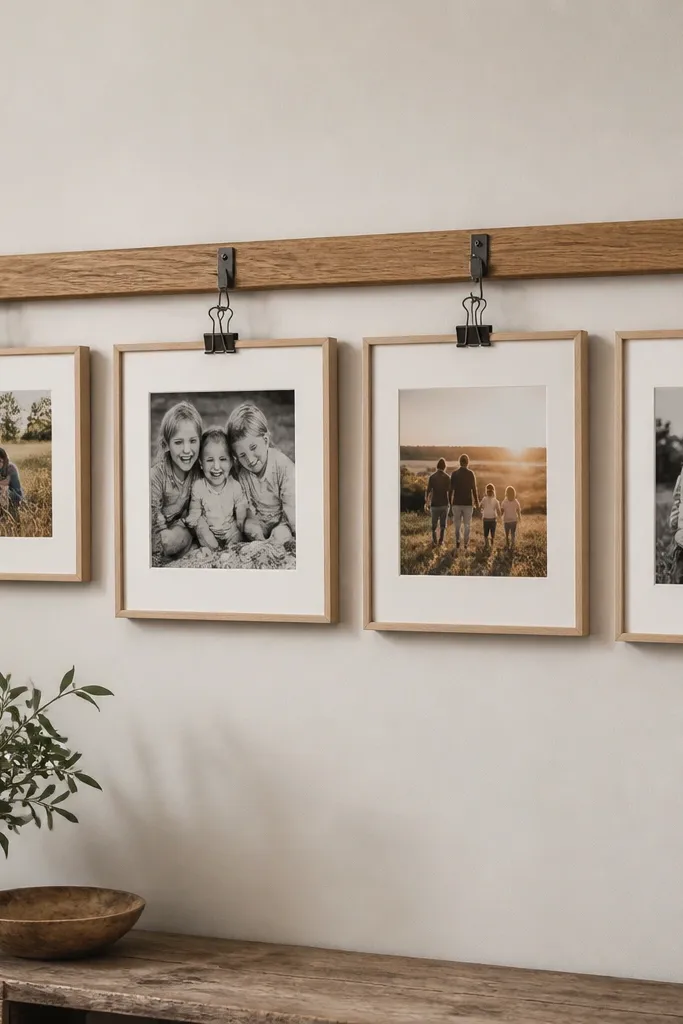
This is for when you want to change photos without redoing hardware every time. The clip system lets you swap prints in seconds, and the consistent rail keeps the layout tight. Cream mats make the whole rail feel warm, and black clips add contrast without needing fancy frames. It looks intentional even with different photo sizes because the clip frames share the same outer style.
Pick frames with the same outer dimensions, about 5x7 or 6x8, even if the photo sizes vary. Mount a 1x3 wood rail (about 75-80 mm wide) level using wall anchors. Pre-drill holes for brackets so the clips hang straight. Use acrylic or glass inserts, then secure the back with small clips or corner tabs.
Pro tipCut the print sizes so the photo sits centered under the mat opening; crooked centering shows instantly.
AvoidSkip mismatched clip colors - one bright chrome clip makes the whole row look DIY.
3. Book page decoupage frame with linen mat
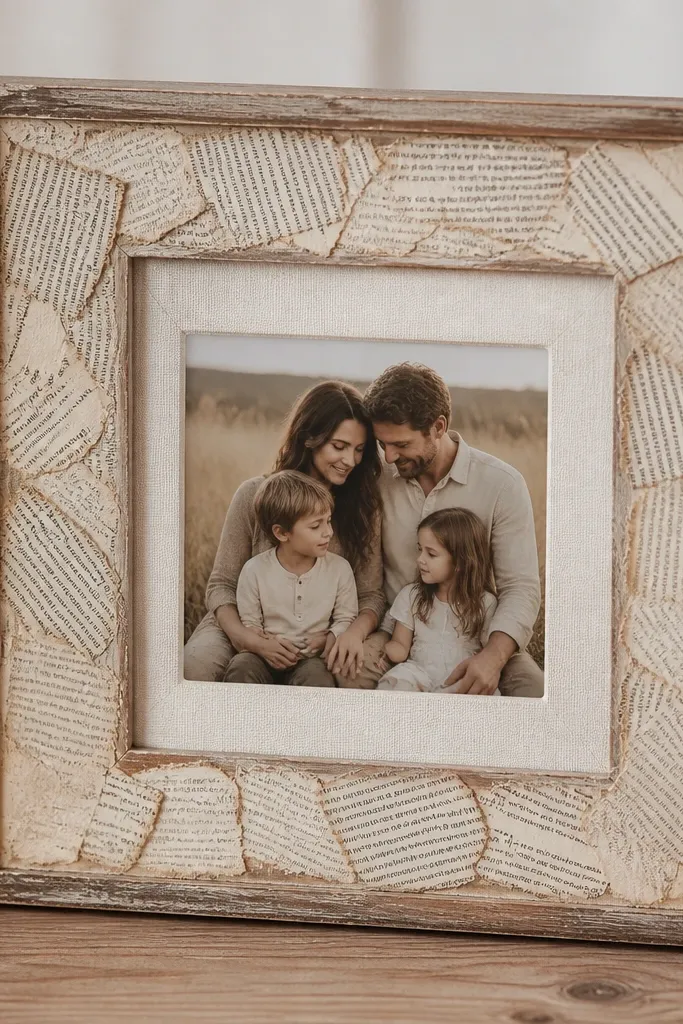
Paper decoupage adds pattern without making the photo disappear, especially when you keep the design only on the frame edges. Linen mat fabric gives a gentle texture that hides fingerprints and makes the photo feel grounded. I've used this with older family portraits - it makes them look like they belong in a study or reading corner. The key is to let the photo stay the cleanest part of the piece.
Sand the frame lightly, then tear book pages into strips. Brush decoupage medium (matte) onto the frame, lay strips, and overlap edges by 2-3 mm. Seal with two coats of medium on top. For the mat, cut a window from foam board and wrap the outside with linen fabric using spray adhesive, then trim the window opening cleanly.
Pro tipLet each decoupage coat dry fully before sealing; if you rush, the paper buckles around corners.
AvoidDon't decoupage the photo area - glossy paper there creates glare and wrinkles.
4. Scrap wood shadow box with 3D keepsakes
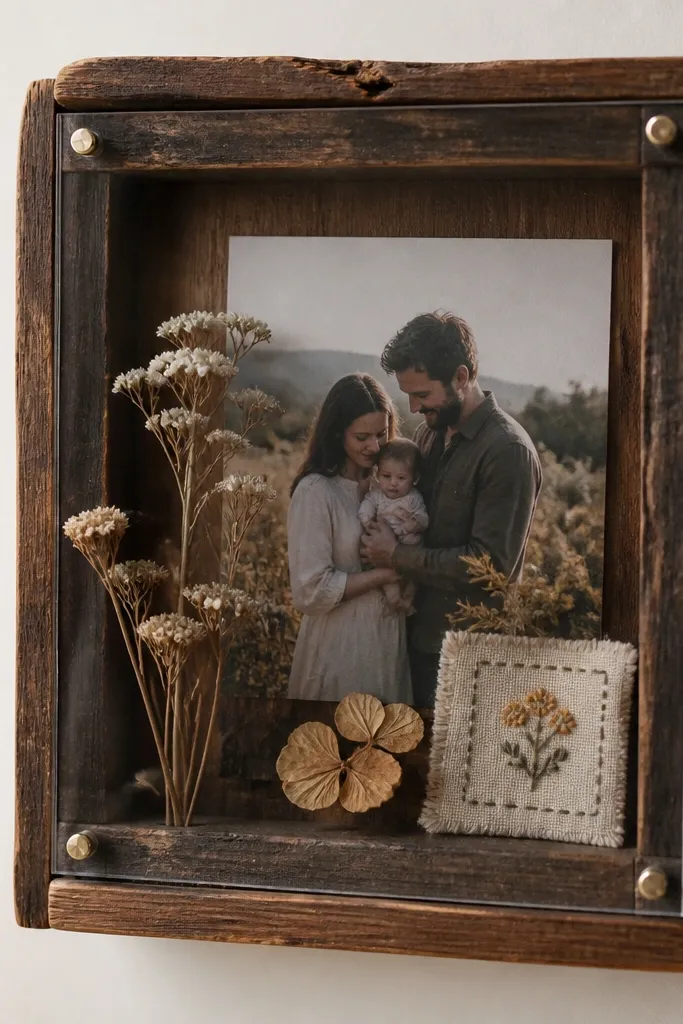
This gives you more than a flat photo - it holds a memory object too. The shadow box depth adds dimension, and the stitched fabric piece brings warmth that plain wood frames can't. The photo stays sharp because it's mounted on the back panel, not glued directly to the front. I like using it near a mantel or entry table because it reads like a little display.
Build a box with 1.5-2 inch depth using scrap boards. Mount the photo to a backing board, then add spacers (foam or wood blocks) so the object sits 1-2 cm in front of the photo. Use acrylic glazing with corner clips so you can open it later. Stain or paint the outside first, then assemble the interior after the finish cures.
Pro tipUse museum gel or removable dots for the keepsake so you can swap it without tearing the photo.
AvoidDon't crowd the front - leave at least 1 cm between objects and the acrylic to avoid scratches.
5. Concrete-look spray frame with black-and-white photos
Concrete texture makes the frame look architectural, even if it started as a cheap thrift frame. Pair it with black-and-white photos and a black mat for a clean, graphic look. The textured finish hides small surface flaws from sanding. This works best in rooms with light walls and simple furniture, because the frame texture becomes the focal point.
Scuff-sand the frames, then spray with a concrete-texture finish in two thin coats. Use matte black mat board and cut the inner window with a straight ruler. Mount the photo with photo corners or thin double-sided tape around the edges. Add a matte clear coat only if the texture spray doesn't already resist fingerprints.
Pro tipTest spray on a scrap frame first - some brands look cooler-toned than you expect.
AvoidSkip glossy top coat - it turns the texture into a shiny mess.
6. Fabric-wrapped frame with a matching pillow fabric mat
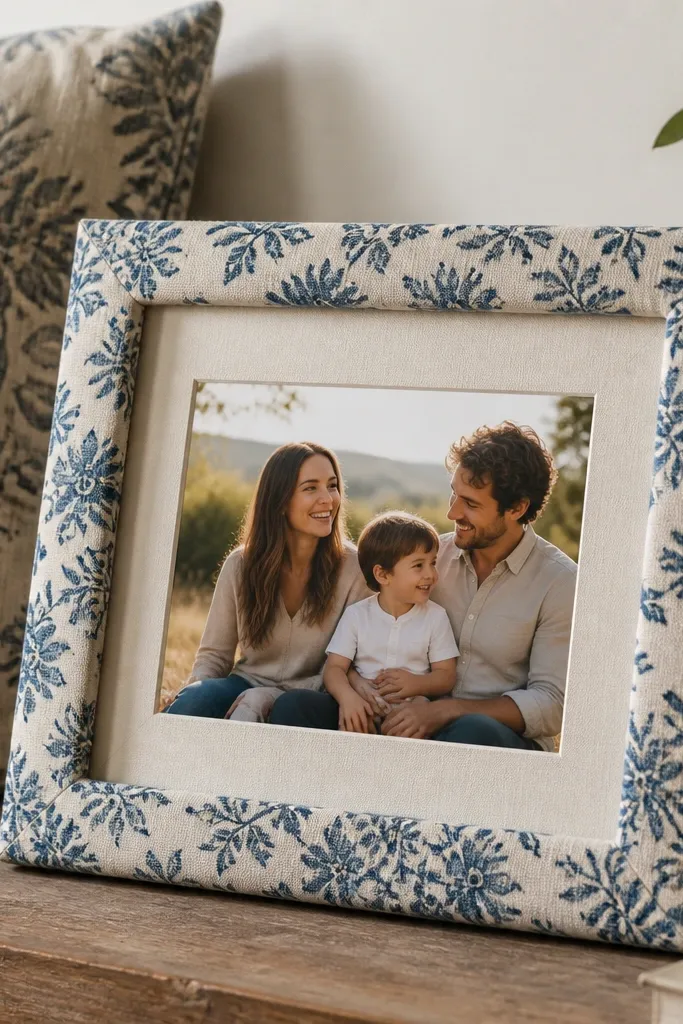
This is the easiest way to make a frame look like it belongs in your home textiles. When the frame fabric matches a pillow or curtain, the whole room feels coordinated without trying. The photo looks softer against the textile, especially if your fabric has small dots or stripes. I've used this in nurseries and living rooms because it hides minor frame imperfections.
Wrap the frame with cotton or linen fabric using spray adhesive on the back surface. Fold corners like you're wrapping a gift, then staple the folds on the back. For the mat, cut foam board and cover the outer edges with the same fabric, leaving the photo window clean. Use acrylic glazing to keep the fabric from warping with heat.
Pro tipUse a light iron on the fabric before wrapping so wrinkles don't telegraph through the finish.
AvoidDon't glue fabric over the inner lip where the acrylic sits - it can create uneven pressure.
7. Vintage brass picture frame with oxidized edges

Oxidized edges add age without turning the whole frame into a tarnished mess. The brass center keeps skin tones warm, while the darker corners pull your eye toward the photo. This works especially well for engagement photos, weddings, and older family portraits. I prefer cream mats to keep the patina from overpowering faces.
Start with a brass-toned frame (or paint a base layer with metallic craft paint). Use a patina solution or a controlled vinegar-salt approach on a small cloth, then dab only the edges and let it sit briefly. Seal lightly with a clear matte protectant so it doesn't transfer to hands. Mount the photo with a backing board and secure with corner tabs.
Pro tipMask the inner glass opening with painter's tape so patina stays on the frame edge only.
AvoidDon't soak the whole frame - blotchy oxidation looks accidental.
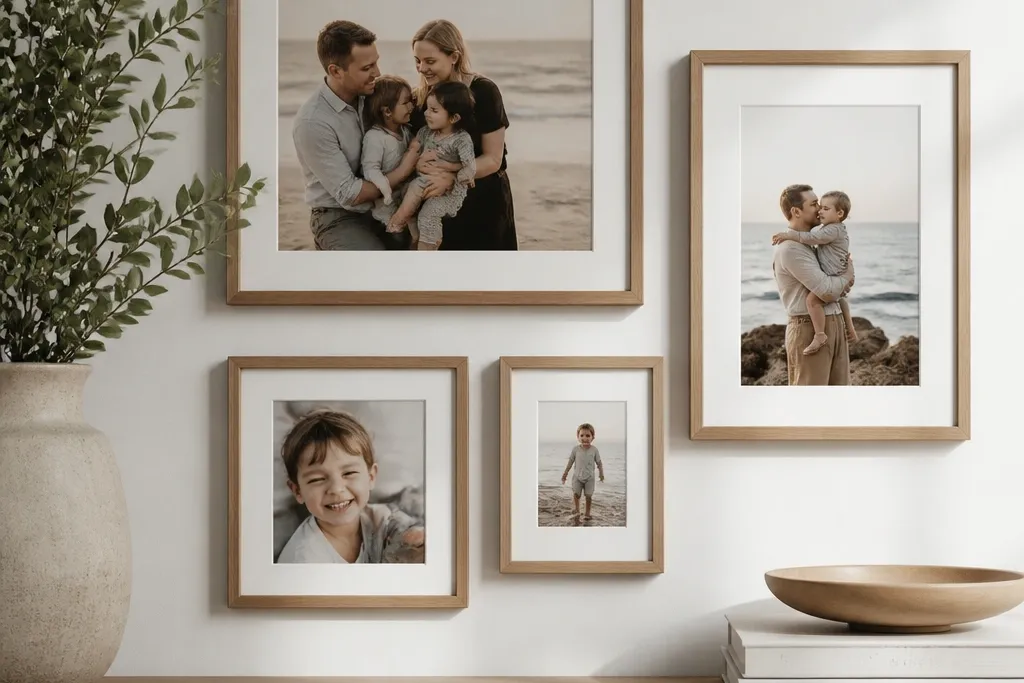
8. Mat board cutout frame with oversized white border
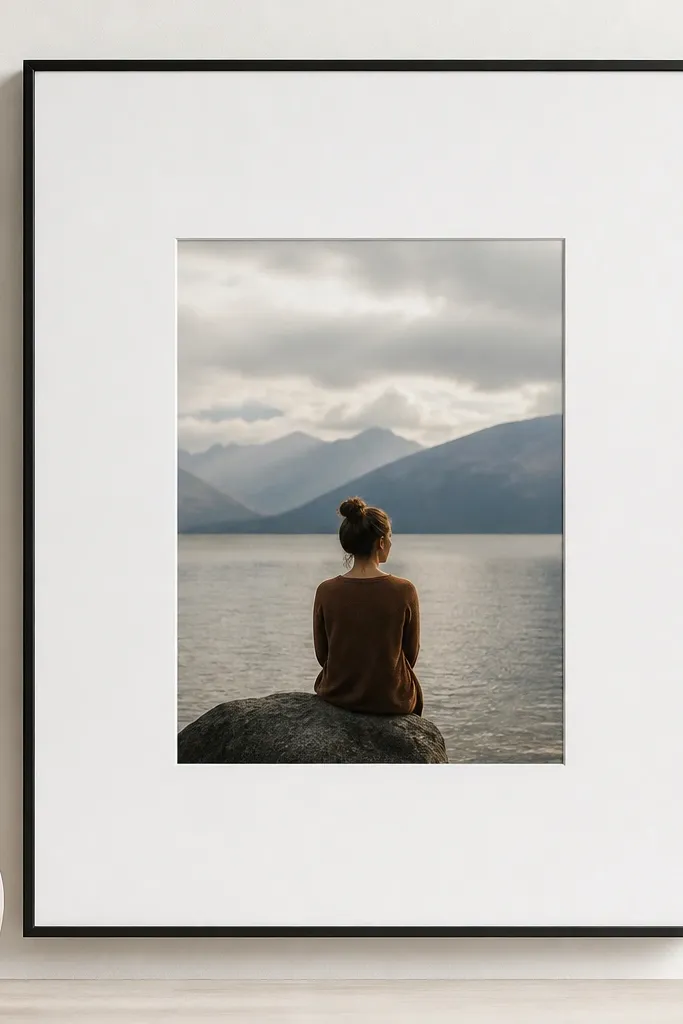
When the border is the star, your photo has room to breathe. Oversized matting makes even a small 4x6 print look like a museum print. The clean white border reduces distractions around the photo and makes faces look sharper. This is a great fix for busy photos with lots of background clutter.
Use a thin black metal frame or a simple frame base. Cut mat board to create a window that fits your photo exactly. For the border, aim for 2.5-3 inches (6-7.5 cm) on all sides. Use acrylic glazing for safety and a clean look.
Pro tipCheck the mat window with a scrap photo first - a 1-2 mm miscut shows as a weird gap.
AvoidSkip crooked mat cuts - they scream "homemade" in a way paint never does.
9. Mason jar shadow display with tiny photo strips
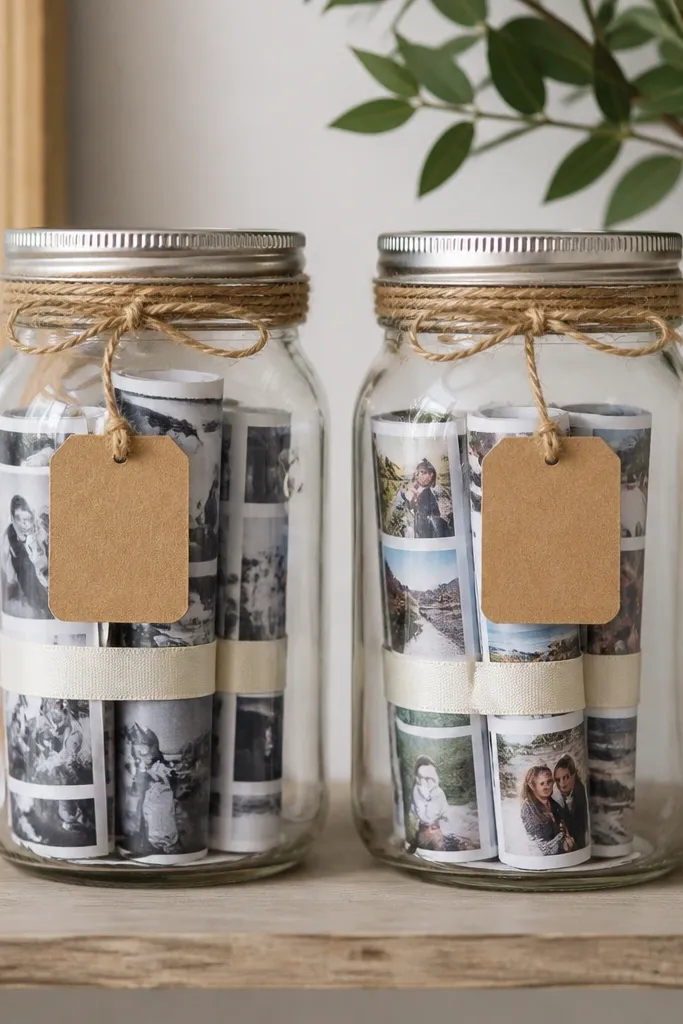
This is for people who don't want traditional frames. Rolled photo strips inside glass look tidy, and the jars protect prints from dust. It creates a rotating "year in photos" vibe without changing wall hardware. I've used this on kitchen shelves because it's easy to read from across the room.
Print photos as narrow strips (like 2x6 or 1.5x4). Roll them gently and place them back-to-back in the jar so the image stays visible. Tie ribbon around the lid and add a label tag with a date or family member name. Keep the jar on a stable surface away from direct sunlight to reduce fading.
Pro tipSpray a light layer of photo-safe matte sealant on prints if they're turning glossy from handling.
AvoidDon't use cheap inkjet prints without protection - glass shelves magnify smudges.
10. Painted pegboard frame with hanging photo clips
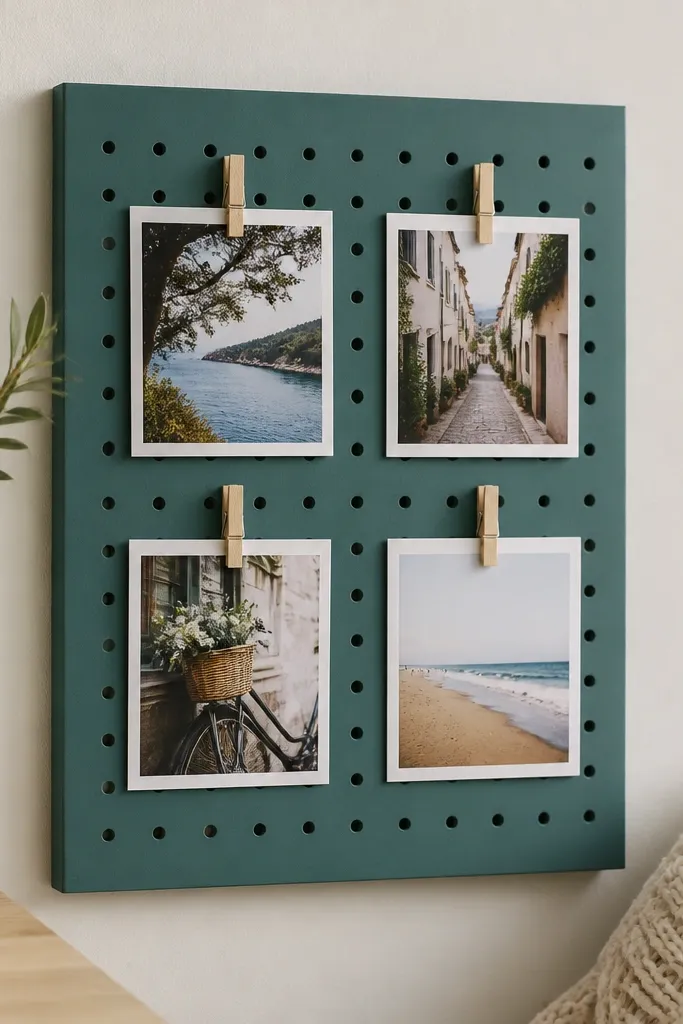
Pegboard makes photo swapping painless and keeps the layout tight. The holes create a grid that looks intentional even when you hang different sizes. Matte teal adds color without needing a full room remodel. This works great in a home office or laundry room where you want photos visible but not precious.
Cut pegboard to your desired size, then paint with matte acrylic paint. Mount it with 2-3 screws and wall anchors. Place photos behind white paper so the background stays consistent. Use mini clothespins or binder clips attached to the photo corners.
Pro tipUse a level and measure the center line before mounting - pegboard looks off when it's even slightly crooked.
AvoidDon't hang glossy photos - reflections from pegboard make faces harder to see.
11. Old record sleeve frame with a vinyl label mat

This is a playful upcycle that still looks clean when you keep the photo presentation simple. The circular mat echoes a record label and gives the photo a clear focal shape. I've made these for music-loving families and they look great in dens or around a home bar. The sleeve print adds personality without needing extra decorations.
Cut a backing board from foam or thick cardboard. Wrap the outer edges with record sleeve material and seal with matte decoupage. For the circular mat, cut a circle window using a compass or a craft circle cutter. Mount the photo inside the circle and seal the edges so the paper doesn't fray.
Pro tipUse a matte sealant on the sleeve print so it doesn't smear when touched.
AvoidSkip busy circles with busy photos - choose either a simple mat or a simple photo background.
12. Washi tape border frame for kids' photos
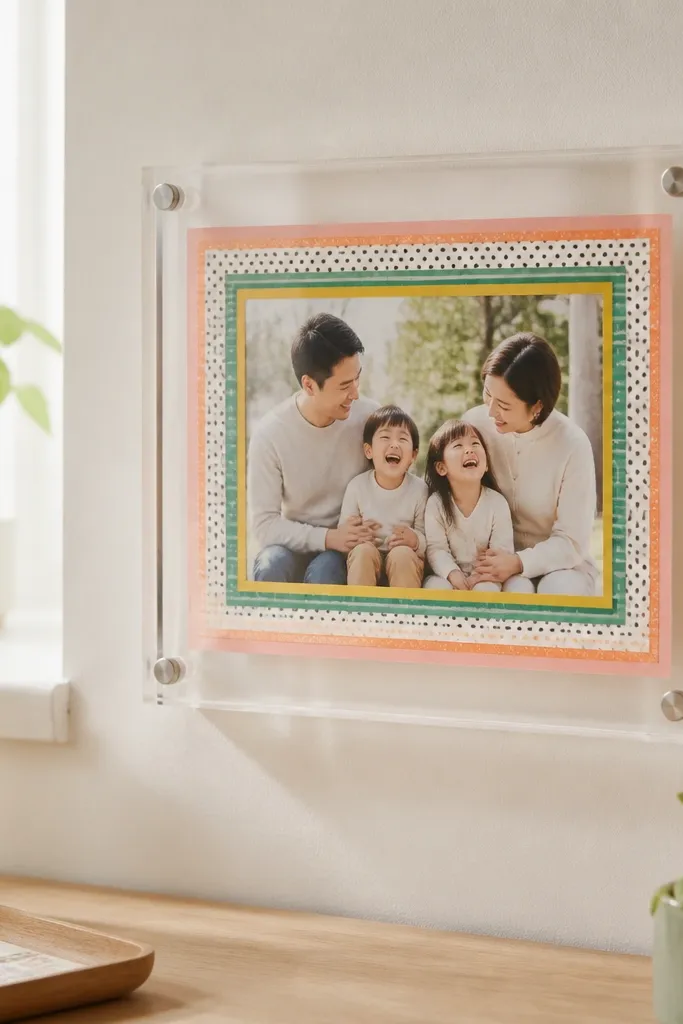
Washi tape turns a plain frame into a kid-friendly display without permanent changes. The tape border defines the photo area and adds color while keeping the rest simple. It looks cheerful for birthdays and school years, and it's easy to replace when the kids change themes. I like using tape stacks in two colors so it doesn't look chaotic.
Use a frame with a removable back so you can place the tape on the mat or directly around the photo opening. Cut tape strips to the exact edges and overlap by 1-2 mm. Seal only if the frame is in a high-touch area; otherwise keep it removable. For photos, use thicker cardstock print paper so the tape holds its edge cleanly.
Pro tipStick the tape to a scrap strip first to remove excess stickiness, then apply to the mat for cleaner edges.
AvoidDon't cover the photo itself with tape - it creates glare and makes the faces look uneven.
13. Wood slice frame with burned family date strip
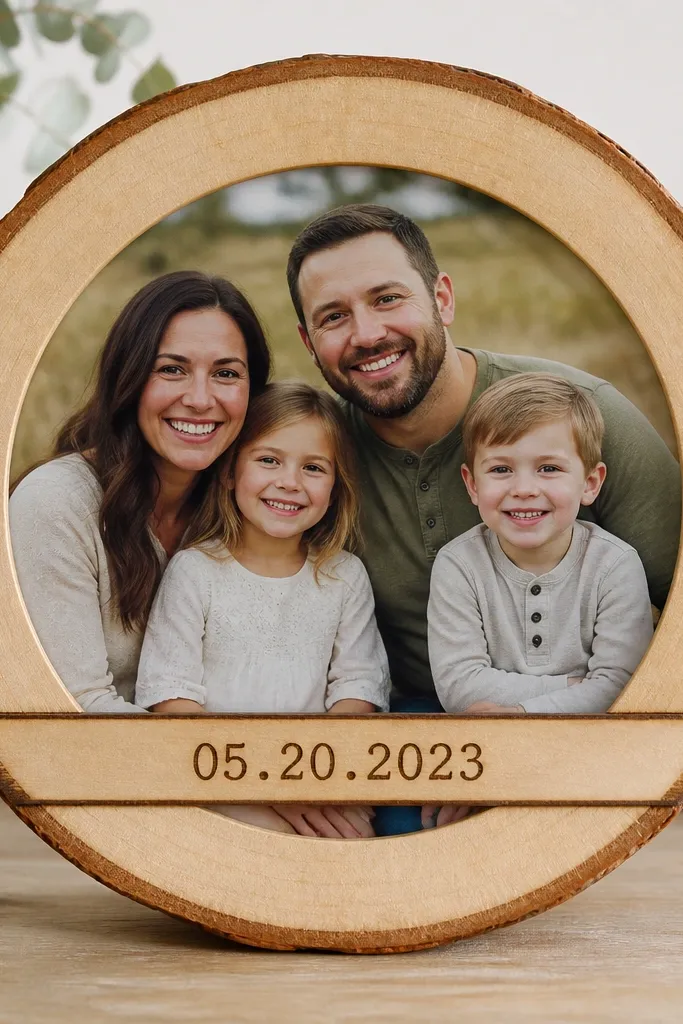
Wood slice frames feel warm because the border is organic and textured. The burned date strip turns the frame into a keepsake, not just decoration. The photo sits in the center under a clear acrylic cover, so it stays protected. This works especially well for outdoor weddings, camping families, and holiday gatherings.
Use a wood slice about 6-10 inches wide. Cut a center opening to fit your photo, then sand the edges smooth. Burn the date on a thin wood strip or directly on the slice where it's flat enough. Finish with clear satin so the grain doesn't look oily, then glue the photo backing behind the opening and add acrylic on top.
Pro tipUse a stencil for the date so the burn lines stay crisp and readable.
AvoidDon't leave rough saw marks around the photo opening - they scratch the acrylic and look messy.
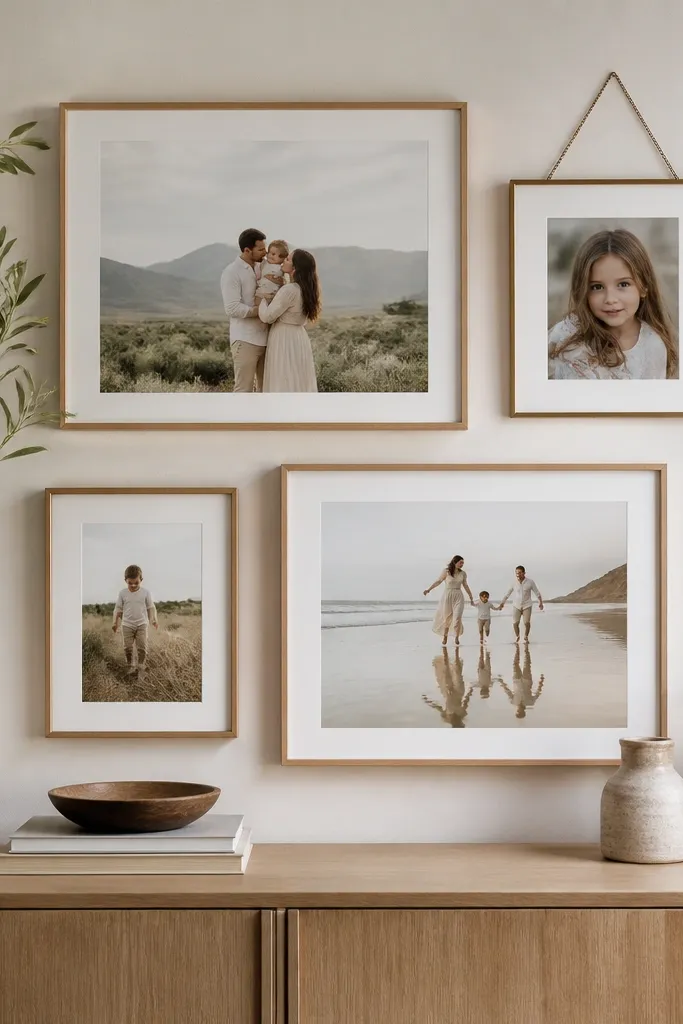
14. Ombre painted frame with matching mat gradient
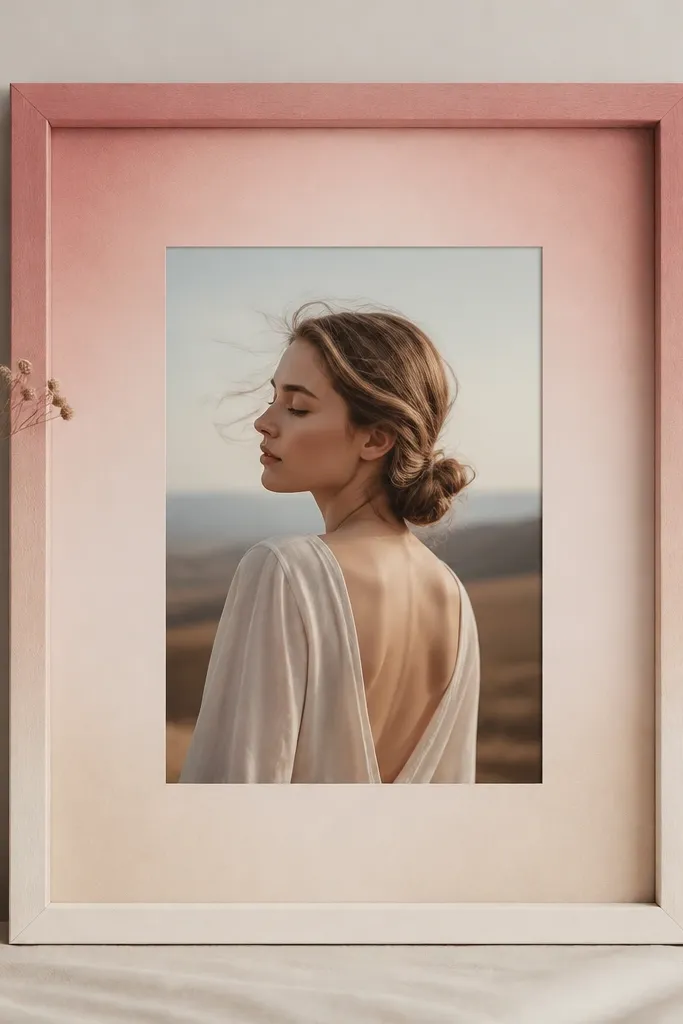
Ombre frames add a gentle, modern look without needing complicated decor. When the mat gradient matches the frame color, faces look cohesive and the photo feels styled rather than pasted in. I used this with family beach photos and it made the sky tones blend naturally. Keep the gradient subtle so it supports the photo instead of competing with it.
Paint the frame with two base colors, then blend with a sponge from one side to the other using light passes. For the mat, use a diluted watercolor or acrylic wash on the back side of the mat board, then seal it. Cut the mat window cleanly and mount the photo with corner tabs. Seal the front with matte clear coat to prevent sticky fingerprints.
Pro tipPractice blending on scrap cardboard first - ombre hides mistakes, but only if you keep the transitions smooth.
AvoidSkip heavy pigment - thick color around the photo opening makes faces look tinted.
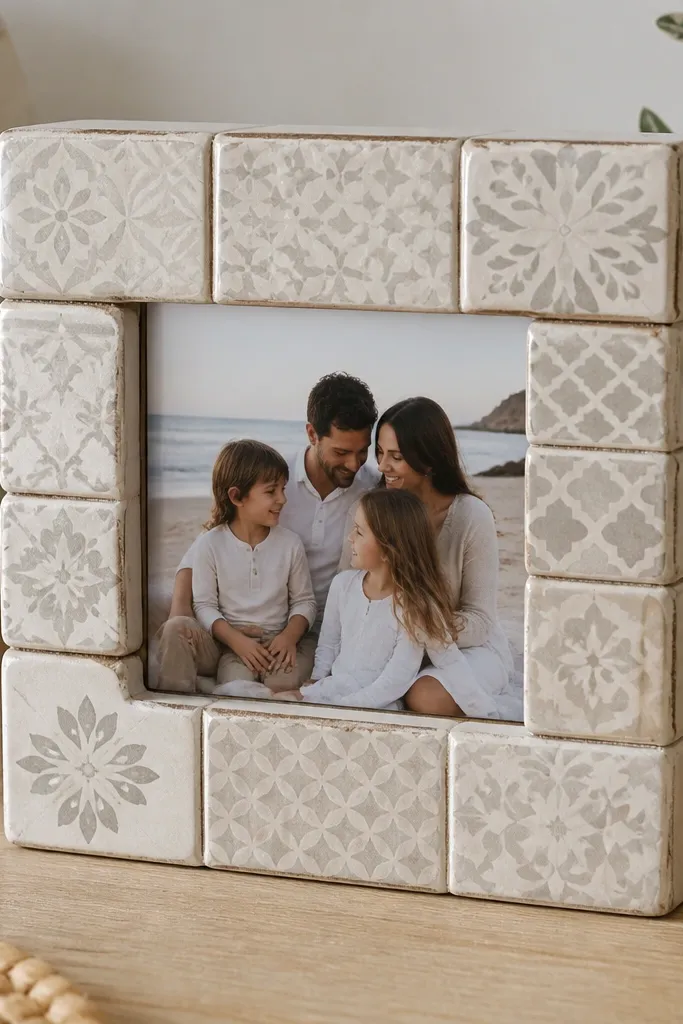
15. Scrap tile photo frame with grout-look edges
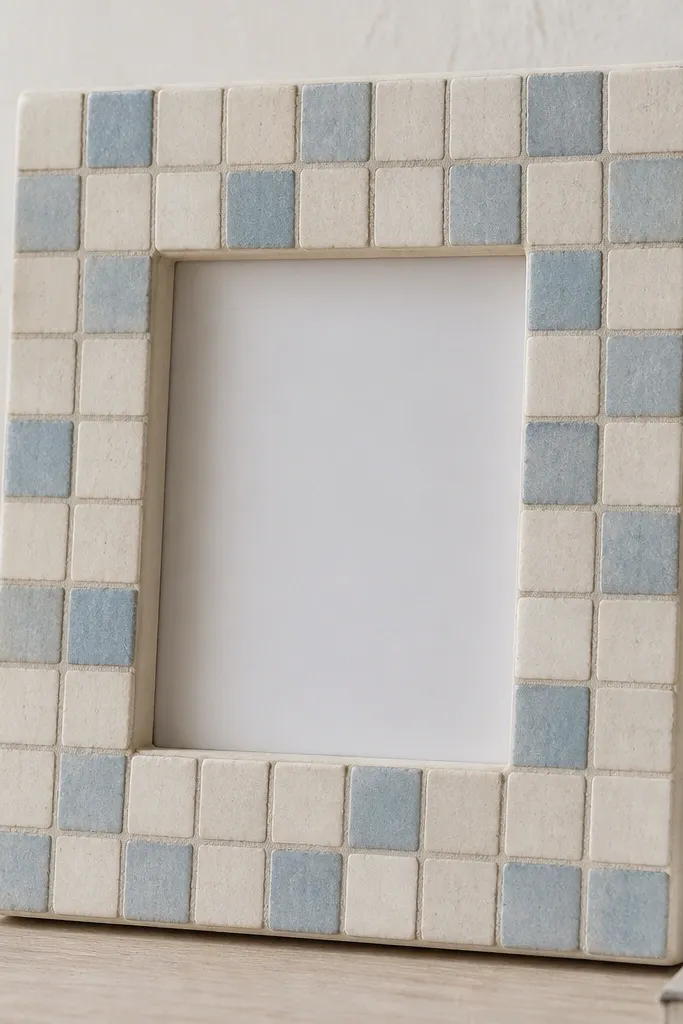
Tile edges make a frame feel sturdy and permanent. The grout lines create structure, so the frame looks designed even if the tile pieces came from different leftover batches. Off-white and pale blue keep it calm and let family photos stay the focus. This works well in kitchens, entryways, and bathrooms where you want something durable.
Use a thick base frame like MDF or wood. Cut the inner opening, then glue tile pieces to the outer border using tile adhesive. Fill grout lines with pre-mixed grout tinted light gray. Seal with grout sealer after curing, then add acrylic glazing inside the opening.
Pro tipPress a thin strip of painter's tape along the edge of the photo opening to keep adhesive from smearing on the center.
AvoidDon't rush grout cleanup - haze sets fast on tile and looks dull around the photo.
16. Pressed leaf frame with clear acrylic and white background
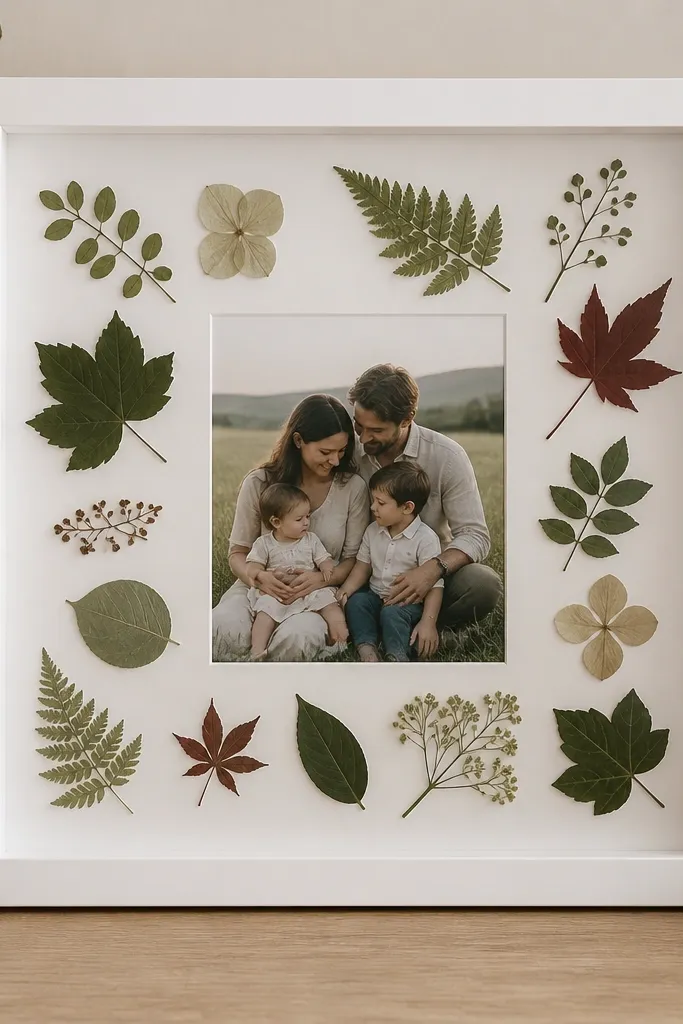
Pressed leaves add texture without turning the frame into clutter. The white background keeps leaves looking crisp and prevents them from blending into the photo. I like this with spring portraits, family hikes, and holiday gatherings because it makes the season feel present. The clear acrylic protects the leaves from dust and keeps the arrangement flat.
Arrange dried leaves around the photo on a backing board, then lightly tack them with archival glue dots. Place acrylic over the top with spacers so the leaves don't get squished. Paint the frame matte white or light wood and seal it before assembly. Use a backing paper to hide any glue spots behind the leaves.
Pro tipPress leaves between book pages for 2-3 weeks for flat results that don't warp under acrylic.
AvoidDon't use fresh leaves - they turn brown and curl under the acrylic.
17. Leather strap photo frame with brass snaps
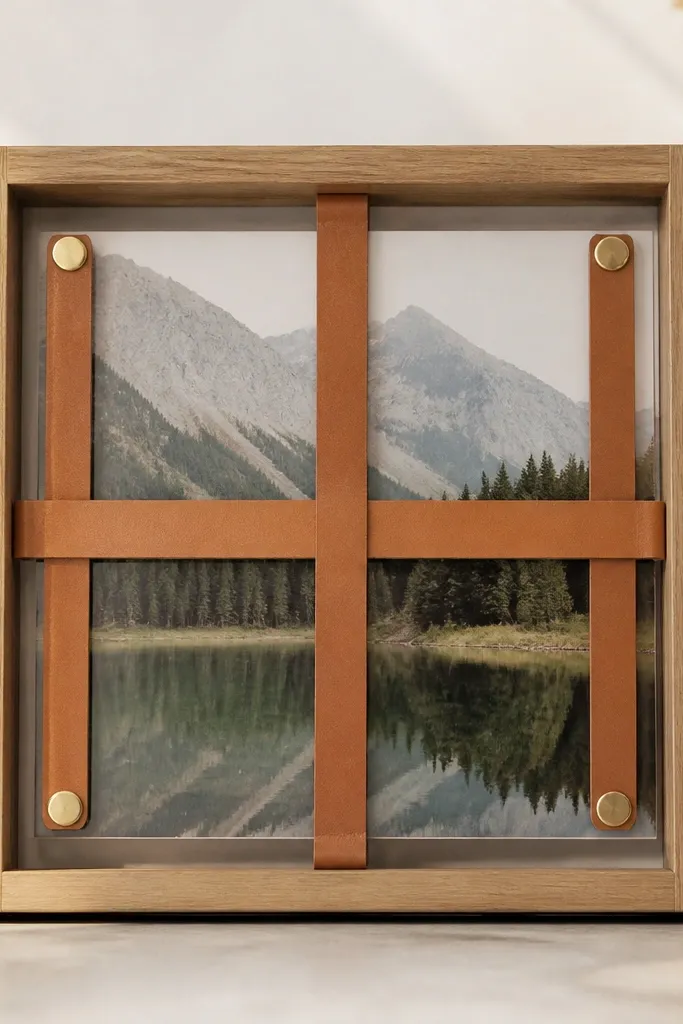
Leather straps add warmth and structure, especially when you keep the rest simple. The brass snaps make it feel functional, like a strap you'd use on a bag. This style looks great for father's day, graduation, and travel photos. The strap also hides small gaps where the acrylic meets the frame.
Use a thin wood or MDF frame. Cut leather strips to cross at the center, then punch holes for snaps. Attach snaps to the frame corners or inner lip, then stretch the leather taut across the photo. Seal the leather with a light conditioner after assembly. Keep the photo size centered so straps don't crop faces.
Pro tipUse a ruler and mark snap placement before punching so both straps sit symmetrical.
AvoidDon't over-stretch leather - it warps and makes the photo look off-center.
18. Map print frame with compass rose mat
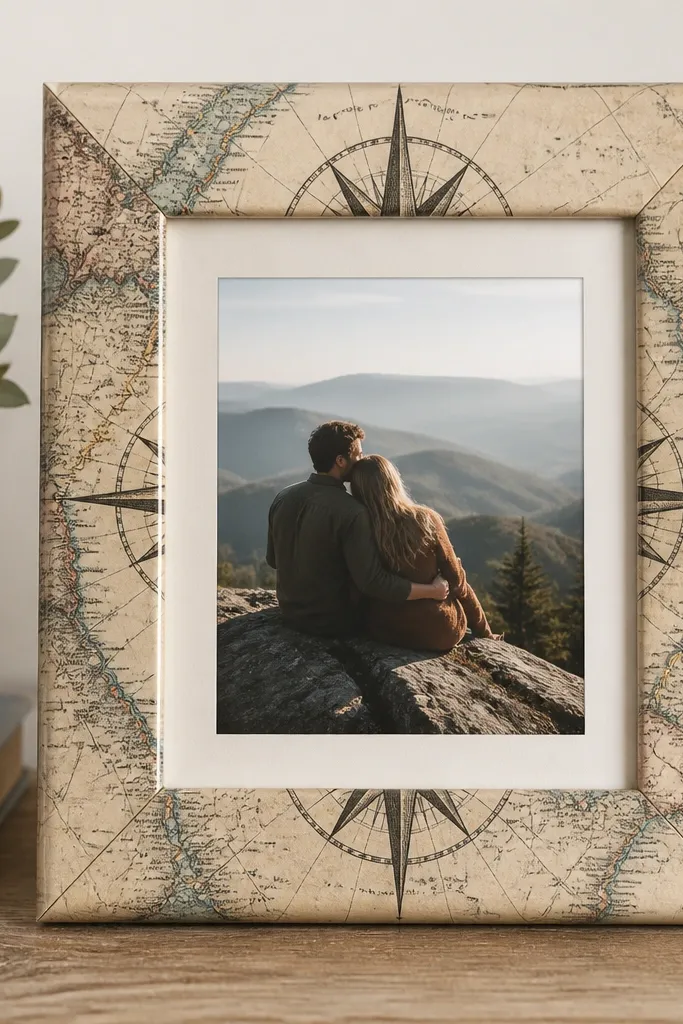
Map print makes travel photos feel tied to a place, even if you don't have a specific destination theme for the whole room. A compass rose mat adds a graphic anchor behind the photo without covering it. I've used this with family road trip pictures and it looks great in entryways where people come and go. Keep the map muted so it doesn't fight with faces.
Wrap the frame with map paper using decoupage medium and seal with satin clear coat. Cut a cream mat with a small compass rose printed or stamped on the back panel behind the photo. Secure photo corners so it stays centered and flat. Use acrylic glazing to protect the paper edges from humidity.
Pro tipChoose maps with lots of light space so the print stays readable but not busy.
AvoidDon't pick bright neon map colors - they tint skin tones and make photos look weird.
19. Oversized frame with mini family portraits strip
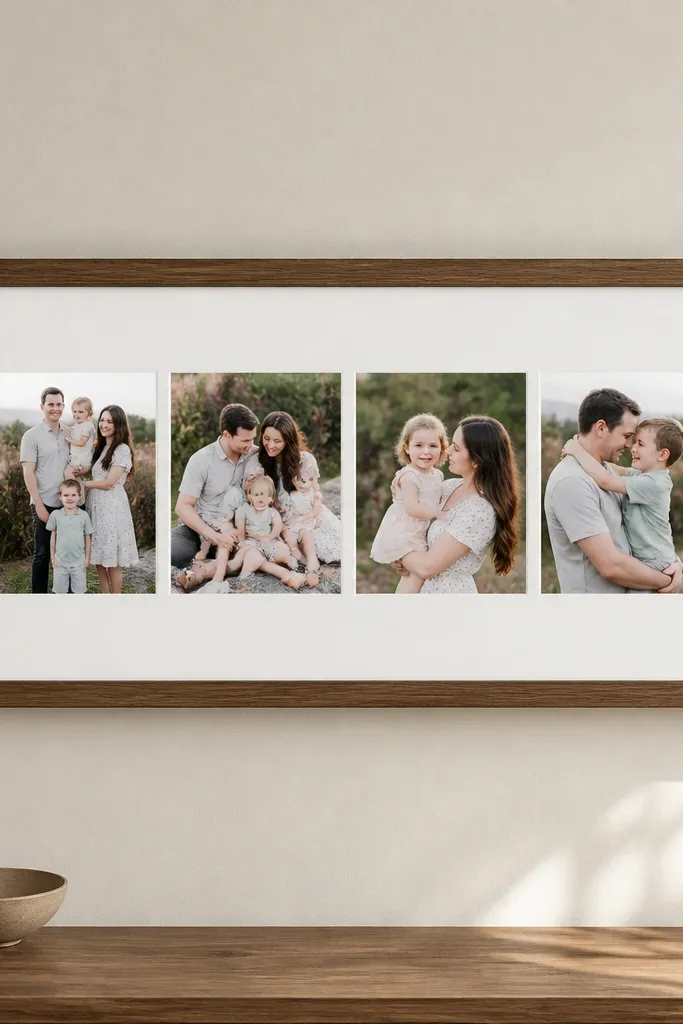
This is a smart option when you want to show more people without making a messy collage. The mini strip keeps everything readable and gives the frame a clean focal line. I like using 2x3 or 2x2.5 mini prints so the strip looks intentional. It also works when you're dealing with mixed photo quality because you can pick the best shots for each slot.
Start with a larger frame, like 11x14 or 16x20. Cut a mat window so the mini strip sits centered, then mount mini photos on a backing board with even spacing (about 6-8 mm). Use a thin black paper strip between photos if you want extra separation. Seal the whole thing under acrylic and secure with the frame's back clips.
Pro tipKeep one consistent border color around each mini photo so the strip reads as one unit.
AvoidDon't use random mini sizes - one uneven mini print makes the whole strip look careless.
20. Chalkboard paint frame with magnetic photo corners
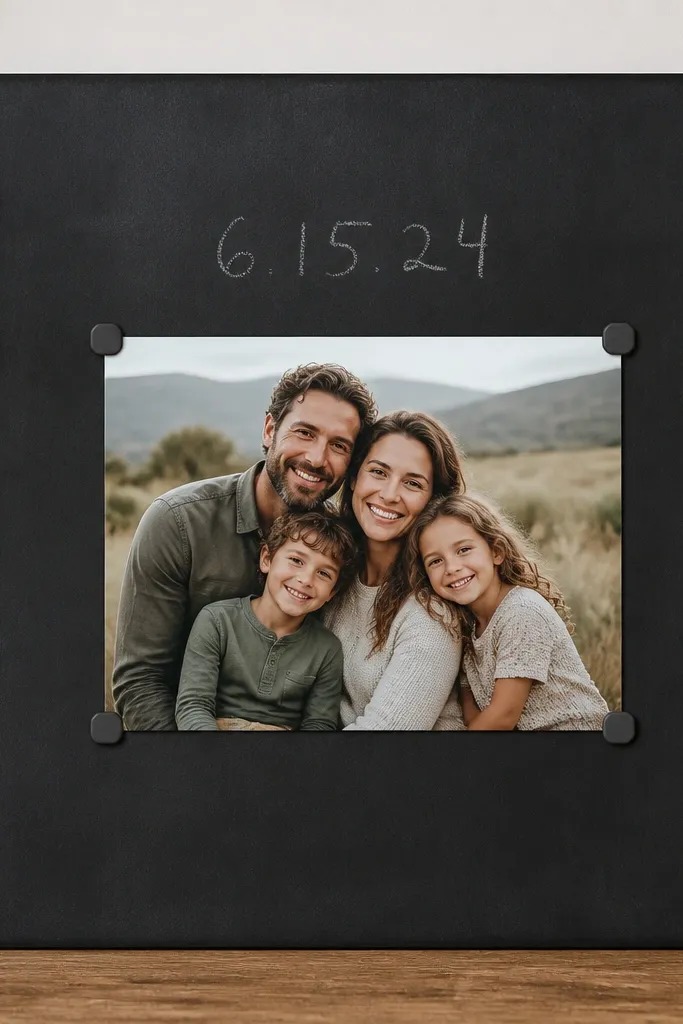
A chalkboard frame lets you write captions that change with seasons. Magnetic corners make swapping photos quick without peeling tape. The matte black background makes skin tones pop, especially with color photos. I use this in kitchens where families update the "today" photo and date.
Prime the frame, then paint with chalkboard paint in two coats. Use small magnets or magnetic photo corners attached to the photo backing corners. Write your date or names with chalk after the frame fully cures. Use acrylic glazing if you want the chalk to stay clean - otherwise chalk dust can smear.
Pro tipUse a soft cloth to brush chalk off lightly before re-writing so the surface stays even.
AvoidDon't use glossy chalk markers - they smear and look shiny against matte paint.
21. IKEA-style shadow box with fabric pockets for photo cards

Fabric pockets keep mini cards from sliding around and make the display feel organized. It's also a great solution for families who print wallet photos regularly. The off-white frame and neutral fabric keep the whole thing calm. I've made these for grandparents because they can swap cards without opening anything fragile.
Use a shadow box frame with at least 1.5 inch depth. Sew or glue fabric pockets onto the inside backing, then insert photo cards sized to fit. Keep pocket openings about 1 cm wider than the photo so cards slide in easily. Mount acrylic with spacers so fabric doesn't press against it.
Pro tipLabel the back of each pocket with a pencil so you remember the order when you reinsert cards.
AvoidSkip loose pocket edges - frayed fabric makes the whole frame look unfinished.
22. Salted-wood stain frame with twine bow hang
A light walnut stain with subtle texture looks warm and old-fashioned without being heavy. Twine bows soften the whole piece and make it feel handmade in a good way. This style works for seasonal family photos because it looks natural in farmhouse and cottage rooms. The key is keeping the photo mat simple so the twine doesn't compete.
Stain the frame with a light walnut, then lightly sand again after drying so the grain shows. Use a cream mat and keep the border around 1 inch. Tie twine loops at both top corners and hang from two hooks or a small picture wire tied to the twine ends. Finish with a satin protective coat so the stain doesn't rub off.
Pro tipTie a small knot on the back so the bow faces the wall, not the ceiling.
AvoidDon't use thick rope - it stretches and makes the frame hang uneven.
23. Mirror-backed frame with photo in the center window
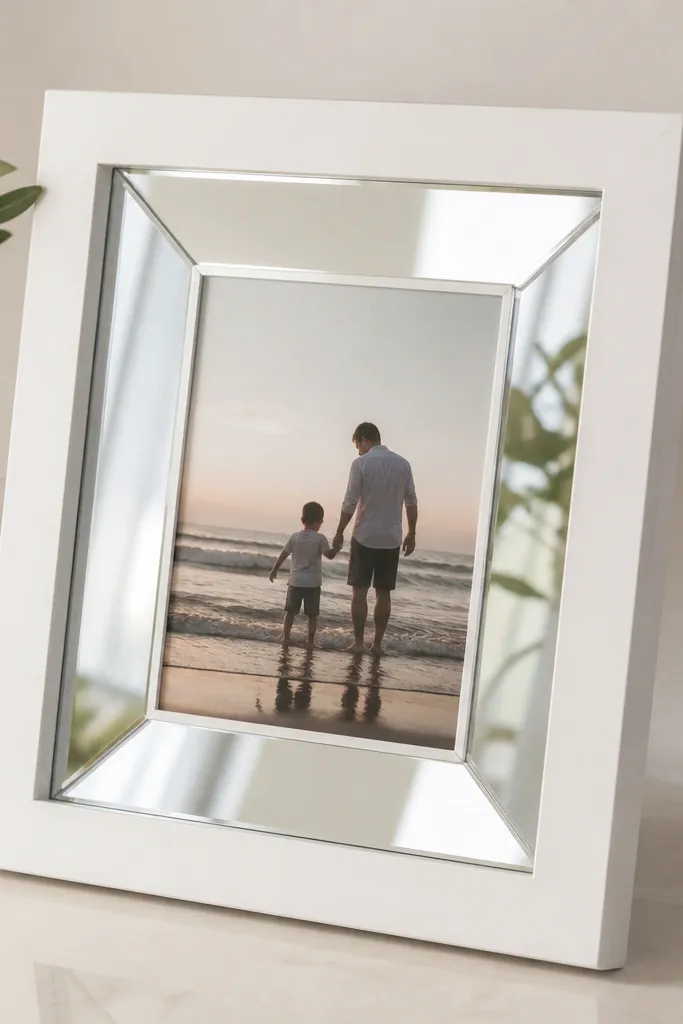
Mirror backing makes the photo look brighter because it bounces light back into the room. It's especially good for darker hallways where frames look dim. The mirror edges create a clean halo, so even simple frames look styled. I use this for family photos with warm lighting - the mirror makes the overall display feel lively.
Cut a mirror sheet to fit the back panel size, leaving space for the photo window. Secure mirror with mirror adhesive or a frame backing that holds it without direct pressure. Use acrylic glazing in front if you want safety. Keep the mat border thin so the mirror ring is visible but not overpowering.
Pro tipWipe the mirror with microfiber and glass cleaner right before sealing the back - dust shows as gray spots.
AvoidAvoid placing mirror-backed frames near direct sun - glare can wash out the photo.
24. Painted clothespin frame for yearly family milestones
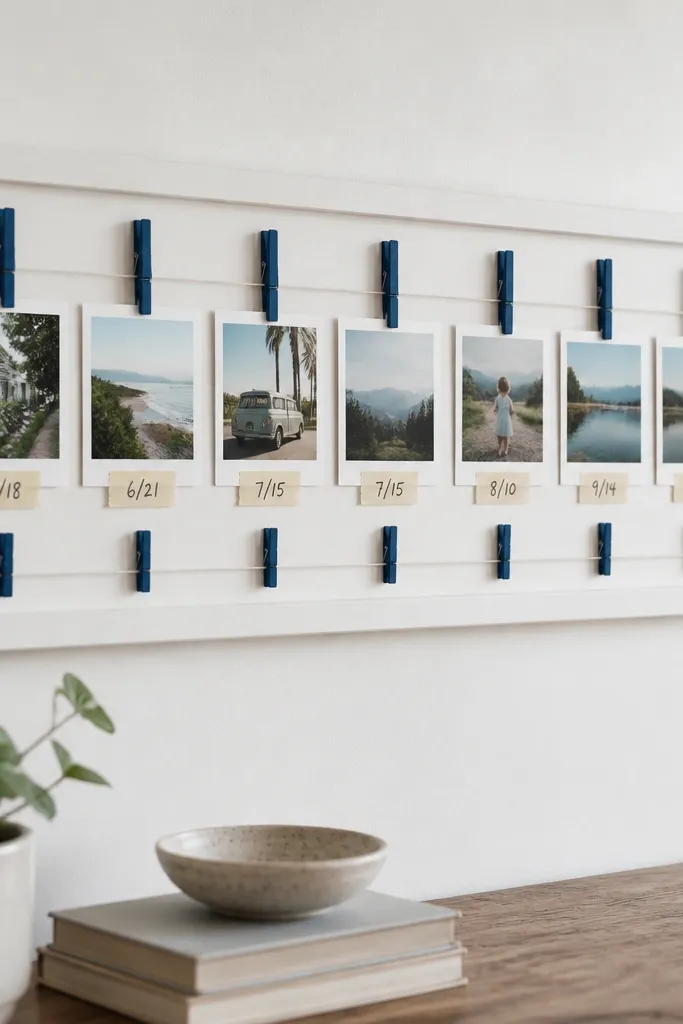
Clothespins make a milestone display feel alive because you can swap prints each year. The handwritten date labels add context without needing fancy printing. I like using a consistent pin color so the board looks cohesive. This works in kitchens, hallways, and near calendars where your family already checks dates.
Use a board about 12-18 inches long, paint matte, and attach small hooks or a peg strip for pin placement. Cut mini prints to the same width and add date labels on paper tape. Clip photos with clothespins mounted at equal spacing. Seal the board with matte clear coat so it wipes clean.
Pro tipPre-label the back of each clothespin position with a tiny dot in pencil so you can rehang quickly later.
AvoidDon't hang photos at random heights - even one off-level pin makes it look like a laundry line.
25. Ceramic tile coaster frame using stacked coasters
Using coasters as a frame border gives you a built-in mosaic look without tile cutting. The ceramic protects the edges, and the patterns make the border interesting even if your photo is simple. I like this for small photos like 5x5 or 4x4 where a regular frame feels plain. The coaster texture also hides minor alignment issues.
Stack four coasters and secure them with a base plate underneath using strong adhesive or a thin wood base. Cut a center opening for your photo and insert acrylic glazing. Use a light mat board behind the photo to create consistent spacing. Seal the coaster surfaces if they're glossy and reflect too much.
Pro tipUse spacers between coasters so the border stays square and the photo window doesn't warp.
AvoidDon't use coasters with heavy glossy glaze - reflections turn the border into a distraction.


