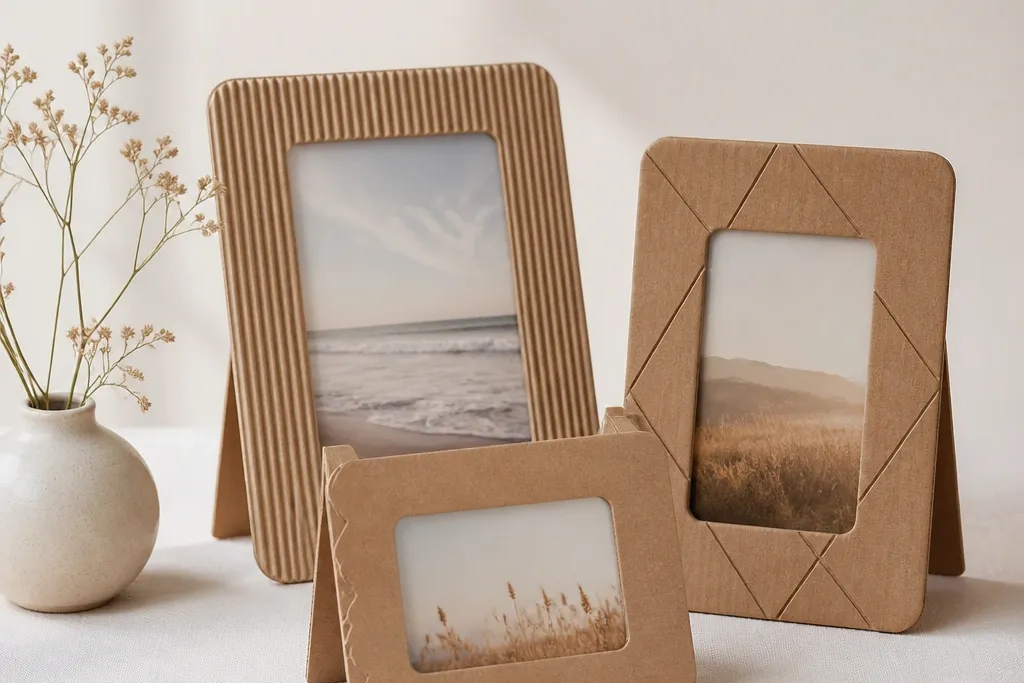
1. Painted corrugated border frame with acetate window
This one looks clean because the front stays smooth where it matters, but the border still has texture. I paint the outer frame first, then cut the window so the edges get a crisp look. The acetate window keeps the photo flat and prevents smudges from fingerprints. Matte off-white or warm gray makes almost any photo feel coordinated.
Cut a front rectangle from corrugated cardboard and remove the center window for the photo area. Cut a back rectangle 1/2 inch larger on all sides, then glue it behind the acetate pocket. For the photo pocket, tape acetate at the back corners so it lies flat without wrinkles. Finish with two coats of matte acrylic paint, letting each coat dry 20 minutes.
Pro tipIf your acetate shows tape shine, paint over the back tape spots with the same frame color.
AvoidDon't glue acetate directly across the window edge or it will bow and create a wavy photo.
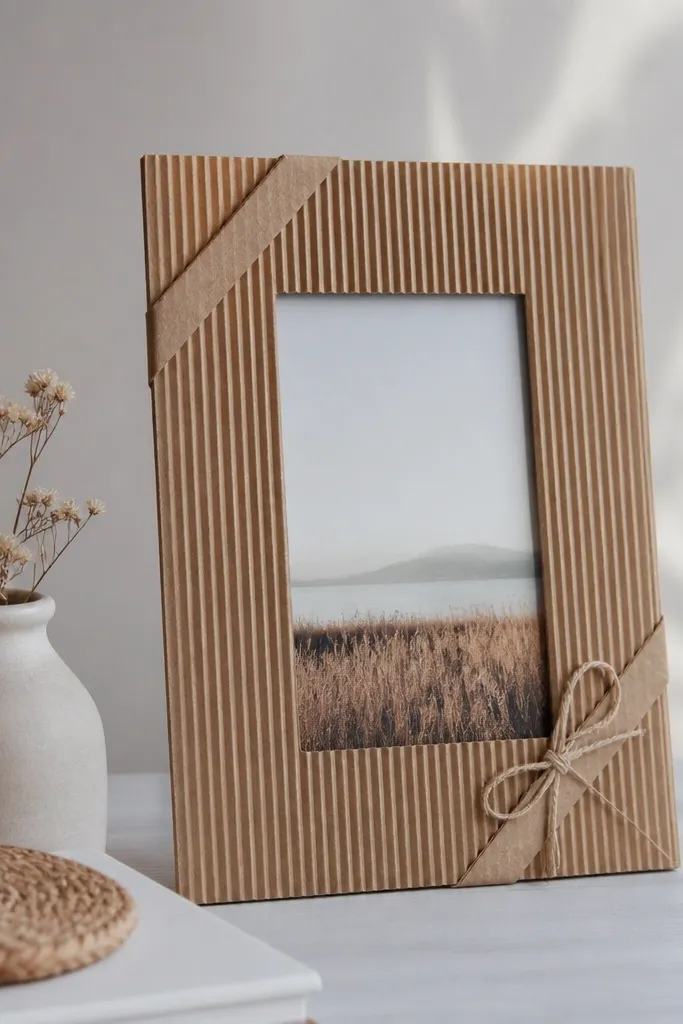
2. Twine-wrapped mini frame with corner knots
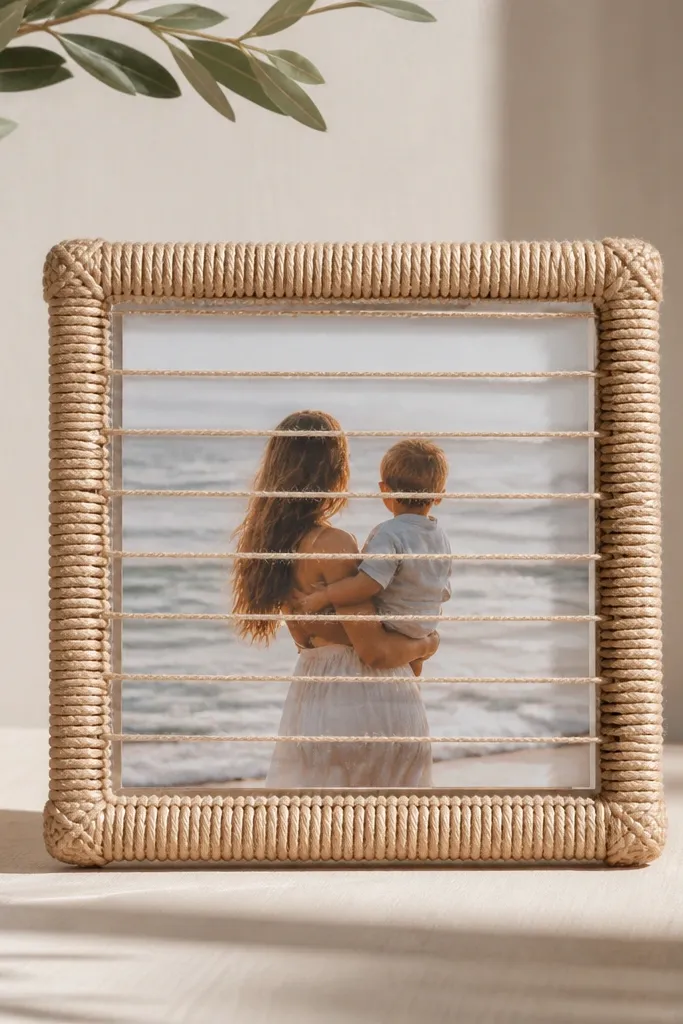
Twine gives that cozy, handmade look without needing fancy tools. The even wrap lines create a pattern your brain reads as "intentional design." I use a square frame because twine spacing looks best when the wrap lines meet neatly at corners. It also hides minor cardboard dents because the rope sits on top.
Build a square front with a window and a back pocket. Lightly coat the front with a thin layer of white glue mixed with a teaspoon of water so the twine sticks without lumps. Wrap twine horizontally first, then vertically, and tie small knots at each corner to cover where lines might shift. Seal the twine with a thin matte Mod Podge layer once everything is dry.
Pro tipKeep tension consistent - pull the twine snug but not so tight that it warps the front rectangle.
AvoidSkip thick glue blobs under the twine or they dry shiny and visible.
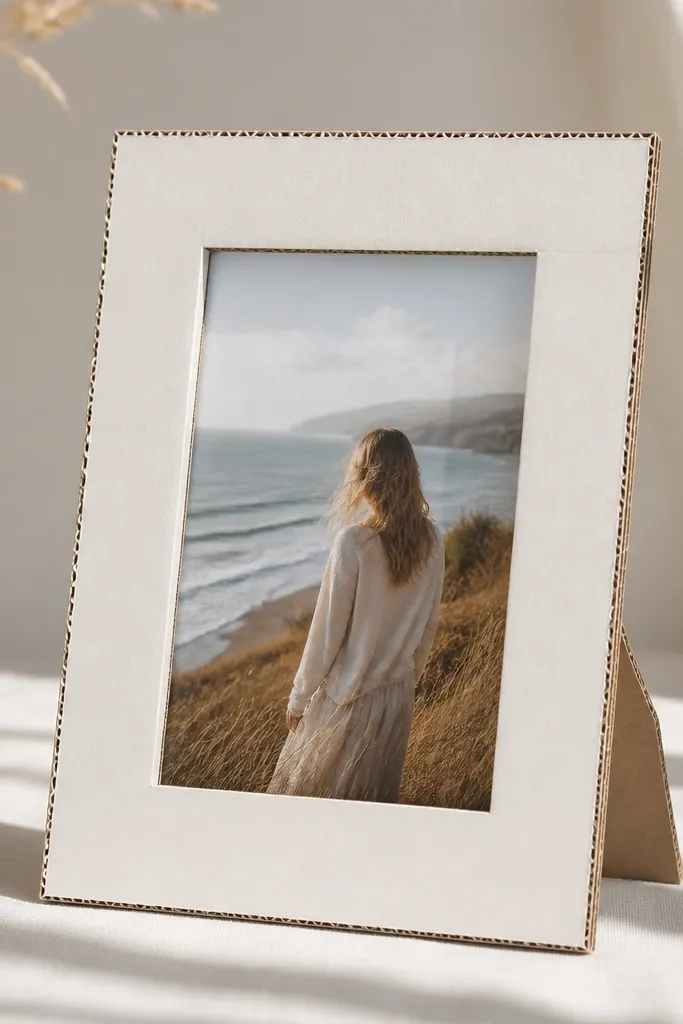
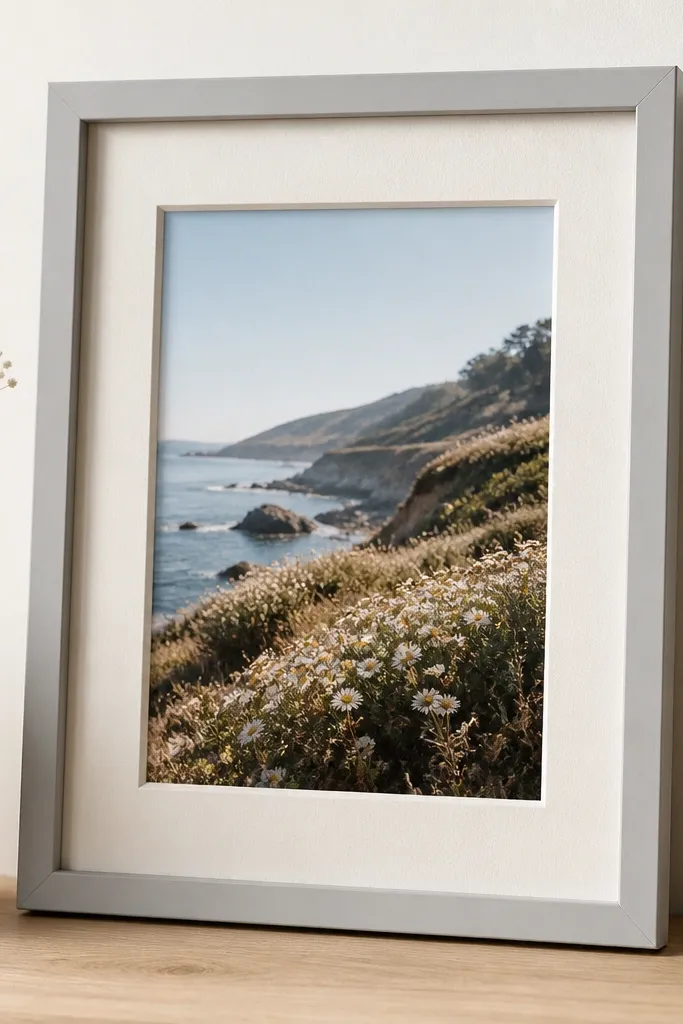
3. Scrapbook paper mat frame with faux "gallery" border

This is the easiest way to make cardboard look like a real store frame. The mat border gives depth, and scrapbook paper hides the cardboard color immediately. I like muted tones like sage, dusty rose, and soft navy because they don't overpower the photo. The result reads as "gallery print" instead of craft project.
Cut your front window and then cut a second mat layer from thin cardboard or foam sheet. The mat layer should be about 1/4 inch smaller than the window opening so it creates a clean inner border. Glue the scrapbook paper over the mat layer and trim edges with a sharp craft knife. Add acetate behind the photo so it stays flat.
Pro tipUse a paper with small patterns only - big prints compete with the photo.
AvoidDon't use glossy paper; it catches light and makes the frame look cheap.
4. Pressed leaf and marker outline frame
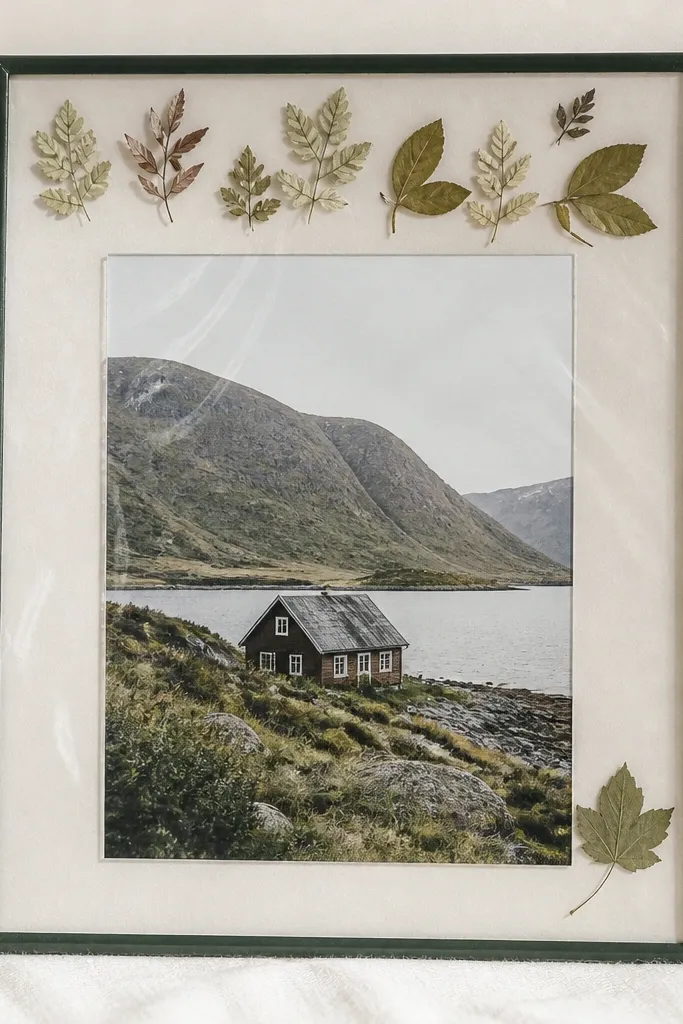
This one looks surprisingly high-end because the leaf shapes add realism and the marker outline keeps everything crisp. I press leaves between book pages for 5-7 days, then seal them so they don't crumble. The outline acts like a picture frame mat, making the window edge feel intentional. Best photos are black-and-white or nature shots.
Cut a front window and paint or color the outer frame in a deep green or charcoal. Glue pressed leaves along the top and one side using a tiny amount of white glue. After it dries, trace the window edge with a fine-tip paint marker for a steady border line. Seal the whole front with matte clear spray once everything is dry.
Pro tipChoose leaves with thin stems so they lie flat and don't lift at the edges.
AvoidDon't skip sealing the leaves or they fade and shed dust over time.
5. Neon tape frame with a bold window cut
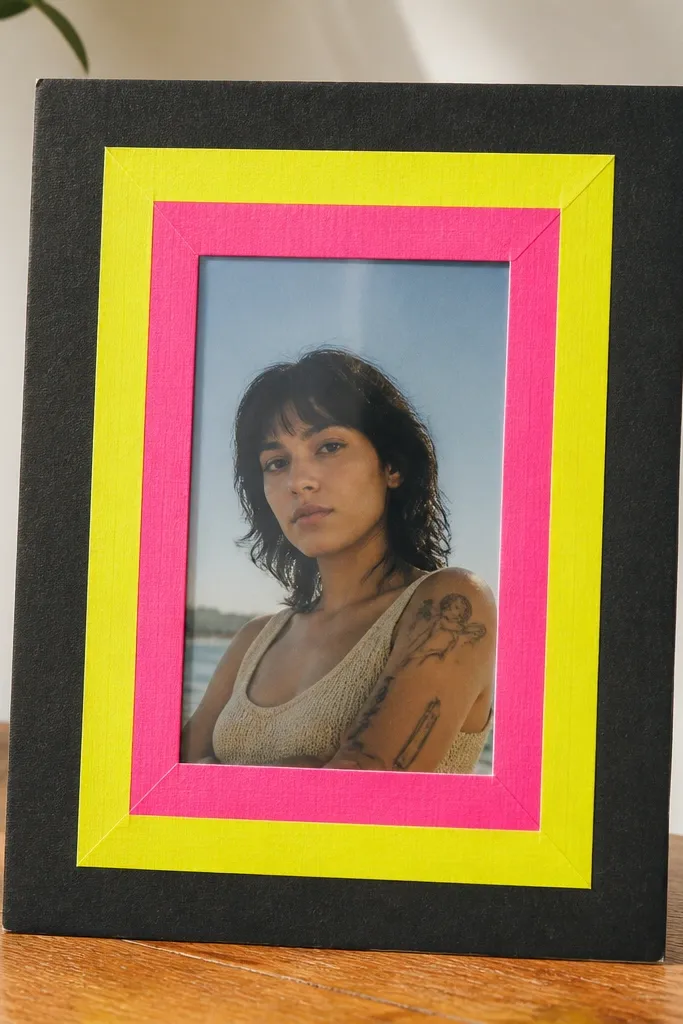
Neon tape makes cardboard look modern fast. The secret is contrast: paint the base black, then use neon tape for a thick border so the cardboard never shows through. I cut the window big and keep the border around 1 inch wide. Photos with white backgrounds pop hard against black.
Paint the front and back in matte black. Cut the window opening, then line the border edges with double strips of neon tape - one on the outside edge and one on the inner edge for thickness. Add a clear plastic sleeve on the back so the photo slides in and stays flat. Finish by folding a cardboard stand tab on the back.
Pro tipPress the tape down with a credit card edge so it seals without bubbles.
AvoidAvoid using neon tape on unpainted brown cardboard; it dulls the color and shows through.
6. Magazine strip chevron frame
Chevron hides seams because the pattern breaks up straight lines. I've done this with old fashion magazines and it gives a playful "upcycled wallpaper" look. The frame reads best when the chevron colors stay within one family, like warm oranges and browns or cool blues and purples. It's also easy to repair if one strip lifts.
Cut strips about 1/2 inch wide from magazine pages, then arrange them in a chevron pattern on the front. Use a brush to spread a thin layer of glue over the cardboard, lay strips down, then coat the whole front with a clear matte finish. Trim any overhang around the window opening with a craft knife after the finish dries.
Pro tipPick strips with similar gloss levels so the surface dries evenly.
AvoidDon't stack too many layers at the window edge or the photo pocket won't sit flat.
7. Burlap and button corner frame
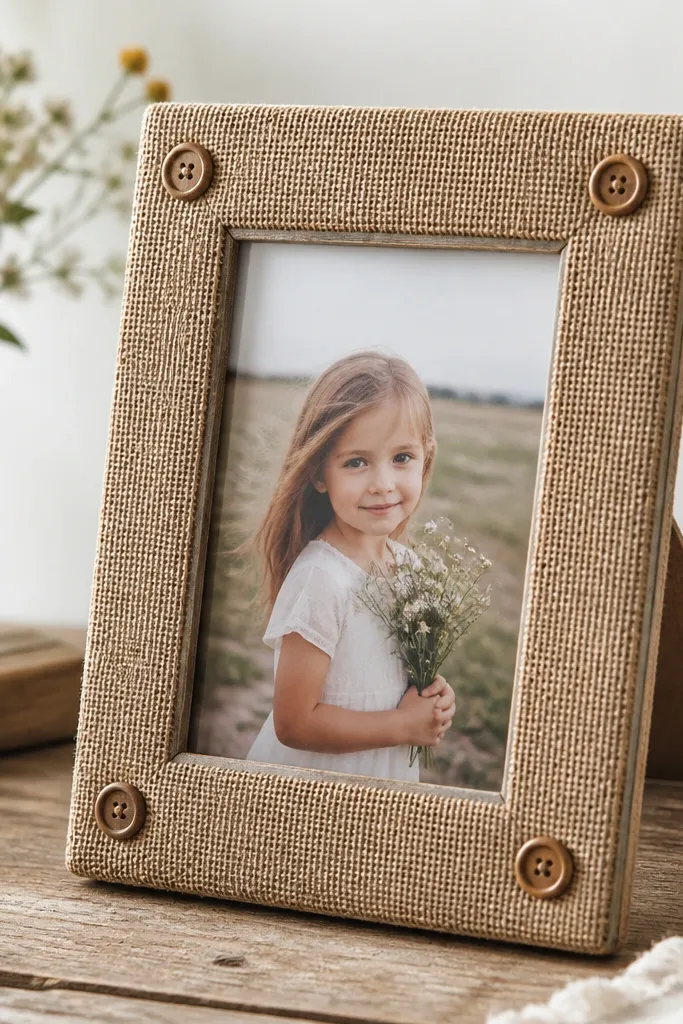
Burlap adds texture without needing paint. The corners with buttons look like hardware on a real frame, and they also help keep the burlap edges from fraying. I use a neutral burlap and add buttons in cream, tan, or dark brown so it doesn't fight your photo. This is great for family portraits and farmhouse-style rooms.
Cut your front frame and paint a thin layer of glue over it before placing burlap. Wrap burlap around the outer border edges and glue the back side down. Add a small button at each corner using hot glue, then seal the burlap with matte Mod Podge so it doesn't shed. Build a back pocket for the photo with acetate.
Pro tipTrim burlap edges with pinking shears for a cleaner fray pattern.
AvoidSkip glossy glue - it soaks into burlap and leaves shiny patches.
8. Foam sheet "shadow box" frame with layered photo
Depth makes cardboard look expensive. By using a foam sheet spacer behind the photo, you get that "shadow box" feel even with simple materials. I like this for photos with small subjects like a bouquet or a pet portrait because the extra layer gives the image separation. The front window edge still looks neat because the foam layer defines it.
Cut a front frame window and glue a foam sheet rectangle slightly smaller than the window opening. Place the photo on the foam spacer and cover it with acetate or a clear plastic sheet. Attach the back piece over the edges, leaving enough clearance so the photo doesn't rub the front. Paint or cover the outer frame after the foam is in place so you can hide any glue lines.
Pro tipUse 2mm foam sheet for a subtle shadow; thicker foam makes the photo look floating in a cheap way.
AvoidDon't use thick cardboard spacers - they warp and make the window edges uneven.
9. Color-block frame using painter's tape stripes
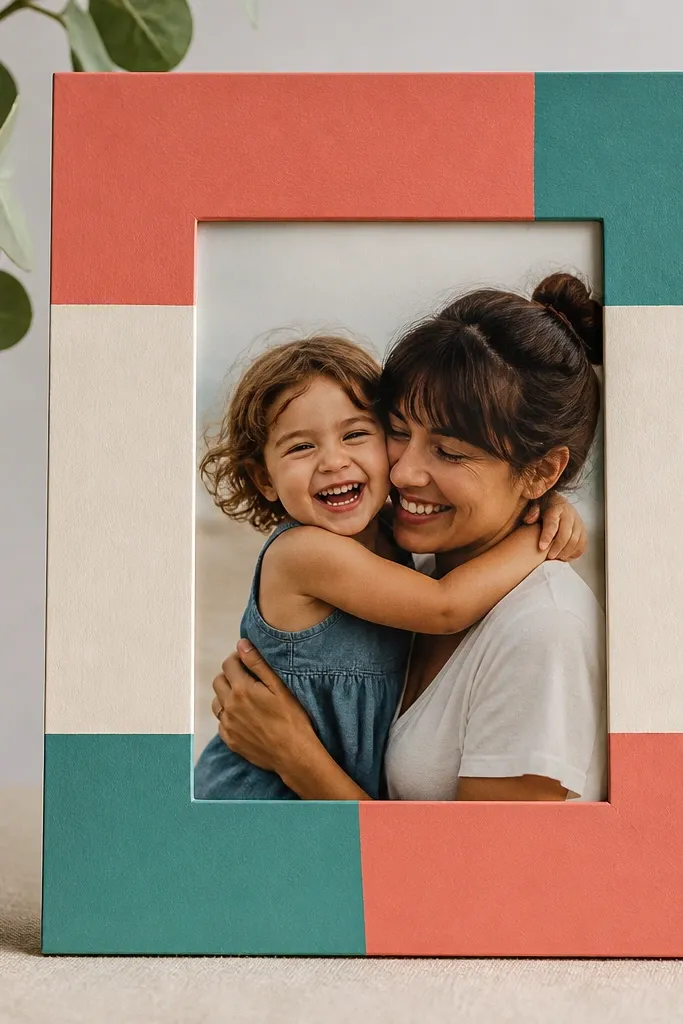
Painter's tape is my go-to for crisp color blocks because cardboard edges are rarely perfect. The tape gives you straight lines without a ruler-fight. I choose two accent colors plus a neutral so the photo remains the star. This looks great in kids' rooms too because the colors read fun and clean.
Paint the outer frame cream first and let it dry fully. Apply painter's tape in stripe bands around the window border, then paint over with teal and coral. Remove tape while the paint is still slightly tacky so edges stay sharp. Add acetate on the back and use tape tabs to keep the photo from sliding.
Pro tipPress tape down firmly along the cardboard seam so paint doesn't bleed under.
AvoidDon't use cheap masking tape - it can tear and pull paint off the first coat.
10. Washed watercolor frame with salt texture

Salt texture makes a simple cardboard frame look like handmade paper. I use watercolor or diluted acrylic on the outer border only, keeping the window area clean. The speckles add depth without cluttering the photo. It's perfect for travel shots, landscapes, and portraits with warm tones.
Paint a wet watercolor wash on the outer border - not the window. While it's still damp, sprinkle coarse salt (kosher salt works) and let it dry completely. Brush off the salt crystals gently, then seal with matte clear spray. Assemble the photo pocket with acetate and a back board.
Pro tipUse a light hand around the window so salt doesn't creep into the opening edge.
AvoidAvoid heavy water - warped cardboard ruins the window alignment.
11. Kraft paper wrapped frame with stitched look
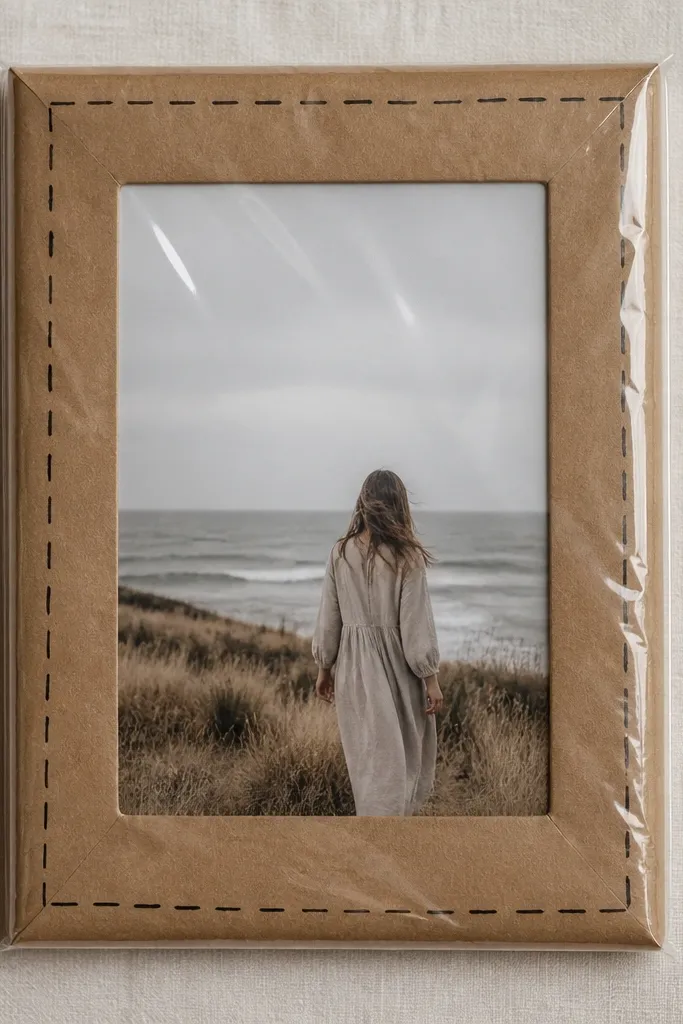
Kraft paper makes cardboard feel intentional, like it belongs in a craft shop. The stitched look adds a border detail that reads like fabric trim even though it's marker. I use black marker for high contrast or dark brown for softer contrast. This style works with vintage photos and simple black-and-white prints.
Cover the outer frame with kraft paper using glue stick or thin Mod Podge. Smooth it so there are no big wrinkles. Draw small stitch dots around the border using a fine-liner, then add two or three "thread" lines to connect dots. Seal with matte Mod Podge so the marker doesn't smear. Mount the photo behind acetate with a back pocket.
Pro tipPractice your stitch spacing on scrap cardboard first; it keeps the border even.
AvoidDon't skip sealing the marker or it will smear when you handle the frame.
12. Washed denim pocket frame
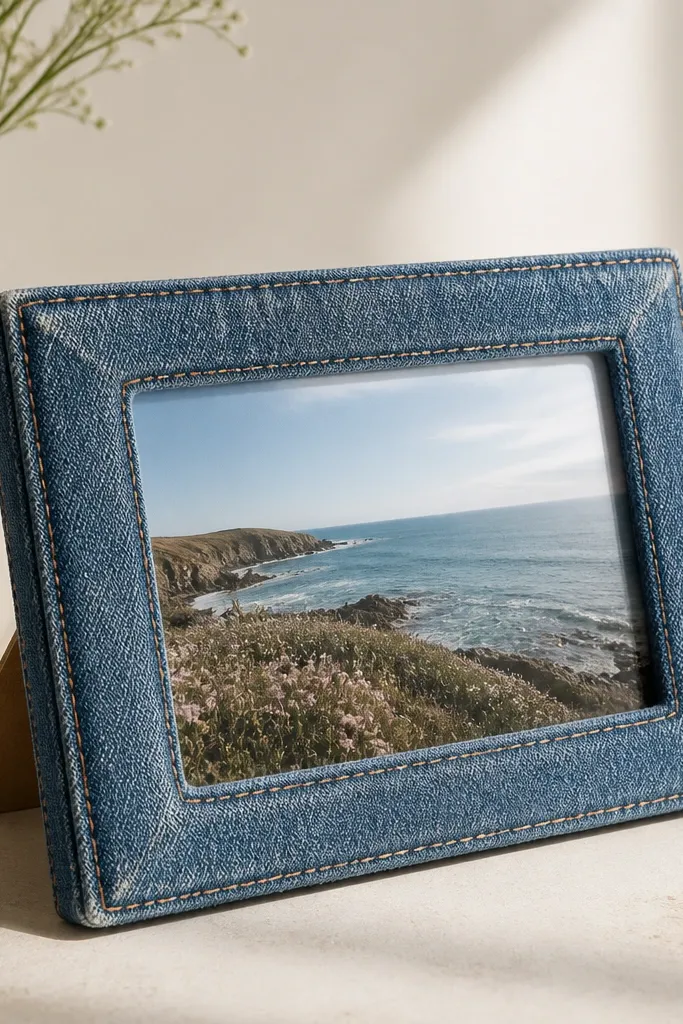
Denim reads "real textile," so cardboard disappears under fabric. I like this for family photos because the blue tones match everyday outfits and walls. The pocket-like border around the photo gives it a soft, casual look. Denim also hides small cardboard edges because the fabric wraps around them.
Cut a front frame and window. Wrap denim around the outer border, glue it on the back side, and trim the front edge clean. Add a clear plastic sheet over the photo opening - acetate is easiest. For the back, use thicker cardboard so the frame stands without sagging. Finish with a thin coat of fabric-safe matte sealer if you want less fray.
Pro tipUse fabric glue for the border so you don't soak cardboard and warp it.
AvoidDon't use stiff craft foam behind denim; it makes the frame bow.
13. 3D paper fan border frame
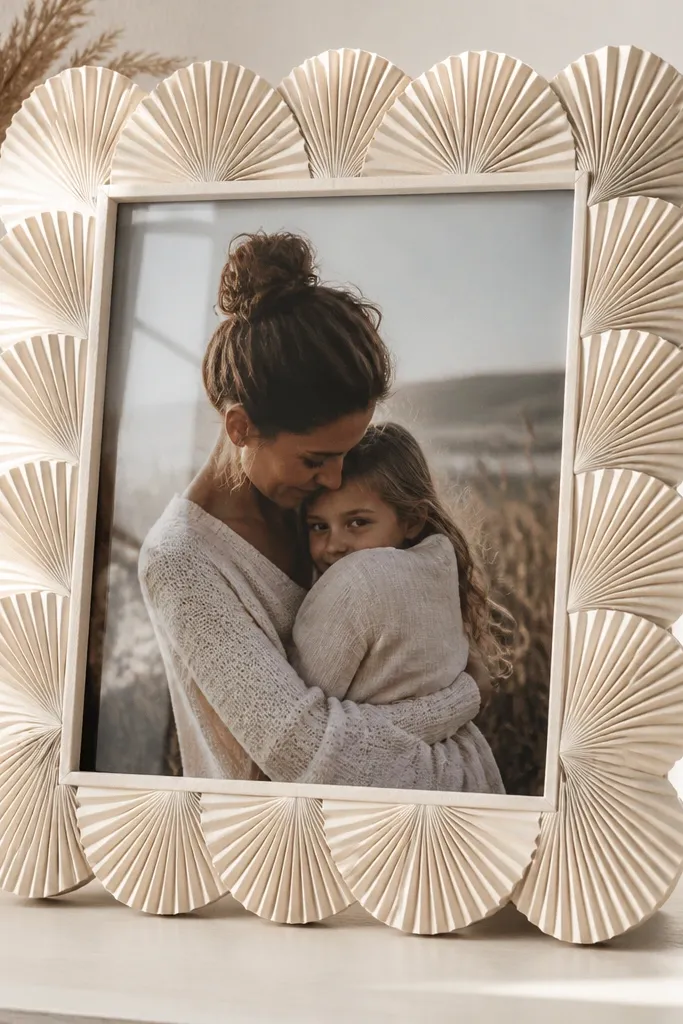
3D paper fans make cardboard look like a layered craft without needing thick materials. The fans create shadow lines, so even plain photos look more dimensional. I make fans from 65-90 lb cardstock so they hold shape, then glue them around the border. Choose one paper color and vary tone - it looks cohesive and not busy.
Cut cardstock strips about 1 inch wide and fold accordion-style. Glue each fan to the front border edge, leaving the center window clear. Work one direction at a time so spacing stays consistent. Seal lightly with matte spray from a distance so the fans don't lose their shape. Build the back pocket with acetate for the photo.
Pro tipCut fans first and lay them on the frame without glue, then adjust spacing before committing.
AvoidDon't glue fans onto the window edge - it makes the opening look jagged.
14. Dowel-accent frame with twine hanger
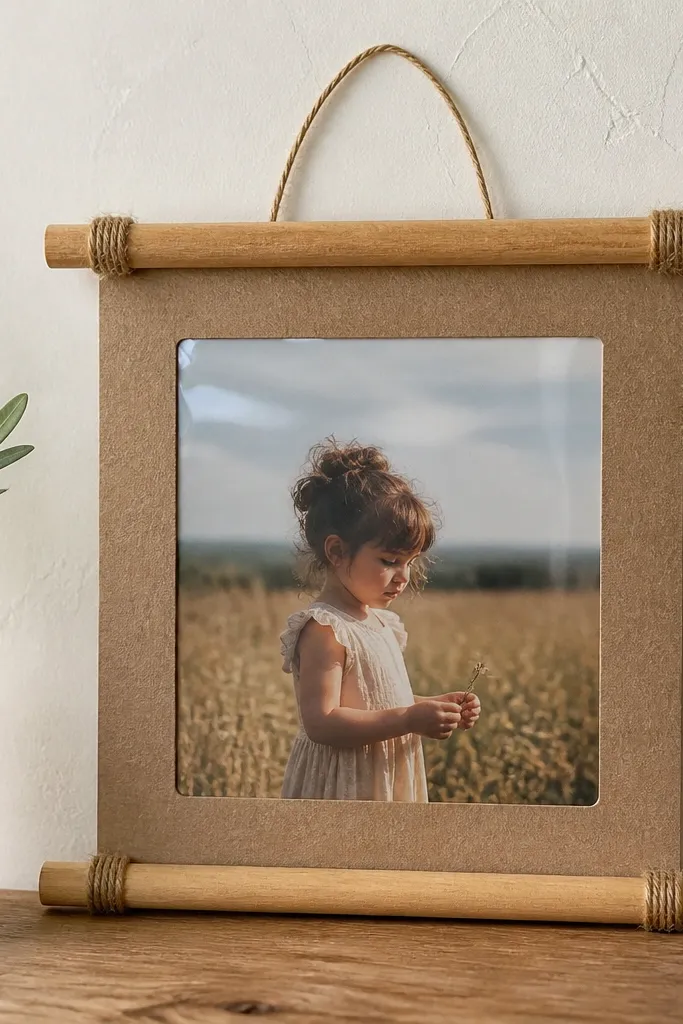
This is the only cardboard frame on the list that makes people ask where you bought it. The dowels bring straight, sturdy lines that cardboard alone can't fake. Twine hanger adds that handmade detail without extra hardware. It looks best on walls because the dowels catch light and create a clean shadow.
Cut a front frame and window from thick corrugated cardboard. Glue short dowel pieces (about 1/2 inch shorter than the frame width) along the top and bottom border, then wrap twine around the dowels and secure on the back. Add acetate behind the photo and attach the back board. Punch a hole near the top edge and thread twine through for hanging.
Pro tipSand dowels lightly before attaching so they don't look rough or splintery.
AvoidDon't use dowels longer than the frame - they'll shift and crack the cardboard when you hang it.
15. Scrap ribbon bow frame with clean corner tabs
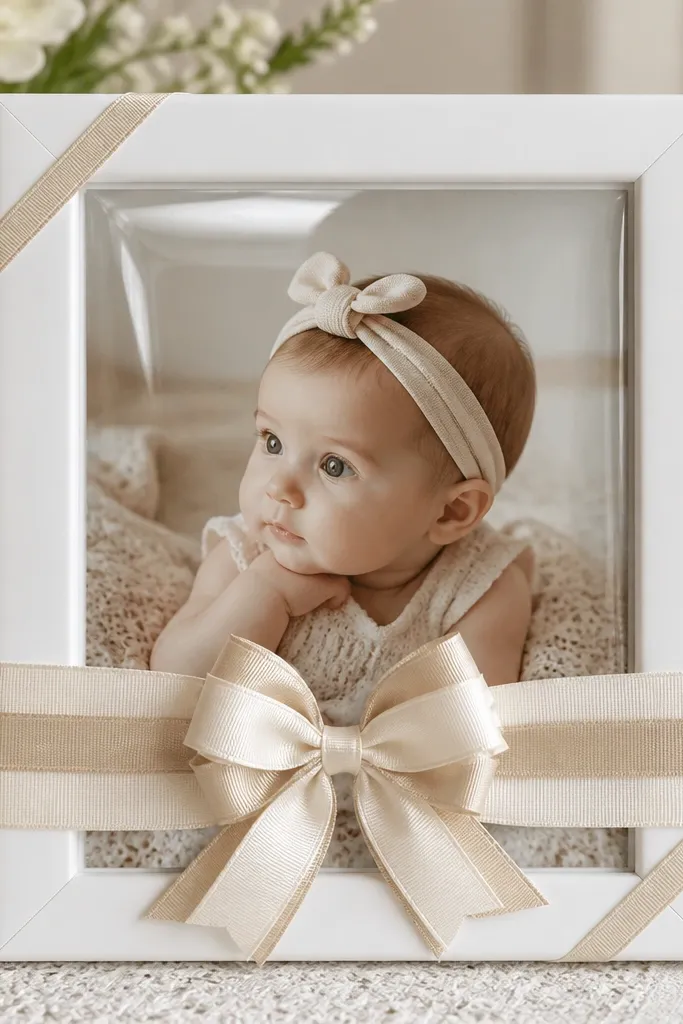
Ribbon makes cardboard feel like a gift tag turned into a real frame. I keep it simple: one bow in the center, plus corner tabs that hide where the photo sleeve meets the frame. The corner tabs also reinforce the edges so the front doesn't peel. This works best for baby photos, birthdays, and seasonal prints.
Paint the outer border white or a soft pastel. Cut corner tab pieces from thin cardboard, cover them with matching ribbon, and glue them at the inside corners of the window. Make a layered bow from two ribbon widths - for example, 1/2 inch and 1 inch wide. Glue bow tails to the front around the photo window center, then assemble acetate pocket and back board.
Pro tipUse hot glue for the ribbon bow only; use glue stick or tacky glue for tabs so it stays neat.
AvoidDon't glue ribbon directly over raw cardboard edges without a tab - it lifts after a few days.


