1. Thrifted frame with linen backing and stitched photo corners
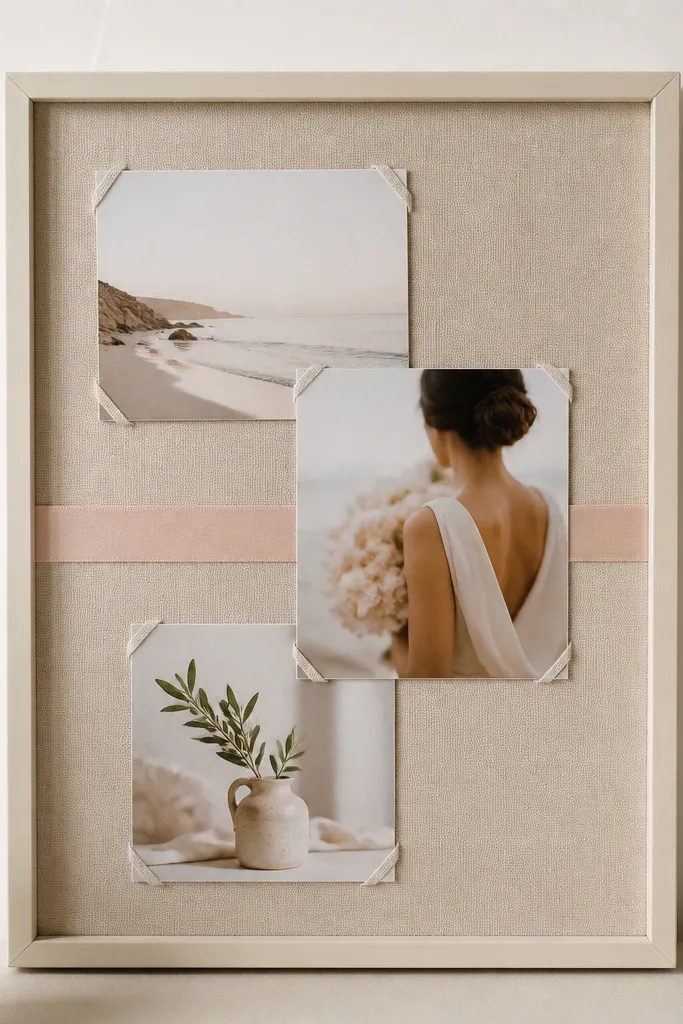
I love linen because it eats glare and makes even cheap prints look softer. The photos feel like they belong on fabric, not taped to paper. Keep the ribbon blush or dusty pink so it reads dreamy instead of loud. The stitched corners add a handmade pause - your eye notices the effort.
Buy a 1/4 yard of linen or linen-look cotton. Stretch it tight like a canvas, staple to the back, and trim clean. Use paper photo corners or thin cloth tabs made from 1 cm strips folded into tiny squares, stitched with matching thread.
Pro tipUse a matte spray on the photos (light coat) before mounting to reduce shine under daylight.
AvoidAvoid glossy photo prints - they fight the linen texture and look pasted on.
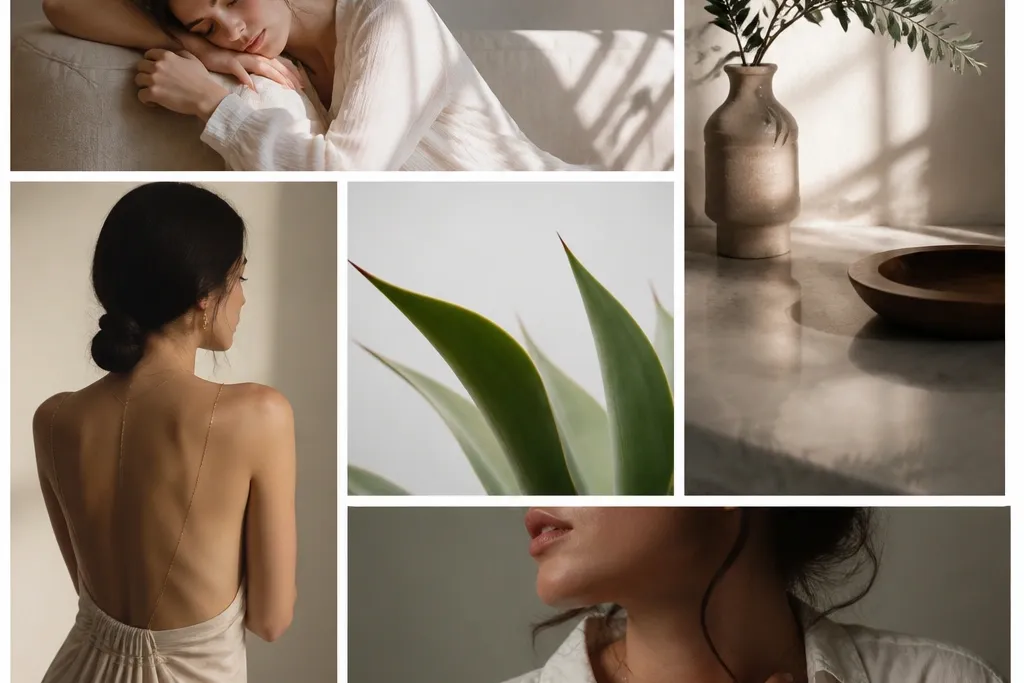
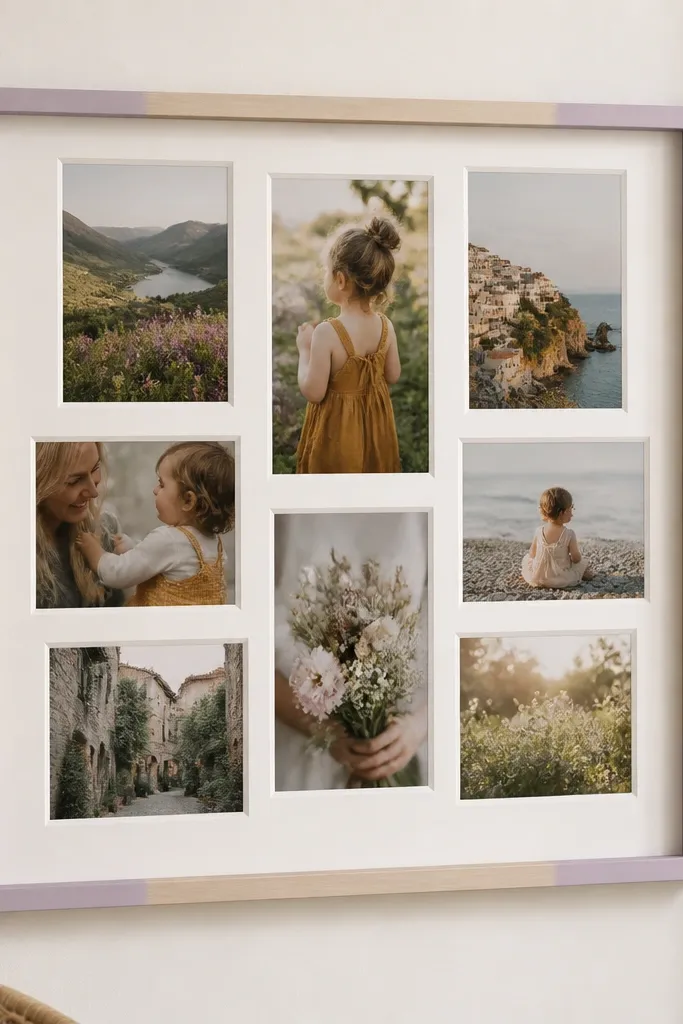
2. Soft watercolor wash frame using diluted acrylic in ombre bands
This is dreamy because the background has movement, like a gentle sky. Ombre bands give your collage depth without adding extra patterns. I keep the photos in mostly light tones - warm skin, pale walls, beaches - so the wash doesn't clash.
Thin white acrylic with water until it looks like milk. Paint 2-3 horizontal bands, let each dry 10-15 minutes, then feather the edges with a damp sponge. Back the collage with torn deckle-edge paper in matching tones.
Pro tipMask the photo area with low-tack painter's tape so you get crisp boundaries between wash and photos.
AvoidSkip heavy paint - thick acrylic looks like a solid wall instead of a soft wash.
3. Vintage book-page mat with single-color photo palette
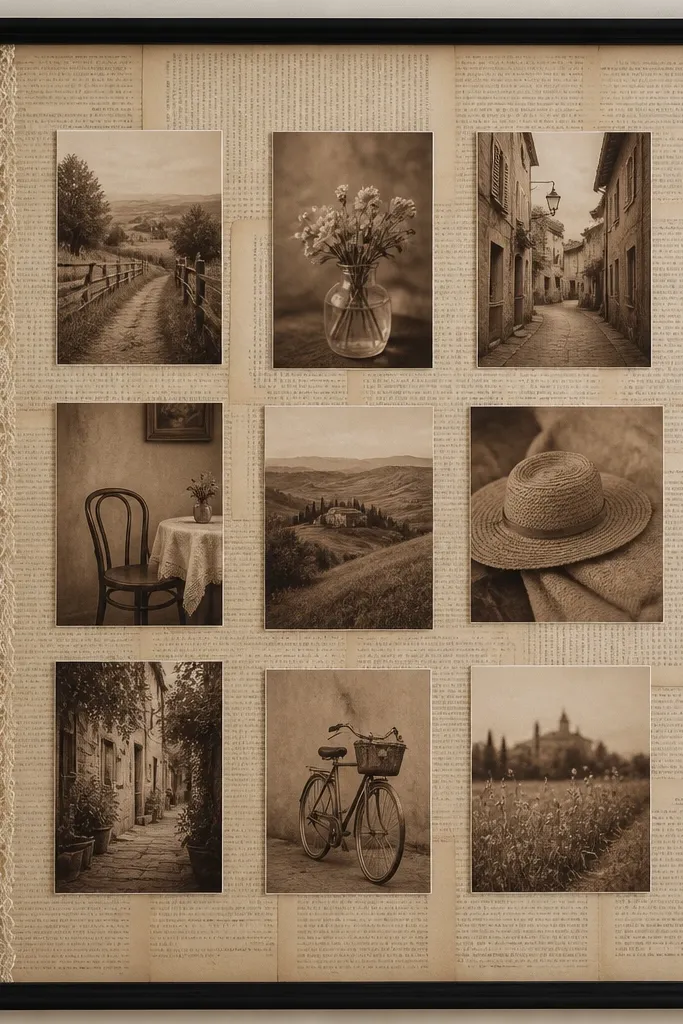
Book pages create instant texture and a story-like feel. The key is restraint: choose one photo palette so the page text doesn't compete. I use mostly sepia or warm beige prints, and I keep the photo edges slightly off the mat so the page texture shows.
Cover a mat board with book pages using matte gel medium or glue stick. Seal it with a light coat of matte Mod Podge so it doesn't smear. Mount photos with adhesive corners and add a 1 cm lace strip on the left for a gentle "frame within the frame."
Pro tipTear the book paper edges instead of cutting them for softer transitions around the mat.
AvoidDon't use random color photos with busy page text - it turns into clutter fast.
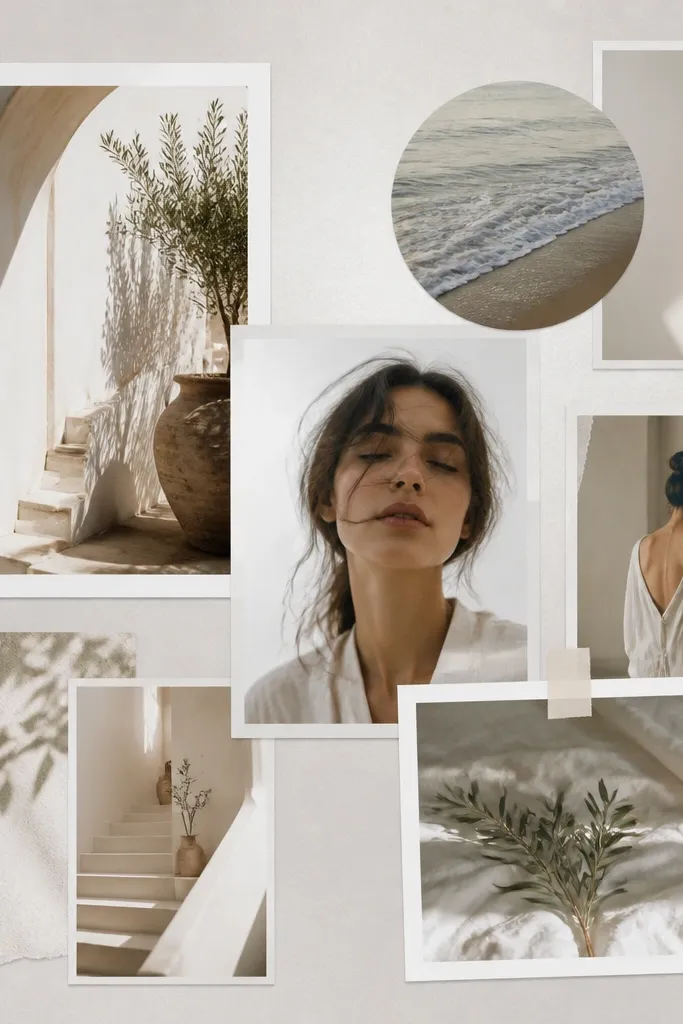
4. Polaroid stack with faux film border and tiny date labels
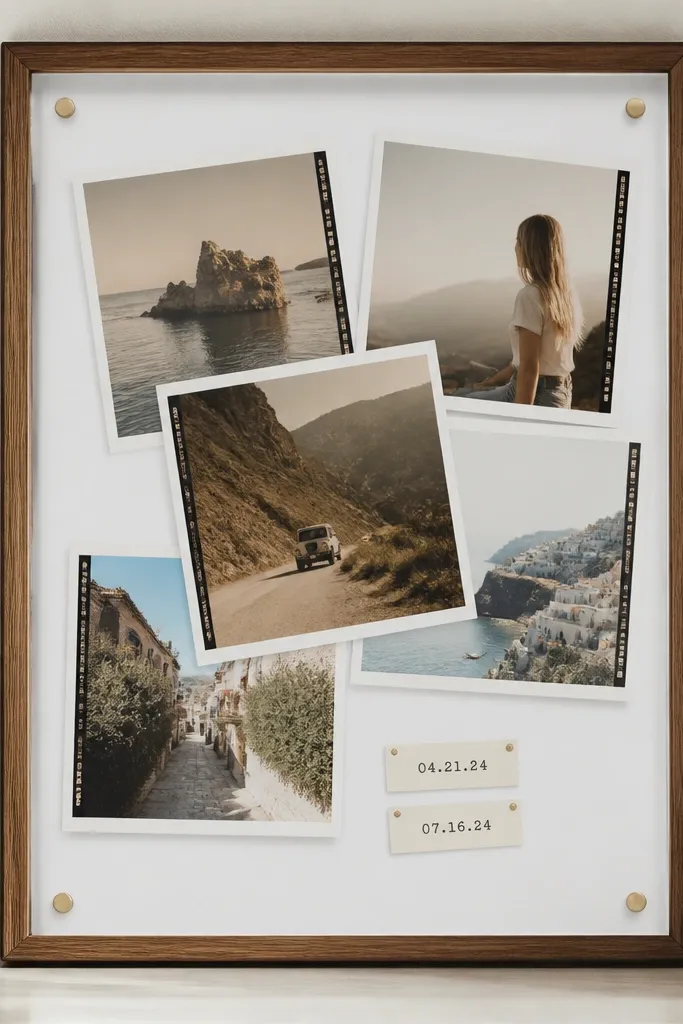
Polaroid styling makes the collage feel nostalgic and dreamy even with modern photos. The faux film border is a small detail that ties every picture together. Date tags add a calm structure so the angles don't look chaotic.
Print your photos with white borders or add borders using a photo editor. Cut 1 cm wide strips of light gray paper for the film border and place them under each photo. Use label stickers or cut paper tags (3 x 2 cm) and write dates in a consistent font style with a black fine liner.
Pro tipKeep the stack to two main angles: lean left for 4 photos and right for 5 so it looks intentional.
AvoidAvoid big mismatched borders - they make the collage look like a collage app.
5. Dried flower pressed background with clear tape photo mount
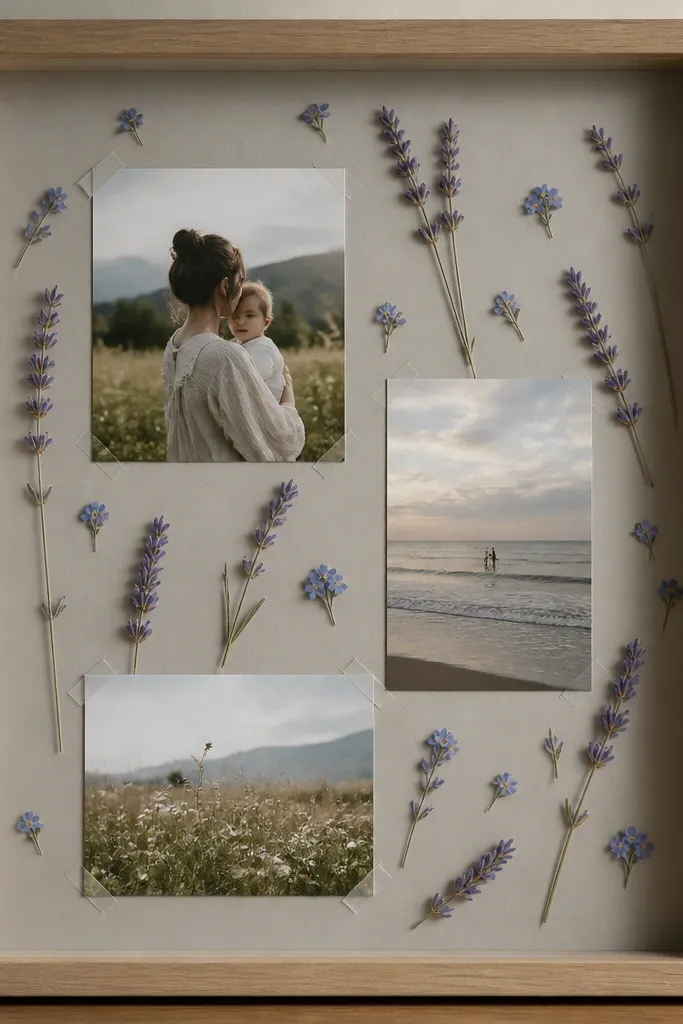
Pressed flowers create a dreamy, soft-focus look without needing fancy paints. Lavender and tiny blue tones are calming and work with light portraits. Clear tape tabs let the flowers show through while holding photos flat.
Press flowers between book pages for 2-3 weeks. Lay them on a pale backing and seal lightly with a matte acrylic spray from a distance. Attach photos with small clear tape tabs on the corners so you can adjust spacing before final placement.
Pro tipUse a thin layer of parchment paper over the flowers before placing photos so tape doesn't stick to delicate petals.
AvoidSkip thick glue blobs - they warp and turn the background lumpy under the frame glass.
6. Curtain fabric frame with braided rope divider lines
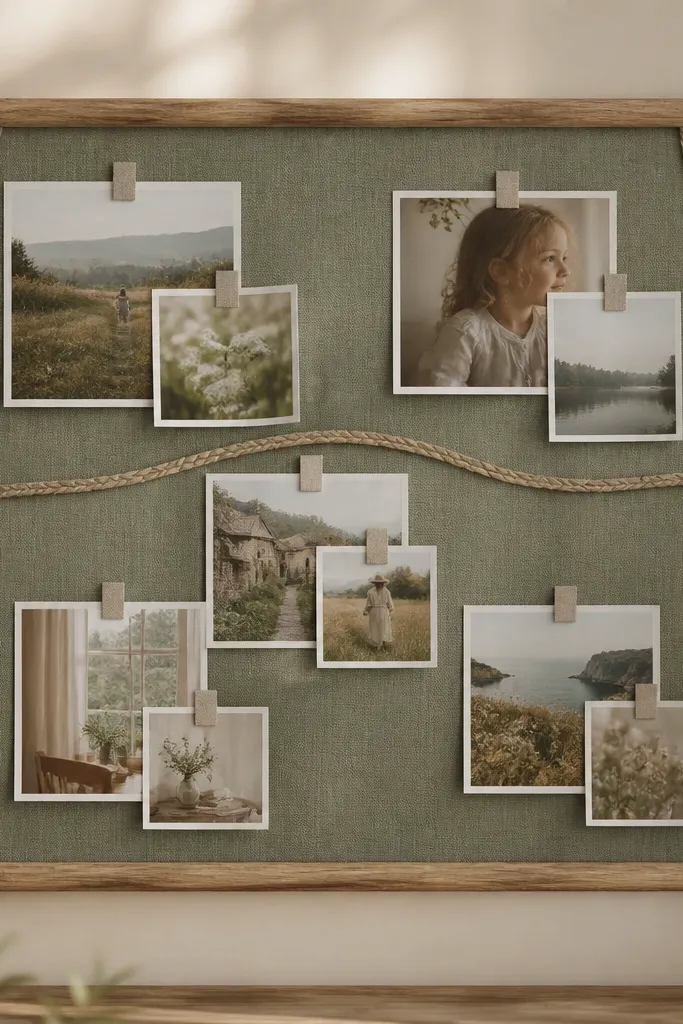
Fabric backing makes the whole piece feel soft and cozy, which reads dreamy instantly. Rope dividers give structure - your collage has sections, not just floating photos. Dusty sage is a great base color because it doesn't fight most skin tones.
Cut fabric to cover the back and staple smoothly. Hot glue the rope in thin paths (about 3-5 mm thick rope) to separate photo groups. Mount photos with fabric tabs made from 1 cm strips folded behind the photo edges.
Pro tipUse the rope as your "grid" and place photos so each cluster sits within one rope section.
AvoidAvoid shiny satin fabric - it creates glare that makes photos look washed out.
7. Lavender spray paint edge + white paper photo layers
Spraying only the edges keeps the center calm and lets your photos stay the star. The white paper halos create a dreamy separation, especially when your photos have mixed backgrounds. Lavender edge color gives a consistent mood without turning the whole frame purple.
Mask the glass and inner area with painter's tape. Spray 2 light coats of lavender spray paint on the outer lip only. Cut white paper mats 6-8 mm wider than each photo and layer with adhesive tabs.
Pro tipUse a craft knife and a metal ruler for mat cuts - crooked halos ruin the soft look.
AvoidSkip thick foam tape under every photo - the stack gets uneven and won't sit flat.
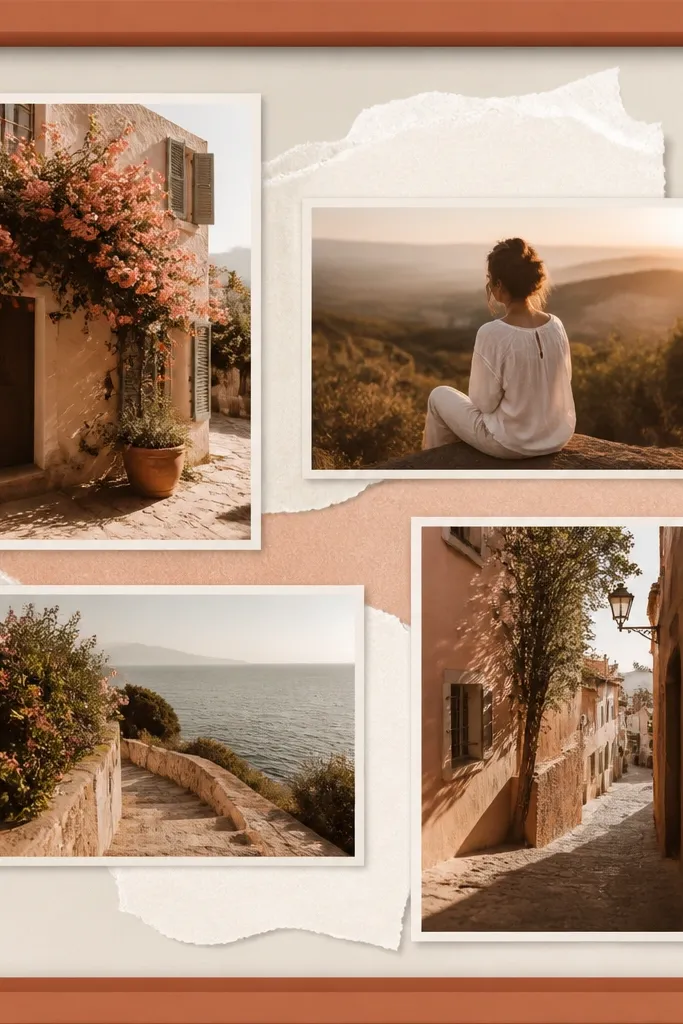
8. Map coordinates theme using torn atlas paper strips
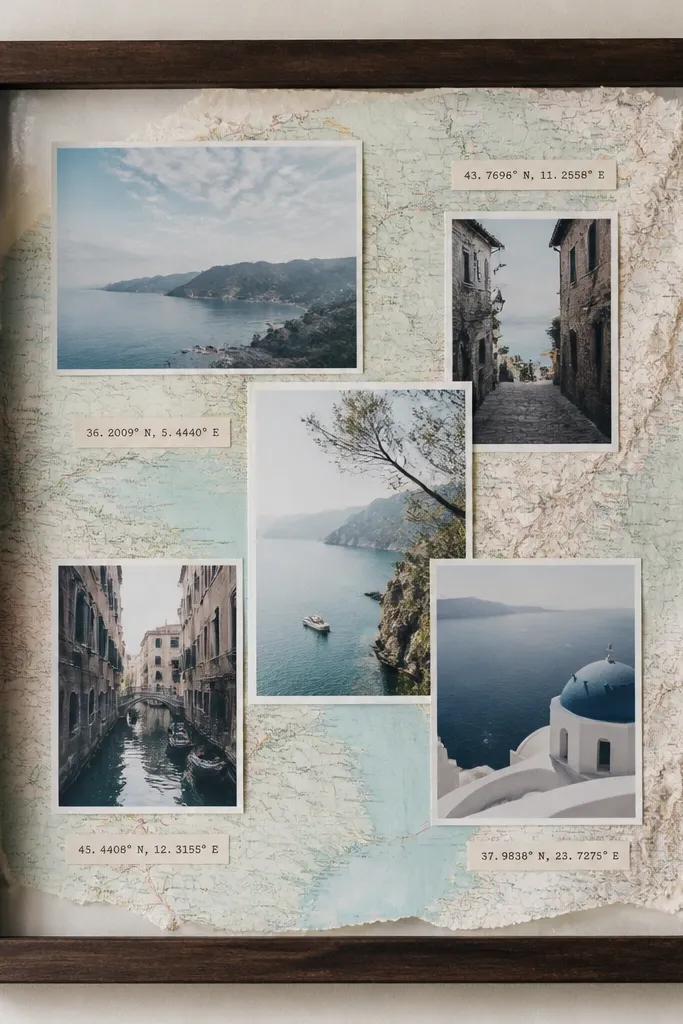
Torn atlas paper looks airy because the edges are irregular and light. Coordinates add a personal, dreamy travel vibe without adding clutter. When your photos have sky, ocean, or wide landscapes, the map paper makes them feel like they belong in a memory archive.
Tear atlas paper into 2-3 strip layers and overlap lightly. Seal with matte Mod Podge so it doesn't curl. Add coordinate strips (1 x 5 cm) with a typewriter font - keep them near the top corners of each photo.
Pro tipPick one compass color for accents: antique gold or muted teal only.
AvoidAvoid covering the entire background with dense map text - it fights the photos.
9. Galaxy tint frame with star confetti and sheer organza

A sheer layer is what makes this dreamy - it blurs hard edges and adds subtle glow. The indigo tint makes photos pop, especially warm highlights like hair and sunlight. Star confetti stays restrained if you use small pieces and keep them mostly in the corners.
Tint backing with diluted indigo acrylic or watercolor wash. Glue star confetti lightly and then cover with organza cut to size. Mount photos with clear adhesive squares so the organza stays smooth.
Pro tipUse a matte black frame, not glossy, so reflections don't overpower the glow.
AvoidSkip thick glitter - it sheds and looks messy in photos over time.
10. Botanical stencil frame with sage paint and photo cutouts

Stencil work adds a soft pattern that stays in the background. Deckle-edged photo cutouts make the collage feel like it's been in a scrapbook for years. Sage paint keeps it calm and matches most natural light portraits.
Use a floral stencil and apply sage paint with a foam brush using a light hand. Cut photos using deckle scissors or trace a deckle template onto photo prints. Mount with adhesive corners so the deckle edges lift slightly.
Pro tipStencil once per side, not all over - the negative space keeps it dreamy.
AvoidDon't use dark green stencil - it makes the whole frame feel heavy.
11. Shadowbox with layered vellum windows and soft lettering
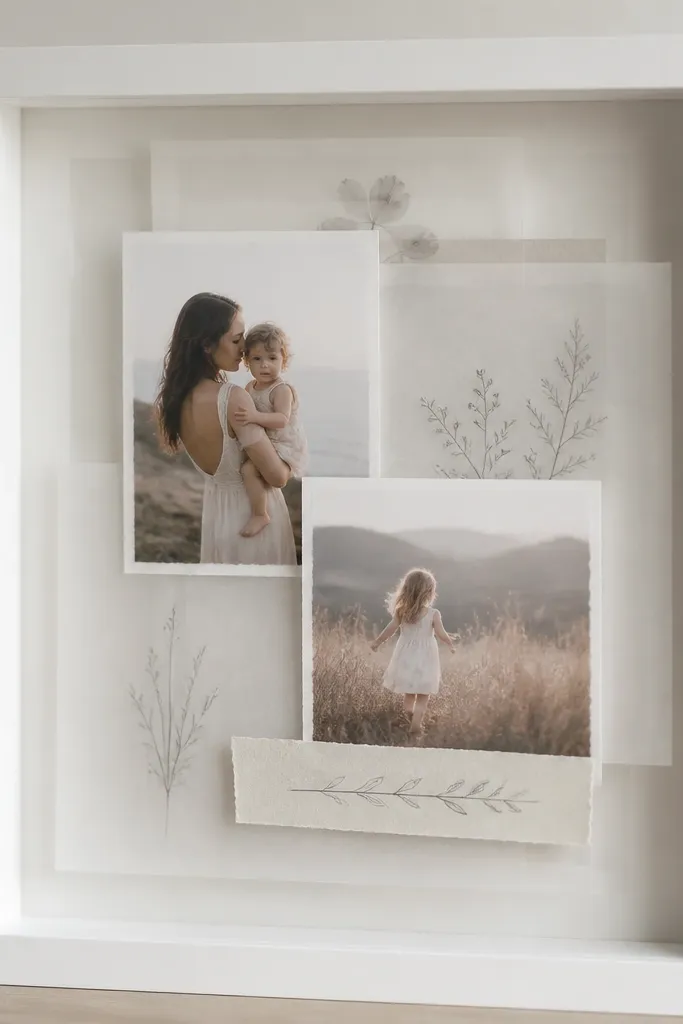
Vellum is my favorite "instant dreamy" material because it diffuses light. The layered windows give depth without adding bulk. Soft lettering on vellum gives context without stealing attention from faces.
Cut vellum rectangles 1-2 cm bigger than each photo. Overlap vellum behind the photo and tape the vellum edges to the backing. Add lettering strips (about 1.5 cm wide) with a graphite pencil so it looks faint and gentle.
Pro tipKeep vellum layers to two per photo spot to avoid wrinkles.
AvoidAvoid thick marker on vellum - it bleeds and looks harsh.
12. Gold leaf tape corners with monochrome photo collage
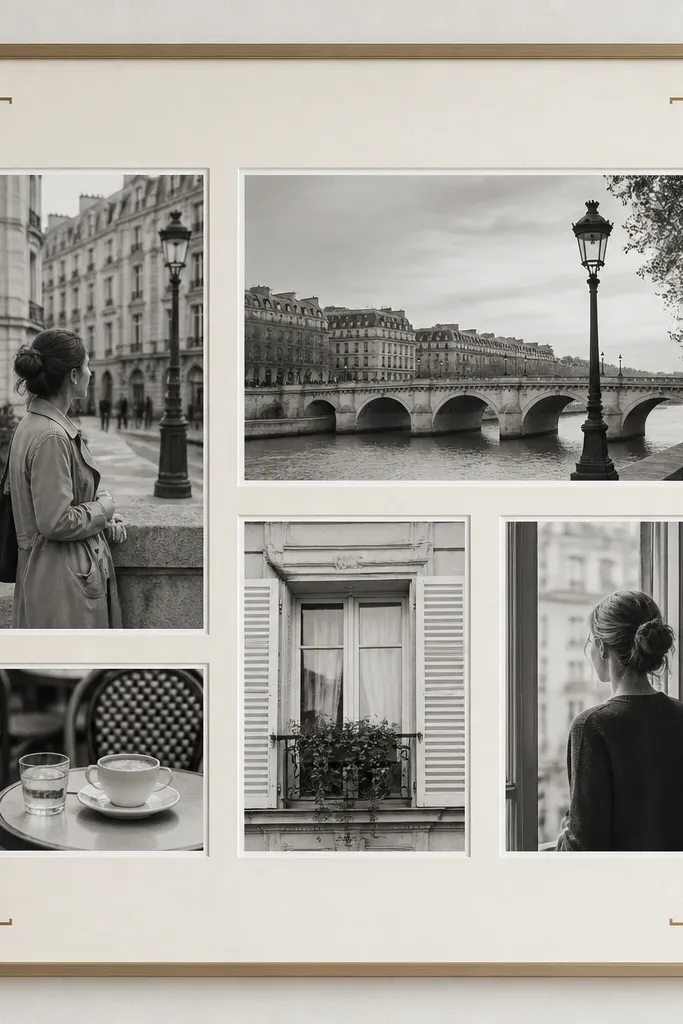
Gold leaf tape corners make the layout feel polished without painting the whole frame. Monochrome photos keep the mood consistent and dreamy, especially in older neighborhoods or indoor lighting. White borders make the collage look crisp and airy.
Use gold leaf tape in small 2-3 cm corner segments. Print photos in black-and-white and adjust contrast so faces aren't muddy. Mount with a 1 cm white border mat behind each photo so spacing stays even.
Pro tipUse one border width across every photo - consistency makes it look designer.
AvoidDon't use multiple gold shades - yellow and rose gold together looks accidental.
13. Rainbow film-strip border with muted pastel photos
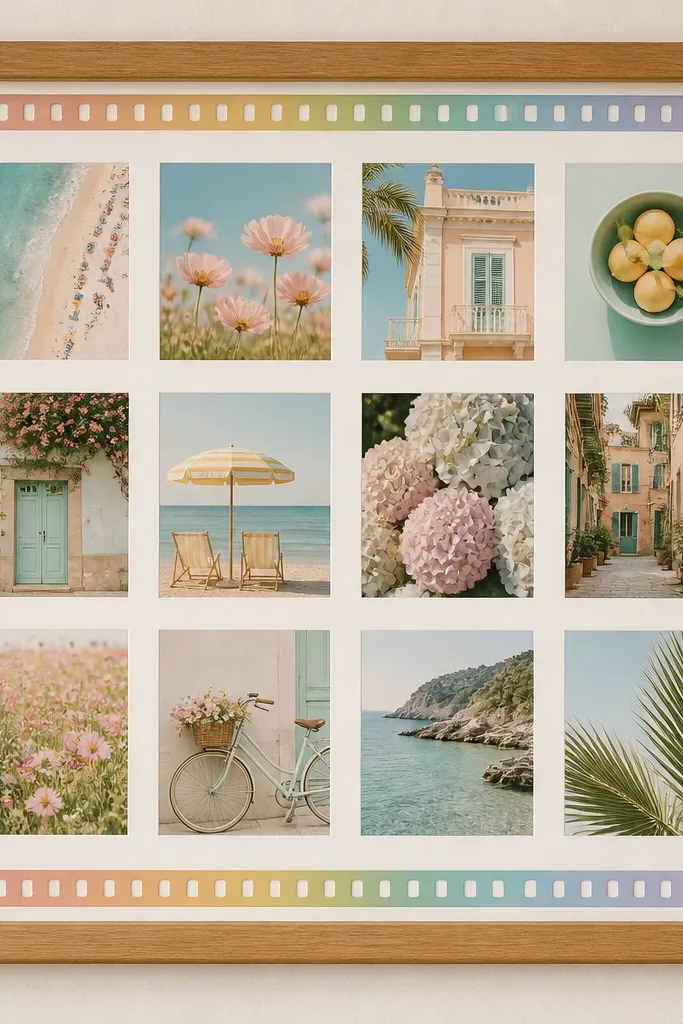
A film-strip border is an easy way to add dreamy color without covering the whole frame. Muted pastels keep it soft and nostalgic. When your photos have similar saturation, the border becomes a gentle guide for your eyes.
Cut a strip of paper into film-strip shapes with small rectangles. Paint each rectangle in a pastel rainbow (light peach, pale yellow, mint, light blue, lavender). Glue the strip along the top and bottom and keep photo spacing uniform.
Pro tipPick one pastel set and stick to it - don't add neon to "make it pop."
AvoidSkip bright primary colors - they turn dreamy into childish.
14. Wrapped corkboard frame with pushpin photo clusters
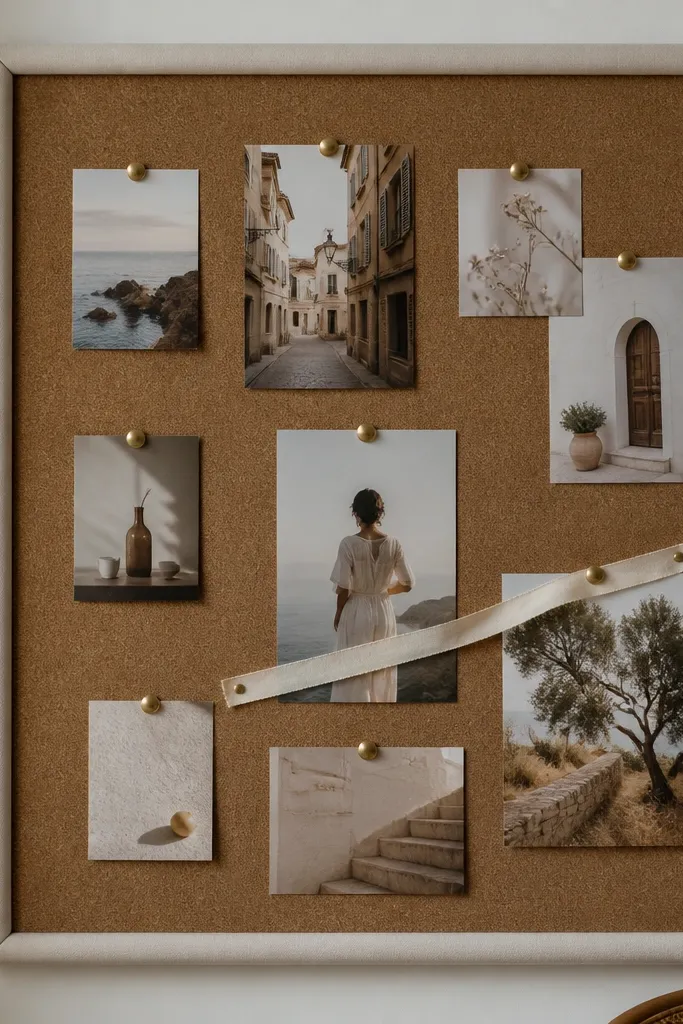
Corkboard is forgiving and looks handmade even when you're working fast. Pushpin clusters create a casual dreamy arrangement that still has structure. The fabric wrap makes it look softer than plain cork.
Cut cork to fit the inside of your frame. Wrap with fabric and staple on the back. Use metallic pushpins in two sizes - small for corners and a couple larger ones to anchor the main cluster. Add a ribbon pinned horizontally with two pushpins.
Pro tipPlan your cluster around one "hero" photo and build outward in layers.
AvoidAvoid using too many pushpins on each edge - it looks cluttered.
15. Ceramic tile photo frame with grout-line layout
Mosaic layouts feel dreamy because they look like a memory made from pieces. The grout-line spacing gives automatic alignment, so your photos don't drift. Use off-white and light gray tiles so it stays airy.
Use craft tiles or small foam squares painted to look like tile. Create grout lines with gray acrylic between squares using a thin brush. Mount photos into each square with craft glue and keep one empty tile near the center for balance.
Pro tipDry-fit the photo sizes before gluing anything so the mosaic doesn't end up lopsided.
AvoidSkip glossy tile finishes - reflections show up as harsh spots.
16. Hand-painted ombre washi tape grid over a neutral frame
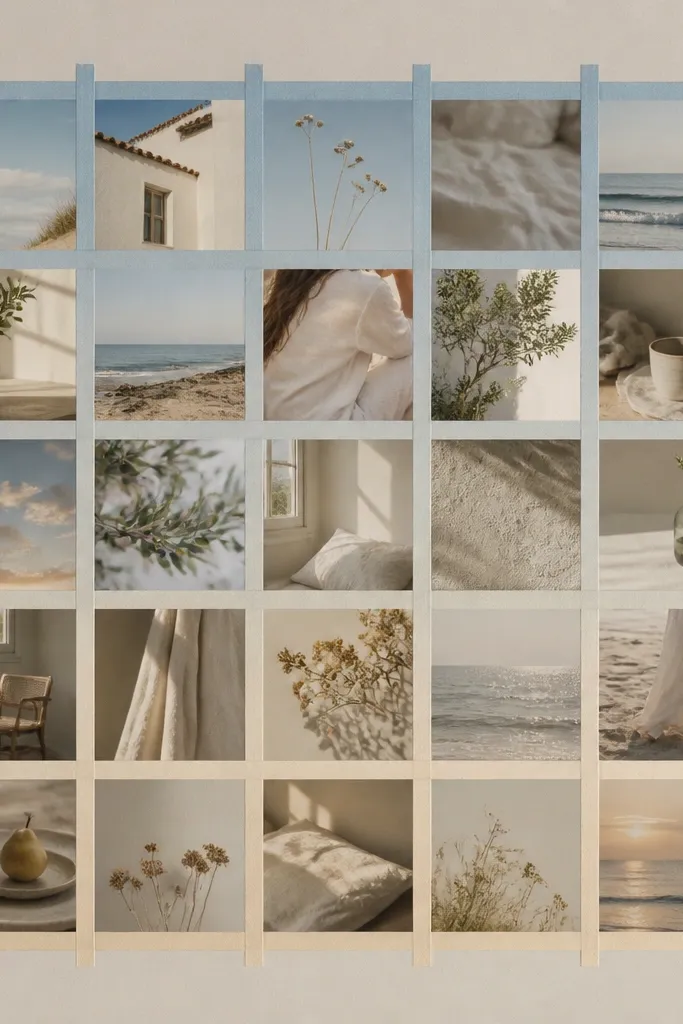
Washi tape grids are dreamy because they add structure without looking rigid. The ombre shift gives motion, like soft weather moving across a sky. With neutral background photos, the tape becomes the color story.
Lay washi tape strips in a grid pattern across the inside backing. Color the tape lightly with diluted blue/purple markers so the ombre fades. Mount photos behind the grid cells using adhesive corners so tape edges remain clean.
Pro tipUse one tape width only (like 6 mm) so the grid stays calm.
AvoidDon't stack tape layers - you'll get bumps that show through the frame glass.
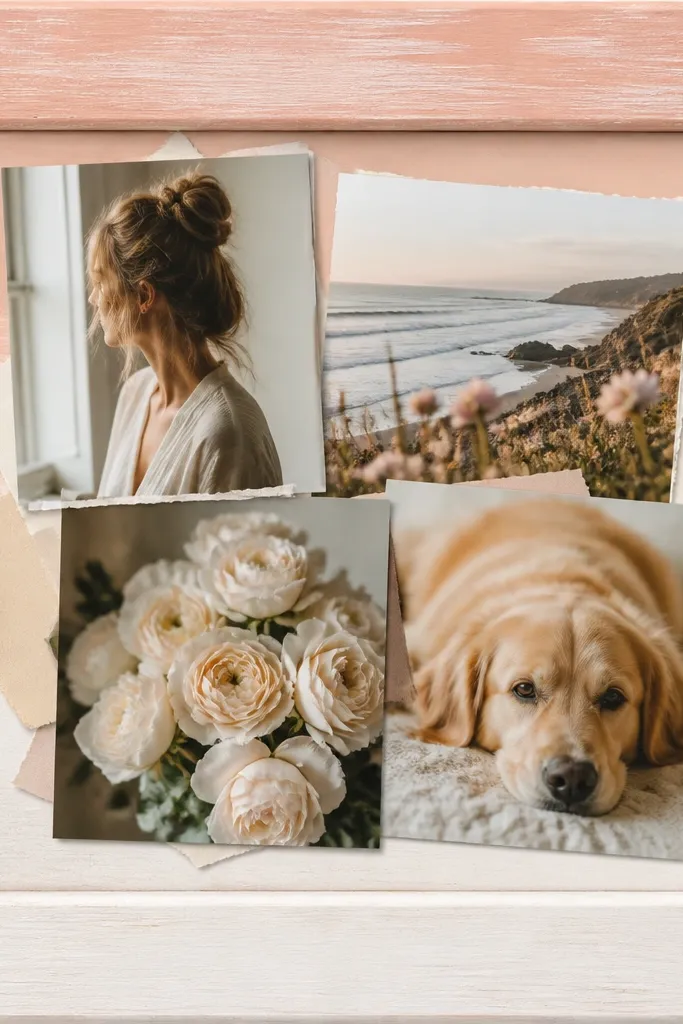
17. Terracotta and cream frame with torn paper clouds behind photos
Cloud-shaped torn paper makes a collage feel like a sky memory. Terracotta adds warmth, and cream keeps it airy. This works best with photos that include light skies, people in sunlight, or warm indoor scenes.
Paint frame terracotta and let it cure fully. Tear paper into cloud shapes and layer them behind the photos. Use matte glue so paper edges don't curl, then mount photos with flat adhesive tabs.
Pro tipKeep cloud shapes larger than your photos so they feel like a backdrop, not confetti.
AvoidAvoid overly perfect circles - torn edges need irregularity to look organic.
18. Monogrammed ribbon bow anchor with angled photo cluster
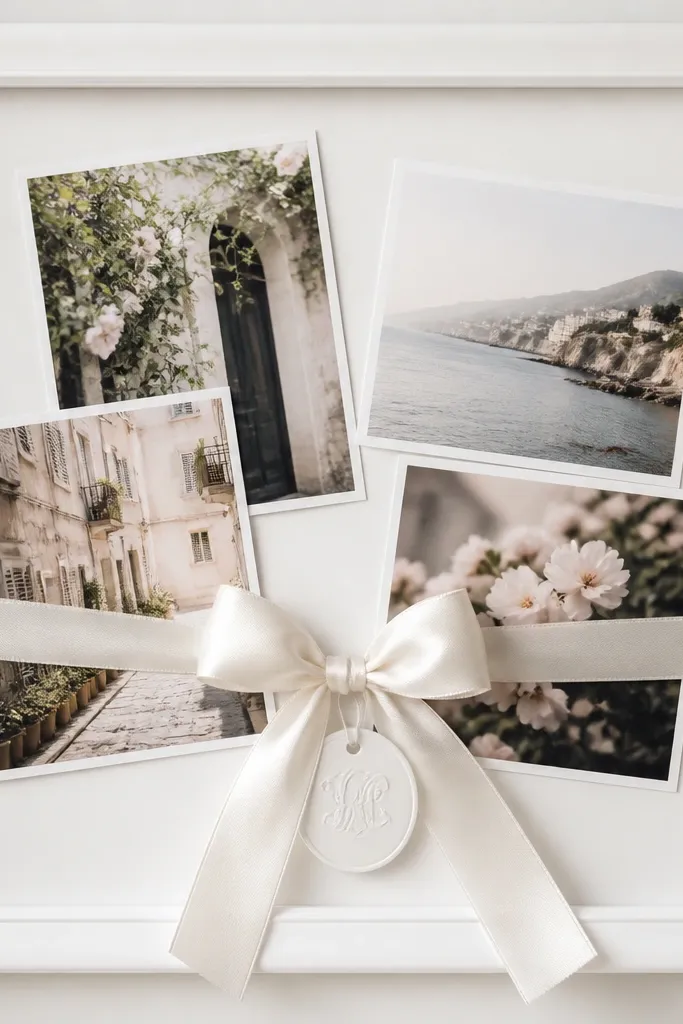
A single ribbon bow anchor gives the collage a focal point. The angled photos feel playful but still ordered because the bow pulls the eye. I use a monogram tag to personalize without adding extra text clutter.
Tie a ribbon bow using 1.5 cm wide grosgrain in ivory or soft blush. Add a small tag (2.5 x 5 cm) with a monogram or initial printed in black. Position the bow on the backing and angle photos around it using adhesive corners.
Pro tipUse a matte ribbon, not shiny satin, so it doesn't glare under light.
AvoidSkip multiple bows - two or three bows makes it look like gift wrap.
19. Sea-glass palette frame with crackle medium and translucent paper
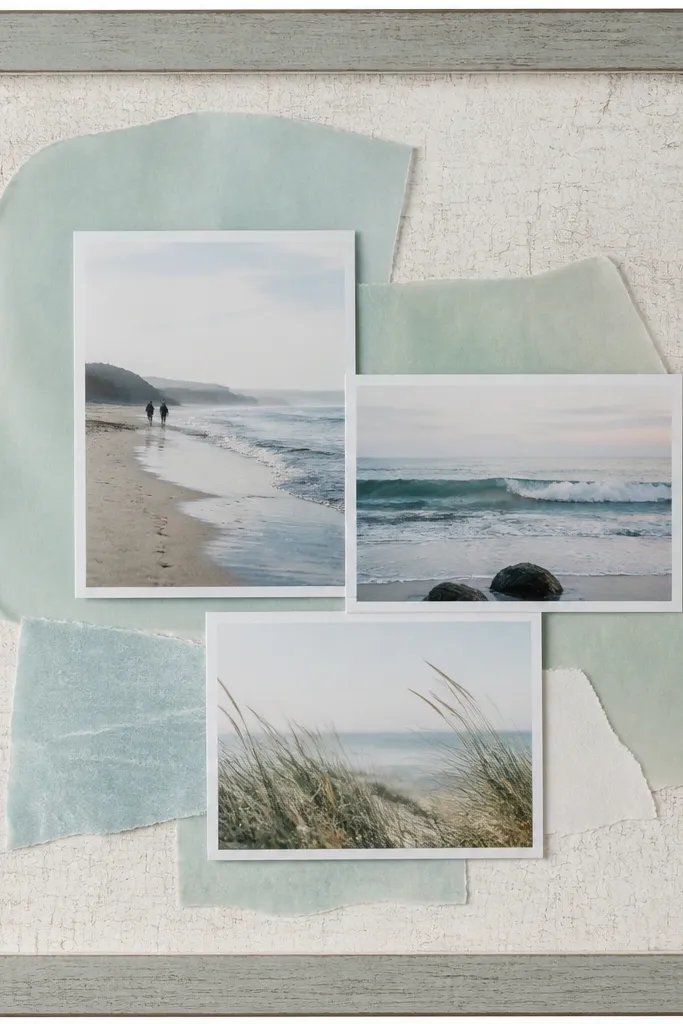
Crackle medium makes a gentle aged look that reads dreamy in photos. Translucent paper adds a sea-glass glow, especially over light-toned photos. This combo is perfect when your images already have blues, teals, or pale greens.
Apply crackle medium on the backing and paint over the base color first (light gray or pale aqua). Layer translucent tissue or vellum cut into irregular panels behind photos. Seal lightly so colors don't smear.
Pro tipUse tissue as a veil - keep it 1-2 cm larger than the photo to create a glow border.
AvoidDon't use dark crackle on bright photos - it turns moody in a harsh way.
20. Sprayed speckle frame with black-and-white portraits and soft gray mat
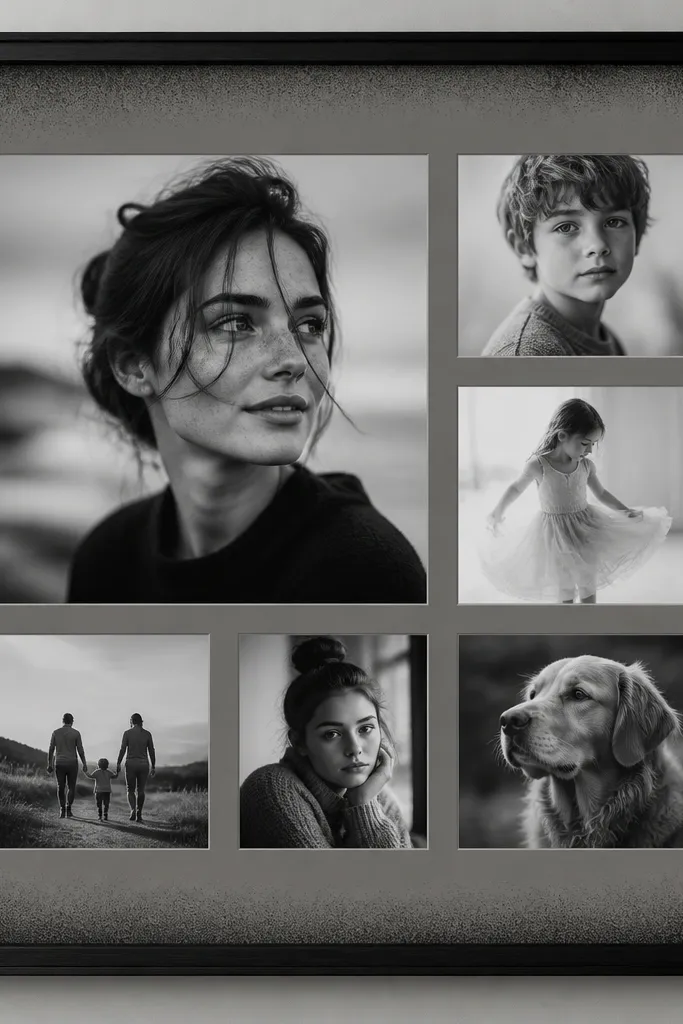
Speckling adds dreamy texture without covering faces. The gray mat softens contrast so portraits look gentle instead of sharp. Keep the portraits black-and-white and consistent in lighting so the speckle doesn't fight each photo.
Spray a thin speckle on the mat edge using a toothbrush and diluted black acrylic. Let it dry fully. Use a 1 cm gray mat border around photos and keep spacing even with a paper template.
Pro tipMake a quick paper template with cutouts so every photo lands at the same height.
AvoidAvoid big drips - speckles should be pin-sized, not blobs.
21. Reclaimed wood frame with thin pressed fern strips
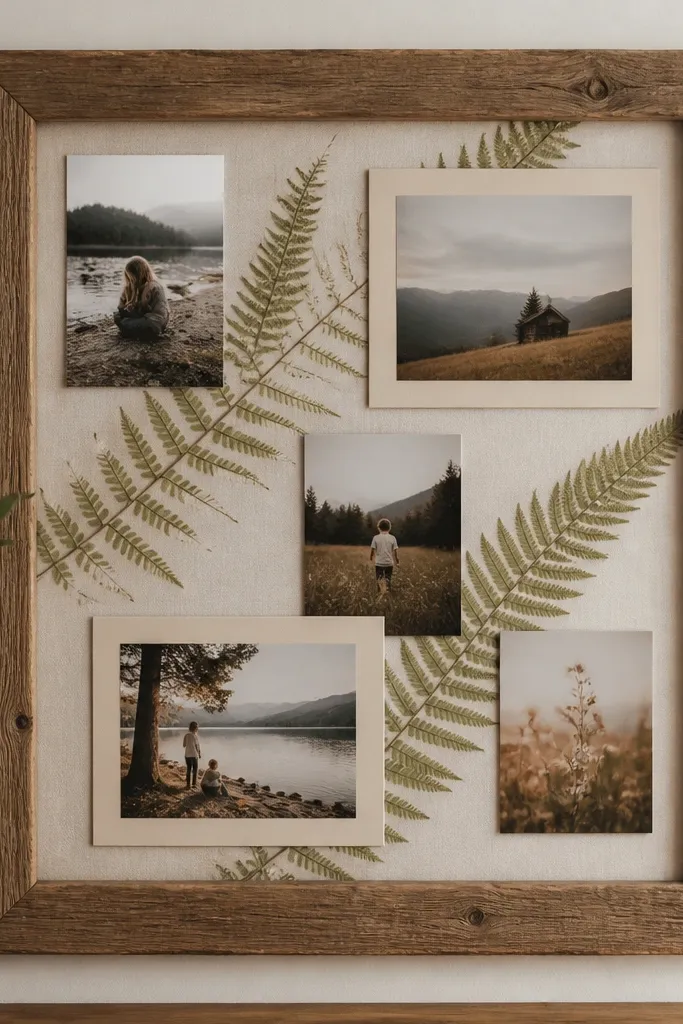
Fern strips look delicate and airy, which makes the collage feel like it's floating. Reclaimed wood adds warmth, and natural tones keep it dreamy instead of rustic-cold. I use this with photos that have greenery, window light, or soft outdoor scenes.
Sand reclaimed wood lightly and wipe with a damp cloth, then seal with matte clear. Place pressed fern strips behind the photos and secure with tiny dots of glue at the edges. Use beige paper mats (cut 5-7 mm wider than each photo) for a calm frame within the frame.
Pro tipPress ferns flatter by placing them under books with a heavier weight for another week if they curl.
AvoidSkip fresh greenery - it turns brown and lifts off over time.
22. Fabric tassel fringe border with neutral photo collage
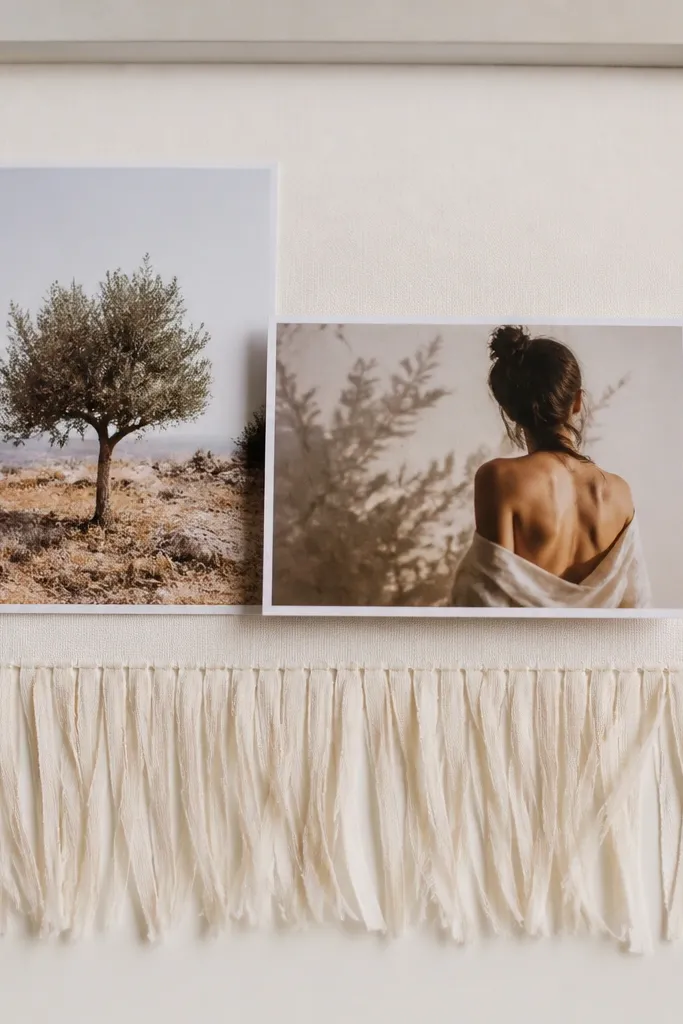
A tassel fringe border adds motion in a way a flat ribbon can't. It reads dreamy because the fibers catch light softly. Keep your photos neutral - beige, gray, soft blues - so the fringe becomes the texture element, not the color element.
Cut fabric strips 10-12 cm long, fold in half, and glue or stitch them to a strip of backing paper. Trim the fringe ends after attaching so the bottom edge is even. Add a thin gold chain behind one photo using tiny dots of craft glue.
Pro tipUse a light hand with glue - too much glue makes fibers stiff.
AvoidAvoid heavy tassels - thick fringe makes the collage look like a party banner.
23. Matte black frame with translucent vellum overlay and photo "windows"
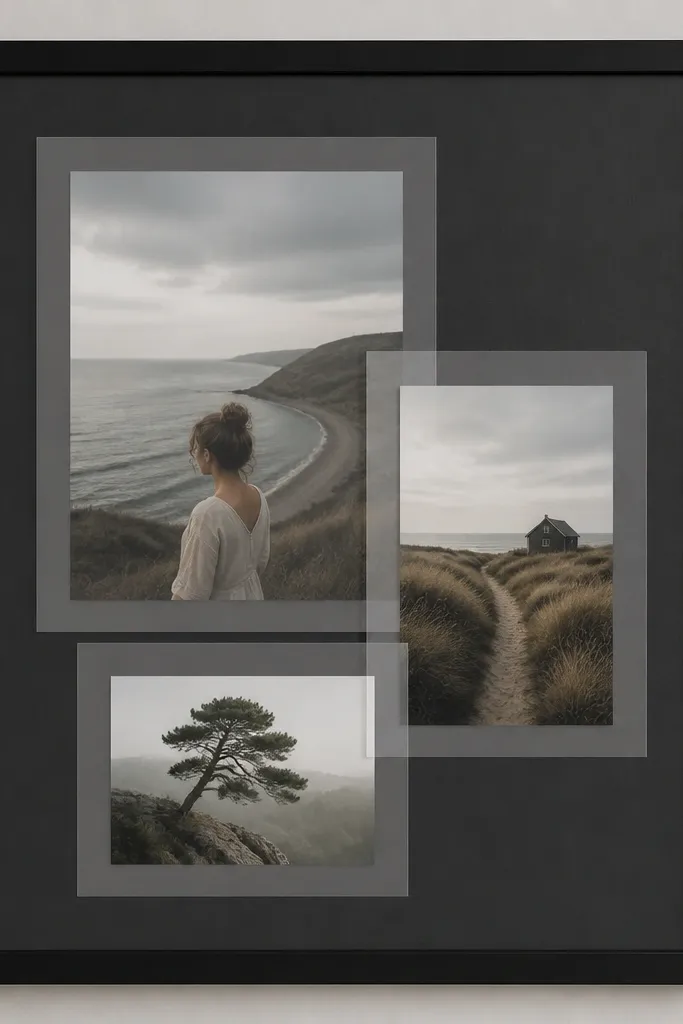
Dark frames can still look dreamy when you use translucent layers instead of solid paper. Vellum softens the photos and reduces harsh contrast. The "window" layout feels modern and calm because you're not stacking random shapes.
Cut vellum rectangles and tape them to the backing. Place photos centered in each vellum window and secure with adhesive corners. Keep three photo windows max so the vellum can breathe.
Pro tipUse a dark gray backing, not pure black, so faces don't look too stark.
AvoidAvoid glossy tape on dark backgrounds - it reflects and ruins the smooth look.
24. Handwritten letter fragments on aged paper behind photo clusters
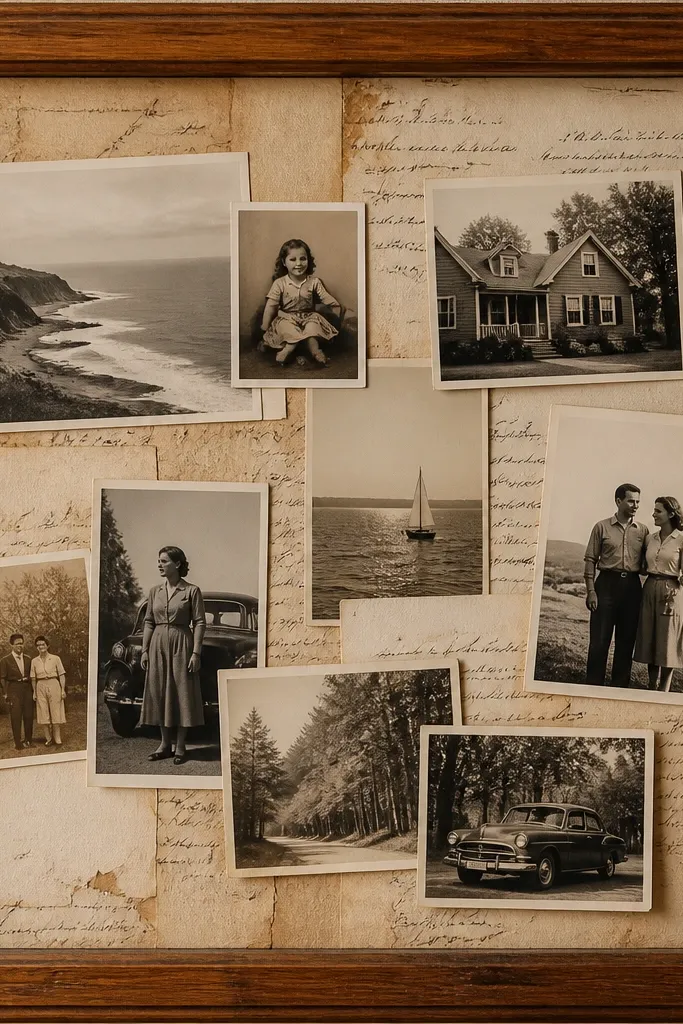
Ghost text makes a collage feel like it has a backstory. The dreamy part comes from layering: the letter scraps sit behind photos so you see them softly. This works best with photos that include faces or close moments, so the "letters" feel personal.
Age paper by tea staining or using brown craft paper. Tear into irregular strips and write fragments with a fine pen. Layer behind the photos and seal the paper with matte Mod Podge so ink doesn't smear.
Pro tipWrite small - 2-6 words per strip - so the background stays calm.
AvoidDon't use full paragraphs - it reads busy and kills the dreamy softness.
25. Colored pencil blush shading around photo edges on matte paper
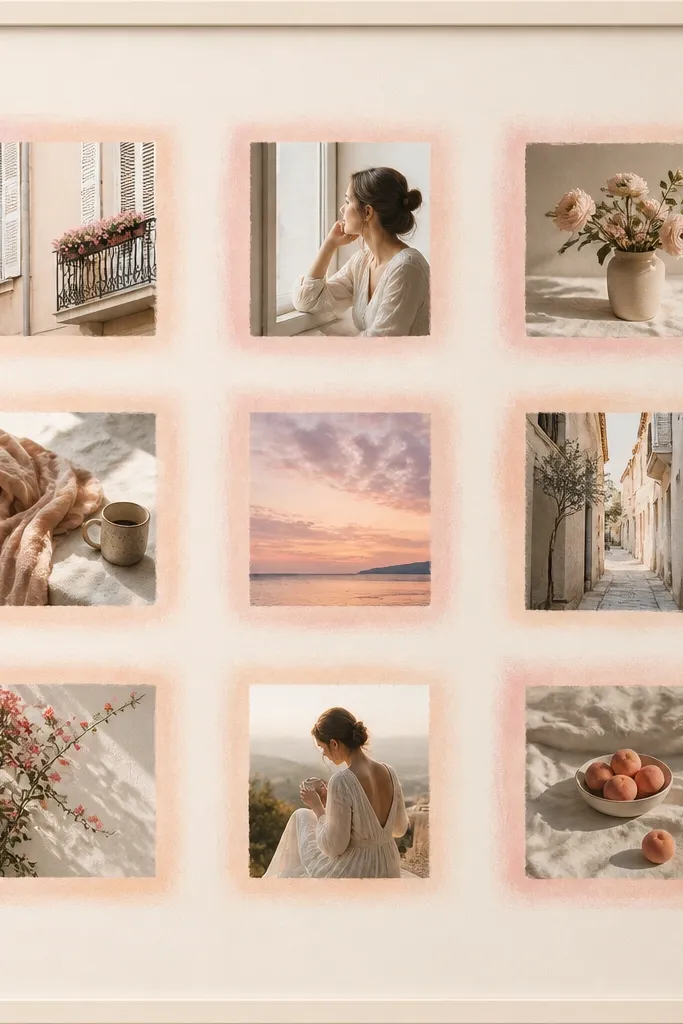
This look is dreamy because it mimics the way old prints fade at the edges. Blush shading creates separation without needing extra paper mats. I keep the pencils light and build slowly so the photos still look like they belong together.
Use matte photo paper. With colored pencils, lightly shade a 5-8 mm border around the photo edges on the backing mat (not on the photo itself if you can avoid it). Seal the mat with a matte fixative spray before mounting.
Pro tipBuild the halo in layers: start pale, then add color only where the photo needs help.
AvoidSkip heavy pressure - dark pencil marks look like a craft project.


