1. Sunburst Scallop Rim with Cream Base
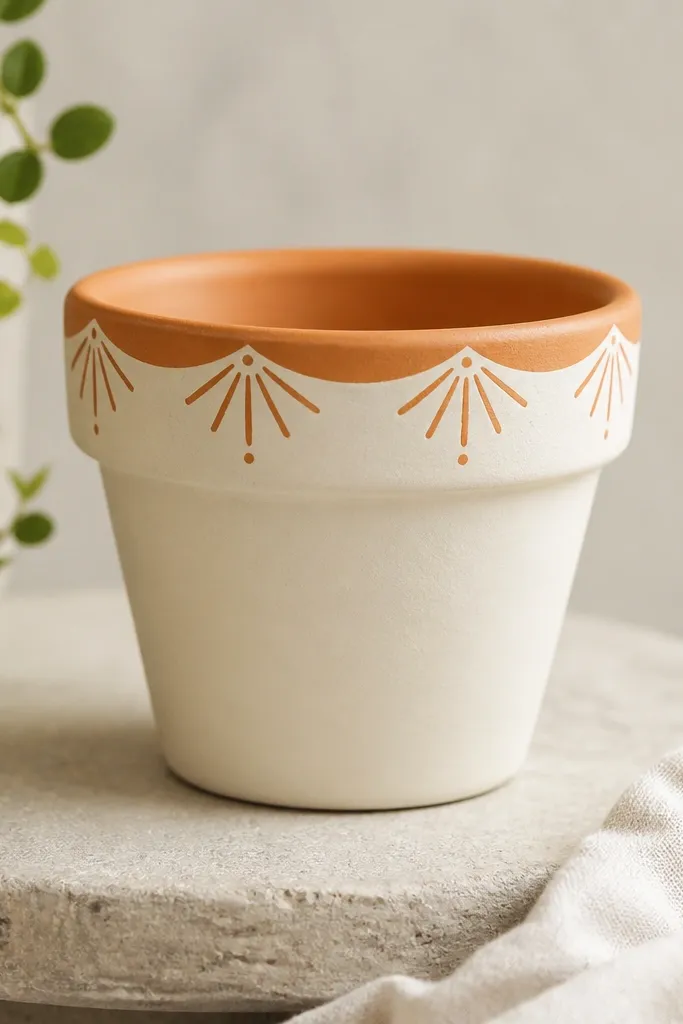
Start with a creamy base so the bright rim doesn't look loud. The scallops give a hand-painted "frill" effect that still reads neat on a small planter. Orange sunburst lines add energy without covering the whole pot. I like this for spring and summer because it looks bright even in cloudy window light.
Paint the pot body in two thin coats of matte cream. For the rim, mark a line around the top edge, then paint scallops using a small round brush and a steady rhythm. Add short sunburst strokes (about 1/2 inch long) inside each scallop, then finish with tiny dot tips in pale yellow.
Pro tipDo scallops with a paper template ring first so the spacing stays even on a small diameter pot.
AvoidDon't flood the paint at the rim or it will pool and look uneven when it dries.
2. Tiny Star Field with Night Blue and Silver Dots
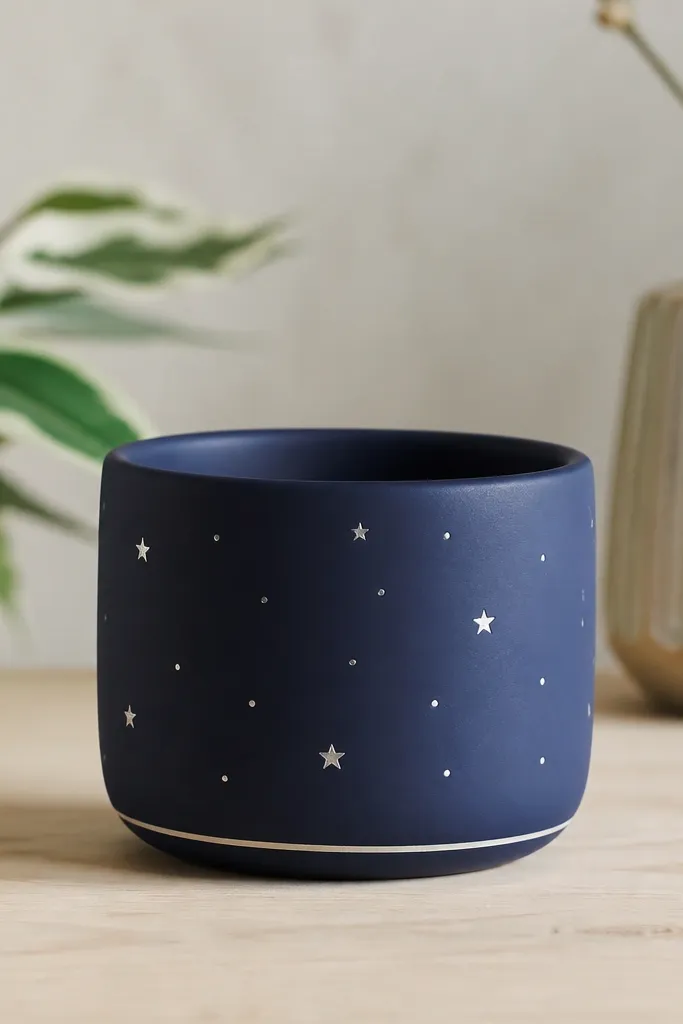
A night blue base makes tiny details pop instead of blending into the terracotta texture. Silver dots look like light reflections, so the pot feels festive without being cartoonish. Keep the stars sparse - the negative space makes it look clean. This one works for fall, winter, and even year-round for a cozy indoor shelf.
Prime and paint the pot body navy, then let it cure until it feels dry to the touch with no tack. Use a fine liner or toothpick to place silver dots - vary dot sizes from pinhead to small pea. Add 3-5 five-point stars using a stencil or a star-shaped sponge stamp.
Pro tipMix silver paint with a tiny drop of matte medium if it looks too metallic and streaky.
AvoidSkipping primer on terracotta makes the star dots fade or flake when you water.
3. Pastel Stripes with Teal Accent Bands
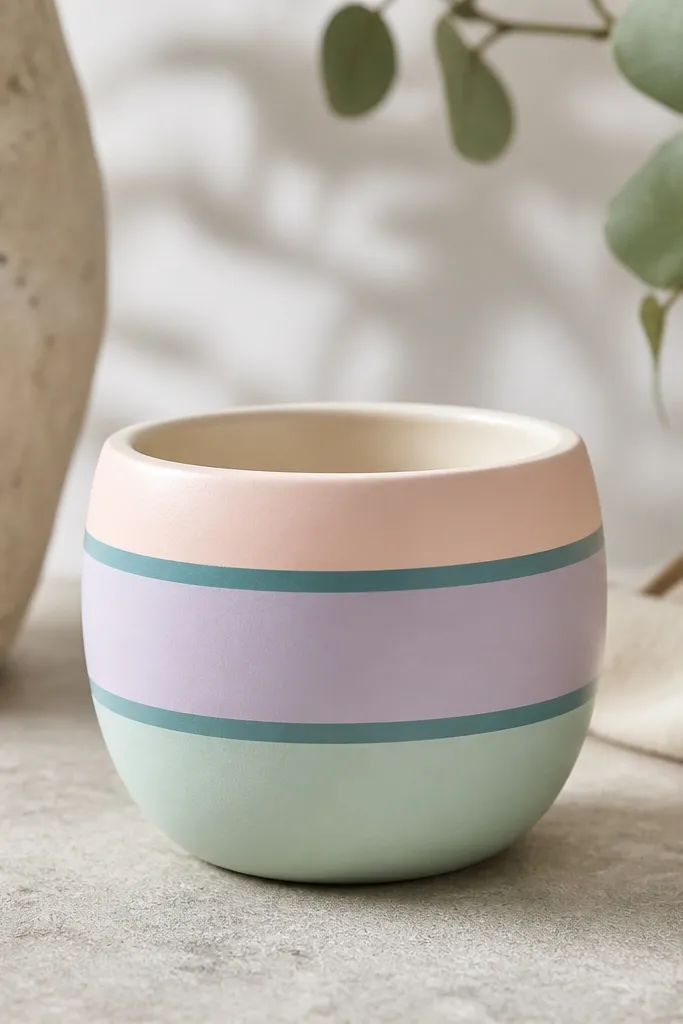
Horizontal stripes look modern on small planters because they guide the eye around the pot. Pastels read gentle next to greenery, and teal adds contrast without turning the pot into a loud decoration. Crisp tape lines are the difference between "cute" and "messy." This is a great year-round option because you can swap pastel tones seasonally.
Tape off 1/2 inch bands with painter's tape, working around the circumference. Paint one band at a time, remove tape while paint is still slightly wet, and let each color dry before the next. Add teal bands last using a slightly thicker stroke for a hand-painted look.
Pro tipUse a foam brush for pastel stripes if your brush leaves streaks on curved surfaces.
AvoidDon't rush tape removal - if the paint fully dries, the edge can tear and look jagged.
4. Watercolor Wash Corners with White Fade
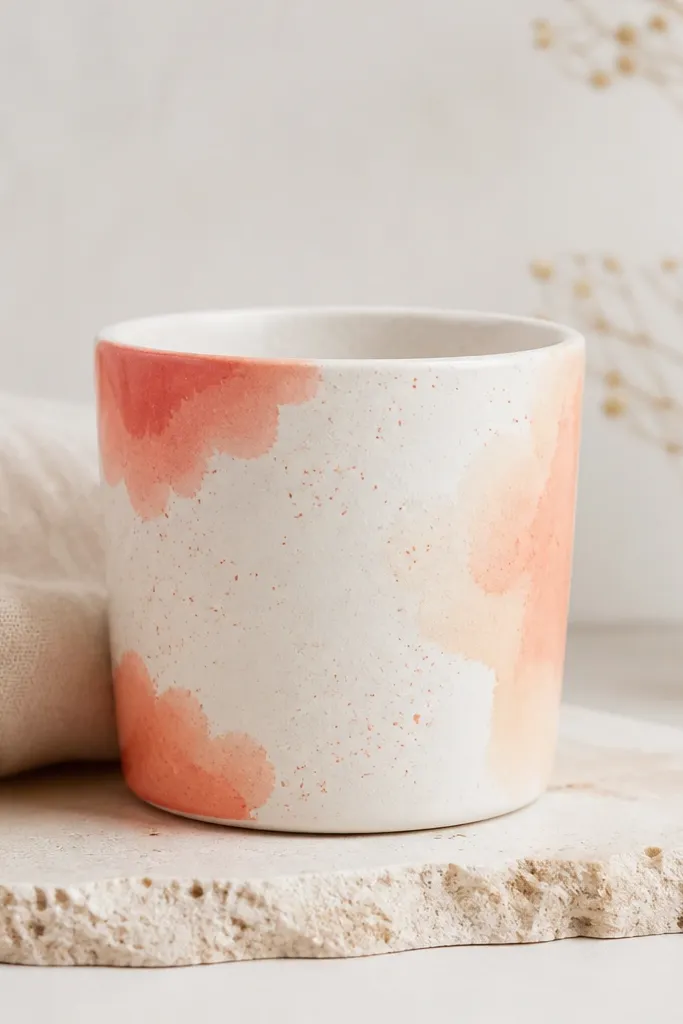
Watercolor corner washes look artsy but still tidy when you keep them to a few corners. The white fade gives a soft transition and prevents the pot from looking like it's fully painted over. Coral and peach pair nicely with green leaves, and the speckle makes it feel handmade. It works in every season because it's color-light and doesn't scream holiday.
Paint the whole pot matte white first. For the corners, load a damp brush with diluted coral paint and press the color into the corner, then pull outward lightly to fade. Add a few tiny speckles by tapping your brush over a small scrap paper near the pot.
Pro tipDilute paint with water or acrylic medium and test the fade on a paper towel before touching the pot.
AvoidDon't use heavy wet paint or you'll get hard tide marks on the curve.
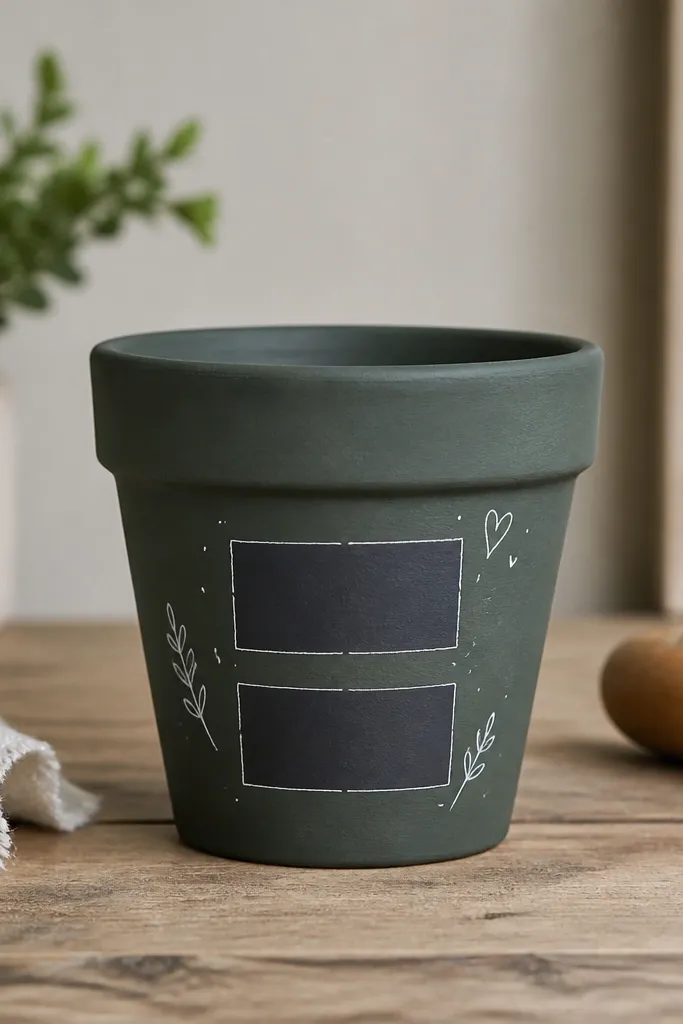
5. Greenhouse Label Look with Fake Chalk Text
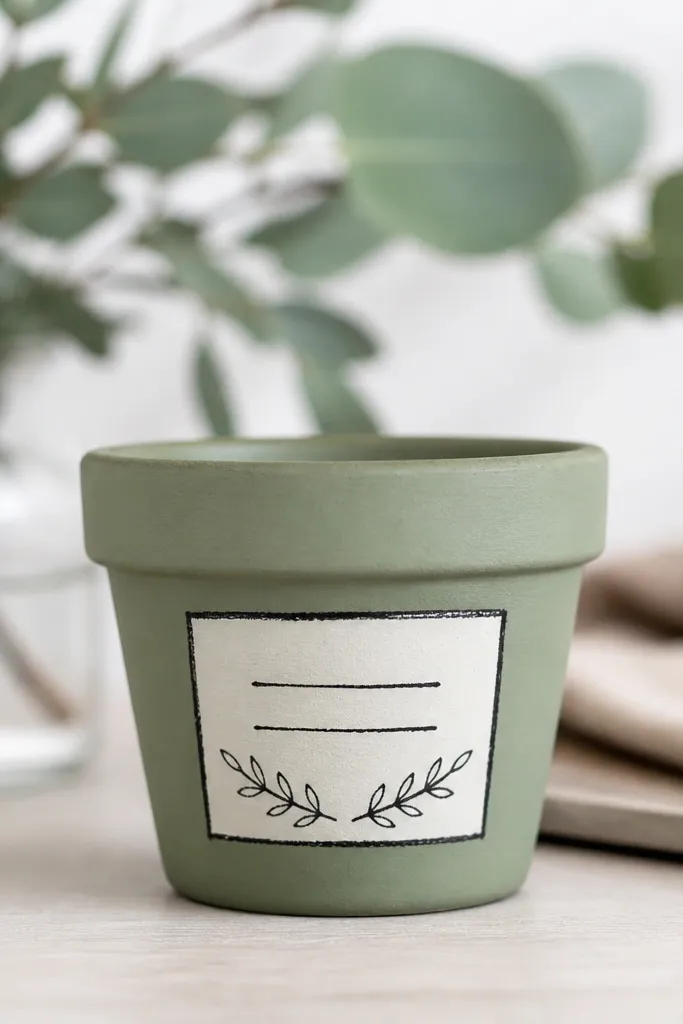
This design makes a small planter look styled, like it belongs in a greenhouse display. The off-white label keeps it readable and clean against sage. Chalk-style doodles feel handmade without needing perfect handwriting. It's also easy to change by season: swap the short lines for winter herbs, spring flowers, or summer greens.
Paint the pot sage, then outline a label rectangle with a pencil guide. Fill it with off-white, then use a black paint pen or liner brush to draw a slightly uneven chalk border. Add 2-3 short lines of text and tiny leaf icons.
Pro tipUse a paint pen for the text so the lines stay consistent on a curved surface.
AvoidAvoid straight, perfectly symmetrical label corners; sharp corners look sticker-like on a pot.
6. Holiday Red Green Check Rim
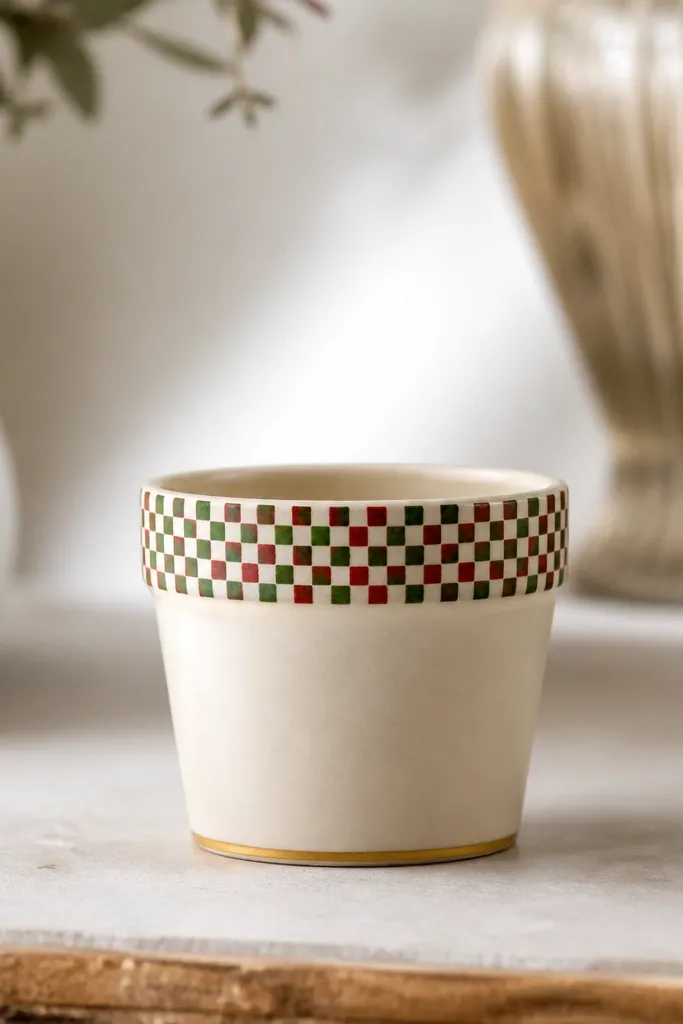
A check rim makes the planter feel seasonal without covering the whole pot. Cream keeps it bright, and the grid reads crisp even at a distance. Gold line at the bottom adds a little "finished" look. This one is great for winter, then you can switch to other accent colors for the rest of the year.
Paint pot cream first. Mark the rim area with tape bands about 3/8 inch tall. Paint red squares, let dry, then add green squares by filling alternating cells, using a fine brush for the grid lines. Finish with a thin gold stripe around the lower edge.
Pro tipPractice the square size on a scrap cardboard circle cut to pot diameter so the checks don't stretch.
AvoidDon't make the check squares too small - tiny squares blur on curved pottery.
7. Monochrome Daisy Dot Pattern
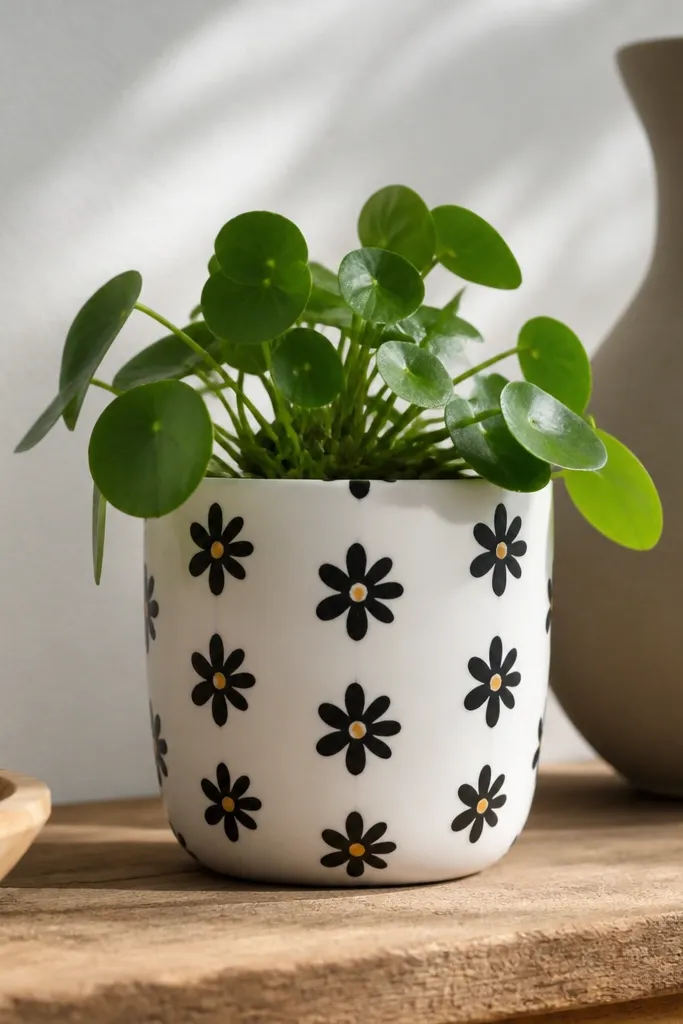
Daisies in monochrome look clean and cheerful next to green leaves. The white base keeps it crisp, while the yellow centers add warmth. Repeating a simple flower icon makes it feel intentional instead of random doodles. This works year-round because daisies don't scream one holiday.
After priming, paint the pot white matte. Use a dotting tool to place yellow centers, then draw petal loops around each center with a small round brush. Keep spacing consistent - one daisy every 1.5 to 2 inches around the pot.
Pro tipIf your petals look shaky, use a small stamp made from a craft foam daisy shape instead of freehanding.
AvoidAvoid painting full daisies too close to each other or the petals merge into a blob.
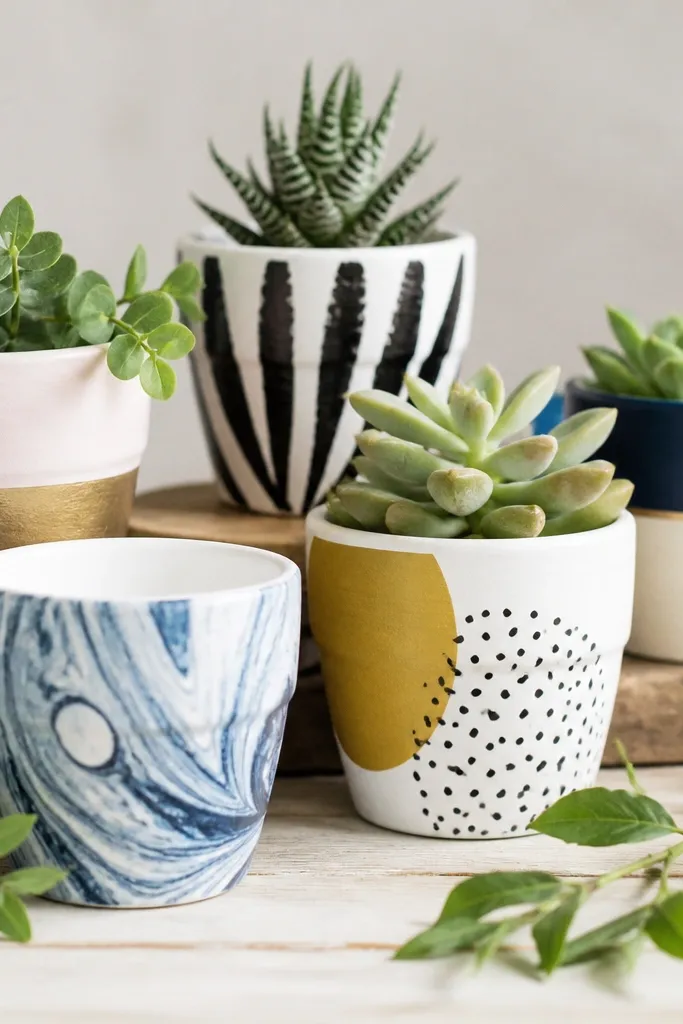
8. Midnight Marble with Gray Veins
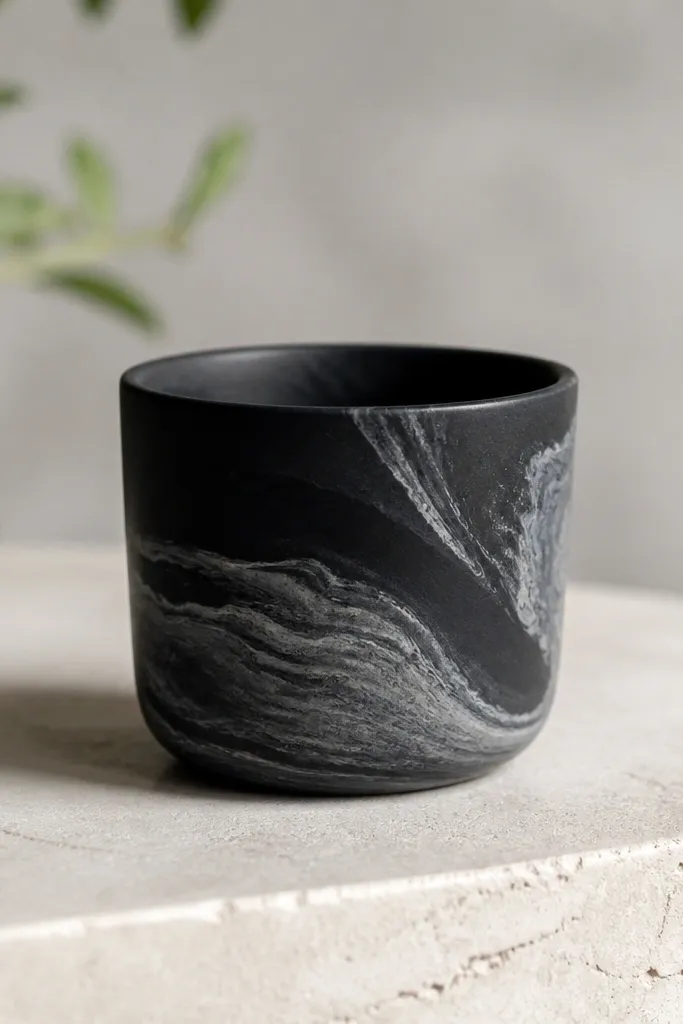
Marble paint effects look expensive on small planters because the veins create movement. Keep the veins gray on black and you'll get a high-end look that still pairs with any plant. This design hides minor texture from terracotta because the marbling is already irregular. I like it for year-round because it works in modern, neutral homes.
Paint the pot charcoal or black matte. For veins, use a thin liner brush with watered-down gray paint, then drag lines and add feather edges by lightly tapping with a dry brush. Add a few thicker streaks using more paint, then lightly blend the edges with a almost-dry brush.
Pro tipMake your veins thicker near the center and thinner at the ends so it reads like real stone.
AvoidDon't over-layer veins - too many lines make it look dirty instead of marble.
9. Botanical Branch Line Art
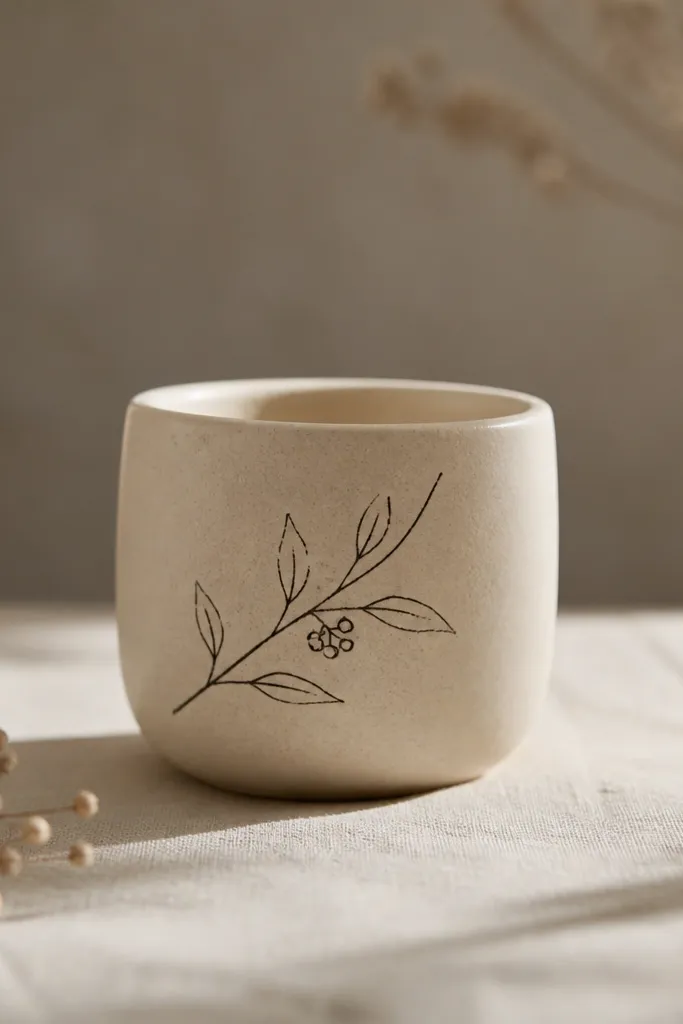
Line art looks crisp on small planters because it doesn't need heavy coverage. A sand beige base makes black ink-style drawing stand out. This style is calm and fits any season, since branches don't tie to one holiday color. It also looks good with herbs because it matches the theme.
Prime and paint sand beige matte. Use a fine black paint pen or liner brush to draw a branch that curves upward. Add small leaf shapes and 3-5 berry dots. Keep the drawing on one side so the pot doesn't feel busy from every angle.
Pro tipSketch with pencil first and erase before painting - curved surfaces punish freehand mistakes.
AvoidAvoid thick marker-like lines; wide strokes make it look like a kids' craft.
10. Pastel Galaxy with Tiny Crescent Moons
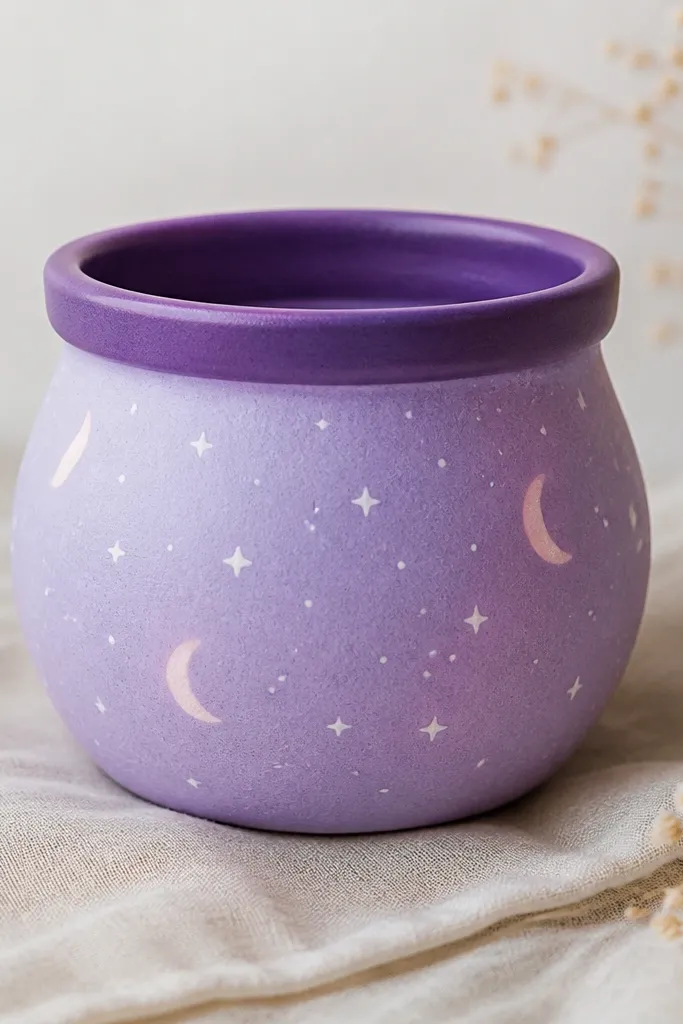
A pastel galaxy is fun without being too dark for indoor plants. Lavender base plus white dots makes the greenery look brighter. Crescent moons add a cute, kid-friendly astronomy vibe. It's a great year-round pot idea because you can keep it light and swap the accent moon color if you want.
Paint a base lavender, then sponge on slightly darker purple around the middle and lower area. Add white stars with a toothbrush flick (tap gently over the pot). Paint a few crescents with a small brush or use a curved stencil.
Pro tipMask the rim with tape so the top edge stays clean for watering and handling.
AvoidDon't flick too hard - big splatters look messy on small planters.
11. Terracotta to Chalkboard Green Mini Panels
Chalkboard green makes the pot feel like a plant note station. The matte surface hides small imperfections and looks good even if your brush marks show. White faux chalk text gives contrast and lets you change what you write by season. I like it for windowsills because it reads clearly when you're standing nearby.
Use chalkboard paint if you want the real chalk look, or paint matte dark green and seal with a matte topcoat. Tape two mini rectangles and paint them off-white, then add faux chalk text with a thin white paint pen. Add tiny icons like a snowflake or leaf to match the season.
Pro tipSeal with matte clear spray so the white marks don't smear when you wipe dust.
AvoidAvoid glossy topcoat on chalk-style pieces - the shine kills the chalk vibe.
12. Citrus Peel Segments with Yellow Lines
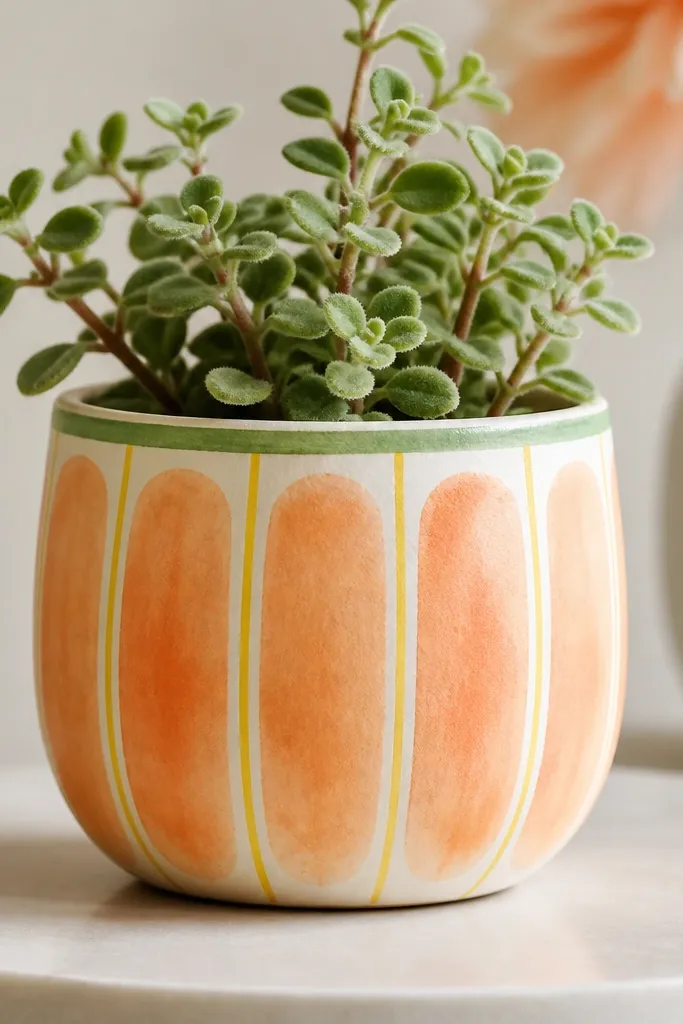
Citrus segments make a small planter look like a mini fruit, which is adorable in summer and still cute in colder months when you want color. The white base prevents the oranges from looking muddy. Yellow separators make it look graphic, not messy. Add a thin green rim and it reads like peel.
Paint pot white. Draw 6-8 vertical segment lines with yellow paint, then fill each segment with diluted orange using a small sponge or brush. When dry, add a thin green stripe around the top rim with a steady hand and a small flat brush.
Pro tipUse a damp sponge for the orange fill so the edges stay soft and watercolor-like.
AvoidDon't paint over wet orange washes - they'll bleed into the separators.
13. Monogram Corner with Gold Leaf Accent
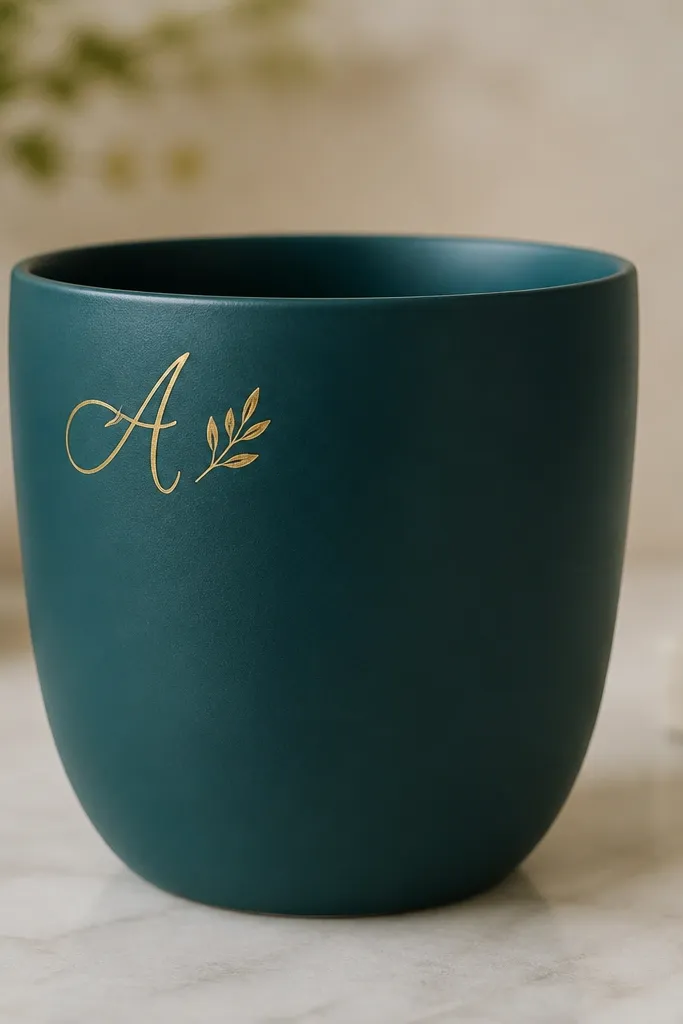
A monogram corner looks intentional because it's small and placed. Teal plus gold feels expensive without needing a full pattern. The gold leaf accent adds texture and catches light on the pot's curve. This is a good year-round choice for gifting or matching a room color scheme.
Paint pot solid deep teal matte. Use stencil tape or a vinyl stencil for the initial so the script looks sharp. Paint gold with metallic acrylic and let it dry fully, then add a small gold leaf piece on top using craft glue if you want real texture.
Pro tipIf you don't want real gold leaf, use metallic gold paint and stipple it with a dry brush for a leaf-like grain.
AvoidSkip thick paint on the stencil edges - it will look raised and uneven on curves.
14. Winter Snowcap Hills with Blue Drifts
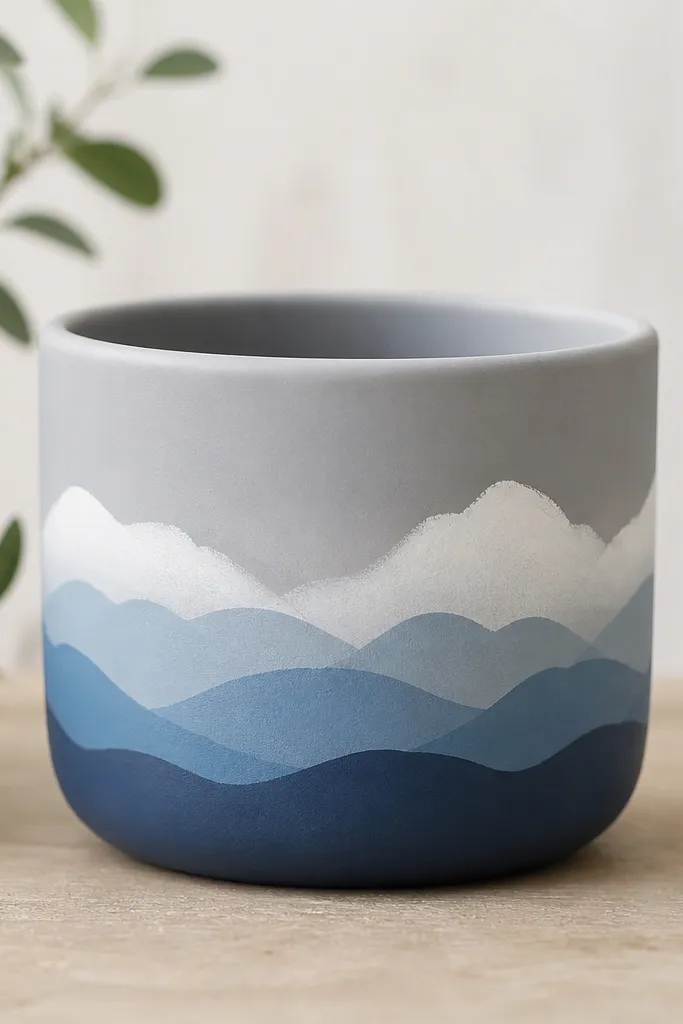
Snowcap hills are one of the easiest ways to make a planter feel winter-ready while staying cute. Light gray base makes the blues look cool and the white snow look crisp. Layered hills add depth without needing a full landscape scene. This style still works in spring if you swap the blue for green or pastel pink.
Paint pot matte light gray. Mix two blues: one medium and one pale. Paint the bottom hill shapes first in medium blue, then add pale blue on top with a slightly smaller wave. Finally, paint white snowcaps along the top edges of hills using a dry brush for softer blending.
Pro tipUse a makeup sponge to dab snowcaps - it keeps the texture airy instead of paint-streaky.
AvoidDon't try to make the hills perfectly smooth; wavy edges read more natural.
15. Rainbow Waterline with White Divider

A rainbow waterline looks playful and clean because it's contained to one band. Thin white dividers keep each color from turning into a single muddy strip. It's also easy to adjust for season by changing which colors you include - keep it full for Pride season, or switch to autumn colors later. This one looks great when the pot is grouped with other planters.
Paint the whole pot white first. Tape a band across the middle about 1 inch tall, then paint the rainbow stripes within the band from red to blue. Use a thin brush to add white dividers between colors, then remove tape while paint is slightly wet.
Pro tipIf tape pulls paint, seal your base with a thin clear coat before taping for the rainbow band.
AvoidAvoid thick rainbow stripes; on small pots they look chunky and cheap.


