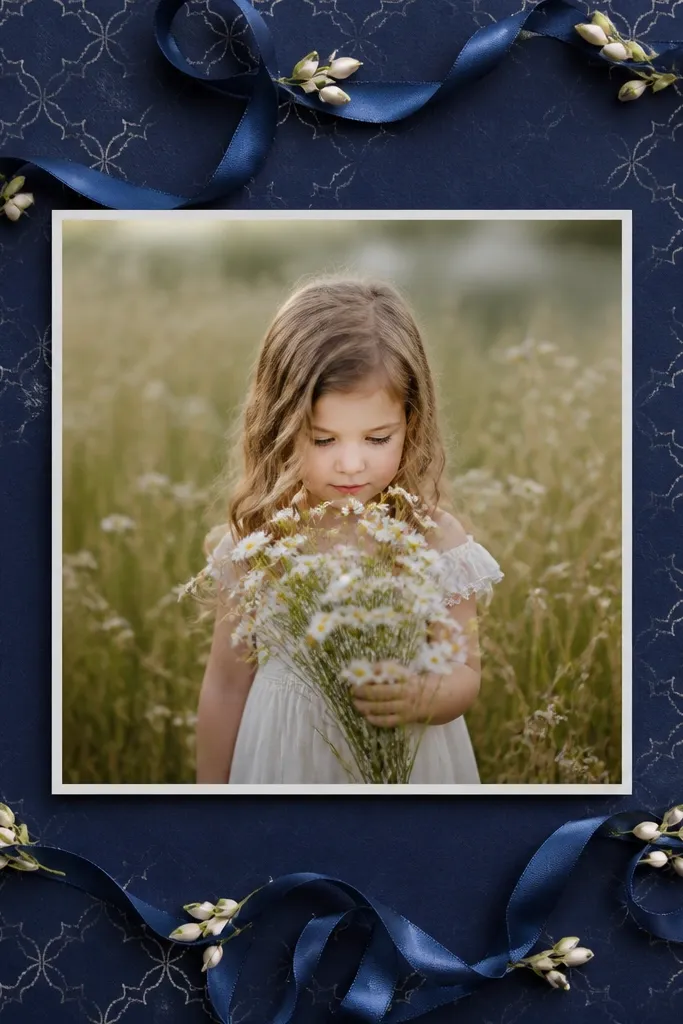
1. Navy Hydrangea Mat with Powder-Blue Ribbon Edge
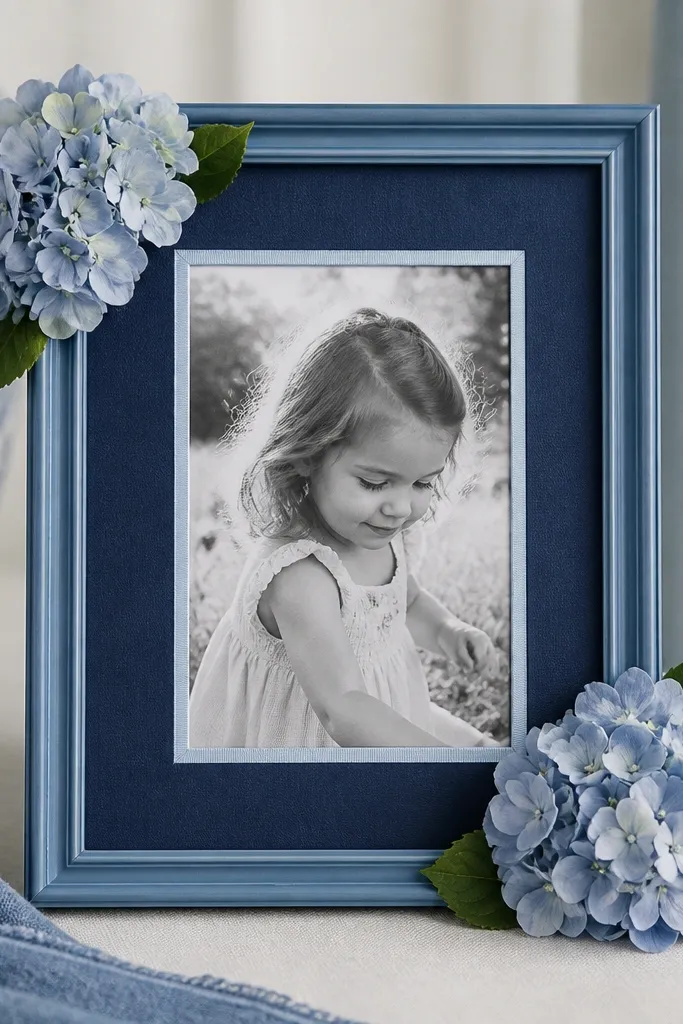
This one works because the navy mat gives your flowers a dark "stage" and the powder ribbon adds a crisp line that makes the whole frame feel finished. I use faux hydrangea because the rounded petals create a soft, full silhouette that looks good even from across a hallway. The blue ribbon is narrow and stays flat, so it doesn't fight the flower shapes.
Start with a thrifted wooden frame painted navy (two light coats). Replace the original backing with 1/8-inch foam board and cut a navy mat window for a 5x7 photo. Hot glue the hydrangea clusters with tiny dots at the base only, then glue the ribbon just inside the inner edge.
Pro tipCut the ribbon ends at a 45-degree angle and burnish them against a warm spoon so they don't fray.
AvoidDon't glue the ribbon over flower stems or you'll get bumps that show through the photo opening.
2. Periwinkle Pressed Flowers in a Blue-Tinted Glass-Style Frame
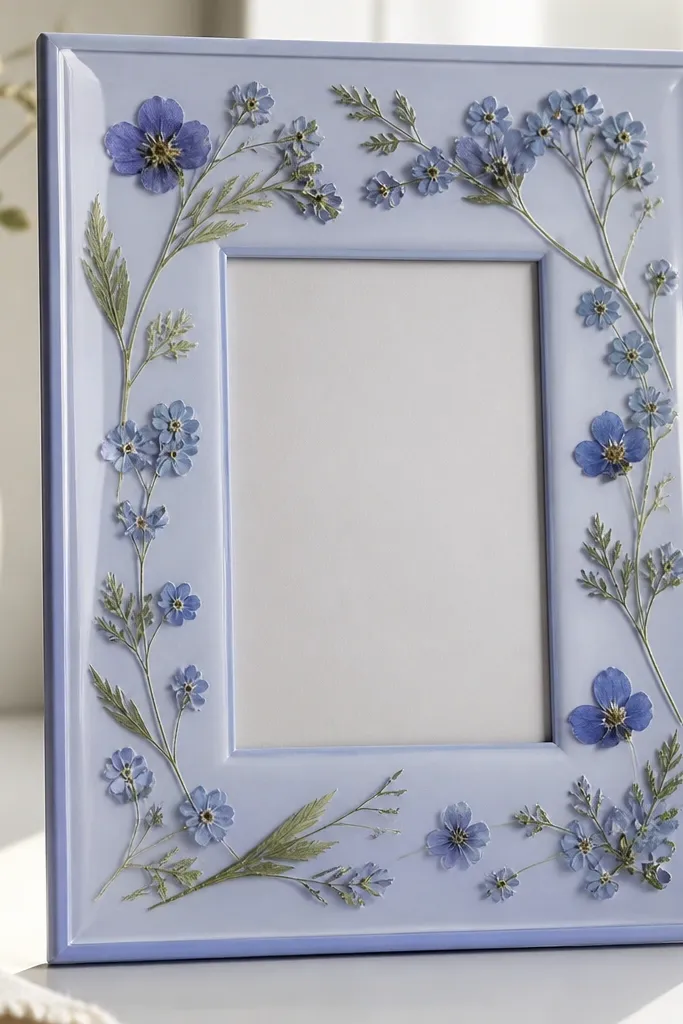
Pressed flowers look delicate, so the trick is contrast. A periwinkle border holds the blues together and keeps the pressed greens from turning muddy. I like thin pressed leaves because they add lines without adding bulk, and the overall look reads like a botanical print.
Use a frame with a clear acrylic front if you can. Tint a mat board with periwinkle craft paint (thin coats, let it dry between coats). Lay pressed flowers dry first, then seal them in place with a thin brush of matte Mod Podge over the flowers only, not the mat.
Pro tipPress flowers under books for 10-14 days, then mist the back of the pressed piece lightly with water and press again for 24 hours if edges curl.
AvoidSkip glossy sealant; it makes pressed petals look wet and cheap.
3. Royal Blue Paper Quilling Blossoms with White Photo Border
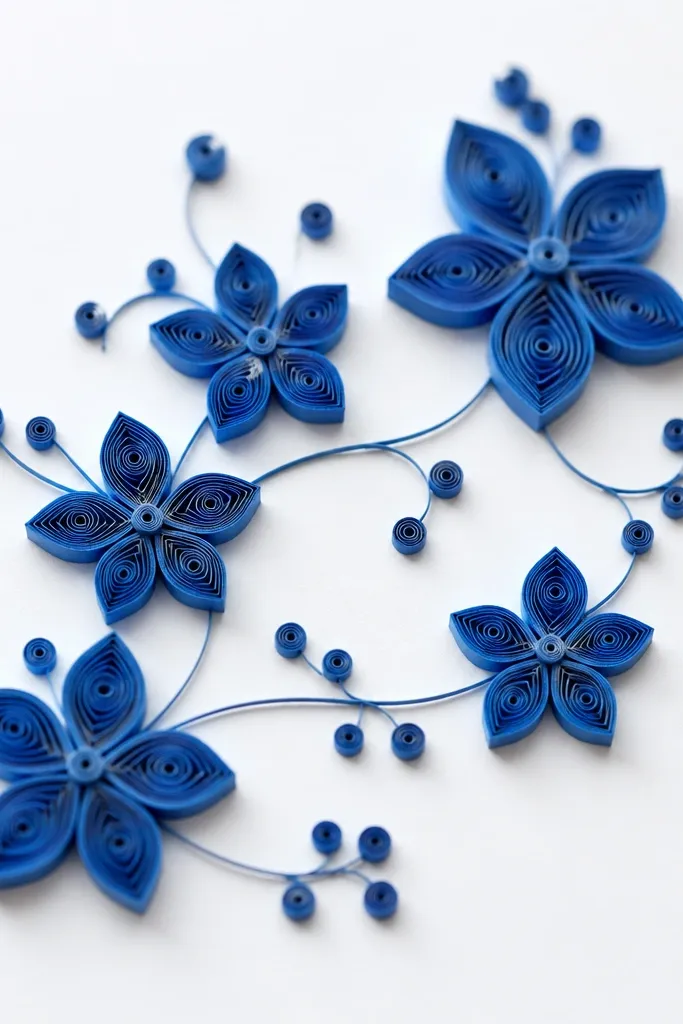
Quilling gives you structure, and structure is what makes a year round flower photo frame look designed instead of "decor." The royal blue pops against white, and the small coil shapes create a consistent texture that reads well in photos. I add a few tiny white coils to mimic highlights on petals.
Cut a 1-inch white border around your photo opening and glue it to a backing sheet. Use quilling strips in royal blue and white, roll with a quilling tool, and glue each coil with craft glue. Build 6-10 blossoms and place them around the photo, leaving breathing room.
Pro tipUse a toothpick to add glue to the coil base so you don't get glue strings across the petals.
AvoidDon't pack the flowers too tightly; crowded quilling looks messy fast.
4. Blue Gingham Frame with Faux Cornflower Crown
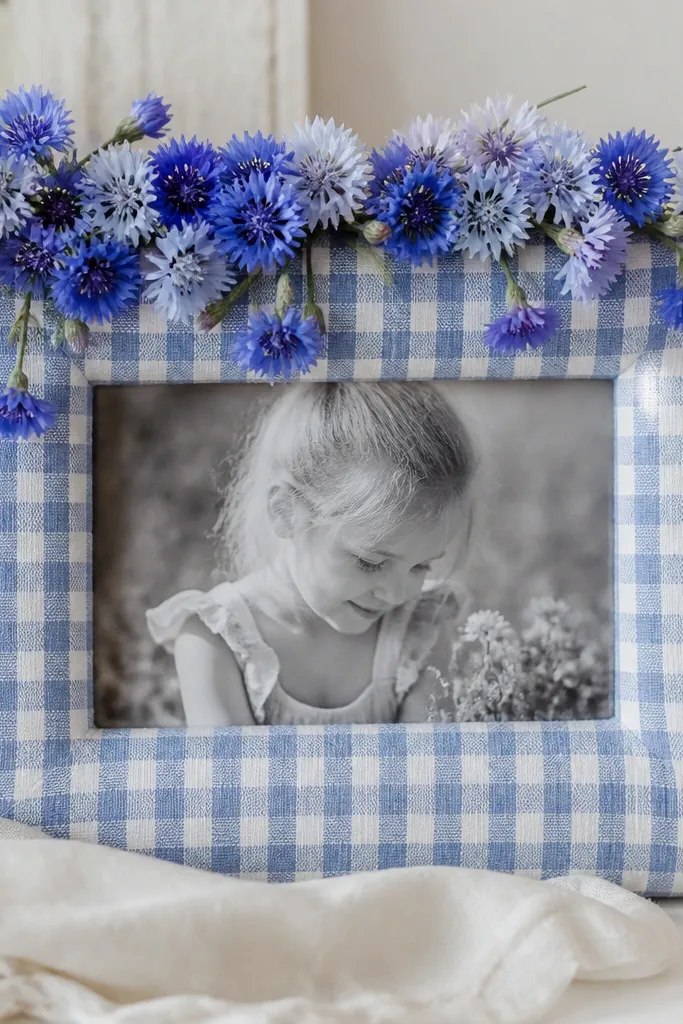
Gingham is bright and friendly, so it stops the flower frame from feeling too "formal" for everyday. The cornflower heads are smaller than hydrangea, which helps the design stay airy. The blue-and-white pattern also makes the frame feel summery without needing specific seasonal flowers.
Wrap the frame with cotton gingham using spray adhesive or Mod Podge, then trim the corners cleanly with a sharp craft knife. Add a top crown of cornflowers using a hot glue gun, anchoring only the bottom of each stem. Finish the edges with a thin strip of matching ribbon or bias tape.
Pro tipIron the gingham before wrapping so the pattern lines stay straight.
AvoidDon't use stretchy fabric; it warps and makes the flowers look off-center.
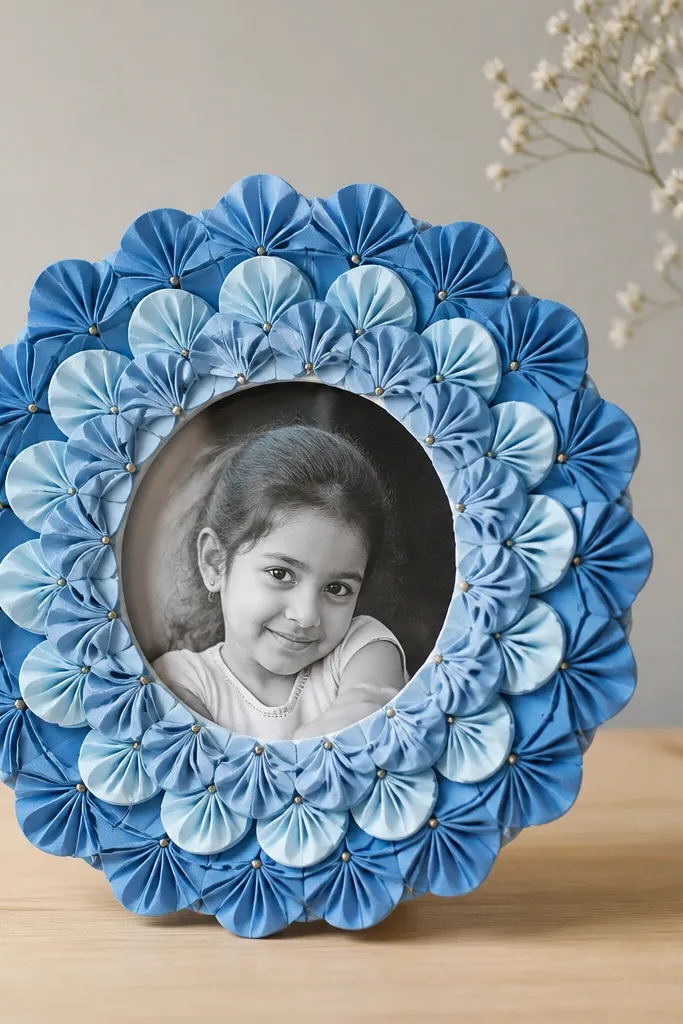
5. Cerulean Foam Board Back with Layered Paper Hydrangea Circles
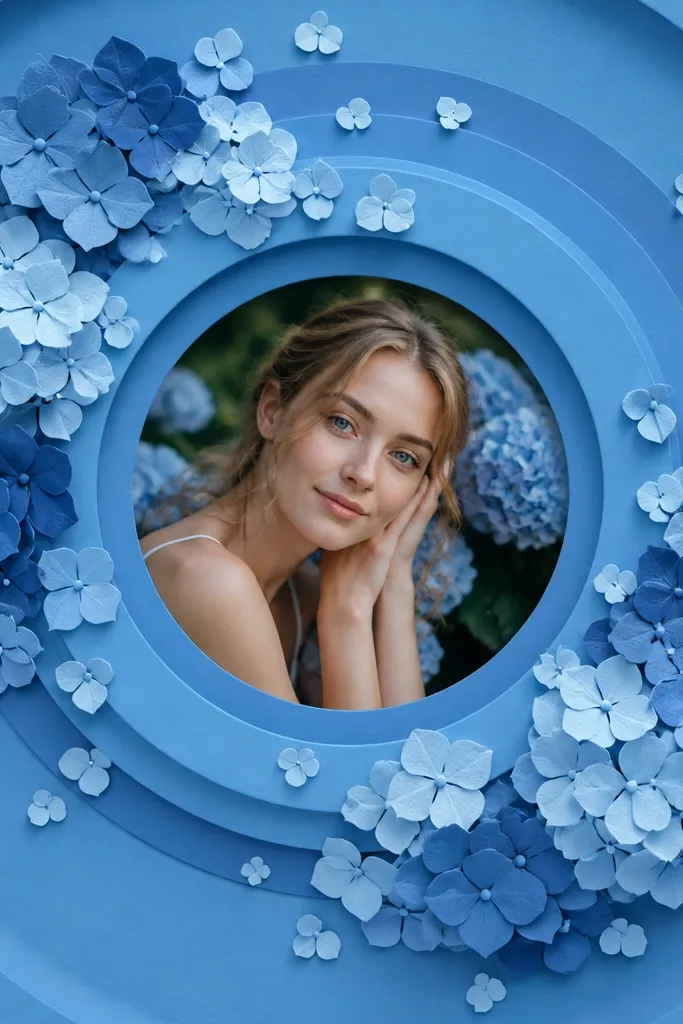
Paper flowers can look flat, so this uses layered circles to fake depth. A cerulean foam board backing gives you a sturdy, smooth surface, and the concentric layout frames the photo like a target. Dark-to-light cerulean petals create a gradient that looks intentional from every angle.
Cut circles from cardstock in 3 shades of cerulean. Fringe the edges with small cuts, then stack the circles from largest to smallest using foam dots or folded paper tabs. Glue the stacked hydrangea circles to a cerulean foam board backing behind a mat opening.
Pro tipStagger the fringe cuts so the top layer covers the gaps of the layer below.
AvoidDon't over-glue the center; it makes the petals collapse and look lumpy.
6. Deep Indigo Stenciled Background with Blue Ribbon Vines
A stenciled background adds texture without adding more objects to your layout. The ribbon vines give you motion lines, and the buds make the frame read like a living plant instead of a flat sticker sheet. I keep the stencil faint so it doesn't compete with the flowers.
Paint or cover the mat with deep indigo. Use a stencil and white acrylic paint with a dry brush technique for light coverage. Twist thin blue satin ribbon into gentle curls, then tack it down with hot glue at the ribbon bends and add tiny faux buds along the curves.
Pro tipDry-brush the stencil - thick paint looks chalky and cheap.
AvoidSkip shiny ribbon on a glossy sealant surface; reflections make the ribbon look plastic.
7. Blue Ombre Spray-Paint Frame with White Foam Daisy Clusters
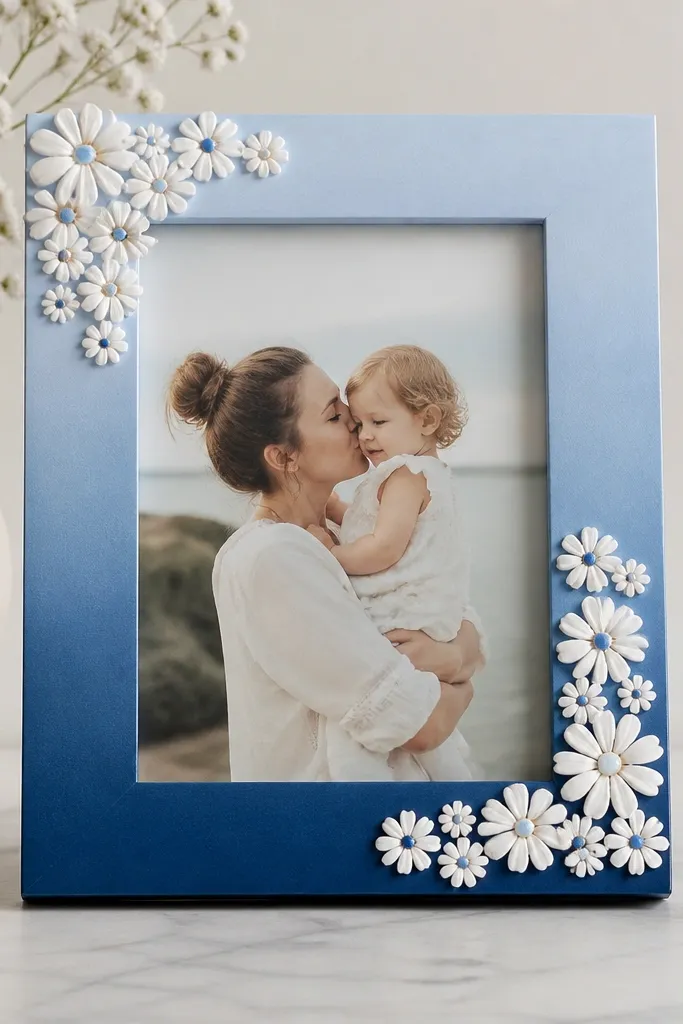
Ombre paint gives you instant color depth, and it makes the flowers look like they belong to the frame instead of sitting on top. White daisies keep it bright, and the tiny blue centers connect to your blue palette. The result feels springy but still works for fall because the base is deep at the bottom.
Sand the frame lightly, wipe clean, and spray with primer. Apply a navy base at the bottom third, then blend upward with lighter blue spray in overlapping passes. Attach white foam daisies with hot glue, but only at the back rim so the petals stay lifted.
Pro tipPractice your ombre on cardboard first so you don't get a hard line at the blend point.
AvoidDon't skip primer; paint chips off the moment you touch it during assembly.
8. Silver Wire Flower Frame with Blue Glass Teardrops
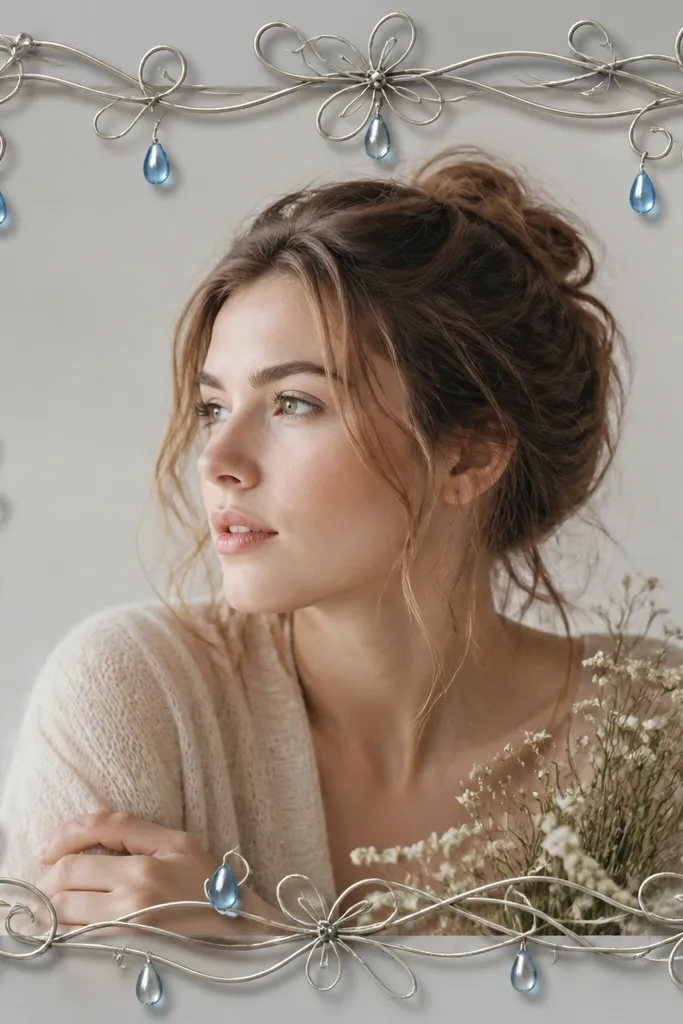
This is the "grown-up" blue flower frame. The wire lines are thin and clean, and the blue glass teardrops catch light like tiny petals. I use this when I want a year round flower photo frame that doesn't look childish or overly craft-store.
Use 18-20 gauge craft wire. Bend it into a frame outline and add flower loops at corners, then secure joints with pliers. Tie blue beads onto short wire tails and twist them into the loops. Mount wire border to a backing board using hot glue at a few points, not all along.
Pro tipWear gloves when cutting wire and wipe beads clean so fingerprints don't show.
AvoidDon't use thick wire; it makes the pattern look bulky and blocks the photo.
9. Blue Felt Flower Sprigs with Embroidered Stems
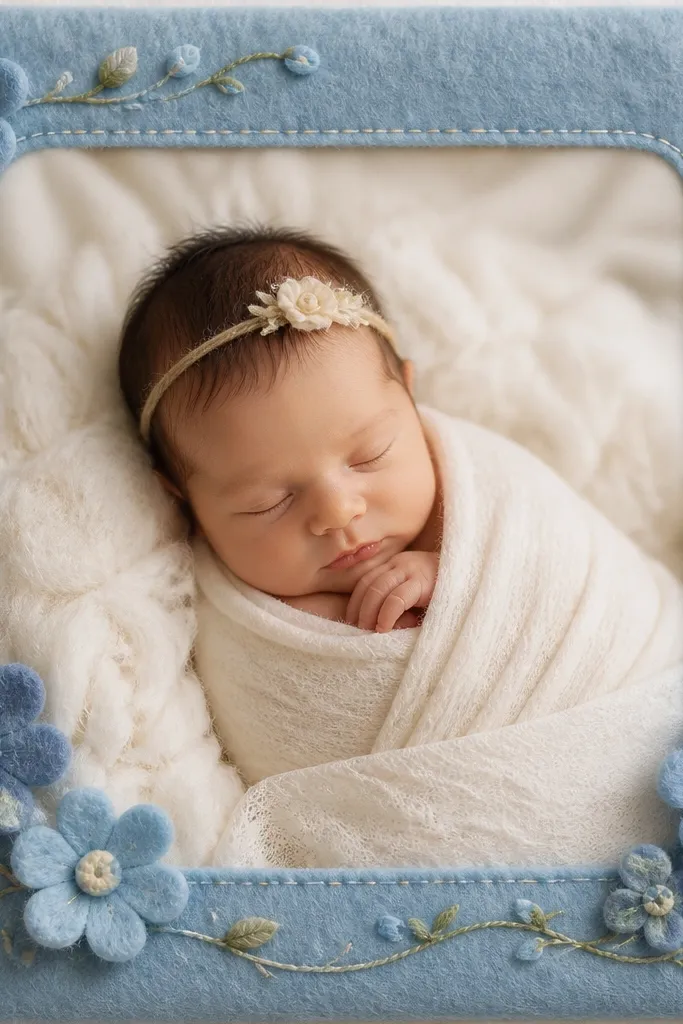
Felt flowers look cozy, and the embroidered stems make it feel handmade in a good way. Use different shades of blue felt so the flowers have depth without needing extra layers. This design also holds up well because felt doesn't curl like paper when humidity shifts.
Cover a foam board backing with blue felt. Cut small felt petals and stitch them onto the felt using matching thread. Add embroidered stems with a simple backstitch, then tack the whole sprig cluster in place with a few hidden stitches.
Pro tipUse a longer needle and pull thread tight so the stems don't sag.
AvoidDon't glue felt flowers flat; stitch them so they stay slightly raised.
10. Cerulean Chalk Paint Frame with Lace + Blue Rosebuds

Chalk paint has a matte look that makes lace feel crisp instead of shiny. The lace border gives structure, and the blue rosebuds add a focal point without heavy bulk. I like this when I want a frame that looks good near a lamp because the matte finish avoids glare.
Sand the frame, apply cerulean chalk paint, and let it cure fully (at least 24 hours). Glue lace along the inner edge with fabric glue. Arrange rosebuds in two corner clusters and add tiny greenery sprigs for a natural spacing rhythm.
Pro tipTrim lace with pinking shears so you don't need to hem for a clean edge.
AvoidSkip thick hot glue blobs on the lace; they show through and look lumpy.
11. Blue Botanical Wallpaper Accent with Watercolor-Style Flower Cutouts
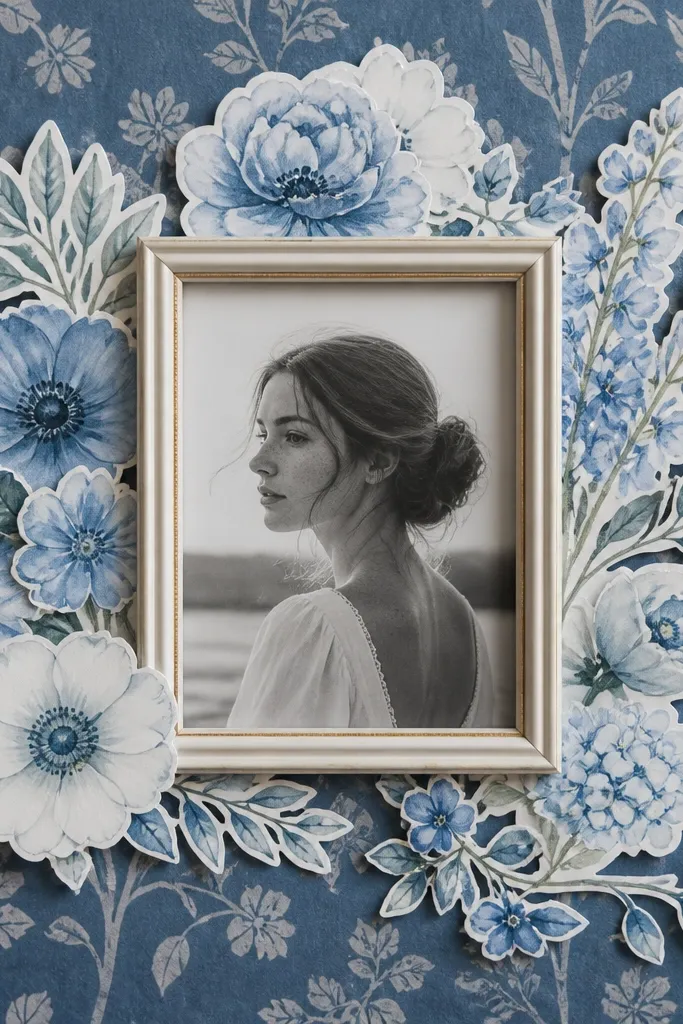
Wallpaper does the heavy lifting for texture. When you add watercolor-style cutouts, the frame looks like a coordinated print set instead of craft pieces. I keep the cutouts mostly in the corners so the center stays clean and the photo remains the focus.
Choose a blue botanical wallpaper with small leaves, then cut it to fit the backing board. Seal the wallpaper with a thin coat of matte Mod Podge so it doesn't peel. Cut watercolor-style flower shapes from thick paper or sticker paper, then glue them with double-sided tape dots for a slightly raised look.
Pro tipUse a craft knife and metal ruler so the wallpaper edges sit straight against the frame.
AvoidDon't cover the entire photo opening with cutouts; it makes the photo look crowded.
12. Blue Paper Lantern Flower Rings Around the Photo
Rings create an instant focal point that reads clearly even from a distance. The folded petal look adds dimension without needing real flowers. I use multiple ring sizes so the frame feels dimensional but still tidy.
Cut 3-4 ring sizes from cardstock in navy, mid-blue, and light blue. Fold small petal tabs around the edges of each ring. Stack rings using foam tape so each ring sits slightly higher, then place them around the photo window like a halo.
Pro tipMeasure the photo window and leave a consistent 1/2-inch gap so the rings don't overlap the picture.
AvoidDon't use thin paper; it buckles and makes the rings look flimsy.
13. Blue Mason Jar Style Frame with Hanging Dried Baby's Breath
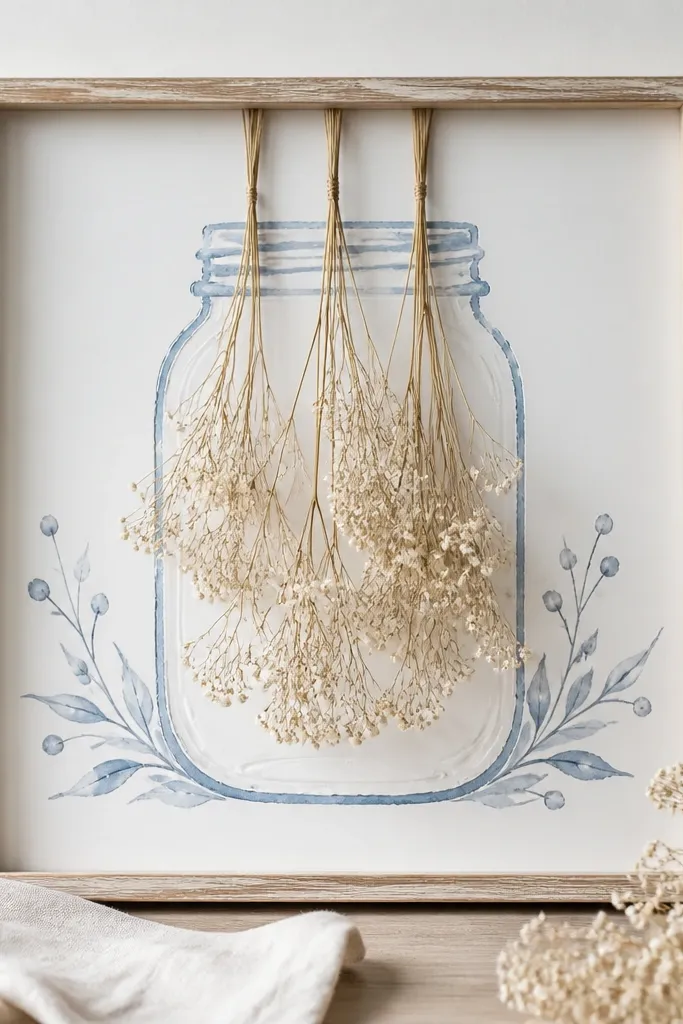
Hanging dried elements give you motion and a "real arrangement" vibe. Baby's breath is small enough to work year round, and the blue accents keep it from turning purely bridal. The strands also hide glue seams because they fall naturally.
Paint the frame with a blue jar outline using a stencil or printed template. Create a small "jar" panel on the backing with clear acetate or a thin acrylic sheet. Glue dried baby's breath strands at the top and let them drape down over the photo area, then seal the ends lightly with matte spray.
Pro tipSpray dried baby's breath lightly from 12 inches away so it doesn't clump.
AvoidDon't over-seal; thick spray turns dried stems dark and sticky-looking.
14. Glitter-Free Blue Flower Foam Tiles in a Grid Pattern
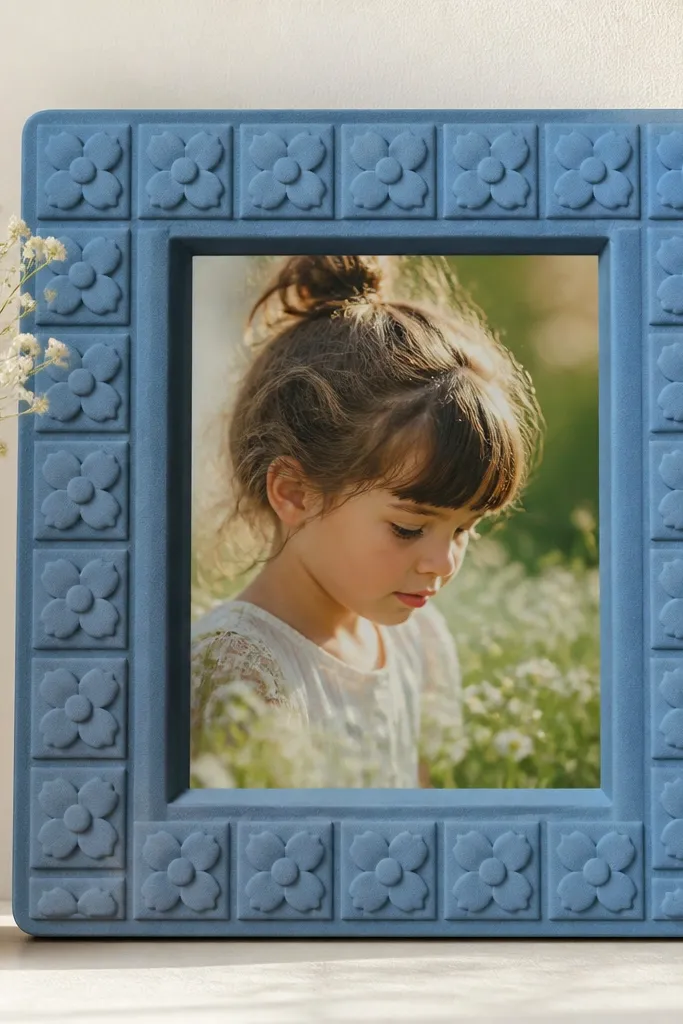
This one is playful but controlled. A repeating grid makes the frame look designed, and tiny foam flowers keep the whole thing lightweight and sturdy. I avoid glitter on foam because it flakes - plain colored foam looks better under indoor light.
Cut foam board into a grid and cover it with matte blue paint. Use a small flower punch or cut templates to create tiny flowers from lighter blue foam. Glue flowers into the grid using craft glue, then mount the grid behind the photo mat so the edges stay aligned.
Pro tipSand the foam edges lightly so the frame looks smooth when you slide it into the backing.
AvoidDon't mix too many blue shades; 2-3 tones look intentional, 6+ looks chaotic.
15. Indigo Frame with Blue Velvet Poppies and Brass Button Centers
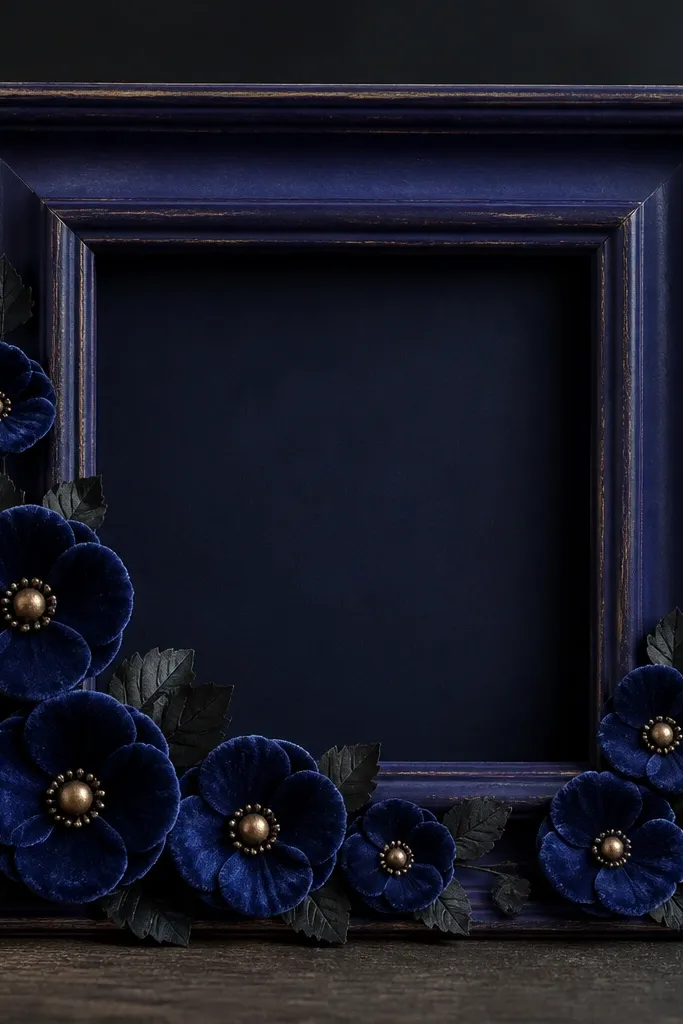
Velvet petals absorb light, which makes blue poppies look rich without looking shiny. The brass button centers add a warm contrast that keeps the whole piece from feeling cold. I like this design for winter because deep indigo and dark leaves still read cozy.
Paint the frame indigo and let it dry fully. Cut velvet petals in 2 sizes and glue them around a button center using a fabric-safe adhesive. Add a few dark green felt leaves at the bottom edges, then arrange poppies in a diagonal across the photo corners.
Pro tipUse a scrap of cardboard under the velvet while gluing so glue doesn't soak through the fibers.
AvoidSkip hot glue right on velvet; it can leave dark spots after drying.


