1. Candy Stripe Rim and Tiny Dot Base
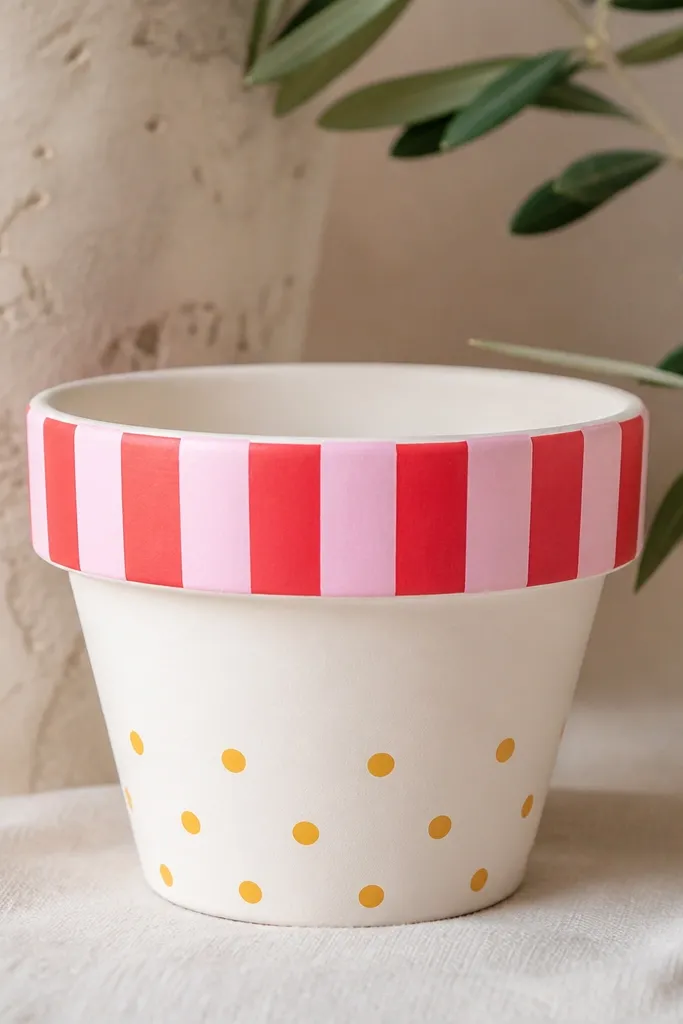
This one works because the stripes sit where your eyes land first - the rim. The tiny dot band grounds it and gives the design a "finished" rhythm without adding clutter. I use high-contrast colors so the pattern stays readable even when the pot is on a cluttered windowsill.
Tape off a 1/2-inch strip around the rim using painter's tape. Paint alternating stripes with a small angled brush, then remove tape while paint is still slightly wet for sharp edges. Add dots with a dotting tool or the end of a round paintbrush handle, keeping the dot spacing consistent.
Pro tipDo one stripe test on cardboard first so your stripe width matches the tape edge.
AvoidDon't freehand the rim stripes - uneven widths make the whole pot look rushed.
2. Snowy Pine Branch Silhouette on Cream
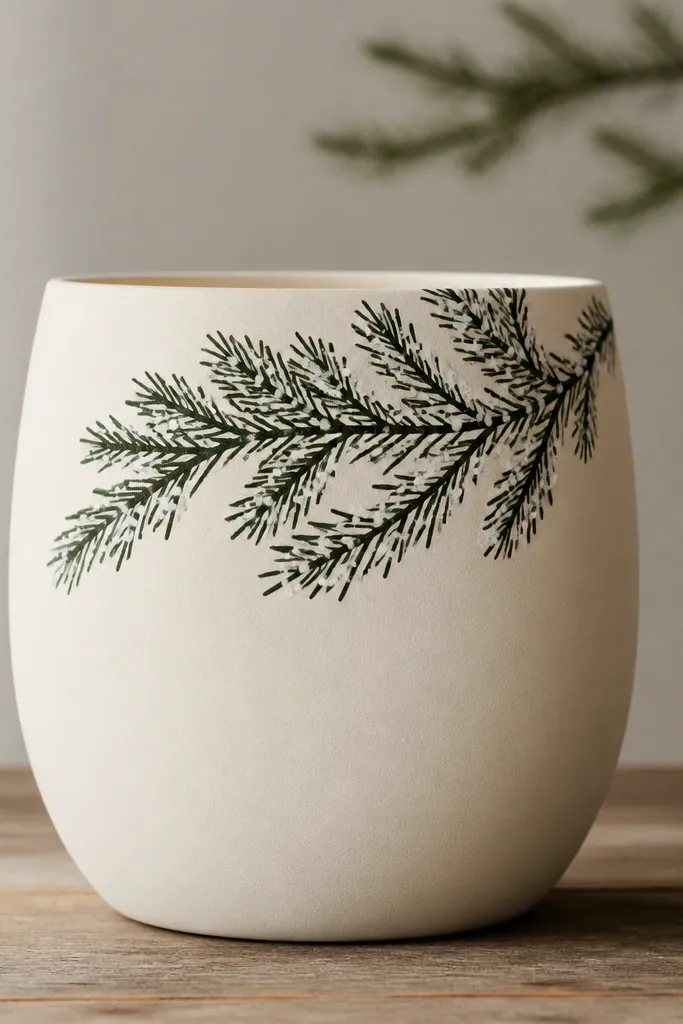
A silhouette design looks good even on small planters because it's mostly negative space. The diagonal branch adds movement, and the white flecks mimic winter texture without needing fancy detail. I like this style for herbs and small evergreens because it looks seasonal without screaming "holiday store."
Paint the pot with two coats of creamy off-white acrylic. Use a liner brush to drag a pine branch line, then add short angled offshoots. Tap white paint with a stiff toothbrush for snow flecks only near the tips.
Pro tipKeep the branch one continuous line - it looks more natural than separate strokes.
AvoidAvoid covering the whole pot with snow - it makes small space pot painting ideas look busy.
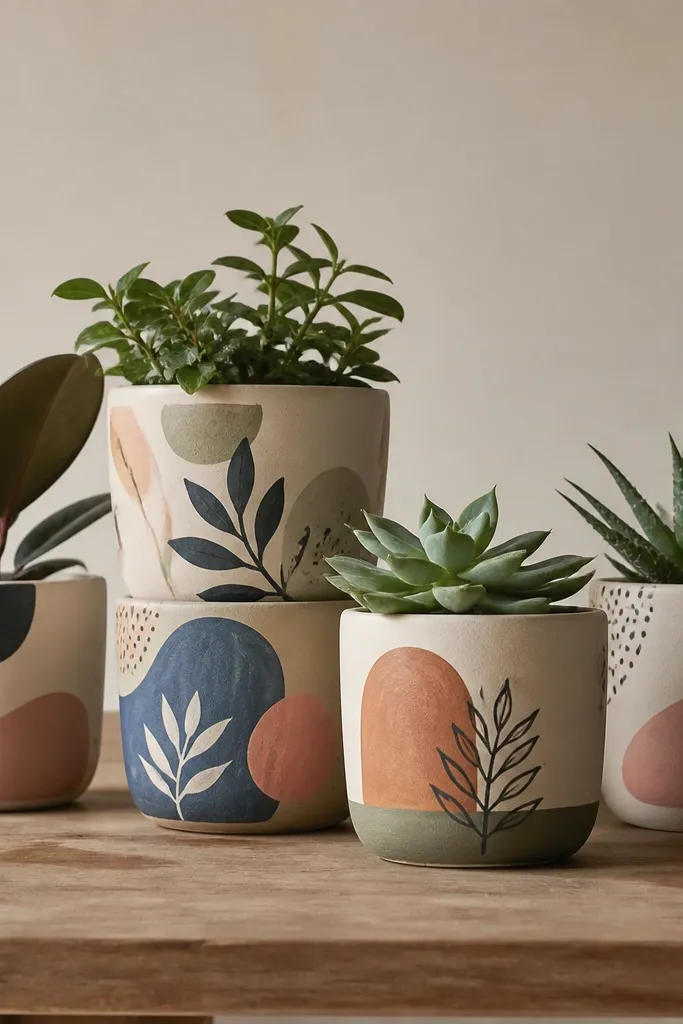
3. Fall Leaf Stencil Band
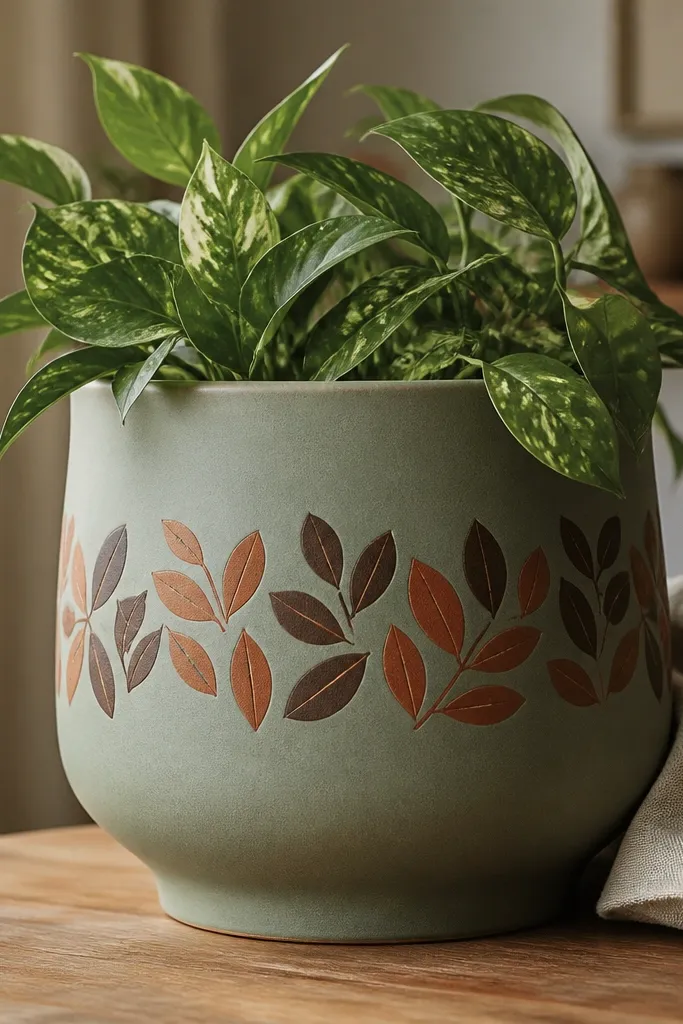
Stencils make it easy to get clean edges on a small surface. A single horizontal leaf band reads like a "label" and keeps the pot from looking like a patchwork craft. This style looks great when you group two pots: one sage, one terracotta base.
Prime if needed, then paint the full pot sage. Hold a leaf stencil at the 2-inch mark from the base and tape it so it won't shift. Dab burnt orange for the leaves, then use a thin brown wash lightly on the leaf veins for depth.
Pro tipUse a sponge dauber, not a brush, to prevent stencil bleed.
AvoidDon't flood paint through the stencil - it creates fuzzy edges that look cheap.
4. Midnight Sky with Constellation Dots
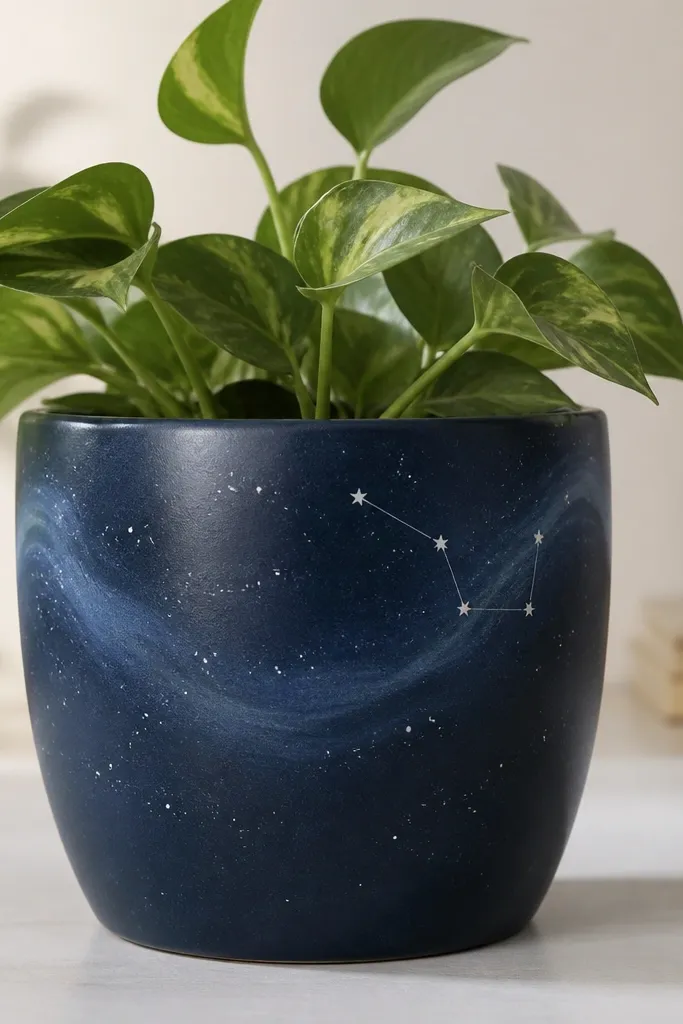
This is one of the easiest small space pot painting ideas that still looks high-effort. The navy base hides brush marks, and the dots look like stars even from a distance. Add a tiny constellation and suddenly it feels like a themed planter, not just paint.
Paint the pot navy and let it fully cure. Use a toothbrush to splatter micro white dots, then place larger dots with a dotting tool. Add constellation lines using a fine liner brush and a steady hand.
Pro tipMake your constellation small - if it takes over the pot, it reads like random dots.
AvoidSkip thick white paint for the stars; it dries too raised and chips faster.
5. Pastel Ombre from Base Up
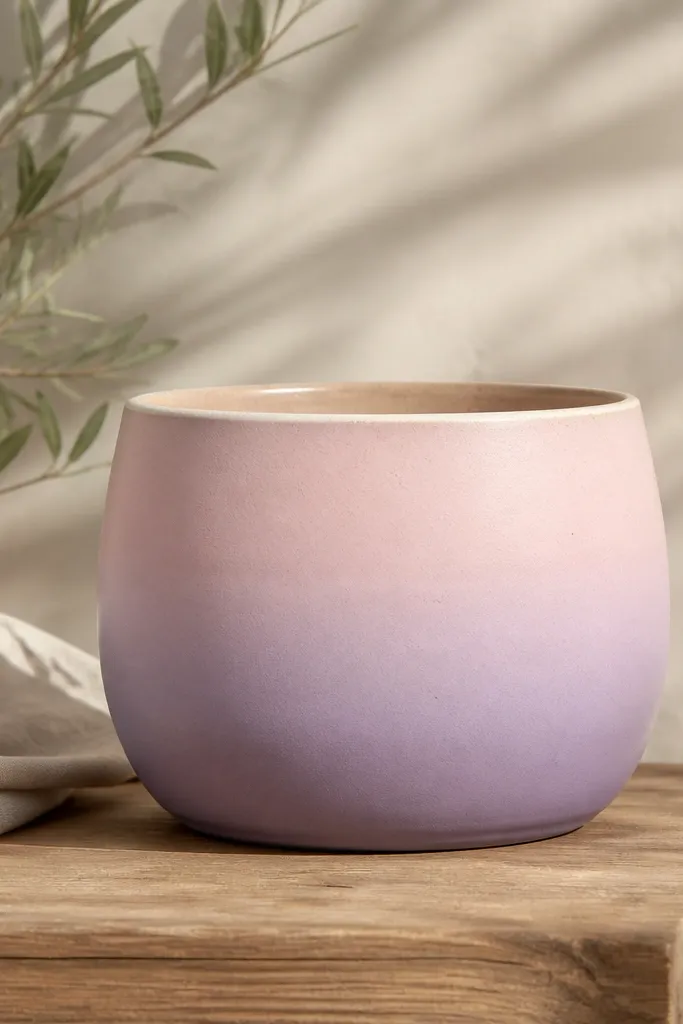
Ombre looks expensive because it's smooth and calm. On a small pot, you only need a vertical gradient - it makes the planter feel taller and cleaner. Pastels also play nice with most plants, especially trailing pothos and small succulents.
Paint a solid base color at the bottom (lavender). Blend upward with a second pastel (pink) using a damp sponge or wide flat brush, working in small horizontal strokes. Keep the transitions gentle and stop before the top rim so it stays crisp.
Pro tipWipe your sponge on a paper towel between colors so you don't muddy the gradient.
AvoidDon't overwork the blend; repeated strokes create streaks.
6. Blackboard Mini Label with Chalk-Style Text
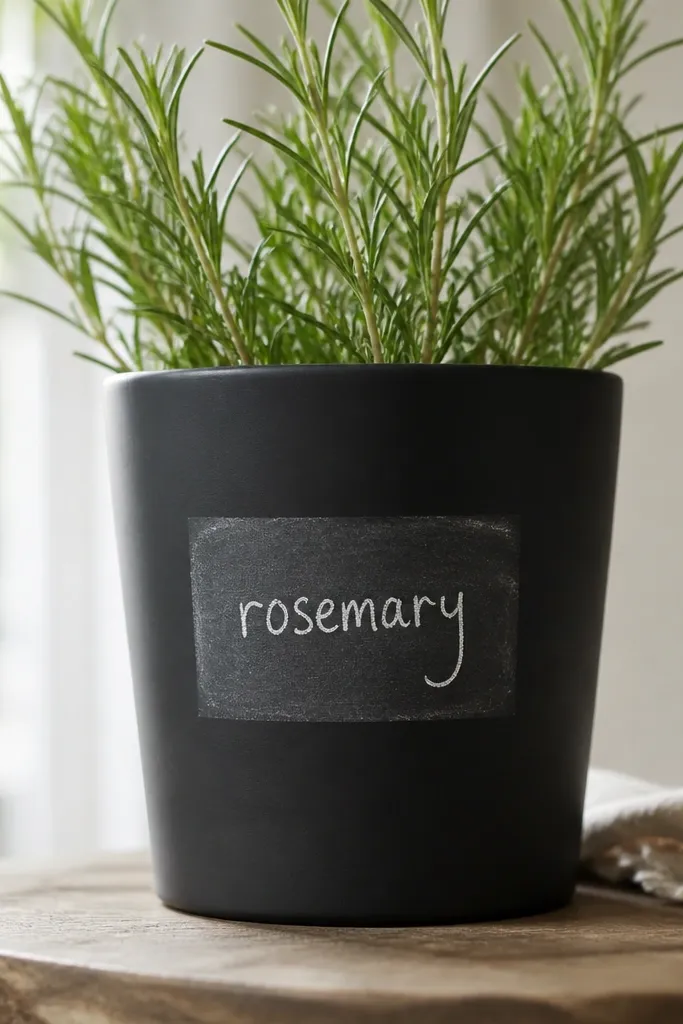
This is my go-to for herbs because it looks functional and decorative at the same time. The matte black hides small imperfections and makes the white text pop. The label area gives structure, so the pot doesn't look like a random paint blob.
Use matte black acrylic or a chalkboard paint on the whole pot. Tape a rectangle label area and paint it with the same black or a slightly different black for contrast. Write with a white paint pen or thinned acrylic and add a tiny smudge with a dry brush.
Pro tipSeal with matte clear once it's fully dry to keep the "chalk" texture from turning shiny.
AvoidDon't seal before the paint cures; it smears and ruins the text.
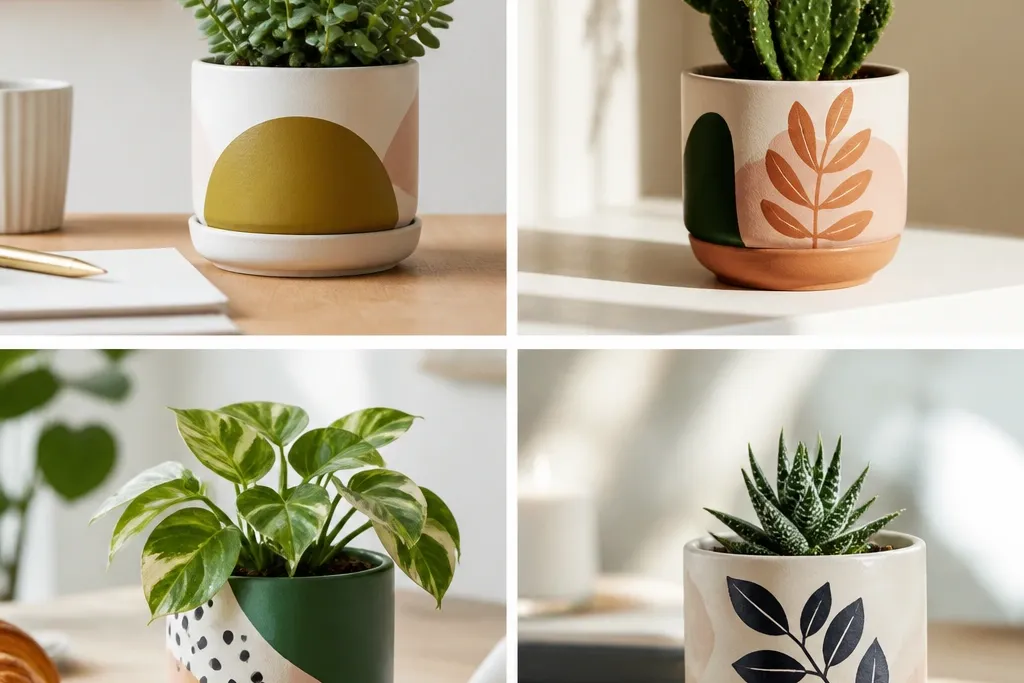
7. Terracotta Wash with White Geometric Corners
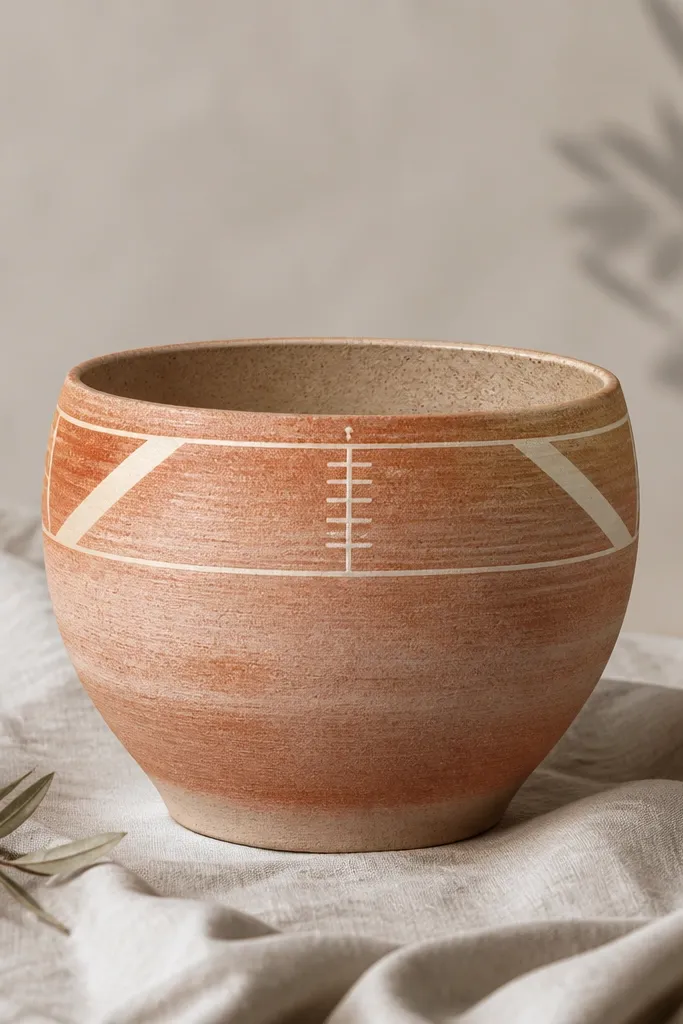
A wash keeps the pot looking organic instead of plastic-smooth. White geometric corners give you a modern look without needing full coverage. This one is great when you want seasonal variations by just changing the accent color on the lines.
If your pot is plain terracotta, clean it and apply a thin watered-down acrylic wash (terracotta + a little water). Let it dry, then tape corner triangles using painter's tape to mark the geometry. Paint white shapes and remove tape carefully for sharp edges.
Pro tipUse a ruler to place triangles so both sides match - symmetry matters on small pots.
AvoidDon't use thick tape for tiny corners; it leaves jagged edges.
8. Red-White-Blue Stars with a Simple Wave Line
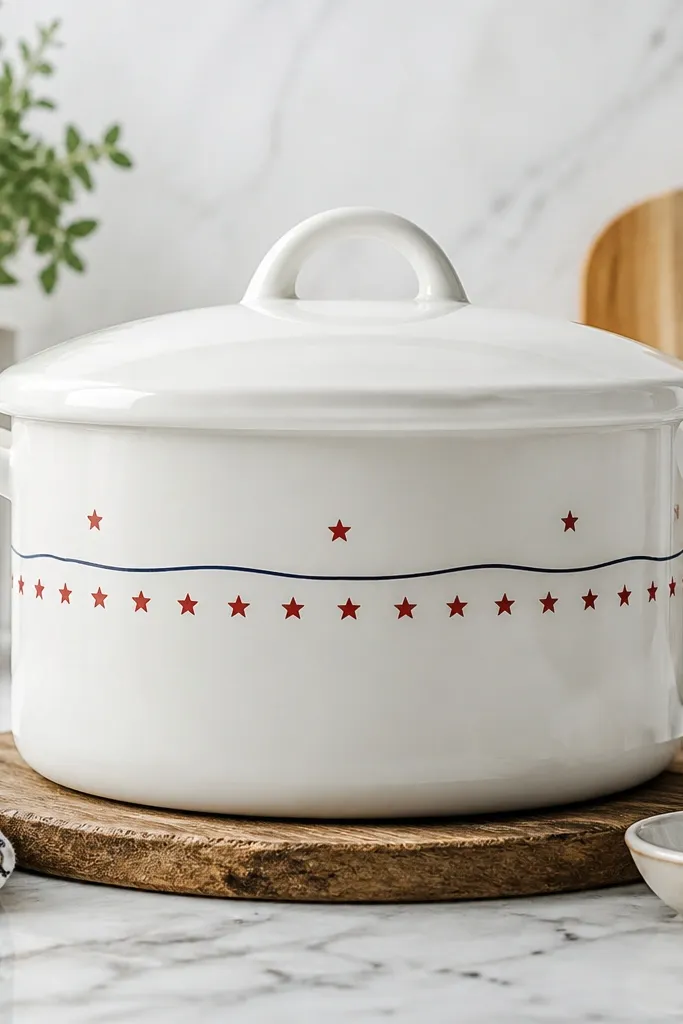
This reads patriotic without looking like a kid's craft because the stars stay small and the wave line is thin. The wave adds motion and breaks up the flat band of stars. It's also easy to adapt for any holiday by swapping the star color.
Paint the pot white and let it dry hard. Use a star stencil or a small star punch stencil to dab red stars. Add a navy wave using a thin liner brush and a steady curve across the center.
Pro tipKeep star size consistent - one "big" star makes it look accidental on a small surface.
AvoidAvoid painting stars freehand; uneven points ruin the clean look.
9. Greenhouse Checkers in Two Shades
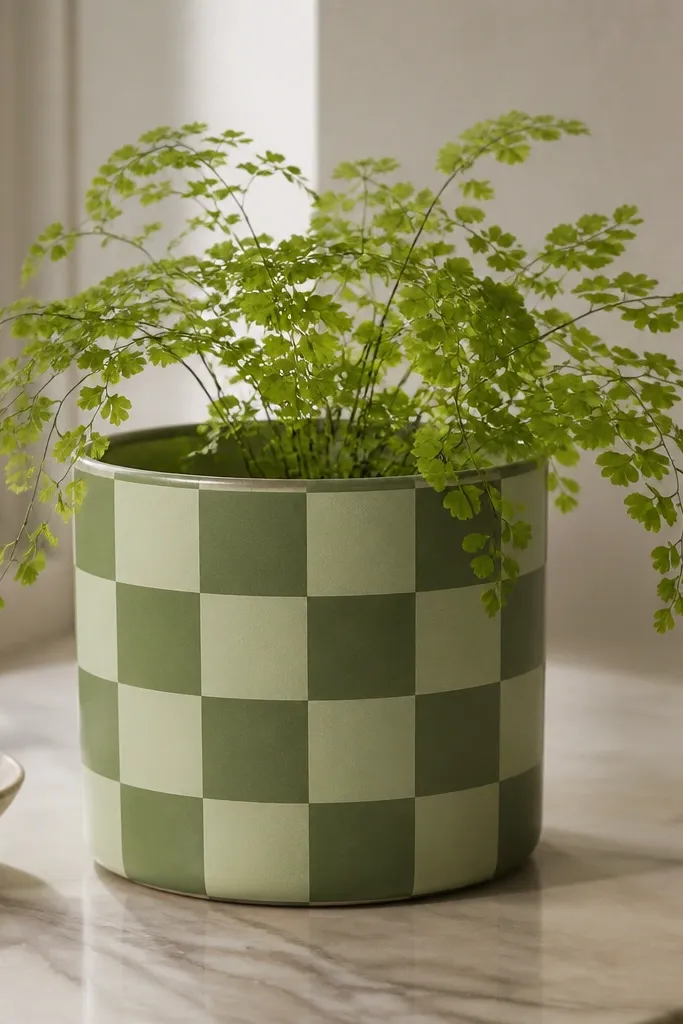
Checkers give a strong pattern even when the pot is small because each square is a clear unit. Two green shades look natural next to plants and don't clash with leafy textures. I like this for spring because it feels fresh without needing flowers painted on.
Paint a base shade first (light sage). Once dry, tape a grid using painter's tape strips about 1/4-inch wide for a 4-6 inch pot. Fill alternating squares with the darker green, then remove tape while paint is slightly tacky.
Pro tipMeasure the pot circumference with string so your checker rows don't drift.
AvoidDon't use too many colors; more than two greens makes it look noisy.
10. Gold Outline Florals on Matte Clay
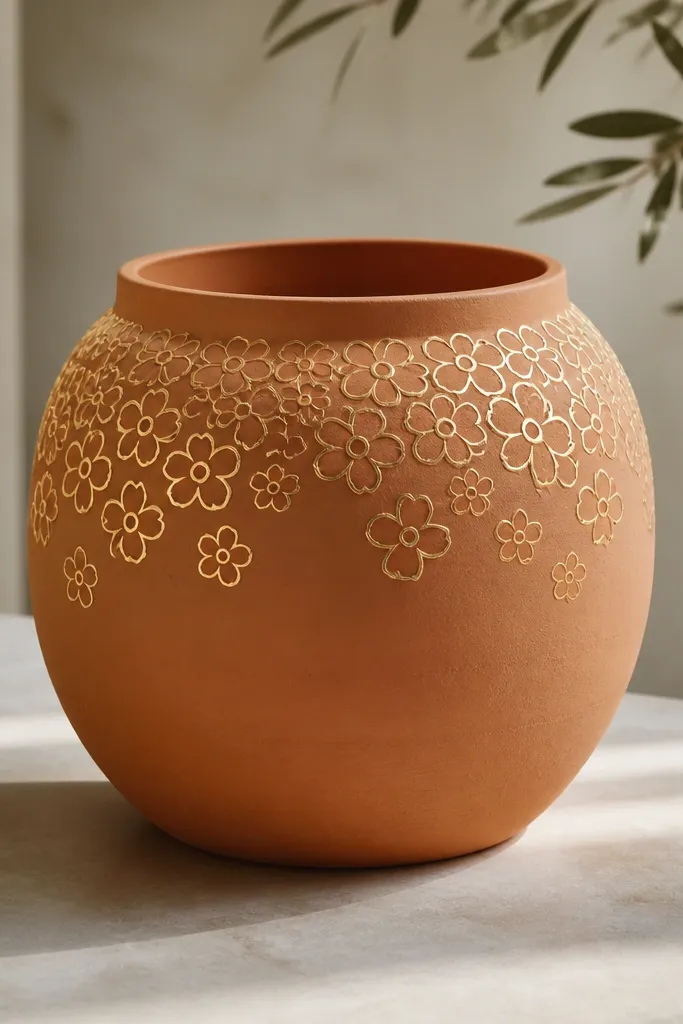
Gold outlines look classy on small pots because they rely on line work, not fill coverage. Leaving the interior unpainted keeps the design light and lets the plant color do the rest. This is the style I reach for when I want "pretty" without adding heavy paint layers.
Scuff the pot lightly and wipe clean. Use a gold acrylic paint pen for the flower outlines, then add small leaf lines. Keep the cluster small - about 1.5 inches across near the top so it stays readable.
Pro tipAdd one tiny dot center per flower with a gold paint pen tip - it makes the outlines feel intentional.
AvoidDon't try to cover the whole pot with gold; it turns into a blob on small surfaces.
11. Monochrome Marble Swipe
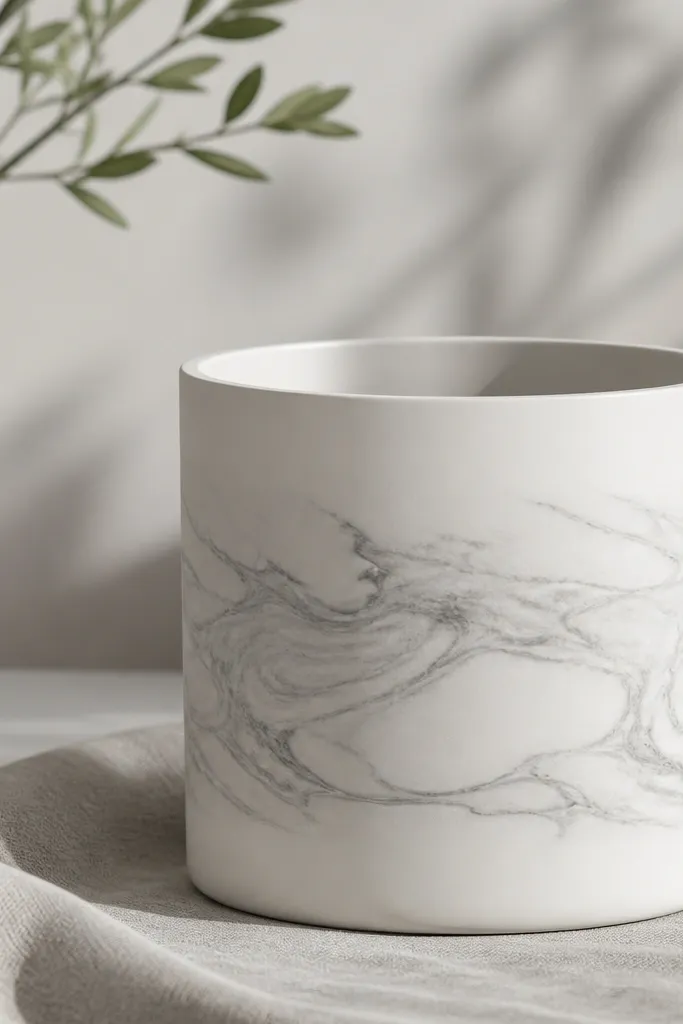
Marble looks good on small space pot painting ideas because you can fake "stone" with a few controlled swipes. Keeping it monochrome keeps it modern and prevents it from fighting with colorful plants. Concentrating the marble in the middle band makes it look designed, not random.
Paint the pot white first. Mix grey acrylic with a touch of water so it flows, then use a plastic card or old gift card to swipe thin lines across the wet paint. Add a few darker streaks last, then let it dry completely.
Pro tipPractice two swipes on paper first so you know how much paint your card pulls.
AvoidDon't overmix colors while swiping; it turns into muddy grey.
12. Candy Confetti Sprinkle Top
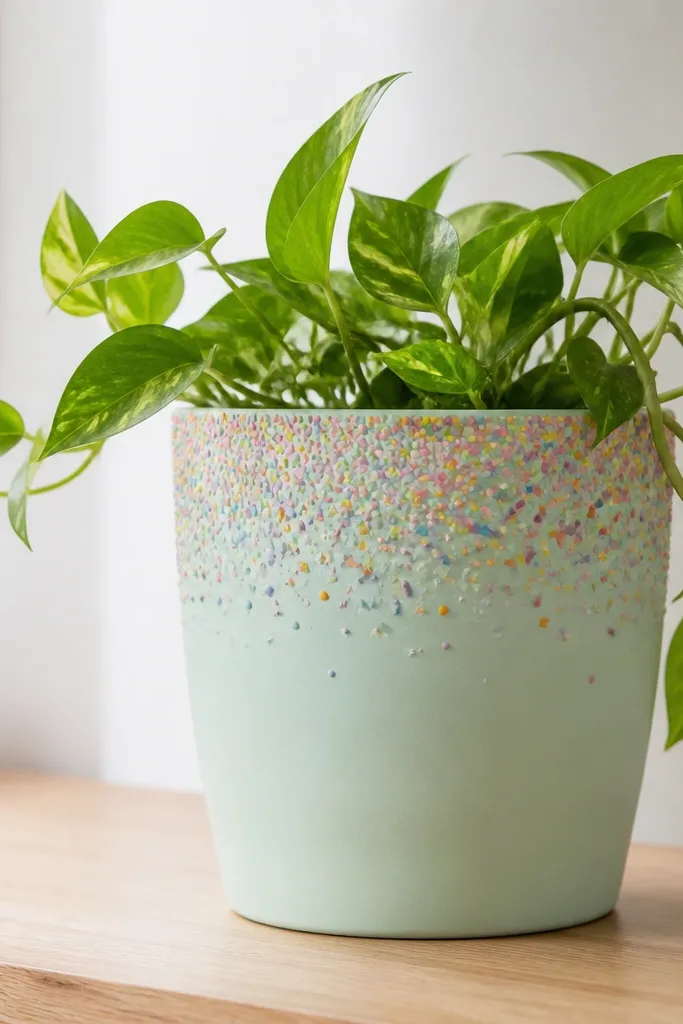
Confetti dots are the quickest way to make a small pot festive without covering the whole surface. The top placement makes the pot look playful while still clean. I use it for birthdays, summer, and easy seasonal refreshes by changing the dot colors.
Paint the pot mint or pale yellow. Use a toothbrush or stiff brush to flick dots across only the top third. Stick to 4-5 colors max so it looks like a planned palette, not a spill.
Pro tipCover your work table with paper and keep a fan of scrap paper nearby so you can test dot size.
AvoidAvoid giant dots; on small pots they read like blobs.
13. Leaf Vein Wash with Clear Gloss Accent
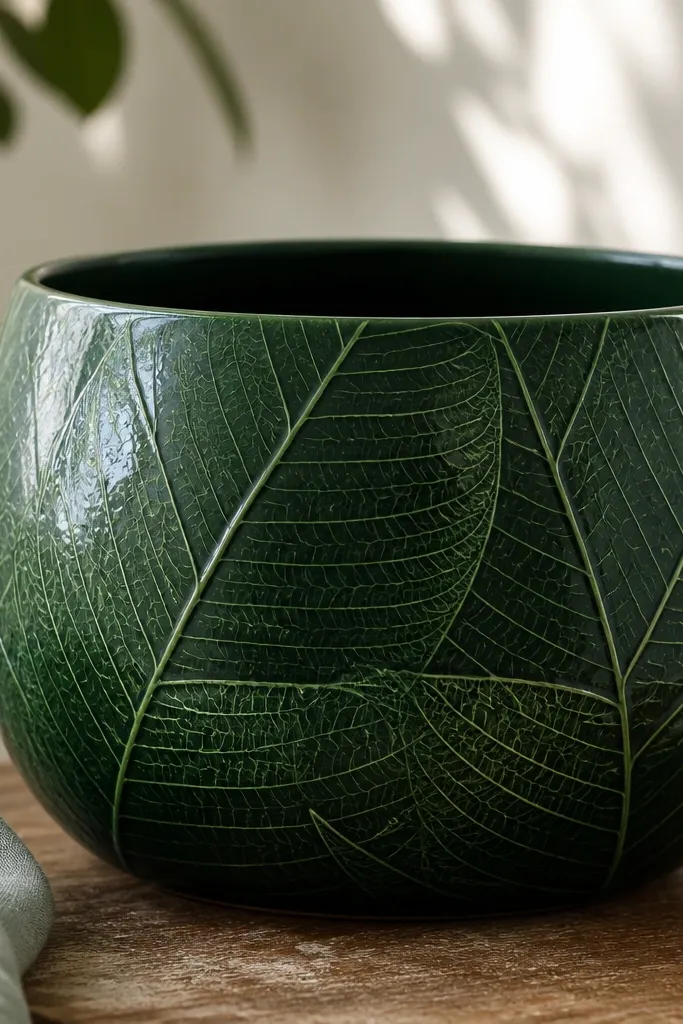
This one has a "real plant" feel because the veins are line-based. The base color makes the veins stand out, and a tiny glossy accent makes the design look dimensional. It's a classy option for winter-to-spring transitions when you want green without candy colors.
Paint the pot deep green and let it dry. Mix a lighter green and water it down for a wash, then use a liner brush to draw vein lines. After dry, paint a thin clear gloss over just a few vein segments.
Pro tipUse a liner brush with a sharp tip; dull tips make veins look thick and clumsy.
AvoidDon't gloss the whole pot; it becomes shiny in a way that highlights flaws.
14. Black Cat Silhouette for Halloween Mini Pots
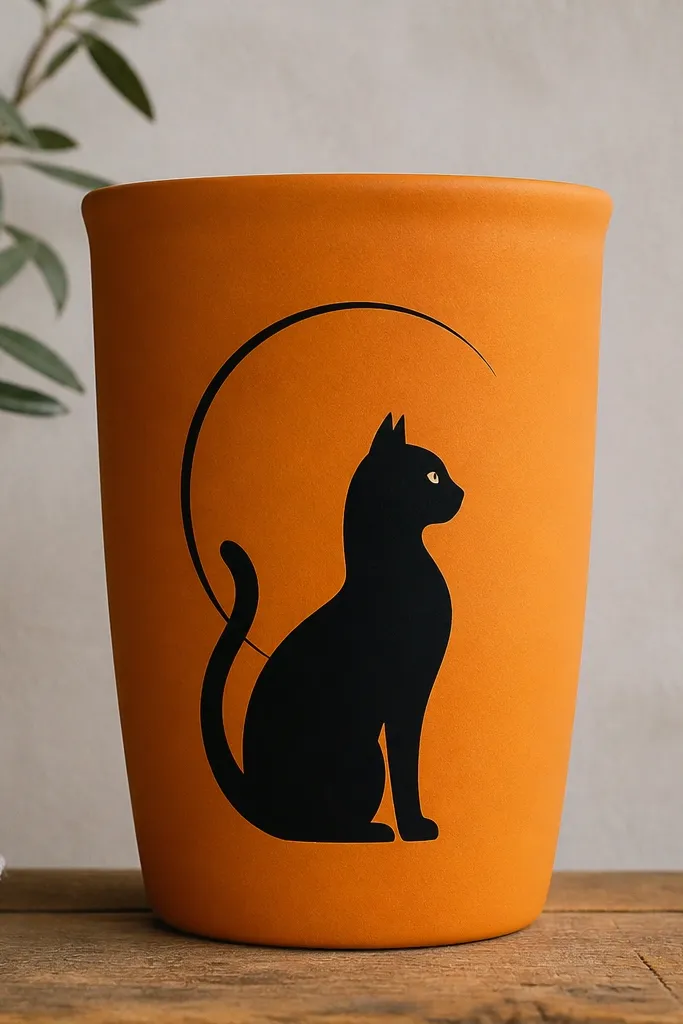
A single silhouette looks bold on a small pot and doesn't need lots of detail. Orange base gives instant Halloween energy, and the moon adds depth without filling the whole surface. This works great for desk planters where you want something fun but not messy.
Paint the pot orange first. Use a printed cat silhouette as a reference and trace with a fine brush or paint pen. Add a small black moon behind the cat and a tiny white dot for the eyes.
Pro tipKeep the cat size about 2 inches tall on a 4-inch pot so it stays readable.
AvoidSkip the glitter - it catches dust and looks messy fast on small surfaces.
15. Winter Monogram Initials with Faux Enamel Look
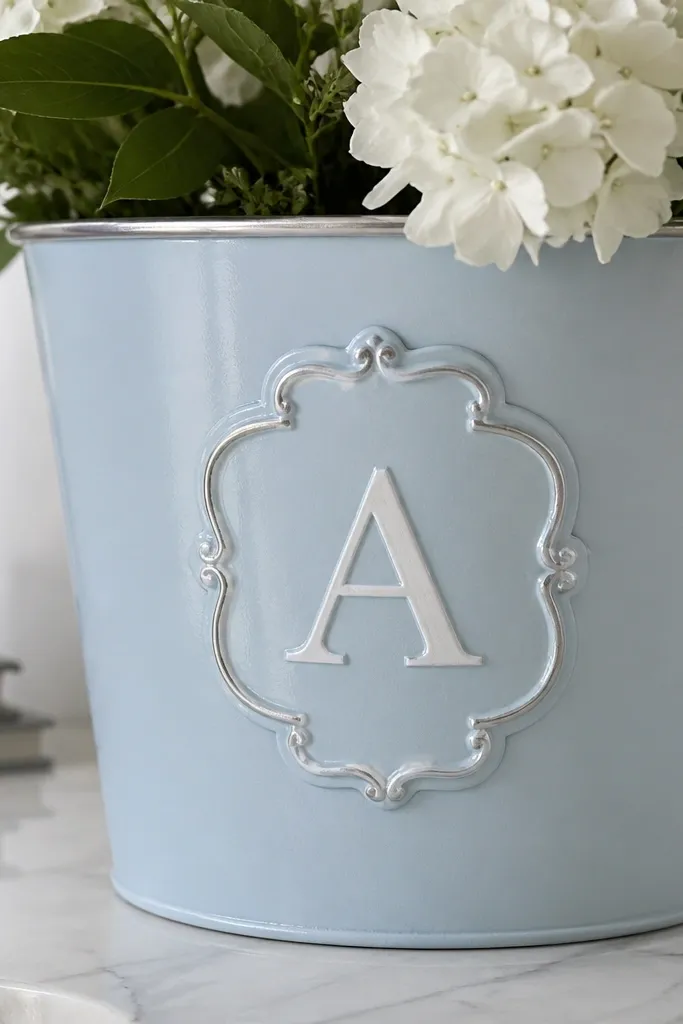
Monograms make small planters feel intentional and gift-like. The faux enamel look comes from layered paint that dries smooth but slightly raised. Silver framing keeps it cold-weather without needing snowflakes everywhere.
Paint a pale blue base and let it dry fully. Tape a rectangle border if you want it centered, then paint a thick white initial. Once dry, add a thin silver line around the initial edges.
Pro tipUse two thin coats for the initial instead of one thick coat to prevent drips.
AvoidDon't use metallic paint as the base; it chips and shows scuffs.
16. Spring Watercolor Wash with Salt Texture
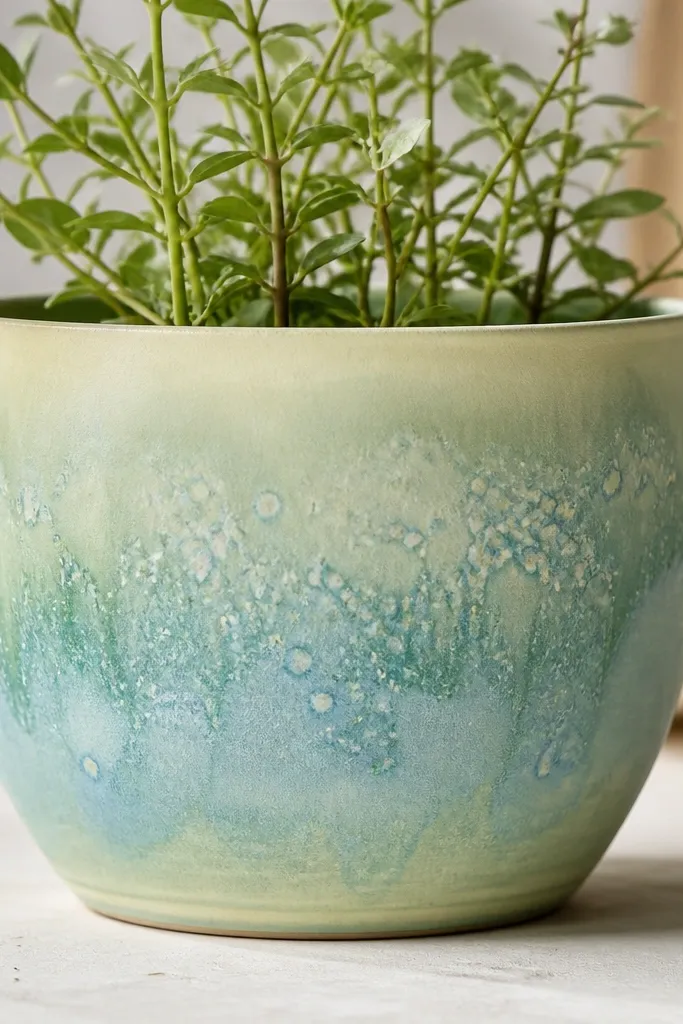
Salt texture looks like natural speckling and hides minor brush marks. It's perfect for small pots because the pattern stays subtle. Keep colors light so it reads airy next to fresh growth.
Paint a light base (yellow-green). While still wet, brush on diluted blue and mint in loose swaths. Sprinkle coarse salt (like kosher salt) over the wet paint, let it dry completely, then brush off the salt crystals.
Pro tipUse less water than you think; too-wet paint runs and ruins the pot shape.
AvoidDon't seal right away - salt texture needs full dry time or the crystals smear.
17. Mid-Century Bands with Teal and Terracotta
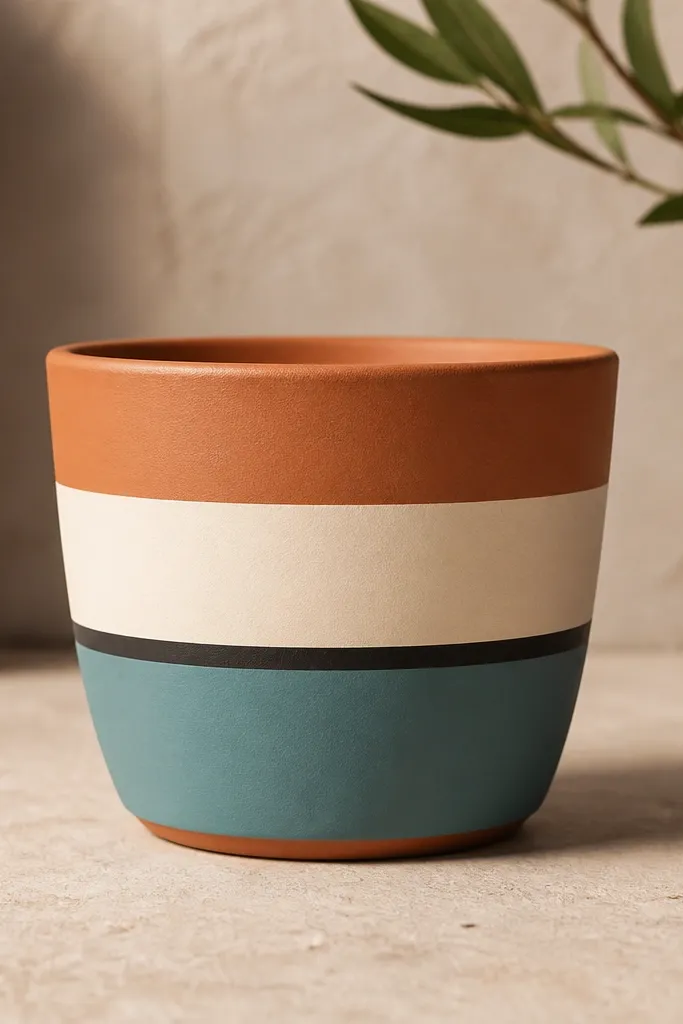
This look is clean and graphic, the kind that makes a small planter look styled rather than painted. Horizontal bands stretch the eye and keep the design balanced. Teal plus terracotta looks great year-round because it doesn't lean too seasonal.
Paint a cream band first with painter's tape, then add teal on top of a second taped section. Add a thin black line between bands using a liner brush. Seal with matte clear so the lines don't glare under sunlight.
Pro tipRemove tape in one direction, not back and forth, so the edges stay crisp.
AvoidAvoid thick paint on the tape lines; it can peel when you pull the tape.
18. Holiday Red Bow with White Stripes
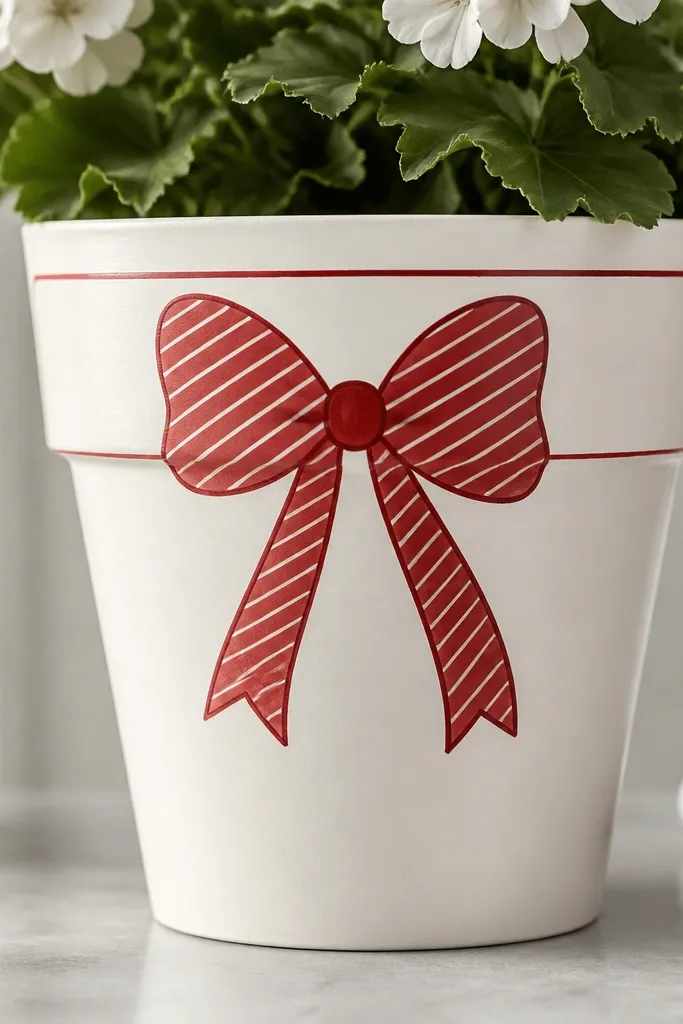
A bow is instantly readable from across a room, which matters on small planters. The striped loops add movement and keep it from looking flat. I like placing it near the top so the plant can fill in the bottom and soften the design.
Paint the pot white or cream. Sketch the bow shape lightly with pencil, then paint red loops and add diagonal white stripes using a small angled brush. Outline the bow lightly with a darker red or black for definition.
Pro tipUse a small craft sponge for stripes if your brush pulls too much paint.
AvoidSkip extra details like tiny dots - on a 4-5 inch pot it turns into clutter.
19. Monochrome Dot Grid with One Color Accent
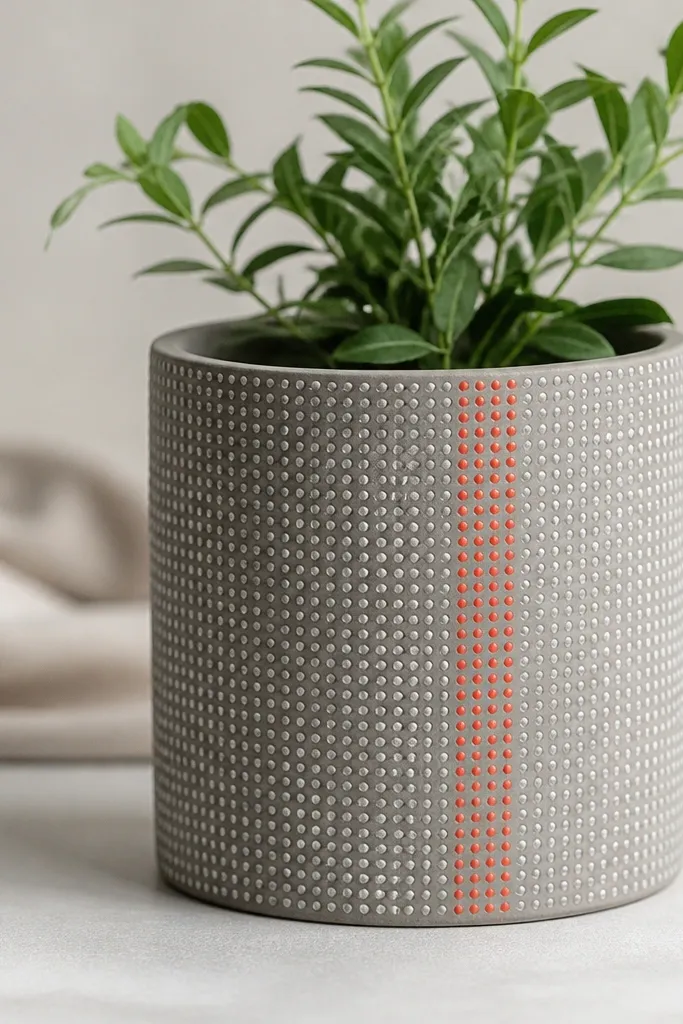
A dot grid looks tidy and modern because it's pattern-driven. Keeping most dots white on grey makes it calm, and a single accent stripe adds seasonal personality. This is my favorite "small space" option because it looks good even when the pot is partially hidden by leaves.
Paint the pot grey and let it dry. Use a dotting tool to place white dots in a consistent grid, then paint one column of dots in coral or deep green. Seal with satin so the dots don't look flat.
Pro tipMark a faint guideline with pencil so your dot columns line up before you start.
AvoidDon't vary dot size too much; uneven dots make the grid look messy.
20. Snowflake Stencil Half-Pot Fade
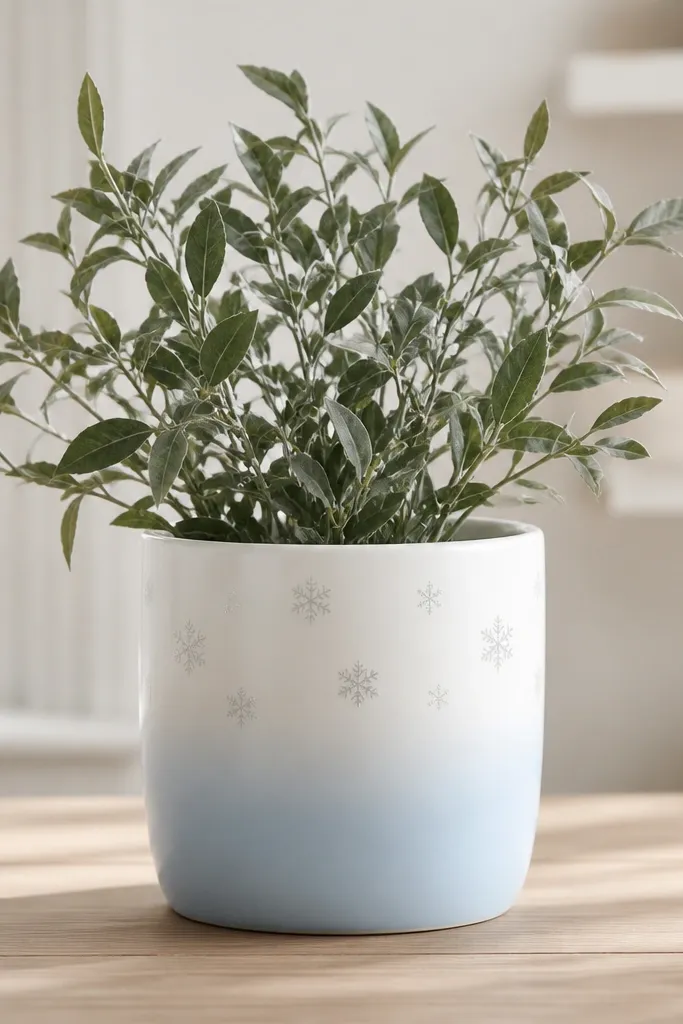
A half-pot design keeps the pattern from crowding the plant. Snowflakes in pale grey feel wintery without going loud, and the fade gives softness. This style works well for small space pot painting ideas because the design still reads when the plant grows and covers part of the surface.
Paint the bottom half light blue, then blend upward with white using a sponge. For snowflakes, use a stencil and dab pale grey only on the upper section. Let everything dry, then seal with matte clear to reduce glare.
Pro tipKeep snowflakes spaced - leave visible background between them.
AvoidDon't cover the whole top with heavy snowflakes; it looks like a sticker sheet.


